What Did You Do Today 2020

What Did You Do Today 2020

Home Forums The Tea Room What Did You Do Today 2020

Viewing 25 posts - 401 through 425 (of 636 total)
  • Author
    Posts
  • #479709
    Nigel Graham 2
    Participant
      @nigelgraham2

      Nicely done, Nicholas.

      Milling-machines are remarkably greedy for space!

      Is the idea to leave the milling-machine on that trolley, so you can tuck it away more tightly when necessary? (I think you'd need put levelling / stabilising feet on the frame so it's standing directly and fully on the floor when in use.)

      That is something that's occurred to me with some of my kit, including a small Denbigh horizontal mill patiently awaiting putting back into service. The Myford mill is too big and heavy for that.

      I have mounted the horizontal band-saw (another space-hungry beast) on castors, as its original two wheels and crude handle were just too crude, and worn out; and the effort has paid off. Another possibility is a double-decked trolley for my two welding sets.

      I am building, in stages, an overhead travelling crane for my workshop. but limited headroom and fairly light construction mean it won't lift a complete, large machine-tool, but I did not intend that. It's primarily for work on large models, and handling heavy machine-tool accessories. However, with due thought about storage it might well help smaller machines such as tool-grinders being stored away and brought out as needed.

      #479735
      Howard Lewis
      Participant
        @howardlewis46836

        Yesterday morning wife got a call from a very with it 90+ lady asking could I help as the catch on her washing machine door had broken.. We went (Stuff lock down! ) and looked, she had saved the broken piece. So disassemble door to access the catch assembly. Return home and start measuring the bits to make sketches of what hopefully would be a metal replacement.

        Fortunately, both Mill and Lathe have no jobs in them.

        Find a suitable bit of Ali and start milling. There is only only one straight face, all the others run at various angles.

        Since the catch is 8 mm wide, and got weaker with every cut, the cuts got smaller as the thing took shape.

        The original one piece plastic moulding included two collars to locate the coils of a sort of U shaped spring.with two long legs

        Replacing the collars with a turned tube (to fit on the 4mm pivot pin ) would weaken the catch too much, so set to work to mill the catch, leaving turning the two collars for later. Complete all the milling, (hours! )and turn two steel filing buttons to file the radius on the rear end of the catch, Drop one on floor. Spend more time not finding it than making another, so work with just one.

        Go to reassemble, find that one collar can be fitted into the coil on one side of the spring, and the catch, but now no space to fit collar into the coil on the other side of spring. Return home, hold pin in vice, fit first collar into spring, push pin through into catch. Brutalise spring by levering out so that the second collar can be slid off a small screwdriver into coil, and wedge coil back into the plastic housing.

        Return to lady's house and start assembling door. Two large circular pieces of plastic to hold glass bowl, which have to sandwich the two plastic pieces at top and bottom of hinge,between them, while hoping that the catch assembly has not fallen out of place. (Hinge cannot be removed from machine, to ease reassembly because it is trapped under the rubber seal for the door ) Finally, all is together again, and the catch and spring have all been assemble right way round, and the door closes again!

        Just hope that there is no call to say that it now leaks water!

        My reward was that wife had ordered a Chinese Take Away.

        Now back to my projects!

        Howard

        #479737
        Nicholas Farr
        Participant
          @nicholasfarr14254
          Posted by Nigel Graham 2 on 14/06/2020 01:40:51:

          Nicely done, Nicholas.

          Milling-machines are remarkably greedy for space!

          Is the idea to leave the milling-machine on that trolley, so you can tuck it away more tightly when necessary? (I think you'd need put levelling / stabilising feet on the frame so it's standing directly and fully on the floor when in use.)

          That is something that's occurred to me with some of my kit, including a small Denbigh horizontal mill patiently awaiting putting back into service. The Myford mill is too big and heavy for that.

          I have mounted the horizontal band-saw (another space-hungry beast) on castors, as its original two wheels and crude handle were just too crude, and worn out; and the effort has paid off. Another possibility is a double-decked trolley for my two welding sets.

          I am building, in stages, an overhead travelling crane for my workshop. but limited headroom and fairly light construction mean it won't lift a complete, large machine-tool, but I did not intend that. It's primarily for work on large models, and handling heavy machine-tool accessories. However, with due thought about storage it might well help smaller machines such as tool-grinders being stored away and brought out as needed.

          Hi Nigel, no the milling machine will not be left on the trolley, it was only made for moving it into it's new position as the other trollies that I have are to high and there isn't the headroom for the milling machine and its stand to be lifted high enough to fit on them.

          Regards Nick.

          #479749
          Henry Brown
          Participant
            @henrybrown95529

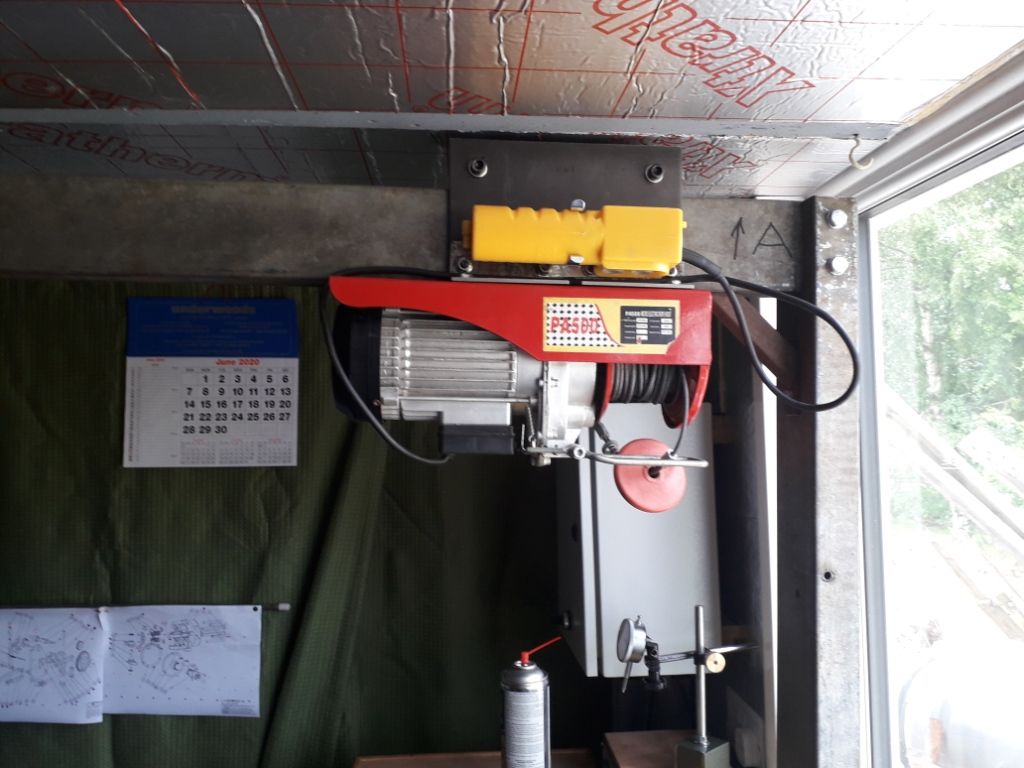
            Picked this second hand 500kg hoist up from fleabay a while back, I modified the rolling carrier I had made for when I used the block and tackle it to give a bit more headroom and fitted it to my lifting beam. It sits up there out of the way and could be used for lifting the 4 jaw on when I get even more decrepit…

            20.06.13 electric hoist.jpg

            #479760
            Bazyle
            Participant
              @bazyle

              Last week an Irish builder working round the corner offered me a grand for my Landy. He was back just now and offered 3 grand. laugh Not selling as it is my camper van and when I retire me and my loco will be touring the club tacks.

              #479766
              DiogenesII
              Participant
                @diogenesii
                Posted by Bazyle on 14/06/2020 11:52:01:

                Last week an Irish builder working round the corner offered me a grand for my Landy. He was back just now and offered 3 grand. laugh Not selling as it is my camper van and when I retire me and my loco will be touring the club tacks.

                ..I don't want to cause alarm 'cos the guy might be perfectly innocent, but I have heard similar tales before – I'd be very mindful in securing the vehicle for a while.. Maybe it's bad to be so alarmist.. second opinions, anyone?

                #479769
                Bazyle
                Participant
                  @bazyle

                  Indeed, one of the nice things about lockdown was the reduction in wandering persons of undefined income source. This guy is ok as I know the people he is working for who therefore have all his details but I am concerned that the increase in unemployment will increase crime. Not helped by the police being diverted into activities that shouldn't be necessary.

                  #479789
                  Henry Brown
                  Participant
                    @henrybrown95529

                    I've lost count of the number of folks that have offered me money for my Defender! The last was a groundwork guy who wanted to give me £3k for it, I told him I'd turned down £10k and he offered me £11k. Fortunately it was some way away on a garage forecourt but we've parked the modern car tight behind it since. No way am I selling it, its part of the family…

                    #479837
                    Iain Downs
                    Participant
                      @iaindowns78295

                      What I did today was to have a narrow escape. I was busy doing some tidying up when there was a groan and crash and I looked over to see the shelves (below) gently start to collapse.

                      r8 tool stand.jpg

                      I had a moment when I thought I should minimise the damage and rush to held them up – only for a second before I thought of all the very heavy bits of metal which could land on me. No. I stood back and watch the disaster happen.

                      When it all settled, I picked everything up and put it on my lathe table which I had fortuitously just moved the lather off as part of the tidy-up.

                      The problem is that if I drill into the garage, I void the warranty, so all my stuff is no-more-nailsed to the walls and in this case it would appear that nails (well screws with rawplugs) would have been much the better option.

                      If I'd actually been standing underneath this I would have been hurt, so I think the garage warranty can go beg I will get my power drill out and fix it properly.

                      Ugh!.

                      Iain

                      #479852
                      Nick Clarke 3
                      Participant
                        @nickclarke3
                        Posted by Iain Downs on 14/06/2020 17:30:59:

                        What I did today was to have a narrow escape. I was busy doing some tidying up when there was a groan and crash and I looked over to see the shelves (below) gently start to collapse.

                        I had a moment when I thought I should minimise the damage and rush to held them up – only for a second before I thought of all the very heavy bits of metal which could land on me. No. I stood back and watch the disaster happen.

                        Probably a good job you didn't try to hold it up as when I was in a similar situation I held up a set of shelves where one support bracket was giving way and precisely because I was holding it up the whole shelf unhooked itself from the uprights and a whole shelf-full of books showered around me, not just those at one end!

                        Fortunately the CRT monitor on the desk underneath was OK, I suspect a more modern LCD would have been totalled.

                        #479893
                        Nicholas Farr
                        Participant
                          @nicholasfarr14254
                          Posted by Henry Brown on 14/06/2020 10:12:15:

                          Picked this second hand 500kg hoist up from fleabay a while back, I modified the rolling carrier I had made for when I used the block and tackle it to give a bit more headroom and fitted it to my lifting beam. It sits up there out of the way and could be used for lifting the 4 jaw on when I get even more decrepit…

                          20.06.13 electric hoist.jpg

                          Hi, that looks a decent job Henry. yes

                          Regards Nick.

                          #479897
                          Henry Brown
                          Participant
                            @henrybrown95529
                            Posted by Nicholas Farr on 14/06/2020 21:35:03

                            Hi, that looks a decent job Henry. yes

                            Regards Nick.

                            Thanks Nick, I posted the frame a while back just after I'd made it from some pallet racking beams and used a block and tackle to put the GH1322 in place. I picked the hoist up for about £30, looks like a builder had it for a job as it had a bit of cement dust on it but under that looked brand new. I had to use it earlier in the week to move the lathe again, it works a treat.

                            #480072
                            Nick Clarke 3
                            Participant
                              @nickclarke3

                              I haven't used the 3D printer for ages so I fitted the glass bedplate I bought and never got round to, re-levelled the bed and reloaded the filament after the cat had been there (see my other post)

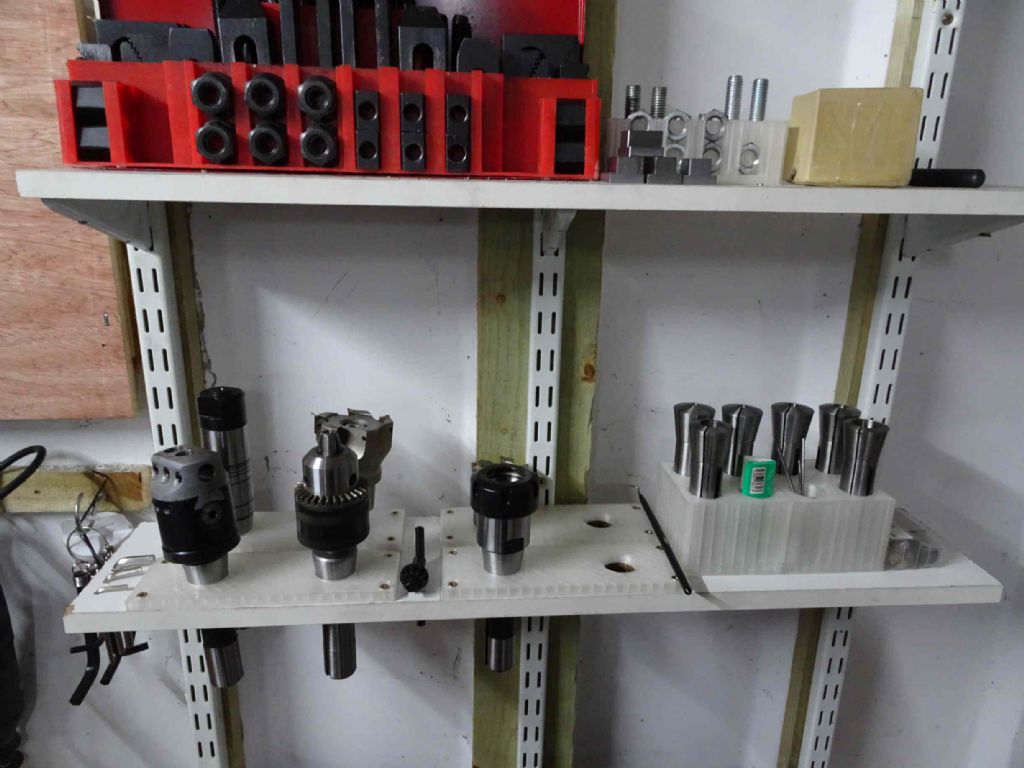
                              Then made a few bits from designs on the web – a chuck spider for the 3 Jaw, a couple of holders for holding QC toolholders and tools conveniently on the splashback of the lathe (I think these may annoy me in a week or so, but lets see) and most interesting of all an apron gear swarf shield to bolt on. I will need to see how well this fits before I start drilling the apron I think.

                              #480075
                              Jeff Dayman
                              Participant
                                @jeffdayman43397

                                If 3D printing brackets from PLA for holding steel QC toolholders / tools – a suggestion – make sure there is something soft below them to keep them from getting damaged when the PLA lets go and the items being held fall. Don't ask me how I know. PLA is very handy for many things and is pretty good in compression and light loads. Tension, over time, with heavy items, not so much.

                                My PLA paintbrush holding pieces on my peg board are doing beautifully, holding up like the very rock of Gibraltar. Total load about 30 grams. smiley

                                #480083
                                Nicholas Farr
                                Participant
                                  @nicholasfarr14254

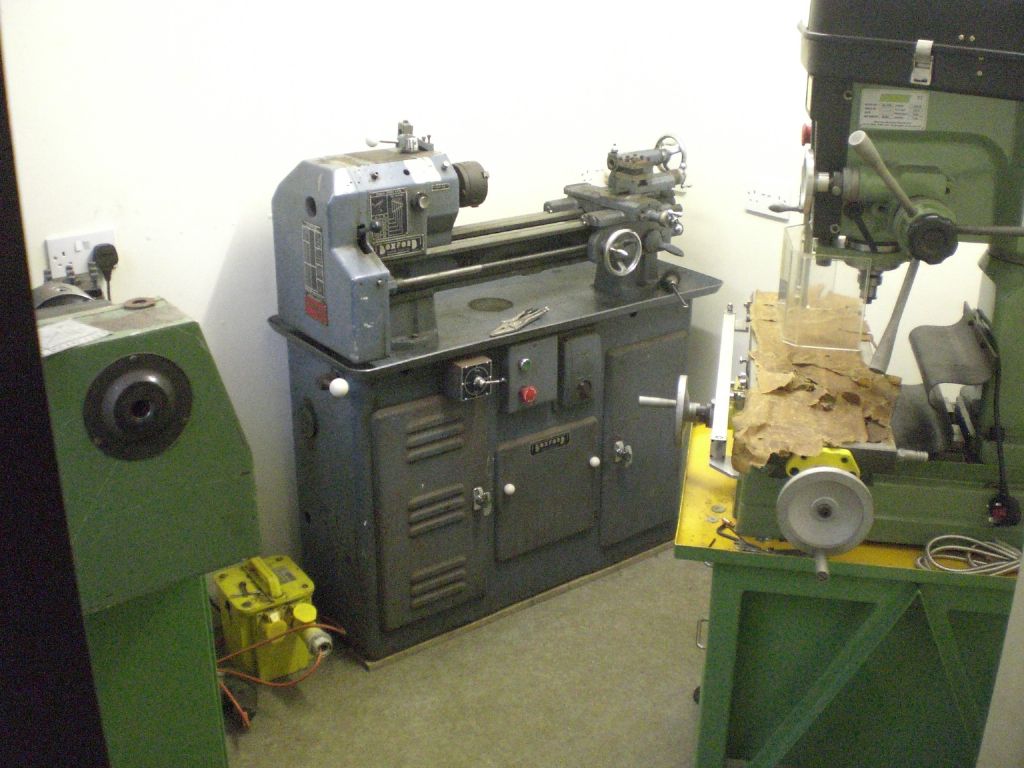
                                  Hi, today I positioned my Boxford in place successfully after moving it into the same room last Friday that Major milling machine is in.

                                  moving 4.jpg

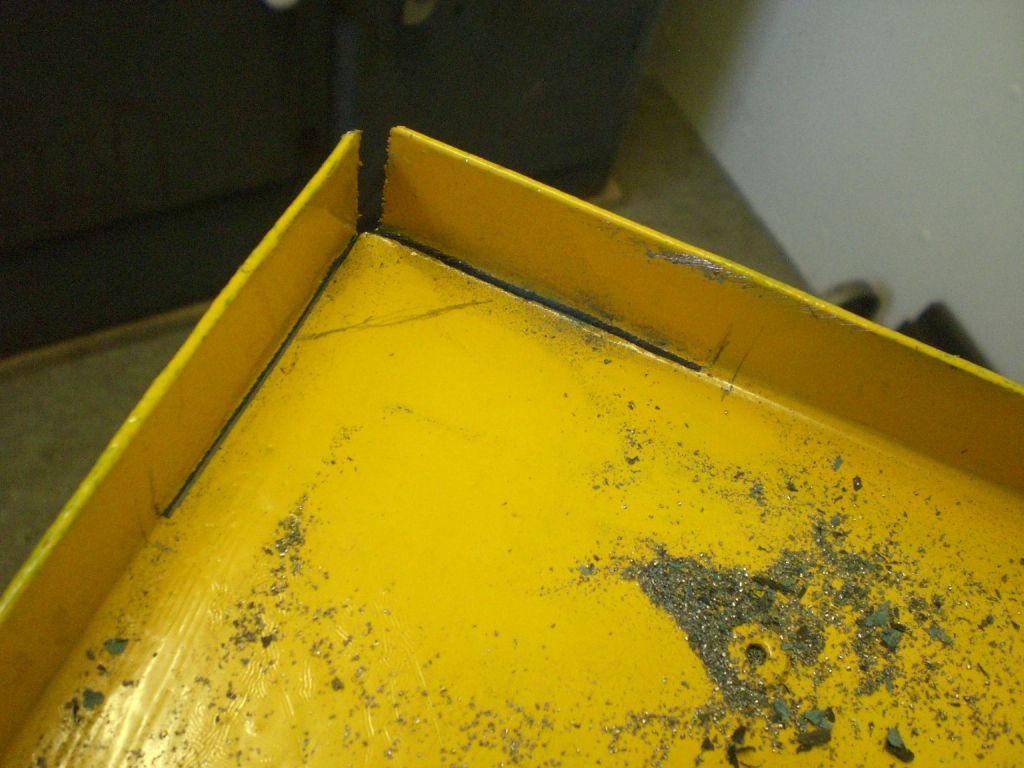
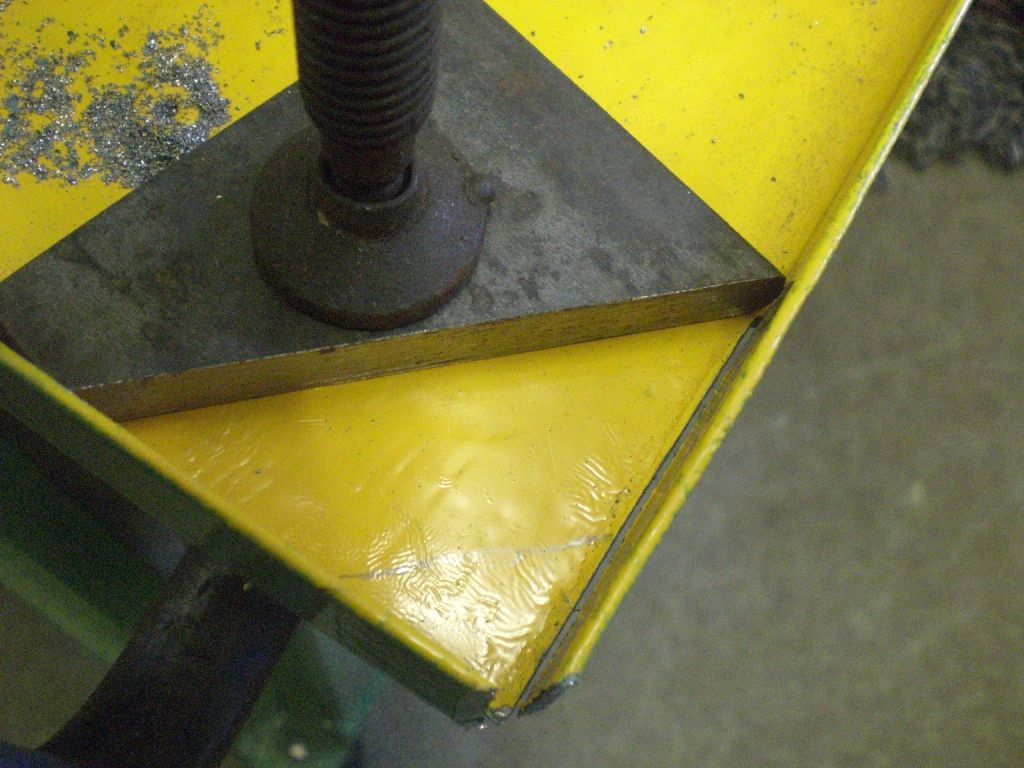
                                  I then turned my attention to cutting the corner of the tray under the milling machine, which is opposite the Boxford, to give me 50mm more clearance between the two. I first cut the corner off the lip and then cut the lip along the fold, 75mm long each way using a hacksaw.

                                  cimg2832b.jpg

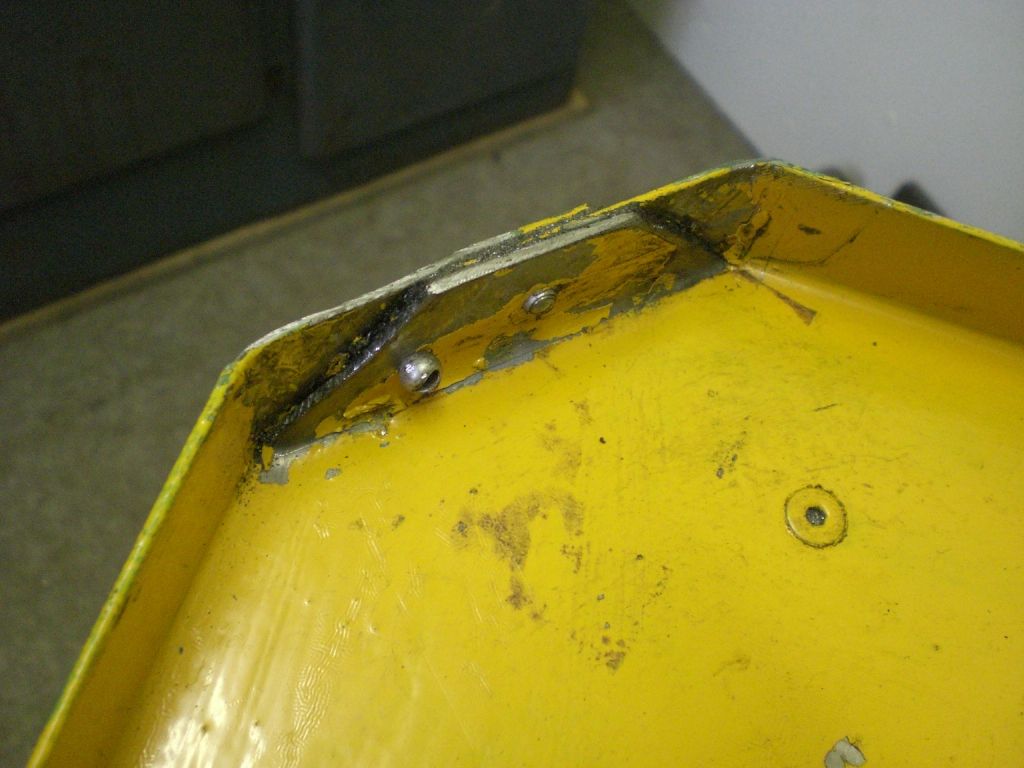
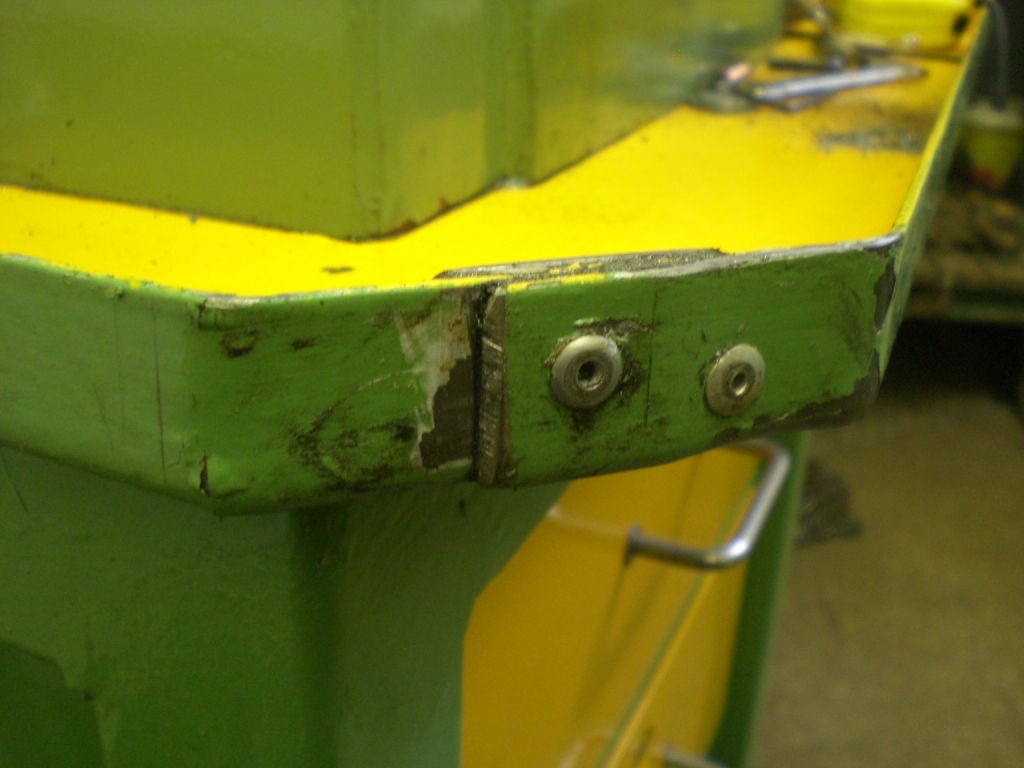
                                  Apiece of 12mm plate was clamped between the ends of each cut and the lip was then bowed outward a little so as to get a long nose vice grip plier/wrench in, to bend the bottom of the tray up as far as I could and was finish with a hammer and drift, to bring it upright. The two free ends of the lip were then folded round, with one over the other with a little instant gasket silicon between them and the folded up bottom and a couple of 4.8mm pop rivets nipping the whole lot together and the excess of the bottom part of the tray, was then hacksawed off to bring it to the same height as the lip.

                                  cimg2833b.jpg

                                  The cut was filed smooth so no nasty burs to cause injury.

                                  cimg2834b.jpg

                                  Just needs tidying up now with a bit of paint.

                                  cimg2835b.jpg

                                  May do the other corner the same, although it's not in the way of anything.

                                  Regards Nick.

                                  Edited By Nicholas Farr on 15/06/2020 22:17:39

                                  #480363
                                  Anonymous

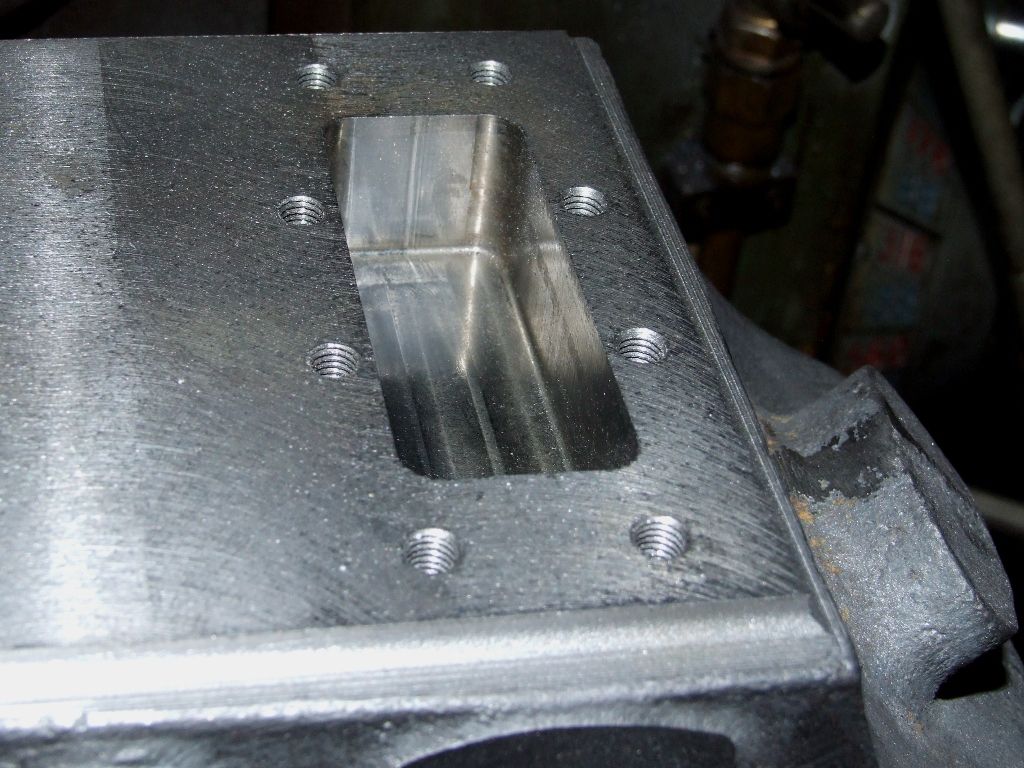
                                    Been working on the cylinder castings. The regulator recesses are done:

                                    regulator_recess.jpg

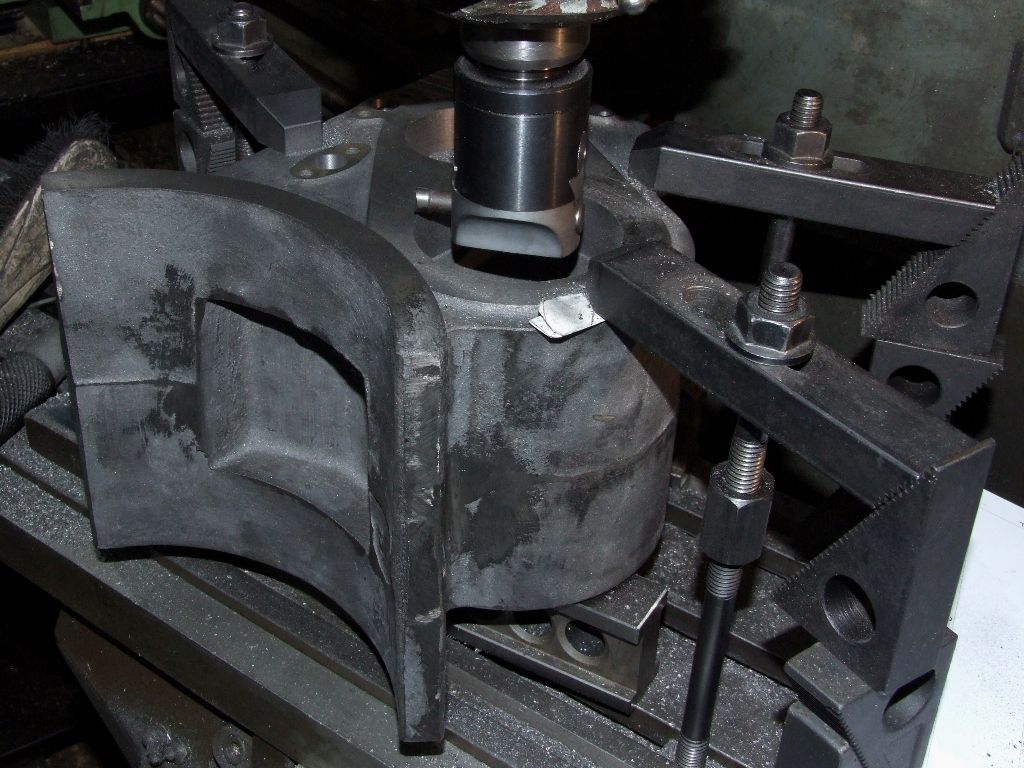
                                    Also the valve and regulator packing gland locations and the bores started:

                                    boring_lp_bore.jpg

                                    Both bores are undersize by about an 1/8" and only go an inch deep. In due course I'll use the machined part of the bores to pick up the locations on the horizontal mill and use the Wohlhaupter boring head to bring the bores to size. The Bridgeport quill movement isn't big enough to machine the complete bore.

                                    I know the centre to centre distance of the bores from the drawings and my 3D CAD model. As a sanity check I measured the bores as they are now and also measured the width of the web between the bores. Adding half the measured bore diameters to the measured web agrees with the theoretical centre to centre distance to 2 tenths of a thou. I don't believe that for a moment! It's not easy to get an accurate reading with an internal micrometer and likewise the vernier calipers used to measure the web. However, if I'm within a couple of thou I'll be happy.

                                    Andrew

                                    #481587
                                    Anonymous

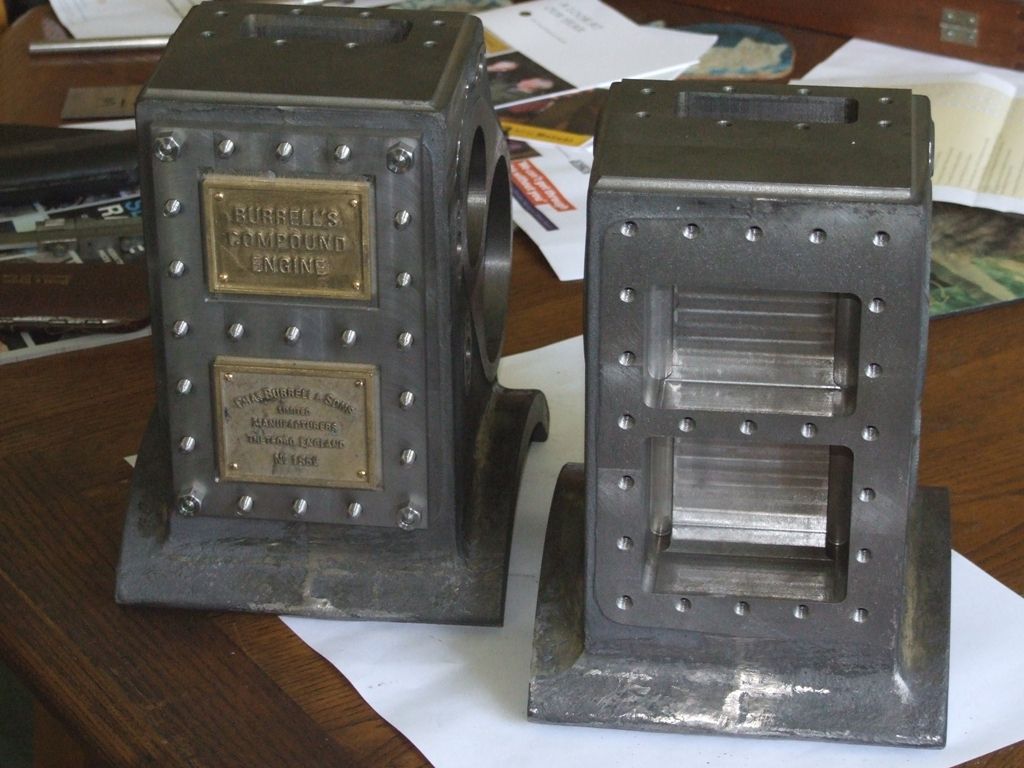
                                      Finished the valve chest cavities:

                                      cylinders_valve_chests.jpg

                                      The LP cavity is nearly 2" deep so a fair stick out on the 10mm endmill! All machining was done by numbers, X and Y from the DRO and Z using the handwheel dial. It's pleasing that finished dimensions are within a couple of thou. The holes for the valve chest cover studs were drilled and tapped using the DRO on the vertical mill while the holes in the cover were done on the CNC mill. Fortunately the cover fits, studs are 1/4" BSF, clearance holes were drilled 6.4mm.

                                      Next task is to finish bore the cylinders on the horizontal mill.

                                      Andrew

                                      #481608
                                      Nigel Graham 2
                                      Participant
                                        @nigelgraham2

                                        Fine work, Andrew!

                                        I had a bit of a lazy day. I think I've earned it.

                                        I've been working hard on my wagon over the last few weeks, endeavouring to bring the boiler and its auxiliaries to a state of an initial test this particular weekend, but it was not to be.

                                        I even went as far as buying fittings I ought really be able to make, and some have not yet arrived, most particularly the gauge-glass.

                                        Still, by close of play yesterday (Sunday, 11.30 pm) I had most of the rest of the fittings plumbed back as far as their cold water sides, and could think how to pipe water fo'rrard from the tank without in due course finding I've put the pipe right where the engine wants to be!

                                        Looking at it though I am sure I could have done better – and I am not happy with the turret that took hours to make. So in due course, yet more re-working. All self-inflicted, choosing a prototype for which no original examples or even works drawings survive!

                                        '

                                        So today, a drive over to the hardware shop the other side of town to give the car a reasonable run (about 12 miles round-trip) and stock up on bird-seed and a couple of pipe fittings. Then a leisurely few hours tidying the workshop (with lots of " So that's where it went…! " and " Now which die went in this little round box? &quot and exhuming the lathe from a mass of brass, steel and bronze swarf.
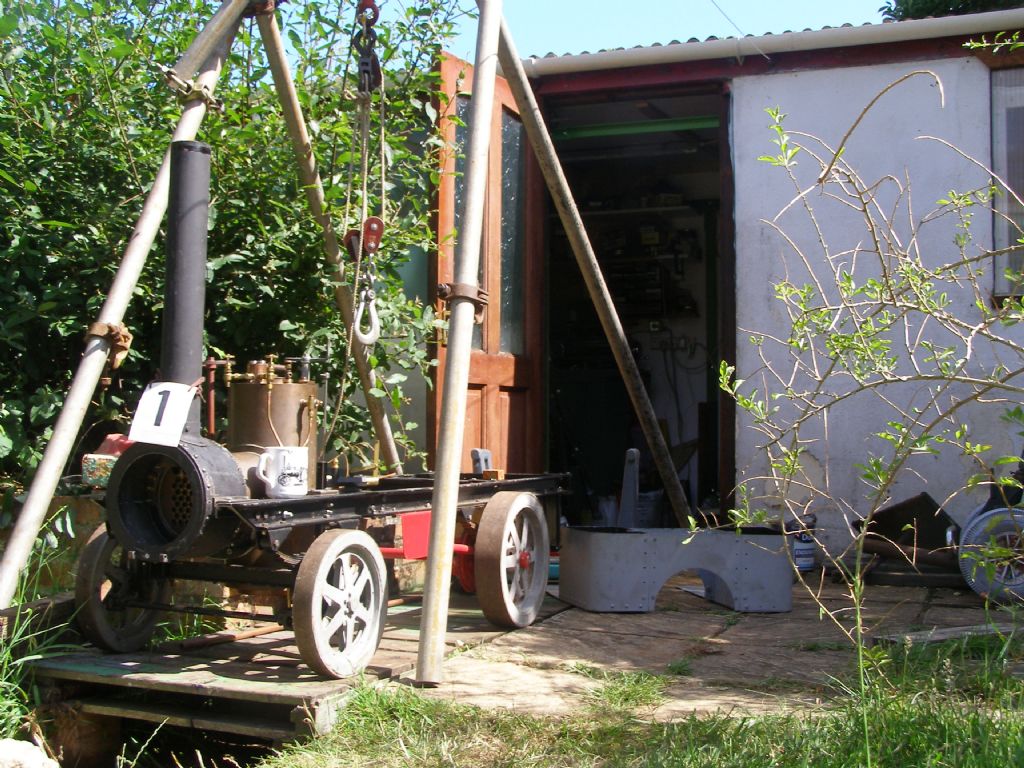
                                        'Orrible stuff, brass and gun-metal swarf, with an affinity for skin similar to that of glass-fibre matting; and sharing with beach sand the ability to get everywhere, and when you think you've cleaned it all away, to re-appear as if by magic!

                                        The picture is of progress on Sunday afternoon, about the time the MSRVS Rally's closing Parade would have taken place in normal times. Still, if I can't exhibit a steam-wagon under construction I can still get on with that construction! I couldn't resist hanging a rally number on it…

                                        Rally Sunday - 21-06-20

                                        #481688
                                        Danny M2Z
                                        Participant
                                          @dannym2z

                                          I just finished three books in two days.

                                          That's a lot of colouring in ;-(

                                          #481716
                                          Bazyle
                                          Participant
                                            @bazyle

                                            Congratulations on getting frist prize at the rally Nigel laugh

                                            #481735
                                            Robin
                                            Participant
                                              @robin

                                              I saw a fancy new solder sucker but couldn't see how it worked. Well, it just arrived and whoever designed the V twin, mains powered, diaphragm pump was obviously proud of it because he made it see-through. Don't know if it will last, but it sucks like a Humboldt squid on heat .

                                              #481741
                                              Nigel Graham 2
                                              Participant
                                                @nigelgraham2

                                                Thank you Bazyle!

                                                Not difficult when it's the only entrant.

                                                I'll have to make a rally plaque with my own town name.

                                                #481813
                                                Ian Skeldon 2
                                                Participant
                                                  @ianskeldon2

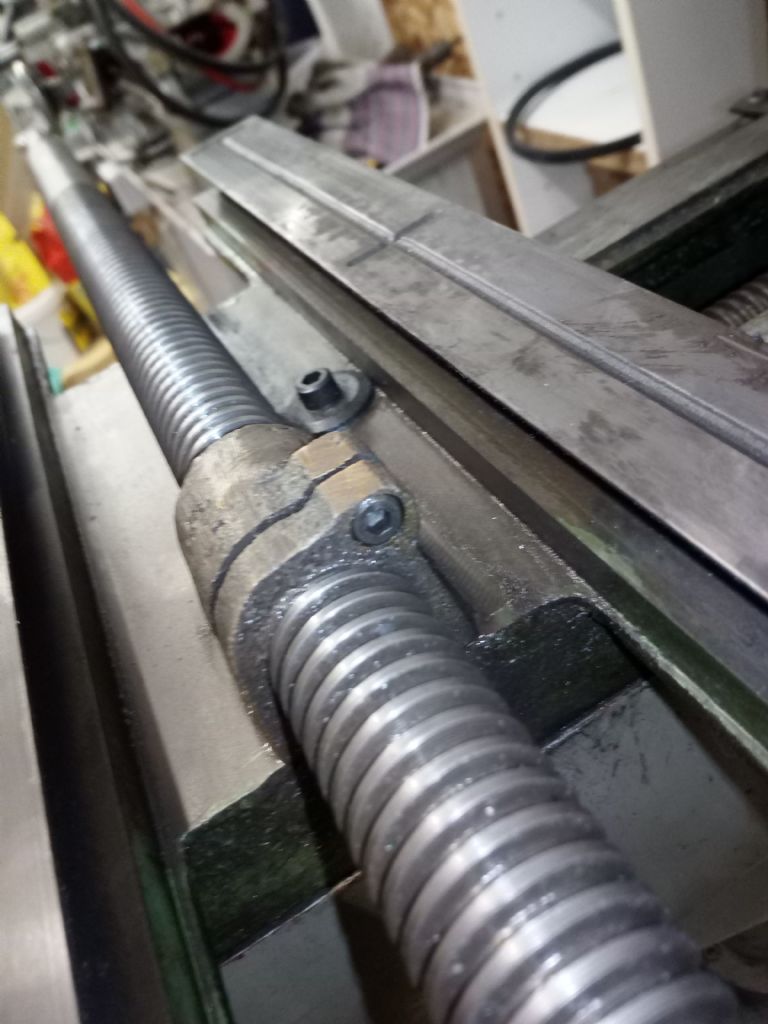
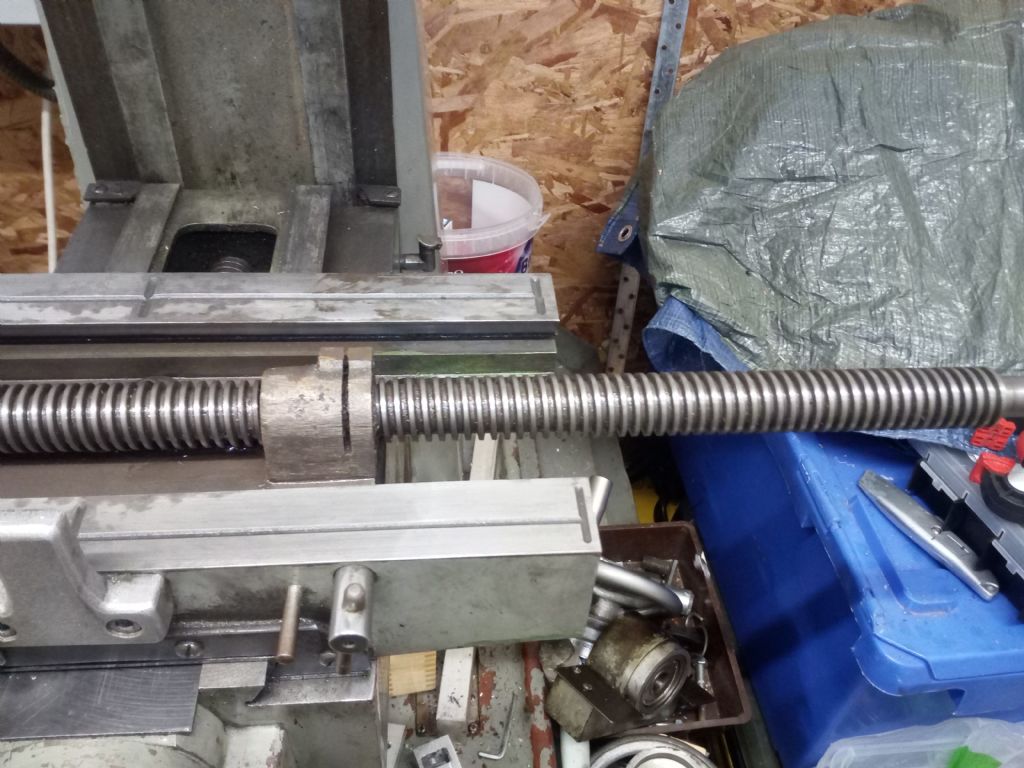
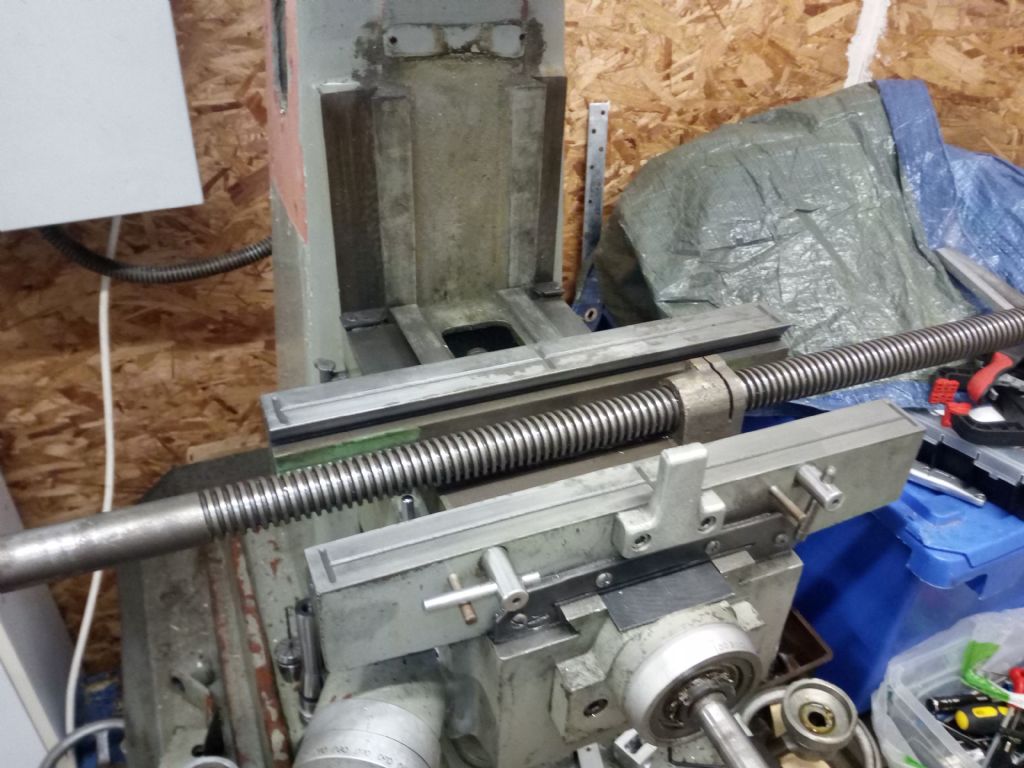
                                                  img_20200623_173452.jpgimg_20200623_173411.jpgToday saw the start of a strip down and service of my Myford Mill. Table off to check the lead screw, turns out that it's not too bad at all, a quick tweak of the adjustment screw on the half nut block saw the backlash greatly reduced. The gib seems to be in good condition as well. I have taken out the oil cups in the table to be replaced with new ones, the ways will be cleaned up and checked and the table checked for any little issues before I strip anything further.

                                                  img_20200623_173400.jpg

                                                  #481826
                                                  Nigel Graham 2
                                                  Participant
                                                    @nigelgraham2

                                                    Ian –

                                                    Thank you for showing us progress.

                                                    I am following it with particular interest as I own a Myford VM-C too and you might be able to help with a couple of small snags.

                                                    The first is that the leadscrew appears to miss a beat now and again. It's an odd effect, as if somehow the leadscrew occasionally saves all its backlash up and releases it in one go, in mid-wind in one direction. Any clues?

                                                    The second is one that came with the machine but fell down the priority list, and that is a very stiff quill, making sensitive drilling difficult. The stiffness is enough to prevent the quill springing back up. The problem may be as simple as congealed grease on the rack and pinion, but Myford did not make it particularly accessible. I am also very reluctant to interfere with the wound-up spring. I do not have the tools or knowledge for handling clock-type springs and past experience dictates leaving it well alone in its little housing, still clinging to the shaft! Would I right thinking the rack and pinion are accessible but only by removing the entire unit from the head of the machine?

                                                    +++

                                                    Today's work was a little bit of design-measuring and photographing on the steam-wagon then commencing a new motor-shield for the Myford lathe, after a spiral of swarf wiggled past what I had been using , entered the motor and damaged the inverter.

                                                    The repaired inverter and tested motor came home today from Newton-Tesla to whom thank-you for efficient service, but fitting will wait until the new guard is ready. I am fabricating this from 3mm thick, stiff PVC sheet. I would have used steel (ex-central heating boiler panels courtesy of a friend in the building trade) but a certain germ has rendered access to the necessary guillotine and folder inaccessible for the duration!

                                                    '

                                                    Have had to leave the shed door open, with a barrier to keep out inquisitive frogs, as a young starling has hidden itself away on a shelf stacked with stuff, and I can only hope the early-morning daylight and my absence will make it find its way out. I have no idea what had frightened it but it had come hurtling through the door at floor level ,in a blind panic, and up to the furthest and highest corner. It didn't seem too frightened of me, but perhaps I don't look like a cat or bird of prey or whatever it was that had probably chased it. After trying to escape through a translucent, not transparent, window it has now lodged itself in another inaccessible spot. Luckily my back garden is quite secure.

                                                    #481956
                                                    Nicholas Farr
                                                    Participant
                                                      @nicholasfarr14254

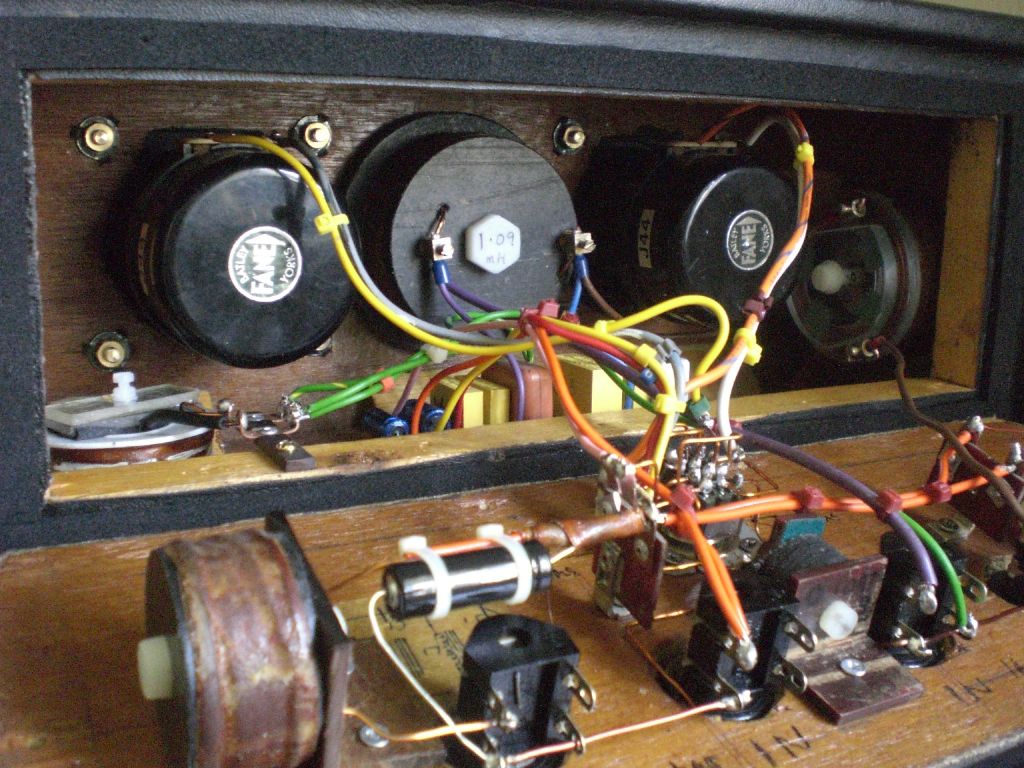
                                                      Hi, although not strictly ME, some components were made using my mini lathe, sensitive drilling machine and a few other hobby tools. Just for interest to music listing people, today I completed fitting my upgrade Crossovers to my Horn Cams,

                                                      horn cab 1.jpg

                                                      I sounded out both horn cabs and the LF cabs with Tina Turner's song "Better Be Good To Me" which is one of hers with some fantastic guitar music in it, which really tested the horns and they performed very well indeed, pumped the sound up till it was nearly rattling the windows and no significant distortion was detected.

                                                      A few pictures of the chokes that I made Crossover Coils for those who are interested.

                                                      Regards Nick.

                                                    Viewing 25 posts - 401 through 425 (of 636 total)
                                                    • Please log in to reply to this topic. Registering is free and easy using the links on the menu at the top of this page.

                                                    Latest Replies

                                                    Home Forums The Tea Room Topics

                                                    Viewing 25 topics - 1 through 25 (of 25 total)
                                                    Viewing 25 topics - 1 through 25 (of 25 total)

                                                    View full reply list.