

TIG is harder than it looks
TIG is harder than it looks
- This topic has 29 replies, 20 voices, and was last updated 6 January 2021 at 09:17 by
 Ady1.
Ady1.
 Ady1.
Ady1. John Olsen
 Martin King 2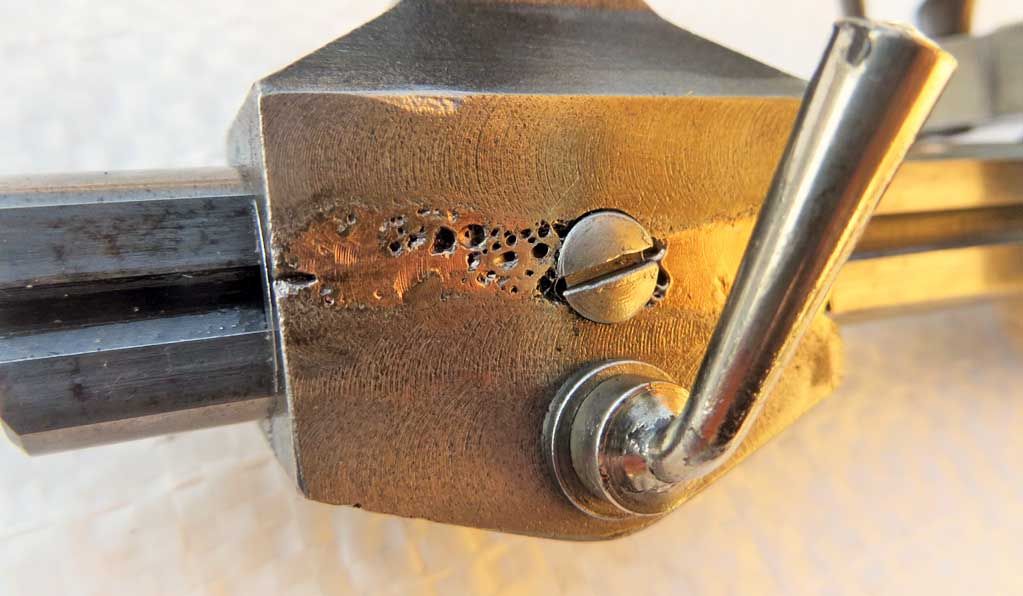
 mark costello 1
 Kiwi Bloke
 Ady1
Ady1- Please log in to reply to this topic. Registering is free and easy using the links on the menu at the top of this page.
Latest Replies
-
- Topic
- Voices
- Last Post
-
-
Drive coil ampere turns for seconds pendulum
Started by:
carlw
in: Clocks and Scientific Instruments
- 3
-
16 September 2026 at 09:23
John Haine
-
Have I got 12-28 UNF wrong or has Völkel?
Started by:
Bill Phinn
in: Workshop Tools and Tooling
- 12
-
16 September 2026 at 09:15
Andrew Crow
-
pendulum support springs
Started by:
gerry madden
in: Clocks and Scientific Instruments
- 3
-
16 September 2026 at 09:13
bernard towers
-
Making curved parts
Started by:
Steve Huckins
in: Beginners questions
- 8
-
16 September 2026 at 08:56
roy entwistle
-
Cylindrical Grinding Attachment
Started by:
Shaun Churchill
in: General Questions
- 7
-
16 September 2026 at 08:46
Peter Neill 1
-
Pittler C3 lathe, dividing and gear cutting attachments
Started by:
vic newey
in: Workshop Tools and Tooling
- 4
-
16 September 2026 at 08:46
Gerard O’Toole
-
REVERSE-ROTATION R/C Propellers…
Started by:
Andre ROUSSEAU
in: Help and Assistance! (Offered or Wanted)
- 2
-
16 September 2026 at 08:22
JasonB
-
Photography in the workshop (for the inept)
1
2
Started by:
Pippin
in: Workshop Techniques
- 20
-
16 September 2026 at 00:03
Nigel Graham 2
-
Ideas needed for problem wth Tom Senior E type Mill
Started by:
Mike Crossfield
in: Manual machine tools
- 6
-
15 September 2026 at 23:24
blowlamp
-
Microscope eyepieces
Started by:
gerry madden
in: Clocks and Scientific Instruments
- 3
-
15 September 2026 at 23:20
gerry madden
-
3 phase supply (again)
1
2
3
Started by:
colin hamilton
in: General Questions
- 22
-
15 September 2026 at 23:04
thetinkerer210
-
A new Milling Machine
Started by:
Martin Johnson 1
in: Workshop Tools and Tooling
- 8
-
15 September 2026 at 20:26
Wade Beatty
-
Robinson scale engine
Started by:
Frank Waugh
in: Stationary engines
- 2
-
15 September 2026 at 18:49
JasonB
-
New to castings
Started by:
BOB BLACKSHAW 1
in: Workshop Techniques
- 4
-
15 September 2026 at 18:06
JasonB
-
Do you chase a galvanized thread, or leave it alone?
Started by:
elowen01
in: Workshop Tools and Tooling
- 6
-
15 September 2026 at 16:49
noel shelley
-
… I had hoped we were growing-out of this nonsense !
Started by:
Michael Gilligan
in: The Tea Room
- 13
-
15 September 2026 at 16:42
Graham Meek
-
CLarke C430 lathe threading
Started by:
tatler
in: Help and Assistance! (Offered or Wanted)
- 4
-
15 September 2026 at 16:31
DC31k
-
Myford ML7 Motor
Started by:
ian Holdsworth
in: Manual machine tools
- 4
-
15 September 2026 at 09:57
Michael Gilligan
-
Octopus Heat Pump
1
2
3
Started by:
Michael Gilligan
in: The Tea Room
- 20
-
15 September 2026 at 09:46
Michael Gilligan
-
Annealing extruded acrylic
Started by:
Mick Bailey
in: Materials
- 2
-
15 September 2026 at 08:40
bernard towers
-
4¾” 13swg copper tubing?
Started by:
martynt50
in: Materials
- 8
-
14 September 2026 at 22:36
Mick Bailey
-
Source of milling cutters post Arceurotradw
Started by:
Mike Crossfield
in: Workshop Tools and Tooling
- 12
-
14 September 2026 at 21:57
Mike Crossfield
-
Quorn Belt Guard
Started by:
John Purdy
in: 3D Printers and 3D Printing
- 9
-
14 September 2026 at 21:34
John Purdy
-
Revolution – The Future is Out There!
Started by:
JasonB
in: Stationary engines
- 3
-
14 September 2026 at 20:50
JA
-
Tractor meeting in Babenhausen with a small model exhibition
Started by:
Werner Schleidt
in: Traction engines
- 2
-
14 September 2026 at 20:15
Roger B
-
Drive coil ampere turns for seconds pendulum
 carlw
carlw John Haine
 Bill Phinn
 Andrew Crow
 gerry madden
 bernard towers
 Steve Huckins
 roy entwistle
 Shaun Churchill
 Peter Neill 1
 vic newey
 Gerard O’Toole
 Andre ROUSSEAU
 JasonB
 Pippin
 Nigel Graham 2
 Mike Crossfield
 blowlamp
 colin hamilton
 thetinkerer210
 Martin Johnson 1
 Wade Beatty
 Frank Waugh
 BOB BLACKSHAW 1
 elowen01
 noel shelley
 Michael Gilligan
 Graham Meek
 tatler
 DC31k
DC31k ian Holdsworth
 Mick Bailey
 martynt50
 John Purdy
 JA
JA Werner Schleidt
 Roger B
Latest Issue

Newsletter Sign-up
Latest Replies
- Drive coil ampere turns for seconds pendulum
- Have I got 12-28 UNF wrong or has Völkel?
- pendulum support springs
- Making curved parts
- Cylindrical Grinding Attachment
- Pittler C3 lathe, dividing and gear cutting attachments
- REVERSE-ROTATION R/C Propellers…
- Photography in the workshop (for the inept)
- Ideas needed for problem wth Tom Senior E type Mill
- Microscope eyepieces

