Home › Forums › General Questions › Surface Grinder refurb
Steve,
The scraping with the Eclipse is showing nice high spots with the classic darker outlines but I would run into elbow issues with such a short handle, as has already been mentioned being able to put your body weight through the scraper is a real help in getting good scrapes and it takes some of the strain off the arms. Perhaps you can make a longer handle for it. Your sharpening method is clearly working for the HSS blade but is sub optimal for your carbide. The Sandvik carbide blade I have is excellent when sharpened on the rotary diamond lapping setup I described previously, only taking a few seconds to restore a a good edge and it holds up well. I have yet to work out how often I should sharpen it but as it’s so quick to do and it removes so little material it’s worth doing sooner rather than later.
I’m in Southampton.
Steve,
The scraping with the Eclipse is showing nice high spots with the classic darker outlines but I would run into elbow issues with such a short handle, as has already been mentioned being able to put your body weight through the scraper is a real help in getting good scrapes and it takes some of the strain off the arms. Perhaps you can make a longer handle for it. Your sharpening method is clearly working for the HSS blade but is sub optimal for your carbide. The Sandvik carbide blade I have is excellent when sharpened on the rotary diamond lapping setup I described previously, only taking a few seconds to restore a a good edge and it holds up well. I have yet to work out how often I should sharpen it but as it’s so quick to do and it removes so little material it’s worth doing sooner rather than later.
I’m in Southampton.
Hi Tony
I think it’s because the scraper is shorter that I can get my weight above it and really dig in, whilst controlling the length of the stroke. And also, I can scrape kind of “backhand” with the back of my hand facing my face (probably makes no sense!) and that’s even easier than a forward scrape, and I don’t need to turn the workpiece. A picture would help explain. I have 2 carbide scrapers, one about 3 foot long from eBay which cost £60, and one I made myself, about 2 foot. I’ve barely used the expensive long one. The home made one is currently superseded by the Eclipse scraper.
For some reason my carbide sharpening hasn’t been working. But whilst the HSS blade needs sharpening more often, when it’s sharp, it’s very sharp.
Problem is, I don’t know anybody locally who is remotely interested in machining, scraping (or plane making and other things I do in my spare time). It’s a bit of a niche passtime!
Edited By Steve355 on 05/10/2022 09:55:28
The loneliness of the long distance scraper …
I am lucky in that I have two friends quite close to me one is interested in scraping but hasn't done any and the other who has attended a Richard King course but whom I have yet to see scape anything. I first met one of them when he turned up to buy something I'd put up on Gumtree we are all interested in restoring / improving machines. Your plane making sounds interesting.
If you would like to PM me I'll give you my address and if you wanted to you could send me one of your carbide inserts and I'll put edges on it (assuming is not braised on to the scraper!) You would at least then know what a sharp carbide can do.
I can't see how a 3' scraper would work but I'm relatively new to this. I do recall as kid spending a lot of time in a neighbour's workshop; he had a few weird looking objects on the wall which he told me were scrapers and he briefly explained what scraping was. These tools looked a bit like upside down swan necked carving gouges with a bit of probably tool steel in the the end, I think with hindsight they were pull scrapers.
Yes a pick of your scraping technique would certainly help.
The easy way to guarantee a good honed edge on a scraper blade is get a coarse wheel (4-600) and grind the radius dead square on the end. Then switch to your edge sharpening wheel (I use 1500 normally) and very lightly put your negative rake edges on. Because the insert is first ground square you only need to grind very lightly each time you sharpen as the cutting edge needs only be half a thou wide and gets a little bit wider each time you sharpen. This will not only save your fine grit lapping disc but help you to avoid sharpening everything BUT the edge, a common problem with novice scrapers.
Testt he blade against your thumbnail. If it digs in with only the lightest of pressure it's sharp.
Progress….
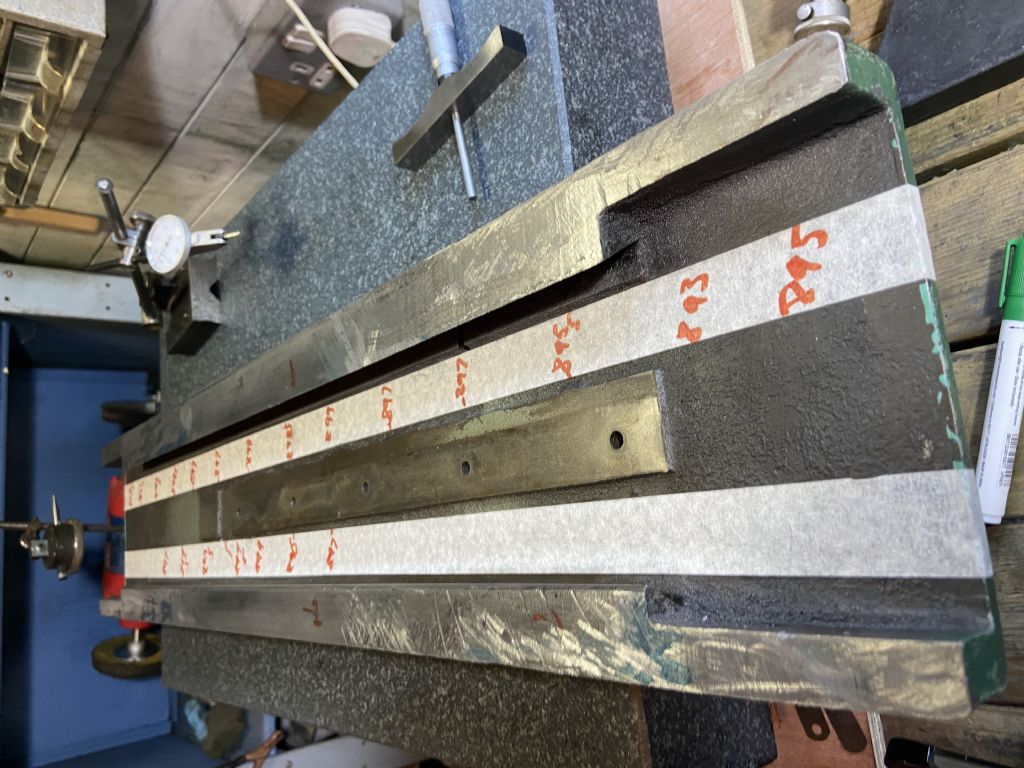
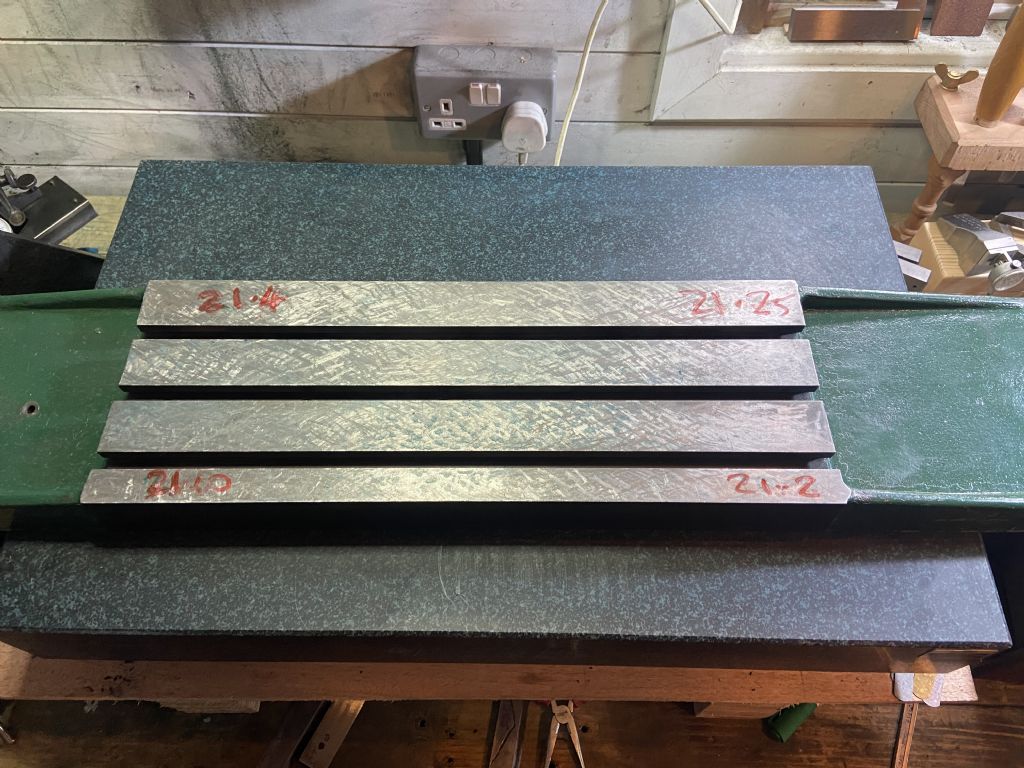
I scraped the top of the table to about 12 points. There are a few areas that I’m not totally happy with but I could go on forever.
The sides are parallel to about .005 so I’m not messing around scraping those.
The sides are square in so far as I can’t get a 0.0005” feeler strip between the square and the metal
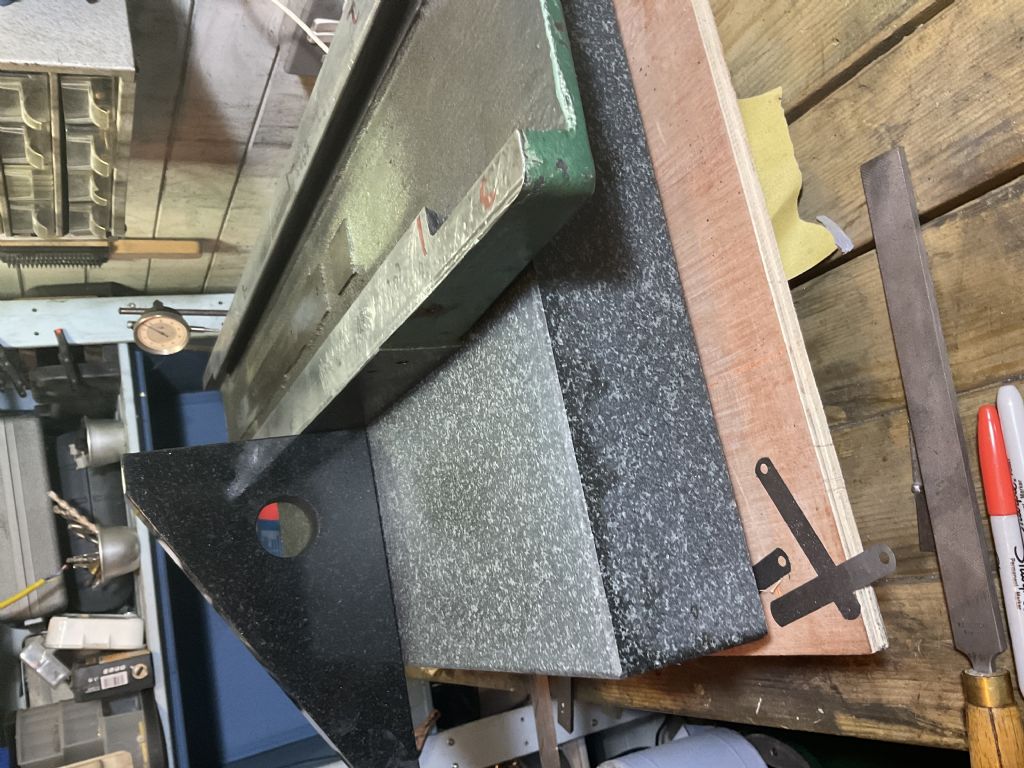
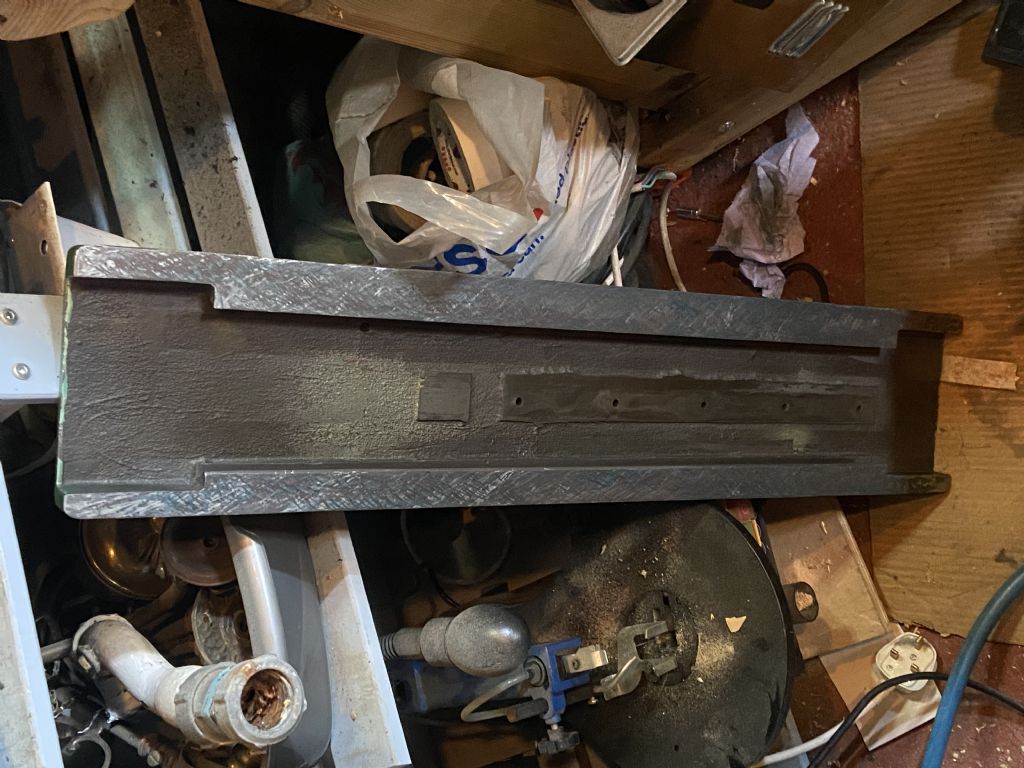
I’ve started on the bottom. If anything beats me, it will be this. They are quite worn going up at the ends by 0.003. Quite big patches of 0.002. I’ve tried scraping but it’s slow. I have tried a file as recommended by Pete but the two rails (?) are not evenly worn, and if I try to file just one side it’s very easy to end up with a hump in the middle and low at the edges. Ideally I’d fly cut it on a great big mill but obviously I don’t have a mill big enough. My surface plate isn’t quite big enough, but will probably work ok.
It is hard to measure. I’ve tried using a gauge block, perhaps that will help.
I have a feeling that this is going to be very very time-consuming and hard work.
I’ve also been looking at some gibs. They don’t seem to be worn (consistent micrometre measurement along the length), but they are warped, with a hump in the middle of a few thou,
Albeit on a shorter table, so less overall area to scrape off, but mine were something like 12 thou high at one end and 14 at the other, so I ended up taking nearly 15 thou off each end and one thou in the centre.
This was where I found myself taking a long time, due to trying to save money using a variety of lumps of carbide, all of which were all the wrong grade.
Tough yes, but unable to take, or maintain a very sharp edge.
It was also during the first lockdown, so obtaining stuff was a bit more difficult.
Are you using the correct grade of carbide yourself?
Bill
Albeit on a shorter table, so less overall area to scrape off, but mine were something like 12 thou high at one end and 14 at the other, so I ended up taking nearly 15 thou off each end and one thou in the centre.
This was where I found myself taking a long time, due to trying to save money using a variety of lumps of carbide, all of which were all the wrong grade.
Tough yes, but unable to take, or maintain a very sharp edge.
It was also during the first lockdown, so obtaining stuff was a bit more difficult.
Are you using the correct grade of carbide yourself?
Bill
It’s the carbide that came with the scraper. I haven’t had a lot of success with it. I actually prefer my old Eclipse HSS scraper – it’s a better length for me and is dead easy to sharpen, and when sharp it seems to hog off quite a lot of cast iron.
I had an idea to try to use my little horizontal mill for it. It’s far too small for the surface grinder table but I only need to skim a couple of thou off the ends. If I’m careful I can probably do it, I will give it a go tomorrow.
Re the gibs, as I see it you have 3 options:
1. Leave them as they are but stone off any high spots. If the gibs are adjusted by a series of screws they will largely take out the bend anyway.
2. Try to take out or reduce the bends, if it’s just one bend per gib this should be straightforward; your woodworking vice will easily have enough power to do this. Follow this up with scraping for oil retention.
3. Make new ones, ground flat stock can save a lot of work, don’t forget that once the grinder is running it can be used to make parts for itself. The short one would be easy to reproduce.
Right now your table wear is the thing needing your attention, you can always come back to the gibs at a later date.
Ref the table.
Let me express my concerns first; you are trying to bring a surface into flatness that is that is larger than your surface plate, this is where a suitable straight edge comes into its own. I can’t remember what length you are getting from Lamb’s if it’s not scraped in and longer than your table you’ll face the same difficulties.
The top surface is now flat to your satisfaction, this is your reference surface which should be used whatever metal removal process is employed, here are my thoughts:
Put the job out to an engineering company to take the bulk of the material off the flat ways, It might not be as expensive as you think.
Find someone with a larger mill ( not clapped out) to help you with it.
Use your mill, but be realistic, how flat is its table? Can it support the weight of the grinder, dangling the job off the end even on Bridgeport will affect the depth of cut etc.
Finally a radical idea: mount a bench grinder to a flat sled / base with 3 points of contact that rides on the surface plate and grind the material off. I would hinge the grinder on one side and adjust the height using an elevating screw. Like a router cutter the grinding wheel only has one point of contact and once dressed will be co planar with the plate I think I saw NY CNC do this to a straight edge prior to scraping. I would probably only do this on the flats. I would use a 46 grit surface grinding wheel which you will need to bush to fit the grinder. The elevating screw at a fine pitch will give you good control. To be clear you move the grinder sled not the job.
Ok another idea, look up Gena Bazarko on the tube he’s Russian but he shows using a Demel or similar to put ‘scrape’ marks on a straight edge, He follows the 45 degree system just as one would with a scraper.
Whichever you do I would do the dovetails by hand as you will have more control.
Tony
Beware of apparently bent gibs. They can bend a surprising amount due to uneven temperature through them. I had a pair of gibs for the shaper seem to have well over half a thou of bend and I scraped it out. Next day the bend was the other way… I realised that they had had a day for the temperature to normalse.
After that I kept them chocked up so that air could circulate around them and used a fan to make sure that it did when I wasn't working on them. No more issues with gibs flapping about.
Re the gibs, as I see it you have 3 options:
1. Leave them as they are but stone off any high spots. If the gibs are adjusted by a series of screws they will largely take out the bend anyway.
2. Try to take out or reduce the bends, if it’s just one bend per gib this should be straightforward; your woodworking vice will easily have enough power to do this. Follow this up with scraping for oil retention.
3. Make new ones, ground flat stock can save a lot of work, don’t forget that once the grinder is running it can be used to make parts for itself. The short one would be easy to reproduce.
Right now your table wear is the thing needing your attention, you can always come back to the gibs at a later date.
Ref the table.
Let me express my concerns first; you are trying to bring a surface into flatness that is that is larger than your surface plate, this is where a suitable straight edge comes into its own. I can’t remember what length you are getting from Lamb’s if it’s not scraped in and longer than your table you’ll face the same difficulties.
The top surface is now flat to your satisfaction, this is your reference surface which should be used whatever metal removal process is employed, here are my thoughts:
Put the job out to an engineering company to take the bulk of the material off the flat ways, It might not be as expensive as you think.
Find someone with a larger mill ( not clapped out) to help you with it.
Use your mill, but be realistic, how flat is its table? Can it support the weight of the grinder, dangling the job off the end even on Bridgeport will affect the depth of cut etc.
Finally a radical idea: mount a bench grinder to a flat sled / base with 3 points of contact that rides on the surface plate and grind the material off. I would hinge the grinder on one side and adjust the height using an elevating screw. Like a router cutter the grinding wheel only has one point of contact and once dressed will be co planar with the plate I think I saw NY CNC do this to a straight edge prior to scraping. I would probably only do this on the flats. I would use a 46 grit surface grinding wheel which you will need to bush to fit the grinder. The elevating screw at a fine pitch will give you good control. To be clear you move the grinder sled not the job.
Ok another idea, look up Gena Bazarko on the tube he’s Russian but he shows using a Demel or similar to put ‘scrape’ marks on a straight edge, He follows the 45 degree system just as one would with a scraper.
Whichever you do I would do the dovetails by hand as you will have more control.
Tony
Hi Tony
What I tried to do was to use my Burke horizontal mill to skim the last quarter or so of the bed. The wear was all in the middle, so skimming those sections bright the ends in. It wasn’t altogether unsuccessful. In general, there’s about 0.001 of variation now, a little more in places.. The extremities were a lot more difficult to do, so one is high and one is low. The high one can be scraped, and the low extremity probably doesn’t really matter.
However, I am very tempted to do as you suggest and see if a local machine shop will do it. They should be able to get it all much flatter that I can prior to scraping. I will ring around on Monday and see what I can find, as you say it’s a simple and quick job for someone with a decent mill.
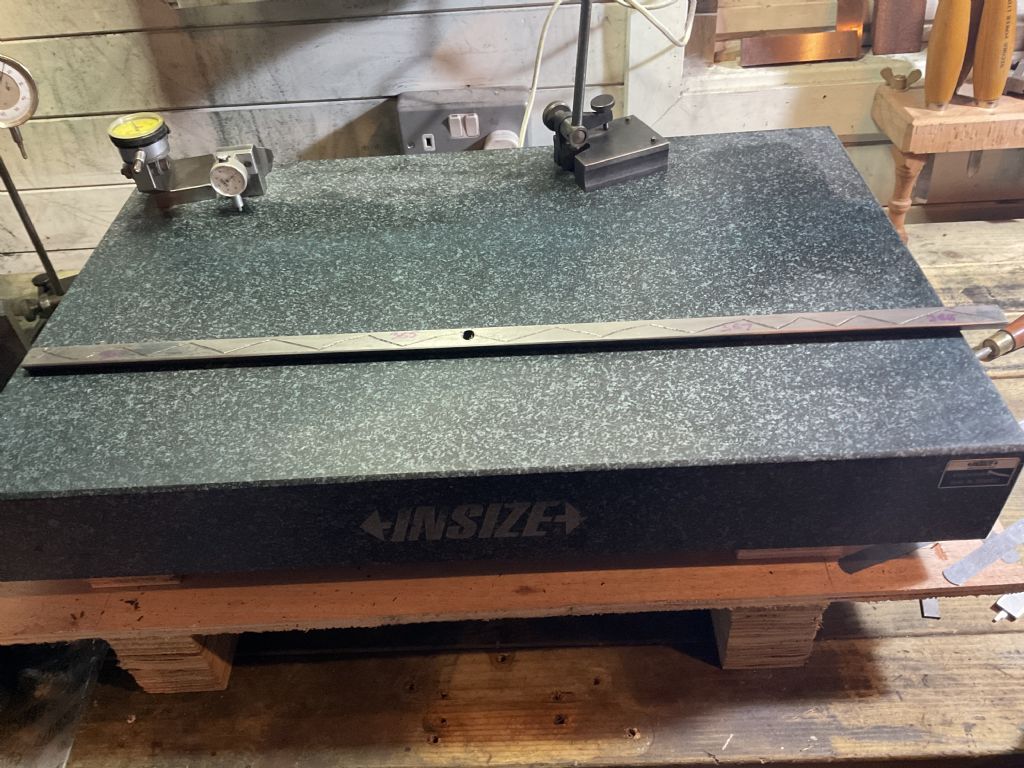
Re the surface plate, diagonally it is about 2 inch shorter than the full length of the table. This is by far the longest surface on the grinder, and I just couldn’t justify or afford (or move) a bigger plate. But if the table bed is pretty flat (say 0.001) before it is spotted, well I haven’t done the trigonometry but the potential error (1 thou in 32 inches) is incredibly small.
The straight edge that’s coming is sized for the dovetails, so it’s 24 inches long which is the length of the longest dovetail. I don’t think a bigger straight edge would be easy to handle.
I think you are right about the gibs, given they don’t seem to be worn, just slightly warped, they should be fine. As Mark suggested, they seem to have improved since I took them off the machine.
I understand your constraints regarding the surface plate, although as you say the potential area will be small the difference between a high spot and a low is also incredibly small. It will be worth researching what others have done when faced with a similar situation as there are techniques that can be used to minimise any error.
I would ask any shop what tolerance they can hold over the length of your surface and I would be looking for precision engineers; you can tell a lot by the cleanliness of their premises if you visit them.
Getting disillusioned now ![]()
I took the table to my local machine shop and they told me to go away. Said they didn’t have time to do it and it was too big for their machines anyway.
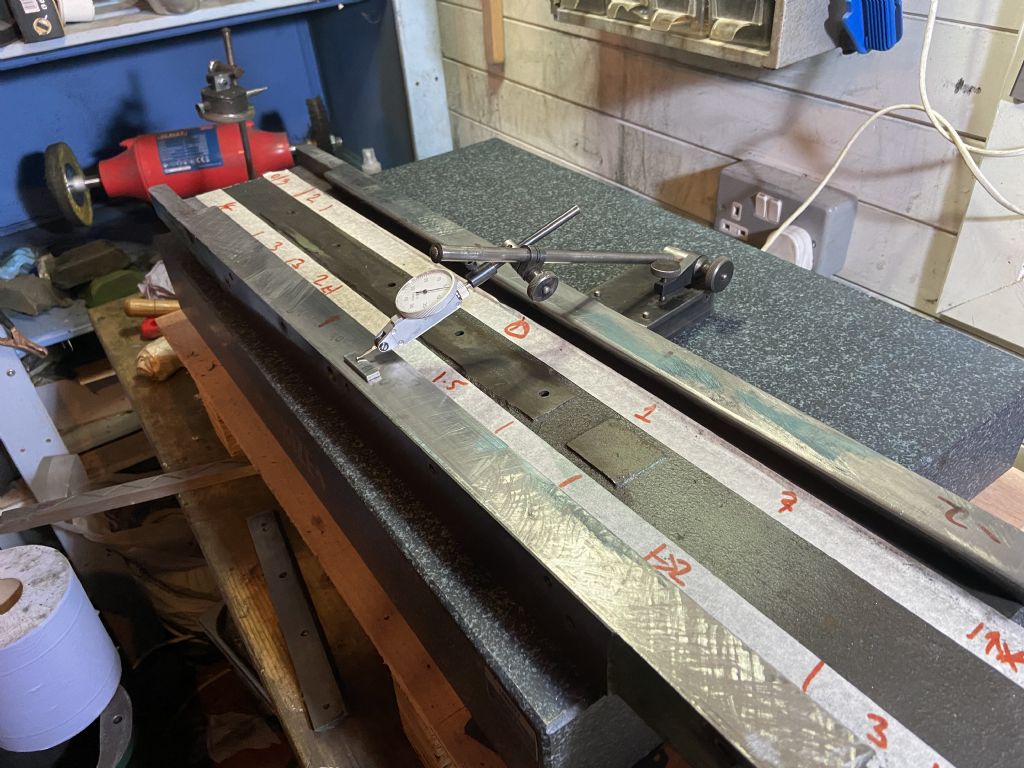
So I carry on trying to flatten the ways myself. It’s mostly within about 0.001, up to 0.002 in places. But of course I can get it flat, but it needs to be flat and co-planar with the top of the table on the other side. Looking at the blue patch between 5 and 10, the blue says it’s a high spot. But the DTI says it’s a low! I’m very reluctant to keep scraping away at it unless I know what I’m doing is right.
Surely the top won’t matter, you will clamp a magnetic chuck on to it and then grind the top of the chuck, unless I am being totally thick as usual in which case I apologise. Not surprised at local machine shop attitude I have heard the same story from many people trying to get bits of machining done, they are told to expletive off or told it will cost hundreds of pounds to do a five minute job.
Baz, Steve is scraping the ways.
Steve, sorry to hear about your experience with your local machine shop, clearly a bunch of idiots.
I share you concerns re conflicting readings blue vs dti, Maybe it would be worth waiting until your SE is ready and printing off that.
Tony
Getting disillusioned now ![]()
I took the table to my local machine shop and they told me to go away. Said they didn’t have time to do it and it was too big for their machines anyway.
So I carry on trying to flatten the ways myself. It’s mostly within about 0.001, up to 0.002 in places. But of course I can get it flat, but it needs to be flat and co-planar with the top of the table on the other side. Looking at the blue patch between 5 and 10, the blue says it’s a high spot. But the DTI says it’s a low! I’m very reluctant to keep scraping away at it unless I know what I’m doing is right.
Looks like you filled the low spot with blue then. Can happen when there is a lot of blue on the surface plate and it smears into the low spots. Clean it all off and then blue the surface to be scraped. Rub onto the surface plate and the blue will be removed from the high spots. Clean up again and blue the surface plate lightly and the blue should be tranferred to the high spot that way round so you get the inverse.
regards Martin
Certainly sounds puzzling, but we need to know more about exactly how you're setting up the job for clocking. How is the work supported? What is the reference surface for the clock? Have you measured table thickness (variations) with a micrometer – assuming the table top is truly flat)? When is the straight-edge coming? Might be a good idea to wait for it.
I don't like the idea that the pic shows blue-filled hollows, when there's almost no other blue to be seen. But I agree that sometimes you can get horribly misled by blue's antics. Last two sentences of Martin Kyte's last post is good advice – sanity check!
The scraping looks very uneven in depth, and scratchy as hell. Perhaps it's the photography, but I suspect the scraper (hopefully the tool, mostly, not the operator…).
The work and workpiece is on a surface plate.
The scraping looks horrible because on the ”0” side I have 0.001 to remove across about 12 inches so I was just going at it and roughing it out, I will clean it up as it gets nearer to the target height. That was the idea anyway.
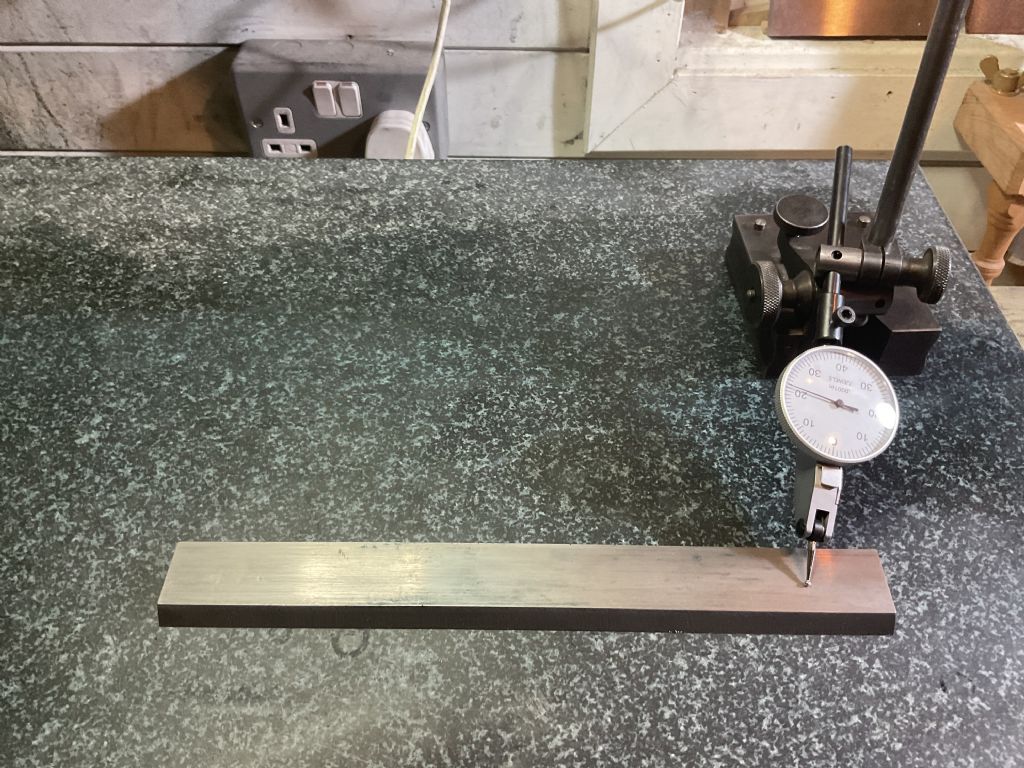
Yes I have checked it with a micrometer, but to take the measurements shown I used a small V block on its side to try to measure the general thickness for roughing it to approximately the correct height before using the surface plate to print it and get the surface flat. What I found after a while was that one of the ways has lateral wear of about 0.001, this was really not helping with accurate measurements.
The surface plate is 24” (same as the straight edge I’ve ordered) and the ways are 32”. Not ideal at all but I can’t justify a bigger plate or straight edge for this one surface. 24” is plenty for everything else I’m likely to do. So I was focussing on one end of the ways and taking it carefully, I am not sure how the straight edge will help?
The top of the table is flat at about 12ppi. There are some areas that aren’t quite 12 ppi but I had to stop somewhere.
If I had a really good way of measuring it that I trusted I think it would work out fine. But when the blue doesn’t agree with the dti which doesn’t agree with the micrometer, it gets tricky!
Steve,
The use of the SE was based on watching the well know Youtubers rebuild machines. Generally they scrape the SE to the plate (the plate is always your primary reference and we have no concerns that the plate isn't in spec.) Yes maybe it's not on 3 points but the difference that is going to make is very small compared to the variances you are measuring on your parts. From experience it is very easy to get dirt between the part and the plate – you can feel it on small parts but I think that would be much more difficult on a large lump like your grinder table. This is where your SE comes in as its easier to handle and possibly improve that feel.
Bluing on the plate shows how the surface compared to a known surface of high flatness. Miking shows local thicknesses, there are bound to be variances with your table top surface that will affect the readings what is the resolution of your mike? The accuracy of your DTI is less of an issue, provided its rigidly mounted and you can get repeatable readings – which you can check on e.g. a parallel as principally you need to indicate difference.
As I mentioned before it is easy to end up with a convex or concave surface which can play havoc with printing. One thing you might try is putting the table scraped side down on two known parallels resting on the surface plate. the indicator base rides on the surface plate and you indicate the downward facing scraped surface.
Regarding the quality of your scrapes you really do need to make the change to carbide and a suitable sharpening setup.
Don't get disheartened you are doing a good job, maybe take a break for a few days & come back to it with a fresh pair of eyes & renewed energy.
Tony
Update….
well, I spent the entire weekend on the ways of the table, in the end I made decent progress.I realised that I could measure the top of the table (already scraped) with a depth gauge. I was getting decent consistent measurements that way. I ended up with the table corners within 0.0005. Which will have to do.
i dealt with the ways, which don’t quite fit on the surface plate, by carefully scraping not too much so as not to overshoot and end up with a scooped or bowed middle, it’s not 12ppi everywhere by any means, but again, it will have to do and it’s now all flat to 0.0004 rather than 0.004. So ten times flatter than it was.
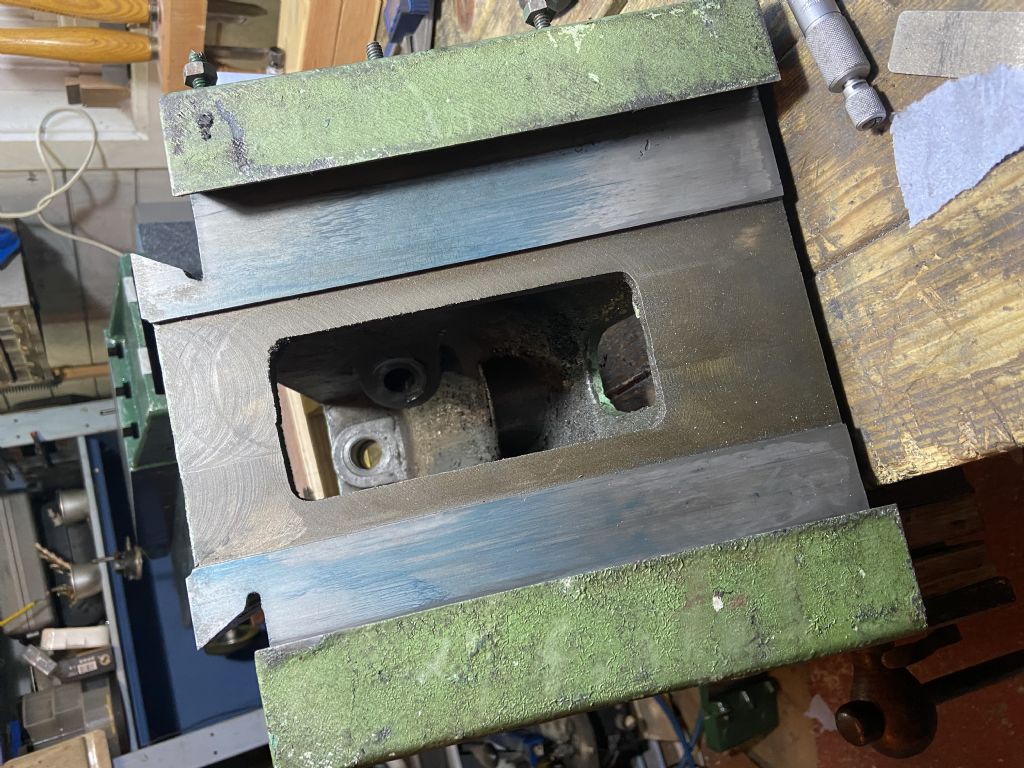
Now I’m onto the knee.I’ve started with the easiest surface, which has some well defined wear in the middle.
I have also blued up the vertical surface of the knee. The question here is, am I seeing this pattern because of.wear (i think that’s where I would expect wear) or poor printing due to the weight distribution of the knee, or both?!
Slow progress, but progress. Tony’s idea of having a couple of days off was a good one.
Edited By Steve355 on 17/10/2022 23:57:03
Edited By Steve355 on 17/10/2022 23:58:08
Glad to see that rest & recuperation time helped. Scraping can seem rather soul-destroying, can't it?
I'm not sure exactly what you're doing, so can't answer your question, however, some observations…
I think that it would be time well spent to make up some dovetail spotting masters. And you'll need some rollers.
Scraping overhanging angled surfaces of dovetails is awkward at best, and miserable at worst. Do make sure there's a suitably large 'run-out' groove as there seems to be under the horizontal ways' dovetails. Not so sure about the vertical ones. A small Eclipse scraper, with the end thinned down, comes in useful here.
The knee's vertical ways are likely to be worn significantly. I think I'd start scraping these surfaces, and only then correct the knee's right-angled geometry by scraping the horizontal surfaces – it would be easier, particularly the dovetails. You should consider making the relationship between horizontal and vertical ways a tad obtuse, to compensate for the droop that will occur when the saddle and table load the knee.
It's probably a good idea to finish the vertical surfaces of the knee with a little central relief. I think Connelly explains the whys and wherefores. However, for the amount of wear that's likely to occur during your use of the grinder, this refinement is optional – however, avoid a convex surface at all costs. (Folk may argue that, since the knee is so heavily loaded, it's likely to be stable, almost regardless of its geometry, but we're trying to do things properly, aren't we?
Good luck, you're probably about 20% of the way there…
Steve you're doing great so take heart and keep going. Your goal here is to make the machine perform as well as YOU can without expecting a professional-level job. For sure, it will be better just from what you have done.
Your wear on the small end of the knee, the vertical ways, is completely typical. Your print shows blue in the middle, the least worn part, more wear at the bottom of the flat ways (which is carrying the most load) and a little at the top (which is where dirt collects and grinds away the iron).
The long ways (Horizontal) are worn in the middle because whomever has used the grinder has only ever ground parts in the middle of the chuck so they have not spread out the wear. This is good for you because you now have four reference points of un-worn material.
Start by scraping the long ways on your surface plate. Before you put it on your plate put two opposite-diagonal scraping passes right down both ways to clean them up and create a good pick-up for the blue. Stone them VERY lightly to remove burrs. This will make your plate last longer you don't want to be putting an un-scraped part onto your best plate if you can help it.
Now bear in mind that you have a hugely un-balanced weight here so you will have to either use your judgement to support the heavy end with your hand or (the better way IMHO) use a smaller plate to print it and put the plate on top of the part. Just be aware that the heavy end will always put down more blue. Scrape those long ways to get a good print all along them then use a square to check the relationship with the short ways.
When you scrape the short ways, start with the section that's printing heaviest and scrape a band across both sides so you end up with two strips of blue that you then move out towards the ends. This will prevent you from scraping the ways rainbow-shaped which they already are. There's an excellent visual representation here:
As Kiwi Bloke said above, you can relieve the centre of a moving way so that it wears-in before it starts wearing out. Your work will be much longer lasting that way. Don't do it with a static way, obviously.
I'm glad the rest helped.
Regarding the knee you are right to be concerned about the weight distribution affecting the print but I have no experience as to what extent. This is where the SE comes in – are you still waiting for yours to arrive?
I would think for now you can rough scrape the knee and finesse it with the SE when it is ready for use.
Thats a nice image that Pete linked – I have not seen that before.
When I set up a surface grinder the first thing I used to do was to grind the bed top before fitting the chuck. Usualy it took little or no metal of but it made the face absolutly flat to axis. The next was to grind the chuck base. It would be set face down on the ground bed and cleaned up. Then the chuck, with a thin coating of silicone grease between them to prevent corrosion, was ground in situ for a good parallel machine. Then the check for squareness with a bottle square would be done to check the vertical axis.
David
When I set up a surface grinder the first thing I used to do was to grind the bed top before fitting the chuck. Usualy it took little or no metal of but it made the face absolutly flat to axis. The next was to grind the chuck base. It would be set face down on the ground bed and cleaned up. Then the chuck, with a thin coating of silicone grease between them to prevent corrosion, was ground in situ for a good parallel machine. Then the check for squareness with a bottle square would be done to check the vertical axis.
David
The main issue with surface grinders is that the y-axis ways tend to wear rainbow-shaped. When this happens no amount of grinding the table or chuck wil produce a flat part because the table cross-travel is moving in an arc.
Steve is lucky in that 1. his wear is very minimal and 2. his y-axis is not worn in the above fashion.
The X axis tends to wear because it sees the most motion. The Z axis tends to wear less (especially on a J&S, since they're ball ways) and the Y axis usually very little (again, roller ways in J&S land).
![]()
Edited By Mark Rand on 19/10/2022 19:36:40
Home › Forums › General Questions › Topics
Started by: Bill Phinn
in: Workshop Tools and Tooling
Bill Phinn
Started by: COLIN MARTIN 2
in: Materials
southernchap
Started by: john fletcher 1
in: General Questions
Nimble
Started by: Bill Phinn
in: Workshop Tools and Tooling
old mart
Started by: ron vale 3
in: Stationary engines
Weary
Started by: lucerne
in: Manual machine tools
Howard Lewis
Started by: Speedy Builder5
in: Materials
Dalboy
Started by: Harry Broadbent
in: Model Engineer & Workshop
duncan webster 1
Started by:
ray1580
in: Introduce Yourself – New members start here!
Howard Lewis
Started by: wilfried54
in: Introduce Yourself – New members start here!
Howard Lewis
Started by: Werner Schleidt
in: Traction engines
Werner Schleidt
Started by: Chris Crew
in: The Tea Room
Bill Phinn
Started by:
dean clarke 2
in: I/C Engines
alecs
Started by: Bill Dawes
in: General Questions
Nigel Graham 2
Started by:
JasonB
in: The Tea Room
Nigel Graham 2
Started by: Buffer
in: General Questions
Vic
Started by: Dougie Swan
in: General Questions
Dougie Swan
Started by: berwick
in: Beginners questions
Michael Gilligan
Started by: Nick Welburn
in: Work In Progress and completed items
Nick Welburn
Started by: Alan Ambrose
in: Manual machine tools
southernchap
Started by:
duncan webster 1
in: Electronics in the Workshop
John Haine
Started by:
Michael Gilligan
in: Clocks and Scientific Instruments
michael m
Started by: Phil Whitley
in: The Tea Room
Phil Whitley
Started by: Bill Dawes
in: General Questions
Dave Halford
Started by: SteveP
in: I/C Engines
SteveP