Centec 2b mill rebuild

Centec 2b mill rebuild

Home › Forums › Manual machine tools › Centec 2b mill rebuild

Viewing 11 posts - 1 through 11 (of 11 total)
  • Author
    Posts
  • #784968
    Graham Horne 2
    Participant
      @grahamhorne2

      I am rebuilding a late model Centec 2b mill. I stripped the machine back to small parts, removed the existing paint, cleaning up the castings with files, right angle grinder with flap disks and wire wheels and rotary burr grinder. I was surprised how messy and time consuming the casting preparation became. I then used brushed on 2 pack epoxy filler primer and filler to get the surface ready for spray paint. Next I sprayed 2 x coats 2K epoxy filler primer, and final sanded. Tomorrow I will warm up the shop to 20C and final coat with 2K epoxy gloss paint so it’s a day in full cover, air masks and the noise of paint booth fans. Hopefully only about 2 hours then I will get out of there and let it cure overnight. It’s a time consuming process but hopefully worth it.

      Pete Rimmer kindly lent me a camel back straight edge and I now have my carbide scraper, surface plate and everything ready for scrapping the ways and surfaces on the mill. This is new to me but Pete kindly spent some time with me so I can get started. So now I will attempt to bring back the ways on the column, knee, cross slide and table back to as good as I can get. I’ll do my best. Once the paint is cured and I get the scraping done I will post some photos of the reassembly and the accuracy I achieve.

      #784990
      Bazyle
      Participant
        @bazyle

        Check the weather forecast and whether the paint is happy in the very high humidity that will be around. It might be an idea to put light bulbs in the castings to warm them up before putting on the workshop heating else they will be condensation magnets.

        #785024
        noel shelley
        Participant
          @noelshelley55608

          Since heat is needed it will be no good using LED bulbs, incandescent bulbs will be needed ! Noel.

          #785028
          Graham Horne 2
          Participant
            @grahamhorne2

            Thanks for the advice on heat. I have a wood stove which I will put on early in the morning and the fire will be out before I start painting. I stack the paint a parts around the stove so they are warm. There will be no flame when I start to paint but it will be warm.

            #785189
            Graham Horne 2
            Participant
              @grahamhorne2

              The workshop is 10m x 4.5m with a high apex ceiling so there’s a lot of air space. It’s been climbing from 12C overnight to 19C now. The fire is about to be chocked out with all the parts standing around the fire to get warm. The relative humidity is 50% with the air filtration for the workshop on full blast for 4 hours so there is no dust and no cold spots. Just getting ready to dress up into full overalls, gloves and full face masks etc. I am spraying with 2K ring pull rattle cans as I have a problem with the air compressor which is a story for another day. I don’t have an air feed mask but good quality organic filters sourced for this very poisonous stuff. I am not a super experienced painter and normally I paint furniture (I’m a woodworker). These parts are all tedious with under-hangs and overhangs and wrap arounds so i wish I had the right spray guns and not rattle cans. It’s taken me weeks to get to this point. Worts case, sand out the runs and start again. Here we go.

              #785193
              Graham Horne 2
              Participant
                @grahamhorne2

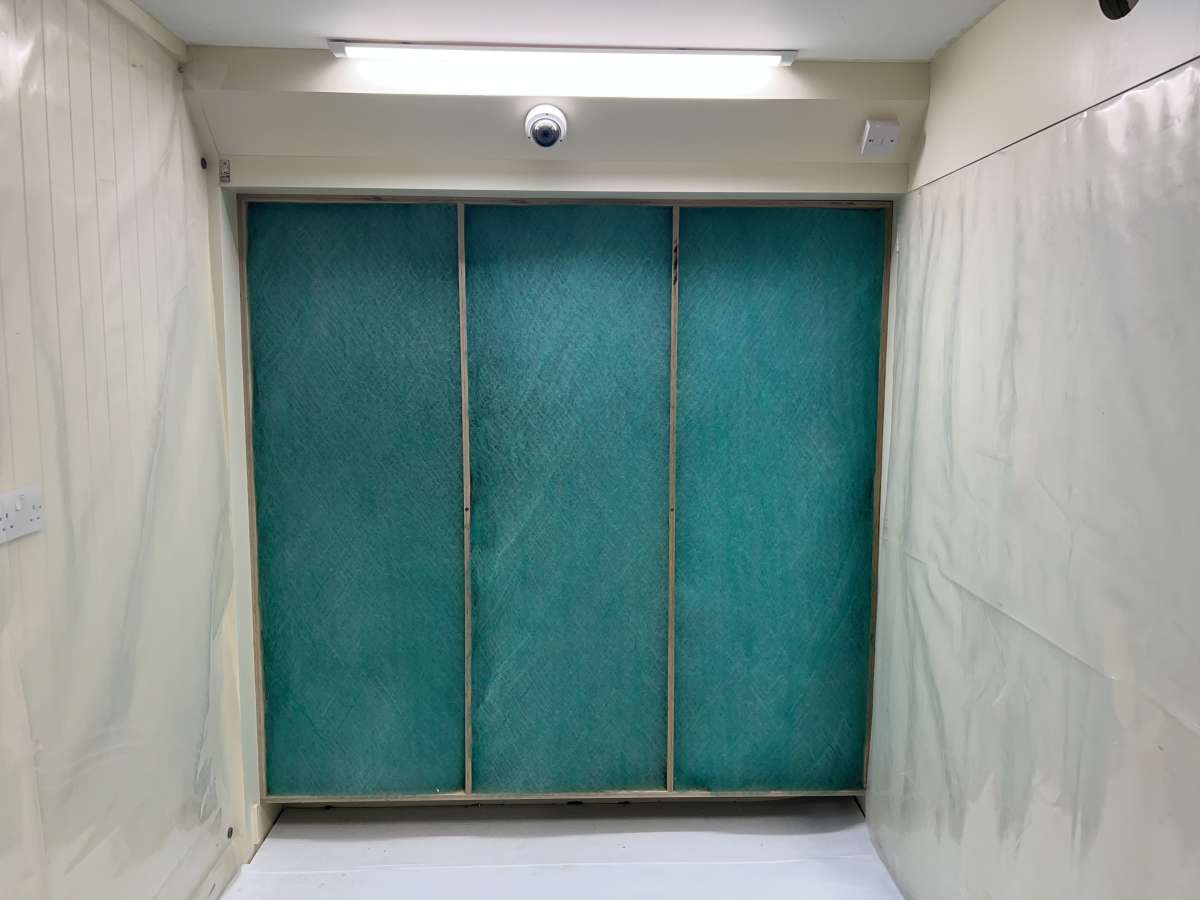
                This is the folding open front spray booth.
                IMG_0647


                #785641
                Graham Horne 2
                Participant
                  @grahamhorne2

                  Spray painting the parts went pretty smoothly overall. It was a bit tricky getting enough coverage in all the nooks and crannies, especially on some of the more complex shapes like the Mk3 vertical head drive shaft and the spindle shaft component. Luckily, the more intricate parts turned out great with no sags, probably because they didn’t have any big vertical flat sections. The bigger parts, like the column, which has vertical flat sections, ended up with a slight sag on one side (you have to be picky to see it). The column’s just too heavy to move around, so I had to leave it upright and paint around the gear shift covers on one side.

                  I’m going to let everything dry completely for a few weeks so the paint cures properly. After that, I might try lightly sanding some paint in an inconspicuous spot (probably on the back of the base) and then do some fine sanding up to around 2000 grit before a buff. If it works well there, I’ll give the column a try. If not, I’ll just leave it as is. The finish is super shiny, and I’m pretty confident once it’s fully cured, it’ll be hard and durable.

                  #785647
                  Graham Horne 2
                  Participant
                    @grahamhorne2

                    Next up is scraping the faces and ways of the Centec. I’ll start with the column faces, which look to be in pretty good condition with minimal wear. Once I get the straight edge ‘blued up’ and give it a test, I should be able to see how flat things really are. The left side of the column way holds the dovetail of the knee, while on the right side, the gib slides against the column way.

                    I’ve made a simple cradle to hold the column at an angle so the left way stays flat while I scrape. The plan is to get the left way straight first, then use gauge pins to make sure the right side way is parallel and straight. After that, I’ll work on straightening the faces and left dovetail on the back of the knee, then finish by mating the knee back to the column. Should keep me busy for a while!

                    I’m new to machine rebuilding, so I’m saying all this out loud in case I’m missing something or doing it wrong. Any advice or thoughts are welcome!

                    #785678
                    SillyOldDuffer
                    Moderator
                      @sillyoldduffer
                      #785759
                      Graham Horne 2
                      Participant
                        @grahamhorne2

                        Hey Dave, just wanted to say I’m not offended by your comments at all. I’m here to learn! I totally understand the difference between BSF, UNF, and Metric threads, both in angle and profile. This week, I learned about BA threads on this forum, which was new to me, and now that I understand it, I see BA threads everywhere on small components—pretty cool!

                        I’ve gone ahead and ordered a 2BA 2nd tap from Zoro to have on hand in case I need to clean up any threads, plus a bunch of 2BA cap head screws for replacement when needed. I’m aiming to work in thousandths of a millimeter, not tenths, so I’ve got my work cut out for me. I’ve got a solid granite surface plate, and Pete checked it with his repeat-o-meter, confirming it’s reference quality and in great shape (it sits on 3 basel points). Over time, I’ve also collected the metrology tools I need.

                        The cost of the machine was not the major concern because of space I needed a solid accurate desktop mill and to be honest I prefer older tools that are well built. I will put the Machine-DRO 3 axis with magnetic encoders on as they fit well on the mill and as I work in metric so the current movement control is not interesting to me.

                        I’ve spent a ton of time watching YouTube scraping videos—hundreds of hours from guys like Stephan Gotswinter, Keith Rucker, Vince Builds, Beachcomber Bob, and Robin Renzetti, SuburbanTool, Nick Mueller, Look Creations and Mach Super just to name a few. I also spent half a day with Pete learning how to scrape, and he was incredibly helpful and generous with his time. Pete even let me borrow a camelback straight edge for this task.

                        The only hiccup was the Sandvik Coromant carbide scraper was out of stock and I could not find one anywhere (unless I wanted to spend a fortune). Eventually, I tracked one down a on eBay, but while waiting for that, I decided to get the paint done. I know normally you wouldn’t paint before other stuff, but in this case I did. I was surprised at how long it took to clean the castings. I thought I’d get the paint done over two weekends, but it ended up taking 8 weekends. The paint job’s turned out pretty well, though! Better than new in my unbiased view.

                        I’ve built a solid steel-framed table (1400mm x 800mm, 220kg) with a rubber top to support the Centec. The frame is made from 75 x 75 x 5mm steel on FootMaster casters, so I can move it around but also level it when needed. Most things in my workshop are on casters (except the Boxford lathe), and since the mill sits in front of my folding spray booth, I need to be able to move it when spraying.

                        The table has 5 full-length drawers on each side for tooling and accessories, all on 50kg ball-bearing slides. In the center is an electrics cabinet housing a fan-cooled VFD with front panel controls. I’ve got on/e-stop, reverse/stop/forward (though direction not relevant for the Centec’s setup), variable speed, and RPM readout from a hall effect sensor on the spindle belt drive. The motor is a new 1.1kW (1.5hp) 240V 3-phase unit mounted directly under the mill and wired to the VFD.

                        I haven’t added jog controls yet but I’m considering it. I did the electrics and aluminium control panel myself, and I’d say they turned out top-class. I didn’t go into much detail before, but I used to be a staircase maker and got into CNC manufacturing 30 years ago when you had to handwrite G-code. Later, I moved into software engineering. So, I’ve done my fair share of control engineering and software-driven automation.

                        #785778
                        Graham Horne 2
                        Participant
                          @grahamhorne2

                          I knew I needed to sort out the table once I got the mill running. If I tightened the gibs when the table was in the center, it wouldn’t move to the ends, so the wear is clearly in the middle. The machine was owned from new by an engineer who specialized in manufacturing spot welding electrodes out of copper, brass, and similar materials.

                          My main concern is the mill table—not terrible, but not great either. No major dings or mill marks, which is good, but it has a +-0.25mm concave bend and noticeable wear in the middle of the ways. At first, I thought about getting it surface ground, but I’ve struggled to find anyone willing to do the job. I chased up a guy mentioned on the forum who used to do this sort of work not far from me in Coventry, but he’s been out of the game for 10 years. The company that took over only does large-scale grinding (3m bed), and their setup costs are prohibitive.

                          So, while I’d still prefer surface grinding for the table, I think I may just scrape it flat instead even though it would probably look nicer ground. Scraping the ways lets me introduce proper oil retention on the ways. That’s really the main reason this whole strip-down and repaint job started—it was meant to be a winter project, but it’s definitely expanded!

                        Viewing 11 posts - 1 through 11 (of 11 total)
                        • Please log in to reply to this topic. Registering is free and easy using the links on the menu at the top of this page.

                        Latest Replies

                        Home › Forums › Manual machine tools › Topics

                        Viewing 25 topics - 1 through 25 (of 25 total)
                        Viewing 25 topics - 1 through 25 (of 25 total)

                        View full reply list.