What Did You Do Today 2026

What Did You Do Today 2026

Home › Forums › The Tea Room › What Did You Do Today 2026

Viewing 25 posts - 176 through 200 (of 202 total)
  • Author
    Posts
  • #864415
    John Hinkley
    Participant
      @johnhinkley26699

      Still plugging away at the Carvera Air cnc mill. I have redesigned the con rods that I’ve previously machined and they are waiting in the wings to be made.  They are now split big end rods with bronze bearings.  I’ve been held back waiting for the delivery of materials and (quite frankly) lethargy on my part!  I have, though, spent a serious amount of time working at the design in Alibre Atom and Fusion 360 (for the G-code).  Each iteration throws up some sort of obstacle and I find that I’m in need of a fixture plate to hold the blank material.  That’s all designed and G-coded, just waiting for me to get out to the workshop and get a move on.

      While pondering on work-holding in general, I thought that a low profile vice would be a nice addition to my arsenal and, as luck would have it Makera make a rather natty one, but it only fits the New Makera Z1 and Z1 pro, which have different work table hole spacing from the Carvera Air  I fired off an email to Makera support and swiftly got a reply, confirming the vice won’t fit Straight into my mill.  A period of head scratching ensued and a series of “conversations” with a Google bot later, I have decided to make a sub-table to fit to the Carvera Air, with a set of pre-drilled and tapped holes (circled red, below) by which the Z1 vice can be attached and located with suitably placed dowel pins.

      At last – what I did today!  It took 7½ hours to print, but I 3D printed the sub table in grey PETG filament.  If I say so myself, it looks reasonable.  The dowel holes aren’t there yet – I’m awaiting Makera’s confirmation of their exact coordinates – so I’ll add those to the final version before cutting any metal.  The sub plate will be 8mm thick, so I won’t be losing much headroom and I can claw some of that back, if necessary, by removing the stock spoil board.

      Here’s a photo of said sub-plate:

      Makera Low profile vice sub-plate

      Doesn’t look too bad, does it?  The camera doesn’t lie, but it certainly can flatter!

      John


      #864561
      IanT
      Participant
        @iant

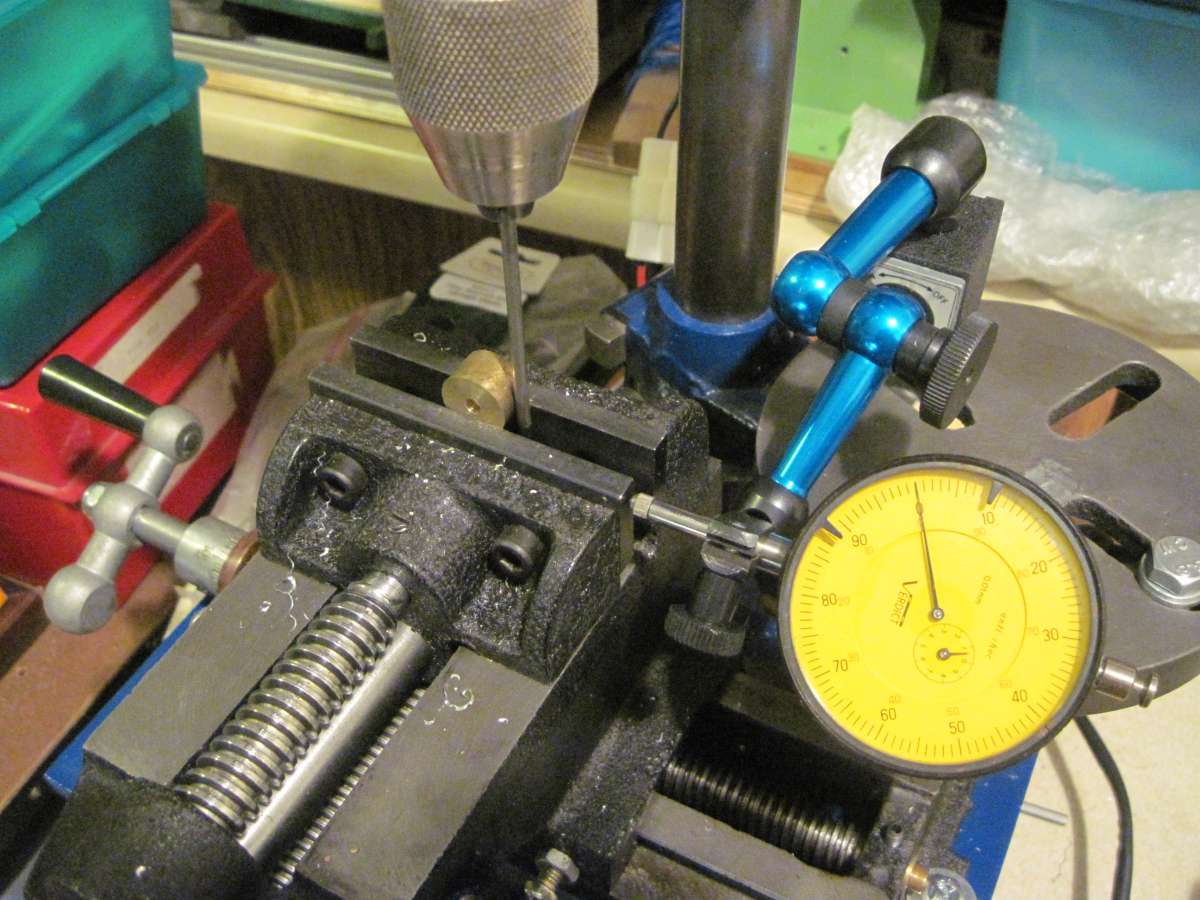
        I have a small Cowells drill that has undergone various modification and additions ove the years, including a variable speed DC motor change. It works very well for small work and it’s ‘indoors’ (so gets used a lot in Winter)  However the chuck jaws had been damaged at some point and runout on small drills was far from perfect. I’d tried various solutions to this issue and did gain some improvements but still wasn’t happy. I’d been condsidering changing the chuck completely, which wasn’t straight forward as it’s an early form of ‘keyless’ chuck (that screws directly onto the spindle – gripping the drill in the process)

        Yesterday, I was rumaging in the Shed when I came across an old Picador grinding spindle. The drill chuck on one end looked quite similar to the Cowells. However, the thread alhough looking very similar, didn’t actaully match. The Picador chuck also proved very hard to disemble but a squirt of Kroil sat in an old tuna tin for 30 minutes finally released the top cap.

        Imagine my joy. The jaws were identical to the Cowells and in perfect condition (possible never used). They were easily swopped over. On the Picador (if it ever does get used) a wire brush won’t worry about runout. On the Cowells, the new jaws have no runout now. A happy day – where for once, something went well.

        IanT

        Below – just a photo from a few years back. I normally use the ‘ruler’ trick to quickly centre a drill over cylinders but I wanted this to be precise for some reason I can’t recall. The 3″ chinese X-Y vice is very handy but needed new bushes and the Y axis handle moving to the front. The keyless chuck is very convenient but I like it even more now that it runs true…  🙂

        IMG_5459

        #864697
        Julie Ann
        Participant
          @julieann

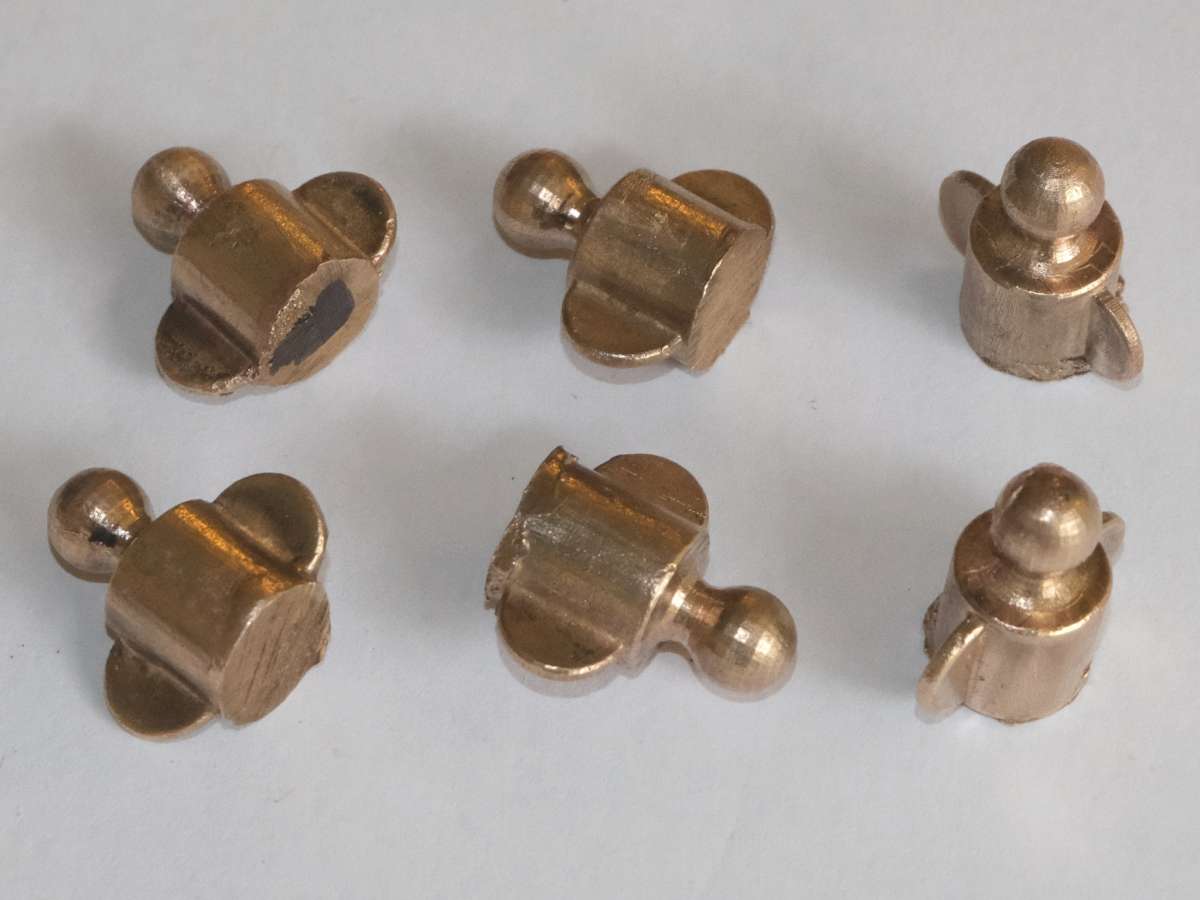
          First ever attempt at investment casting in LG2 – front wheel oiler caps for a 4″ scale Burrell traction engine. For scale the body diameter is 3/8″:

          Front Wheel Oiler Cap Blanks

          The caps are as is from the casting process, just soaked in brick & patio cleaner and a light pass with a fine wire wheel. The undersides will need machining and a hole drilled and screwcut 1/4″ x 40 tpi.

          Julie

          #864707
          Michael Gilligan
          Participant
            @michaelgilligan61133

            Nice !

            MichaelG.

            #864715
            JasonB
            Moderator
              @jasonb

              They have come out rather well. Is the slight faceting of the ball the photo or has the texture of the 3D print been captured in the investment?

              #864764
              Julie Ann
              Participant
                @julieann
                #864774
                JasonB
                Moderator
                  @jasonb

                  Certainly nice to know the process will capture such fine detail, would have been good to have had it when you were CNC machining some of those engraved plates, lettering should reproduce well, maybe even that textured background you see on some makers plates.

                  Bead blasting may be another option for final finishing, I prefer that to brightly polished and easy to get in where abrasives can’t.

                  #865211
                  Bazyle
                  Participant
                    @bazyle

                    Reading the editorial of the latest MEW had me checking the map of Melbourne to remember some of the places I went to 10 years ago. I wonder if the two Fowler ZS engines in the National Steam Centre are now running, if not there were a couple more in Ballarat (now where have I heard that name recently). Box Hill model engineers were very welcoming as I happened to visit during a rally and I managed to get to two others of the many in the city though the problem is they tend to only be open at weekends. The railway museum was sadly lacking in space and volunteers for restoration of the many locomotives. A visit to the Puffing Billy line put another loco on the list of models I would like to build and the boat museum showed the interesting engine layout for the popular little paddle boats that were vital transport  in the 19th century.

                    #865534
                    Neil Wyatt
                    Moderator
                      @neilwyatt

                      I barely got my workshop properly commissioned again, and I’m looking at another move and everything is going into boxes. Thank goodness for 3D printing, it’s kept me sane as an outlet for my creative juices.

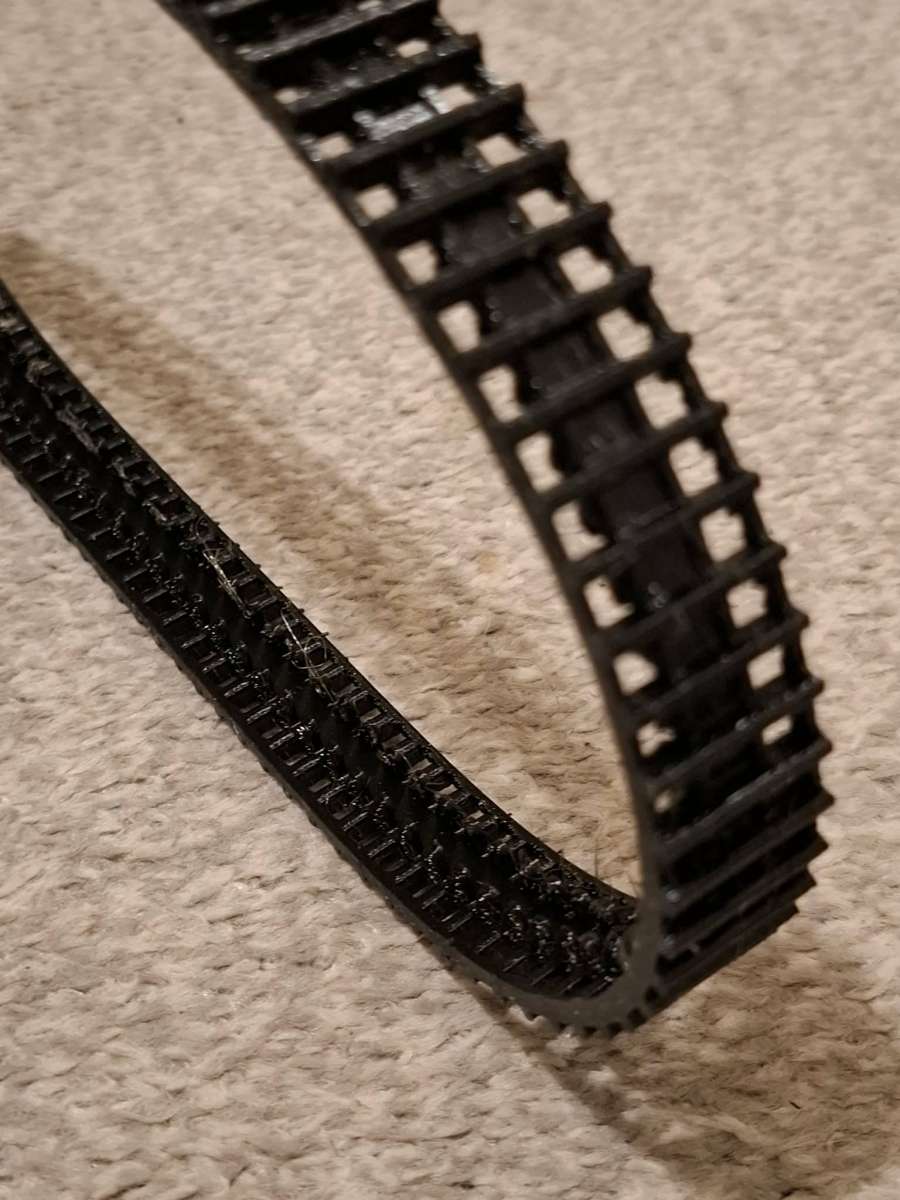
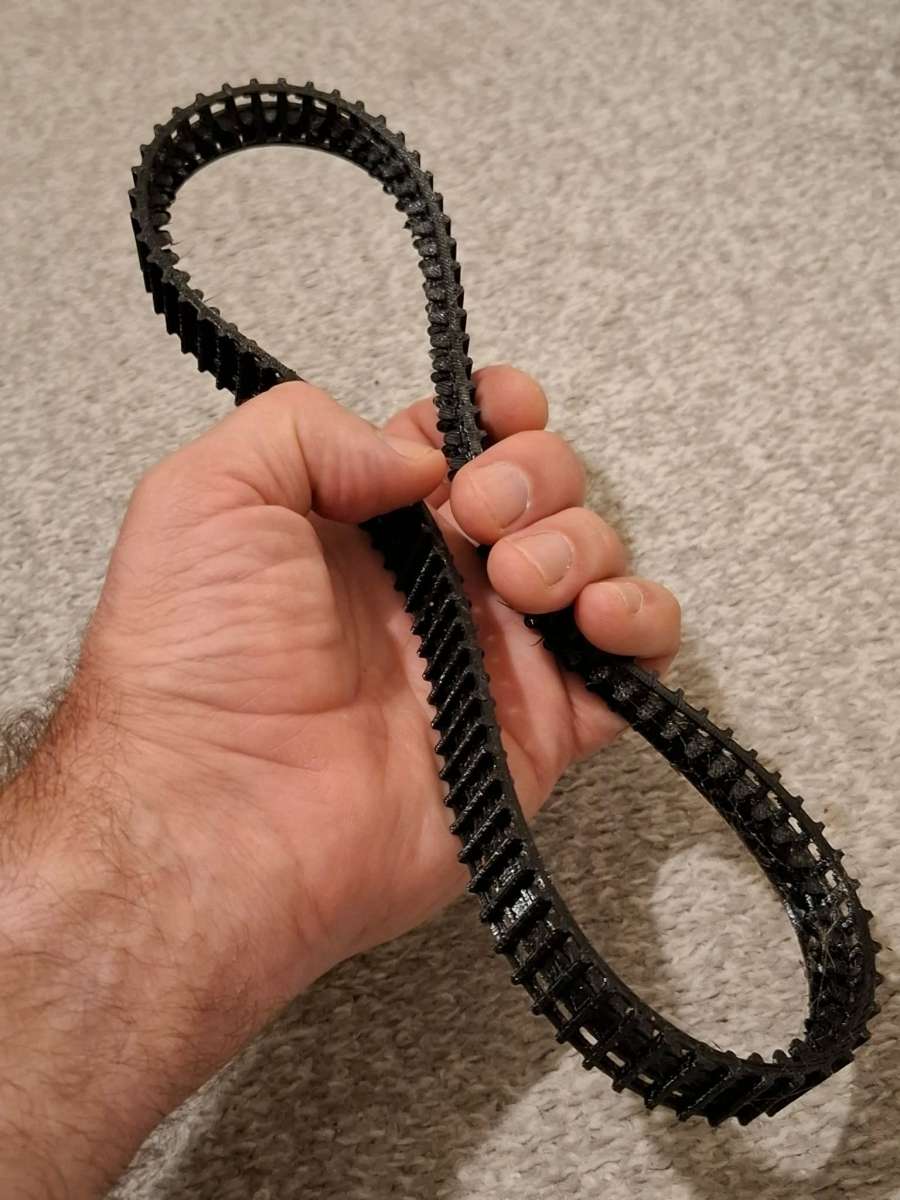
                      I’ve been experimenting with printing one-piece tank tracks in TPU.

                      Not the best photos, but this ‘proof of concept’ track seems pretty tough and dimensionally spot on. I have printed amore accurate track that better resembles individual links.

                      It seems pretty promising for subjects where individually printed links will be too fragile.

                      I think that printing drive belts in TPU would be feasible for emergency ‘keep you going’ purposes.

                      Neil


                      800594058_2475580776269069_9121881097461350280_n800230510_2356256231778596_8000608477232026608_n links.


                      #866237
                      bernard towers
                      Participant
                        @bernardtowers37738

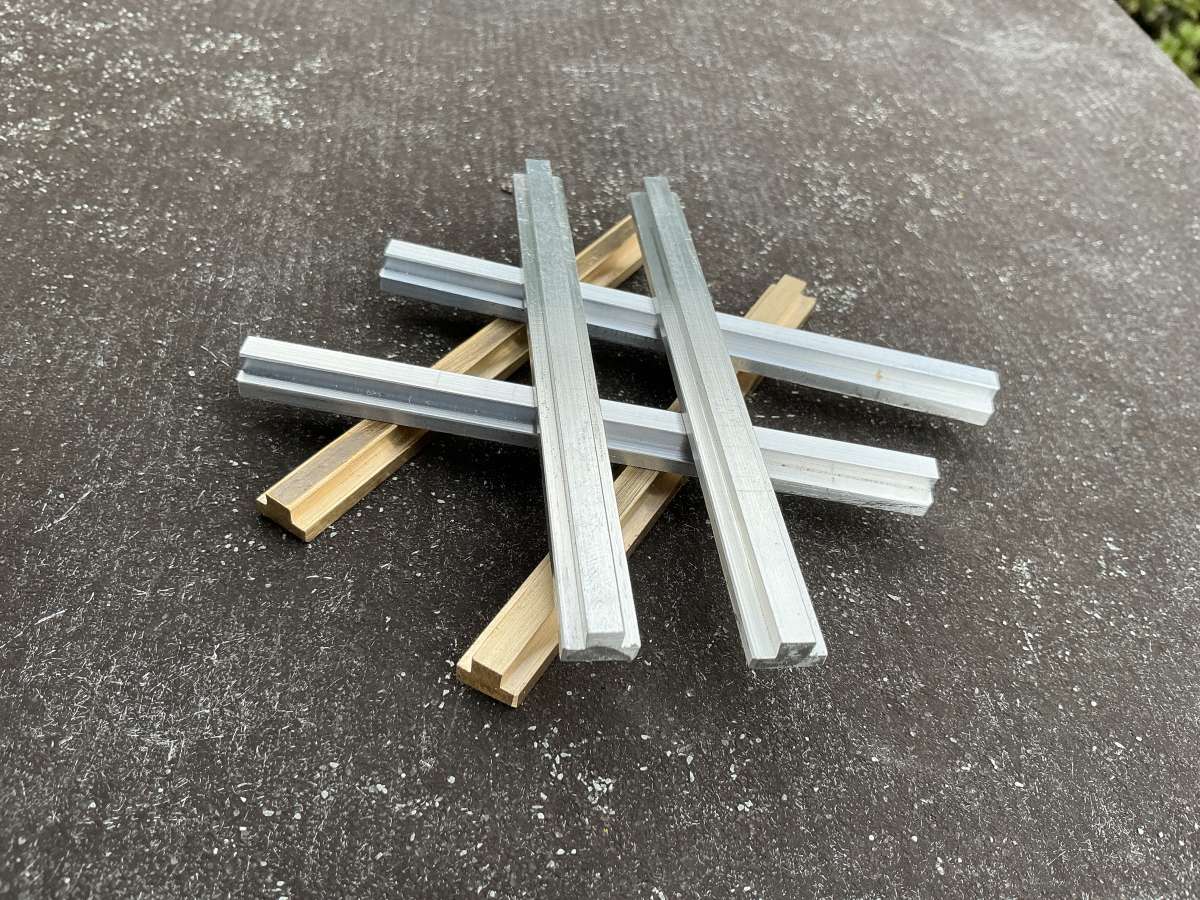
                        Had a couple of hours on the shaper making T nut strips for my Taig gearIMG_4163

                        #866569
                        John Hinkley
                        Participant
                          @johnhinkley26699

                          More time spent on the Carvera Air mill.  I’ve now installed the Carvera Community firmware and Controller to ease me into the use of my 3D probe.  The community software is more “advanced” than Makera’s own and is far more customisable.  I’ve also got a hand-held wireless remote on it’s way from the Orient and that’s simply plug-and-play with the Community controller.

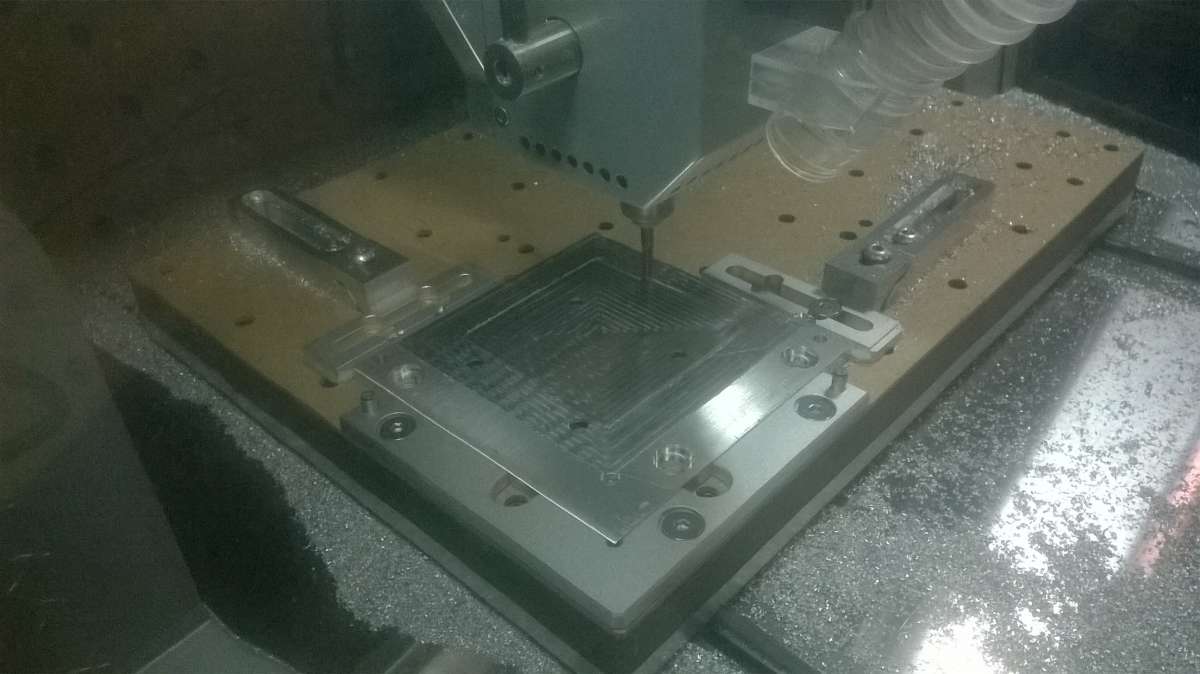
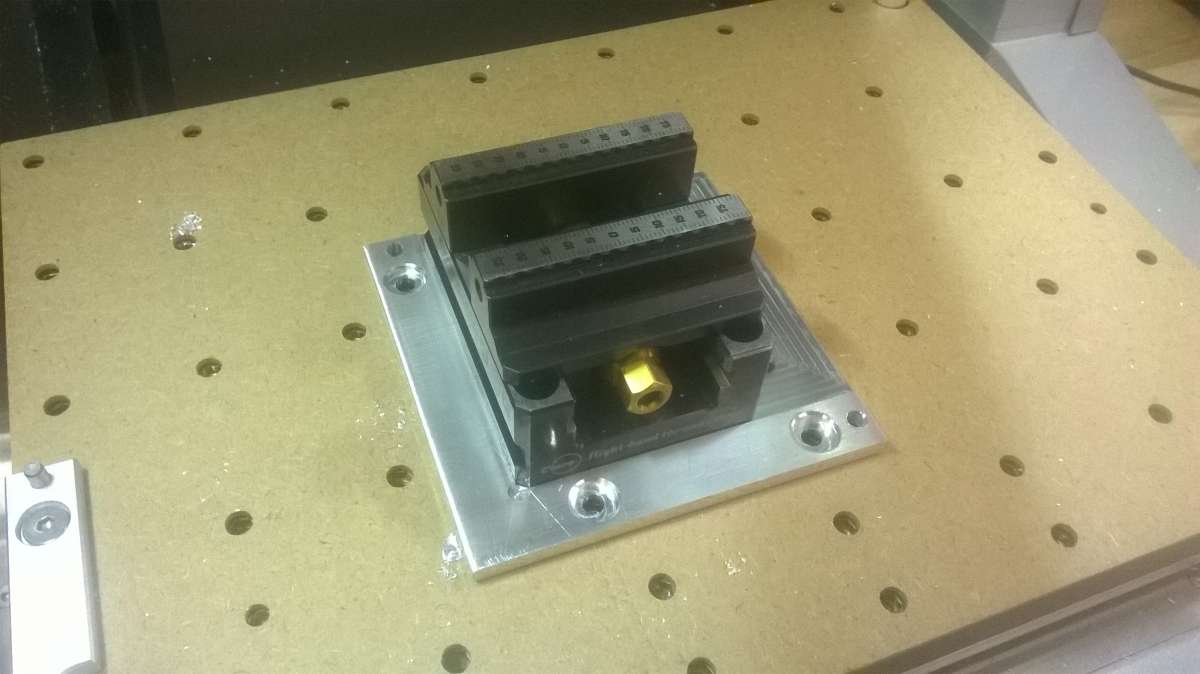
                          I bought a self-centring vice to hold small material and downloaded a STEP file from the web, having watched a video of a chap making one for his Carvera Air.  Had a bit of trouble with the file – holes in the “wrong” place, etc.  But it’s all sorted now and here’s a picture of the machine munching its way through the second side:

                          XinDian mounting plate

                          Not a very good photo, I’m afraid.  Here’s another poor effort showing the vice mounted on the plate and the whole assembly placed at Anchor point 2:

                          XinDian vice mounted on plate at anchor 2

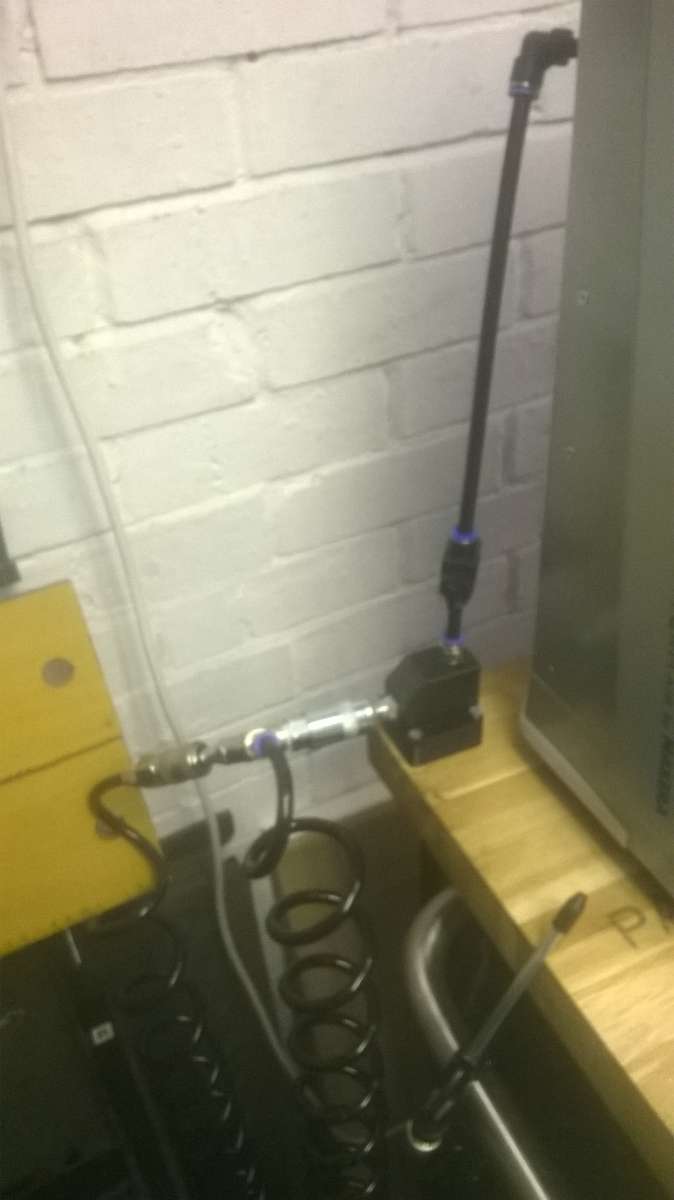
                          I use air assist to evacuate cut chips and had been frustrated by the mill’s lack of automatic on/off control of the air blast due to the removal of the actuating valve in the transition from Carvera to Carvera Air, in the interests of cost reduction presumably.  As I have to control the airflow manually, I’ve introduced a stop valve into the air supply externally, and the air assist nozzle incorporated into the spindle is now permanently on and directed at the point where a cutting tool edge will be.

                          I had to 3D print a manifold to accommodate the mill and a blow-down gun simultaneously but I have a neater aluminium one coming soon.

                          This is the set-up:

                          Air assist supply tap installation

                          Looks slightly out of focus now I’ve uploaded it.  The valve is the blob on the pipe going nearly vertically to the machine inlet at the top of the photo.

                          The next job for the mill is the sub table to mount the Makera Z1 vice to the Carvera.  As I explained in an earlier post, the Z1 and Air have different spacings for the mounting holes, although, thankfully the indexing pins are in the same place.  The vice arrived yesterday and I’ve only had to make a couple of minor alterations to the Fusion file and G-code and I expect to start cutting metal for that project either Monday or Tuesday.  Then I should be in a position to revisit the con rod saga.

                          John


                          #866819
                          bernard towers
                          Participant
                            @bernardtowers37738

                            One of those days! Just three milled a 22 x 1.5 mm thread and looks good only problem is it’s LH. Imust have got out of bed on the wrong side this morning.IMG_4167

                            #867156
                            bernard towers
                            Participant
                              @bernardtowers37738

                              Got it right this time. Conversion from 14 x 1 to er16. Much more versatile.IMG_4172IMG_4171

                              #867300
                              Nigel Graham 2
                              Participant
                                @nigelgraham2

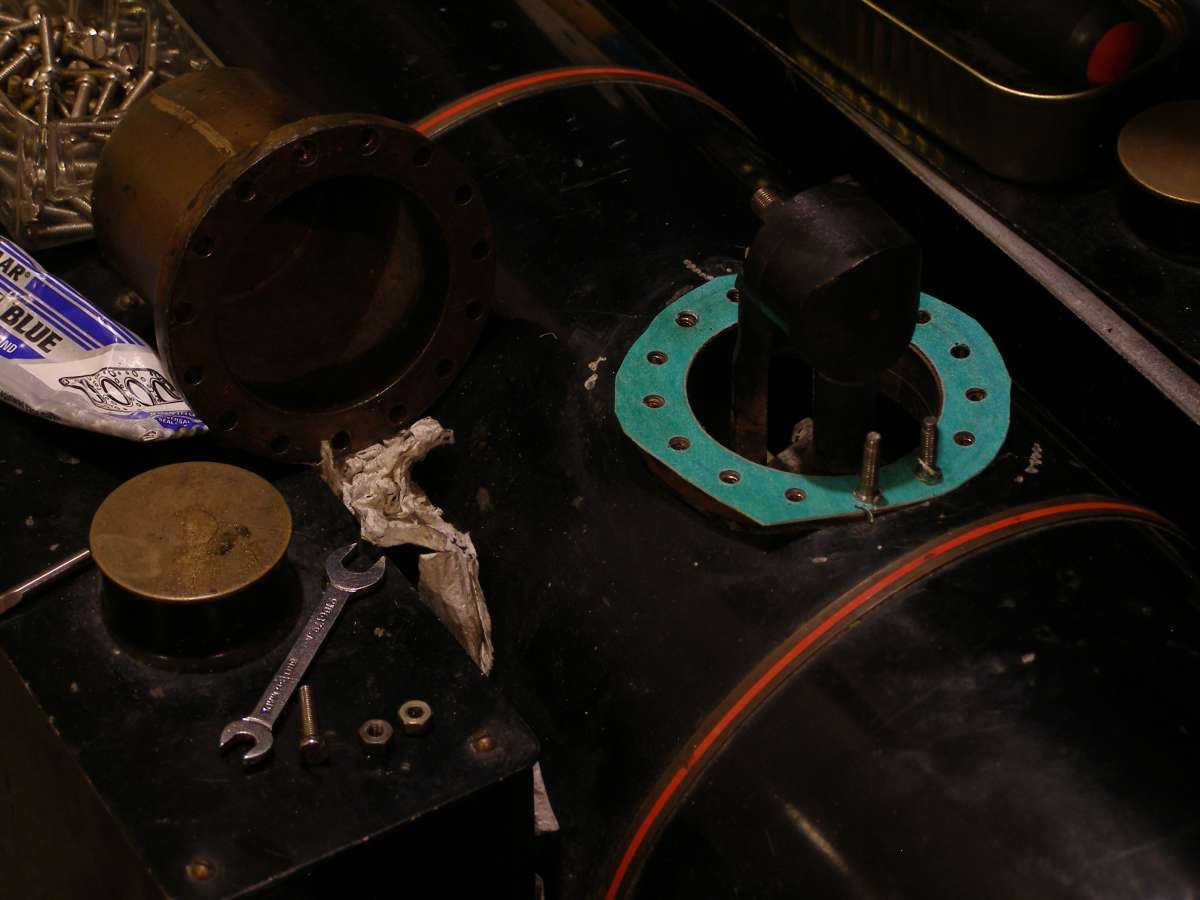
                                Gasket Making.

                                Well, Gasket-making Tool Making.

                                Sorry about the darkness, but this for the dome,

                                P1010012

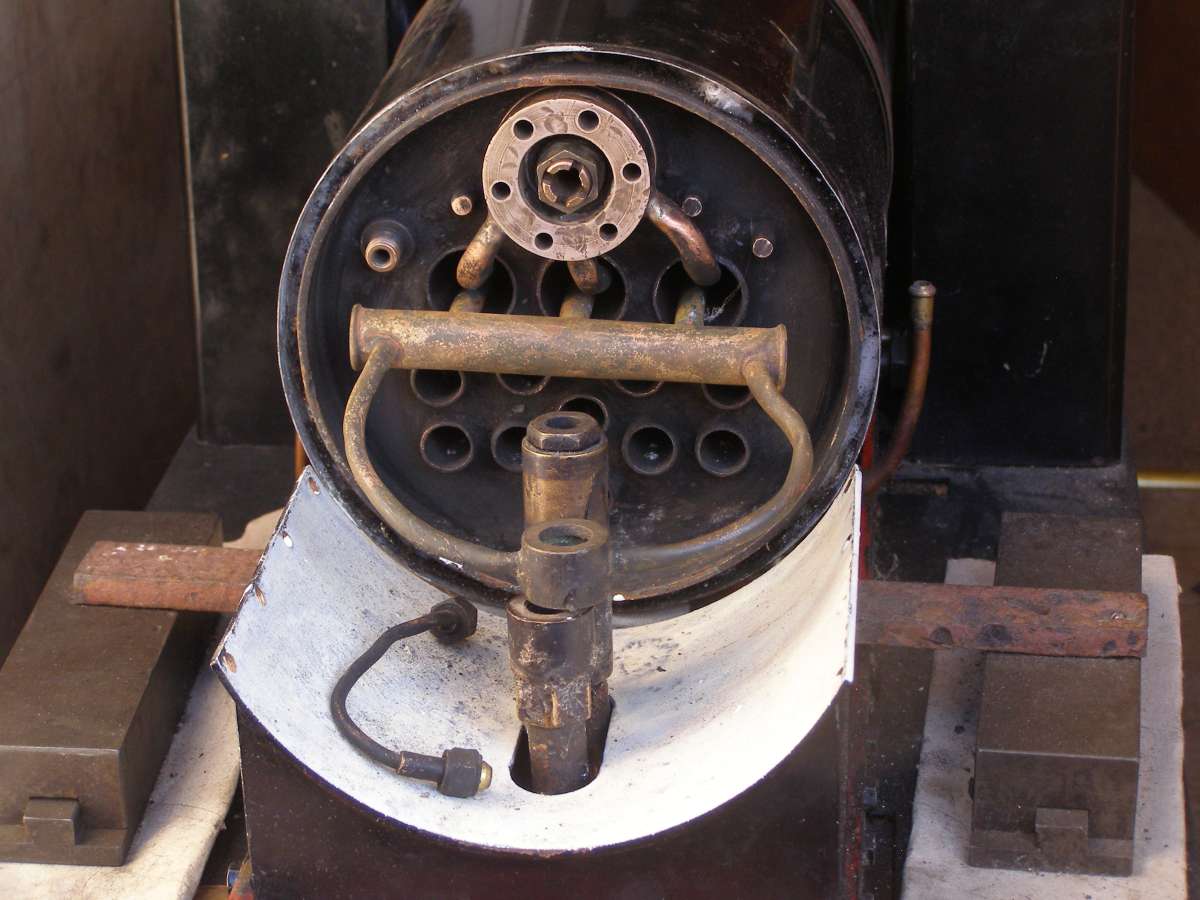
                                …. and two previously for this superheater header and its cover:

                                ‘P1010005

                                One common way is to use wad punches and hammering or slicing the gasket material against the component edges. Here I made cylindrical knives to drill the 1/32″ thick ‘Klingerite’ material, using whatever come-in-handy steel was to hand.

                                With such infrequent, specific use, the knives don’t really need hardening.

                                For the 15 4mm holes (for 4BA screws) in the dome gasket I combined the knife for the large hole, with its ½” dia pilot, as the location jig on a BCA ji-borer.

                                I’d cut the material to rough squares and taped it to a hardboard disc clamped to the machine table, with the pilot right through the lot into the machine table’s central hole.

                                Then simply stepped round 24º at a time,  using a prepared list of angles, to drill the little holes with their own purpose-made cylindrical knife.

                                I did not make a rotary knife for the rim, but simply cut it near to shape with scissors and used a small craft-knife to trim to finish after assembly.


                                The locomotive is a much-modified 7¼” g. version of LBSC’s Juliet. A hydraulic test revealed a leak between the superheater wet header and boilder bush. Dismantling revealed its six 2BA studs were in shallow, blind holes, with the threads in poor condition- one in fact stripped -and I am part-way through the repairs.


                                #867320
                                Andrew Crow
                                Participant
                                  @andrewcrow91475

                                  Very neat job Nigel on what is always a tricky operation.

                                  Andy.

                                  #867443
                                  Dave S
                                  Participant
                                    @daves59043

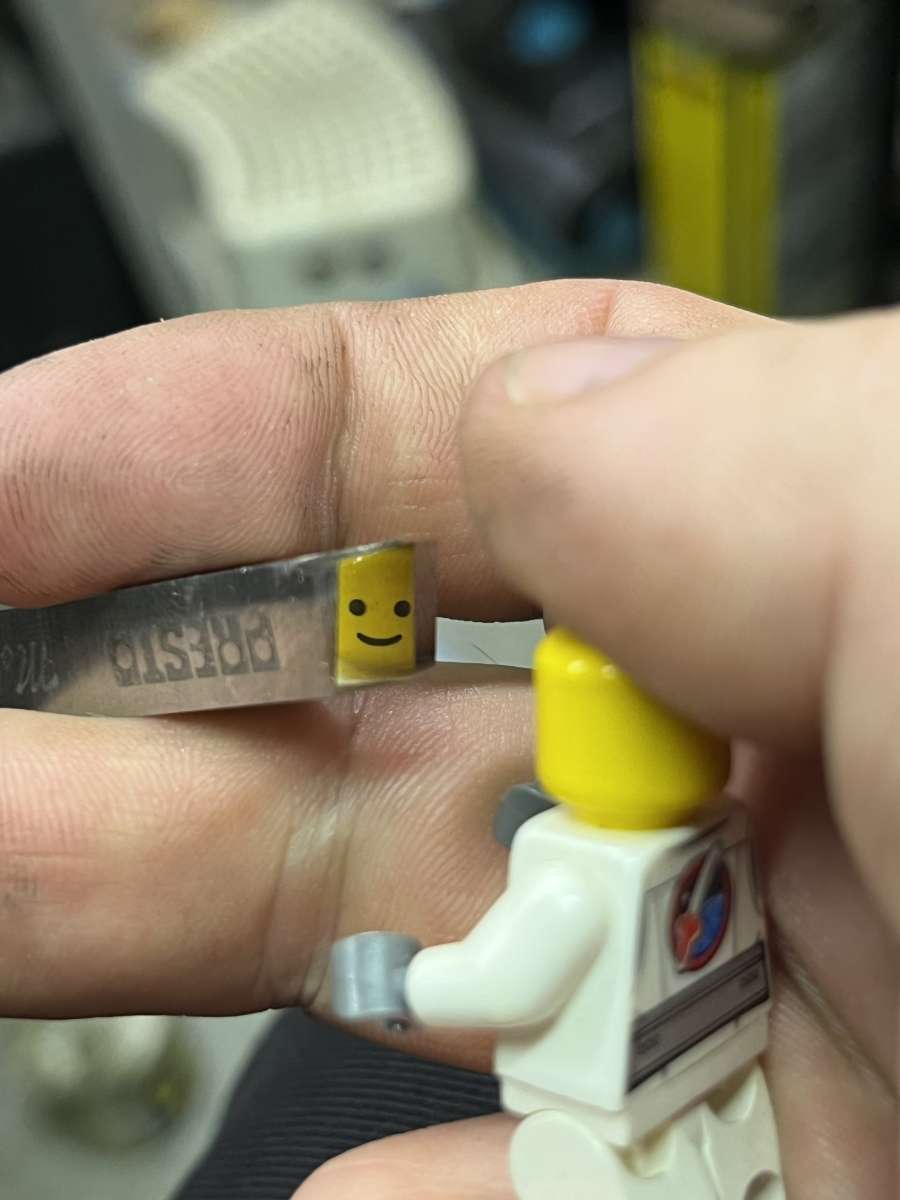
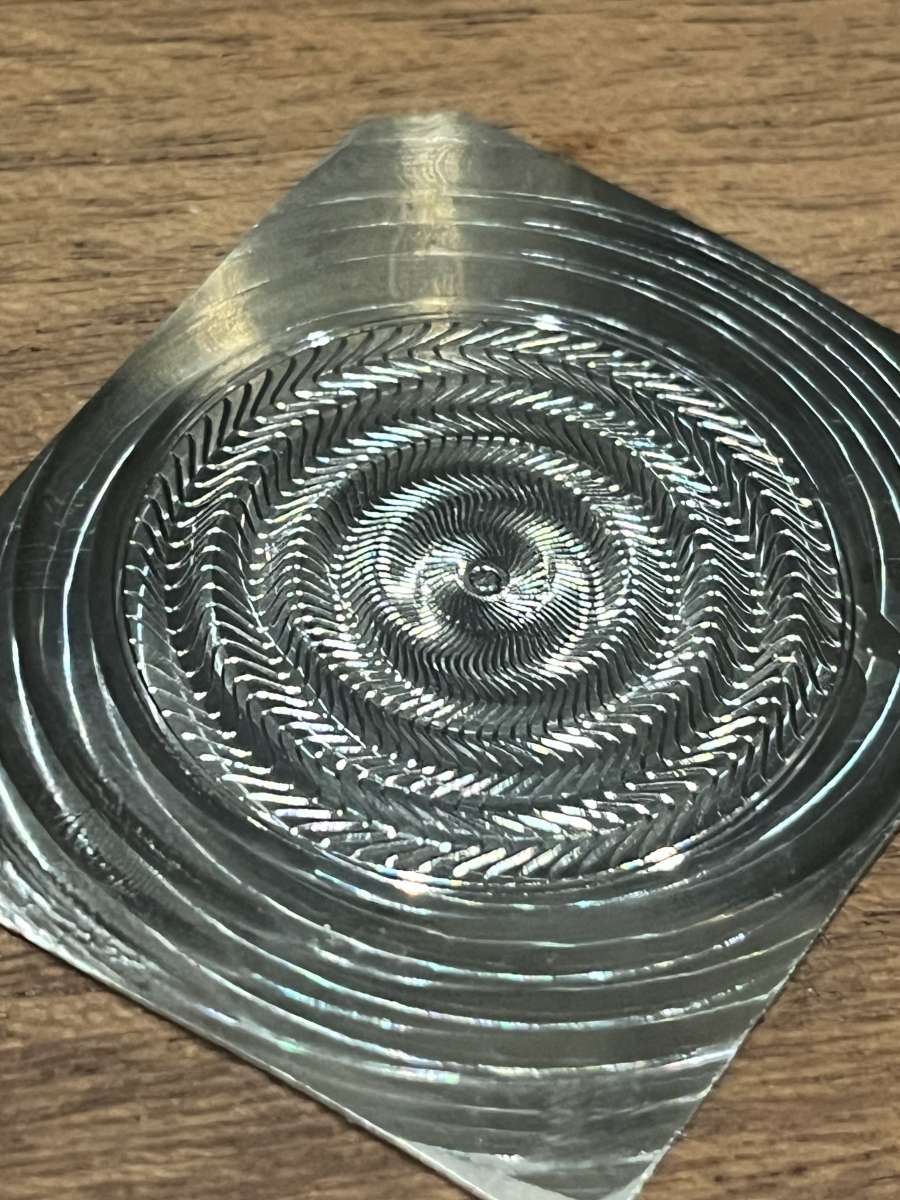
                                    Spent an hour or so yesterday polishing a tool:

                                    IMG_9777

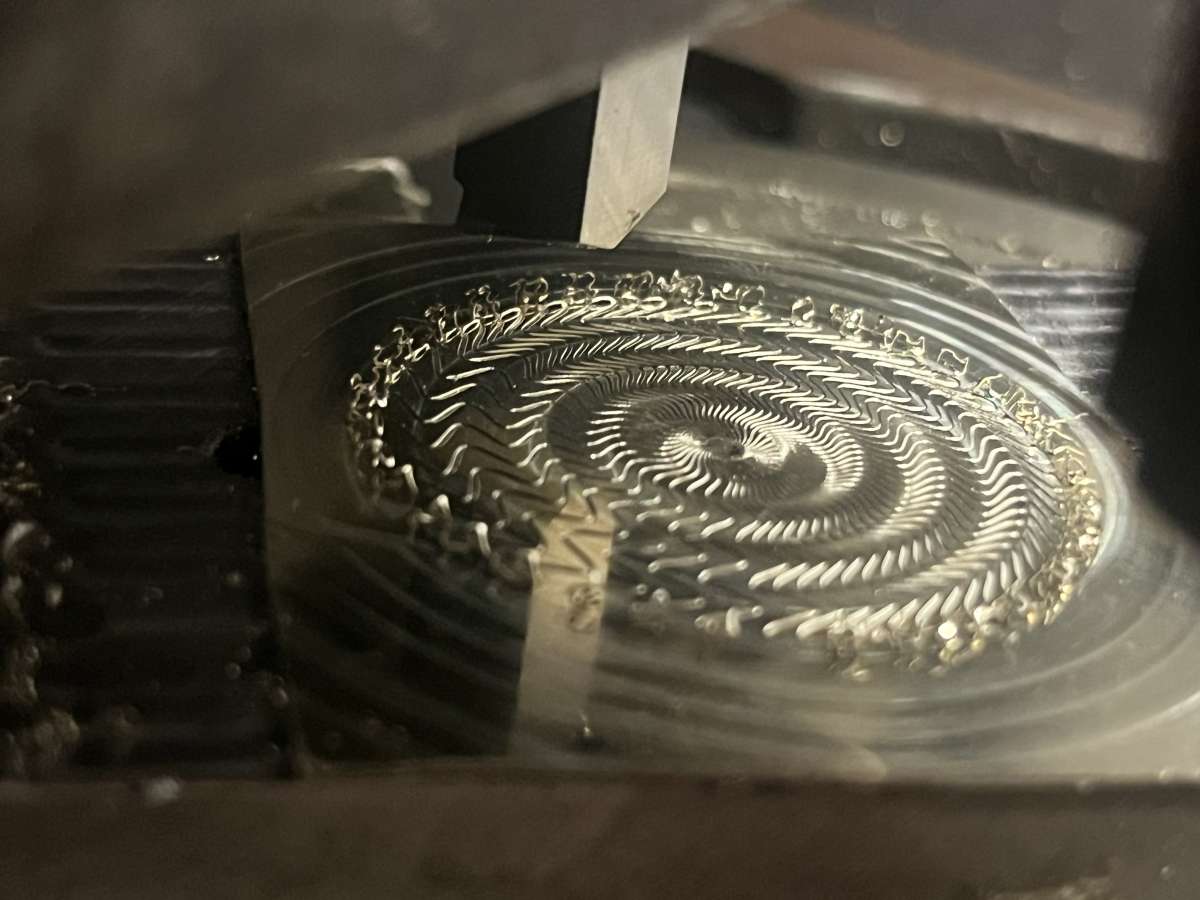
                                    In order to spend a couple of hours tonight making a dial blank:

                                    IMG_9783

                                    IMG_9792Happy with the finish.


                                    #867454
                                    Nigel Graham 2
                                    Participant
                                      @nigelgraham2

                                      Lovely work, Dave! Your little inspector seems happy with it.

                                      Is it pressed work or some form of engraving?

                                      ===

                                      Thankyou Andy.

                                      I started to give the loco a preliminary hydraulic test but it was a losing battle with leaks. I thought the regulator would leak, and it certainly did, but so did the dome joint.

                                      Having removed the dome again, I traced the leak to the two 4BA studs that hold the regulator to the dome ring but also protrude upwards to hold the dome. It is a weak design, and one stud was loose by what seems a partially stripped thread in the regulator body – that part of it is hidden.

                                      It looked as if I could get away with a longer stud so made one this evening; also modified the superheater outlet banjo-union bolt so it can be plugged for the hydraulic test. The photo shows that connection badly misaligned but I think there is enough spring in the pipes to cope with that.

                                      Pu it all back together, willl try another test tomorrow, after the sealant has had all night to cure.

                                      #867471
                                      bernard towers
                                      Participant
                                        @bernardtowers37738

                                        Nice work Dave what’s the material?

                                        #867499
                                        Julie Ann
                                        Participant
                                          @julieann

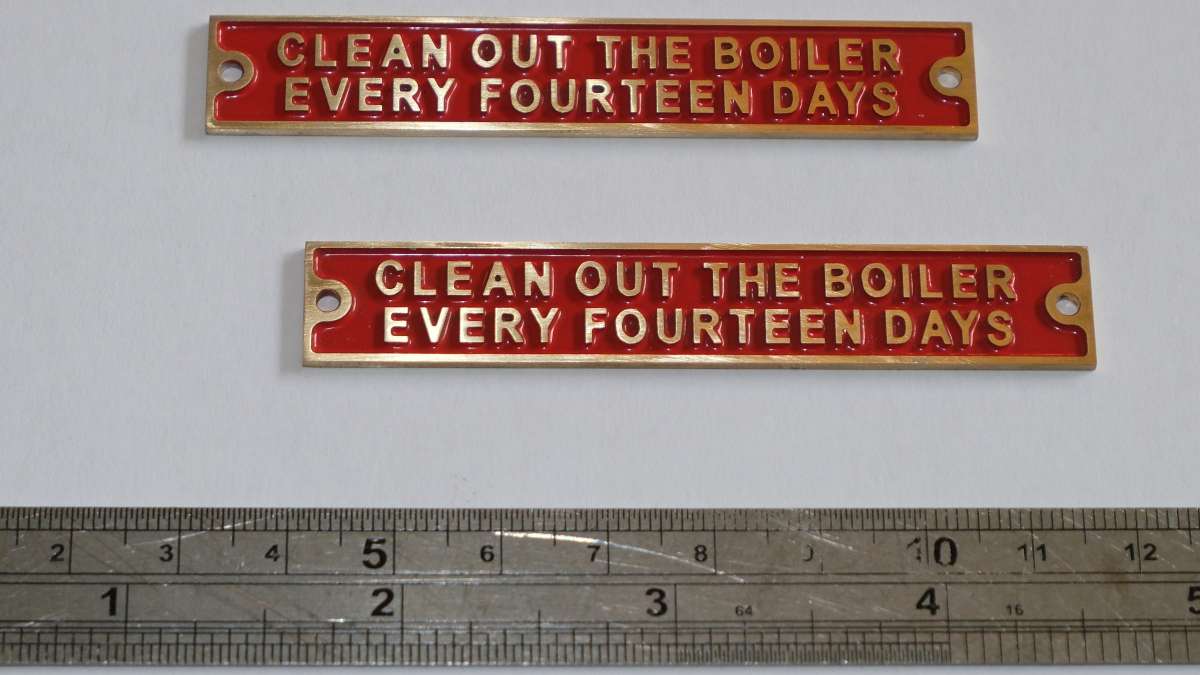
                                          JasonB ‘commented’ on my CNC milled nameplates due to rounded lettering, like this:

                                          Washout_Plates

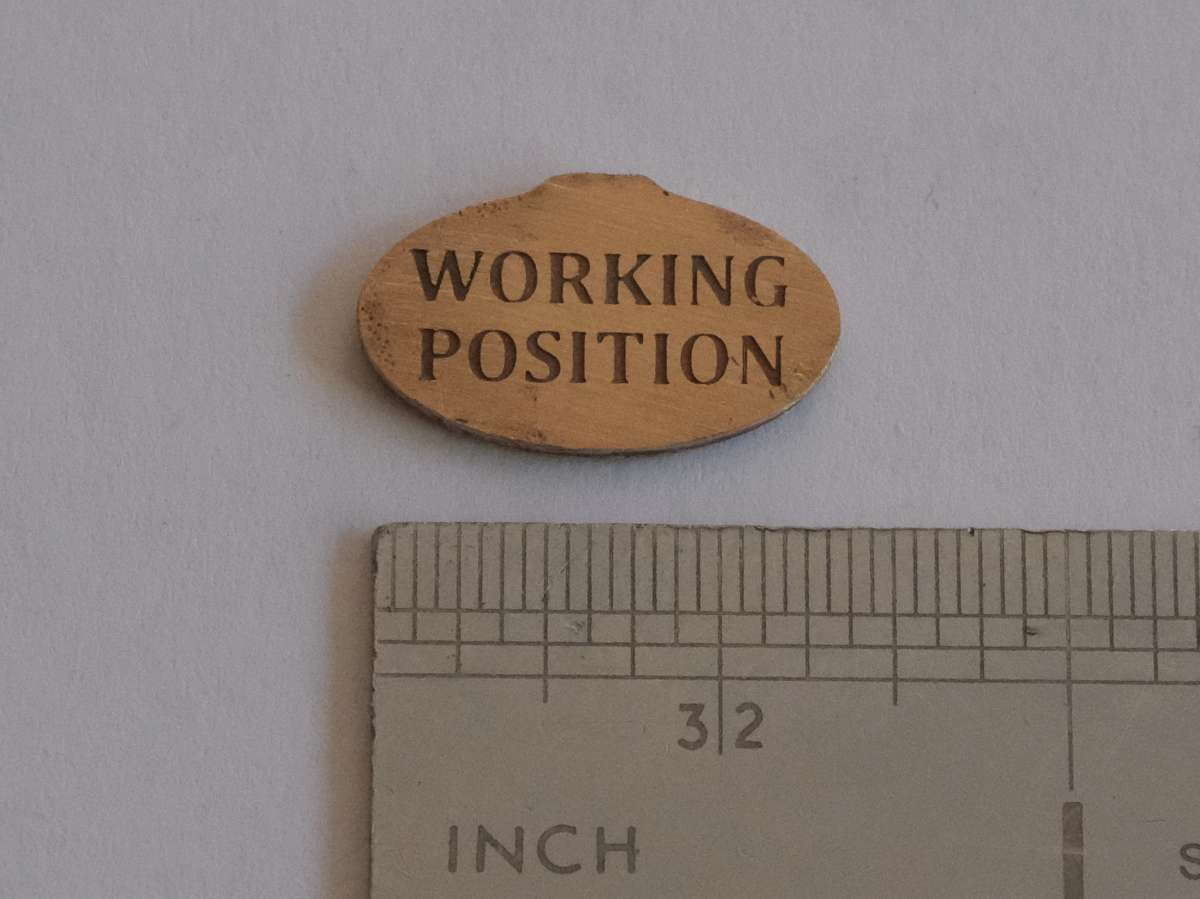
                                          So here is an investment cast nameplate; lettering is 0.08″ high:

                                          Nameplate

                                          Saved me CNC milling them using a 0.15mm diameter cutter.

                                          Julie

                                          #867507
                                          Dave S
                                          Participant
                                            @daves59043

                                            It’s engraved.

                                            Material is somewhat mystery metal. I’m *fairly* sure it nickel silver – cut out of an old sliver plated serving dish. No marks on it, but was with a load of other EPNS stuff.

                                            #867529
                                            martin haysom
                                            Participant
                                              @martinhaysom48469

                                              Dave i like it. but can i ask, what is it for.

                                              #867555
                                              Dave S
                                              Participant
                                                @daves59043

                                                It’s a test for a watch dial. At some point I need to stop testing and actually make the real thing…

                                                #867585
                                                martin haysom
                                                Participant
                                                  @martinhaysom48469

                                                  thanks for letting me know

                                                  #867628
                                                  paul1956
                                                  Participant
                                                    @paul1956

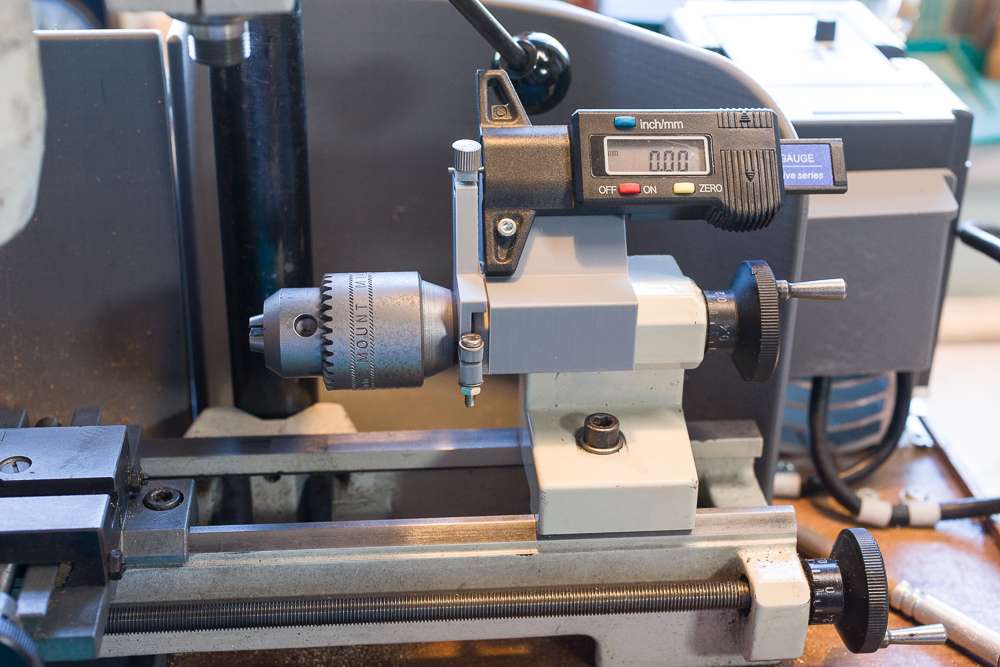
                                                    Today’s project; A digital readout for drilling depth on a Unimat 3.

                                                    A 3D printed collar tightens onto the tailstock quill.  A platform holds a cheap digital tyre tread depth gauge, the measuring probe is clamped into the quill collar.
                                                    I know it’s never going to be accurate to 10 microns, or whatever it displays, but should be good to the nearest half millimetre which will be good enough for my current needs.
                                                    Can all be stripped off in a jiffy leaving no marks.
                                                    Grand cost £3.
                                                    3J1A1903

                                                    #867648
                                                    JasonB
                                                    Moderator
                                                      @jasonb

                                                      Are the tailstock graduations not adequate for your half mm needs? I would have thought the 0.05mm increments better than that and with no loss of tailstock travel.

                                                    Viewing 25 posts - 176 through 200 (of 202 total)
                                                    • Please log in to reply to this topic. Registering is free and easy using the links on the menu at the top of this page.

                                                    Latest Replies

                                                    Home › Forums › The Tea Room › Topics

                                                    Viewing 25 topics - 1 through 25 (of 25 total)
                                                    Viewing 25 topics - 1 through 25 (of 25 total)

                                                    View full reply list.