
Home › Forums › Beginners questions › Portoss lathe – new to me.
For what seems a long time I have toyed with the idea of buying an inexpensive lathe. Finally found a Portoss (S I think) locally. yes I know that they are not brilliant, but budget constraints. A quick measurement I think it is a 3 5/8 centre height. Looks like its crossslide has been extended in the past with a T shaped addition allowing greater movement, plus it has a crudish dial indicator.. Has a 4 way tool post.Comes with 3 and 4 jaw chucks and a jacobs drilll chuck. Not checked them but looks like a full set of change wheels.
Only a couple of cutters, so will need to get some HSS ones. I understand that its not man enough for carbide.
I was thinking of using SAE 30 oil for the headstock bearings, OK?
I have cutting oil from drilling and thread cutting. Does what I use on the ways matter?
I have seen several “restoration ” videos where they are mainly stripped painted and reassembled. I am minded to leave it with its patina. It came with a very heavy stand, this is a bit grubby. I am thinking of painting this, blue. To match the stand of the new Myford I used at school. It had an homemade stand, made from obviously scrap yard angle, but painted blue. Mine is also made from angle with a very thick steel plate so blue seemed appropriate. I think I remember that lathe after 6 decades due to it contrasting with the older ones all on Myford stands.
The other question is chuck removal can I do what I do on an ancient B & D drill, chuck a large Allen key and give a sharp hammer blow?
It will take carbide tools – any lathe will – but as with HSS tools don’t expect industrial steel-shifting rates at terrifying speeds on a little lathe.
Don’t use an Allen key in a chuck socket (unless it is hexagonal, of course). Use an appropriately-fitting key, and never lock a lathe spindle by engaging its back-gear – that is a recipe for smashed gear teeth.
The ‘recommended’ way for an open-framed lathe like this, is to place a block of wood on the ways and smartly tug the spindle backward by hand, using the drive-belt, so a jaw collides with the wood. I must admit not being convinced. Isolate the motor first!
If you must use a hammer, a mallet is better, especially when used on a chuck key.
Be very careful how you bolt the lathe to the bench, whose colour is the least of your worries.
A lathe’s feet are machined to stand on machined surfaces or raising-blocks with special screw height adjusters. Not what is presumably simply a slab of hot-rolled plate. If it is, do not simply plonk the machine down on that, tighten the nuts and bolts hard, and hope for the best. Only, it’s the worst: that will almost certainly warp its bed.
My EW lathe, which is small than your Portass (not ‘Portoss’!), is mounted on two varnished hardwood raising-blocks with thin cork gaskets between iron and wood. (Not oak as it’s corrosive; nor bare wood as that holds moisture.) The entire combination is then bolted to an angle-steel bench’s cross-members, surfaced with laboratory work-bench material something like ‘Tufnol’. The nuts are ‘Nyloc’ to keep their setting, nipped just enough to stop washers under them being moveable. So the lathe is restrained, but not pulled down hard.
The SAE30 oil is OK, and use it on the ways, leadscrew etc. as well. Cutting oil is for lubricating and cooling the cut, not the machine.
I see Nigle beat me to some of this. Portoss or was that a typo for Portass? https://www.lathes.co.uk/portass-s/
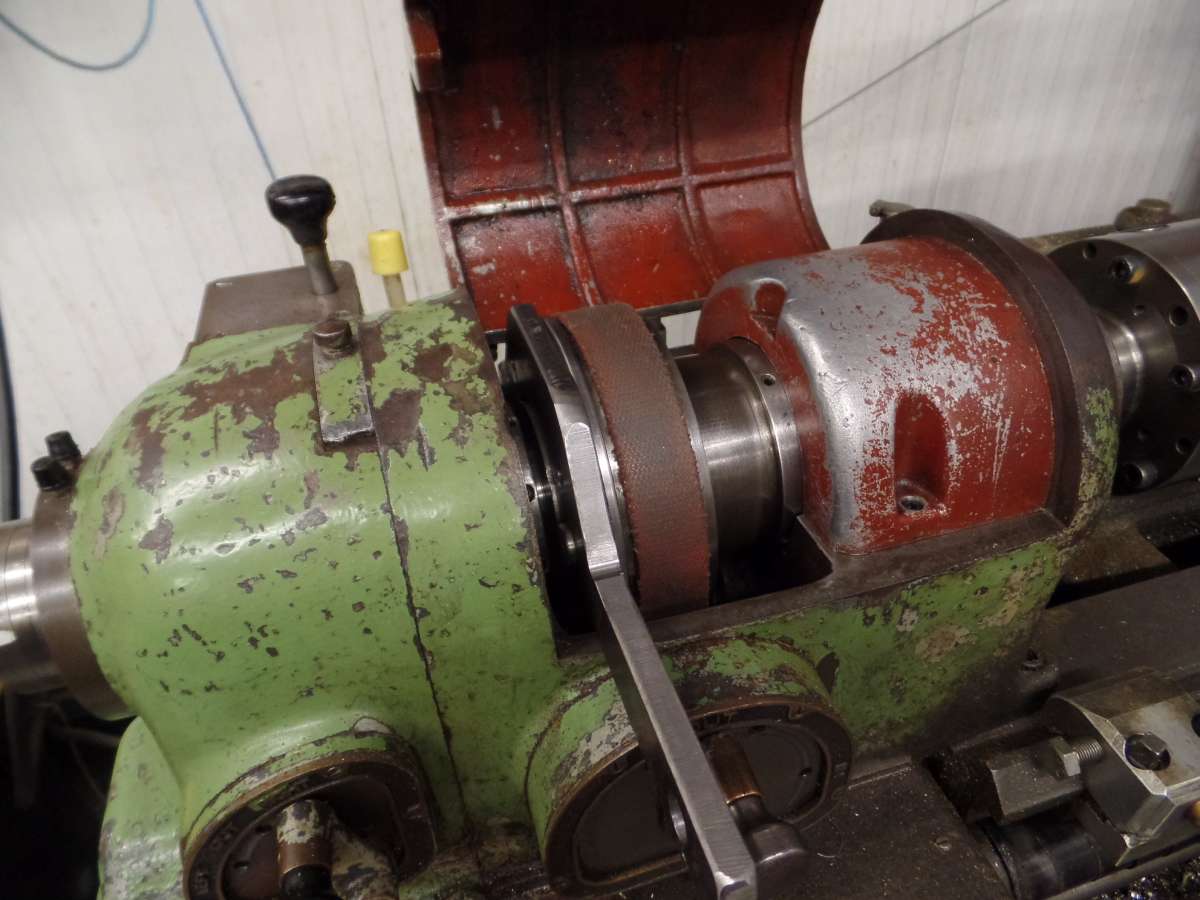
Since I don’t know what your level of experience is, some of this might be redundant. If the chuck is really stuck, then the good thing about these flat belt driven lathes is a cheap strap wrench can be wrapped around the largest pulley and help save the bull gear teeth while removing the chuck. I’d also use a smooth jaw adjustable wrench on one of the chuck jaws instead of chucking up a large Allan wrench, or maybe a second strap wrench on the OD of the chuck.
And if I wasn’t intending on using way oil on the ways, drive gearing, feed screws and lead screw, then I’d probably pick a suitable non detergent 20-30 wt automotive engine oil before I’d ever use cutting oil for lubrication since there formulated for very different purposes. As far as the correct weight and type of spindle oil that should be used, anyone else here who has owned and used these Portass lathes would be far more knowledgeable than I am. But in general, the correct weight of oil has a lot to do with the available bearing to spindle clearance. Too thin and it just flows out, too thick may mean your not getting an adequate amount of lubrication through the oil passages. Another reason to remove the spindle is to ensure those oil passages are in fact open and the bearings and oiling grooves are still clean enough. I’d bet quite a bit they aren’t.
Threaded lathe spindles can end up with a very difficult to remove chuck for a few reasons. Damage, embedded swarf contamination and rusting are a few. Once the chuck is finally removed, I’d closely inspect the spindle threads, the plain un threaded portion, and especially the vertical flat face the chuck seats against on your spindle. The threads only hold the chuck on and in tension enough to keep the chuck or face plate from falling off. The spindles plain portion is what locates the chuck radially so it’s mounted repeatably and reasonably concentric to the spindles center line. And the face on the spindle is what locates the chuck in it’s axial alignment. Although I suspect there might have been a few lathes that might use the vertical face and it’s outside diameter to do both the radial and axial alignments. Any damage or even the slightest burr needs to be lightly stoned off. The exact same should be done for the chuck or the back plate inner surfaces. Depending on the previous owners and if there might be serious galling, then some surfaces may even require re machining. It can be done, but if I’d never done it before I’d be asking lots of questions first. If there’s any rust present on the threads? I’d probably use some very fine emery paper and light oil to polish it off while removing as little metal as possible.
Chucks also get stuck if they ever get over tightened. Trying to spin a chuck on while the lathe is rotating is a method most will only do once. Or something like interrupted cutting can also over tighten the chuck. Threads hold from a slight amount of stretching within the metals elastic limits, and that can also cause a high amount of friction between the inner spindle seat in the chuck or it’s back plate recess and that axial alignment face on the spindle. Those surfaces should always be kept spotlessly clean and lightly lubricated when changing any chuck. And there’s a second but what I think is an old machinist method for threaded spindles that seems to be little known about or even rarely mentioned today. That high friction, close contact between the metal surfaces and that thread tension are what create a difficult to remove chuck. Get the chuck to loosen even a fraction of a turn and most will then come off easily. The old machinist trick is to cut a doughnut shaped and thin card board washer that’s visually just slightly larger for the inside hole than the spindles plain portion, and just slightly smaller in diameter than the inside recess in the chuck. Single layer cardboard such as something from a cereal box or old school shoe box as examples of the type of cardboard I mean. Over time and multiple uses it’s going to be a consumable item, so I’d make a few to save doing more later. Cardboard and due to the way it’s produced is remarkably consistent for it’s thickness and that helps to maintain the chucks axial alignment. But it can also absorb humidity and then cause unwanted rusting. Soak those cardboard washers in a light oil for a few minutes and then blot the excess off. Use one on each chuck and it will reduce that metal to metal friction by a lot.
With any used lathe and especially one of that vintage, I’d seriously consider a full disassembly and through solvent cleaning of all the parts even if I had no intentions of repainting it. I was no different, but few amateurs seem to appreciate the need for proper maintenance, cleaning and enough regular oiling to help flush any swarf and the inevitable wear particles out. It’s not exactly uncommon where grease may have been incorrectly used at some point as well. For some sound reasons, grease is almost the worst type of lubrication you can use on most manual machine tools unless they were designed to use it, and few were. I’ve found any machine tool can be adjusted tighter while still operating smoother and more accurately after that through cleaning and lubrication. As well as better and easier gib or even feed nut adjustments if the design allows those. The used shaper and little horizontal mill I bought were particularly bad after being unused and neglected long enough that the slides were almost seized together from congealed lubrication. And that took multiple applications of solvent just to get them disassembled.
It’s also likely that head stock bearing adjustments might be necessary as well since it seems these Portass lathes used sleeve type bearings? If it does, I’d be very observant about the position and number of any shims that are in place first, and the exact orientation of the bearing caps. And if those bearing caps aren’t already marked, I’d dot punch them with something like a center punch on either the front or rear face so there’s no mistake about which position and orientation is correct. There may even be shims used to set the spindle end play so watch for those as well. If you don’t yet have them, a cheap magnetic base and dial indicator is a big help while checking spindle clearances, and they have multiple other uses.
I’ve used carbide tipped cutting tools on a little Emco Compact 5 lathe. You may not have the rigidity, horse power and rpm available with that lathe to efficiently turn with carbide that industrial machine tools do, but it’s still capable of using carbide. If money is that tight, I’d still chose to use HSS.
Another area that doesn’t get the attention they should is the actual condition of both the head and tail stock tapers. Too many amateurs willingly use damaged and even rusty Morse tapers without a thought. There actually some of the highest precision and important surfaces on any lathe. Any internal damage inside those tapers reproduces and will also damage even brand new Morse taper shanks since few of them in our sizes and price range are hardened. And that same damage seriously degrades a Morse tapers retention and resistance to rotating within the taper which will cause even more damage. About the only method I know of to at least lightly restore those internal tapers for most of us is to then buy or borrow some Morse taper reamers. If that might be required? I’d be extremely cautious about just how much material is removed. Because of those fine tapers, you can easily make them too large. Removing even .001″ or .025 mm of material does NOT mean the taper shank will only move in that same amount. If my calculations are correct and depending on the taper size, the tool shank taper will move inwards by roughly .020″ for every .001″ of material that’s being removed. And in reality, that’s only removing .0005″ per side of the taper.
Given it’s age and probable use over its lifetime, your lathe could easily have a permanent twist to it’s bed. No doubt there’s also a certain amount of wear as well. Even so, forcing the lathe bed back to being straight isn’t a worthless effort. If money is that tight most wouldn’t be willing to pay for the proper and accurate enough machinist’s level. If you can’t borrow one, then there’s still at least one other method I know of that can get you very close. https://www.youtube.com/watch?v=2qIdsnl5vpg It would be slow and your then trading time for money, but it would get you close enough until actual turning tests can be done and the last final counter adjustments could then be done.
It will take carbide tools – any lathe will – but as with HSS tools don’t expect industrial steel-shifting rates at terrifying speeds on a little lathe.” Brazed or inserts better?
“Don’t use an Allen key in a chuck socket (unless it is hexagonal, of course). Use an appropriately-fitting key, and never lock a lathe spindle by engaging its back-gear – that is a recipe for smashed gear teeth.”
I perhaps wasn’t clear -_mounted in the chuck.
“The ‘recommended’ way for an open-framed lathe like this, is to place a block of wood on the ways and smartly tug the spindle backward by hand, using the drive-belt, so a jaw collides with the wood. I must admit not being convinced. Isolate the motor first!
If you must use a hammer, a mallet is better, especially when used on a chuck key.”
I haven-t examined the lathe closely, doing other things. But I did notice 2 flats behind the chuck. Need to look closer as I wasn’t sure if they are on the chuck backplate or the spindle.
“Be very careful how you bolt the lathe to the bench, whose colour is the least of your worries.” I was being a bit tongue in cheek, but the few restoration videos I have watched seem to be about painting them. Someone from America had tried to buy some parts of the one I got to restore his.
“A lathe’s feet are machined to stand on machined surfaces or raising-blocks with special screw height adjusters. Not what is presumably simply a slab of hot-rolled plate. If it is, do not simply plonk the machine down on that, tighten the nuts and bolts hard, and hope for the best. Only, it’s the worst: that will almost certainly warp its bed.”
That is how it has been mounted by at least the last 2 owners. I did wonder if it had been done to remove warp. But the Whitworth screws were not very tight. I guess I need to find out how to check for
warp.
“My EW lathe, which is small than your Portass (not ‘Portoss’!), is mounted on two varnished hardwood raising-blocks with thin cork gaskets between iron and wood. (Not oak as it’s corrosive; nor bare wood as that holds moisture.) The entire combination is then bolted to an angle-steel bench’s cross-members, surfaced with laboratory work-bench material something like ‘Tufnol’. The nuts are ‘Nyloc’ to keep their setting, nipped just enough to stop washers under them being moveable. So the lathe is restrained, but not pulled down hard.”
Will try this on mine, but it is held with screws going into tapped holes in the steel plate.
“The SAE30 oil is OK, and use it on the ways, leadscrew etc. as well. Cutting oil is for lubricating and cooling the cut, not the machine.”
Thanks yes I realize the use of cutting oil. My concern was that I have read some oil additives are not good for the bearings.
Thanks for your comprehensive response
Keith
“I see Nigle beat me to some of this. Portoss or was that a typo for Portass? https://www.lathes.co.uk/portass-s/”
Don’t know where the O came from -m had been looking at the Lathes site earlier.
“Since I don’t know what your level of experience is, some of this might be redundant. If the chuck is really stuck, then the good thing about these flat belt driven lathes is a cheap strap wrench can be wrapped around the largest pulley and help save the bull gear teeth while removing the chuck. I’d also use a smooth jaw adjustable wrench on one of the chuck jaws instead of chucking up a large Allan wrench, or maybe a second strap wrench on the OD of the chuck.”
Sounds a better option.“And if I wasn’t intending on using way oil on the ways, drive gearing, feed screws and lead screw, then I’d probably pick a suitable non detergent 20-30 wt automotive engine oil before I’d ever use cutting oil for lubrication since there formulated for very different purposes. As far as the correct weight and type of spindle oil that should be used, anyone else here who has owned and used these Portass lathes would be far more knowledgeable than I am. But in general, the correct weight of oil has a lot to do with the available bearing to spindle clearance. Too thin and it just flows out, too thick may mean your not getting an adequate amount of lubrication through the oil passages. Another reason to remove the spindle is to ensure those oil passages are in fact open and the bearings and oiling grooves are still clean enough. I’d bet quite a bit they aren’t.”
Sounds like I do need to dismantle it. Thanks.
“Threaded lathe spindles can end up with a very difficult to remove chuck for a few reasons. Damage, embedded swarf contamination and rusting are a few. Once the chuck is finally removed, I’d closely inspect the spindle threads, the plain un threaded portion, and especially the vertical flat face the chuck seats against on your spindle. The threads only hold the chuck on and in tension enough to keep the chuck or face plate from falling off. The spindles plain portion is what locates the chuck radially so it’s mounted repeatably and reasonably concentric to the spindles center line. And the face on the spindle is what locates the chuck in it’s axial alignment. Although I suspect there might have been a few lathes that might use the vertical face and it’s outside diameter to do both the radial and axial alignments. Any damage or even the slightest burr needs to be lightly stoned off. The exact same should be done for the chuck or the back plate inner surfaces. Depending on the previous owners and if there might be serious galling, then some surfaces may even require re machining. It can be done, but if I’d never done it before I’d be asking lots of questions first. If there’s any rust present on the threads? I’d probably use some very fine emery paper and light oil to polish it off while removing as little metal as possible.
Chucks also get stuck if they ever get over tightened. Trying to spin a chuck on while the lathe is rotating is a method most will only do once. Or something like interrupted cutting can also over tighten the chuck. Threads hold from a slight amount of stretching within the metals elastic limits, and that can also cause a high amount of friction between the inner spindle seat in the chuck or it’s back plate recess and that axial alignment face on the spindle. Those surfaces should always be kept spotlessly clean and lightly lubricated when changing any chuck. And there’s a second but what I think is an old machinist method for threaded spindles that seems to be little known about or even rarely mentioned today. That high friction, close contact between the metal surfaces and that thread tension are what create a difficult to remove chuck. Get the chuck to loosen even a fraction of a turn and most will then come off easily. The old machinist trick is to cut a doughnut shaped and thin card board washer that’s visually just slightly larger for the inside hole than the spindles plain portion, and just slightly smaller in diameter than the inside recess in the chuck. Single layer cardboard such as something from a cereal box or old school shoe box as examples of the type of cardboard I mean. Over time and multiple uses it’s going to be a consumable item, so I’d make a few to save doing more later. Cardboard and due to the way it’s produced is remarkably consistent for it’s thickness and that helps to maintain the chucks axial alignment. But it can also absorb humidity and then cause unwanted rusting. Soak those cardboard washers in a light oil for a few minutes and then blot the excess off. Use one on each chuck and it will reduce that metal to metal friction by a lot.”
Really great idea. I haven’t tried removing it yet, just feared it might be hard. I did notice when casually looking today that there are 2 flats (for a spanner I assume) behind the backplate, but not sure if part of the backplate or spindle.
“With any used lathe and especially one of that vintage, I’d seriously consider a full disassembly and through solvent cleaning of all the parts even if I had no intentions of repainting it. I was no different, but few amateurs seem to appreciate the need for proper maintenance, cleaning and enough regular oiling to help flush any swarf and the inevitable wear particles out. It’s not exactly uncommon where grease may have been incorrectly used at some point as well. For some sound reasons, grease is almost the worst type of lubrication you can use on most manual machine tools unless they were designed to use it, and few were. I’ve found any machine tool can be adjusted tighter while still operating smoother and more accurately after that through cleaning and lubrication. As well as better and easier gib or even feed nut adjustments if the design allows those. The used shaper and little horizontal mill I bought were particularly bad after being unused and neglected long enough that the slides were almost seized together from congealed lubrication. And that took multiple applications of solvent just to get them disassembled.
It’s also likely that head stock bearing adjustments might be necessary as well since it seems these Portass lathes used sleeve type bearings? If it does, I’d be very observant about the position and number of any shims that are in place first, and the exact orientation of the bearing caps. And if those bearing caps aren’t already marked, I’d dot punch them with something like a center punch on either the front or rear face so there’s no mistake about which position and orientation is correct. There may even be shims used to set the spindle end play so watch for those as well. If you don’t yet have them, a cheap magnetic base and dial indicator is a big help while checking spindle clearances, and they have multiple other uses.”
“I’ve used carbide tipped cutting tools on a little Emco Compact 5 lathe. You may not have the rigidity, horse power and rpm available with that lathe to efficiently turn with carbide that industrial machine tools do, but it’s still capable of using carbide. If money is that tight, I’d still chose to use HSS.”
Brazed or cardide inserts?
“Another area that doesn’t get the attention they should is the actual condition of both the head and tail stock tapers. Too many amateurs willingly use damaged and even rusty Morse tapers without a thought. There actually some of the highest precision and important surfaces on any lathe. Any internal damage inside those tapers reproduces and will also damage even brand new Morse taper shanks since few of them in our sizes and price range are hardened. And that same damage seriously degrades a Morse tapers retention and resistance to rotating within the taper which will cause even more damage. About the only method I know of to at least lightly restore those internal tapers for most of us is to then buy or borrow some Morse taper reamers. If that might be required? I’d be extremely cautious about just how much material is removed. Because of those fine tapers, you can easily make them too large. Removing even .001″ or .025 mm of material does NOT mean the taper shank will only move in that same amount. If my calculations are correct and depending on the taper size, the tool shank taper will move inwards by roughly .020″ for every .001″ of material that’s being removed. And in reality, that’s only removing .0005″ per side of the taper.
Given it’s age and probable use over its lifetime, your lathe could easily have a permanent twist to it’s bed. No doubt there’s also a certain amount of wear as well. Even so, forcing the lathe bed back to being straight isn’t a worthless effort. If money is that tight most wouldn’t be willing to pay for the proper and accurate enough machinist’s level. If you can’t borrow one, then there’s still at least one other method I know of that can get you very close. https://www.youtube.com/watch?v=2qIdsnl5vpg It would be slow and your then trading time for money, but it would get you close enough until actual turning tests can be done and the last final counter adjustments could then be done.”
Thanks for your time and great advice. Not sure were the O in Portass came from, but I don’t seem to be able to change it. Had been using the correct spelling when searching earlier, perhaps it suddenly became a musketeer.
Cheers
Keith
Err, never mind if we have any ‘Ose… why did you quote all that?
Carbide: brazed or insert tipped? you ask.
As far the lathe is concerned it probably does not matter, but you need a proper grinding wheel (the “green grit” ones) to re-sharpen the brazed tools. The insert, or”indexible”, types are nominally throw-away, hence having multiple cutting edges; but I dare say some owners manage to regrind theirs, somehow, after a fashion.
They are not cheap though; and sometimes you can achieve a better finish with a well-ground, properly-set HSS tool, espcially on “preloved” steel of unknown grade. I use both indexible carbide, and HSS, tools on the same lathe and often at the same speeds; quite satisfactorily.
High-speed steel can be sharpened on a standard off-hand (bench) grinder; and it’s not especially hard to make better tool-rests with adjustable fences to guide grinding lathe tools.
The application for which I tend to use only the carbide tips is screw-cutting, for accurate angles, but I usually still finish the thread to profile with a die.
I’ll just add my thoughts on insert tools to an already big response. I do occasionally use inserts with my Drummond Bs Type and ETA but for a chatter free cut HSS is generally the way to go. Theres plenty on line about the geometry of cutters for different materials but I tend to take angles to the sharper end of the scale . The old school relief / rake angles were as much about tool life as they were about cutting and tool life is not a problem for most of our tasks, we dont lose money by spending a wee bit more time on the job. Once you get into it a small lathe will talk to you and you’ll learn the lingo quickly , the load on the motor ,the sound of the cut and the ‘feel”.
With grateful thanks for the responses I have decided on a plan. I will strip clean, and will probably paint it whist its apart. Need to clear existing projects from my metal work and wood work benches first to give a clean area to dismantle and contain the parts. In the meantime whilst it was easy to clean up and paint the bench I am doing so in between other jobs. Someone with a Portass S said that they screwed the head down tight, but left the tail loose. tempted to do that. In the meantime I am searching the web for help. I did look at chuck removal videos. The first 1 I saw was putting a large Allen key in the chuck and hitting it, after protecting the bed with a piece of timber. Worryingly did see locking the backgear as a suggestion. I did watch someone dismantle theirs, but rather than remove the chuck by unscrewing it they separated it from the black plate which they left in place which I found odd.
If you know somebody who is 3D printing, you could get a plastic locking piece made to lock the bull gear. It would need about 10-15 teeth to spread the load and an end that sits up against the headstock casting. There are many such printed locks made for Myfords that work very well, not likely to fit a Portass though. I made two for the Atlas 12 x 24 out of a block of nylon on the rotary table using a milling machine, the bull gear is made from Zamak, or Mazak over in the UK which is a zinc alloy, not very strong teeth.
You certainly can use carbide inserted tooling, the HO grades used for machining aluminium will stand up well for fine cuts on steel.
Someone with a Portass S said that they screwed the head down tight, but left the tail loose. tempted to do that.
I would not be so tempted at all.
Unless the lathe is on a machined-flat, rigid surface that is a recipe for distorting it.
A lathe has machined soles to its feet, intended to fit a matching stand with machined pads, but lacking said manufacturer’s stand it wants a stable, rigid bench with a reasonably flat surface. A thin cork or synthetic (so oil-resistant) rubber gasket under the mountings will help seat the machine properly.
Do not tighten the mounting-bolts down hard, but just enough to grip the lathe. Use lock-nuts, spring-washers or plastic-insert nuts to keep the mountings at that tightness.
The first 1 I saw was putting a large Allen key in the chuck and hitting it,
At least use a lever that fits properly, not go hammering other tools in the process!
I must admit Pete’s suggestion above is new to me: a thin card gasket to help prevent the chucks jamming. I must try that. Re-reading his description I take it the gasket, like a big washer, goes against the vertical wall of the register on the mandrel.
With my Myford lathe I’ve often found that putting the chuck key in, turning the spindle backwards until the key is pointing to about “one o’ clock” then smartly tugging it forwards often works by fighting the inertia of the drive system, but not if I’ve been doing a lot of relatively heavy, large-diameter turning or worse, interrupted cuts.
Removing the chuck from the back-plate is definitely “odd”. It was actually that he was doing? I think some of the small “Sieg” lathes do use something like that, but by design.
The block of wood to protect the bed is the proper thing to do, though.
It would not be hard to make a device to hold the pulleys while unscrewing the chucks. Also for both the Atlas 12 x 24 and the tiny Emco SL1000 I made riser blocks under the headstock end which allows adjustable bolts at the tailstock end for “levelling”, the Emco did need that done, but your Portass S looks to have a pretty stiff bed and would not need adjustment. Only test cuts would tell.
If you do dismantle it think twice before you remove the headstock from the bed, then don’t do it.
Thanks for latest replies. What I am minded off is that previously the lathe was bolted to a thick 3/8 or so steel plate that is on a heavy angle iron frame. But I will put pads under the feet to be safe. Removing the headstock did concern me, so I will leave it alone. I find the variation in Model S’s a bit confusing. Mine has Vpulleys, I guess they may or may not be original. It was an option but rarely taken up. I believe that they made at least 20 variants of the model S.
I made a special spanner to fit a hole in the side of the pulley on the museum’s Smart & Brown model A to lock the spindle for unscrewing chucks, it has a pin on its side and it rests on the headstock casting when in use, if you take yours apart for cleaning it might be food for thought.


Cleared space on my bench and made a start. I tightened the bent end of a 12″ (about) Allen key in the chuck. Held flats behind the chuck with a spanner and off it came. But I noticed that the inside of the nose was also threaded. Realised this was an adapter (3 jaw chuck has 1″ thread, but others are 3/4″. So removed the adapter as well. it needs to come off so that the 1 morse taper can be used as well. Made a start on cleaning, tail stock and the modified topslide. I thought that it must be rotatable and after loosening 2 thin nuts it was. This is a home made modification.
Ordered the Amateur Lathe this morning, as recommended by Lathes website in lieu of a none existent manual.
Before I realised I needed 2 sizes I made some cereal packet oiled washers, now need to make a second batch of smaller ones.
A general manual on turning is fine.
The principles are all the same.
To add to what has already been said.
If the lathe has back gear, do NOT yield to the temptation to engage it to free a tight chuck. That is a short cut to breaking teeth off the gears!
Be careful when stripping the lathe. It is easy to change a reasonably precise machine into a heavy door stop. Do NOT upset any alignments! Of in doubt, leave alone. Get someone who know what the are doing to help and advise you.
With regards to fixing down, bolt down the Headstock end and make the adjustments , or shimming, at the Tailstock end.
Making and using screwed riser blocks can save time, and provide more precis leveling.
Ian Bradley’s “The Amateur’s Workshop” tells how to adjust the Tailstock end to remove any twist from the bed (If the bed is twisted, the lathe will not cut parallel.) This method is sometimes known as “Rollie’s Dad’s Method”)
Alternatively, you can use a dial indicator on a magnetic base for the job
The Portass is an elderly lathe so not suitable for the high speeds and feeds to get the maximum out of carbide tipped tools, although they will work quite well at sub optimal speeds . HSS would be more appropriate, and you can grind it on grey carborundum wheels..
Sparey’s book tends towards the MYford 7, particularly the illustrations, but the principles are the same for almost any lathe.
You can learn a lot by making simple tools, which can be used for a long time afterwards.
My suggestion would be a Centre Height Gauge, which will save time (Not that we are on piecework!) setting tools.
Then possibly a sliding Die Holder set up, and a Tap holder, (A drill chuck on a suitable body will suffice for this) to make threading easier. (Since the holder slides, the newly cut thread is subjected to much smaller loads than if trying to drag the Tailstock along the lathebed.
HTH
Howard
Home › Forums › Beginners questions › Topics
Started by:
Ramon Wilson
in: Exhibitions, Shows and Club Events
bernard towers
Started by: Ger
in: Manual machine tools
derek hall 1
Started by:
John Purdy
in: Clocks and Scientific Instruments
peter1972
Started by: Peter Venn
in: General Questions
howardb
Started by: Andy Stopford
in: General Questions
Andy Stopford
Started by:
JasonB
in: The Tea Room
JasonB
Started by: davidsewell
in: Beginners questions
vic newey
Started by: Ger
in: Work In Progress and completed items
Ger
Started by: bryansmith1983
in: Introduce Yourself – New members start here!
bryansmith1983
Started by: Bo’sun
in: Workshop Tools and Tooling
old mart
Started by: Bob Sillitoe
in: General Questions
Roderick Jenkins
Started by: David Ambrose
in: Miscellaneous models
Clive Foster
Started by: cedricvale
in: Introduce Yourself – New members start here!
Howard Lewis
Started by: Andrew Tinsley
in: Model Engineer.
Pippin
Started by: William Harvey 1
in: Help and Assistance! (Offered or Wanted)
Martin Johnson 1
Started by: elowen01
in: General Questions
JasonB
Started by: Niels Abildgaard
in: Manual machine tools
Niels Abildgaard
Started by: aytact
in: Manual machine tools
Dalboy
Started by: teamricky
in: Stationary engines
teamricky
Started by: Nigel Graham 2
in: Manual machine tools
Vic
Started by: Kiwi Bloke
in: General Questions
elowen01
Started by: Ronald Wagner
in: Model Engineer & Workshop
duncan webster 1
Started by:
Garry Coles
in: General Questions
Nigel Graham 2
Started by: Speedy Builder5
in: Materials
JasonB
Started by: blowlamp
in: CAD – Technical drawing & design
blowlamp