Silly issue with HBM parting blade

Silly issue with HBM parting blade

Home Forums Workshop Tools and Tooling Silly issue with HBM parting blade

Viewing 22 posts - 1 through 22 (of 22 total)
  • Author
    Posts
  • #486664
    Andy Carlson
    Participant
      @andycarlson18141

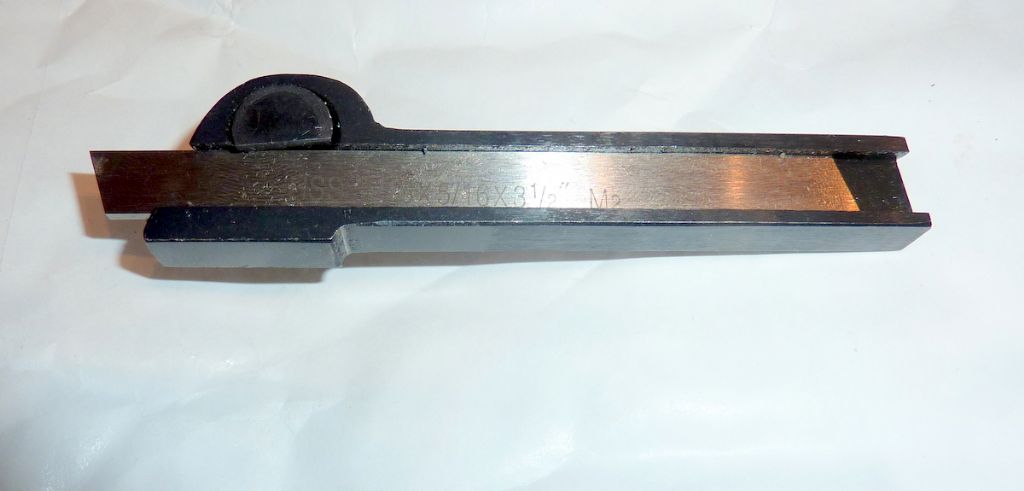
      Bought this from RDG at the Midlands show last October

      p1070543.jpg

      I've used it several times and have not so far had good results, usually ending up with a slightly domed end to either the job or the remaining bar. I've trawled the threads on here and tried all sorts of ways to improve matters.

      I was thinking about buying another blade so last night I fetched the blade and holder out to measure it…

      … and found that the thick edge of the blade was at the bottom.

      So with mine the writing on the blade needs to be upside down. I havent tried it again but I'm hoping for better results when I do.

      I can't remember if the blade was already in the holder when I bought it but if yours isn't performing then it might be worth a quick look.

      I guess one could argue that in an inverted toolpost the writing would be the right way up. I'm not sure I'd be thinking like that even if I was using an inverted holder.

      #19878
      Andy Carlson
      Participant
        @andycarlson18141
        #486668
        larry phelan 1
        Participant
          @larryphelan1

          Should the thick edge not be at the bottom anyway ?

          Does the top edge not need to be thinner in order to provide clearance.?

          Just asking !indecision

          #486670
          Nick Wheeler
          Participant
            @nickwheeler
            Posted by larry phelan 1 on 20/07/2020 09:27:01:

            Should the thick edge not be at the bottom anyway ?

            Does the top edge not need to be thinner in order to provide clearance.?

            Just asking !indecision

            How could that possibly work?

            #486671
            larry phelan 1
            Participant
              @larryphelan1

              Forgot to say, I was thinking about using in a rear toolpost.

              I did buy one of those units years ago but never found it to be any good.

              Try turning the blade around.

              I never bother parting off from the front.

              #486673
              Robert Butler
              Participant
                @robertbutler92161

                Clearly it does work, not properly nor producing the desired result! Robert Butler

                #486683
                Hopper
                Participant
                  @hopper

                  If it gives any further trouble, check that it's holding the blade in the vertical plane. Not all of those cheap holders do that. I had one that the blade noticeably leaned to one side, so of course it never worked properly.

                  #486696
                  Lainchy
                  Participant
                    @lainchy

                    I'd say try it with the blade the other way for sure. I have another type of parting blade holder though, and both 1/16th and 3/32nd blades. The 1/16th blade always leaves a convex end to the chucked stock. The 3/32nd is much better.

                    #486697
                    not done it yet
                    Participant
                      @notdoneityet

                      It looks as though there is a cutting edge at the rear of that cutter? Turned around would it not need the writing the correct way up? Even if the writing was then not visible.🙂

                      #486711
                      HOWARDT
                      Participant
                        @howardt

                        I use a similar tapered blade in a home made holder. The thick side is the cutting edge, which ever way the part is rotating. Blade should be held so that the side tapers are clear of the part groove produced. Mine does tend to cut with a dome face unless I cut a groove with a double cut to widen the groove, I accept this as the blade is quite thin and only 10mm high. This is on a mini lathe also.

                        #486724
                        Andy Carlson
                        Participant
                          @andycarlson18141

                          Yes, the acute angle of the parallelogram needs to be the one doing the cutting and it needs to be the fat edge, not the thin one. Having had another play with it I think there is only one correct orientation – writing visible and upside down.

                          Hopefully my next parting job will go better but it sounds like others have produced domed parting cuts even with this the correct way up.

                          I'd be quite happy to consider an alternative to the RDG blade and holder. Price (within reason) is not a big issue but so far I haven't found much else that will suit.

                          I don't have a rear toolpost on the Faircut at the moment and really need milling on the lathe to be going rather more smoothly before tackling a big lump of metal like that so for the time being I will persevere with the conventional toolpost.

                          The advantage of the RDG holder is that it does actually fit my lathe – the only part of the holder that needs to be below the 'shelf' is at the front end. In my case the 'shelf' is the top surface of the compound because the toolpost is open at the bottom. There is about 12mm between the compound top and centre height.

                          Edited By Andy Carlson on 20/07/2020 13:58:37

                          #486726
                          peter smith 5
                          Participant
                            @petersmith5

                            Hi

                            One of the most difficult things when using a lathe that causes blue words and puts the fear of God into people. Those of a nervous nature may consider brown trousers. I know of a third year apprentice who did that when parting off on a Bantam many moons ago.

                            Good quality holders had a groove in the bottom of the slot so that the thin part located in it. The clamp then pulls it tight in to hold securely. Sometimes it needs packing out with a fag paper or two to get it perfectly upright. The widest part is on top to give cutting clearance. Your photo does not show any top rake??? Only have sticking out enough blade to stop chattering. The front should be ground at about 30 to 45 degrees, the direction depending if you want the pip on the stock in the chuck or on the component. I can not recommend a speed as it depends on the lathe, state of bearings, material and diameter but 50% of your normal turning speed . Try and lock the carriage to the bed and tighten up the cross slide – and top slide – gibs to eliminate chatter.
                            Set the tool to a couple of thou BELOW centre height – no more – to prevent the tool or work “climbing” Remember tool square To the axis of the work and SIDE CLEARANCE which you must grind yourself. Most breakages occur through build up of swarf and lack of lubrication.

                            good luck

                            #486727
                            Emgee
                            Participant
                              @emgee

                              I have found grinding the cutting edge angle to anything more than a few degrees of angle invited the tool to wander off line, especially with 1.5mm thick blades of the style used in small lathes.

                              Emgee

                              #486752
                              duncan webster 1
                              Participant
                                @duncanwebster1
                                Posted by Emgee on 20/07/2020 14:12:35:

                                I have found grinding the cutting edge angle to anything more than a few degrees of angle invited the tool to wander off line, especially with 1.5mm thick blades of the style used in small lathes.

                                Emgee

                                grinding the end at an angle also produces a chip which is wider than the kerf (fancy name for slot!). This makes it more likely to get wedged with predictable results

                                #486757
                                Tim Stevens
                                Participant
                                  @timstevens64731

                                  If you use a hacksaw with the blade inverted, or held upside down, the risk of clashing into the lathe bed as you finish the cut is removed. Use a junior hacsaw to get under the work in a junior lathe. I offer this as a reminder to those whose brown trousers are at the laundry.

                                  Cheers, Tim

                                  #486758
                                  Lee Rogers
                                  Participant
                                    @leerogers95060

                                    I have very few insert tools but my Glanze parting tool is one I wouldn't be without. Batten down the hatches , power feed on the crosslide and little Drummond does it's stuff. All that's logical says this is a risky thing to do but I think that it's the steadyness of the feedrate and me concentrating on the cutting oil that does the trick.

                                    Edited By Lee Rogers on 20/07/2020 18:08:55

                                    #486767
                                    peter smith 5
                                    Participant
                                      @petersmith5

                                      I agree with the inserts. I see no reason to stick with an Austin 7 when you could have a Subaru like me.

                                      before I got Ill and had to stop working 5 years ago I was producing 500 stainless tube, 15 mm long from 6mm x 1 mm wall . I reckon I produced about 5,000 bits. The burrs were horrendous but cutting with insert tool made life easy. I also cut 8 and 12mm tube as well . Still the same insert and it lasted at least 10 years. Buy a good one as those from Far East are not as good as German or Scandinavian.

                                      Another job was brass discs 1” dia x 3 mm thick on the Bantam ( the tube on ML10.) 300 off. Brass swarf flying in all directions, collected as scrap, 1600 rpm 8 seconds for each one. They were later stamped with a number and 2 small holes for a mining museum somewhere. 3 mm wide insert. Remember you do not have to grind them, the angles will all be correct and can be touched up on a diamond wheel. I paid £40 for mine originally but now “cheap as chips” – pun intended.
                                      Pete

                                      #486774
                                      Mick B1
                                      Participant
                                        @mickb1

                                        I use one of these RDG bladed parting tools all the time. I've got a couple of specially-ground 1/4" HSS parting tools for specific job, but the blade thing gets used for about 95% of parting.

                                        Convex/concave effects are usually due to an out-of-square cutting edge causing a deflecting force that increases with the extension/depth of parting. Parting tool mounting out-of-square will produce similar effects. Of course, in the extreme you'll snap the tool, but things can be pretty bad before that happens.

                                        Minimise the protrusion of the blade consistent with reaching the partoff depth required – if there's a hole through the centre of the piece you can reduce it further.

                                        I think the wider edge of the blade should always be on the clamp side of the holder, because the support is sloped to bolster the disengaged (narrow) edge of the blade there. If you use a rear toolpost that whole holder with the blade fitted should be inverted.

                                        I certainly can't say it never gives any trouble, but it does generally get the job done even if I have to fiddle about with settings partway through – and I never have so many bits to part off as to justify paying out for one of the very good carbide insert tools I sometimes use down at the railway.

                                        #486780
                                        Andy Stopford
                                        Participant
                                          @andystopford50521

                                          These are good, and don't break the bank:

                                          https://www.chronos.ltd.uk/product/new-3-8-sq-shank-clamp-type-parting-tool-with-4-1-2-m-35-hss-chipbreaker-blade/

                                          I think you probably need to get the dedicated holder for them to locate properly. No need to grind the top face of course, which makes life easier.

                                          I recently bought one of these:

                                          https://www.arceurotrade.co.uk/Catalogue/Machines-Accessories/Lathe-Accessories/Tool-Posts/Model-000-Parting-Tool-Holder-Horizontal

                                          If you already have, or are thinking of getting, the appropriate QCTP, then I'd thoroughly recommend getting one to go with it.

                                          #486782
                                          Andy Carlson
                                          Participant
                                            @andycarlson18141

                                            Thanks. I have been quite careful with the parting tool, even getting a decent sized square out to check that it was perpendicular to the axis. I just didn't twig that the writing needed to be upside down. If I'd looked really closely at the blade I would have noticed but I didn't (until yesterday).

                                            So hopefully my parting will improve but if it still fails to perform then I shall check out the insert tool – at a fist look it does seem like the 12mm 'standard type' one will be just the job. At the moment I've moved several jobs over to the vice for hacksawing but if things improve I might even consider making some washers which I would not contemplate just now.

                                            #486783
                                            Andy Carlson
                                            Participant
                                              @andycarlson18141
                                              Posted by Andy Stopford on 20/07/2020 20:05:16:

                                              These are good, and don't break the bank:

                                              https://www.chronos.ltd.uk/product/new-3-8-sq-shank-clamp-type-parting-tool-with-4-1-2-m-35-hss-chipbreaker-blade/

                                              I think you probably need to get the dedicated holder for them to locate properly. No need to grind the top face of course, which makes life easier.

                                              I recently bought one of these:

                                              https://www.arceurotrade.co.uk/Catalogue/Machines-Accessories/Lathe-Accessories/Tool-Posts/Model-000-Parting-Tool-Holder-Horizontal

                                              If you already have, or are thinking of getting, the appropriate QCTP, then I'd thoroughly recommend getting one to go with it.

                                              Thanks Andy. I've loked at these but I dont think they will fit my toolpost as is… I have more of an SCTP than a QCTP. I need to unclamp the tool even if I just want to change the angle on the toolpost.

                                              #487398
                                              Andy Carlson
                                              Participant
                                                @andycarlson18141

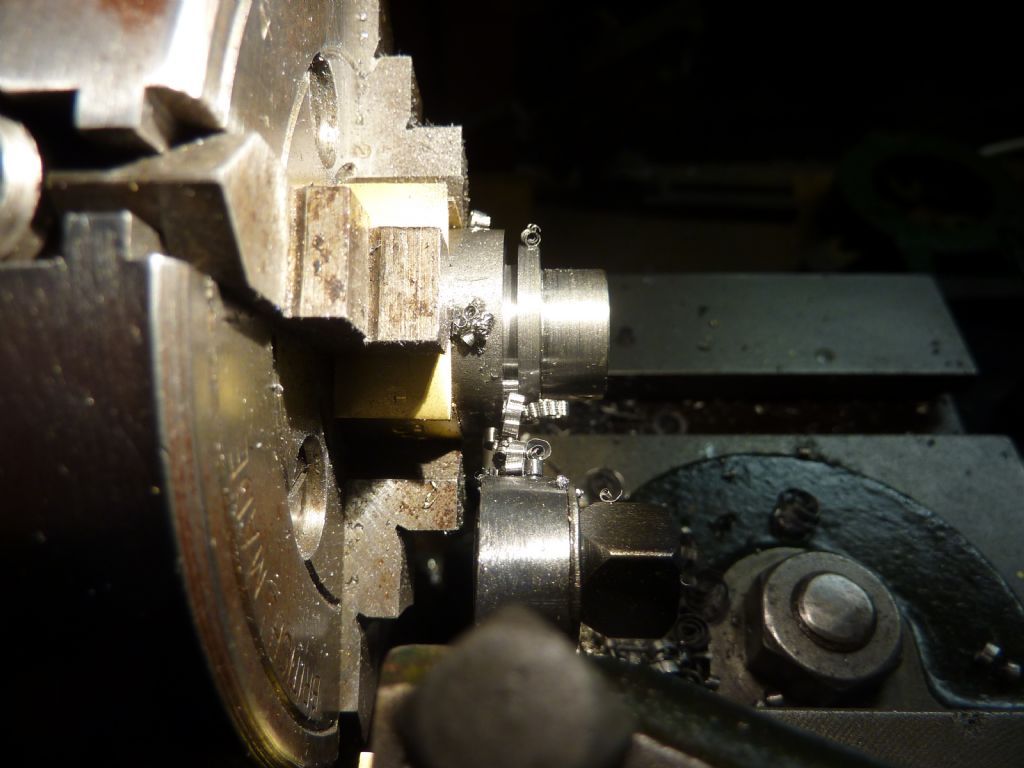
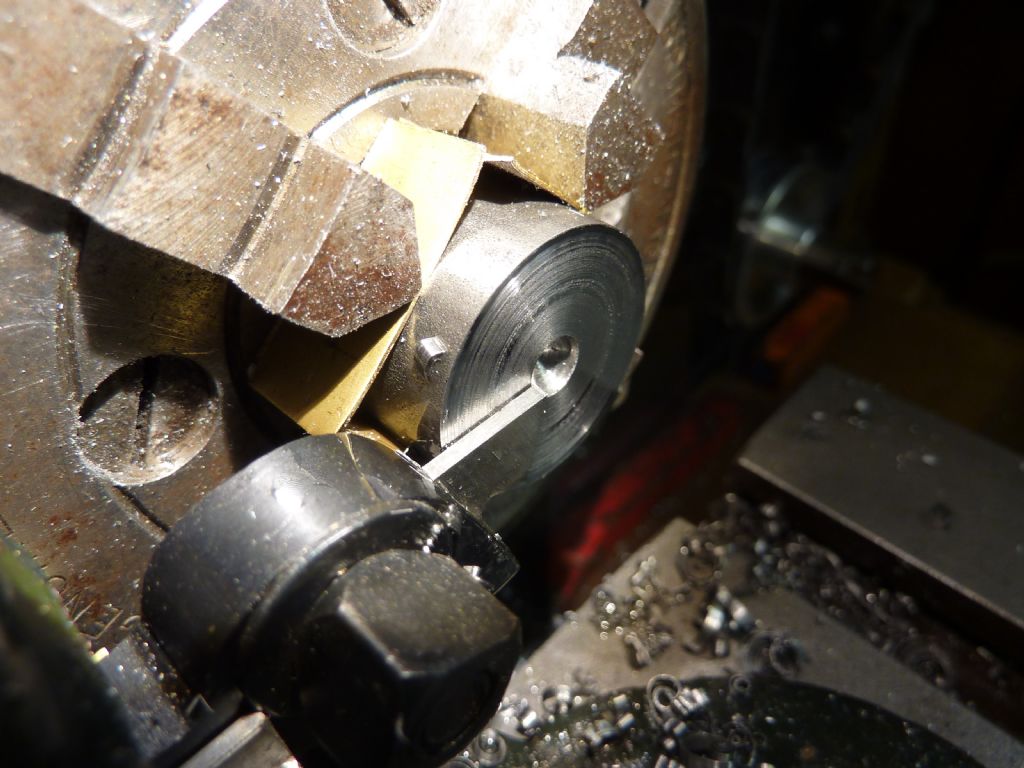
                                                An update… it works a lot better when the blade is the right way up

                                                22mm to 1 inch of EN1A. Setup was very careful, using a square (again) to check the blade was vertical and perpendicular.

                                                Ran into some chatter about half way through. Tried increasing speed from 253 to 456 RPM but that made it unbearable. Went back to 253 and stuffed the tool in harder… chatter gone.

                                                It came out very well, no obvious sign of doming when inspecting the finished cut but for some reason the blade looked like it was veering off to the right during the cut – must have been an optical illusion brought on by numerous prior failures I guess.

                                                p1070553.jpgp1070554.jpg

                                              Viewing 22 posts - 1 through 22 (of 22 total)
                                              • Please log in to reply to this topic. Registering is free and easy using the links on the menu at the top of this page.

                                              Latest Replies

                                              Viewing 25 topics - 1 through 25 (of 25 total)
                                              Viewing 25 topics - 1 through 25 (of 25 total)

                                              View full reply list.