

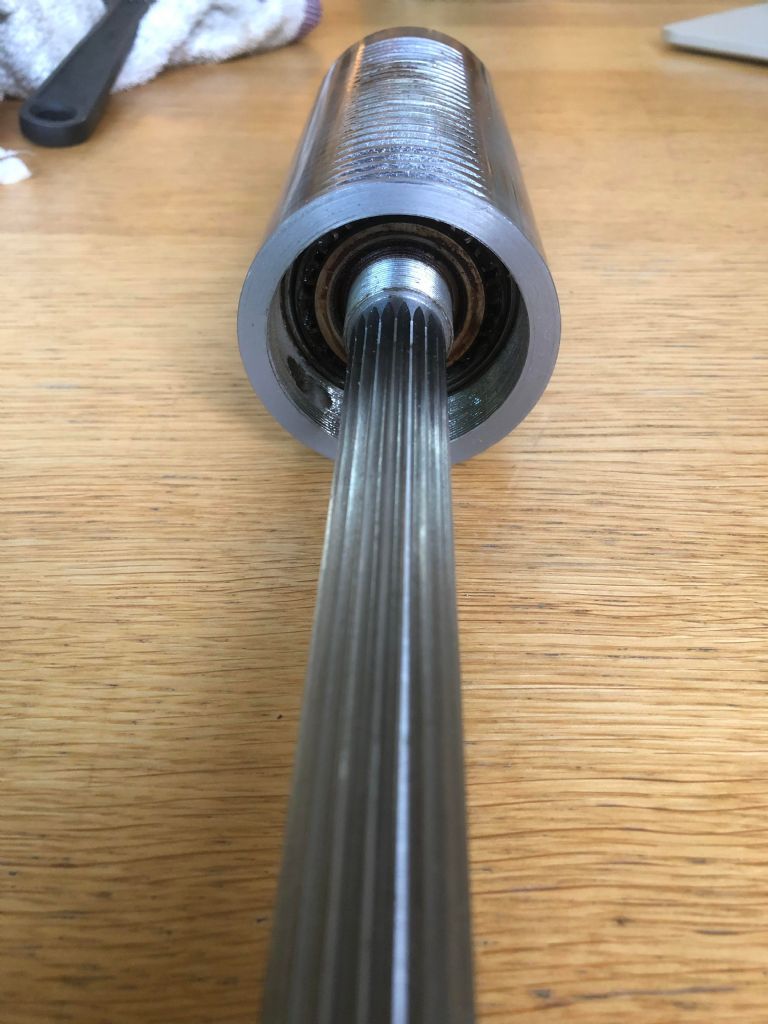
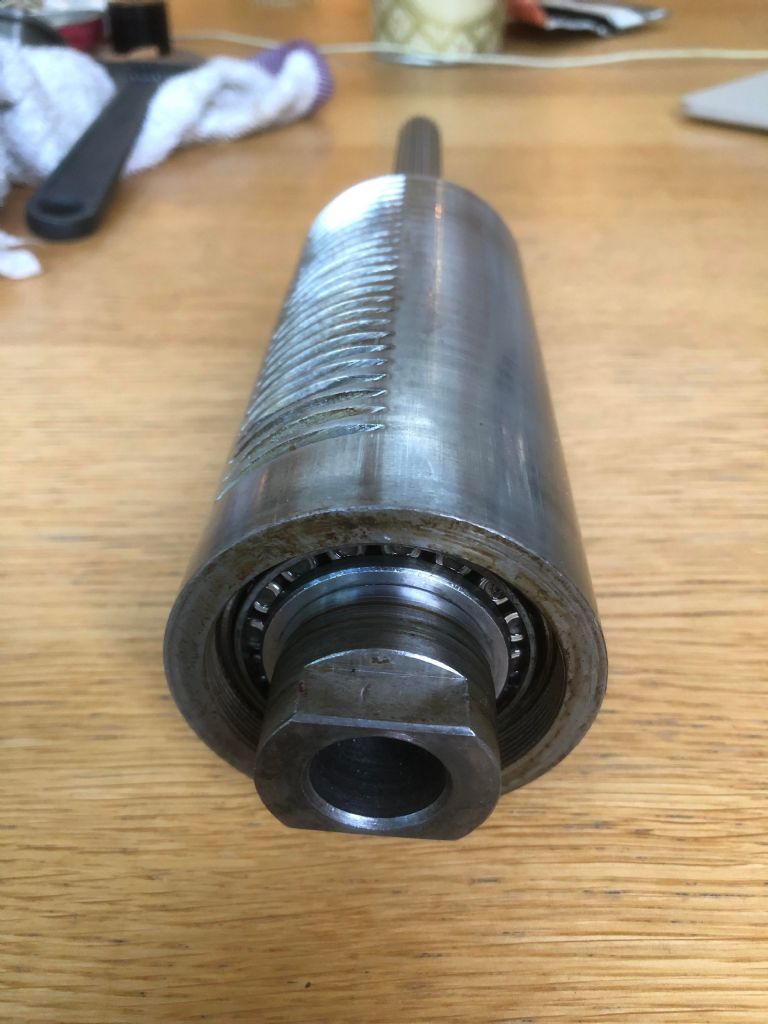
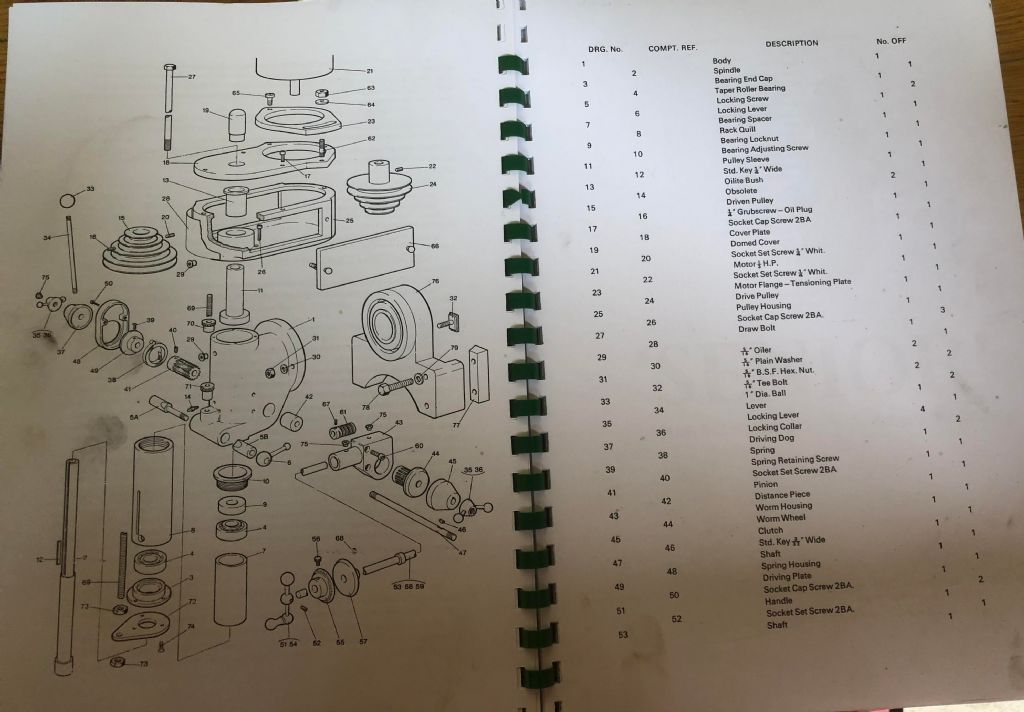
Tom Senior Spindle Disassembly
Tom Senior Spindle Disassembly
- This topic has 7 replies, 6 voices, and was last updated 11 June 2022 at 02:46 by
 Hopper.
 Hopper.
 Fred Benn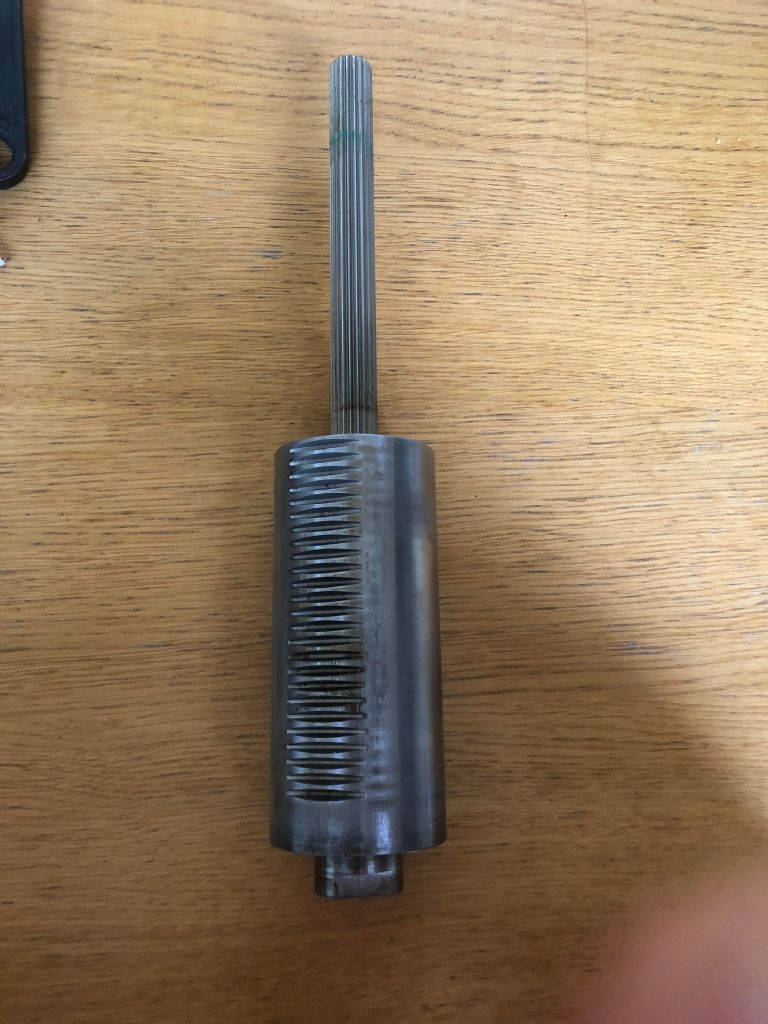
 Andrew Moyes 1
 Jonathan Richards
 old mart
 duncan webster 1
 Hopper
- Please log in to reply to this topic. Registering is free and easy using the links on the menu at the top of this page.
Latest Replies
-
- Topic
- Voices
- Last Post
-
-
Long screwdriver, I know that it usually works but why?
1
2
Started by:
File Handle
in: The Tea Room
- 20
-
3 September 2026 at 18:43
old mart
-
Over Engineered Pencil Sharpener
Started by:
Clive Foster
in: The Tea Room
- 3
-
3 September 2026 at 18:39
old mart
-
Chuck backplates
Started by:
Kiwi Bloke
in: Materials
- 10
-
3 September 2026 at 18:32
old mart
-
New motor for a Myford super 7
1
2
Started by:
Hollowpoint
in: Electronics in the Workshop
- 18
-
3 September 2026 at 18:32
Hollowpoint
-
Fixed steady for WM210 lathe
Started by:
Chris Kaminski
in: Workshop Tools and Tooling
- 5
-
3 September 2026 at 18:23
old mart
-
How long?
Started by:
Adrian 2
in: The Tea Room
- 11
-
3 September 2026 at 18:13
Adrian 2
-
electrical socket screw problem
Started by:
Buffer
in: General Questions
- 9
-
3 September 2026 at 17:01
Journeyman
-
Watchmaker’s Gear-Hobbing Machine
Started by:
Michael Gilligan
in: Clocks and Scientific Instruments
- 6
-
3 September 2026 at 15:49
Michael Gilligan
-
Alibre Atom3D – extended trial stops working
Started by:
David Jupp
in: CAD – Technical drawing & design
- 1
-
3 September 2026 at 13:56
David Jupp
-
Printed circuit boards
Started by:
duncan webster 1
in: Electronics in the Workshop
- 5
-
3 September 2026 at 10:14
John Haine
-
Chronos closing down.
1
2
3
4
Started by:
Andrew Tinsley
in: General Questions
- 36
-
3 September 2026 at 08:17
Hollowpoint
-
Inserting An Angled Feature (Alibre Atom)
Started by:
Nigel Graham 2
in: CAD – Technical drawing & design
- 3
-
3 September 2026 at 07:13
David Jupp
-
Reverting A Section To Full View? (Alibre Atom)
Started by:
Nigel Graham 2
in: CAD – Technical drawing & design
- 3
-
3 September 2026 at 06:43
JasonB
-
Exeter & District Model Engineers Viaduct Open
Started by:
Bazyle
in: Model engineering club news
- 6
-
2 September 2026 at 23:59
Bazyle
-
Emco SL1000 lathe/drill/mill
Started by:
old mart
in: Manual machine tools
- 3
-
2 September 2026 at 21:07
old mart
-
IMLEC 2026 video?
Started by:
Derek Drover
in: General Questions
- 1
-
2 September 2026 at 09:36
Derek Drover
-
Working at a different scale
Started by:
Adrian R2
in: The Tea Room
- 2
-
2 September 2026 at 07:37
Adrian R2
-
Reconstruction of dimensions fom a photo…
Started by:
Robin Graham
in: Beginners questions
- 8
-
1 September 2026 at 22:36
Robin Graham
-
Viceroy Lathes
Started by:
Martin Cargill
in: Help and Assistance! (Offered or Wanted)
- 1
-
1 September 2026 at 21:11
Martin Cargill
-
What Did You Do Today 2026
1
2
…
6
7
Started by:
JasonB
in: The Tea Room
- 46
-
1 September 2026 at 18:43
File Handle
-
Jaxon Steam Car ride to the next beergarden
Started by:
Werner Schleidt
in: Traction engines
- 4
-
1 September 2026 at 16:26
Werner Schleidt
-
Parting off
1
2
Started by:
Peter Simpson 3
in: Beginners questions
- 19
-
1 September 2026 at 16:08
old mart
-
A new Milling Machine
Started by:
Martin Johnson 1
in: Workshop Tools and Tooling
- 8
-
1 September 2026 at 12:58
Martin Johnson 1
-
1904 Whitehead Vertical Gas Engine
Started by:
JasonB
in: I/C Engines
- 4
-
1 September 2026 at 07:38
Andrew Crow
-
Alternative to a ‘fly’ for braking a clock striking train
Started by:
lfoggy
in: Clocks and Scientific Instruments
- 7
-
31 August 2026 at 23:13
Nigel Graham 2
-
Long screwdriver, I know that it usually works but why?
1
2
 File Handle
 old mart
 Clive Foster
 Kiwi Bloke
 Hollowpoint
 Chris Kaminski
 Adrian 2
 Buffer
 Journeyman
 Michael Gilligan
 David Jupp
 duncan webster 1
 John Haine
 Andrew Tinsley
 Nigel Graham 2
 JasonB
 Bazyle
 Derek Drover
 Adrian R2
 Robin Graham
 Martin Cargill
 Werner Schleidt
 Peter Simpson 3
 Martin Johnson 1
 Andrew Crow
 lfoggy
Latest Issue

Newsletter Sign-up
Latest Replies
- Long screwdriver, I know that it usually works but why?
- Over Engineered Pencil Sharpener
- Chuck backplates
- New motor for a Myford super 7
- Fixed steady for WM210 lathe
- How long?
- electrical socket screw problem
- Watchmaker’s Gear-Hobbing Machine
- Alibre Atom3D – extended trial stops working
- Printed circuit boards

