My (new) SABEL Lathe with photos

My (new) SABEL Lathe with photos

Home Forums Beginners questions My (new) SABEL Lathe with photos

Viewing 25 posts - 1 through 25 (of 26 total)
  • Author
    Posts
  • #112858
    Brian Hall
    Participant
      @brianhall37323

      I picked up the SABEL lathe today and have to say, I am very pleased with the purchase. Below are some photos to show the condition together with the inevitable questions

      The lathe has been used at some time for wood turning and there is sawdust in quite a few places where it probably shouldn't be as will be seen in the photos.

      Having the lathe in my own workshop allows a much better evaluation of its condition. With my very limited knowledge of these things this is what I have concluded and would welcome any comments.

      The sawdust is clearly a problem and will need to be cleaned out properly before I run the lathe properly.

      The cross slide and top slide seem to run smoothly not being too tight or too loose. The handle holding the tool post was quite stiff but easily freed up with a little brute force persuasion. The bolts for holding the tools are seized up and will need to be freed.

      There is some wear in the bed as I should probably expect. Moving the saddle from the headstock end to the tailstock end shows some tightening but I do not believe it to be excessive, certainly not too much for the level of accuracy I am likely to require.

      The headstock mandrel has some play which I can feel and hear but it is very slight and I cannot see the movement although my grandson with better eyesight than mine says he can see it move ever so slightly. I believe it should be possible to tighten this up.

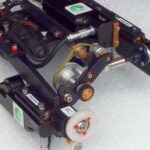
      The first photos show the headstock with the gear cover removed and the sawdust is clearly visible as is a small amount of surface rust on the pulleys:

      SABEL Lathe Headstock

      SABEL Lathe Headstock

      The next couple of photos show the saddle and a view from the tailstock end:

      SABEL Lathe Saddle

      SABEL Lathe Tailstock & Saddle

      The motor and pulley assembly follow:

      SABEL Lathe Motor & Pulley Assembly

      SABEL Lathe Motor & Pulley Assembly

      The next picture shows the stand mounted on wheels…!

      SABEL Lathe Stand on Wheels

      So some questions if I may.

      What is the best way to clean up all the sawdust? I have in my head that if I remove the brackets holding the headstock pulleys & mandrel I should be able to get inside to give everything a good clean. I should be able to adjust any play in the mandrel at the same time. Is this thinking correct?

      I started a discussion here about leveling the lathe and am sure that most people would agree with me that whatever your views on leveling, wheels are probably not a good thing to have on a lathe stand. I am thinking of removing the wheels and using the holes to bolt the stand to the floor.

      I have loads more questions but should probably leave it here for now as I have rambled on long enough.

      Any and all comments gratefully received

      regards

      Brian

      #6589
      Brian Hall
      Participant
        @brianhall37323
        #112864
        Mark C
        Participant
          @markc

          Brian, you might be interested in the section on http://www.lathes.co.uk/southbend9-inch/page3.html about the Smart & Brown Sabel.

          You might also find the Boxford group at  http://groups.yahoo.com/group/BoxfordLathe-UserGroup/ of interest!

          Mark

          Edited By Mark C on 23/02/2013 20:01:20

          #112868
          Brian Hall
          Participant
            @brianhall37323

            Thanks Mark,

            I had already found the lathes.co.uk site. Tony the site owner sells some spares if needed and also has some manuals available but I think they are rather expensive at £38 + p+p for a manual that doesn't just cover my lathe but others as well.

            I found a Yahoo group for the SABEL but it doesn't seem very active at the moment.

            regards

            Brian

            #112873
            Ian P
            Participant
              @ianp

              Brian

              I think the best thing to do to learn about your lathe is to undo a few nuts and bolts at a time, take bits off, clean them indifidually, put them back, undo other bolts etc, and generally just learn your way round it.

              There is no special method or product for removing sawdust but cleaning the lathe is no different to cleaning anything else. You are not likely to do any harm with fine steel wool and thin oil. (I am no fan of the WD40 type stuff).

              I am not familiar with a Sable lathe but there appears to be a ball thrust race behind the headstock pulley, sawdust in that wont help so it might be prudent to dismantle the mandrel, clean it all up and you will be able to examine the journals etc for wear. In doing so you will then know how to adjust the bearings.

              Personally I would not rush into removing the castors, once you have found the best layout and position in your workshop you could think about it then.

              Ian

              #112878
              Bazyle
              Participant
                @bazyle

                My Boxford came out of the carpenters shed at work and had a lot of oiled sawdust everywhere. The great thing was I was able to undo every single nut and bolt and clean it. Noting jamed and rusted up. The only difficult one was a a grub screw down a 1 in hole with another on top as a decoy. The Boxford manuals are on the yahoo group I think and all but the head looks similar.

                I suggest taking off the saddle complete by running to the right, supporting the leadscrew, and then taking it off the right hand end. The bits in the apron are likely to need a clean. take photos as you dismantle.

                #112885
                Ady1
                Participant
                  @ady1

                  Take your time and clean it up

                  A good vacuum cleaner does a great job of sucking out heavy junk

                  Make sure there's oil in those headstock bearings. Never run it without knowing the situation with the bearings

                  The rest you will learn as you go along

                  If you're completely new to this game it's a good idea to underpower the lathe if possible until you get more capable and confident

                  In your case a thin lathe belt would help prevent any mistakes becoming disasters (carriage crashing into headstock chuck etc) …I speak from newby experience, a few dumb things WILL happen in those first few months

                  There is 5-6 mm poly belting which can be purchased on ebay etc. A thin belt would slip in the event of a disaster

                  After a few months munching metal becomes second nature and you'll know yourself when you're capable of operating her competently on full power


                  You've got a pal for life there, well done


                  Edited By Ady1 on 24/02/2013 02:07:42

                  #112986
                  Brian Hall
                  Participant
                    @brianhall37323
                    Posted by Ian Phillips on 23/02/2013 21:28:38:

                    Personally I would not rush into removing the castors, once you have found the best layout and position in your workshop you could think about it then.

                    Ian

                    Hi Ian,

                    I have already decided where it is to go but my idea of removing the castors is a bit academic as they are very securely welded in place

                    Bazyle,

                    I have the manual for this machine that I downloaded from the Yahoo group but the reproduction is quite poor so I might have a look at the Boxford ones as you suggest, thanks.

                    I started cleaning it today but didn't get too far. I wanted to get the stand as level as possible before putting the lathe in place so I needed to shim up the two front feet with some bits of steel. I broke two angle grinders in the process of cutting the steel. The first one, a 9" grinder, hasn't packed up as such but the nut holding the blade in place has locked so tight I am currently unable to free it. So I used an old small grinder someone gave me some years ago and it went up in flames before I'd finished

                    I wanted to take the saddle off for cleaning and assume from your comments that it is okay to just slide it off the right hand end. There's a stop that I will have to remove first though.

                    regards

                    Brian

                    #113002
                    Robin King
                    Participant
                      @robinking15611

                      Brian,

                      Well done on your acquisition – you'll get great satisfaction just from cleaning and adjusting it as part of becoming familiar with the machine.

                      From what I can see in your photos your Sabel is very similar to the Southbend/Boxford models – for more information on disassembly and adjustment I suggest you have a look at **LINK** – this details an owners problems with a newly acquired secondhand Hercus lathe which is another of the Southbend 'clones' ,and includes sections on the apron/saddle etc which I found immensely helpful as a guide when rebuilding my Boxford. The feed gearbox is also a straightforward job to strip/reassemble if needed so don't be put off attempting it if you have any problems with it – my Boxford's box was exceedingly stiff in operation but a strip/clean/reassemble and lubricate solved that problem.

                      Robin

                      #113596
                      Brian Hall
                      Participant
                        @brianhall37323

                        Robin,

                        That is a great link thanks, lots of useful info. I plan to strip this one down as much as possible to clean it before using it. I have started but it really is mucky so will take a while.

                        I have a problem with the toolpost. It is a 4-way type and all the bolts were tight but one of them really doesn't want to come out. It looks as though the bottom of the bolt has been squashed in use which is preventing it from coming out and I don't want to damage the internal thread in the toolpost itself. You can see it in this picture:

                        Should I force it or cut it off and get a new one? Should these bolts not have some kind of taper on the end of the thread to allow for being squashed?

                        regards

                        Brian

                        Edited By Brian Hall on 03/03/2013 14:24:22

                        #113598
                        Keith Long
                        Participant
                          @keithlong89920

                          Brian

                          If the bolt is free to turn and come out – when the damaged end is sorted, then the easiset way is to file the damaged end to get rid of the burred thread that's stopping it coming out. I've seen these bolts with the end turned down to a bit below the thread core depth presumably so that they will come out even when burred. That way you keep the overall bolt length the same and you can reuse the bolt in the tool post.

                          Keith

                          If you've got access to a thread restoring file – common in car mechanics tool kits – then that will sort the problem in about 2 minutes, keeping the length the same and threaded more or less to the end.

                          Edited By Keith Long on 03/03/2013 14:40:28

                          Edited By Keith Long on 03/03/2013 14:40:59

                          #113600
                          Brian Hall
                          Participant
                            @brianhall37323

                            Thanks Keith,

                            Never heard of a thread restoring file – sound like a useful tool.

                            However, I think I will take your advice and file the end down so it will come out.

                            regards

                            Brian

                            #113605
                            Robin King
                            Participant
                              @robinking15611

                              Brian,

                              The quick way to remove the screw is to tackle the burred end with an angle grinder fitted with a thin cut off disc – a file would work but if the screw is of the hardened variety you'll find it slow going. Replacement screws of the square headed pattern are difficult to find so if you can re-use the existing one all well and good, but an alternative Allen socket head screw can usually be sourced; Emkay Supplies can supply in small quantities (even singles) so it's worth a look at their website, if needed.

                              Robin

                              #114088
                              Brian Hall
                              Participant
                                @brianhall37323

                                I managed to get the screw out, quite easily as it happened. I tried a file to start and it cut really easily so I just cut it off with a junior hacksaw. I intend buying new ones as these are all a bit squashed on the end and obviously quite soft metal. I have seen some on eBay (item No. 271163787922) and wonder what you guys think of the price, at £16.00 for the set. The seller is also offering a 'T' bar to suit and I wonder if this is a useful tool to have.

                                I took the saddle off and tried to remove the top slide but it won't come off. It runs quite freely but comes to a dead stop before the end and I wonder if anyone has any ideas how to proceed. There is a grub screw that might need to be undone but I can’t see how it would help. I have highlighted the grub screw in the following photo:

                                Top Slide

                                Any help would be appreciated

                                regards

                                Brian

                                #114089
                                Les Jones 1
                                Participant
                                  @lesjones1

                                  Hi Brian,
                                  I do not know your model of lathe but I will make some suggestions that might help. I think the screw you point out retains the leadscrew nut in the casting. Removing it now will not help as the nut will have to be removed from the casting after the screw is removed by tapping the spigot in the hole just above the tip of the arrow. Wind the topslide to the other end of its travel. I suspect you will then be able to see the and of the leadscrew. I think there may be a circlip on the end of the leadscrew which will have to be removed to allow it to pass trough the nut.

                                  Les.

                                  #114095
                                  Eddy Spriggs
                                  Participant
                                    @eddyspriggs

                                    Hello Brian, The first thing to do is to remove the top slide from the cross slide. Undo the two square headed bolts (one visible in photo). You may have to wriggle it a bit but it will come. You may be better off putting the cross slide back on to give some prchase. Hope this helps.

                                    Eddy.

                                    #114096
                                    Brian Hall
                                    Participant
                                      @brianhall37323

                                      Thanks guys I will try those suggestions and report back.

                                      regards

                                      Brian

                                      #114102
                                      Bazyle
                                      Participant
                                        @bazyle

                                        Brian, take the handle and dial off and the rest of the stuff that end. Then the feedscrew comes out (downwards in your picture) and the bronze nut can be released so the slide comes off in the other direction from what you expect.

                                        Did you join the Boxford Yahoo group which has the drawing available?

                                        By the way when you undo those square headed bolts to release the rotating base part there are brass angled rods between them and the spigot which don't like to move. Plenty of white spirit down the hole might wash out the grease and gently tapping and jiggling eventually does it. real pita.

                                        The bolts you linked – 7/16 seems rather large. I'm suprised they are more than 1/4 though the toolpost looks home made. You don't need square head, Hex socket works fine and if you don't like swarf getting in the socket just fill it with plasticene. Problem nowadays is finding anything whitworth tread – oh what am I saying you've got a lathe so can make some.

                                        #114812
                                        Hopper
                                        Participant
                                          @hopper

                                          That is the first time I have seen a lathe on wheels. Yes could be a bit tricky to set up to turn true over the full length if your shed floor is not a surface plate!

                                          When you get to the stage of setting the lathe up, with or without wheels in place, here is a link to a good run down on how to set it level, with or without an expensive engineer's precision level, by Harold Hall.

                                          http://www.homews.co.uk/page309.html

                                          Here is his take on the precision level debate for the home shop amateur:

                                          "Unfortunately, a precision level will be very expensive, especially when taking into consideration that it will be used very infrequently. Fortunately, all is not lost if a precision level is not to hand, as has been said, it is not necessary that the bed is exactly level.

                                          Having mounted and adjusted the lathe (both across and along the bed) using a basic spirit level a test piece can be turned and measured, from this, the direction of adjustment required can be determined. After adjustment, the test piece is again turned over its length and again measured. Further adjustments can then be made and the process repeated until a virtually error free parallel result is attained."

                                          His test piece procedure is quite complex and thourough so well worth a look.

                                          #115716
                                          Brian Hall
                                          Participant
                                            @brianhall37323

                                            Well it's been a couple of weeks and I have now cleaned up the lathe pretty good, it was quite bad in places. I gave up trying to dismantle that top slide, it wasn't going to co-operate so I just cleaned it as best I could in its assembled state, seems okay although a little bit stiff still. I may revisit it in the future. My main emphasis now is to get the lathe re-assembled so I can actually try turning some metal.

                                            But I have become stuck with the apron. As I have been working, I have done everything in small steps, dismantling, cleaning and then re-assembling everything. This is how I was working on the apron when suddenly, without warning some bits just fell off and I now cannot figure out how it goes back together.

                                            I think the part I am struggling with is called the friction clutch and can be seen on the following photos.

                                            Any help in getting these bits back together would be really appreciated.


                                            Edited By Brian Hall on 30/03/2013 19:58:07

                                            #115718
                                            Eddy Spriggs
                                            Participant
                                              @eddyspriggs

                                              Hello Brian, if you go to ' http://www.wswells.com/partslists' you will find the layout you need.

                                              I think it's the 902D model you need. The only fiddly bit is holding the two half moons is place. (Blob of grease)

                                              Hope this helps,

                                              Eddy.

                                              #115720
                                              Eddy Spriggs
                                              Participant
                                                @eddyspriggs

                                                Hello Brian, Extra info on the above, it's the South Bend Lathe parts list by Dave Smith that you're looking for.

                                                Eddy.

                                                #115722
                                                Mark C
                                                Participant
                                                  @markc

                                                  Forget the parts list (the Boxford one will tell you the same things). Take a look at this page **LINK** for all you need to know!

                                                  After you get it all together you will have developed a new level of dexterity and finger control! I have had my Boxford apart and the "half moons" look a bit odd in your picture, mine are not chamfered at all?

                                                  Mark

                                                  #115728
                                                  Bazyle
                                                  Participant
                                                    @bazyle

                                                    Brian, if you read all of the thread linked by Robin King above you will see a detailed explanation of how the friction clutch goes back together. Also if it is like the Boxford note that the screw in the middle of the star wheel is LEFT HAND THREAD. 90% of these are broken by trying to undo the wrong way. There is a spring in there somewhere too. You will need to undo the screw, undo the star wheel, catching the bits as the spring sends them flying.

                                                    The pin goes through the shaft and ends up between the two shell halves to transfer the drive. The two half moons fit at 45 degrees with the round bit down into the closed end of the shells and the flat sides engage in small indents in the shaft. You have to assemble this while pushing the shaft in against the spring and doing up the star wheel with you fourth hand. Can't remember the exact details after 25 years. Really is time I serviced that part.

                                                    Also the bit dipping down at the the bottom (top in your photo) forms an oil sump so fit a gasket when you reassemble it.

                                                    Edited By Bazyle on 30/03/2013 22:25:45

                                                    #115730
                                                    Bazyle
                                                    Participant
                                                      @bazyle

                                                      Looking again at your photo I think the half moons may not be original as the Boxford ones are much more circular. Also the Boxford does not have a separate casting fo hold the worm, they must have done a bit of value engineering or had better patternmakes. I might be wrong about the pin, perhaps it is for the spring to push against..

                                                    Viewing 25 posts - 1 through 25 (of 26 total)
                                                    • Please log in to reply to this topic. Registering is free and easy using the links on the menu at the top of this page.

                                                    Latest Replies

                                                    Home Forums Beginners questions Topics

                                                    Viewing 25 topics - 1 through 25 (of 25 total)
                                                    Viewing 25 topics - 1 through 25 (of 25 total)

                                                    View full reply list.