My Faircut Lathe

Advert

My Faircut Lathe

Home Forums Manual machine tools My Faircut Lathe

Viewing 25 posts - 51 through 75 (of 90 total)
  • Author
    Posts
  • #430804
    not done it yet
    Participant
      @notdoneityet

      More likely they were made before the US standardised on 60Hz? So closer to 1915 than 1937?

      The UK was still on the Fahrenheit temperature scale back then – apart from enlightened scientists!

      Advert
      #430823
      Andy Carlson
      Participant
        @andycarlson18141
        Posted by not done it yet on 27/09/2019 21:04:11:

        More likely they were made before the US standardised on 60Hz? So closer to 1915 than 1937?

        The UK was still on the Fahrenheit temperature scale back then – apart from enlightened scientists!

        I suspect that Century were active in the UK and made motors specifically for this market. Scanning around the net also turns up examples in Australia.

        There are design variations in these motors. One is only visible when you take the thing apart – the arrangement for tensioning the spring in the middle can be either a threaded collar with a locking clip or a (probably cheaper to make) simple 'C' shaped collar that fits into one of a choice of slots cut at intervals along the shaft. Mine has the latter which I think is a later cost saving arrangement.

        There was one on eBay recently that has a slightly different casing – the three holes at the top of each end housing are omitted – presumably this reduces the amout of crud entering the motor… albeit at the cost of looking less stylish. My guess is that this is a later change. By the late 30s the casing was changed completely to something more sleek and less fussy. Shades of art nouveau vs art deco… if you can apply either term to motor design.

        So my guess is that my motor sits somewhere in the middle of the time range… but it really is just a guess.

        The lubrication arrangement also varies. Some have oil rings and some have wool packing. Mine has the latter but whether this tells us anything about date is not clear to me.

        #431057
        Andy Carlson
        Participant
          @andycarlson18141

          I used my Cowells to turn up a couple of brass lids for the Faircut headstock oilers.

          p1070060.jpg

          My previous lids were effective but hardly very pretty.

          p1070061.jpg

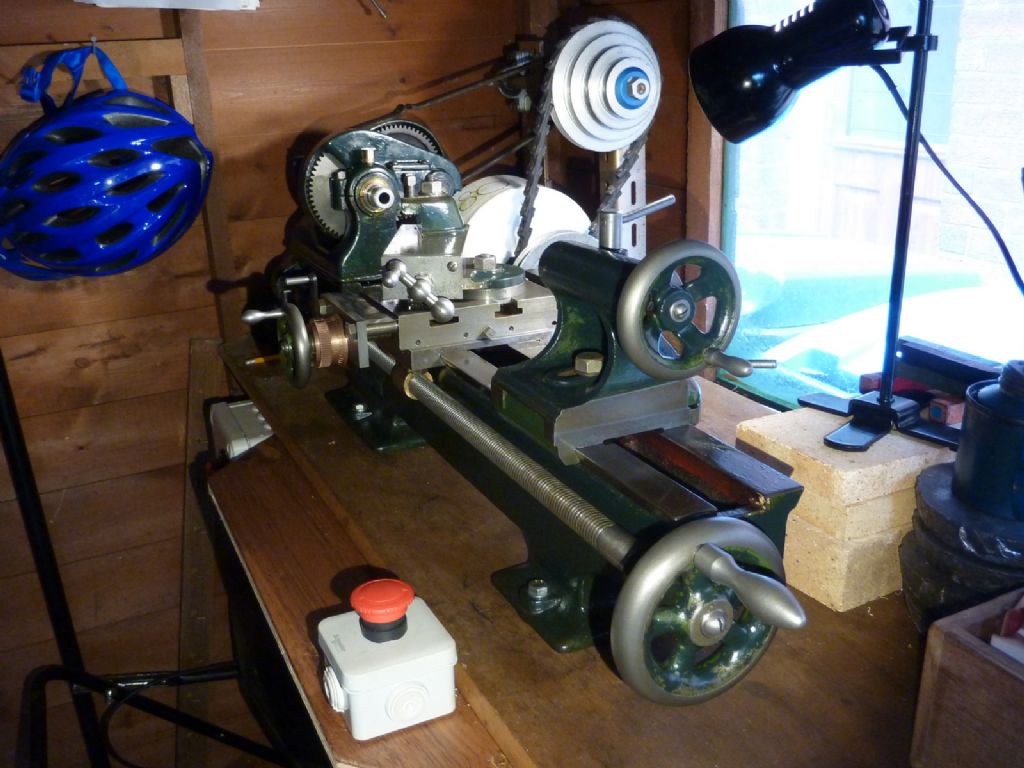
          Most of the lathe has now had at least a first round of cleaning to get rid of the buildup of rust. Now the machine looks rather less neglected.

          p1070058.jpg

          #433536
          Brian Morehen
          Participant
            @brianmorehen85290

            Hi Andy ,

            I have a taper that fits my Faircut , have just it seems to fit ok It is 1 3/4 long from the end to the start of the point

            the small end is 04.17 Thou Large End 05.37Thou .I hope this is of interest and willl make sense

            Brian Morrehen

            #433537
            Brian Morehen
            Participant
              @brianmorehen85290

              Hi Andy ,

              I have a taper that fits my Faircut , have just it seems to fit ok It is 1 3/4 long from the end to the start of the point

              the small end is 04.17 Thou Large End 05.37Thou .I hope this is of interest and willl make sense

              Brian Morrehen

              #433568
              Andy Carlson
              Participant
                @andycarlson18141

                Thanks Brian… although I get a funny number from those measurements (1 in 14.6) which is very un-Morse.

                I discovered a bit more while messing with my home made dead centre. After trying to make the taper better and instead making it worse I found that the actual usable part of my taper is probably in teh range 1 in 22.5 to 1 in 23. The portion at the small end is very damaged by scoring… so my attempts to measure the taper were measuring at two points, neither of which was on the usable part of the taper.

                Basicaly it's a mess and at the moment only usable for running a custom made dead centre. I plan to bore it out to MT1 one day but not just yet. My external taper turning is getting better but I havent yet progressed to internal taper turning so need more practice before attempting such an important job.

                PS: any photos of your lathe?

                Regards, Andy

                #433662
                Brian Morehen
                Participant
                  @brianmorehen85290

                  Hi Andy,

                  Hope this extra info makes sence on taper 13-63 mm or 0.537.5 thou 10.-43 mm or 0.416 thou.

                  Live in Cambridgeshire if any help I am willing to lend you this to make copy from.

                  Photo of Lathe Neil Wyatt has one If you have a mobile send me your No and i will text this to you My No

                  07811 306762 sounds like your having fun with your lathe.

                  Regards Brian

                  #433701
                  Andy Carlson
                  Participant
                    @andycarlson18141

                    Thanks for the offer Brian. I think my headstock taper is both wrong for any known standard (probably from new because I cant imagine how it would have got such a strange taper afterwards) and also damaged so expecting anything to fit it correctly would be unreasonable.

                    My tailstock is now a reasonable fit for No 1 Morse (it wasnt far off anyway) since I used a finishing reamer on it. The headstock taper will need more than just a finishing reamer – it is rather further away from being correct.

                    Regards, Andy

                    #435837
                    Andy Carlson
                    Participant
                      @andycarlson18141

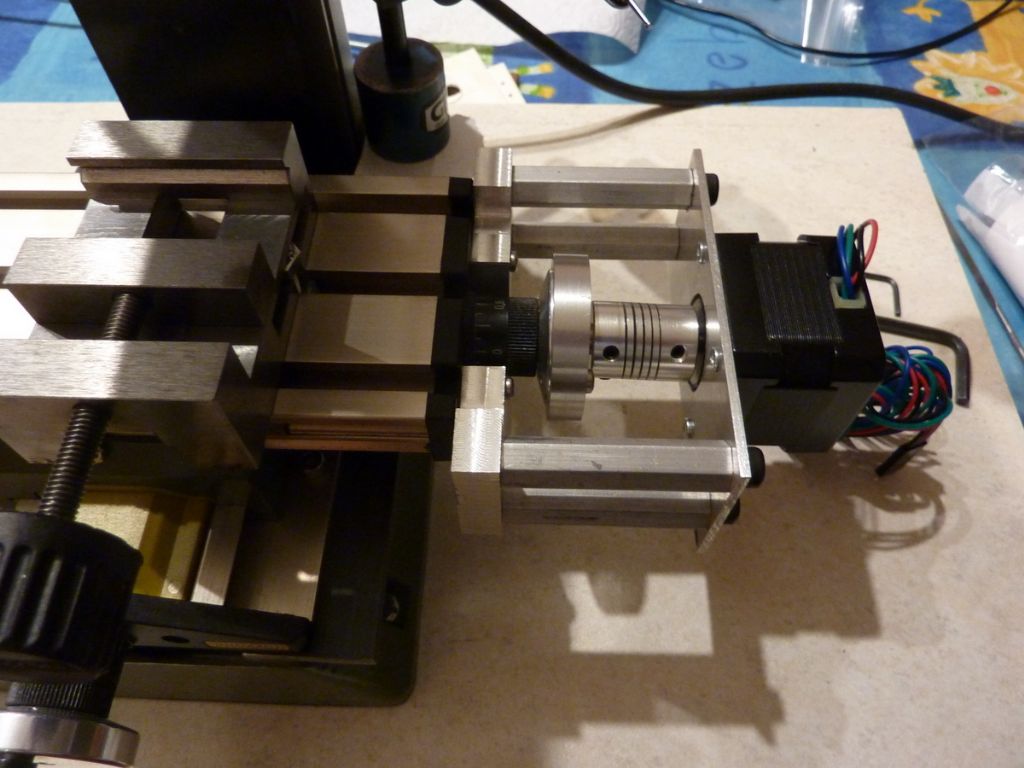
                      A couple of updates. The first is not so much about the lathe itself but a picture of some actual work that I've produced on it. Inevitably the work involved was some parts for another machine – in this case a stepper mounting for the X axis on my Proxxon MF70

                      p1070093.jpg

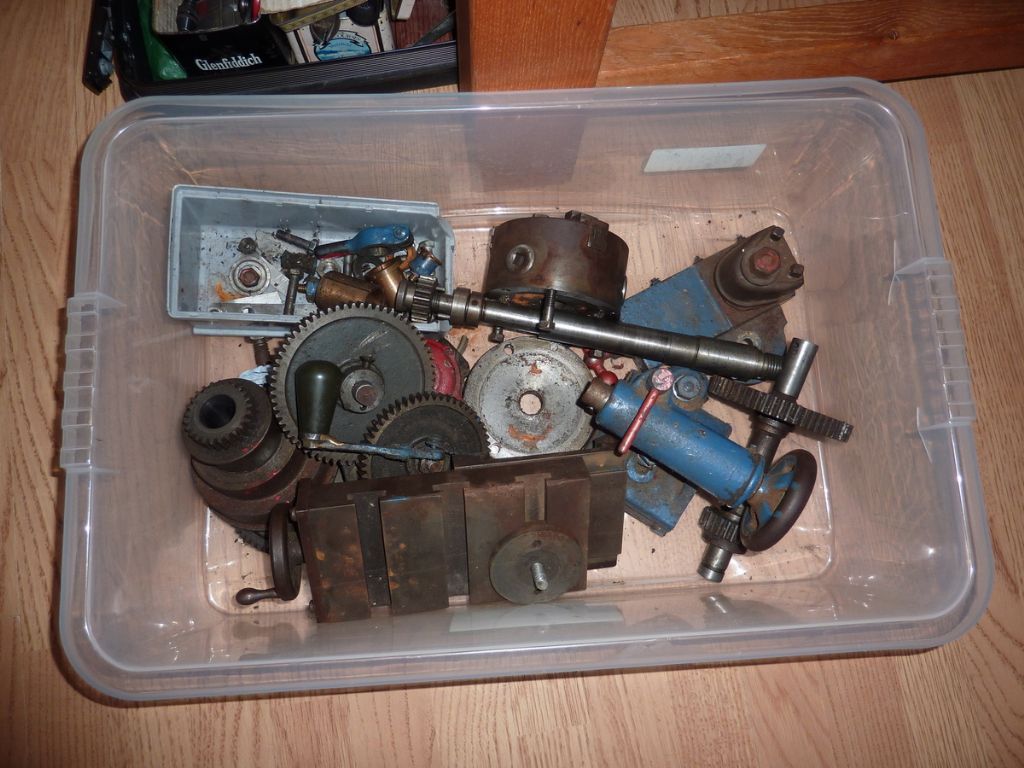
                      Yesterday was a busy day… in the car driving through the rain rather than in the shed. I had to go up to East Yorkshire on a family errand so took the opportunity to go and see Steve King. Some folding stuff was exchanged for some lathe parts. I ended up leaving with rather more than I planned – almost everything except the lathe bed (I still needed room for 3 occupants and luggage on the way home).

                      p1070105.jpg

                      p1070104.jpg

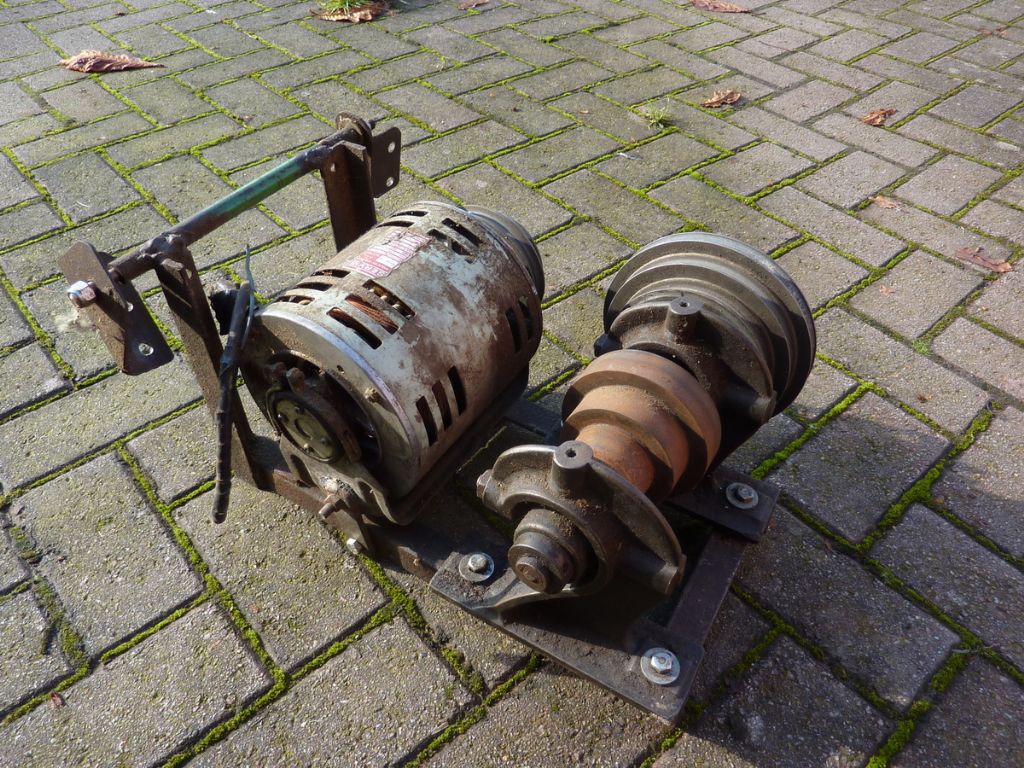
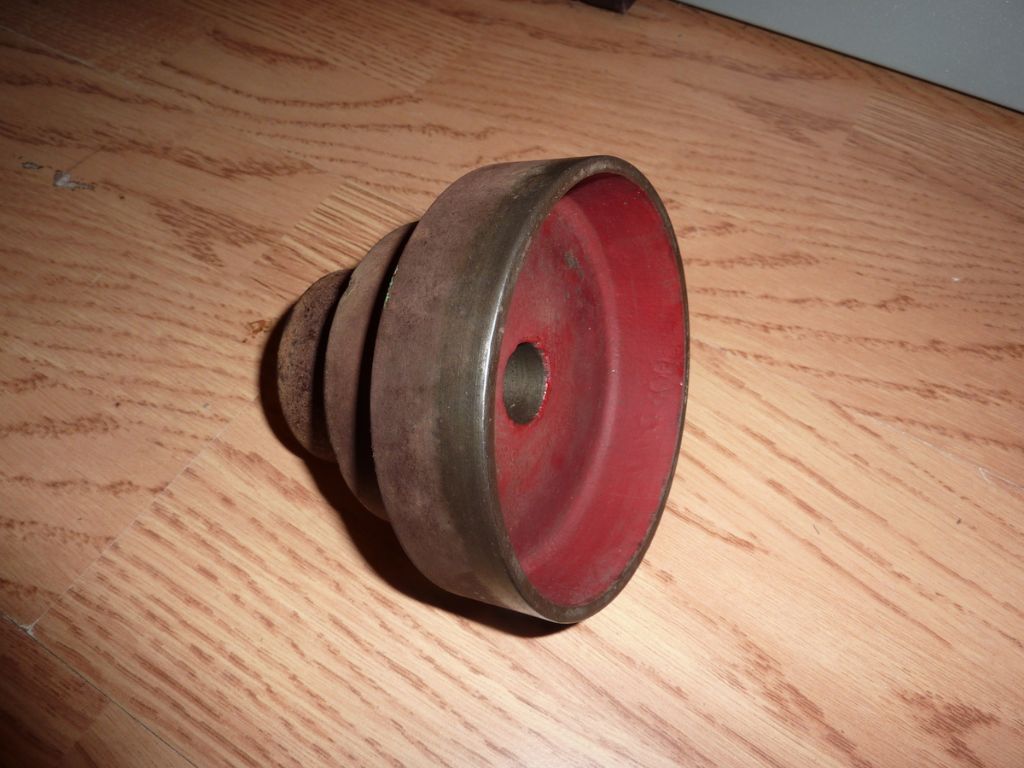
                      The drive assembly was the main thing on my shopping list… and from that the critical part was the pulleys. I think that most of the assembly is non-Faircut stuff. Surprisingly it came apart today without too much of a fight and after cleaning the pulley casting I found a two digit number stamped into it so I think there is a good chance that this is a Faircut made part – the diameters certainly match the pulleys on the lathe. The red paint looks right too.

                      Inevitably the bore isn't the same as my existing countershaft diameter so I need to put my thinking cap on and decide whether to make some bushes or build a new assembly incorporating those interesting shaped brackets. Ideally I also want to move to a 7 or 8 inch 'V' pulley for the motor drive (with a single pulley on the motor shaft) to get the speeds close to what Faircut intended. I might just do the bushes for the time being and come up with a new plan once I have sourced the bigger 'V' pulley.

                      p1070113.jpg

                      #463361
                      Andy Carlson
                      Participant
                        @andycarlson18141

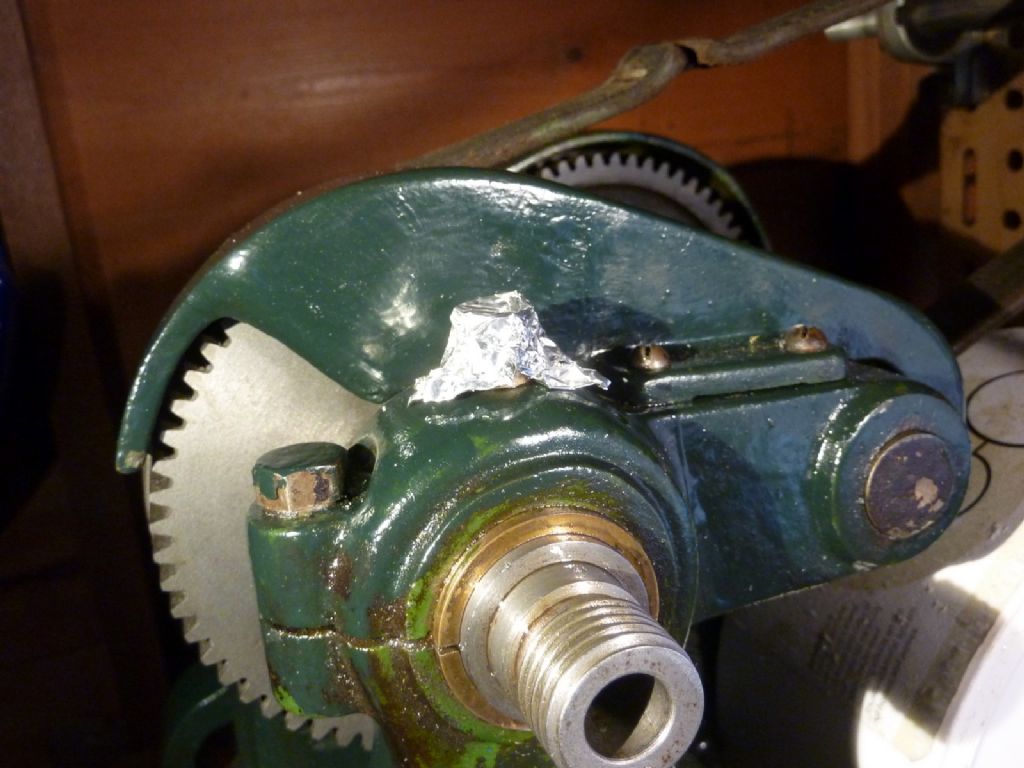
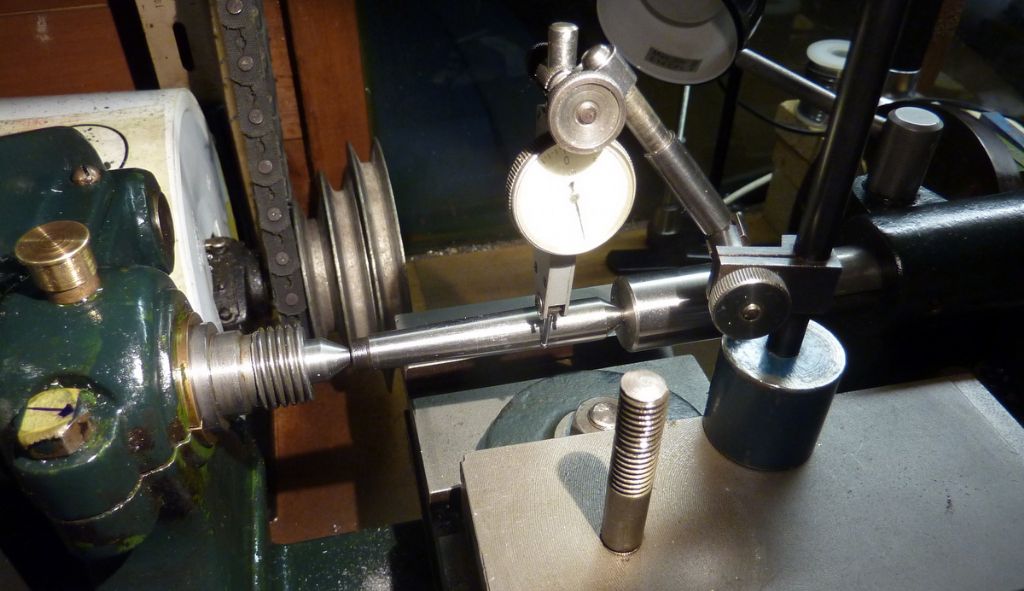
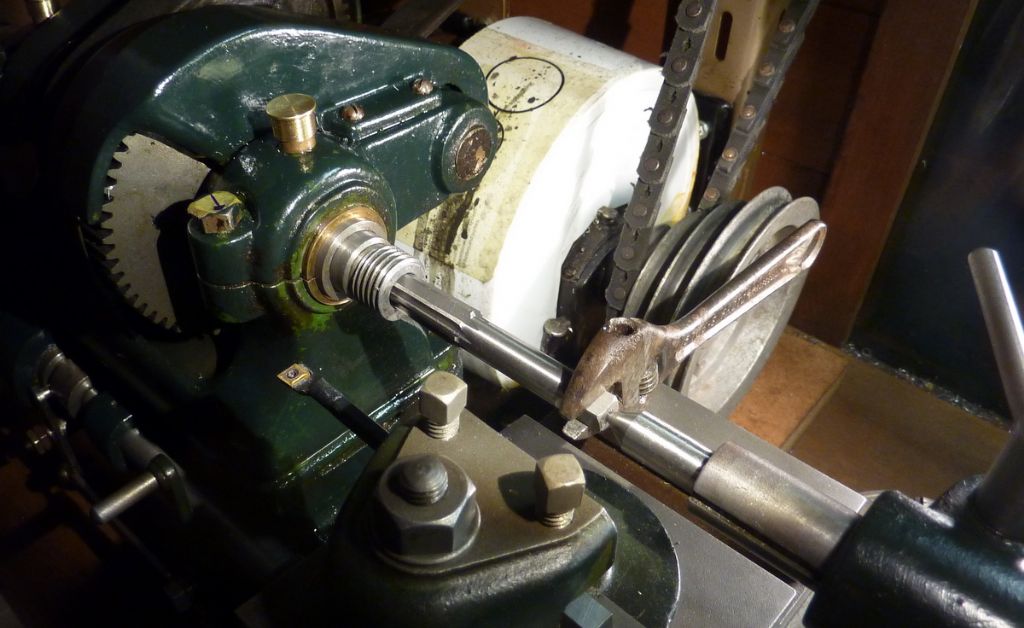
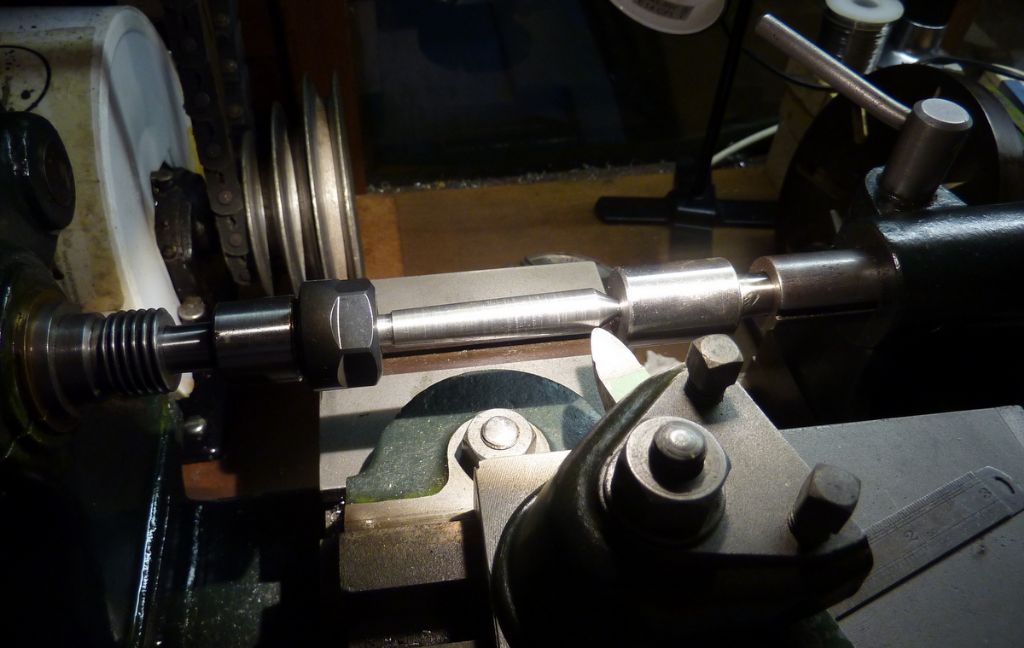
                        Now that the weather is warming up I've bitten the bullet and sorted out the damaged spindle taper on my Faircut. In the end it was much more straightforward than my previous job making a 'mystery taper' centre, probably because I can start setting up by clocking a known MT1 centre…

                        p1070311.jpg

                        Actually that wasn't quite the start. First I had to carefully check and adjust the headstock and tailstock alignment. The headstock alignment tends to go out of adjustment when I do any milling because it's only held by a single central bolt. There is also a hole for a locating pin that should help it to stay put… when I get around to making a new pin.

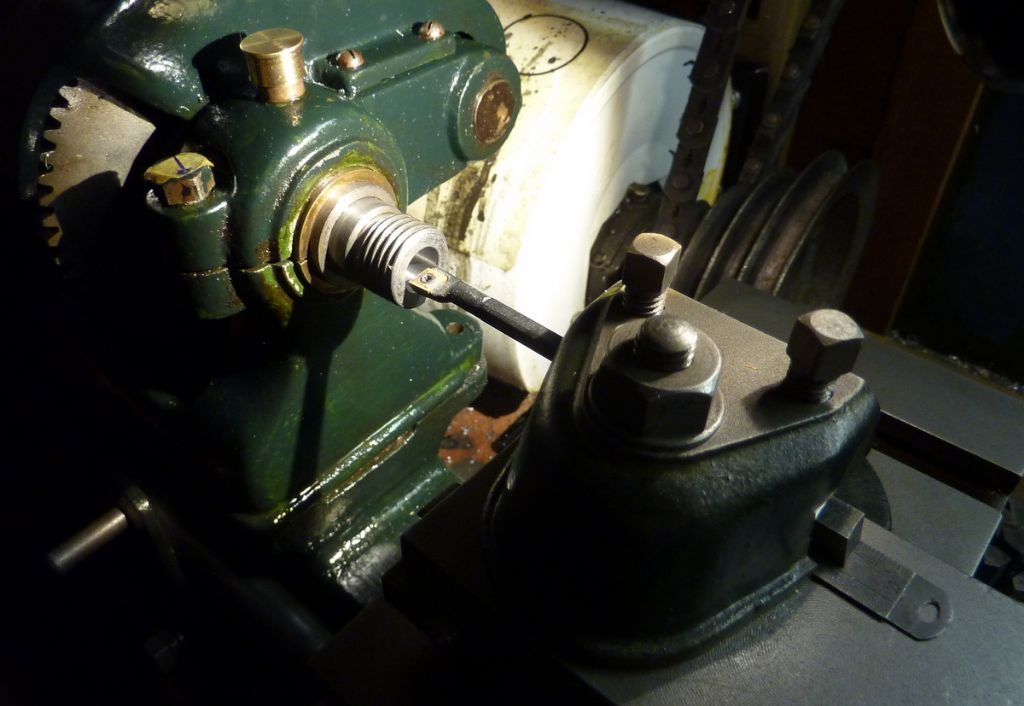
                        Then the RDG boring tool was used to lightly bore the taper, taking light cuts progressively until the tool was cutting along the whole length of the taper. This left some scoring – maybe pre-existing or maybe because of tool chatter (the overhang is pretty big).

                        p1070306.jpg

                        Finally the MT1 finishing reamer (from Chronos) was used until the taper looked nice and smooth. There is still a little scoring visible some way down the taper but I didn't really see the need to continue until all scoring was removed – I can always come back for another go.

                        p1070308.jpg

                        I then made a drawbar for my cheapy Chinese MT1 ER16 holder which now fitted in the taper and clocked at sub half a thou of runout. While the compound was set up I re-cut the taper on my home made soft centre using the ER16 holder and a stub arbor to hold it. I really need to make a new one because this one now slightly disappears inside the spindle.

                        p1070313.jpg

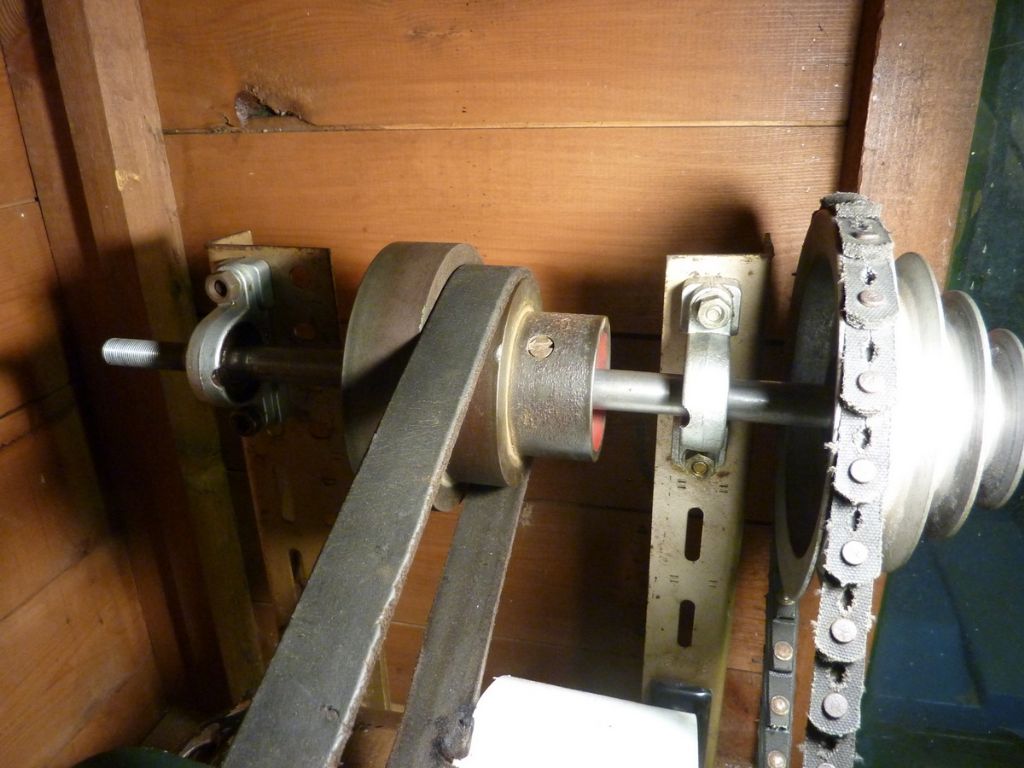
                        One other update – a couple of weeks back I made up some bushes to allow the cone pulley that I bought from Steve King to fit on my Picador countershaft. I still need something like a 7 or 8 inch vee pulley to replace that 4 step Picador one.

                        p1070316.jpg

                        #468978
                        Jacob Leonidou
                        Participant
                          @jacobleonidou84012

                          Hi. I have the same lathe and I've been reading a lot in an effort to better understand it. Would you mind telling me what size tooling you use in the tool post? I can only fit 1/4" tooling with the compound slide fitted. Seems small for the lathe size.

                          Thanks

                          #469071
                          Michael Gilligan
                          Participant
                            @michaelgilligan61133
                            Posted by Andy Carlson on 08/04/2020 22:25:09:

                            Now that the weather is warming up I've bitten the bullet and sorted out the damaged spindle taper on my Faircut.

                            […]

                            One other update – a couple of weeks back I made up some bushes to allow the cone pulley that I bought from Steve King to fit on my Picador countershaft. I still need something like a 7 or 8 inch vee pulley to replace that 4 step Picador one.

                            p1070316.jpg

                            .

                            Looking good, Andy yes

                            Regarding the pulley … What belt section do you need ?

                            MichaelG.

                            #469399
                            Andy Carlson
                            Participant
                              @andycarlson18141
                              Posted by Michael Gilligan on 04/05/2020 14:48:06:

                              Posted by Andy Carlson on 08/04/2020 22:25:09:

                              Now that the weather is warming up I've bitten the bullet and sorted out the damaged spindle taper on my Faircut.

                              […]

                              One other update – a couple of weeks back I made up some bushes to allow the cone pulley that I bought from Steve King to fit on my Picador countershaft. I still need something like a 7 or 8 inch vee pulley to replace that 4 step Picador one.

                              .

                              Looking good, Andy yes

                              Regarding the pulley … What belt section do you need ?

                              MichaelG.

                              Hi Michael,

                              The belt measures 13mm on the thick side, so I assume it is an 'A'.

                              Regards, Andy

                              #469400
                              Andy Carlson
                              Participant
                                @andycarlson18141
                                Posted by Jacob Leonidou on 04/05/2020 08:11:51:

                                Hi. I have the same lathe and I've been reading a lot in an effort to better understand it. Would you mind telling me what size tooling you use in the tool post? I can only fit 1/4" tooling with the compound slide fitted. Seems small for the lathe size.

                                Thanks

                                Hi Jacob,

                                Half inch tools seem about right for mine. I have what I think is the original tool holder which means that the tools sit directly on top of the compound slide.

                                I saw your photos and it looks like yours has a more conventional toolpost which raises the tool off the compound but will also make using deeper tools more problematic. On the plus side, you will find it a lot easier to change the toolpost angle than I do.

                                It would be nice to have the best of both worlds but I'm not sure how to do that without major modifications. I have seen a video on YouTube of a chap with a Faircut Junior who added a packing piece below both the head and tailstock to gain some more height.

                                Regards, Andy

                                #469427
                                Brian Morehen
                                Participant
                                  @brianmorehen85290

                                  Hi Andy

                                  So pleased your headstock taper has worked out O/k Have rechecked mine this must be original because I have Tapers that fit perfectly I believe these are Brown & Sharpe taper No5.., The leadscrew nut was identified by the person who helped me to set my lathe up when I first got it ,who stated that I needed a new nut , i will make you one when you take it apart. sadly this did not happen because he passed away . A very clever man who built his own lathe styled on a Drumond round bed but with two round beds and a adjustable headstock , Your tool holder is the same as mine 3/8 Tools fit perfectley. Very Pleased i needed some 6Ba Nuts llast week I made some without any problems .

                                  All the best Bee M

                                  #469524
                                  Jacob Leonidou
                                  Participant
                                    @jacobleonidou84012

                                    Hi Andy

                                    You actually make a very good point, I can't believe it hadn't occurred to me. I might chop the bottom of that toolpost off as i dont fancy using 1/4 bits. Could explain why the cutting quality has been so bad. This entire time i was convinced my bearings were shot. Another option might be to do away with the compound slide altogether. That would free up another inch or so.

                                    I saw something about shimming the stocks but it looks a bit complicated. I'd like to buy another toolpost but i'd have to find something without a bottom for the tool to rest on. I'm not even sure where to start with regards to sizing and whatnot.

                                    I quite like what you've done with yours. Amazing what a good clean can do!


                                    Thanks Jake

                                    Edited By Jacob Leonidou on 06/05/2020 10:26:29

                                    #469539
                                    Brian Morehen
                                    Participant
                                      @brianmorehen85290

                                      Hi Jake

                                      Re Toolpost for your Faircut Lathe I have a toolpost that fits onto the botton slide you could make one with a suitable block of solid steel and then mill out a suitable slot for larger size tools hope this make sense if not i will try and send Andy a pic to forward I have not complety got the nack for sending pics

                                      Good Luck

                                      Brian Morehen

                                      #469581
                                      Andy Carlson
                                      Participant
                                        @andycarlson18141

                                        Hi Jacob,

                                        It could be the skinny tool but I'd look elsewhere before blaming that. I've had occasions when my Faircut has produced some rough finishes. In my case I'm pretty sure that the main problem was backlash in the compound – certainly the problem happened when the compound was set over at about 45 degrees. Setting it parallel with the cut and also tightening up the gibs a bit produced a good finish.

                                        I think that all of my 'axes' have a decent helping of backlash. My cross slide has a little locking screw in the middle – in between a couple of the gib screws. I'm pretty sure this is also a user modification. It's handy for preventing cross slide movement when milling or turning (as opposed to facing). Mine is pretty awkward to use and I keep intending to get around to changing it for a socket headed screw so that I can use an Allen key on it.

                                        As Brian says, mounting a taller toolpost on the cross slide is certainly an option. The Faircut compound gives you loads of positioning options but I often find it tricky to figure out where to put it so that nothing hits the tailstock, the work or the cross slide handwheel.

                                        #469614
                                        Brian Morehen
                                        Participant
                                          @brianmorehen85290

                                          Hi Andy.

                                          Have the same on my cross slide in the shape of a T fitted in the centre of the gib plate great for locking the cross slide if you are doing any milling cuts Also cut a 3/8 whit thread in a piece of 3/8 Ali just for a trial run.

                                          Regards Brian Morehen

                                          #469712
                                          Jacob Leonidou
                                          Participant
                                            @jacobleonidou84012
                                            Posted by Brian Morehen on 06/05/2020 11:20:42:

                                            Hi Jake

                                            Re Toolpost for your Faircut Lathe I have a toolpost that fits onto the botton slide you could make one with a suitable block of solid steel and then mill out a suitable slot for larger size tools hope this make sense if not i will try and send Andy a pic to forward I have not complety got the nack for sending pics

                                            Good Luck

                                            Brian Morehen

                                            Yes, I do understand. I actually have a piece of solid steel that i was going to mill into a 4-way toolpost. In the meantime i could gain a lot of height by cutting off the bottom part of the existing toolpost. I'd not seen one like Andy's, so it never occurred to me. I have a really nice brand new set of what i think is 3/4 tooling but i would have to do away with the compound slide for it to work.

                                            Andy i think you're right about the backlash. I noticed that I have to apply constant feed pressure when facing as the cutter will move back if i don't. Is this what you mean?

                                            Edited By Jacob Leonidou on 07/05/2020 07:57:48

                                            #469720
                                            Andy Carlson
                                            Participant
                                              @andycarlson18141
                                              Posted by Jacob Leonidou on 07/05/2020 07:57:06:Andy i think you're right about the backlash. I noticed that I have to apply constant feed pressure when facing as the cutter will move back if i don't. Is this what you mean?

                                              Edited By Jacob Leonidou on 07/05/2020 07:57:48

                                              Pretty much – for example when facing something that is rough the work can push the tool away from you, up to the limit of any backlash. If this happens then just keep going. As you make more cuts and the finish cleans up it should stop happening.

                                              I don't want to teach you to suck eggs but if you are trying to work to a specific measurement or dial setting then you should always approach it from the same direction. If you inadvertently go past the point you need to back off by more than the backlash amount and then approach it again.

                                              #469783
                                              Michael Gilligan
                                              Participant
                                                @michaelgilligan61133
                                                Posted by Andy Carlson on 05/05/2020 17:03:14:

                                                Posted by Michael Gilligan on 04/05/2020 14:48:06:

                                                Posted by Andy Carlson on 08/04/2020 22:25:09:

                                                […]

                                                I still need something like a 7 or 8 inch vee pulley to replace that 4 step Picador one.

                                                .

                                                Regarding the pulley … What belt section do you need ?

                                                MichaelG.

                                                Hi Michael,

                                                The belt measures 13mm on the thick side, so I assume it is an 'A'.

                                                Regards, Andy

                                                .

                                                Apologies for the delayed response, Andy … I failed to notice your reply blush

                                                I have ‘safely stored somewhere under the bench’ a very good quality pulley, which I think might be just what you need.

                                                I will dig it out and post a photo later

                                                MichaelG.

                                                #469811
                                                Andy Carlson
                                                Participant
                                                  @andycarlson18141
                                                  Posted by Michael Gilligan on 07/05/2020 11:56:17:

                                                  Apologies for the delayed response, Andy … I failed to notice your reply blush

                                                  I have ‘safely stored somewhere under the bench’ a very good quality pulley, which I think might be just what you need.

                                                  I will dig it out and post a photo later

                                                  No worries Michael – thanks for the msg. When you find it can you please let me know the OD and I will check whether it will fit in without clouting the shed wall. I can mess with the flat belt length a bit which will help but it's all a bit of a squeeze.

                                                  Regards, Andy

                                                  #469837
                                                  Michael Gilligan
                                                  Participant
                                                    @michaelgilligan61133

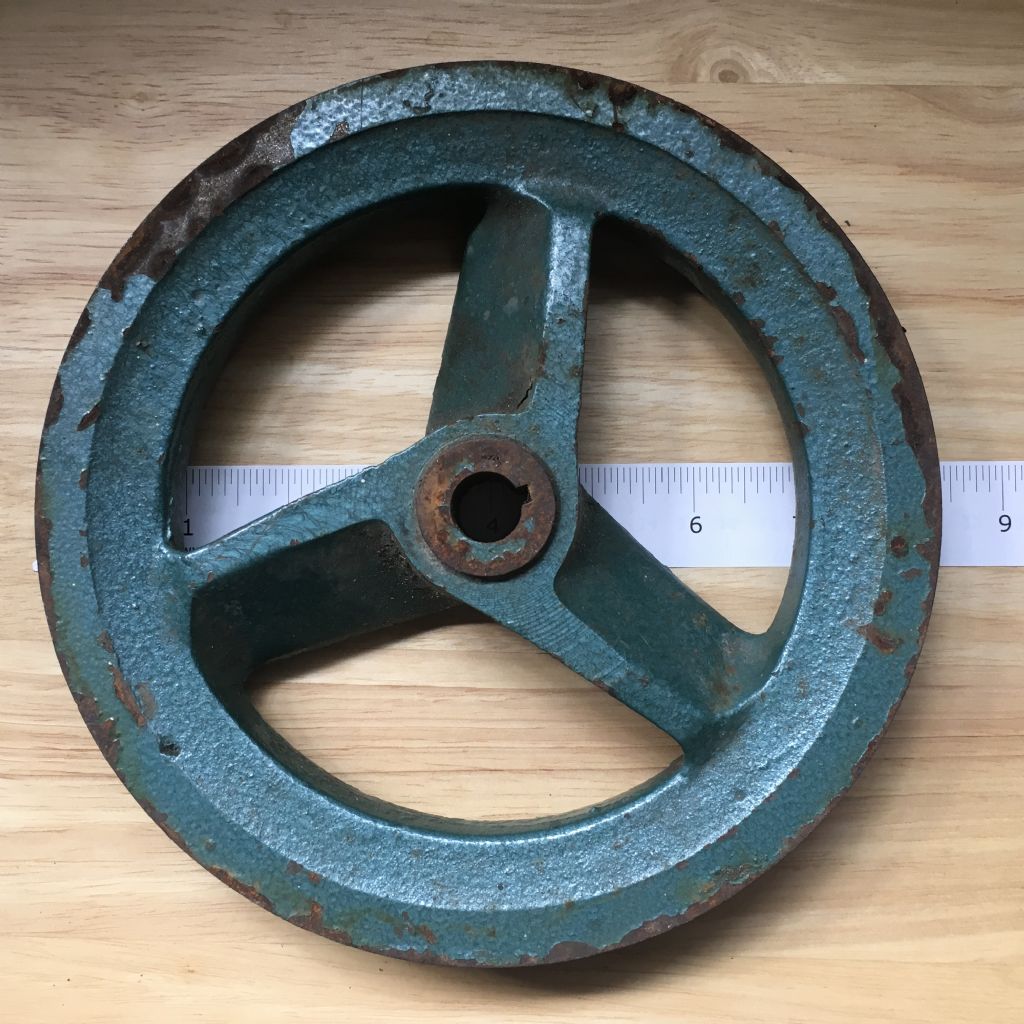
                                                    Here you go, Andy:

                                                    7e15cf5b-3cd9-4834-b6cf-c27eaa3216a2.jpeg

                                                    .

                                                    01e5fa0d-7817-46f6-8cdc-01d233d3f189.jpeg

                                                    .

                                                    Sorry about the colour balance [the close-up one is correct]

                                                    As you can see: according to the ‘Calibrated by IKEA’ tape, it’s just under 8” diameter

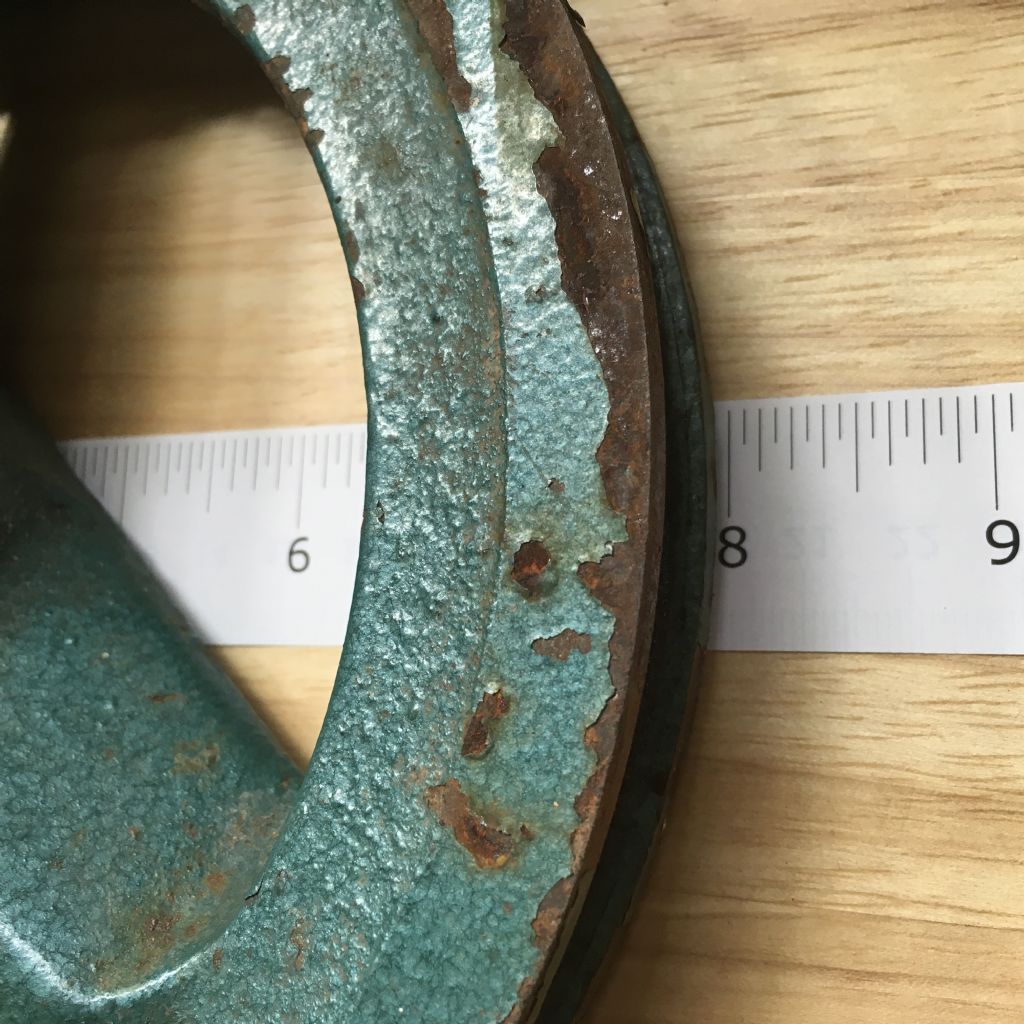
                                                    If you think it suitable, drop me a PM with your eMail address and perhaps a realistic offer

                                                    Note: it weighs a little over 2.1Kg so probably best to use Parcelforce or Hermes

                                                    MichaelG.

                                                    #474346
                                                    Andy Carlson
                                                    Participant
                                                      @andycarlson18141

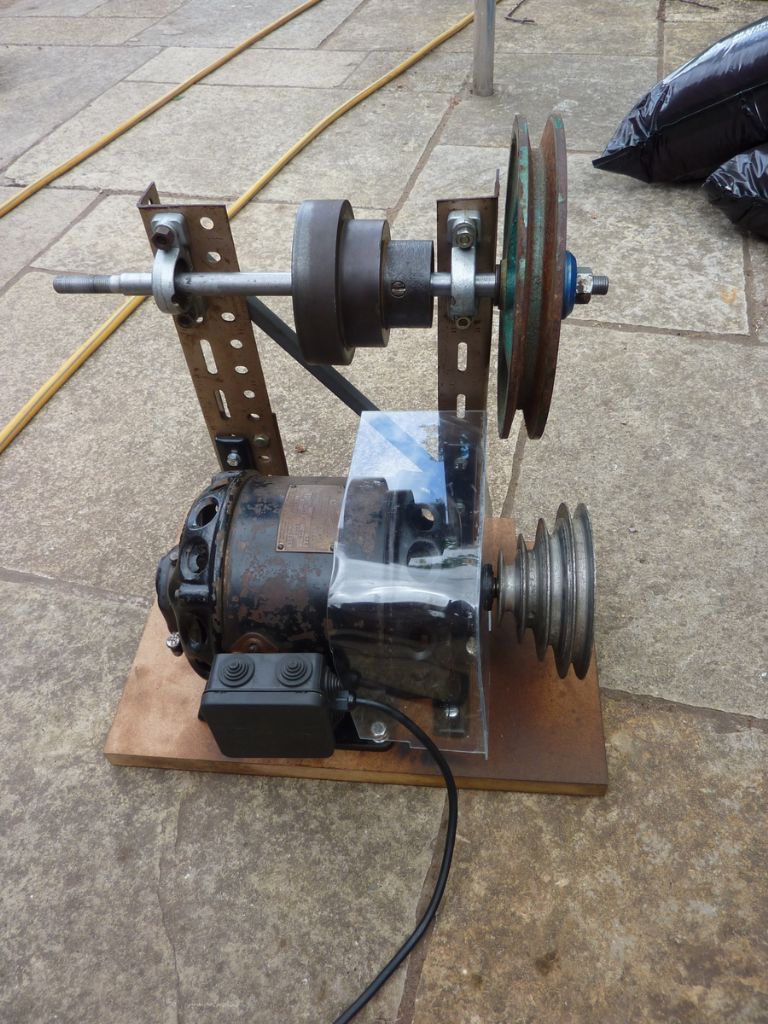
                                                      Some more modifications to the drive system over the past week or so. Until now I have avoided using the top speed on the flat belt pulleys because the vee belt pulleys did not have enough reduction meaning that I would be running the lathe at a higher speed than it was intended to use.

                                                      The (max 5 1/2 inch) Picador cone pulley has now been replaced with the 8 inch one bought from Michael Gilligan.

                                                      p1070397.jpg

                                                      The clamping arrangement needs some more work but I could only find one decently thick half inch washer in my various stashes today. I was hoping to get the motor pulley sorted today as well, but as usual, things took longer than expected… mainly shoving the countershaft bearings 25mm along the shaft to make everything line up again. I've moved them three times now and still have not found a good way to do it.

                                                      The previous addition of the cast iron flat belt cone pulley added a good deal of weight to the countershaft and resulted in some wobble. At least some of this was side to side so I added a diagonal strut made from some square tube recycled from an old lawn spreader. The wobble is now much reduced… a good thing since the cast iron 8 inch pulley has added more weight.

                                                      p1070400.jpg

                                                      A cut down plastic bucket had been a temporary (but long lived) solution to keep swarf out of the rather open air motor casing. I finally got around to making something less ugly. The cover is made from some 2mm acrylic that has been lurking in my garage for many years. Google searches turned up lots of info saying how easy it was to bend acrylic with a paint stripping heat gun. It's one of those things that turns out to be not quite so easy when you try it. I managed a reasonable one after destroying the first attempt but it's pretty uneven in places.

                                                      p1070401.jpg

                                                      There is still more to do… a quick test with the flat belt on the highest speed pulleys quickly showed that the belt was fouling the backgear shaft so I need to lower the countershaft a little… not by much though because otherwise it will not clear that new acrylic cover that I just made.

                                                    Viewing 25 posts - 51 through 75 (of 90 total)
                                                    • Please log in to reply to this topic. Registering is free and easy using the links on the menu at the top of this page.

                                                    Advert

                                                    Latest Replies

                                                    Home Forums Manual machine tools Topics

                                                    Viewing 25 topics - 1 through 25 (of 25 total)
                                                    Viewing 25 topics - 1 through 25 (of 25 total)

                                                    View full reply list.

                                                    Advert

                                                    Newsletter Sign-up