Colchester Chipmaster disassemble

Advert

Colchester Chipmaster disassemble

Home Forums Manual machine tools Colchester Chipmaster disassemble

Viewing 25 posts - 1 through 25 (of 29 total)
  • Author
    Posts
  • #14193
    jason evans
    Participant
      @jasonevans10206
      Advert
      #532393
      jason evans
      Participant
        @jasonevans10206

        Hi

        After selling a few unwanted bits, I have managed to buy a Colchester chipmaster.

        problem is there is no way I can get it round to my garage in one bit, so I have to break it down into manageable bits. If I can keep it as simple as possible, ie saddle assy, headstock, gearbox, bed, variator, motor, and cabinet. My question is, does the manual as seen on eBay in pdf cover disassembly, or enough for me to break it down.

        any help much appreciated can’t wait to get it home

        atb

        jay

        #532441
        David George 1
        Participant
          @davidgeorge1

          Hi Jason What are problems preventing you from moving it yo your garage.

          David

          #532446
          jason evans
          Participant
            @jasonevans10206
            Posted by David George 1 on 07/03/2021 21:42:25:

            Hi Jason What are problems preventing you from moving it yo your garage.

            David

            Hi David

            I have a S bend uphill front path quite steep and bendy, no chance of pulling a half tonne machine up it.

            Then a narrow side path to get to back garden

            atb

            jay

            #532453
            Emgee
            Participant
              @emgee

              Jason

              Join this iO Colchester Group and you can download the Manual that shows exploded views of the Chipmaster.

              **LINK**

              Emgee

              #532478
              jason evans
              Participant
                @jasonevans10206

                Thanks for that, it will help out lots.
                is there any particular order in stripping it down,or things to look out for?

                atb

                jsy

                #532482
                not done it yet
                Participant
                  @notdoneityet

                  I think that back in those days things were built simply. Bits added in logical order. Reminds me of my Landrover Series lll – you just start taking pieces off until you get to the bit you wanted. Simple logic.

                  #532494
                  DC31k
                  Participant
                    @dc31k

                    The best thing to remove to lighten a Chipmaster is the variator and motor.

                    The tailstock is easy but light. Unwind the cross-slide off the back of the machine. The motor door is surprisingly heavy and bulky.

                    After that, it is a lot of work for very little gain. Saddle and apron negligible weight. Gearbox maybe. Headstock from bed then means you have to realign on reassembly. Bed from cabinet to me is not worth it.

                    A Chipmaster is easily mounted on three castors using M12 or 1/2" bolts: one at tailstock end and two in motor cabinet, very close to edge (holes are already there).

                    Consider using a winch (US 'come along&#39, anchored low down on the machine and pull it up the slope, chocking on the downhill side every foot.
                    #532497
                    SillyOldDuffer
                    Moderator
                      @sillyoldduffer

                      When stripping down and reassembling, due to bad memory, I've found it useful to:

                      • Take many photos step by step as it comes apart. Then I can refer back to what it looked like before I got at it.
                      • Take notes. These record the order in which it came apart, which is important sometimes.
                      • Put related small parts like nuts, bolts, springs into small bags and label them!
                      • Try to keep parts assembled together, or taped in position so you don't have to remember.
                      • Don't take stuff off unless it's absolutely essential.

                      Booby traps. Don't ask how I know!

                      • Assembly that must be done in a particular order so you don't end up finding an untightened bolt behind the motor, which is hidden behind a cabinet, etc. etc.
                      • Items where it's unclear which way round it goes, and it turns out to matter!
                      • Small parts like washers, handle keys, terminal screws etc, dropping unnoticed to the floor.
                      • Not all washers are the same thickness. using the right one for correct spacing is sometimes important.
                      • Non-obvious grub screws, pins, or dowels locking parts in position so you break something getting it apart.
                      • Previous owner was a gorilla who tightened nuts up by hitting a spanner extender with a hammer.
                      • Watch out for minor details, for example gibs are often dimpled to accept the adjusting screws. They have to be put back the right way up, the right way round, and with the diimples aligned to their screws.
                      • Never lift with the spindle and don't lift heavy objects by their delicate protrusions. Although lathes are generally robust, it's easy to accidentally bend a lead-screw or break a shear pin. They don't like being dropped either.
                      • Wear steel toe-caps (near miss, thank god.)
                      • Over confidence.
                      • All the other booby traps I haven't fallen for yet…

                      Much more likely to go wrong the first time you do it. Once you know about details like gibs and dimples they're easy. But it can cause a lot of grief if you get small details wrong.

                      Don't panic. It's certainly all doable, but try to be organised. How difficult it is depends on the machine and how good you are at spotting problems: previous experience helps. Some machines are straightforward, others are a bit fussy. I need to take more care than others because I'm not a mechanical natural, but you might sail through it. Always good to share experiences like this with the forum. How you tackle it and what went well or badly will help others – please share!

                      Dave


                      Edited By SillyOldDuffer on 08/03/2021 08:27:57

                      #532502
                      jason evans
                      Participant
                        @jasonevans10206

                        Thanks all that’s a great help. Is there any tricks to removing the saddle/apron. I’m going to give it a bit of a refurb so it will get stripped down eventually anyway.

                        atb

                        jay

                        #532570
                        DC31k
                        Participant
                          @dc31k

                          Remove cap screws from tailstock-end shaft support bracket. Two 2BA threaded dowel pins locate it. Remove them. Slide out leadscrew, feedshaft and bracket. Nothing impedes them at gearbox end.

                          Block of wood under apron to drip tray. Four capscrews to remove. Two dowels locate it. Saddle might then slide off back. If not, maybe six capscrews total front and back to remove retaining strips.

                          Try not to disturb the feed auto-trip mechanism adjustment (leave the worm on its shaft) during refurb.

                          Download the Harrison 10AA manual from the nemes site as it complements and extends the Colchester one.

                          #532764
                          jason evans
                          Participant
                            @jasonevans10206

                            thank you, that helps alot. will get some pics up when it arrives. the one thing i know that is missing is the tool post.

                            any ideas as to what size i need or anywhere selling them. ideally quick change but not essential at the moment.

                            atb

                            jay

                            #533608
                            jason evans
                            Participant
                              @jasonevans10206

                              Hi

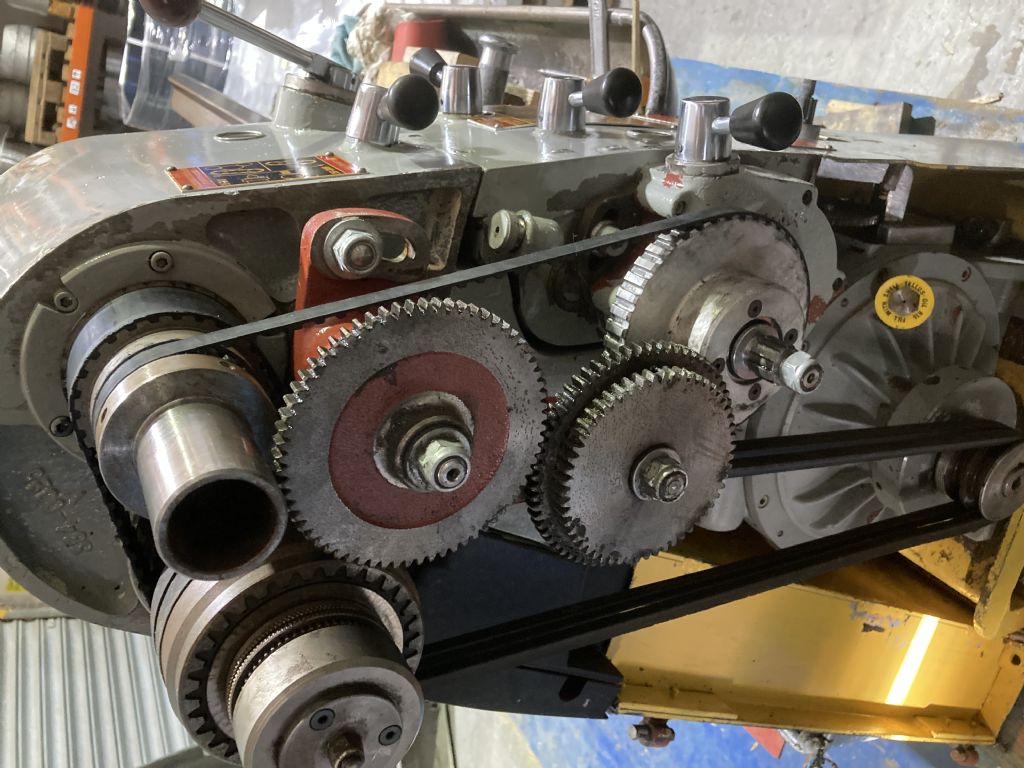
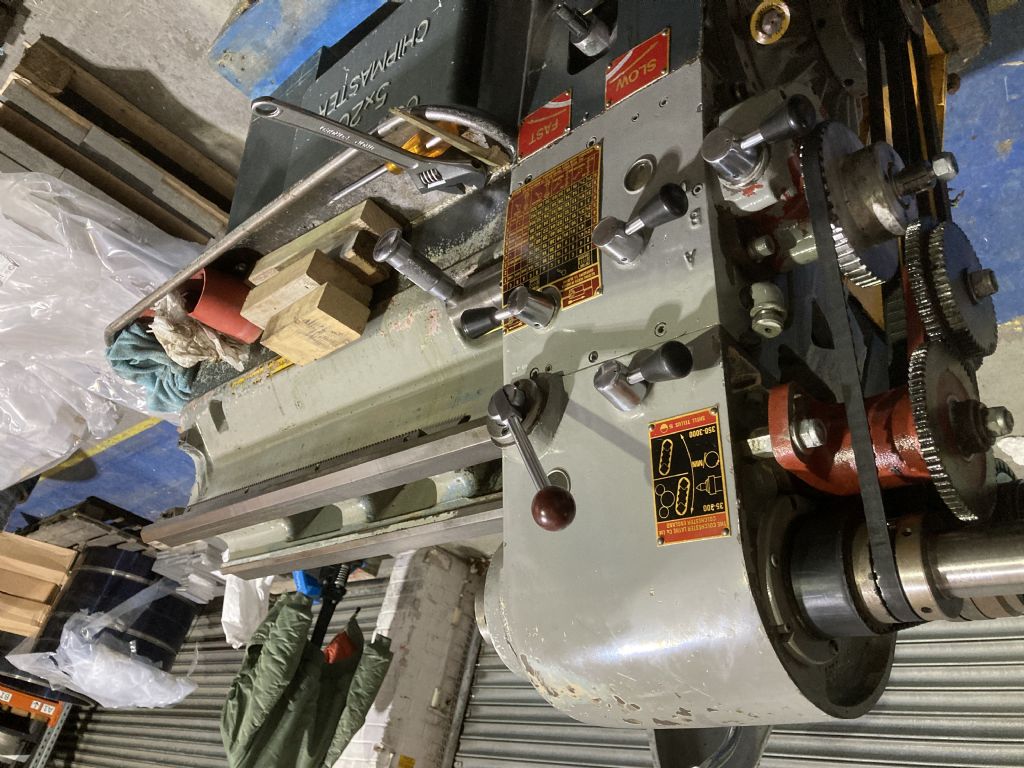
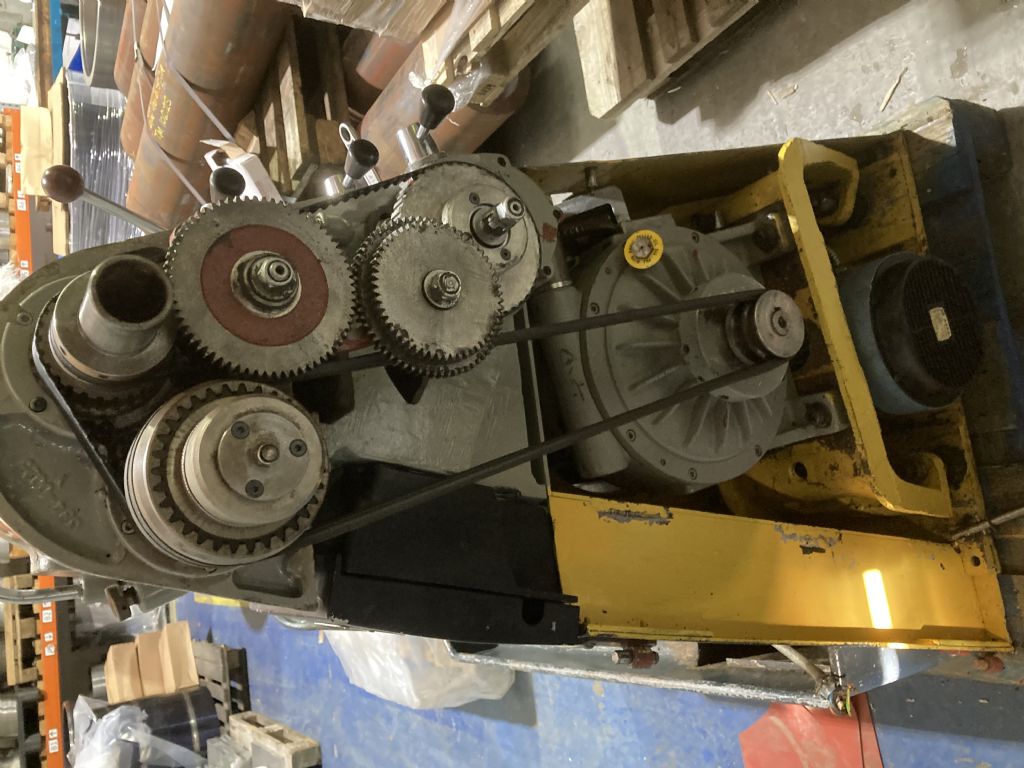
                              well, I’ve got the tail stock, Chuck, main cover, lead screw and saddle off.

                              im a bit stuck as to how to attack the head stock, and how the belts come off.

                              atb

                              jay

                              #533610
                              jason evans
                              Participant
                                @jasonevans10206

                                a4fb21a2-e6a8-43ad-97cf-73037953e07c.jpegffa333bf-0203-4333-9fb3-71d9d362353c.jpeg68e8cbd3-894f-495f-92de-5952ea568903.jpeg

                                #533617
                                DC31k
                                Participant
                                  @dc31k

                                  Undo bolts holding yellow frame to cabinet. Lift motor/variator/frame to create slack in vee-belts. Alternatively, undo variator bolts and lift it slightly.

                                  Slowly rotate thin timing belt, pulling gently towards you. It will work its way off the lower pulley.

                                  No need to touch short, wide timing belt to remove headstock

                                  #533627
                                  jason evans
                                  Participant
                                    @jasonevans10206

                                    Thanks, that makes sense. I’m a bit baffled by the 2 centre gears at the back, these just free spin. Am I missing a gear on the bottom right spline which these link to? The ones on the swing frame.
                                    atb

                                    jay

                                    Edited By jason evans on 13/03/2021 15:17:45

                                    #533635
                                    DC31k
                                    Participant
                                      @dc31k
                                      Posted by jason evans on 13/03/2021 15:13:30:

                                      Am I missing a gear on the bottom right spline which these link to?

                                      Yes. Look in the cabinet or contact the seller.

                                      Standard imperial Chipmaster has a 66t gear, a 33t gear and a 55/65t double gear (used for metric translation). The 33t is not there.

                                      I was under the impression you had a manual. A thorough perusal of the exploded diagrams would tell you what parts are supposed to be present.

                                      #533640
                                      jason evans
                                      Participant
                                        @jasonevans10206
                                        Posted by DC31k on 13/03/2021 16:06:17:

                                        Posted by jason evans on 13/03/2021 15:13:30:

                                        Am I missing a gear on the bottom right spline which these link to?

                                        Yes. Look in the cabinet or contact the seller.

                                        Standard imperial Chipmaster has a 66t gear, a 33t gear and a 55/65t double gear (used for metric translation). The 33t is not there.

                                        I was under the impression you had a manual. A thorough perusal of the exploded diagrams would tell you what parts are supposed to be present.

                                        Yes just had a look at manual, and I’m missing the 33T. Nothing in cupboard, and that’s all that the seller had with it

                                        Not sure where I’m going to track that down.

                                        #534106
                                        jason evans
                                        Participant
                                          @jasonevans10206

                                          Well I’ve tracked down a 33t change gear so all good there. I have started stripping the apron as it is completely bogged up with swarf and grease. I can’t get power feed box out, I know there is a hidden pin but any ideas as to where it is?

                                          thanks

                                          jay

                                          Edited By jason evans on 16/03/2021 08:41:03

                                          #534161
                                          DC31k
                                          Participant
                                            @dc31k

                                            Has the gear you have found come directly off another Chipmaster? Or is it a generic 33t change gear? I hope it is the former.

                                            When you are talking of the power feed box, are you still speaking of the apron assembly?

                                            There is a slightly domed steel blanking plug on the headstock end of the apron, near to the half nut lever that needs to be removed. It is a little bit like a core plug in a car engine block. Behind it is the interlock rod that stops you engaging power feed and half nuts at the same time.

                                            Once more, a close study of the exploded diagram in the manual will assist you in your work.

                                            #534163
                                            jason evans
                                            Participant
                                              @jasonevans10206

                                              Hi

                                              yes it is a 33t off a Chipmaster. And yes the feed box with lever on the apron.

                                              well I’ve looked at the apron diagram and can not see any plug, is it removable or does it need drilling out

                                              atb

                                              jay

                                              #534191
                                              DC31k
                                              Participant
                                                @dc31k

                                                It should not need drilling. Remove all paint covering and surrounding it and at about 5 o'clock looking towards the tailstock, it should be possible to tap in an old wood chisel and ease it out.

                                                You are right that it is not shown in the manual. In the early manual diagram (BAN/9/64) the hole is shown but no plug. In the later manual diagram (CHIP-11-70) even the hole is missing. It is also missing in the Harrison 10AA manual.

                                                #534255
                                                jason evans
                                                Participant
                                                  @jasonevans10206

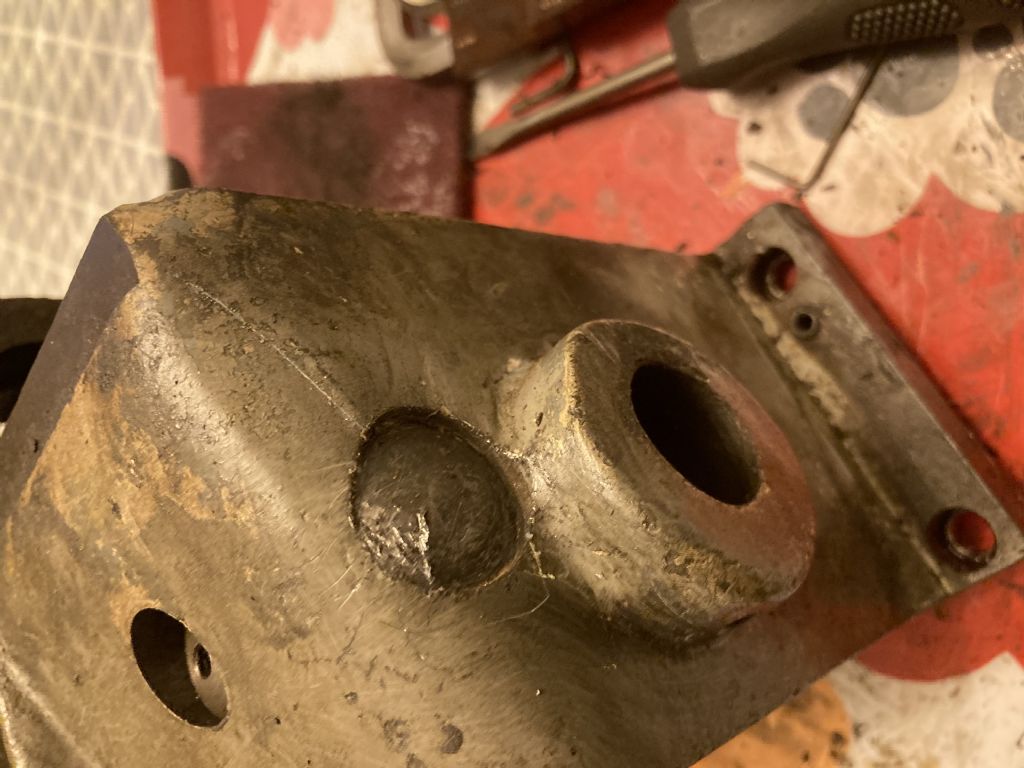
                                                  I’m presuming this is it, bugger is tight in there17a7344d-8ecd-4a98-a610-acaac10c89c0.jpeg

                                                  #534259
                                                  DC31k
                                                  Participant
                                                    @dc31k

                                                    That's it. The way your photo is rotated, you need to attack it at about 7:30 (am or pm does not matter).

                                                    #534260
                                                    jason evans
                                                    Participant
                                                      @jasonevans10206
                                                      Posted by DC31k on 16/03/2021 19:11:10:

                                                      That's it. The way your photo is rotated, you need to attack it at about 7:30 (am or pm does not matter).

                                                      Cheers will wait 5 mins then go for it lol

                                                    Viewing 25 posts - 1 through 25 (of 29 total)
                                                    • Please log in to reply to this topic. Registering is free and easy using the links on the menu at the top of this page.

                                                    Advert

                                                    Latest Replies

                                                    Home Forums Manual machine tools Topics

                                                    Viewing 25 topics - 1 through 25 (of 25 total)
                                                    Viewing 25 topics - 1 through 25 (of 25 total)

                                                    View full reply list.

                                                    Advert

                                                    Newsletter Sign-up