Trouble getting started

Trouble getting started

Home Forums Beginners questions Trouble getting started

Viewing 15 posts - 51 through 65 (of 65 total)
  • Author
    Posts
  • #123594
    Anonymous
      Posted by RICHARD GREEN 2 on 29/06/2013 09:47:14:

      Andrew, It boils down to this, "you build yours how you like, and I'll build mine how I like"

      I completely agree; I don't suppose either of us are going to change our ways.

      I'm not working on full sized engines; so far all the parts I have made fit together properly without the need for 'fitting'. Of course that may well change as I move onto the cylinder and motion gear assembly, where it is fitted to the boiler.

      I agree that the computer will not help in setting the valve gear. But what it will do is help me analyse the existing valve gear and determine whether it works properly or not. And if not, the computer will aid me in designing my own valve gear.

      Remember that I'm building two identical engines. So while there are no real mass produced parts, there are not insignificant numbers of things like spokes and strakes, plus the time consuming parts like the bevel gears. Of course there are also innumerable studs, nuts and washers to make.

      When I've finished my engine I'll also be able to watch it and think that I built it, but also that I modified and re-designed some of it, and that I understand the mathematics behind the design.

      Regards,

      Andrew

      #123595
      Anonymous

        Paul,

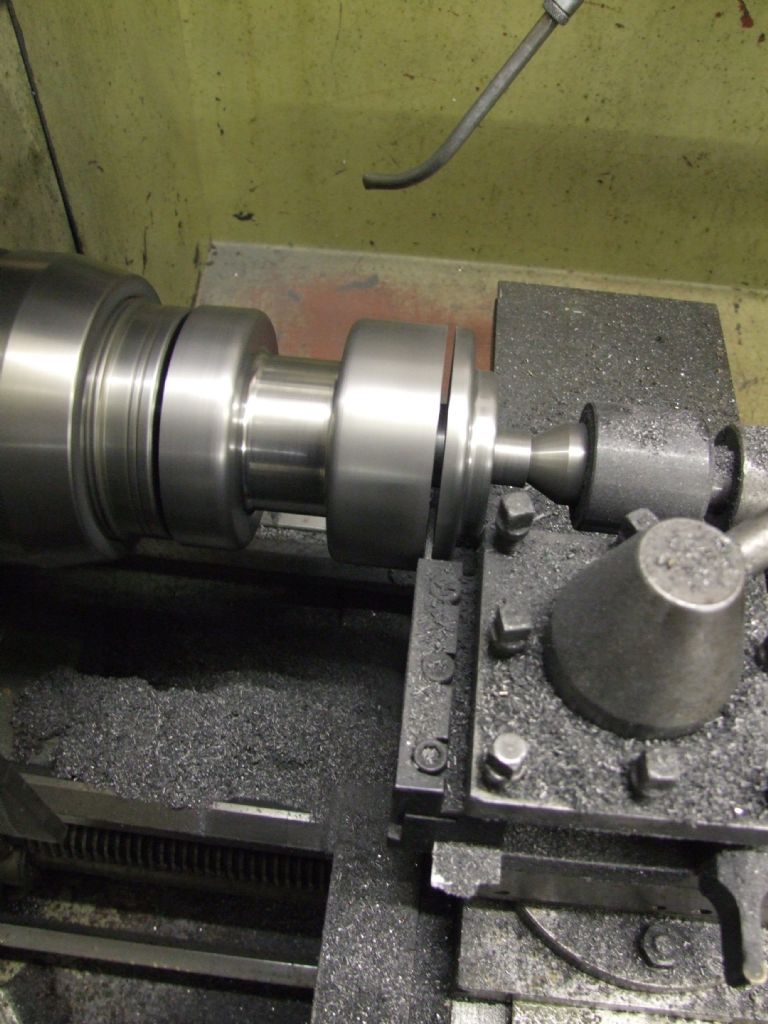
        Personally I just plunge in with the parting tool and keep going, rather than try and widen the groove. Seems to work fine for me, like this:

        Parting Front Wheel Hub

        I also part off under power feed, although that is more controversial. surprise

        Regards,

        Andrew

        #123597
        Paul Harrison 5
        Participant
          @paulharrison5

          Ooooh that looks scary and the work piece looks microns away from the tool post!

          I haven't parted off yet but I'm going to have to give it a go… fingers crossed

          #123606
          Anonymous

            It's not quite as scary as it looks. The toolpost is a fair distance from the work, it's an optical illusion of the picture. I wasn't completely parting off either. It may not be clear from the picture, but the wheel hub has already been drilled and bored, and is mounted on a home made split mandrel. Since I didn't want to damage the mandrel I left a wall thickness of about a 1/16". The hub is 3-1/2" in diameter, and the mandrel is 1-1/8", so the depth of the slot is about 1-1/8".

            Regards,

            Andrew

            #124116
            Paul Harrison 5
            Participant
              @paulharrison5

              Andrew, there are some beautiful radiused corners there. I take it that the work on both sides of the parting tool is for use?

              How did you achieve those really nice corners?

              Paul.

              #124120
              JasonB
              Moderator
                @jasonb

                You can do it a few different ways –

                -use a radius/ball cutter though probably take longer to set up than do.

                – grind up some form tools, like this guy did

                – or just use a file on the corner of the work as it revolves which is what I did ( not on the lobes though )

                J

                Edited By JasonB on 08/07/2013 18:17:31

                #124135
                Anonymous

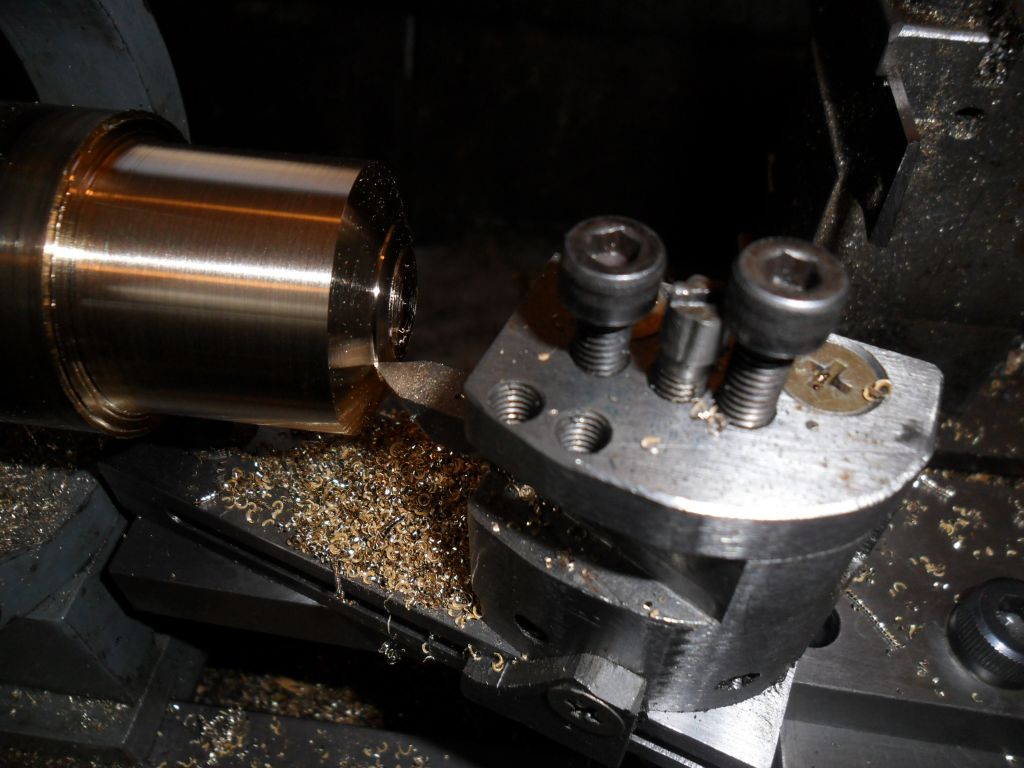
                  Paul: The internal radii were formed with a 5mm diameter carbide button insert. The external radii were 'chamfered' by eye with the same tool and then finally shaped using files.

                  The work to the right of the parting tool is the front wheel hub outer cover. Once removed the end of the work to the left is cleaned up and the inner cover is machined and then also parted off, leaving the hub to be cleaned up to length.

                  Regards,

                  Andrew

                  PS: Look in your PM inbox

                  #124145
                  Nobby
                  Participant
                    @nobby

                    For a male radius say 1/4" the width accros the 45degree chamfer mulitiply .250" x .828" = .207 "
                    then file so there are 2 at approx 22.5 Degrees all 3 same .or .375 x .828 =.310" try it it works
                    Nobby

                    #124146
                    Nobby
                    Participant
                      @nobby

                      Hi Guys
                      Its old hat I know Nobby

                      radius

                      #124147
                      Paul Harrison 5
                      Participant
                        @paulharrison5

                        Thank you Andrew, Jason and Nobby. Nothing wrong with 'old hat' Nobby; I say that at the risk of restarting the CAD or No CAD debate!

                        Jason, FABULOUS photgraphs, really interesting and a real inspiration. I had been looking at making a ball turning device, BUT it requires milling… back to square one. Although I've emailed Warco to let me know when the mill is back in stock.

                        Andrew, 2 questions. First. what exactly is a button insert; I'm presuming it's a rounded equivalent to the triangular ones I have? Secondly, in your 'avatar' what are you sitting in?

                        Finally, sorry to everyone who's P.Md me, but I've only just checked it, still getting use to this forum malarky, but thanks for all your input.

                        #124199
                        Anonymous

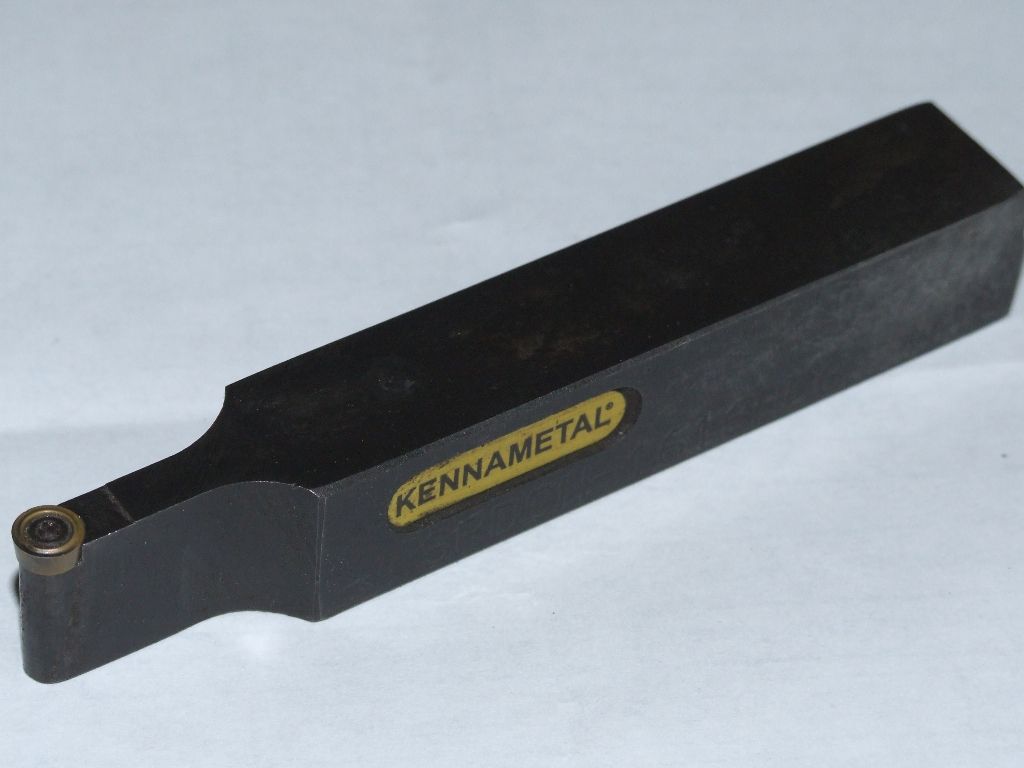
                          Paul: First, here's a picture of my button insert tool:

                          button_insert.jpg

                          Second, I'm sitting in a Pawnee D, ex-crop sprayer, with an O-540 engine, flat six, 235hp and a 4 blade prop.

                          Regards,

                          Andrew

                          #124236
                          Paul Harrison 5
                          Participant
                            @paulharrison5

                            Tht's a great tool, Andrew. I take it you choose the radius you want and then just let it cut?

                            I've also looked up the Pawnee and was surprised to find that it is an agricutural aeroplane. I expect that with trucks, traction engines, trailers etc, but not a plane!

                            Off for my second visit to the local model engineering club tonight.

                            #124288
                            Anonymous

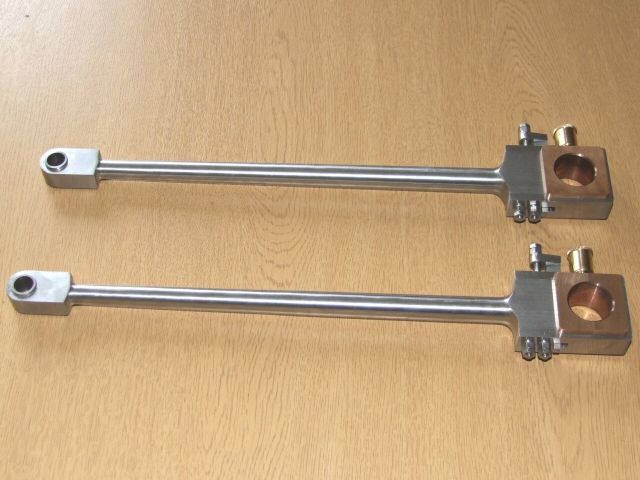
                              Paul: I'm not sure I quite understand your comment on choosing the radius? Using the tool directly you get the radius set by the insert, 3mm. I was wrong in an earlier post, the button insert is 6mm diameter. However, the tool is very useful for generating curves of larger radius, if it can be guided by other means. I have a hydraulic copy unit on my lathe, so the tool can be used to generate tapers and curves from a simple flat pattern, like these connecting rods:

                              conrod_9.jpg

                              The Pawnee is known as the 'aerial tractor', which is about right. Simple construction and controls, no attempt at streamlining and drag reduction and lots of protection for the pilot, as crashes are not uncommon when crop spraying.

                              Regards,

                              Andrew

                              #124331
                              Paul Harrison 5
                              Participant
                                @paulharrison5

                                What I meant, Andrew was that you would choose a tool with a different size 'button' to suit the desired radius. Once set up you would then presumably use either the cross slide or top slide in a straight cutting motion to produce the corresponding curve?

                                Sorry, but here's another question… what is a hydraulic copy unit?

                                Paul.

                                #124399
                                Anonymous

                                  Paul: Thanks for the clarification. The round inserts do come in several sizes, but sadly each one requires it's own tool holder. They're not intended to be interchangeable on the same holder. The 6mm insert is the smallest; for larger inserts you need a fairly rigid machine to avoid chatter as the length of cut can be large. For most of my work on the traction engines the radii are not critical, so I just use the 6mm insert. If I need a definite radius then I'll grind up a HSS special or make one from gauge plate. You are correct that a straight cutting motion is used to generate the radius appropriate to the insert.

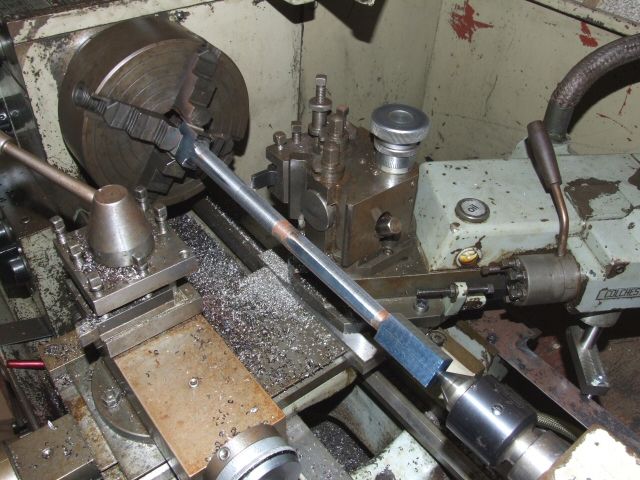
                                  A hydraulic copy unit is a device that normally sits on the back of the lathe cross slide. The unit has a stylus that follows a master pattern, and drives the tool via a hydraulic cylinder to follow the same path. Thus a copy of the master is produced. They were commonly used in industry up until the 1970/80s, when they were largely superceded by CNC. Here's a picture of the unit mounted on my lathe, and in action:

                                  conrod_3.jpg

                                  The hydraulic copy unit is the lump in the top right. Not shown is the oil tank and pump. If you PM me an email address I can send you an article that explains hydraulic copy units and their use in more detail.

                                  Regards,

                                  Andrew

                                  Edited By Andrew Johnston on 12/07/2013 11:15:22

                                Viewing 15 posts - 51 through 65 (of 65 total)
                                • Please log in to reply to this topic. Registering is free and easy using the links on the menu at the top of this page.

                                Latest Replies

                                Home Forums Beginners questions Topics

                                Viewing 25 topics - 1 through 25 (of 25 total)
                                Viewing 25 topics - 1 through 25 (of 25 total)

                                View full reply list.