

Inserting An Angled Feature (Alibre Atom)
Inserting An Angled Feature (Alibre Atom)
- This topic has 32 replies, 4 voices, and was last updated 24 September 2026 at 23:51 by
 Nigel Graham 2.
 Nigel Graham 2.
 JasonB
 David Jupp
 Nick Hughes
 Nigel Graham 2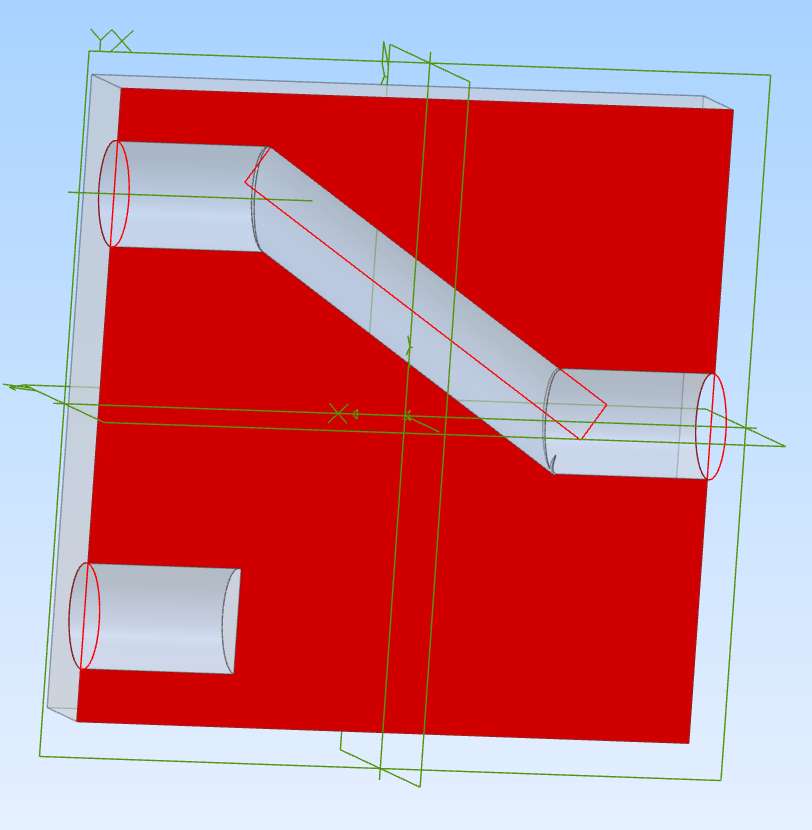
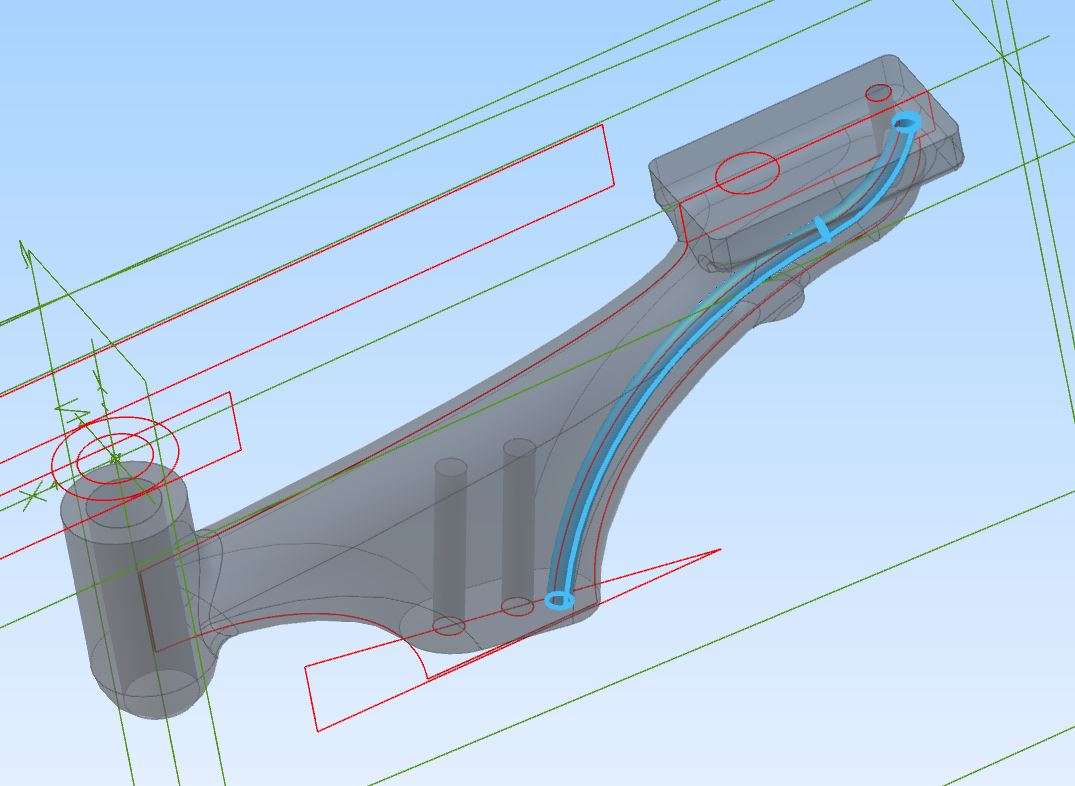
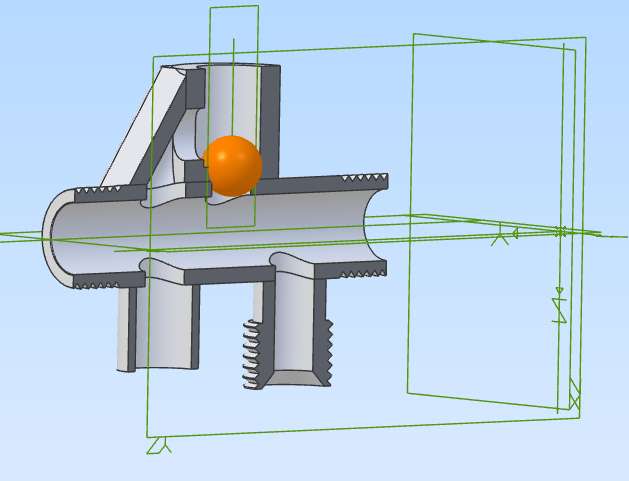
- Please log in to reply to this topic. Registering is free and easy using the links on the menu at the top of this page.
Latest Replies
-
- Topic
- Voices
- Last Post
-
-
Angled d-bit / machinist reamer?
Started by:
Fulmen
in: Workshop Tools and Tooling
- 8
-
15 October 2026 at 06:08
Tendor
-
Lathe arriving – source some practice materials
1
2
Started by:
starjump
in: Beginners questions
- 17
-
14 October 2026 at 23:05
southernchap
-
Lathe turning tool nomenclature
Started by:
JA
in: Workshop Tools and Tooling
- 9
-
14 October 2026 at 22:11
Fulmen
-
Printed circuit boards
Started by:
duncan webster 1
in: Electronics in the Workshop
- 7
-
14 October 2026 at 21:33
duncan webster 1
-
Greenbat 3 ton battery loco
Started by:
Pippin
in: Work In Progress and completed items
- 2
-
14 October 2026 at 21:25
duncan webster 1
-
CAST IRON JOINING
Started by:
ian Holdsworth
in: Beginners questions
- 5
-
14 October 2026 at 21:20
Trevor Drabble 1
-
Does anyone have any info about these vices
Started by:
bjcolyer
in: Introduce Yourself – New members start here!
- 6
-
14 October 2026 at 19:04
Nicholas Farr
-
Searching for roller chain with pitch 2.5 mm
Started by:
Werner Habbel
in: Hints And Tips for model engineers
- 3
-
14 October 2026 at 18:32
Werner Habbel
-
What Are the Most Practical Ways to Make Manufacturing More Sustainable?
Started by:
andrew998
in: Workshop Techniques
- 6
-
14 October 2026 at 16:41
ega
-
Home workshop site down?
Started by:
Andrew Tinsley
in: General Questions
- 4
-
14 October 2026 at 16:39
Brian Baker 2
-
Model Engineer Magazine Collection
Started by:
mfengine1
in: Books
- 11
-
14 October 2026 at 16:16
noel shelley
-
Sealant for bolting a dome casting to a model boiler
Started by:
Greensands
in: Hints And Tips for model engineers
- 6
-
14 October 2026 at 15:37
Derek Drover
-
Involute cutters
Started by:
michael howarth 1
in: General Questions
- 2
-
14 October 2026 at 14:59
not done it yet
-
Powerfeeders
Started by:
larry phelan 1
in: Help and Assistance! (Offered or Wanted)
- 8
-
14 October 2026 at 13:00
duncan webster 1
-
Locomotion No 1 – plans
Started by:
Bob Wild
in: Help and Assistance! (Offered or Wanted)
- 6
-
14 October 2026 at 12:28
Bob Wild
-
Threading accuracy?
Started by:
Andrew Tinsley
in: General Questions
- 11
-
14 October 2026 at 11:38
Andrew Crow
-
Super Simplex Build
Started by:
Peter Hoerlein
in: Work In Progress and completed items
- 7
-
14 October 2026 at 09:26
noel shelley
-
Farm Gate Lock.
Started by:
Grizzly bear
in: The Tea Room
- 15
-
14 October 2026 at 09:10
Nealeb
-
Best approach to pip removal
Started by:
Bill Phinn
in: Workshop Techniques
- 10
-
13 October 2026 at 21:11
Bill Phinn
-
New Member
Started by:
starjump
in: Introduce Yourself – New members start here!
- 4
-
13 October 2026 at 20:40
starjump
-
Motorcycle Centre Stand Pivot
Started by:
COLIN MARTIN 2
in: Related Hobbies including Vehicle Restoration
- 8
-
13 October 2026 at 20:14
COLIN MARTIN 2
-
Those back-room boys have been busy
Started by:
Michael Gilligan
in: The Tea Room
- 6
-
13 October 2026 at 17:55
old mart
-
Scroll Saw Blades for Steel
1
2
Started by:
James A
in: Workshop Tools and Tooling
- 14
-
13 October 2026 at 17:08
Emanuel Hernandez
-
John Haining 2″ Ruston
Started by:
Pixel_Porpoise
in: Help and Assistance! (Offered or Wanted)
- 2
-
13 October 2026 at 13:27
Roderick Jenkins
-
Octopus Heat Pump
1
2
…
4
5
Started by:
Michael Gilligan
in: The Tea Room
- 25
-
13 October 2026 at 12:35
Michael Gilligan
-
Angled d-bit / machinist reamer?
 Fulmen
  Tendor
 starjump
  southernchap
 JA
JA  duncan webster 1
  Pippin
  ian Holdsworth
  Trevor Drabble 1
 bjcolyer
  Nicholas Farr
 Werner Habbel
  andrew998
  ega
ega Andrew Tinsley
  Brian Baker 2
 mfengine1
  noel shelley
 Greensands
  Derek Drover
 michael howarth 1
  not done it yet
 larry phelan 1
  Bob Wild
  Andrew Crow
 Peter Hoerlein
  Grizzly bear
  Nealeb
 Bill Phinn
  COLIN MARTIN 2
  Michael Gilligan
  old mart
 James A
  Emanuel Hernandez
 Pixel_Porpoise
  Roderick Jenkins
Latest Issue

Newsletter Sign-up
Latest Replies
- Angled d-bit / machinist reamer?
- Lathe arriving – source some practice materials
- Lathe turning tool nomenclature
- Printed circuit boards
- Greenbat 3 ton battery loco
- CAST IRON JOINING
- Does anyone have any info about these vices
- Searching for roller chain with pitch 2.5 mm
- What Are the Most Practical Ways to Make Manufacturing More Sustainable?
- Home workshop site down?

