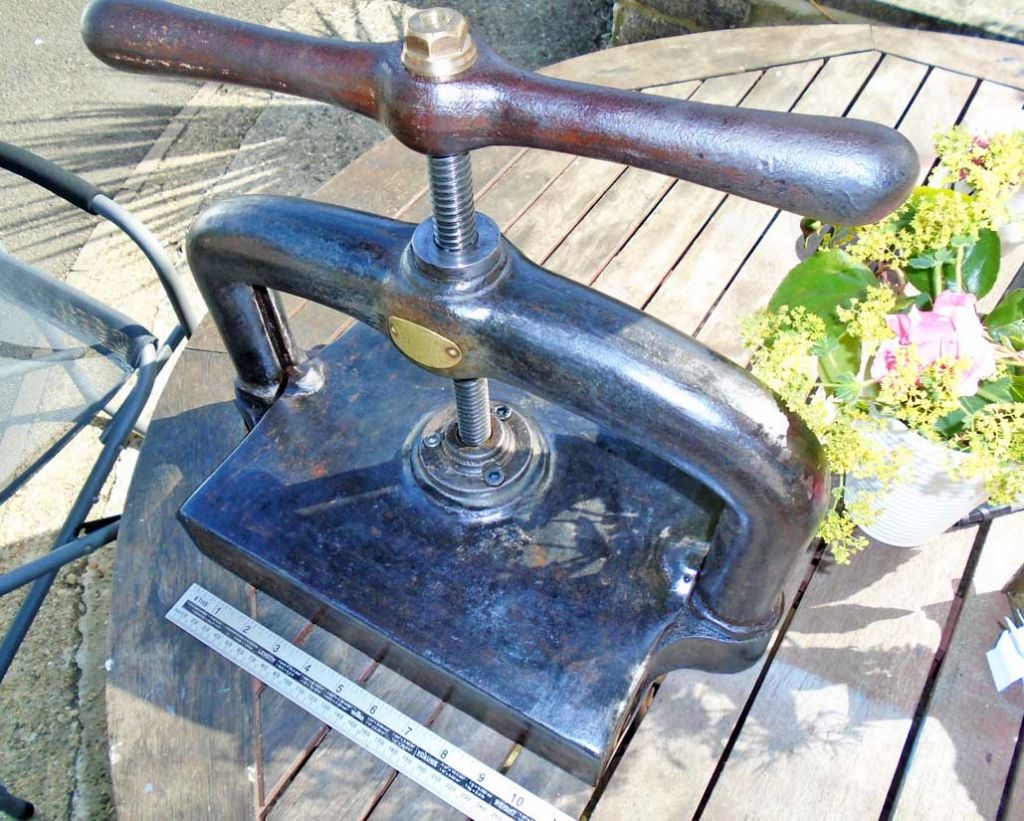
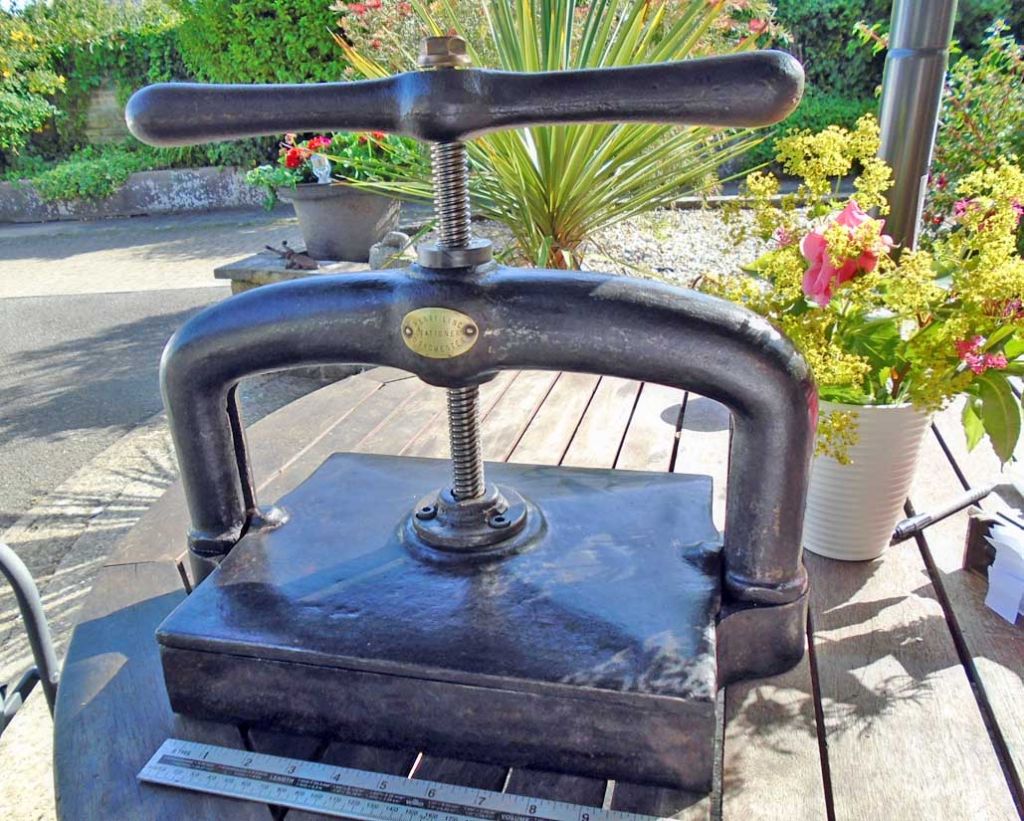
Bookpress 5tpi Square thread help please!

Advert

Bookpress 5tpi Square thread help please!

Home Forums Help and Assistance! (Offered or Wanted) Bookpress 5tpi Square thread help please!

Viewing 19 posts - 26 through 44 (of 44 total)
  • Author
    Posts
  • #415415
    Martin King 2
    Participant
      @martinking2

      Hi All,

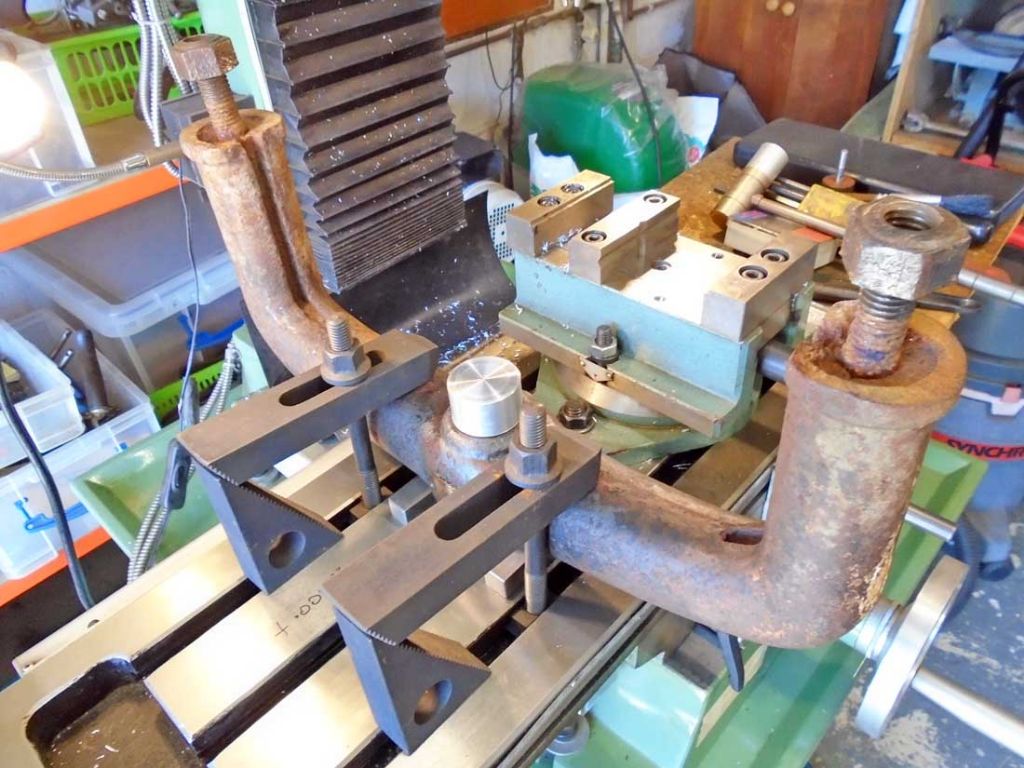
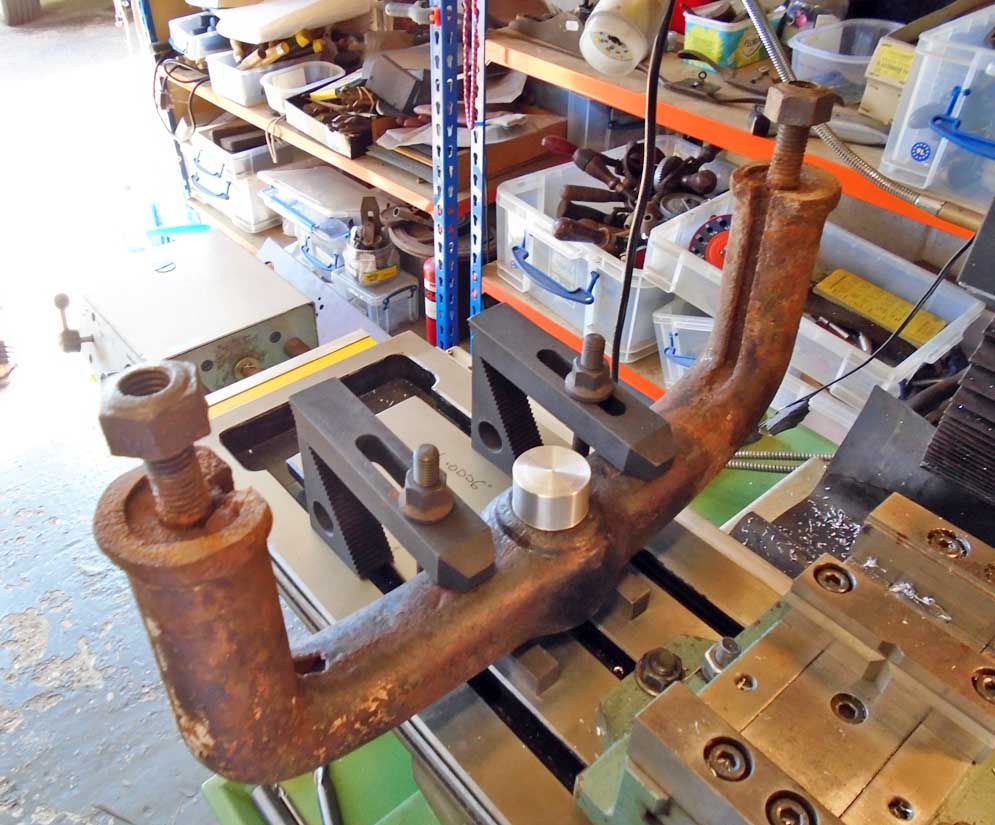
      Here is my first attempt at setting up the arch section for boring out whenb the nut and new screw arrives.

      I have made an ally plug to allow the centre to be found.

      setup 1.jpg

      setup 2.jpg

      I am concerned how rigid and safe this will be, also It is not sitting quite vertical and is difficult to tap into the correct place without it becoming loose. Should I try some alloy or lead sheet between the bottom and the small parallels perhaps?

      I have had to raise it up a little to allow the boring bar to clear at the bottom.

      Any advice is most welcome.

      Cheers, Martin

      Advert
      #415428
      ega
      Participant
        @ega

        Try vee blocks under the work instead of the parallels I think I see in your photo.

        Better still, clamp the work via U bolts as well.

        Edited By ega on 21/06/2019 17:29:38

        #415430
        Martin King 2
        Participant
          @martinking2

          ega, I did try vee blocks but the ones I have are way too small sadly. Will try and find some U bolts.

          Martin

          #415433
          Bill Phinn
          Participant
            @billphinn90025

            Martin, while you're at it have you considered extending the vertical stanchions with spacers in order to increase the available daylight? I know a number of bookbinders who have adapted their copy presses in this way, and I'm sure you could do a better job of it than most bookbinders, and for very little extra cost.

            I don't know how much daylight your copy press has got, but from the look of things about 3.5 inches. This is really very little space for bookbinding purposes. As I'm sure you know, books are placed between wooden pressing boards before inserting into a press of this kind, and the pressing boards will already account for around 1.5 inches of that 3.5 inches.

            #415436
            Tim Stevens
            Participant
              @timstevens64731

              If I were doing this job, I would be happier if the legs of the arch were stayed in some way, ie fixed to the bed so that they remained upright. Just in case anything started to go wrong – it might save a big problem.

              Cheers, Tim

              #415505
              Martin King 2
              Participant
                @martinking2

                Hi Tim, I thought about that and was going to make some large hardwood blocks recessed for the nuts that would clamp to the table but it would be way too high then to allow machining.

                Cheers, Martin

                #415518
                Gordon Smith 1
                Participant
                  @gordonsmith1

                  Why not lay it flat and use the lathe?

                  #415524
                  ega
                  Participant
                    @ega

                    Martin King 2:

                    Good luck with the U bolts.

                    I realised after suggesting this that the common type consisting of a U-shaped rod with threaded ends would be impossible to fit to the normal tee-slotted table but no doubt you spotted that, too!

                    The effective arrangement would be two studs with an inverted U (or yoke) on top retained by nuts.

                    I thought your idea of introducing some slightly compliant packing – lead, aluminium, etc – was a good one.

                    #415528
                    SillyOldDuffer
                    Moderator
                      @sillyoldduffer

                      Not just me being thick I hope, but isn't this an extra-difficult holding problem?

                      I wondered about a long wooden V block giving support underneath and machining some flats on top to give the clamps a stiffer anti-turning grip. The flats could be hidden later with body filler and paint. Glad it's not my problem!

                      Dave

                      #415537
                      John P
                      Participant
                        @johnp77052

                        This is the method i use when holding thin and awkward
                        and irregular shaped pieces for machining.
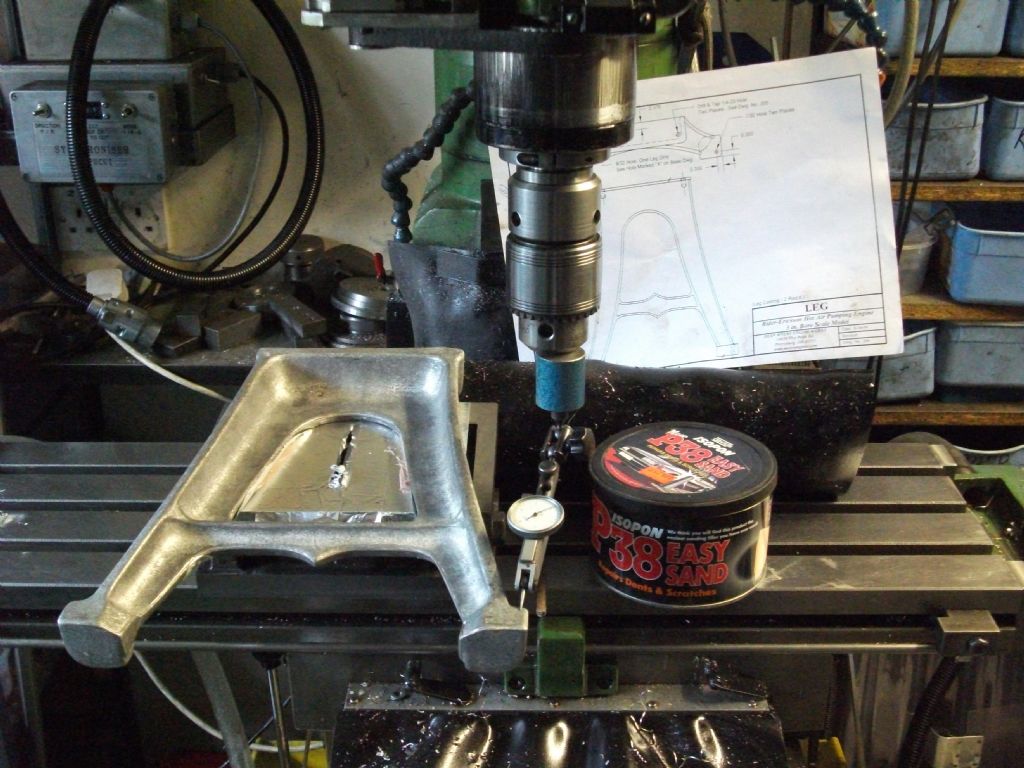
                        This part of a hot air engine had no flat surfaces and was
                        a thin aluminium casting ,using an adjustable angle plate
                        the top surface is covered with some aluminium tape ,the part is
                        attached to the plate using some plastic padding ,it is essential to
                        put some release agent on to the casting to release the part
                        easily ,a single clamp through the central slot in the angle plate
                        provides enough clamping force to hold the part for machining
                        as the plastic padding in this instance forms a shoe for the
                        part to sit in.
                        Used this method many times for these sort of jobs, works
                        every time.

                        Johnsoft clamping.jpg

                        #416034
                        Martin King 2
                        Participant
                          @martinking2

                          Hi All,

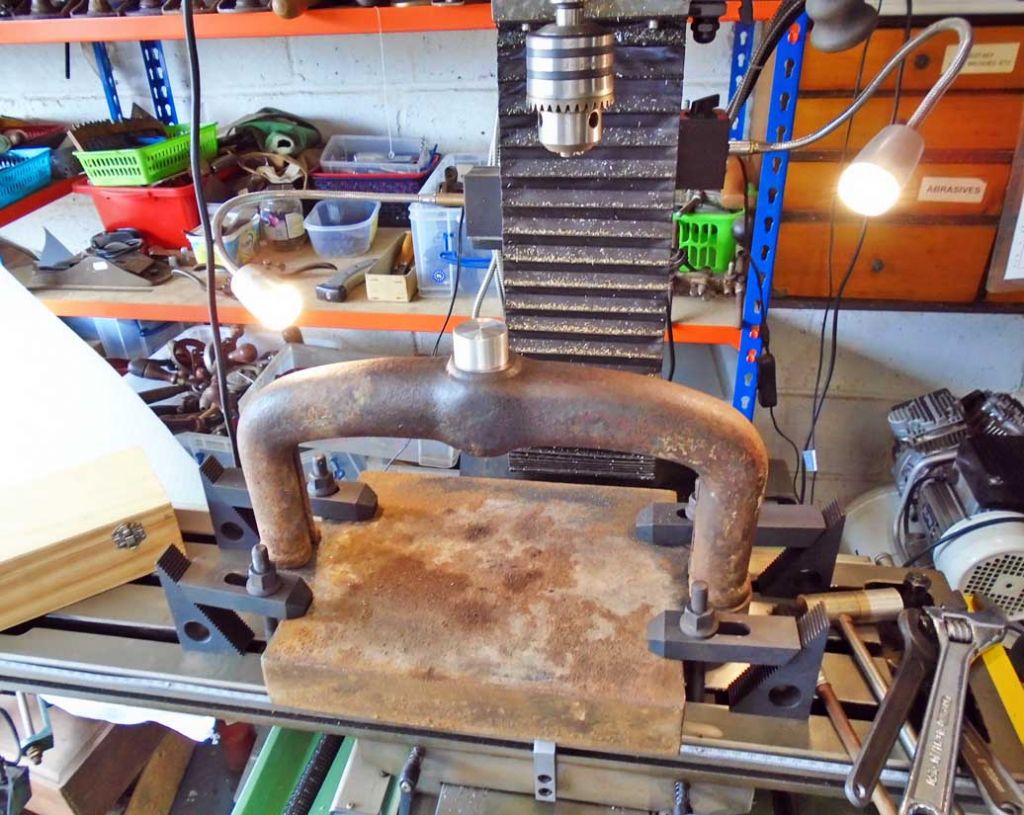
                          I did not feel happy with the first setup so have taken Tim Steven's advice and used the actual bottom section of the press to hold the arch section and clamped the whole lot to the table as shown.

                          setup 3.jpg

                          This is a lot more stable and managed to tke a skim cut off rough surface at the top odf the arch with a face cutter. It all felt very secure.

                          The only problem now is that there is not enough daylight to put my axis centring gauge in the drill chuck to get the centre point. Even with the shortest ext diameter pointer it hits the top of the arch.

                          Cheers, Martin

                          #416036
                          Simon Williams 3
                          Participant
                            @simonwilliams3

                            If you are short of head room, two suggestions:

                            1 Do it the old fashioned way with a dial indicator clamped to the quill, i.e. get rid of the drill chuck.

                            2 I hold the spigot of the centering indicator in a collet up the quill taper to save forfeiting several inches of head room. In my case the collet is MT2 but it means the top of the centering indicator is right tight under the nose of the quill.

                            I guess the accuracy of the centre isn't crucial to a few thou' so use a sticky pin in stead of the DTI.

                            HTH Simon

                            #416037
                            Jeff Dayman
                            Participant
                              @jeffdayman43397

                              Dowel pin and cigarette paper may do the job for finding centre to your aluminum plug within a couple of thou. Short, cheap, and has worked for well over a hundred years.

                              Forgot to mention I have used car body filler to encase and secure irregular parts for light machining. Coat the casting in spray furniture wax or proper release agent spray, then make a plywood box to contain filler and part. kitchen plastic wrap can be used on the bed of the machine to keep filler off it. encase the part to halfway across it, like a casting parting line, then wax the face of the filler and fill the other side.

                              Edited By Jeff Dayman on 25/06/2019 12:25:56

                              #416447
                              Martin King 2
                              Participant
                                @martinking2

                                Hi All,

                                Finally got the arch section bored out OK, had to turn it over for the last 5mm or so which was a bit nail biting!

                                Finished the leadscrew section and pinned both ends and loctited so all good there.

                                Gave all the castings a good going over with soft flap wheels which was a pretty filthy job, then used a phosphate coating and wax polish.

                                Looks a bit better now!

                                lingpress 3.jpg

                                lingpress 1.jpg

                                My thanks to everyone for all the help and advice, much appreciated.

                                Must be my week for presses, just got a much bigger one with column extensions but no normal length bolts so will have to make a couple.

                                Cheers, Martin

                                #416452
                                Brian Wood
                                Participant
                                  @brianwood45127

                                  That looks like a nice, satisfying outcome Martin, well done. A world away from how it was when you bought it

                                  Brian

                                  Edited By Brian Wood on 27/06/2019 18:55:50

                                  #416475
                                  David George 1
                                  Participant
                                    @davidgeorge1

                                    Nice job in the end and nice to see the results as so many don't let us see what happened.

                                    David

                                    #416525
                                    ega
                                    Participant
                                      @ega

                                      Very pleasing pictures!

                                      A small quibble: would it be more correct to replace the three cap screws at the foot of the screw with cheese heads?

                                      #416572
                                      Martin King 2
                                      Participant
                                        @martinking2

                                        Eva, You are quite correct, the original screws were cheese headed. Two of them were so seized that I had to saw them off from under the retaining plate. Then had to redrill into the old screws and tapped M8 to fit cap screws I already had. Did not want to spend more time on this as it is designed to make a profit!

                                        currently on you know where smiley

                                        regards, Martin

                                        #416593
                                        ega
                                        Participant
                                          @ega
                                          Posted by Martin King 2 on 28/06/2019 17:06:18:

                                          Eva, You are quite correct, the original screws were cheese headed. Two of them were so seized that I had to saw them off from under the retaining plate. Then had to redrill into the old screws and tapped M8 to fit cap screws I already had. Did not want to spend more time on this as it is designed to make a profit!

                                          currently on you know where smiley

                                          regards, Martin

                                          Fair enough – you were "pressed" for time and possibly a little "cheesed off" by the end of the exercise!

                                        Viewing 19 posts - 26 through 44 (of 44 total)
                                        • Please log in to reply to this topic. Registering is free and easy using the links on the menu at the top of this page.

                                        Advert

                                        Latest Replies

                                        Viewing 25 topics - 1 through 25 (of 25 total)
                                        Viewing 25 topics - 1 through 25 (of 25 total)

                                        View full reply list.

                                        Advert

                                        Newsletter Sign-up