ML10 tailstock

Advert

ML10 tailstock

Home Forums Beginners questions ML10 tailstock

Viewing 9 posts - 26 through 34 (of 34 total)
  • Author
    Posts
  • #395911
    Dave Springate
    Participant
      @davespringate

      Ok that’s made my mind up I’m going to take the quill out again and paint the tail stock while I’m at it. Anyone know how to remove the key that slides along the keyway ?

      Edited By Dave Springate on 12/02/2019 10:31:58

      Advert
      #395918
      Dave Springate
      Participant
        @davespringate

        Hi Hopper I'm going to remove it again and go over it again as you suggest. Alan Donovan, thanks for pointing that out (newbie error) I will measure it again once I have it apart and post my findings.

        Edited By Dave Springate on 12/02/2019 11:11:22

        #395942
        Hopper
        Participant
          @hopper
          Posted by Dave Springate on 12/02/2019 10:31:27:
          Ok that's made my mind up I'm going to take the quill out again and paint the tail stock while I'm at it. Anyone know how to remove the key that slides along the keyway ?

          Edited By Dave Springate on 12/02/2019 10:31:58

          Not sure on the ML10 but on the ML7 the key has a round pin sticking out the side of it that goes into a round hole in the tailstock body. You can see the end of the pin if you scrape the paint off the outside of the tailstock body next to the key. Tap the end of the round pin with a hammer and small drift and the key should pop out into the bore of the tailstock.

          #395957
          Dave Springate
          Participant
            @davespringate

            Thanks Hopper, the pin is visible so will give it a tap and see if that works, once I manage to get the quill out again. frown

            Edited By Dave Springate on 12/02/2019 14:20:53

            #396009
            Dave Springate
            Participant
              @davespringate

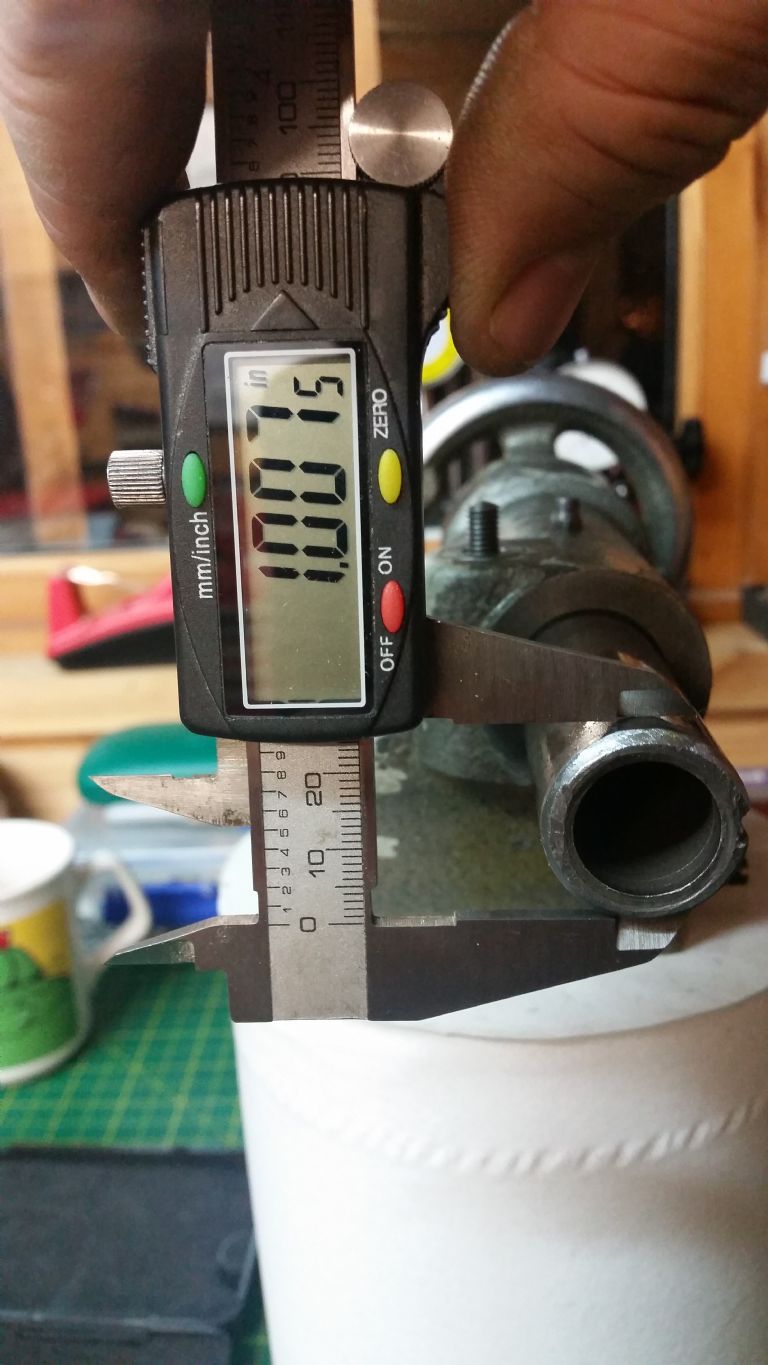
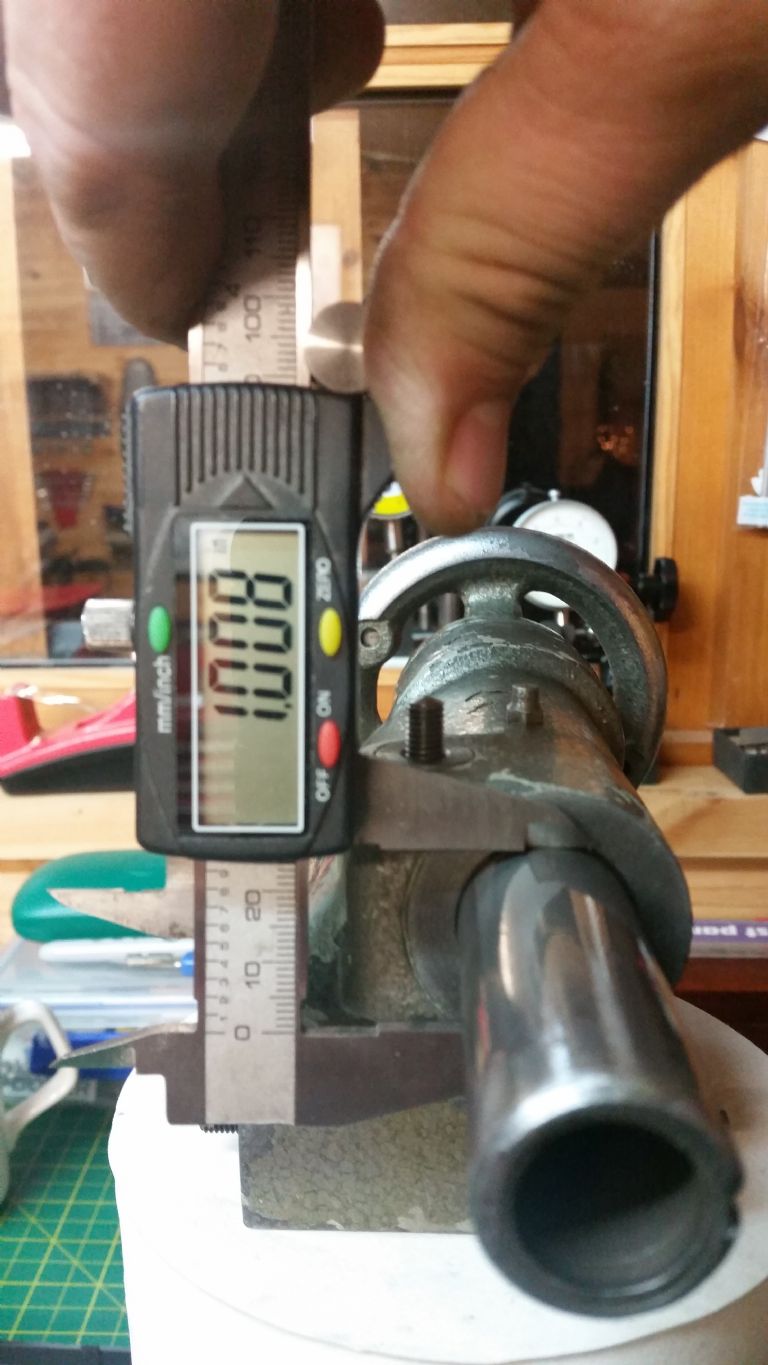
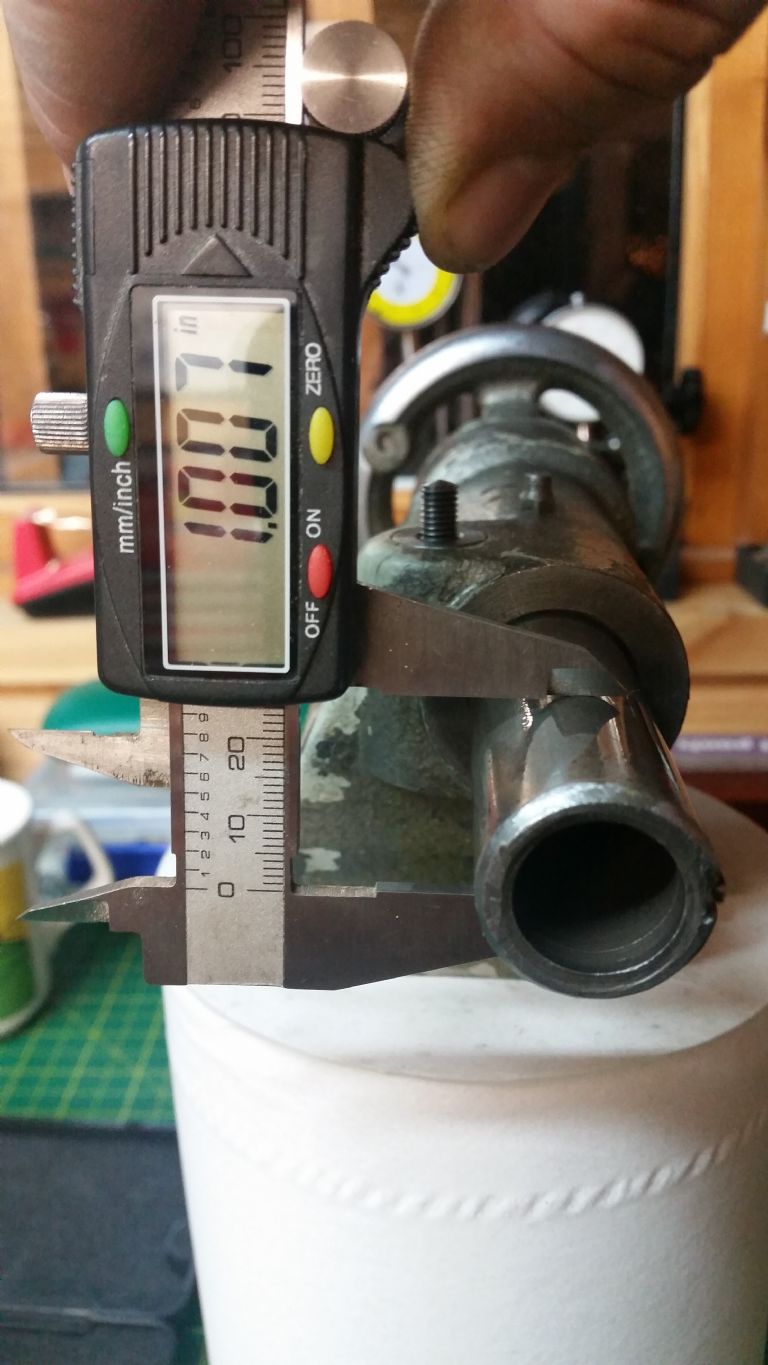
              Well, that was a productive evening, I started to strip the tailstock down again and unscrewed the lock handle and notice that the barrel that is underneath it was not freeing up when you loosen the locking lever. I took it out and have lightly rubbed all the edges with a bit of emery paper and cleaned it, put it back in and hey presto it's working as it shouldsmiley now the quill now has a nice smooth action. I've re-measured the quill avoiding the key groove and got a better measurement, sorry I don't own a micrometer yet so the cheapo digital caliper will have to do. Thanks for all your idea's on this.

              20190212_200139.jpg

              20190212_195930.jpg

              20190212_200111.jpg

              Edited By Dave Springate on 12/02/2019 20:19:16

              #396029
              Hopper
              Participant
                @hopper

                Well done. That's a good result. Our ML7 is much the same: when releasing the lock handle you have to give it a tap with the palm of your hand to make sure the locking blocks have released their grip on the quill. Seems to be nature of the beast. Your measurements look good. Half a thou is nothing to worry about.

                Carry on lathing!

                #396054
                SillyOldDuffer
                Moderator
                  @sillyoldduffer
                  Posted by Dave Springate on 12/02/2019 20:17:40:

                  Well, that was a productive evening, I started to strip the tailstock down again and unscrewed the lock handle and notice that the barrel that is underneath it was not freeing up when you loosen the locking lever. I took it out and have lightly rubbed all the edges with a bit of emery paper and cleaned it, put it back in and hey presto it's working as it shouldsmiley now the quill now has a nice smooth action. I've re-measured the quill avoiding the key groove and got a better measurement, sorry I don't own a micrometer yet so the cheapo digital caliper will have to do.

                  Well done, now you're an expert on ML10 tail-stocks!

                  I think your experience is typical of the fog through which new things are learned in an amateur workshop. Step one, an item of machinery that needs attention, perhaps it's broken, perhaps it just needs a clean and lube job. Step two, the discovery that how a machine works, how it's disassembled, and how it goes back together isn't always obvious. It might even be painfully difficult! Step three: experimenting, taking advice, and frustration. This is the dangerous stage: people reach for hammers, lose parts, and make horrible bodges. This is one reason it's important to check old lathes out before buying them – you don't know who else has been 'at it'. Step four – daylight. Once the machine is understood, or you guess correctly, it's easy. Step 5 – having done something like this before, you just get on with it, what problem?

                  Few tricks that may help. Don't underestimate the difficulty of a first attempt. Take the machine apart in an uncluttered area and put parts into trays that suggest the order in which they were removed. Take lots of notes and photographs – digital cameras make pictures cheap and easy. Have a good think and/or take advice before doing anything that requires force. Try and keep a sense of proportion – if something won't go back together and you don't quite know what you're doing, the most likely cause of the problem is you! If getting annoyed stop for a cup of tea. When severely irritated, take the day off.

                  On the subject of cheapo Digital Calipers, don't worry. They're good for most straightforward measurements in average workshops. Like as not a cheap model will be as accurate as an expensive one. Better calipers have other advantages – they don't lose zero (not having to keep checking and resetting them is important when time is money, less so to us amateurs), they have a smoother more reliable action, and – perhaps – better battery life. A positive advantage of cheap calipers is they can be cheerfully mistreated and replaced. Unlike an expensive caliper that stays permanently in a box because it's too good to use! When precision is important – like checking a suspect quill – a micrometer is more accurate than any caliper.

                  Good luck

                  Dave

                  #396056
                  AJW
                  Participant
                    @ajw

                    Nice useful lathe, good to see you have totally dismantled it for cleaning and reassembly, was it worn?
                    ‘Toying’ with the idea of one myself!

                    Alan

                    #396060
                    Dave Springate
                    Participant
                      @davespringate

                      Words of wisdom SillyOldDuffer and certainly looking forward to trying it out. I cant detect any looseness in the headstock bearings Alan and last night I also added the bottom bit of the tailstock and adjusted up the gib screws to get a nice fit. I only had a bit of 3in1 oil handy (I will get some of recommended oil soon) so lightly oiled it all, the tailstock base now slides nicely along the bed with no tight spots so I assume it should be ok. I do have a single little ding under where the chuck will sit but its not too bad and nothing hits it.

                      Thanks to all of you who offered opinions with this its all been very helpful and I'm sure I will be back with loads more questions over the coming months.

                      Thanks again !

                    Viewing 9 posts - 26 through 34 (of 34 total)
                    • Please log in to reply to this topic. Registering is free and easy using the links on the menu at the top of this page.

                    Advert

                    Latest Replies

                    Home Forums Beginners questions Topics

                    Viewing 25 topics - 1 through 25 (of 25 total)
                    Viewing 25 topics - 1 through 25 (of 25 total)

                    View full reply list.

                    Advert

                    Newsletter Sign-up