Lathe work

Advert

Lathe work

Home Forums General Questions Lathe work

Viewing 25 posts - 1 through 25 (of 49 total)
  • Author
    Posts
  • #27364
    John Baron
    Participant
      @johnbaron31275
      Advert
      #472182
      John Baron
      Participant
        @johnbaron31275

        Hi Guys,

        I have a question !

        If I set up a test bar in the four jaw chuck, in this case a known true 20 mm diameter bar 200 mm in length, so that I cannot measure any deviation when clocked at the chuck, but find that it is several thou out at the tailstock end 150 mm away.

        A micrometer tells me that the bar is exactly the same diameter along its length.

        Why !

        #472184
        Pete Rimmer
        Participant
          @peterimmer30576

          The bar might be 20mm round all the way along but it might not be straight. Apart from that the chuck might not be running true or the jaws might be worn or bell-mouthed.

          Try again with a different piece of stock (larger diameter the better), or flip it end for end.

          #472189
          Martin Connelly
          Participant
            @martinconnelly55370

            Tightening the jaws of a chuck on a bar rarely pulls it straight if it is not already straight. Set it true near the chuck and then tap the end away from the chuck with a soft faced mallet to get it to run true. Tighten the jaws fully and recheck.

            Martin C

            #472209
            Nigel McBurney 1
            Participant
              @nigelmcburney1

              If it is essential to hold the bar the four jaw and the jaws are worn ,then either put some shim between the jaw and the work,on all four jaws try various thickness of shim until the the jaw grips at both ends. or hold in the four jaw chuck and support the outer end in the fixed steady,with the end of the bar running true ,centre drill the end, Then hold the work in the four jaw backed up with a rotating centre in the tailstock. Should you at some time aquire a new four jaw chuck,then use the new chuck for bar work which is gripped over the whole length of the jaw and other decent work,retain the old chuck and use it for gripping rough castings,bits of plate which have to be held a the very front of the jaws and where some abuse may be necessary.

              #472220
              John Baron
              Participant
                @johnbaron31275

                Hi Guys,

                Thanks for the replies.

                After I posted I thought I would go into the workshop and take some pictures.

                I've added notes under the pictures.

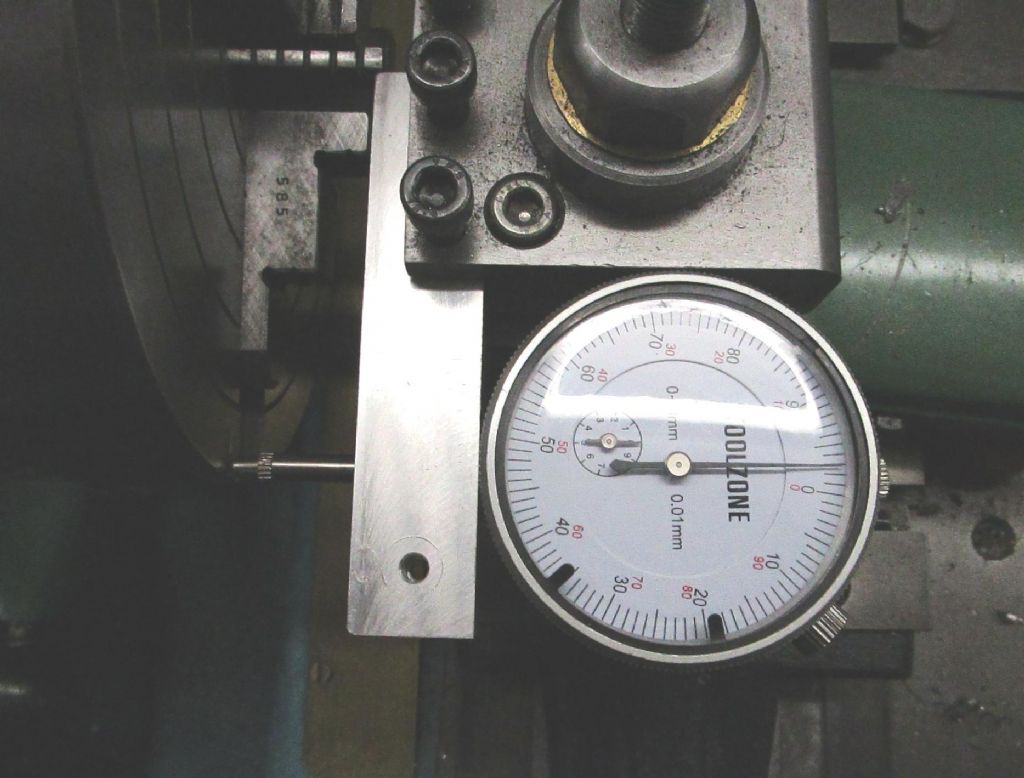
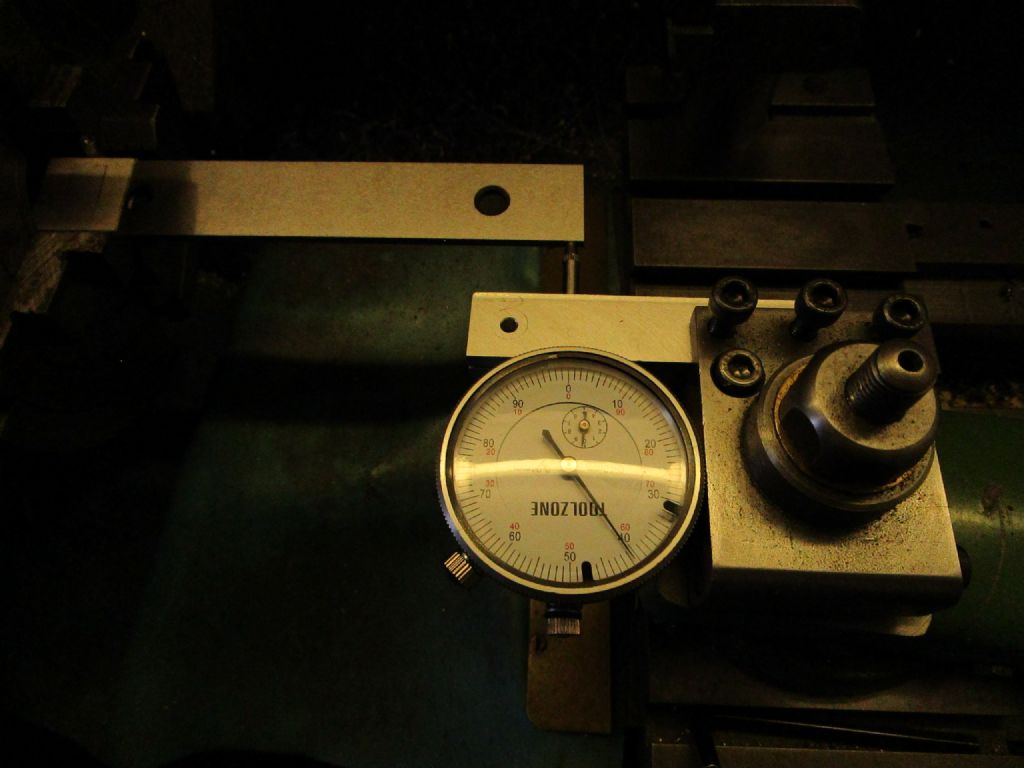
                16-05-2020-1.jpg

                This was the setup that I used to verify that the chuck was running true. The gauge isn't reading zero because I haven't started at this point.

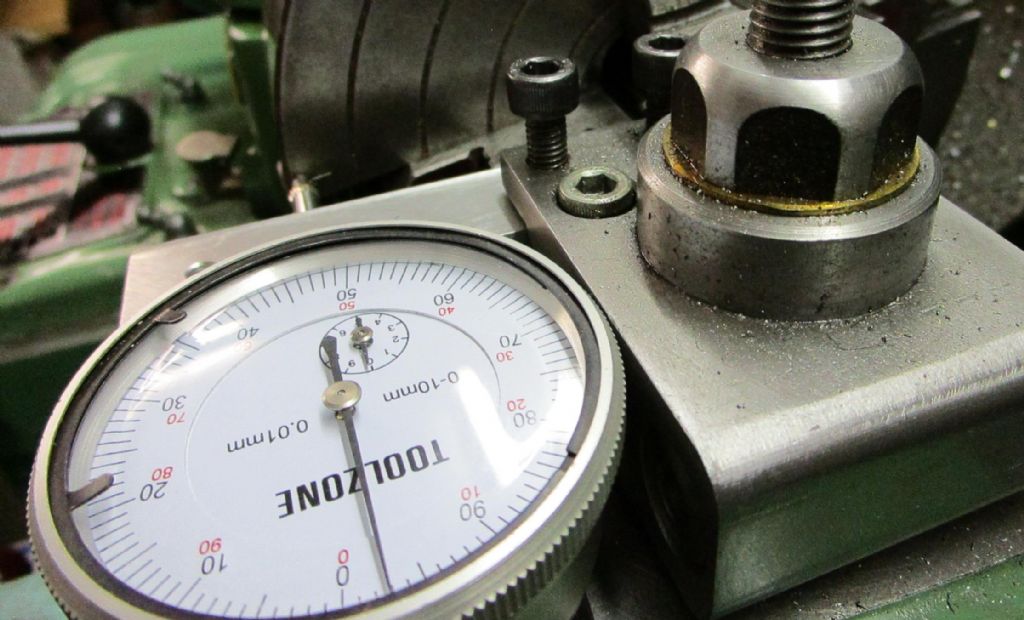
                16-05-2020-2.jpg

                Same setup from another angle. There is less than a needle thickness variation when rotating the chuck.

                This chuck is the original Myford one that has not been used from new until recently even though its 40 years old.

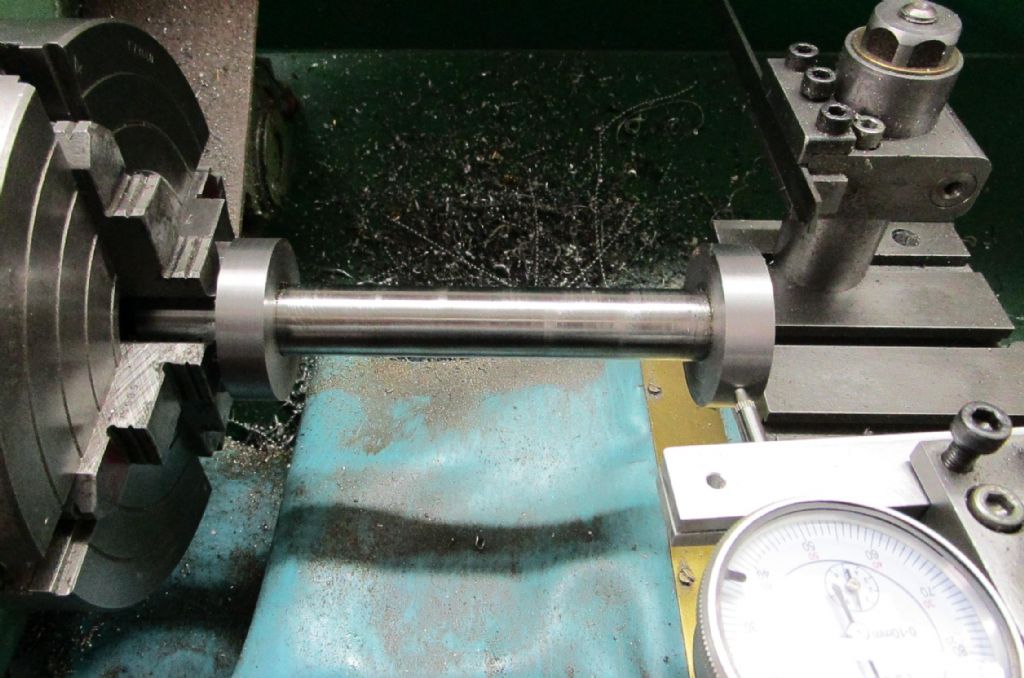
                16-05-2020-6.jpg

                This is the two collar setup that I used. Those collars are 44.0 mm diameter within a couple of tenths of a thou.

                The shaft they are on is a piece of 20 mm hydraulic piston rod.

                16-05-2020-3.jpg

                This is the collar nearest to the chuck with the lathe rotating.

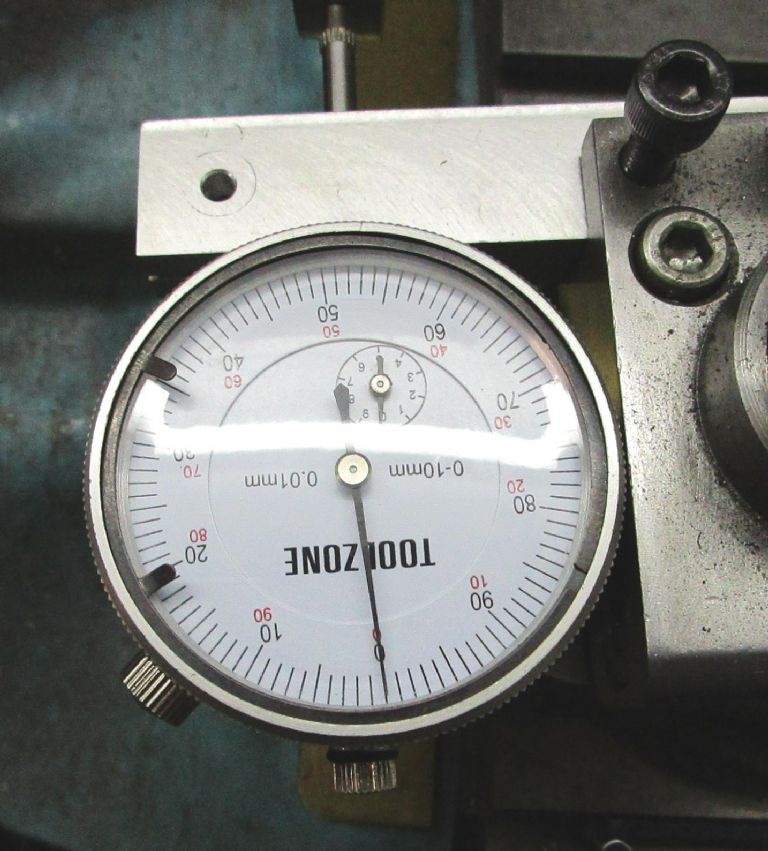
                16-05-2020-5.jpg

                This is the maximum deviation on the collar nearest the tailstock with the gauge zeroed. I did rotate the bar 90 degrees and remeasured. Oddly the amount of deviation barely changed.

                I can't get my head around why I see this behaviour. I only noticed this because I wanted to check that the lathe was still turning true.


                Edited By John Baron on 16/05/2020 17:41:34

                #472225
                old mart
                Participant
                  @oldmart

                  So both ends of the bar run true when the chuck is rotated, but the axis in plan view shows the headstock in not in line with the bed. I hope my understanding is correct. While you are set up, try the height of the bar from end to end also.

                  #472229
                  Martin Kyte
                  Participant
                    @martinkyte99762

                    Looks like the beds twisted. I bet if you took a skim off those collars they would end up different diameters. You need to adjust the lathe mounting.

                    regards Martin

                    #472231
                    Pete Rimmer
                    Participant
                      @peterimmer30576

                      Ok for that setup to return a reliable result you need to have turned both collars AND the piece of bar that's held in the chuck whilst holding the bar between centres, and verified that the collars are both exactly the same diameter after turning. Otherwise you do not know that the two collars are perfectly co-axial to the bar centreline.

                      Otherwise, if you're 100% sure that the bar is not bent try the dial gauge directly on the bar.

                      Edited By Pete Rimmer on 16/05/2020 18:29:52

                      #472233
                      old mart
                      Participant
                        @oldmart

                        Yes, twisted is a distinct possibility, and easier to correct than moving the head.

                        #472252
                        John Baron
                        Participant
                          @johnbaron31275
                          Posted by old mart on 16/05/2020 17:56:28:

                          So both ends of the bar run true when the chuck is rotated, but the axis in plan view shows the headstock in not in line with the bed. I hope my understanding is correct. While you are set up, try the height of the bar from end to end also.

                          Not quite. If I choose the closest point to the tool holder on the tail end collar and rotate the chuck the dial gauge reading moves to just over 30 divisions at the furtherest point.

                          Now I did rotate the test bar 90 degrees and the reading stayed the same, so the test bar is straight. Actually I tried rolling the two collar bar down a flat surface to see if it followed a curve. For all intents an purposes it doesn't.

                          Answering some other comments.

                          The lathe bed is not twisted ! That two collar test bar was skimmed in the soft jaws of the three jaw chuck and the collars are within a couple of tenths of a thou of each other.

                          One thing that does bother me though, is that I can true the end collar to read dead true, but when I come back to the chuck end, I'm back to it not being true, though its not as great a deviation, only about half that.

                          I'm about ready to bang my head against the wall…

                          #472283
                          old mart
                          Participant
                            @oldmart

                            Have you bored the soft jaws to take the test bar?

                            #472304
                            Hopper
                            Participant
                              @hopper
                              Posted by John Baron on 16/05/2020 19:28:26:

                              … I can true the end collar to read dead true, but when I come back to the chuck end, I'm back to it not being true, though its not as great a deviation, only about half that.

                              Sounds like your chuck jaws are bellmouthed and the job is able to move about a bit.

                              #472306
                              Perko7
                              Participant
                                @perko7

                                IMO either the headstock is not exactly aligned with the bed, or the bed is not straight, or the carriage is not running true on the bed. Is there some movement in the carriage at either end of it's travel? Did you take up any slack in the carriage before measuring? Do you use the leadscrew or the carriage handle to move the carriage? Either of these can introduce very small variations in carriage alignment. Does the test bar line up with a centre in the tailstock? If you run the test bar between centres do you get the same result? A few more tests like these will eventually direct you to the source of the error.

                                #472318
                                Hopper
                                Participant
                                  @hopper

                                  Lathe aligment seems ok as he says a skim cut across both collars shows no taper.

                                  #472321
                                  John Baron
                                  Participant
                                    @johnbaron31275
                                    Posted by old mart on 16/05/2020 20:57:50:

                                    Have you bored the soft jaws to take the test bar?

                                    Thanks for the comments Guys.

                                    Yes ! I have also checked the original piece of hydraulic piston rod in the soft jaws. It measures the same at both ends, so its not bent.

                                    Hopper:

                                    I'm coming to a similar conclusion ! However the chuck is essentially new and unused. I need to do some further checks on the chuck. I'm happy that the face is flat and true, but I want to check the slots on the chuck and the jaws themselves. I've a suspicion that the problem is something to do with the jaws. Though at the moment I'm not sure how I would do that.

                                    #472323
                                    Michael Gilligan
                                    Participant
                                      @michaelgilligan61133
                                      Posted by John Baron on 16/05/2020 17:40:49:

                                      Hi Guys,

                                      […]

                                      This chuck is the original Myford one that has not been used from new until recently even though its 40 years old.

                                      16-05-2020-6.jpg

                                      .

                                      So that’s presumably the 6” lightweight chuck that Burnerd made specially for Myford.

                                      They are usually excellent … but the defining word is lightweight

                                      Hopper’s suggestion of bell-mouthed jaw[s] is certainly worth checking thorougly

                                      Some ground stock and a pack of Plastigauge would seem to be a very good start.

                                      MichaelG.

                                      .

                                      Edit: ___  ‘ere we go: https://plastigauge.co.uk/about/how-plastigauge-works/

                                      Edit: ___ The genuine product does seem “reassuringly expensive” … so it might be worth searching for a clone.

                                      Edited By Michael Gilligan on 17/05/2020 06:30:36

                                      Edited By Michael Gilligan on 17/05/2020 06:36:01

                                      #472333
                                      Hopper
                                      Participant
                                        @hopper

                                        Or just grip the bar lightly in the chuck and see if you can wobble the far end about or see if there is daylight visible at the front ends of the jaws. Also check chuck is firmly seated on the collar on the spindle and the face there. And check headstock bearings, again by grasping end of bar and measureing with dial indicator up and down movement of the spindle.

                                        Or try wrapping a piece of paper or even a strip of emery cloth around the job where the jaws grab and tighten up the jaws and see if the wobble is reduced or eliminated.

                                        You can also check the jaws with an engineer's try square to see the gripping surface is square to the dovetail surface that runs in the chuck.


                                        Edited By Hopper on 17/05/2020 08:14:15

                                        #472346
                                        Pete Rimmer
                                        Participant
                                          @peterimmer30576

                                          Ok, there are a couple of things to point out here from the various comments.

                                          • If a part is running out then it's absolutely not a lathe alignment problem. The part turns with the spindle regardless of the direction it's pointing so we can totally discount bed twist or headstock alignment as the cause.
                                          • Measuring the diameter of the bar or the test collars will not tell you if the test bar is bent – nor will rolling it because if the two collars are turned at the same time they will be concentric to each other even if the bar holding them is bent like a banana.

                                          Given that the bar is turning true at the chuck jaws but not turning true further out I see several possibilities.

                                          1. The bar itself is not straight. Hopefully being a test bar it was turned between centres so it can be easily checked. If not, put the bar on vee blocks or (If it is properly centre-drilled) in a bench centre or between solid centres in the lathe. Turn the bar on the centres (with the lathe turned off) and check for runout at several points along it's length with a tenth-reading dial gauge. If there's any movement – make a new test bar or re-machine that one.
                                          2. The collars are not concentric to the OD of the bar. This is easy to check during the above test or simply by putting the dial gauge on the bar and then on the collar and making sure the readings match. Using two dial gauges side by side, on the bar and on the collar will tell you right away if they are concentric.
                                          3. The spindle is not turning true on it's own axis. Extremely unlikely but it does happen sometimes if there are problems with the bearings. You can almost discount this option but it's easy to check – put a dial gauge each end and find if it's running out. A bent spindle is also a possibility but even less likely.
                                          4. The spindle is running true but the chuck is not. Very possible and probably the most likely cause. It's a good quality chuck so start by checking the face of the chuck with a dial gauge. If the face checks out OK then check the OD. If that has no runout it's unlikely to be the problem. If you find that either the face or the OD have any runout at all then remove the chuck and check the registers. Use engineer's blue on the chuck register and a dial gauge on the spindle register.
                                          5. The chuck body runs true but the jaws do not hold the part straight. If all of the above check out OK, this is the last option. Time for a new chuck.

                                          Can't think of anything else that could be the cause, but someone else might.

                                          #472366
                                          John Baron
                                          Participant
                                            @johnbaron31275

                                            Hi Guys,

                                            Pete is the winner I think.

                                            [quote] The chuck body runs true but the jaws do not hold the part straight. If all of the above check out OK, this is the last option.[/quote]

                                            Comments below the pictures. By the way I somehow managed to take a video but the forum won't let me upload it.

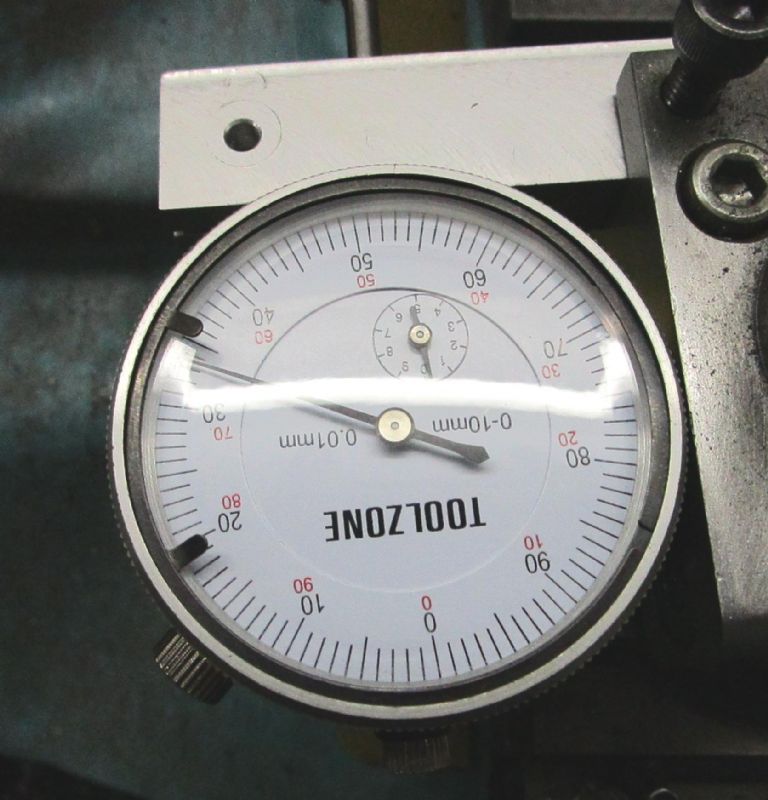
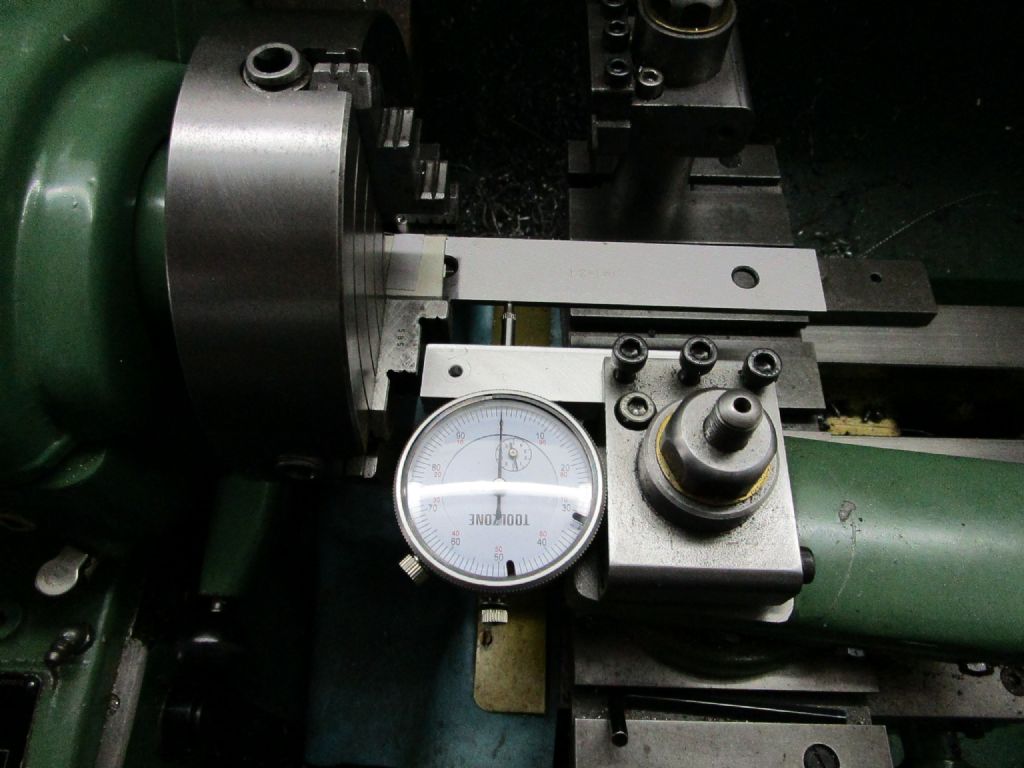
                                            17-05-2020-01.jpg

                                            I used a 1" inch parallel to check how straight the jaw was. I used a piece of postcard and a small dowel to hold the parallel tight up against the jaw face. I set the dial gauge so that it was level with the edge of the parallel.

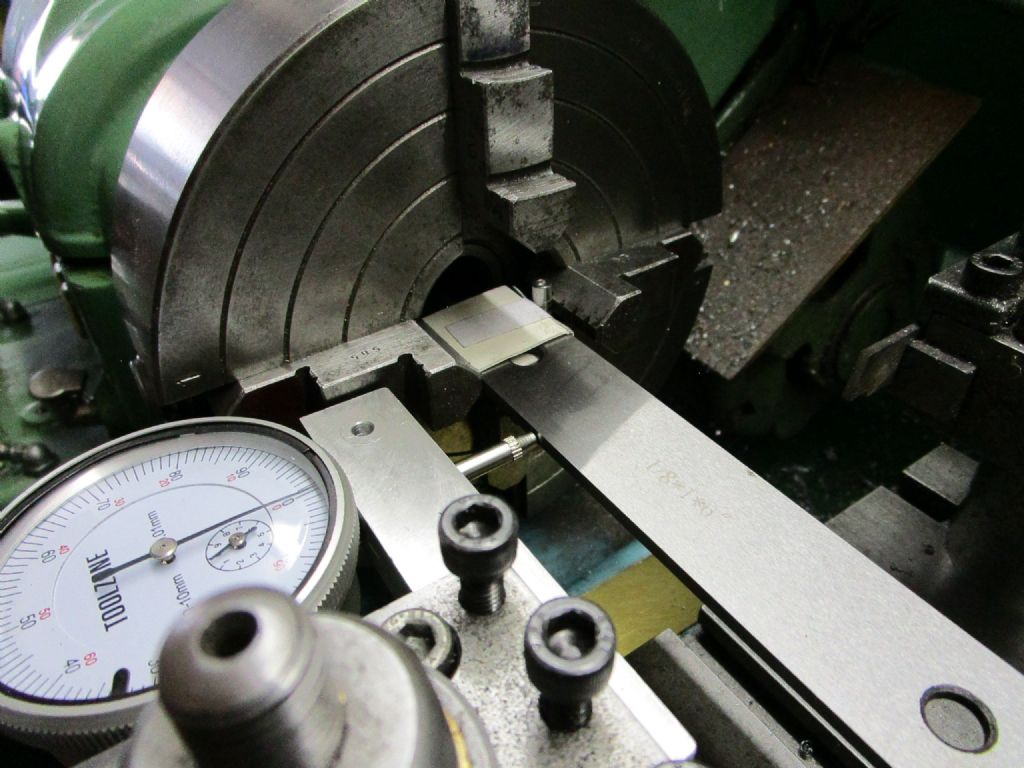
                                            17-05-2020-02.jpg

                                            In this picture you can see the arrangement. This is jaw No:4.  I used the lower jaw to support the parallel.

                                            17-05-2020-03.jpg

                                            In this picture I've run the dial gauge down to the end of the parallel. It shows that its moved away by about 0.6 mm.

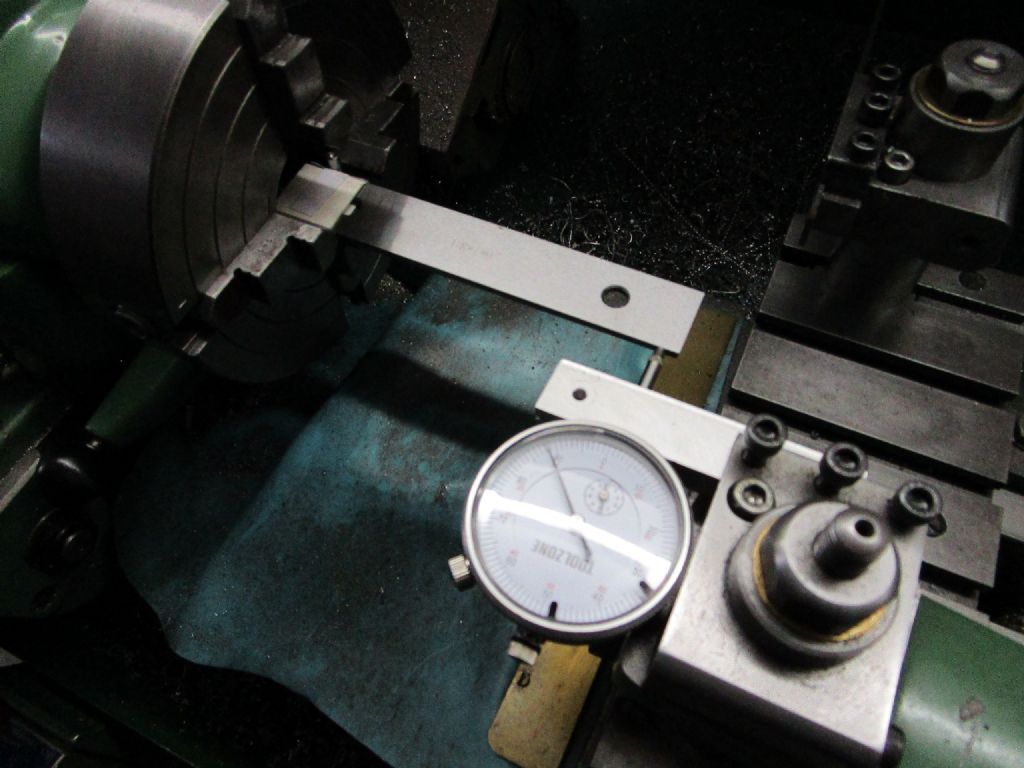
                                            17-05-2020-04.jpg

                                            Sorry about the colour, fluorescent lighting. This jaw No1 was the worst one. I stopped taking pictures at this point.

                                            All the jaws have some runout when measured in this way ! I'm not sure why but they all seem to run away from the tool holder. The worst ones were jaws 1 and 2. When I gripped the parallel by the flat sides you could see that the indentations in the cardboard were deeper on one side.


                                            It also explains why I can set the work piece true at either end and its out at the other.


                                            So it seems that I've got the source of the problem… badly or wrongly ground jaws. After all this time I doubt that there is any point in having a word with Pratt Burnard.


                                            To answer some questions:

                                            Yes the chuck is the original slim body one that was supplied with the lathe when I bought it directly from Myford. They arranged with Denford to deliver and set the lathe up. At the time Denford made bridgeport mini mills that were badged and sold by Myford. Its had three homes since I bought it.


                                            Thanks for all the comments and suggestions. Now to think about what I'm going to do about it.


                                            Edited By John Baron on 17/05/2020 10:48:16

                                            #472370
                                            Bazyle
                                            Participant
                                              @bazyle

                                              Just because a chuck is new it doesn't mean it will be perfectly aligned to the spindle nor that it's jaws will hold something true to the body without adjustment as mentioned in an early post. Even a collet doesn't do that.

                                              #472381
                                              KWIL
                                              Participant
                                                @kwil

                                                I think I would start by stripping and cleaning/examination of all the jaw faces, guide slots etc.

                                                #472386
                                                Pete Rimmer
                                                Participant
                                                  @peterimmer30576
                                                  Posted by John Baron on 17/05/2020 10:45:57:

                                                  Hi Guys,

                                                  Pete is the winner I think.

                                                  [quote] The chuck body runs true but the jaws do not hold the part straight. If all of the above check out OK, this is the last option.[/quote]

                                                  Comments below the pictures. By the way I somehow managed to take a video but the forum won't let me upload it.

                                                  17-05-2020-01.jpg

                                                  I used a 1" inch parallel to check how straight the jaw was. I used a piece of postcard and a small dowel to hold the parallel tight up against the jaw face. I set the dial gauge so that it was level with the edge of the parallel.

                                                  17-05-2020-02.jpg

                                                  In this picture you can see the arrangement. This is jaw No:4. I used the lower jaw to support the parallel.

                                                  17-05-2020-03.jpg

                                                  In this picture I've run the dial gauge down to the end of the parallel. It shows that its moved away by about 0.6 mm.

                                                  17-05-2020-04.jpg

                                                  Sorry about the colour, fluorescent lighting. This jaw No1 was the worst one. I stopped taking pictures at this point.

                                                  All the jaws have some runout when measured in this way ! I'm not sure why but they all seem to run away from the tool holder. The worst ones were jaws 1 and 2. When I gripped the parallel by the flat sides you could see that the indentations in the cardboard were deeper on one side.


                                                  It also explains why I can set the work piece true at either end and its out at the other.


                                                  So it seems that I've got the source of the problem… badly or wrongly ground jaws. After all this time I doubt that there is any point in having a word with Pratt Burnard.


                                                  To answer some questions:

                                                  Yes the chuck is the original slim body one that was supplied with the lathe when I bought it directly from Myford. They arranged with Denford to deliver and set the lathe up. At the time Denford made bridgeport mini mills that were badged and sold by Myford. Its had three homes since I bought it.


                                                  Thanks for all the comments and suggestions. Now to think about what I'm going to do about it.


                                                  Edited By John Baron on 17/05/2020 10:48:16

                                                  I'm sorry John but that test you show could be reading bed twist (or wear). All of the checks you make need to be rotational checks. Your issue is one of runout, so all your checks need to be for runout.

                                                  Edited By Pete Rimmer on 17/05/2020 11:32:54

                                                  #472396
                                                  John Baron
                                                  Participant
                                                    @johnbaron31275

                                                    Hi Pete,

                                                    I'm getting a bit lost now ! The idea behind that last run of checks with the parallel were intended to check that the face of the jaws was square to the axis of the lathe. Which they don't seem to be. I cant get my head around being able to swap to the three jaw and turn a bar parallel over roughly five inches in length with less than a couple of tenths variation from end to end.

                                                    The thing that really bothers me is why then when I check each jaw the parallel seems to move away from the gauge. To me that suggests that the jaws have a taper running away towards the back of the chuck. I've checked the guides in the chuck for each jaw and they are virtually the same reading from the outer to the inner. Maybe a division at most.

                                                    I'm going to take the jaws out and see what I can find, I did notice that the two jaws with the greatest deviation were the most loose in the guides.

                                                    Thanks for your help. Its very much appreciated.


                                                    Edited By John Baron on 17/05/2020 11:58:53

                                                    #472407
                                                    Neil Wyatt
                                                    Moderator
                                                      @neilwyatt

                                                      If both sides of the parallel run away from the tool holder then it isn't the chuck at fault.

                                                      If the parallel is parallel then opposite sides should go in opposite directions.

                                                      Something is not right with your test.

                                                      Neil

                                                    Viewing 25 posts - 1 through 25 (of 49 total)
                                                    • Please log in to reply to this topic. Registering is free and easy using the links on the menu at the top of this page.

                                                    Advert

                                                    Latest Replies

                                                    Home Forums General Questions Topics

                                                    Viewing 25 topics - 1 through 25 (of 25 total)
                                                    Viewing 25 topics - 1 through 25 (of 25 total)

                                                    View full reply list.

                                                    Advert

                                                    Newsletter Sign-up