Haimer Measurement Probes

Advert

Haimer Measurement Probes

Home Forums Workshop Tools and Tooling Haimer Measurement Probes

Viewing 19 posts - 26 through 44 (of 44 total)
  • Author
    Posts
  • #95637
    Pete
    Participant
      @pete41194

      Hi Andrew,

      A few thoughts that may be worth far less than you paid.

      I bought mine a couple of years ago from a U.S. dealer where imperial measurements, tooling, and what I'm most comfortable working with are much more comman than most other areas of the world. The shank on mine is a true 3/4" and I'm using a Bison built end mill holder for mine.

      After going back thru my Haimer manual and with a bit of thinking. Even though Haimer say's they should only be used with the same spindle you zeroed it to, just maybe zeroing your unit to the machine you use the most would be the best. Then with that preset zero, you could retest it in the second mill and record your deviation from a true zero in both X and Y? No it wouldn't be ideal since you'd have to always remember to compensate for that deviation on that machine. But these units are accurate enough that I think you could still depend on very good and accurate readings. Since I haven't yet used or tested mine on a second machine, I could easily have missed something with my logic.

      Due to the way their designed, a dead true tram on both your milling heads probably isn't required. But I did do that while adjusting mine just as a precaution. I'll also 100% agree about the manual and Haimers description for zeroing with the built in adjustments. Frankly they could have done better. My manual shows the use of a standard dial indicator for setting that zero, since my .0001 reading indicators are the D.T.I. type, that's what I used. And I hope you've got a real good .0001 reading, or it's metric equivellent DI or DTI that your positive will give 100% accurate and repeatable results.

      Your unit is newer and non digital, so the following may not match up exactly with what you have. The zeroing procedure in my manual do look to be the same for each type though. Setting for zero on these isn't something you want to rush. Maybe this will help you understand it a bit better? Think of the procedure as the same as what you'd do while setting an ultra precision ground rod in a lathes 4 jaw chuck for .0000 runout. It's basicly the same idea, except your now working vertical instead of horizontal, and with a lot finer thread pitch for those adjustments. From what I can tell, Haimer use an internal and fairly heavy spring loaded gimbal that the system uses to measure the probe movement. So, set up your DI or DTI with it's ball end centered as close as possible by eye to the center of the Haimers ball on the probe. Loosen all 4 of the Haimer adjustment screws, their located in the 4 holes just above the shank on your unit. (mine were pretty tight from the factory) Zero the dial on your DI or DTI. Ok, what you want to do is zero one axis at a time for either X or Y. We'll use X as an example. rotate your spindle by hand 180 degrees and check your DI or DTI indicator readings. Adjust those two Haimer adjustment screws till your indicator readings are the same each time you rotate the milling heads spindle by hand 180 degrees. Lock those screws down. Now do exactly the same for the Y axis screws. Your final check along with probably some very minor corrections on each of the adjustment screws is to rotate your spindle 360 degrees without getting ANY deflection on the DI or DTI indicators needle. It will take a bit of time to get this done. Good enough ISN'T for this job. You really do want .0000 if your patient enough. The really nice thing about this tool is that it doesn't depend on any real imperial or metric measurement system. Once the unit is properly adjusted for zero to your spindle centerline, then all your needing is to move your part edge for either axis till the needle or display reads zero. There's nothing to remember to do or compensate for like the standard offsets on the wobble type edge finders. Once your unit is properly adjusted for a dead on zero, then when the needle or display reads zero, that's exactly where you are. Your also not depending on these to "visually kick off" like the standard types do. Leaving aside a normal mills table flatness and overall machine rigidity. With one of these and a very good DRO, you can in a home shop replicate locational accuracys quite compareable to what some of the very accurate and more than very expensive jig borers like Moore Tools built could do.

      Given that your also using CNC, overtravel well beyond the units safety limits could I guess easily happen. I hope you ordered or will now order a spare probe. You can't damage the measurement unit itself unless you had a sudden and unexpected Z axis crash, but you could break the probe due to that overtravel on either X or Y.

      I really know less than nothing about CNC. But it's my understanding these can be used as a 3 axis probe system to manualy reverse engineer almost anything with a few different computer programs that are avalible. Yes it's much, much slower than something like a proper setup such as the Renshaw probe system uses. But it can be done with a lot more time involved.

      You have my apologys for how long this turned out to be. But I hope this helps a bit.

      Pete

      Advert
      #95640
      MICHAEL WILLIAMS
      Participant
        @michaelwilliams41215

        Probe needs to be set up so that it goes into the machine spindle in the same relative position each time .

        Auto centering or auto calibration :

        Set up a true cylinder on work table and roughly centre it under the spindle .

        With spindle and probe static use CNC functions to move cylinder around to approach probe in four different directions . Record coordinates (relative to any convenient datum) for each detect .

        Rotate spindle and probe through 90 – 180 – 270 and repeat each time .

        The coordinates at which detects occur for each of the positions and tests will be slightly different .

        Simple sums then gives the error offsets of the probe .

        Move cylinder under CNC control to calculated positions such that probe should detect it there and manually adjust probe so that it does .

        In many cases there is no actual need to adjust the probe to zero the errors . Just use offset functions to allow for them in programming .

        If CNC program allows math functions the whole process (apart from the manual adjustment ) can be automated .

        Also works with a true hole in a block instead of a cylinder .

        Four detects per four probe positions theoretically contains x2 data actually needed . Calibration procedures with less number detects can sometimes be adequate .

        Regards ,

        Michael Williams .

        High accuracy cyinders and spheres for calibrating probes are commercialy available but very expensive . A nice piece of ground bar faced off truly would be quite adequate .


        Edited By MICHAEL WILLIAMS on 03/08/2012 01:00:00

        #95643
        MICHAEL WILLIAMS
        Participant
          @michaelwilliams41215

          PS:

          When doing higher accuracy work with a probe a two stage detect is used :

          Approach work and detect contact and then back off and detect break of contact – the break of contact gives the more accurate position reading .

          #95646
          Pete
          Participant
            @pete41194

            Michael,

            No doubt your correct. Since I'm not using CNC, I had to post how I set up mine the old school way. I envy those of you who have the knowledge and abilities to fully utilise what CNC can do. I was more than happy the day I installed a X axis power feed.

            Pete

            #95715
            Anonymous

              Hi Pete,

              Thanks for the description of the zeroing method. I think it's beginning to fall into place. I'll have to re-read the Haimer leaflet in the light of your notes, which I think make things clearer.

              The next task is to test the Haimer again in the CNC mill, but this time taking care to clean everything beforehand. If I get a reasonable result (say less than 0.02mm) I'm going to assume that in due course I can zero that out with the adjustment screws on the unit. Once I'm happy with the CNC measurements I can concentrate on the Bridgeport. I'm pretty sure the appalling results on the Bridgeport are due to the spindle nose, but there are some tests I can do that may prove that. After that it's a question of cleaning up the spindle nose on the Bridgeport so that it runs true.

              Regards,

              Andrew

              #95716
              blowlamp
              Participant
                @blowlamp

                Anyone got one of these from Arceurotrade? **LINK**

                Martin.

                #95727
                Anonymous
                  Posted by blowlamp on 04/08/2012 00:45:47:

                  Anyone got one of these from Arceurotrade? **LINK**

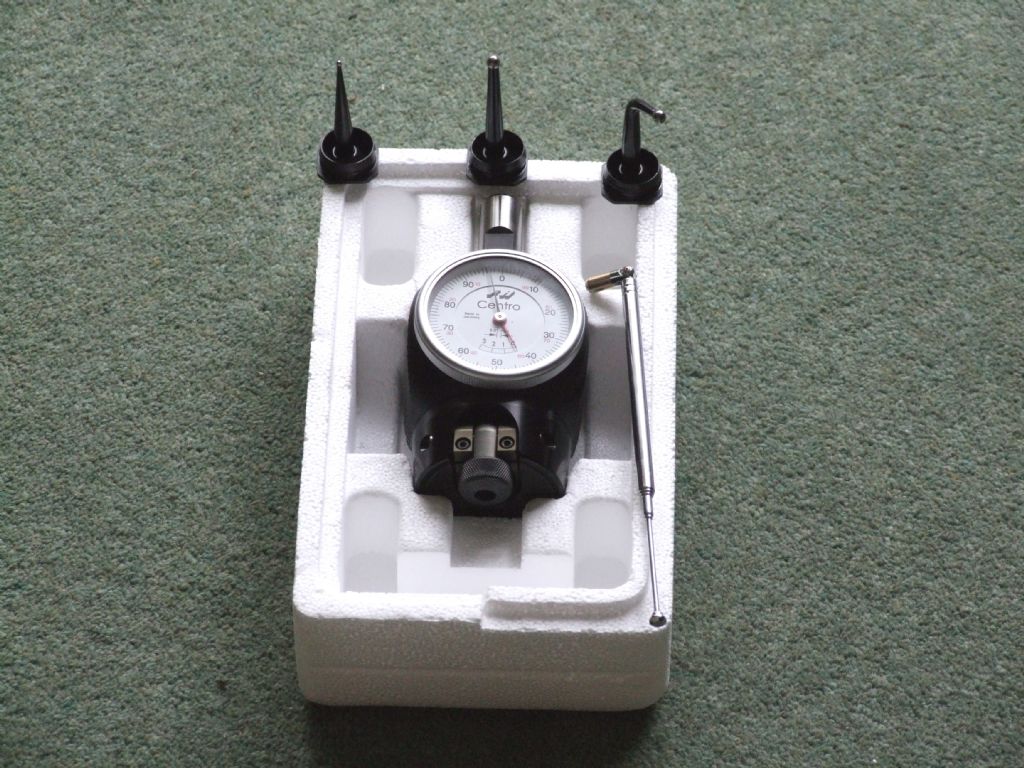
                  No, but I have recently bought the equivalent from Haimer:

                  centro.jpg

                  In due course, once I've tried it out, I'll report in.

                  Regards,

                  Andrew

                  #95779
                  Pete
                  Participant
                    @pete41194
                    Posted by blowlamp on 04/08/2012 00:45:47:

                    Anyone got one of these from Arceurotrade? **LINK**

                    Martin.

                    Martin,

                    Again my points are from a North American perspective. I spent a lot of time and did a lot of research before I spent the extra and bought the original Blake design. I've read numerous complaints about the item you show from North Amerian dealers. Again most people will post complaints far sooner than the ones will who are satisfied. I wish I could be more positive. Some have reported excellent results, others………………? To be fair I've also read the very rare complaint about the Blake units. Those did suprise me. Mine is well within it's readings and I wouldn't hesitate to depend on what my results are, and I'm more than happy with mine.

                    One thing to remember, due to their design, they aren't a true measurement system, just like a DTI it isn't for accurate distances in comparision to a standard analog or digital indicator. Their designed to center I.D. and O.D. parts. Your looking for a null or zero deflection on the needle. They do work very well if their accurate. If you do have a good dependable DTI, it's easy enough to test them. If it did turn out to be inaccurate? It would take a highly skilled home machinist with at least a tool post grinder.

                    Right now I don't have the tooling or real knowledge to do those improvements if they were needed.

                    Pete

                    #95791
                    Anonymous

                      I've made a few more measurements using the Haimer Zero Master; same technique as before.

                      On the CNC mill the maximium runout was 0.02mm. It is difficult to tell exactly, as I'm relying on the Mach3 screen readout for comparison. At each step one can hear the stepper motor clicking, and the display increments, but the Haimer needle doesn't move. After a few clicks the table might suddenly move 0.005-0.0075mm. I guess this is a static friction versus dynamic friction effect, plus a little bit of free play in the drive system.

                      I also did a measurement on the Bridgeport, but with the holder not pulled up tight on spindle nose. Total error in this case was 0.03mm. Again not easy to judge as the resolution of my DRO is 0.005mm.

                      From these tests it seems clear that the spindle nose on the Bridgeport is a bit out. As for the rest of the measurements I feel that I'm operating at the limits of my equipment. Time to cogitate; I feel that if I jump in a try to adjust the errors I'll end up chasing my tail as some of the 'errors' will be in the measurement system itself.

                      I have adjusted the Z axis zero on the Haimer and I tested that against a 10mm gauge block on the CNC mill, pretty much spot on, better than 0.005mm indicated.

                      Regards,

                      Andrew

                      #96623
                      Anonymous

                        Finally got to test the Haimer Centro this evening, now that I have a 16mm R8 collet to hand. I followed the instructions and centred on a hole in an aluminium plate. The hole had been previously bored in the lathe as part of a jig, so I am assuming that it is round to a better degree than I can measure. Once the movement of needle on the Centro was minimised I zero'd the DRO in absolute mode. I then replaced the Centro with a 3/4" collet and a short length of 3/4" silver steel. Having put the DRO in incremental mode I then zero'd on the hole centre by using my normal method. In other words, touch the silver steel on one side, by trapping a fag paper, and zero the DRO. Then touch the opposite side and use the '1/2' function on the DRO to go to half way, ie, the centre. Repeat for the other axis.

                        I then turned the handles until the DRO showed zero according to the Centro and switched from absolute to incremental mode to see what the difference was. The answer was 0.025mm in X and 0.05mm in Y. I would have hoped for better than that. The question is, which one, if either, is accurate?

                        Some possible errors are: the runout on the silver steel at the tip is about 0,01mm. Judging the degree of 'trap' on the fag paper is open to error. The fag paper measures 0.02mm thick. If you overshot the touch point with the silver steel slightly, one might change the alignment of said silver steel very slightly.

                        I've had a think about how I check the results. This is what I've come up with. I bore a recess in a flat plate on the lathe. I then use one or other of the centring methods to set the DRO at zero on the nominal centre on the mill. I then drill/bore a smaller hole right through with the DRO set on zero. Then replace the plate in the lathe and set it to run true using the original bored recess. The DTI can then be used to measure the runout of the smaller bored hole. This should tell me what the concentricity between the holes is, and hence the accuracy of the initial centring.

                        Regards,

                        Andrew

                        #113830
                        Anonymous

                          After a foul up at work today, on the part of the project manager, I found myself with a couple of hours to kill, so I decided to sort out the spindle nose on the Bridgeport mill.

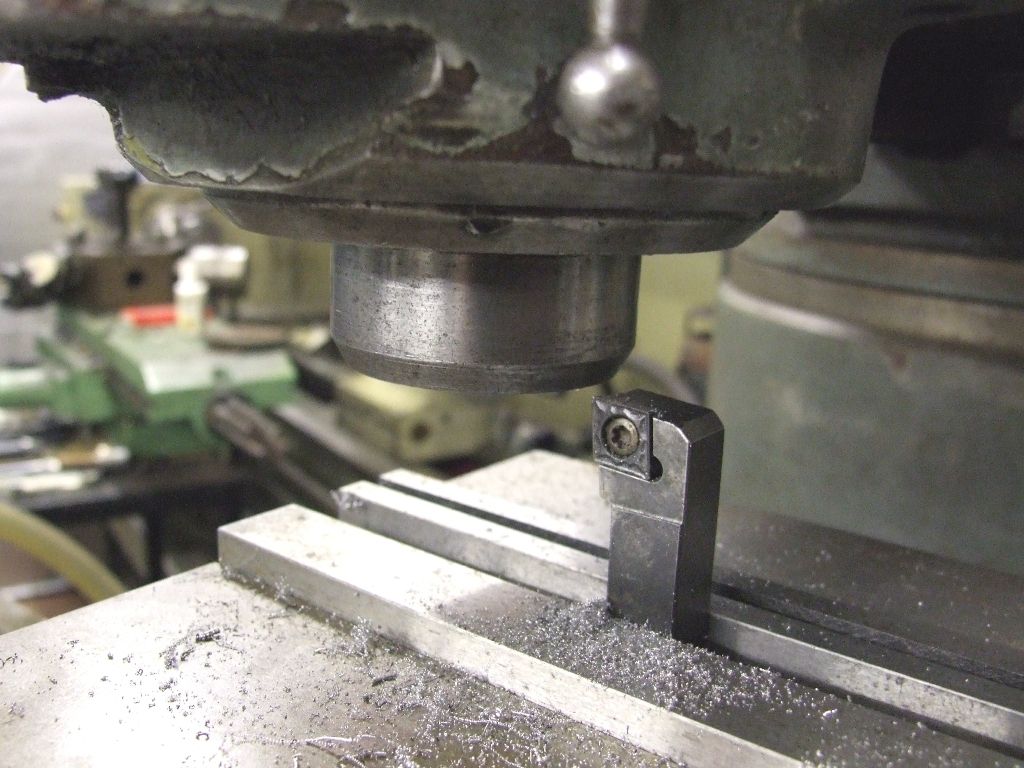
                          First, I trammed the mill in X and Y. I don't seem to be able to achieve the miniscule figures that other people report, but I was happy with ±0.02mm over 200mm diameter in both X and Y. Next a test on the bottom of the R8 spindle confirmed that the nose was repeatably running out ±0.01mm. Using a carbide tool in the machine vice I skimmed the bottom of the spindle, like this:

                          spindle_skim.jpg

                          After skimming the spindle runout barely moved the DTI, so around ±0.002mm? Using the Haimer Zero Master now gave an error of around ±0.015mm, as measured on the DRO, rotating the spindle round the four cardinal points relative to the first point. That is getting close to the limit of what I can measure, given that the resolution of my DRO is 0.005mm. The quoted accuracy of the Haimer is ±0.01mm so the results are probably as good as it is going to get, and more than adequate for my needs.

                          Regards,

                          Andrew

                          #113892
                          Anonymous

                            I've now also done the experiment using a plate with a hole bored in it to test the accuracy of the Haimer Centro. I did the test as described in a previous post. The result is that the second hole partially bored on the centre of the first, as determined by the Centro, had a TIR wrt the first hole of 0.15mm. Not good.

                            I then repeated the experiment, but using my method of a piece of silver steel, a fag paper and the '1/2' function on the DRO to determine the centre of the first hole. The TIR of the second hole in this case was 0.13mm. Not good either.

                            From these results my working hypothesis is that the Centro and fag paper method of centring are consistent, but there's a systemic error somewhere in the system to do with boring the second hole.

                            Regards,

                            Andrew

                            #113894
                            Les Jones 1
                            Participant
                              @lesjones1

                              Hi Andrew,
                              You have probably done these tests but I will suggest them anyway. After boring the second hole did you check that the first hole showed as still being concentric while still on the mill. My line of thinking is that the cutting forces moved the table after setting things up.

                              Les.

                              #113914
                              Anonymous

                                Les,

                                Errr, actually no I didn't. blush I rather assumed that since the DRO still showed zero in X and Y, and both axes were locked during boring, the table wouldn't have moved. Nevertheless, it's a good idea, and will be the next thing to try.

                                Regards,

                                Andrew

                                #113938
                                Les Jones 1
                                Participant
                                  @lesjones1

                                  Hi Andrew,
                                  I didn't think about the fact that you would have noticed the change in the DRO reading. The other two possible causes are the work moving on the table which we can probably discount and the knee moving with respect to the mill body. The fact that the knee would be in a lower position when the boring head was fitted than its position when you lined things up with the short length of silver steel made me think of another possible cause. If the spindle axis was not parallel with the Z axis it would change the centre alignment at different knee positions. I suggest the following. Verify the concetricity of the first hole straight after centering it using a dial gauge mounted on the spindle with its probe the same distance from the spindle nose as the tip of the piece of silver steel. (I don't see that this can possibly be wrong.) Next fit the boring head but mount a dial gauge on it with the probe at the same distance down as the tool tip would be. Check to see if the first hole still seems to be concentric. If not there could be the axis alignment problem or the knee has moved the table in the X and/or Y directions when it was lowered. I hope you read this before trying to bore the second hole as it will save wasting any more bits of metal.

                                  Regards Les.

                                  #120294
                                  Anonymous

                                    A further update on the Hamier Centro: I have recently cut 63 and 69 teeth 6DP gears as part of a differential centre for a friend of mine, who is making the same traction engine as me. The jig I made to cut my gears uses the differential centre to hold the gear rings. My friend had machined all the parts, but not drilled and tapped the nine holes on a 8.375" PCD that hold the whole assembly together. So it seemed like an ideal chance to test out the Haimer Centro to set the DRO to zero over the centre of the assembly before drilling and tapping.

                                    A noteworthy thing is that I got the needle on the Centro to move rather less than one division when centred. On my previous experiments with an aluminium test piece the best I could get was 4-5 divisions. A check with a length of silver steel in a collet in the spindle, and a fag paper, gave a maximium variation on the DRO at the four cardinal points of half a thou. That's worse than the Centro claims, but the 'trap a fag paper' measurement is a bit subjective. If I'm centred within half a thou I'd be pretty happy. The finish on the cast iron differential centre didn't seem much better than on my aluminium test piece, but clearly something was amiss with my test piece.

                                    When I drilled and tapped the assembly I made a boo-boo and got the differential centre back to front, so on final assembly I turned it over. All the screws fitted, so I must have been pretty well centred. The screws are M6, and the clearance holes are drilled 6mm.

                                    I've sort of been ignoring the Centro recently, but this exercise has given me some confidence in it, and a feeling that may be I hadn't wasted my money after all.

                                    Regards,

                                    Andrew

                                    Edited By Andrew Johnston on 20/05/2013 20:26:05

                                    #130718
                                    Anonymous

                                      Update: I have recently countersunk/drilled/tapped a set of 6 holes in a circular pattern in three parts that screw together at final assembly. The parts were drilled independently, using the Centro to pick up the central bore of each part. The holes are drilled 6.0mm for M6 screws, which fit in any orientation chosen at random. Overall I'm now pretty happy with the Centro and the accuracy I'm able to achieve with it.

                                      Regards,

                                      Andrew

                                      #238026
                                      3dtech tech
                                      Participant
                                        @3dtechtech23360

                                        I only have manual mills with DRO and got sick of using a combination of edge finders, coax indicators, and dial indicators, to locate edges, hole centres, align the vice and table etc etc. Since I got the Haimer I've not used anything else, just pop it in the collet chuck and it'll do the lot.
                                        I use the vertical movement to reset the swivel table square, or the top of a job in the vice, something a touch probe wouldn't be good at.

                                        additive manufacturing india
                                        #238036
                                        Anonymous
                                          Posted by 3dtech tech on 09/05/2016 10:00:10:

                                          I only have manual mills with DRO and got sick of using a combination of edge finders, coax indicators, and dial indicators, to locate edges, hole centres, align the vice and table etc etc. Since I got the Haimer I've not used anything else, just pop it in the collet chuck and it'll do the lot.

                                          Hmmmm, I'll bet he's never even seen a Haimer probe let alone used one.

                                          Andrew

                                        Viewing 19 posts - 26 through 44 (of 44 total)
                                        • Please log in to reply to this topic. Registering is free and easy using the links on the menu at the top of this page.

                                        Advert

                                        Latest Replies

                                        Viewing 25 topics - 1 through 25 (of 25 total)
                                        Viewing 25 topics - 1 through 25 (of 25 total)

                                        View full reply list.

                                        Advert

                                        Newsletter Sign-up