Colchester Student Mk1 Won’t Start

Advert

Colchester Student Mk1 Won’t Start

Home Forums Help and Assistance! (Offered or Wanted) Colchester Student Mk1 Won’t Start

Viewing 25 posts - 376 through 400 (of 797 total)
  • Author
    Posts
  • #472928
    Phil Whitley
    Participant
      @philwhitley94135

      Herman, I did use the Paragon paints colchester green, it is a bit pricy, but very good quality, it is thinned with naptha, not white spirit, and I believe this gives it better oil resistance. I used slightly less than one litre on my lathe, but I was spraying over a primed and denibbed surface, you use a lot less top coat that way, I also used the paragon thinners.

      Richard, start at the back of the lampholder, and see if you have a voltage there, then follow back to the led power supply. Put a 13a plug on the led supply and see if that works, I think by then you will have found the fault. also check the bulb with a power supply to check it is ok. if you have voltage at the lampholder, check that both pins are free on their springs and can be compressed and pop out again.

      Phil

      Advert
      #472931
      Herman van der Merwe
      Participant
        @hermanvandermerwe76509

        Posted by Phil Whitley on 19/05/2020 12:29:14:

        Herman, I did use the Paragon paints colchester green

        Would you mind scanning the paint and get the code to me? You can use PointPaint if you have an iPhone or Color Grab for Android.

        @Phil what primer did you use? White or grey colour?

        @Richard, as @Phil said start tracing at the output of the transformer up to the two pins in the holder. Also check that the switch is working!

        #472945
        Howard Lewis
        Participant
          @howardlewis46836

          I'd be a bit wary of sealing the Loctite bottle!

          It is an anaerobic, so shutting off from oxygen is likely to cause it to cure. Probably better to leave the cap loose so that it doesn't seal.

          I have bottles which are never sealed tight, and are still useable, and effective, YEARS after their "expiry" date. Not the official recommendation, but I believe that a Loctite engineer once said that as long as it was liquid, it was useable.

          Howard

          #472982
          Herman van der Merwe
          Participant
            @hermanvandermerwe76509
            Posted by Howard Lewis on 19/05/2020 13:36:36:

            I'd be a bit wary of sealing the Loctite bottle!

            It is an anaerobic, so shutting off from oxygen is likely to cause it to cure. Probably better to leave the cap loose so that it doesn't seal.

            I have bottles which are never sealed tight, and are still useable, and effective, YEARS after their "expiry" date. Not the official recommendation, but I believe that a Loctite engineer once said that as long as it was liquid, it was useable.

            Howard

            You are correct Howard, but then your little bottle of Loctite has never fallen over and the liquid running into the thread of the cap. Once the thread is sealed, good luck with opening the cap. The pin creates a seal at the top, so that no liquid gets into the cap threads. There is more than enough oxygen in the bottle itself to keep it liquid. Just a tip from a Loctite engineer I have been using for more than 35 years …

            It seems LOCTITE® 222 is what you are after.

            #472987
            Richard Kirkman 1
            Participant
              @richardkirkman1

              Thanks Howard

              We finally have light!!!!!!!!!!!

              It's taken a couple of months but we're finally there

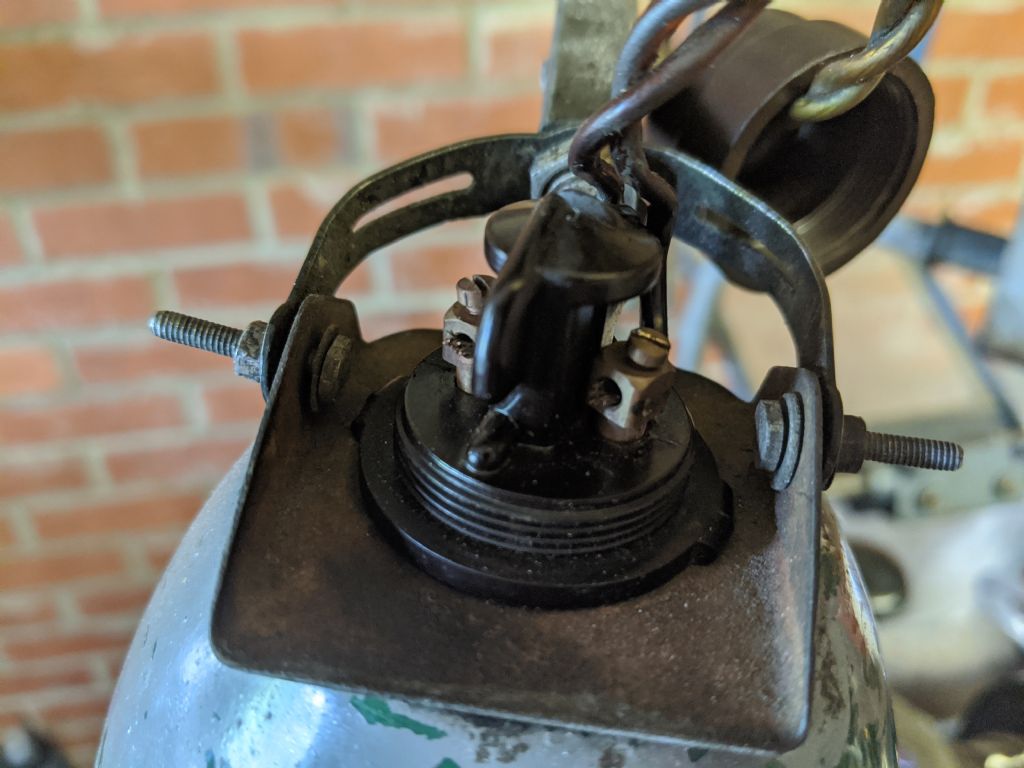
              So, I started by taking the light out and checking continuity for everything

              img_20200519_132815.jpg

              Then I went in the cabinet and checked there. Everything had continuity and was working. Absolutely no idea what goes on or really how to check voltage.

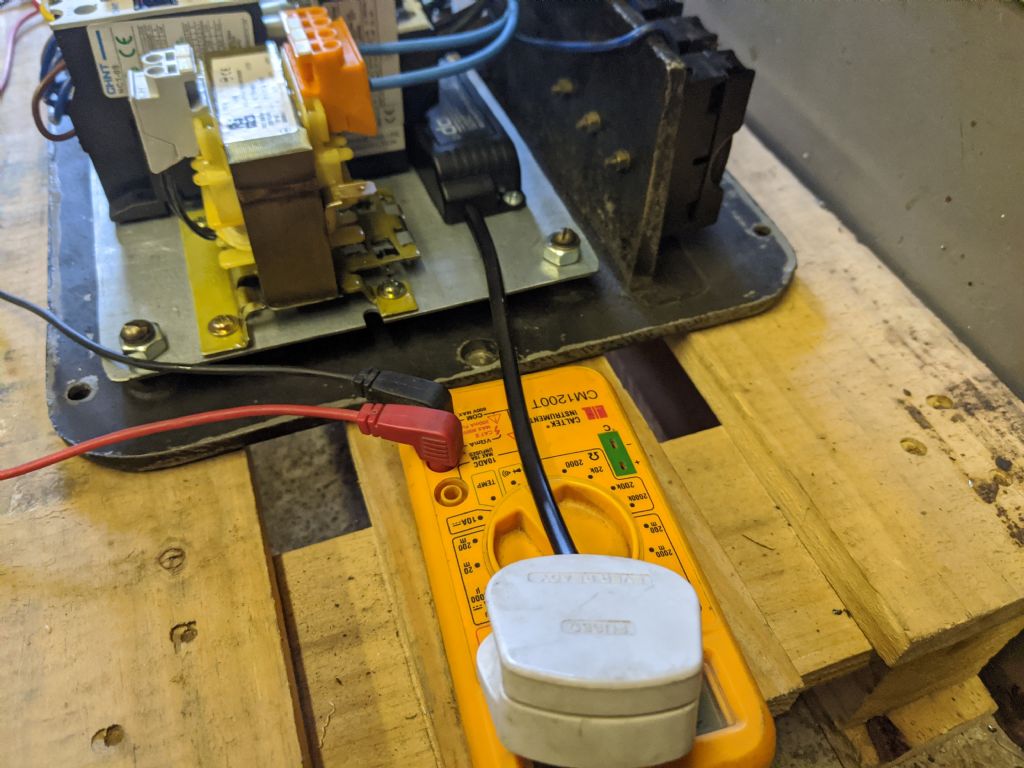
              So, I put a plug onto the 240v to 12v transformer

              img_20200519_134313.jpg

              Then I plugged it in and nothing. Absolutely nothing. So, I put the multimeter to volts or something and started prodding things. It should have only been 12v so i wasn't too worried, but I was still careful.

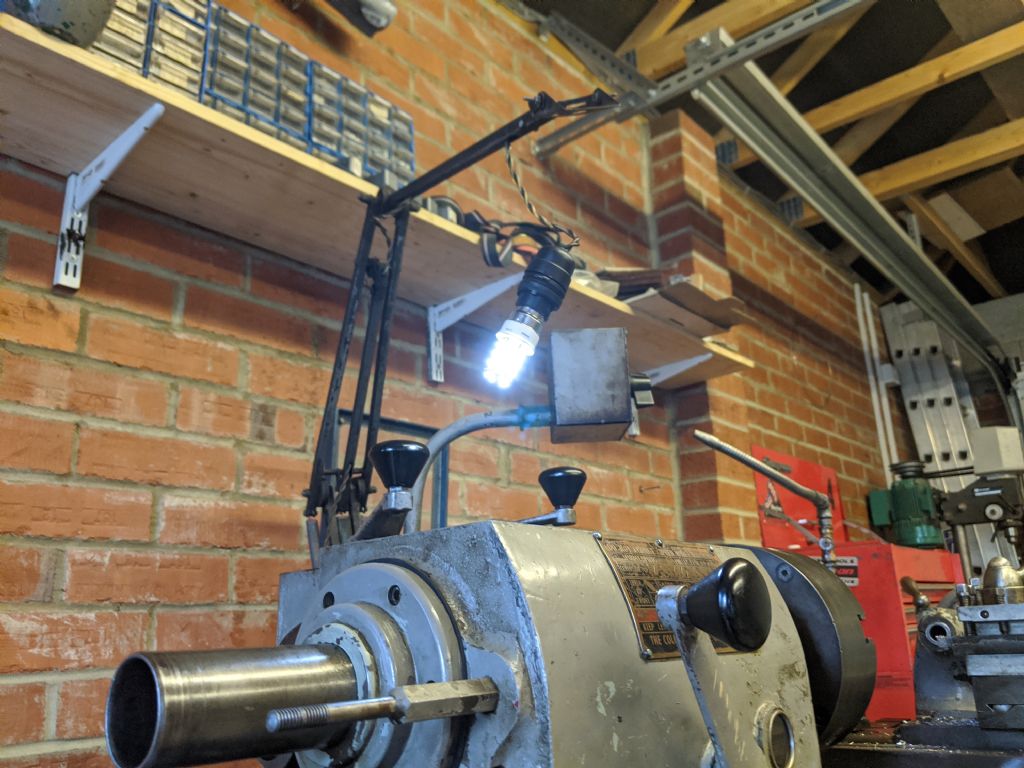
              Then I was just playing around. I looked up and it was on. No idea what I did, if anything at all. It was running from the plug, which was great. Then I took the plug off and put everything back together. Low and behold, it still worked. Not a clue what I did or what happened, but it's now working.

              img_20200519_135212.jpg

              img_20200519_135853.jpg

              Light off

              img_20200519_135949.jpg

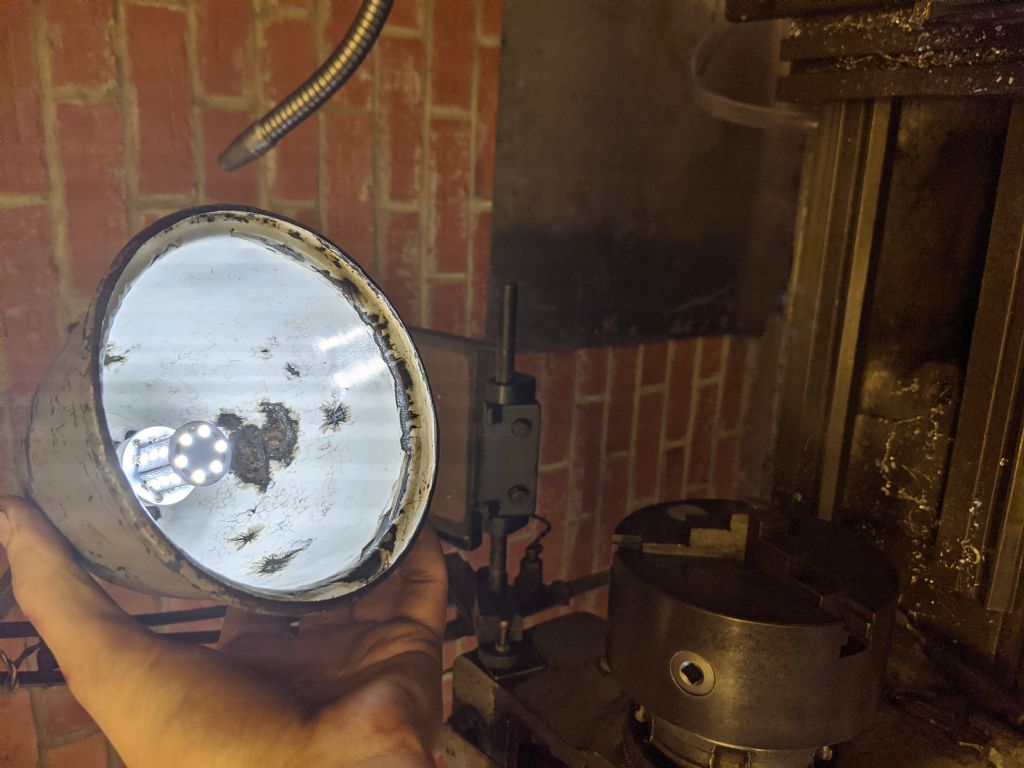
              Light on

              img_20200519_135945.jpg

              It just adds that bit extra lighting. Was it a lot of effort? Yes. Was it expensive for a light? Yes. But is it exactly what I wanted? Definitely as it fills the hole and remains contained in the lathe. The lamp seems to be very good and holds in place where I put it, unlike the lamp I have on my wood lathe.

              Phil, Thank you once again. Do you want the other two contactors that I have, the 240v one and the Normally Closed 415v one? When I post you the gasket stuff, I can send them too?

              I haven't been using the chuck guard at all, I find it just gets in the way. However, I think that could be a good mount for a DRO eventually

              #473009
              Herman van der Merwe
              Participant
                @hermanvandermerwe76509

                Good news. Most likely you screwed the screw of the termination block onto the sheathing of a wire and it did not touch the wire. When you did the plug thing and you screwed the wires back in, it then contacted the wire. Presto – current flows!

                #473010
                Herman van der Merwe
                Participant
                  @hermanvandermerwe76509

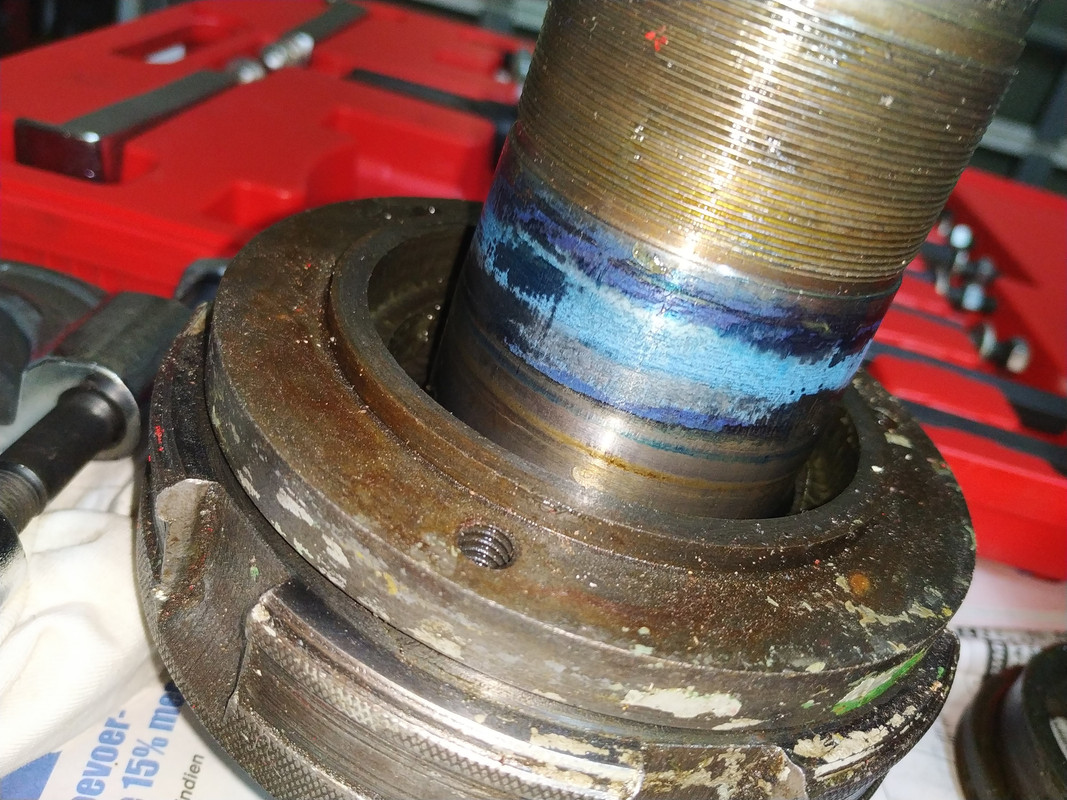
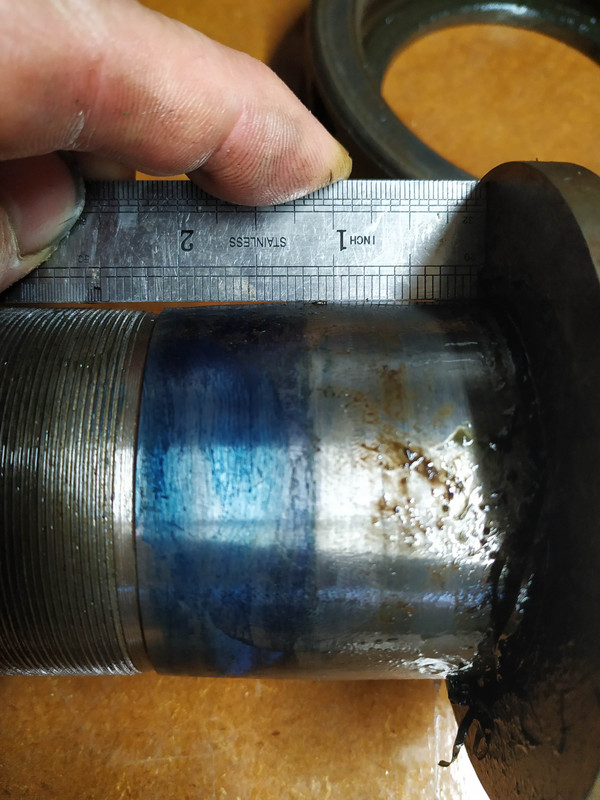
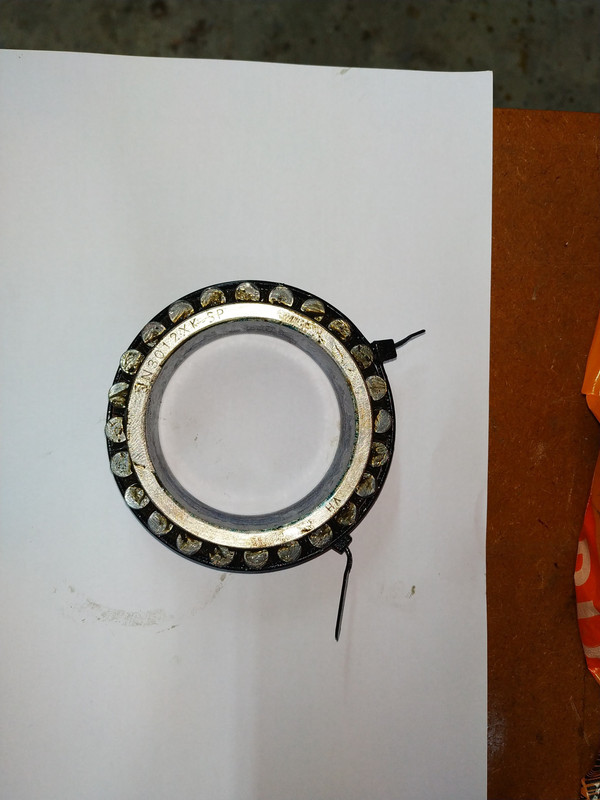
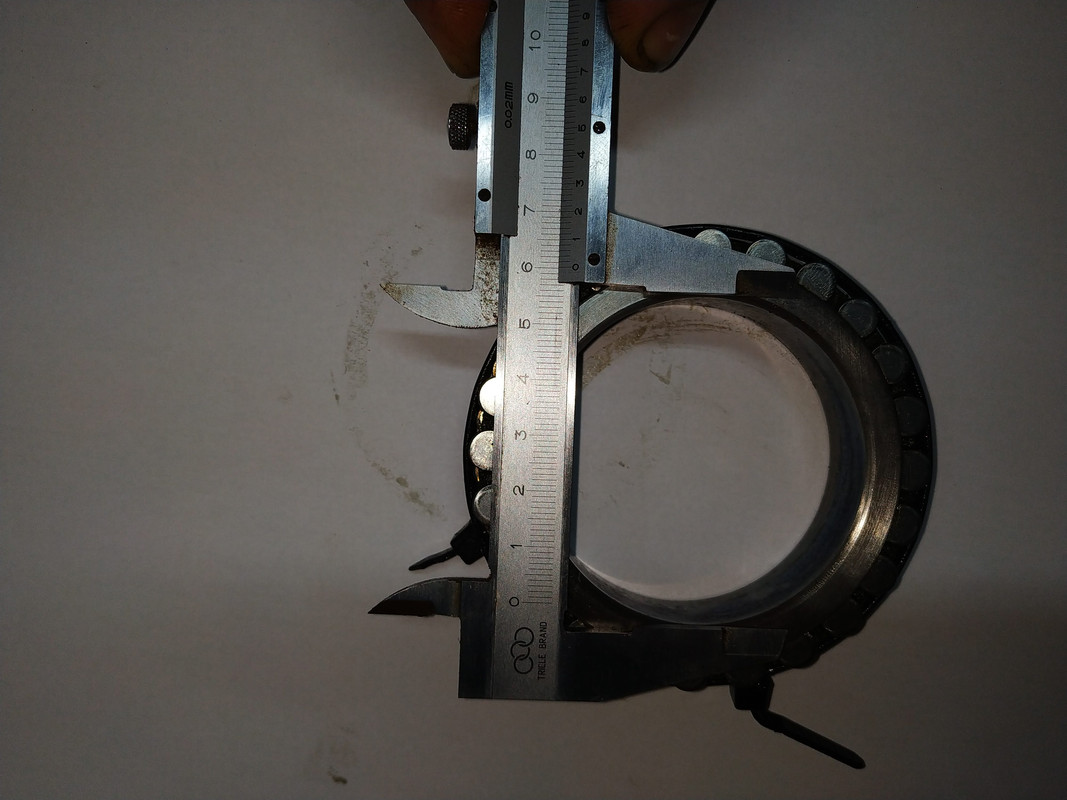
                  I also have good news. Went to a friend and we pressed the bearing off the spindle! A lot of engineering bluing on the shaft ….

                  Never seen a taper in the shaft under a bearing. Any ideas?

                  #473014
                  Herman van der Merwe
                  Participant
                    @hermanvandermerwe76509

                    Dang, never fixate on a single thing in Engineering … the bearing is tapered on the inside as well! So that is why I could not get it loose. It locked in place under vacuum caused by the bluing or whatever it is.

                    #473021
                    Richard Kirkman 1
                    Participant
                      @richardkirkman1
                      Posted by Herman van der Merwe on 19/05/2020 15:33:18:

                      Good news. Most likely you screwed the screw of the termination block onto the sheathing of a wire and it did not touch the wire. When you did the plug thing and you screwed the wires back in, it then contacted the wire. Presto – current flows!

                      It wasn't that. I didn't unscrew any wires apart from the 240 to 12 transformer, which was done perfectly fine.

                      I think it was more likely to be a bad contact somewhere. Most likely in the light socket. As that's the only thing that really had the most difference to it.

                      I'm really enjoying your thread Herman, good job getting the bearing off. I'm glad I haven't had to do anything like that!

                      #473022
                      Richard Kirkman 1
                      Participant
                        @richardkirkman1
                        Posted by Herman van der Merwe on 19/05/2020 15:33:18:

                        Good news. Most likely you screwed the screw of the termination block onto the sheathing of a wire and it did not touch the wire. When you did the plug thing and you screwed the wires back in, it then contacted the wire. Presto – current flows!

                        It wasn't that. I didn't unscrew any wires apart from the 240 to 12 transformer, which was done perfectly fine.

                        I think it was more likely to be a bad contact somewhere. Most likely in the light socket. As that's the only thing that really had the most difference to it.

                        I'm really enjoying your thread Herman, good job getting the bearing off. I'm glad I haven't had to do anything like that!

                        #473030
                        Phil Whitley
                        Participant
                          @philwhitley94135

                          Herman, I will have to get you a code off the tin unless I can get one of those apps working, my phone is not very smart, and my I-phone that I use for vlogging has no sim in it, so will see if I can download it at home across the wifi! The primer was a 2 pack acrylic in grey, but any standard spray shop primer will do the job, when I ran the garage business from my workshop in the 70's I used grey cellulose primer, and when I went to buy a 5ltr, found that it was hardly available anymore, so I bought the most popular spray shop primer that was in current use, so see what is available in SA. Any oil resistant machinery paint is suitable, My Harrison Mill is painted with Tractol John Deere green, because it is almost identical to the original colour. See what you can find in the local tractor supplies outlet!

                          #473035
                          Howard Lewis
                          Participant
                            @howardlewis46836

                            Fascinating to see you two overcoming the problems and bringing your machines back to life!

                            Keep up the good work!

                            Howard

                            #473075
                            Herman van der Merwe
                            Participant
                              @hermanvandermerwe76509
                              Posted by Phil Whitley on 19/05/2020 16:51:17:

                              Herman, I will have to get you a code off the tin unless I can get one of those apps working, my phone is not very smart, and my I-phone that I use for vlogging has no sim in it, so will see if I can download it at home across the wifi! The primer was a 2 pack acrylic in grey, but any standard spray shop primer will do the job, when I ran the garage business from my workshop in the 70's I used grey cellulose primer, and when I went to buy a 5ltr, found that it was hardly available anymore, so I bought the most popular spray shop primer that was in current use, so see what is available in SA. Any oil resistant machinery paint is suitable, My Harrison Mill is painted with Tractol John Deere green, because it is almost identical to the original colour. See what you can find in the local tractor supplies outlet!

                              Thanks @Phil. I could not see on your YouTube! video if it was a white or the grey primer. So the primer should be fine with the oil?

                              A code off the tin will be the #1 solution. Thanks for trying and helping me on this one!

                              #473077
                              Herman van der Merwe
                              Participant
                                @hermanvandermerwe76509
                                Posted by Richard Kirkman 1 on 19/05/2020 16:33:52:

                                I think it was more likely to be a bad contact somewhere. Most likely in the light socket. As that's the only thing that really had the most difference to it.

                                I'm really enjoying your thread Herman, good job getting the bearing off. I'm glad I haven't had to do anything like that!

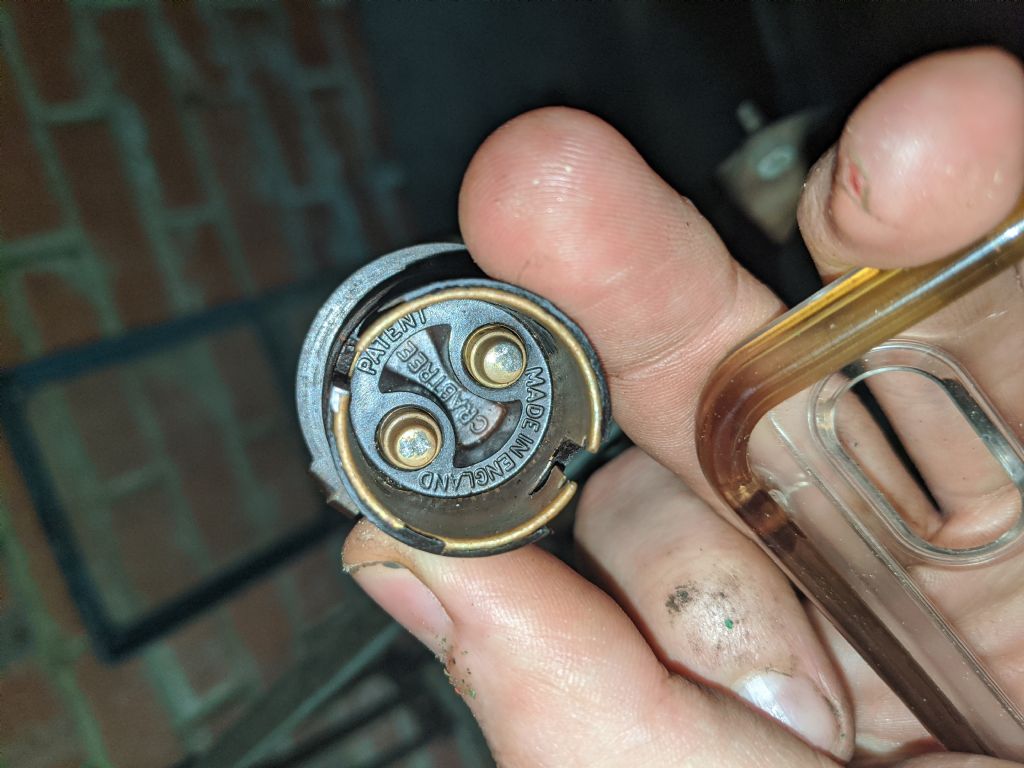
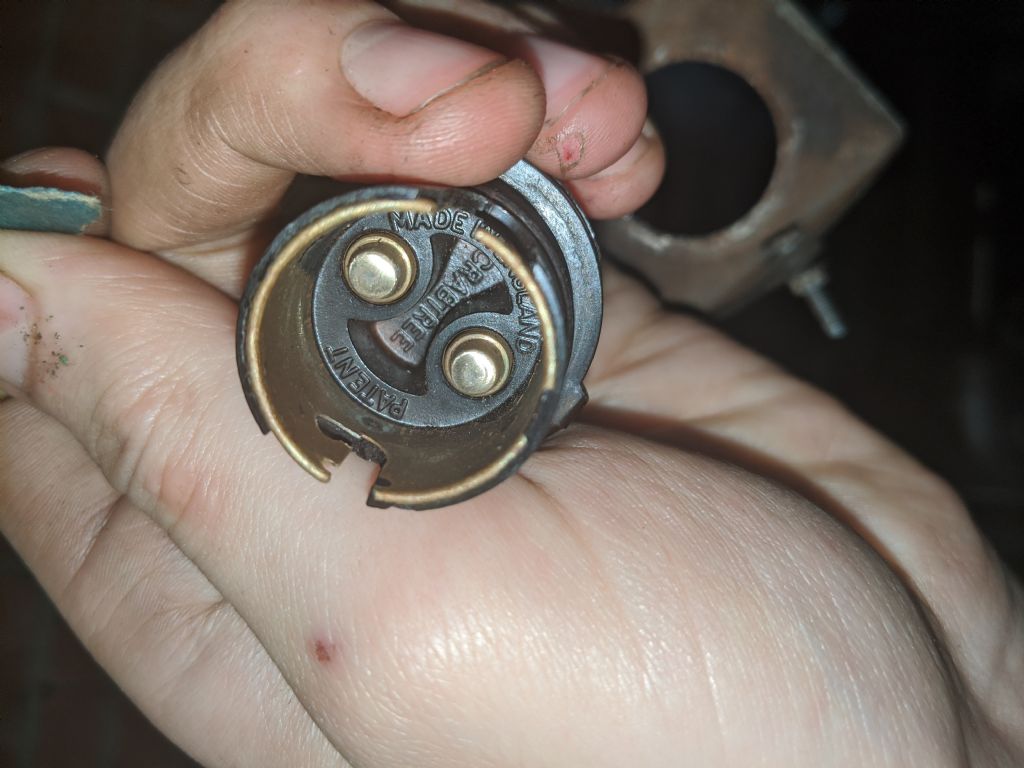
                                Yes, that is the second place I thought of. Did you sand the bulb holder's contact pins a bit to get a bright new surface? I use a nail file for this as it gives a nice bright surface.

                                Thanks, yeah I am quite a number of days behind on the thread. Lot of work to type it up, but I actually enjoy the writing.

                                #473137
                                Richard Kirkman 1
                                Participant
                                  @richardkirkman1

                                  Yes, I think I'll clean the contacts tomorrow since thinking about it, they've been potentially covered in oil and things over the years. Who knows how long they've been exposed. I think that's most likely why it didn't work the first time.

                                  Yeah, I completely agree, I find it useful to write everything up, helps to vent a little and explain things to people who will understand, especially in lockdown. My parents don't particularly understand everything without an in-depth explanation. Plus it gives me something else to do and potentially entertains others. So it's a win-win for everyone!

                                  #473348
                                  Phil Whitley
                                  Participant
                                    @philwhitley94135

                                    I think the blueing under the bearing is loctite bearing fit Herman, glad you got it off ok, the paint code for the colchester green is 135555. hope this helps, if not get back to me and I will have a go at getting that app!

                                    Phil

                                    #473364
                                    Herman van der Merwe
                                    Participant
                                      @hermanvandermerwe76509

                                      Phil, what colour code would that be? BS, DIN, Pantone or one of the many others?

                                      I thought Loctite bearing fit is yellow in colour?

                                      #473384
                                      Phil Whitley
                                      Participant
                                        @philwhitley94135

                                        Aaaah!, now that I don't know but I have just thought that my wife has a set of colour chips which are ICI/ Akzo Nobel, I will take them tomorrow and get a match! The bearing fit I used in the 70's was blue, the latest one is greeny yellow.

                                        #473397
                                        Herman van der Merwe
                                        Participant
                                          @hermanvandermerwe76509
                                          Posted by Phil Whitley on 20/05/2020 20:52:06:

                                          Aaaah!, now that I don't know but I have just thought that my wife has a set of colour chips which are ICI/ Akzo Nobel, I will take them tomorrow and get a match! The bearing fit I used in the 70's was blue, the latest one is greeny yellow.

                                          Thanks Phil. Munch appreciated as we would say.

                                          OK, that makes sense. So yes, then it is the bearing fit Loctite. Good to know! You may have a pint on me for this info.

                                          #473600
                                          Herman van der Merwe
                                          Participant
                                            @hermanvandermerwe76509

                                            Hi Phil, any news on the colour code? I do not want to chase you but ….


                                            I bought the primer yesterday. It is a 50/50 two pack system that is to mil spec and used on heavy duty machinery. A bit expensive but then I know it is a good paint foundation that is in place.


                                            Edited By Herman van der Merwe on 21/05/2020 15:34:08

                                            #473604
                                            Herman van der Merwe
                                            Participant
                                              @hermanvandermerwe76509

                                              Another thing Phil. You mentioned in your video that you replaced the seals between the bed's feet and the stand. Do you have any specifications as to what I need to buy for new seals?

                                              I am pulling the bed tomorrow and want to ensure I have the seals before I assemble.

                                              #473687
                                              Richard Kirkman 1
                                              Participant
                                                @richardkirkman1

                                                I'm very impressed at your speed Herman, you seem to be getting things done very quickly. It feels like I've been working on my lathe forever(not in a bad way)


                                                Anyway, today I cleaned the light bulb contacts with a bit of 600 grit. They were definitely not clean, but now they are

                                                img_20200521_112353.jpg

                                                img_20200521_112920.jpg

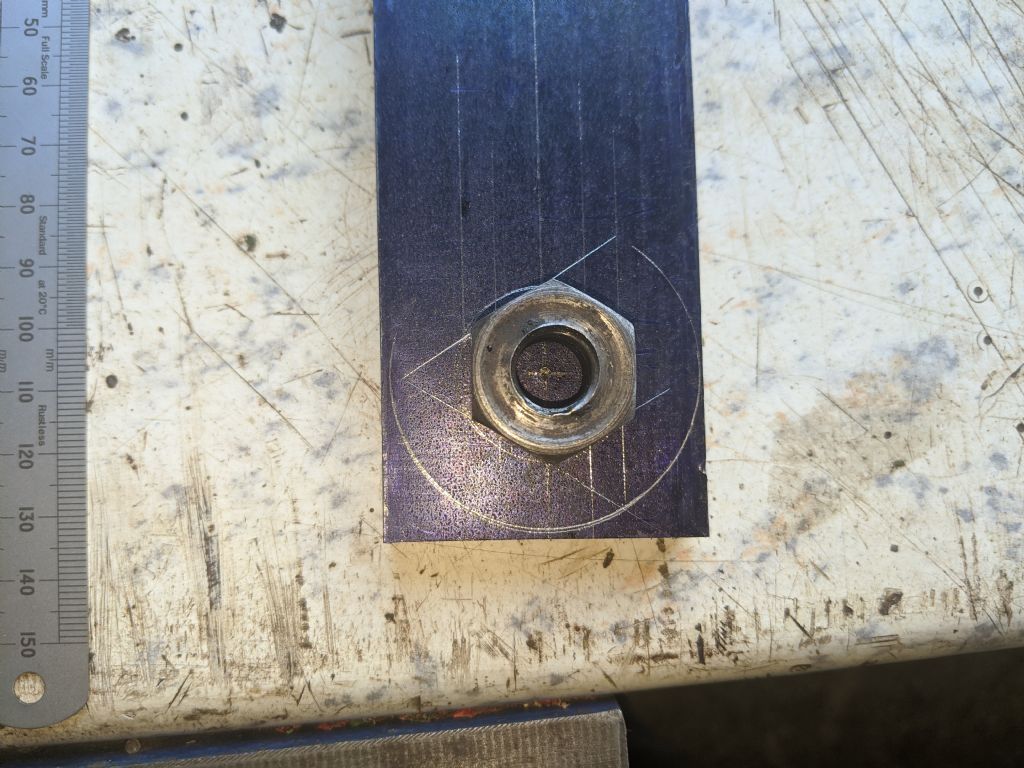
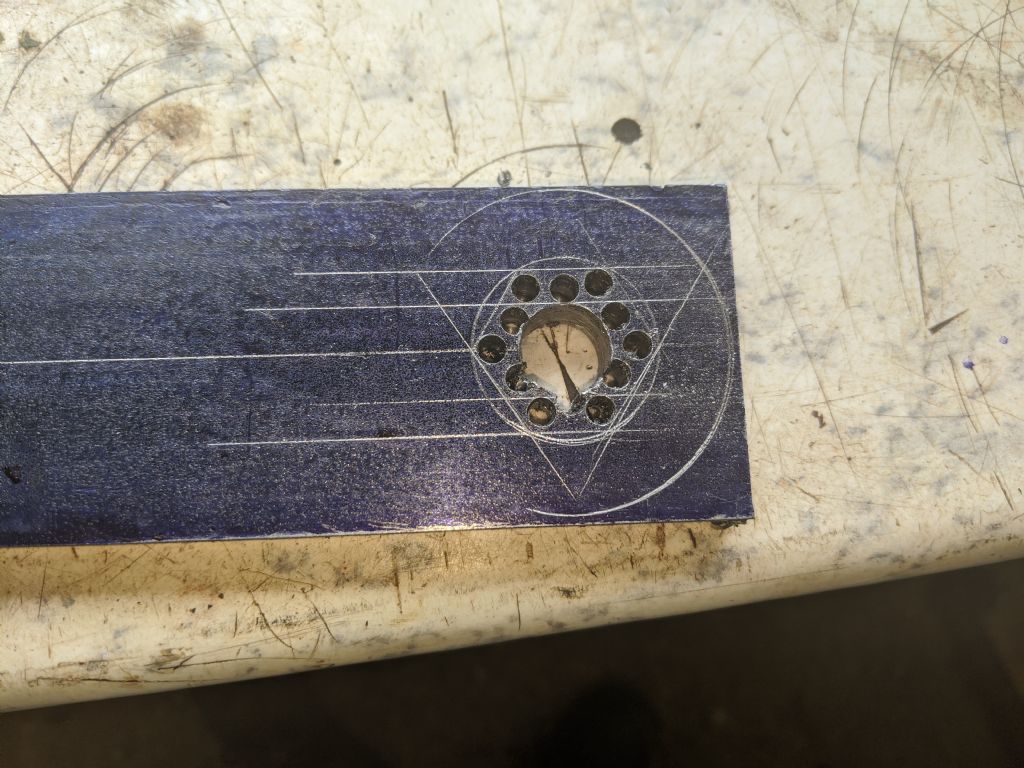
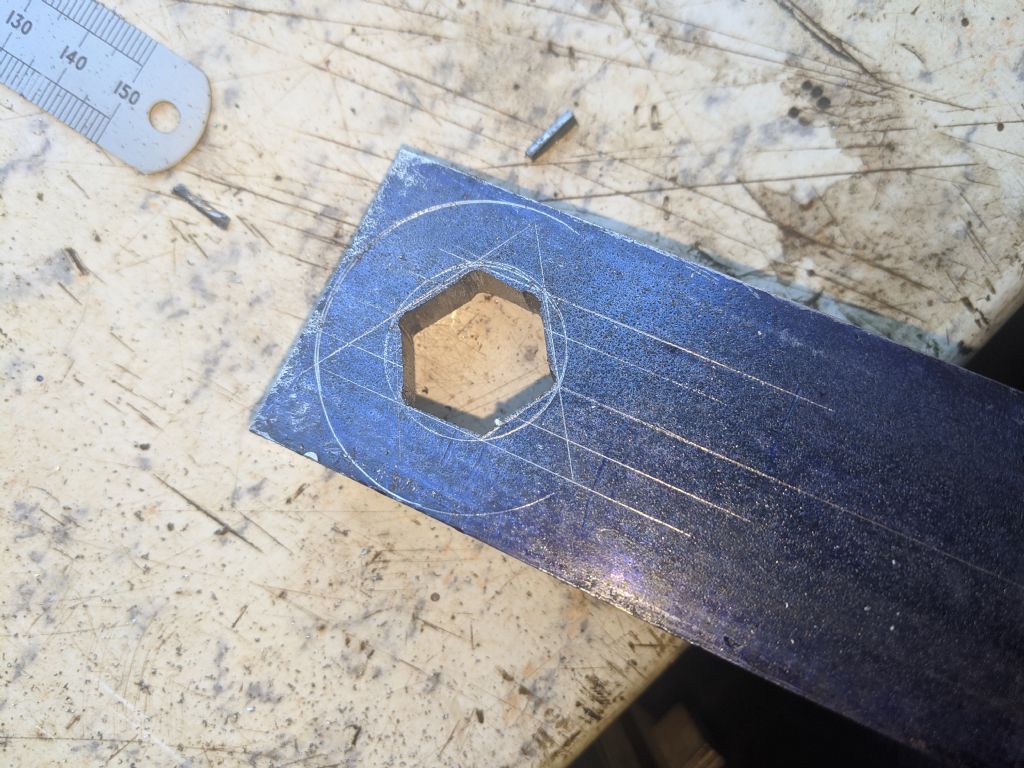
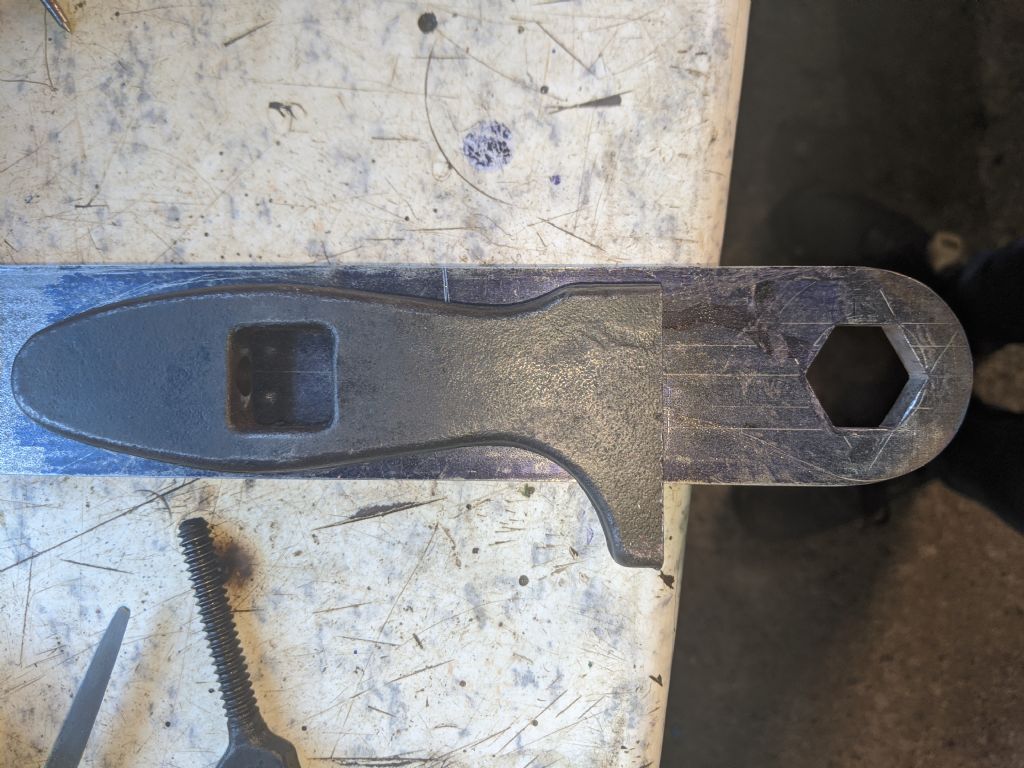
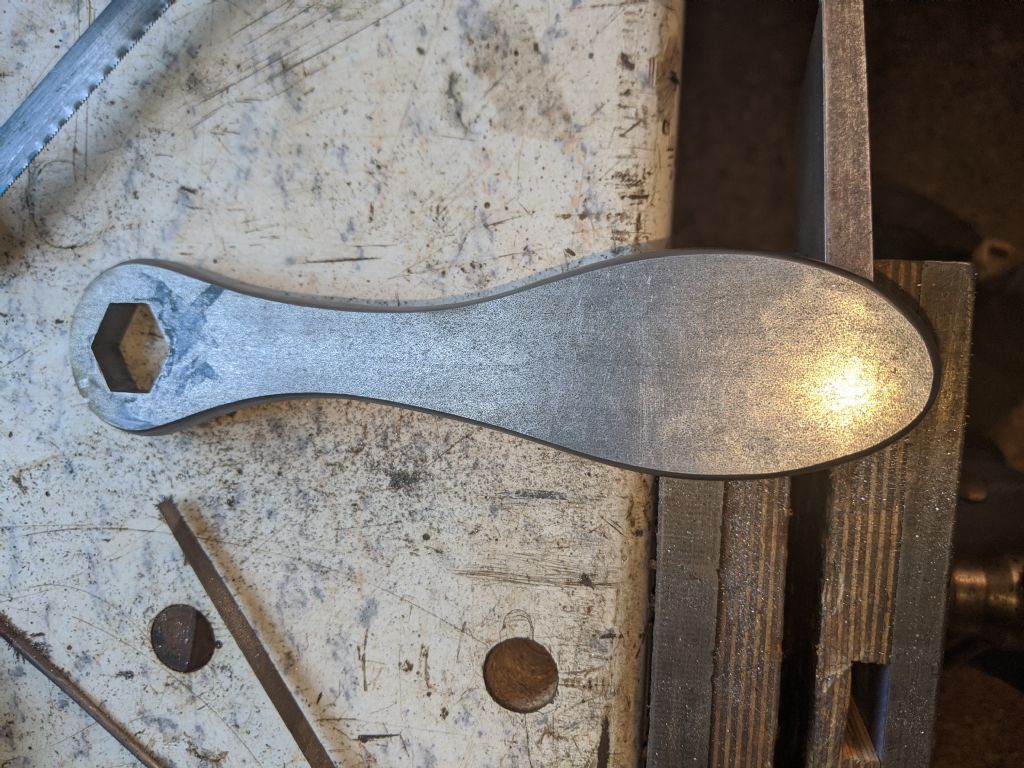
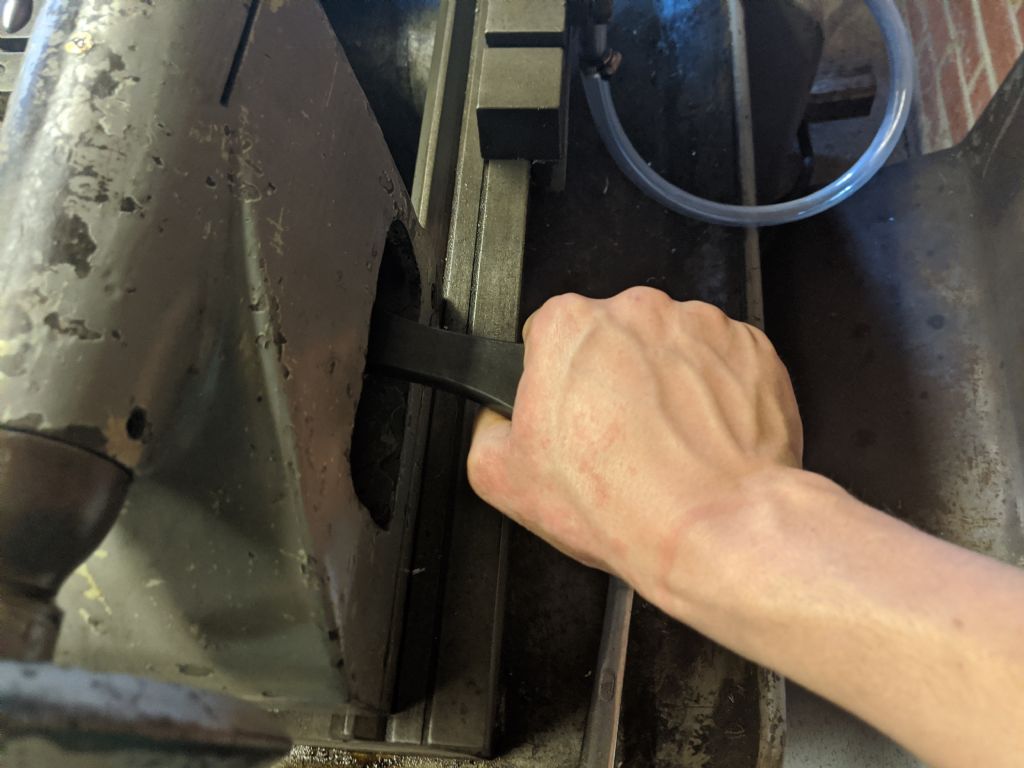
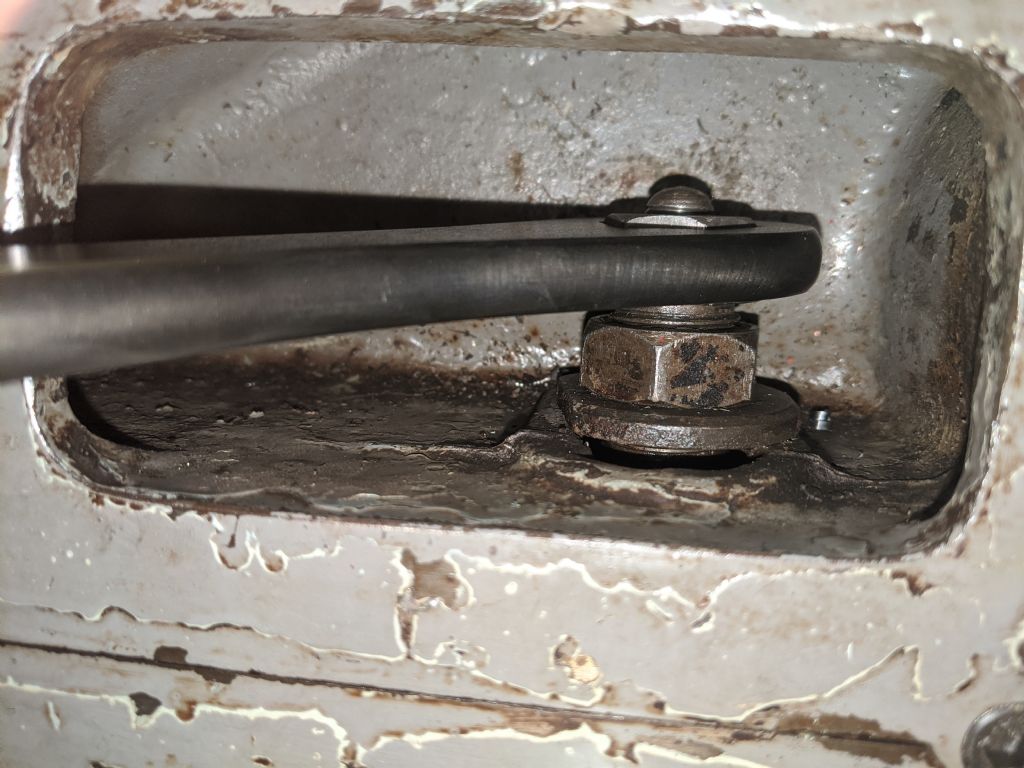
                                                Then I began work on a dedicated ring spanner for the tailstock. I wanted to make this a large spanner, bigger than the original which I have seen pictures of. So, I'm using a piece of 10x50x220mm steel I started by laying out the nut, then chain drilling and filing till I had the fit I was looking for

                                                img_20200521_115530.jpg

                                                img_20200521_121502.jpg

                                                img_20200521_124059.jpg

                                                I liked the size and shape of one of the spanners I had, so I made it a similar shape

                                                img_20200521_145544.jpg

                                                img_20200521_170222.jpg

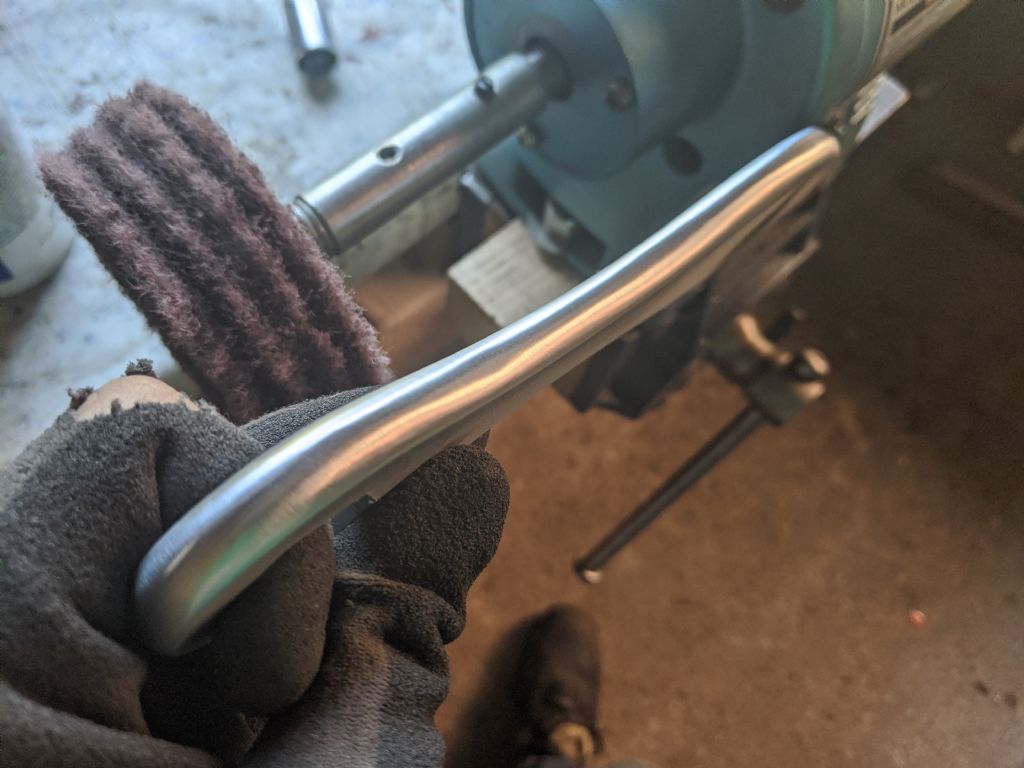
                                                So I shaped it with an angle grinder, grinding disk, then flap wheel, then I moved to the belt grinder which I used to get to final shape then round all the edges

                                                img_20200521_172535.jpg

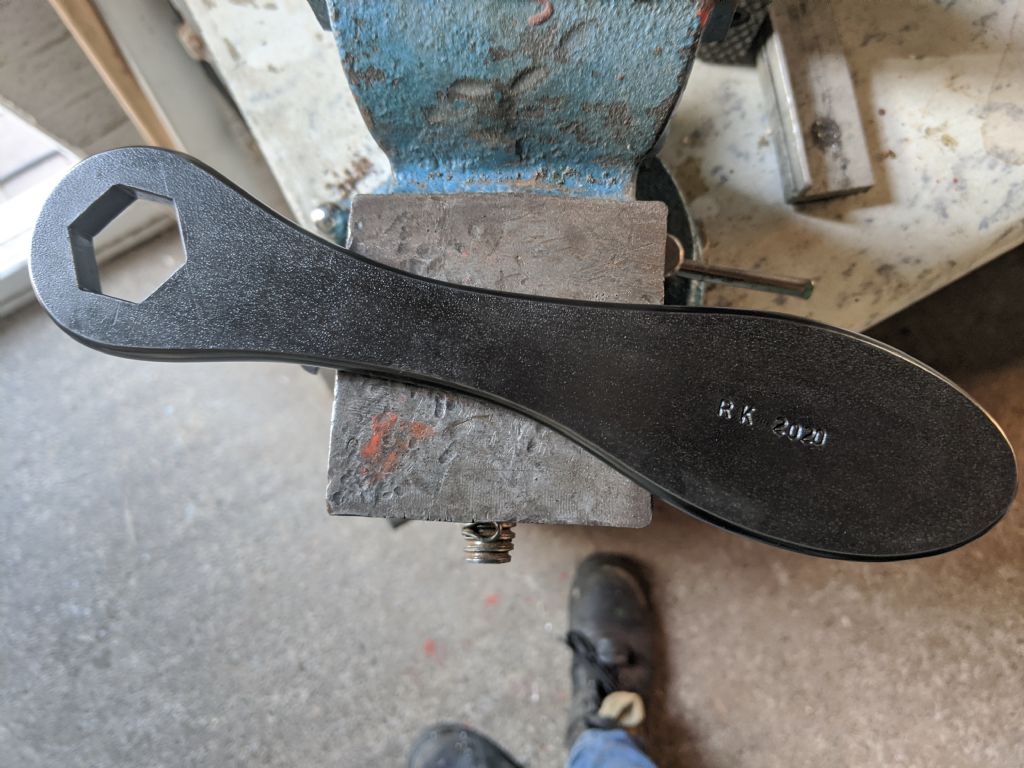
                                                Then I used a surface conditioning wheel to get a consistent surface finish all over, which I then cold blued

                                                img_20200521_174327.jpg

                                                img_20200521_174939.jpg

                                                Initials and year stamped in to show when this has all been done.

                                                img_20200521_174945.jpg

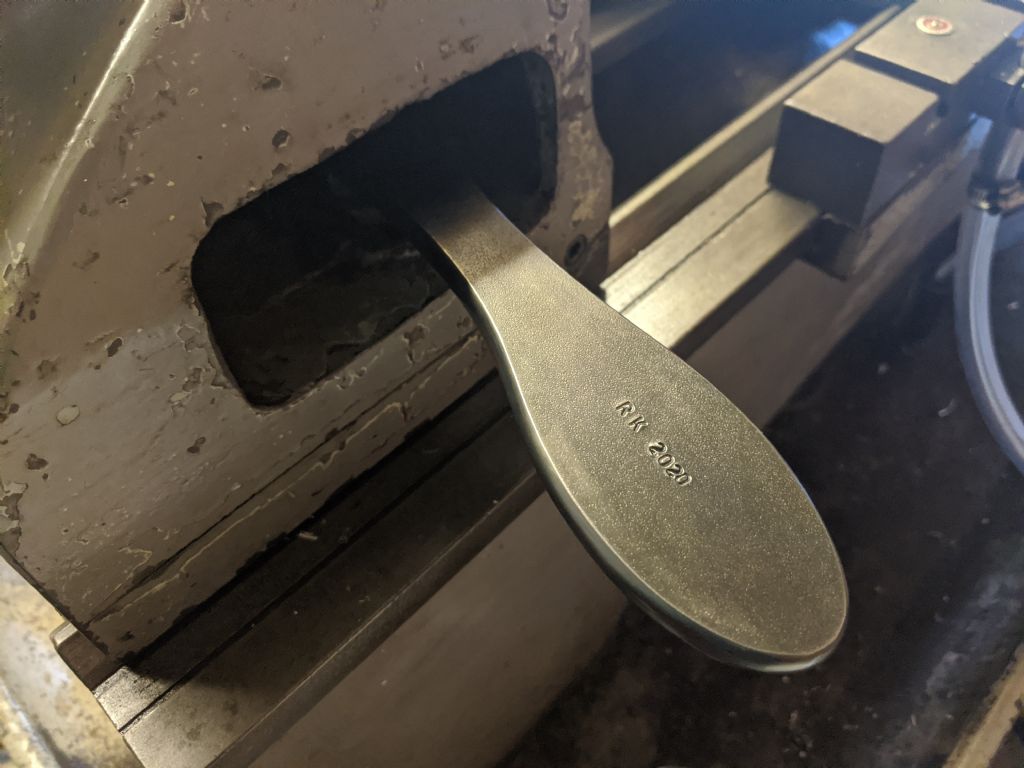
                                                I think its very comfortable. Not hard to find, and its not symetrical, so you get more clearance instead of it hitting the tailstock casting

                                                img_20200521_180925.jpg


                                                img_20200521_180933.jpg

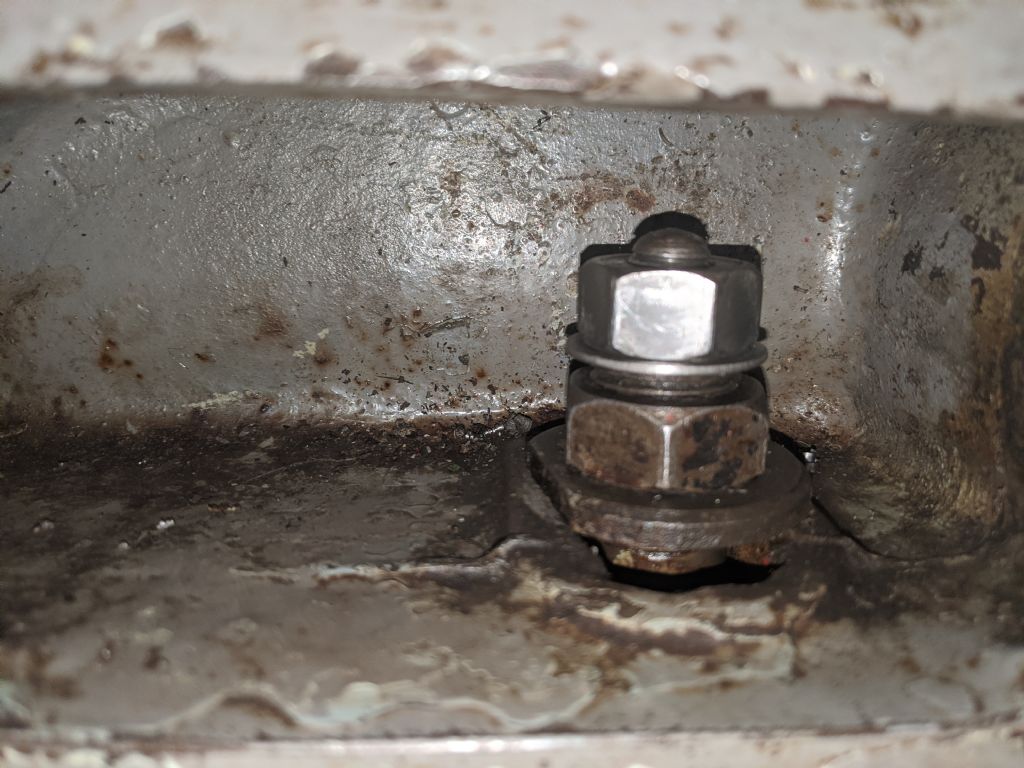
                                                Finally, I added a washer to spread the load a bit better since the nut was getting marks in it.

                                                This also raised the nut so the spanner fit in a better position for locking. Not too sure how to explain that properly, but it works very well now!

                                                Anyway, back to Herman

                                                Was the Headstock very heavy once emptied Herman? Were you able to lift it by yourself?

                                                Reading your most recent write up post, I also really struggled to remove the gearbox selector screws that hold the comb thing. Lots of penetrating oil and they still took a lot of force, with a very loud snap they came out. Clearly from your picture in here you managed to get them out

                                                Edited By Richard Kirkman 1 on 21/05/2020 19:09:49

                                                #473690
                                                Phil Whitley
                                                Participant
                                                  @philwhitley94135

                                                  Hi Herman For bed seals I just used 3 O rings that were a good fit on the bolts, but you could easily use 3 leather washers, it is just to stop the coolant running into the cupboard and the electrics box.

                                                  Colour as near as I can see is ICI/ Akzo Nobel dulux 30GY 23/232. I say as near as I can see because when I looked closely at the different areas of lathe , they are a slightly different shade, as some were painted on different days with different amounts of thinners, and some of the areas sprayed over primer look brighter than areas which were sprayed over flatted green paint!

                                                  Phil.

                                                  #473693
                                                  Phil Whitley
                                                  Participant
                                                    @philwhitley94135

                                                    Excellent spanner Richard, really good craftsmanship, and not a CNC in sight!

                                                    Phil.

                                                    #473728
                                                    Herman van der Merwe
                                                    Participant
                                                      @hermanvandermerwe76509
                                                      Posted by Richard Kirkman 1 on 21/05/2020 18:56:28:

                                                      I'm very impressed at your speed Herman, you seem to be getting things done very quickly. It feels like I've been working on my lathe forever(not in a bad way)

                                                      Was the Headstock very heavy once emptied Herman? Were you able to lift it by yourself?

                                                      Reading your most recent write up post, I also really struggled to remove the gearbox selector screws that hold the comb thing. Lots of penetrating oil and they still took a lot of force, with a very loud snap they came out. Clearly from your picture in here you managed to get them out


                                                      Thanks Richard. Being two persons makes it a bit easier.

                                                      I did not know how heavy the headstock would be, so I used a block and tackle to lift it. It is heavy, but I can lift it by myself with effort which I have no need to do.

                                                      Yes I got the two cap screws out. I just decided stuff this and put a very long ring spanner on the end of the Allen key and pulled. It came loose with a very load clap and the Allen key is still OK. Normally I would use a hex drive 1/2" socket, but because these are AF, I did not have the size. So an Allen key it was.

                                                      Would you mind scanning your spanner so that I can make one also? It looks impressive! You might want to harden the area where the hex hole is and drill a small hole on the other end to fit a small round chain through there to hang the spanner safely. That is the only fault I can find with it. Well done!

                                                      Your lamp working OK now?

                                                      I found this old lamp when I went tool hunting yesterday and thought of your lamp. Although not the correct Colchester lamp, it is from the same era and I think it will look good with the lathe!

                                                      Edited By Herman van der Merwe on 21/05/2020 21:00:34

                                                    Viewing 25 posts - 376 through 400 (of 797 total)
                                                    • Please log in to reply to this topic. Registering is free and easy using the links on the menu at the top of this page.

                                                    Advert

                                                    Latest Replies

                                                    Viewing 25 topics - 1 through 25 (of 25 total)
                                                    Viewing 25 topics - 1 through 25 (of 25 total)

                                                    View full reply list.

                                                    Advert

                                                    Newsletter Sign-up