What tool do I need? I need to measure the radius of a tiny fillet on a 90° edge.

Advert

What tool do I need? I need to measure the radius of a tiny fillet on a 90° edge.

Home Forums Workshop Tools and Tooling What tool do I need? I need to measure the radius of a tiny fillet on a 90° edge.

Viewing 25 posts - 26 through 50 (of 98 total)
  • Author
    Posts
  • #577626
    John Smith 47
    Participant
      @johnsmith47

      @Dave
      > 1. measure arbitrary radii to know what they all are to some level of accuracy, or
      > 2. to indicate that one radius is more-or-less correct?

      Both.
      i.e. I want to create some test radii by hand to see what feels right and works right, so that I can formally specify them with a view to out sourcing at some point. 

      And then, having measured what I think works correctly, I want to apply the radii consistently across multiple parts to make sure that I am making them consistently.

      [To get clear, for functional reasons I need the radii to broadly be as small as possible, this is because I need to surfaces next to them to be as large as possible, HOWEVER if they are too small then the part starts to become dangerously sharp. So some sort of compromise 'happy middle ground' has to be found by experiment. ]

      Yes, the radii will be machined by hand mostly using a deburring wheel. Possibly I may use a hand file (or files) but I am trying to avoid that.

      Various edges will need to be measured along quite long parts.
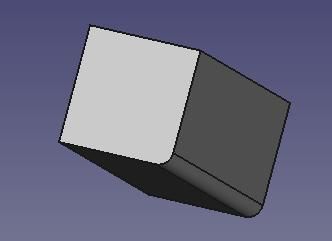
      i.e. it will be much more like this:

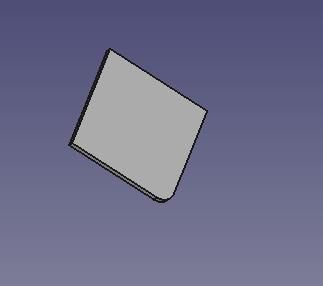
      And never like this:

      ==> So I can't see how a light source would help me.
       

      @peak4
      Yes, now that I see how it works, I can see that that in many ways the "Helios Preisser H0597305" is the ultimate answer(!). One down-side is that it is assuming that the radius is perfectly circular, which given that the radius will be made by hand that will be a rash assumption. Maybe I could find a much cheaper one somewhere.

      Where I've got to so far
      I think where I've got to is that I need to try to buy a few different sizes of simple looks that have a L shaped corner and broadly look somewhat like this Starrett:

      …If that is, anyone actually manufactures such a thing in smaller dimensions
      e.g. say: 0.4, 0.3, 0.2 or even 0.1mm ??

      But it's starting to look like nobody makes such a tool.

      J


      Edited By John Smith 47 on 30/12/2021 20:53:06

      Advert
      #577632
      MikeK
      Participant
        @mikek40713

        Could this not be made? Turn several pieces of small rod to known diameters, on the lathe, and glue each to a stick?

        #577634
        John Smith 47
        Participant
          @johnsmith47
          Posted by MikeK on 30/12/2021 20:50:48:

          Could this not be made? Turn several pieces of small rod to known diameters, on the lathe, and glue each to a stick?

          Yes in effect that would do the same job as the 211 euro Helios Preisser thing.

          But it would also be nice to be able to see into the corner to see how how much light was getting paste the radius, to see how circular my hand-made fillets are. 
           

          Edited By John Smith 47 on 30/12/2021 20:59:44

          #577635
          peak4
          Participant
            @peak4

            See P1-3 of this catalogue from FujiTool
            https://www.fujitool.co.jp/pdf/catalogue_vol218.pdf

            Or FujiTool's own web site
            https://www.fujitool.co.jp/eng/products/measuring_tools.html

            The exact style you seek (L300M2) only start at 0.2mm,
            but 272MAA 01-408 are available in a set from 0.1mm-1mm

            They are available from Hogotex, who seem to have branches in Germany, Netherlands, and Belgium.
            https://www.hogetex.com/radiusmeters-type-272-serie

            If you're prepared to work in increments of 5 thou, rather than metric TTC in the US make some
            https://www.travers.com/product/ttc-grg-28-radius-gage-set-57-025-025

            Bill


            Edited By peak4 on 30/12/2021 21:31:12

            #577640
            Nick Wheeler
            Participant
              @nickwheeler
              Posted by Robert Butler on 30/12/2021 19:01:41:

              As the OP has advised the component has a variable (hand made) radius, what exactly is being measured? A simple set of radius gauges viewed against a light source will produce an indication of the radius and allow acceptance or rejection of the component. Anything else appears to be a waste of time and money.

              I hope we will all be able to retire on our share of the Royalties from this device when it comes to market.

              Just knowing what it is and why it needs such fiddly to produce parts would be enough, from the limited information we've been allowed.

              #577642
              Robert Butler
              Participant
                @robertbutler92161

                In these circumstance a radius gauge can only serve as a comparator given the use of a deburring wheel or hand file to produce the radius. Therefore simple radius gauges should be more than adequate due to the variability of manufacture. Radius gauges have a flat datum surface to bear on the sample and assuming the sample is flat the approximate radius (which is all that can be hoped for) established.

                Robert Butler

                #577658
                Pete.
                Participant
                  @pete-2

                  I was under the impression commercial projects were a no no on this forum, this project appears to be 100% about making money and 0% about someone learning workshop skills as a hobby.

                  #577661
                  peak4
                  Participant
                    @peak4
                    Posted by Robert Butler on 30/12/2021 21:41:46:

                    In these circumstance a radius gauge can only serve as a comparator given the use of a deburring wheel or hand file to produce the radius. Therefore simple radius gauges should be more than adequate due to the variability of manufacture. Radius gauges have a flat datum surface to bear on the sample and assuming the sample is flat the approximate radius (which is all that can be hoped for) established.

                    Robert Butler

                    Whilst what you say is correct, the real difficulty would seem to be finding radius gauges to measure the radii requested by John.
                    As soon as you get down to a minimum radius of 0.1mm, and thus similar increments, the price goes up considerably and the number of manufacturers decreases.

                    I did find some to the pattern and tolerance requested, but they weren't obviously available to order in the UK or US, but are available from Japan for 66,500 Yen. They were also out of stock from this retailer, but whether that is a similar situation to eBay stores here which just increase the price of OOS items, I don't know; they also show the wrong photo for the named product listed.

                    I'll let you do the price conversion yourself, but I suggest it will be beyond the means of the OP.

                    Bill

                    Edited By peak4 on 30/12/2021 23:21:07

                    #577667
                    William S
                    Participant
                      @williams

                      To be honest, to measure stuff sub 1mm you are looking in to optical equipment to get the best idea of what you are looking at. All what I could suggest has already been put forward.

                      My first inclination was shadowgraph with appropriate screen/mask, the measuring loupe would be the next best thing (cheaper but one would struggle with wide parts the ends only being measurable)

                      Then there is a Mitutoyo contracer: https://www.mitutoyo.com/products/form-measurement-machine/contracer/

                      That would be the most accurate and easiest method and also the most expensive.

                      I really don't see the point to all of this, its really only a break-edge from what I can make out from what John has described so doesn't need to be quantified. The works drawings I work too have break all edges in the notes section which is enough for us employee to work out that they don't want huge great chamfers(would be specified if that was required)

                      As Robert Butler has said through out this post, a set of rad gauges along the Moore and Wright pattern would suffice if one has to be really pedantic, although as others have said the size required doesn't really exist. They could be lazer/water jet cut but the kerf has to be thought about.

                      Just my thoughts that will no doubt be disregarded

                      William

                      #577681
                      Tony Pratt 1
                      Participant
                        @tonypratt1
                        Posted by Pete. on 30/12/2021 23:03:18:

                        I was under the impression commercial projects were a no no on this forum, this project appears to be 100% about making money and 0% about someone learning workshop skills as a hobby.

                        Damm I wasn't going to comment further on this thread but you are 100% correct.

                        Tony

                        #577683
                        Dusty
                        Participant
                          @dusty

                          It strikes me that this is putting the 'cart before the horse' Why make something and then try to measure what has been made? The usual sequence is, design the component and then make it to the design. I get the feeling that the OP has little or no knowledge of basic engineering principles. If this fillet was hand made, by whatever method, it tells me that it does not need to be that accurate, why make a simple job difficult? What is being asked is virtually impossible with the kit most model engineers have or could afford.

                          #577684
                          Martin Connelly
                          Participant
                            @martinconnelly55370

                            I have a micrometer barrel that was saved from a tool that was being scrapped, like a depth gauge without the foot. I would make a tool that held it at 45° to the edge and could be adjusted to read zero on a sharp corner. Then anything less sharp can be measured and the reading converted to a reasonable idea of the radius with simple geometry. You may also decide that a simple 45° chamfer is all that is required. It would certainly be good enough to decide what was a good value to go for. Imagine the centre finding slide of a combination set with a micrometer barrel instead of a sliding rule.

                            Martin C

                            #577686
                            JasonB
                            Moderator
                              @jasonb
                              Posted by Tony Pratt 1 on 31/12/2021 09:03:55:

                              Posted by Pete. on 30/12/2021 23:03:18:

                              I was under the impression commercial projects were a no no on this forum, this project appears to be 100% about making money and 0% about someone learning workshop skills as a hobby.

                              Damm I wasn't going to comment further on this thread but you are 100% correct.

                              Tony

                              Actually it is the promotion of commercial products or services that is not allowed, not asking about a project that may be commercial. From the T&Cs

                              "Upload, post or otherwise transmit any unsolicited or unauthorized advertising, promotional materials, or any other form of solicitation."

                              Edited By JasonB on 31/12/2021 10:11:27

                              #577713
                              KWIL
                              Participant
                                @kwil

                                tea much more interesting.

                                #577724
                                Bob n About
                                Participant
                                  @bobnabout

                                  In the world of "Pro Bodgery" we would make up a small punch tool (chisel shape) with a short length of annealed copper wire or solder and tap it into the radius. You now have a copy of the radius you can examine away from the piece under investigation or blue to test against another location on the part.

                                  Edited By Bob n About on 31/12/2021 12:50:37

                                  #578364
                                  John Smith 47
                                  Participant
                                    @johnsmith47

                                    Been away. Catching up.

                                    This is rather overwhelming but I shall try to respond to each person, but thank you for all your contributions.

                                    @MikeK – in principle, yes, along the lines of what Brian G says.
                                    The L-shaped Starrett design would do me fine, however they don't make them small enough. TBH, If I can't find some fairly simple tool to do the job I just abondon ship. To get clear the reason why I want to know the radius of a fillet that I have made is so that I can outsource some of the work to someone else.

                                    @peak4
                                    Yes, that Fujitool "L300M2" looks perfect. Although I would only want the first 3 or 4 tools in the set. Any idea where I could buy one?
                                    [ No, I don't like the look of L300M2. Nor the "Radiusmeters Type 272 serie" from Hogotex I want a 90 degree L shape (with a radius in the concave corner). 0.010inches is 0.254mm which is already slightly large for my purposes.]

                                    @Robert I simply don't understand your comment. My apologies.

                                    @Pete As I have said elsewhere this project is currently a very long way from being commercial.

                                    @peak4
                                    I couldn't undertand that page, but 66,500 Yen would be £427 which would be an INSANE amount of money to pay. Particularly for what would only be 3 or 4 small pieces of metal that if pushed I'm pretty sure that I could get laser cut at reasonable accuracy for a lot less money.
                                    But seriously, this mission/odyssey is definitely not worth spending more than say £150 on.

                                    @William
                                    You are correct that it is roughly speaking a "break-edge" situation, but there are competing ergonomic issues that need to be balanced by experiment. And I then need to quantify the radiuses. I am now confused about what you mean by the "Moore & Wright pattern".

                                    @Tony Pratt
                                    No, I am a very long way from making money on this project.
                                    Yes, I am keen to learn about workshop skills & any suitable tools that anyone can suggest that could help with the measurements.

                                    @Dusty
                                    > Why make something and then try to measure what has been made?
                                    It's called a prototype.
                                    The key discipline is ergonmics.
                                    If it turns out that no such tools exist of the size I seek, fine let's all move on. At this point that seems unproven.

                                    @Martin
                                    Yes, if I can't get nicely rounded fillets, then as you imply maybe 45 degree chamfers would do.
                                    Wait, do simple "L"-shaped little tools exist which look broadly like the Starrett that I found exist which have chamfers not radiuses?

                                    @JasonB
                                    I hope it's 100% clear to everyone that I am not promoting any specific product, and am merely seeking buying advice.

                                    tldr; / SUMMARY:
                                    If the tool I seek doesn't exist at a half-reasonable price (ideally sub £100) then let's all abandon this thread.

                                    RECAP:
                                    What I'm seeking is a simple tool(s) to measure the radius of convex fillets (i.e. the radius on "break-edges"?) created on 90 degree edges.

                                    Something similar to that Helios Preisser H0597305 would do the job, but 211 Euros is GBP177, and worse post Brexit there will now probably be a hefty import tax on it… ==> over £200?

                                    So I was hoping to buy some very simple L shaped pieces of steel with precision radiuses inside corners, with which to make quick checks.

                                    THOUGHT:
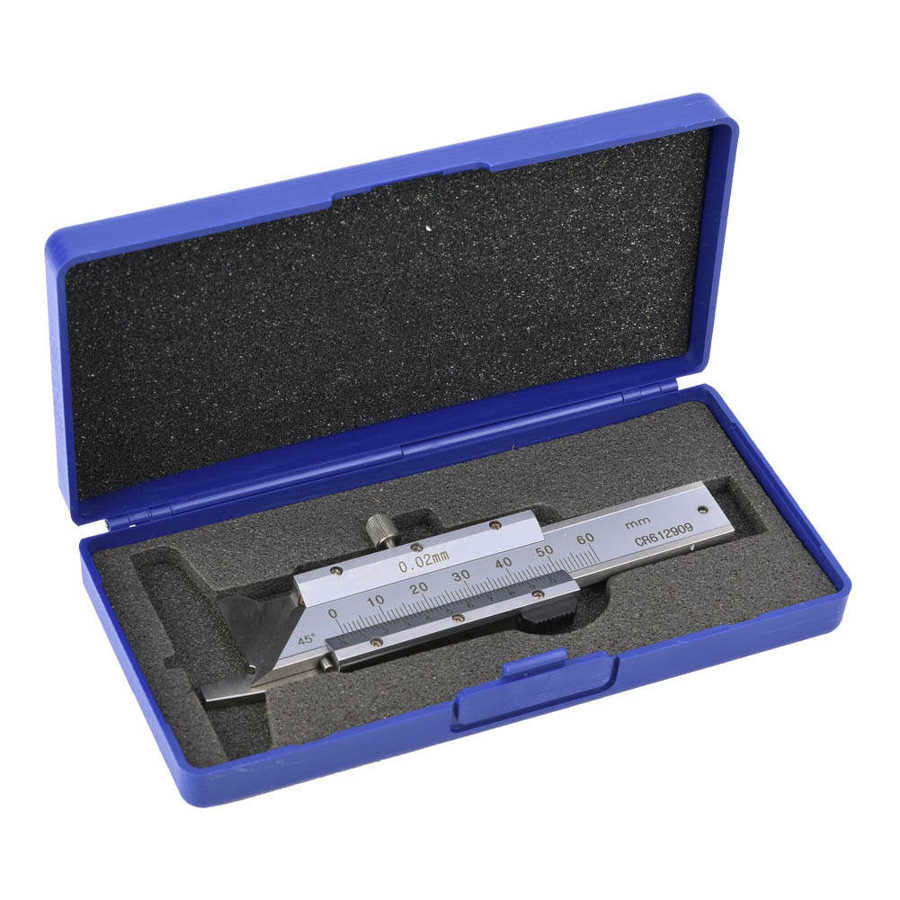
                                    If, as some of you have suggested, I just assume circular radius and just focus on measuring the equivalent 45° chamfer, what about buying something like this?
                                    **LINK** for c. £56

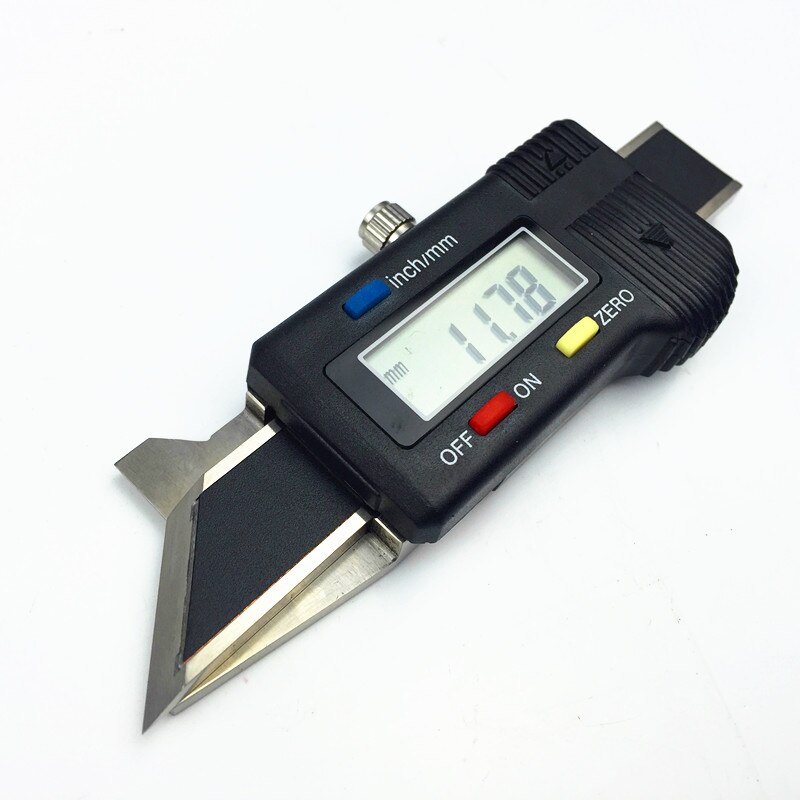
                                    Or a digital equivalent for c. £76?
                                    **LINK**

                                    Or similar… (?)

                                    J

                                    #578366
                                    John Smith 47
                                    Participant
                                      @johnsmith47

                                      PS Wait, I think this would be better quality
                                      "Digital Chamfer Gauge – 1180" – made by Insize, for c. £90+VAT looks like better a build quality:

                                      **LINK**
                                      https://www.cutwel.co.uk/0-10mm-0-0-39-45-digital-chamfer-gauge-1180-series-insize

                                      #578371
                                      JasonB
                                      Moderator
                                        @jasonb

                                        With an accuracy stated of 0.06mm you could be getting some readings that are not that accurate particularly if you factor in any errors in the maths converting to a radius due to rounding up/down. That is also assuming your deburring wheel is forming a perfect 1/4 circle in the first place.


                                        Edited By JasonB on 04/01/2022 07:50:53

                                        #578403
                                        John Smith 47
                                        Participant
                                          @johnsmith47

                                          Yes, good spot – "0.06mm" IS pretty disappointing. That said, that is presumably the inaccuracy over the full 10mm, so if one has recently re-zeroed the device, hopefully it will be much more accurate at the smaller distances.

                                          #578407
                                          JasonB
                                          Moderator
                                            @jasonb

                                            No I would say it is the reading will be +- 0.06 anywhere along the scale.

                                            It's worse than most of the other callipers that they do but that is likely to be the fact the chamfer will be 1.404 times longer than the scale moves so any error in the scale and therefore reading is magnified by this factor

                                            #578409
                                            John Smith 47
                                            Participant
                                              @johnsmith47

                                              Yes, I agree that the chamfer will increase the inaccuracy compared to straight-forward digital calipers (with parallel measurement surfaces…  but beyond that I don't follow your logic.

                                              Srely at least some of the stated inaccuracy must come be incurred during the 10mm of travel. 
                                              Presumably the internal digital measurement tech to be standard, off-the-shelf parts.

                                              I mean if I zero the device and move it just 0.10mm, what do you think the range of readings will be?


                                              Edited By John Smith 47 on 04/01/2022 12:18:56

                                              #578413
                                              Dave S
                                              Participant
                                                @daves59043

                                                0.1+-0.06 most likely

                                                #578414
                                                John Smith 47
                                                Participant
                                                  @johnsmith47
                                                  Posted by Dave S on 04/01/2022 12:14:15:

                                                  0.1+-0.06 most likely

                                                  So are you assuming that the measurement of the distance of travel is 100% accurate and that 100% of the errors are due to the play of 0.06mm?

                                                  #578415
                                                  John Smith 47
                                                  Participant
                                                    @johnsmith47

                                                    i.e. So when freshly zero-ed, as soon as you move it, and move it back to zero that it would is still be reading somewhere between +0.06 and -0.06mm?

                                                    Seems a little excessive… 

                                                    Edited By John Smith 47 on 04/01/2022 12:33:59

                                                    #578419
                                                    Dave S
                                                    Participant
                                                      @daves59043

                                                      To answer the question properly you need to do a gage r and r study.

                                                      Typically an accuracy spec which doesn’t include a %of length term is an absolute spec – I.e. it will be within the range no matter the length moved.

                                                      Accurcy and repeatability are not the same thing.

                                                      So zero, move 0.1mm and move back 0.1mm would I expect report 0, but absent any spec for repeatability it could be +-0.06 and not be out of spec – so you would have no grounds for complaining if it did show 0.05 for instance

                                                    Viewing 25 posts - 26 through 50 (of 98 total)
                                                    • Please log in to reply to this topic. Registering is free and easy using the links on the menu at the top of this page.

                                                    Advert

                                                    Latest Replies

                                                    Viewing 25 topics - 1 through 25 (of 25 total)
                                                    Viewing 25 topics - 1 through 25 (of 25 total)

                                                    View full reply list.

                                                    Advert

                                                    Newsletter Sign-up