What Did You Do Today 2020

Advert

What Did You Do Today 2020

Home Forums The Tea Room What Did You Do Today 2020

Viewing 25 posts - 251 through 275 (of 636 total)
  • Author
    Posts
  • #468426
    Henry Brown
    Participant
      @henrybrown95529

      I have one of those vises Ian, after skimming the base to get it parallel with the faces the jaw moves on I'm well pleased with it.. The keys have to be all things to all mills, I was going to remake the keys to fit the slots on my SX4 but they discovered that they aren't all the same width so I haven't bothered. They give a good started for ten though, a parallel in the vise soon has it set up…

      Advert
      #468446
      John Haine
      Participant
        @johnhaine32865

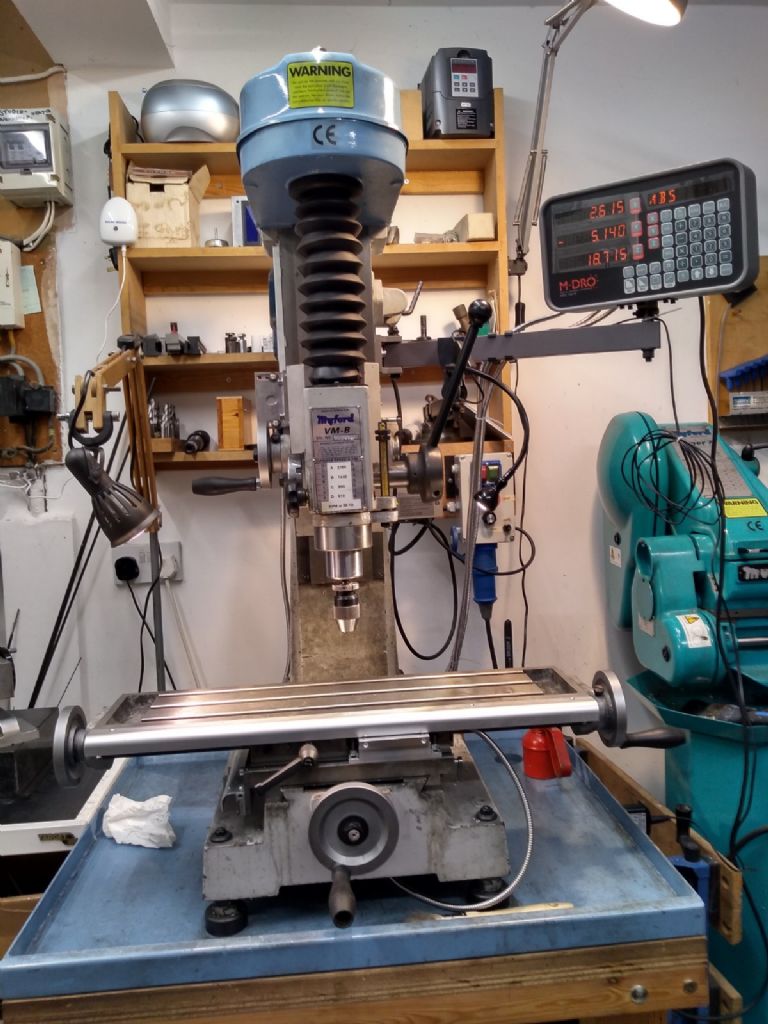
        Finished fitting a 3-axis DRO to my VMB mill, one of the kits from M-DRO using magnetic scales.

        img_20200501_203458405_hdr.jpg

        Fitting was reasonably straightforward but tedious – more pics in my DRO album. Main issue was with the Z scale which I mounted on the side of the column as there wasn't enough space on the head. The column side was reasonably flat and vertical bit I had to shim the scale to get it straight and parallel to the head movement. Reader bolted using one of the supplied brackets on the machined side of the head. That was the only bracket that was useful.

        For the Y axis I bolted a piece of 1/4" flat plate to the carriage to hold the scale and mounted the reader to the base which surprisingly was flat and parallel to the table.

        The X axis is bolted on the front of the table with the reader on a block machined to just the right height and bolted to the Tee slot at the front of the carriage. By the time I was making this block I had two working axes and they were already proving their worth.

        The console arm swivel base is bolted to the RHS of the column. Once I started drilling holes in the machine I got quite blase about it! In my picture of that you can also just see the surgery I had to do to the belt guard to fit a 3-phase motor and change the pulley arrangement to something more sanitary.

        So far I've only done a few quick checks but the system seems as accurate or more accurate than the leadscrews/handwheels.

        I've fitted the swarf guards to the X and Y scales but the Z scale is reasonably out of harms way and I hope won't need it – getting round the back of the machine to do up the screws would be a right pain!

        #468530
        Iain Downs
        Participant
          @iaindowns78295

          Have created a new thread on my vice alignment : **LINK**

          #468547
          John Haine
          Participant
            @johnhaine32865

            Re DRO fitting, one issue is that the top of the cover on the X scale is slightly above the plane of the table which means that I can't bolt down a vice etc that would otherwise overlap the front. The table thickness was only just enough to fit the scale channel. As it was I had to file a chamfer all along the bottom edge to stop the channel touching the base and acting as a table lock! I don't want to run the machine without the scale cover on the front because lots of swarf escapes forward. Especially with ferrous material I can foresee iron filings attaching themselves to the scale! So I'll need to mill a step on the couple of vices I have that are affected.

            #468657
            Anthony Knights
            Participant
              @anthonyknights16741

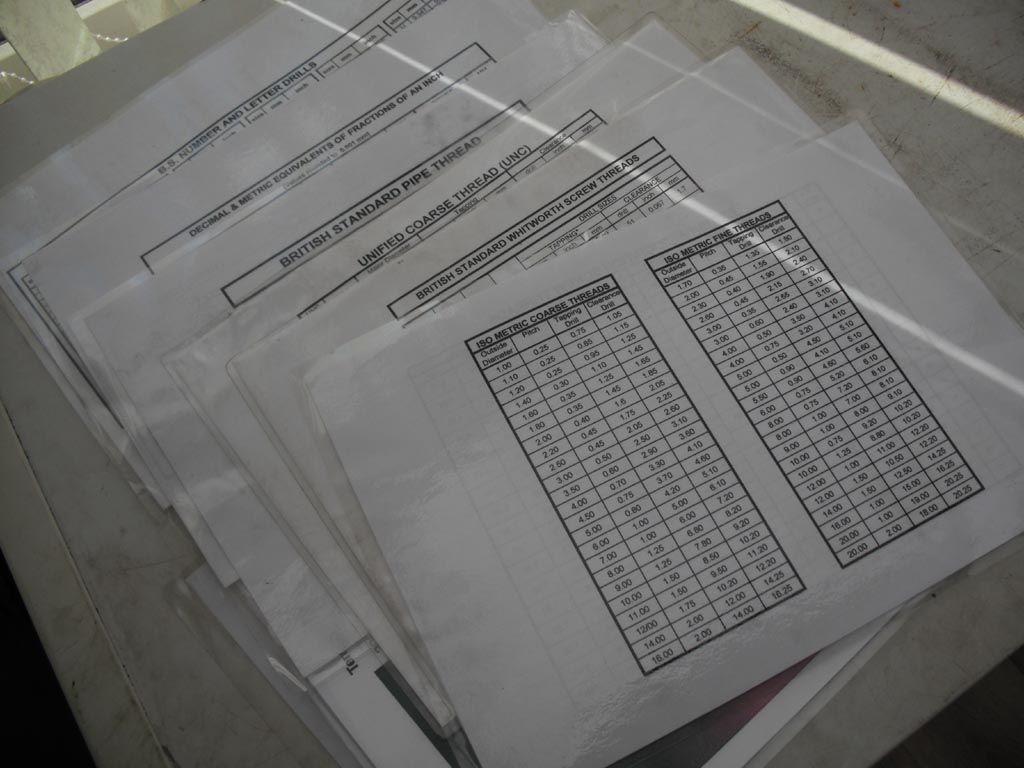
              After a frustrating couple of hours in the workshop this morning, where I achieved virtually nothing, I decided to give it a rest. I fired up the computer, printed out and laminated some data sheets for use in the workshop. These were to replace the ones that had started to come unstuck, probably due to the damp last winter.

              laminates.jpg

              #468705
              David Caunt
              Participant
                @davidcaunt67674

                Having taken advantage of the 6 for a £1 offer for Model Engineer I was looking at the on line digital copies and was taken by the Oliver Evans' Half -Beam Engine from Dec 2001 on.

                I decided to start with the beam which is somewhat complicated the main structure starts with 2mm thick material which I managed to cut from an extruded of material which seems like dural.

                The beam has an arc both top and bottom which although the plan doesn't describe the radius I reckoned it to be about 635mm.

                The attached photo shows the length I had to go too to get this on my Warco 14.

                Has anyone else made. This model as portrayed in the articles?

                img_1039_0732.jpg

                #468720
                Colin Heseltine
                Participant
                  @colinheseltine48622

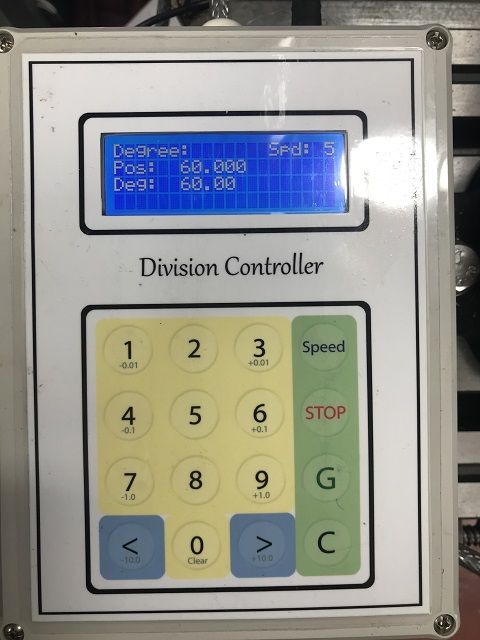
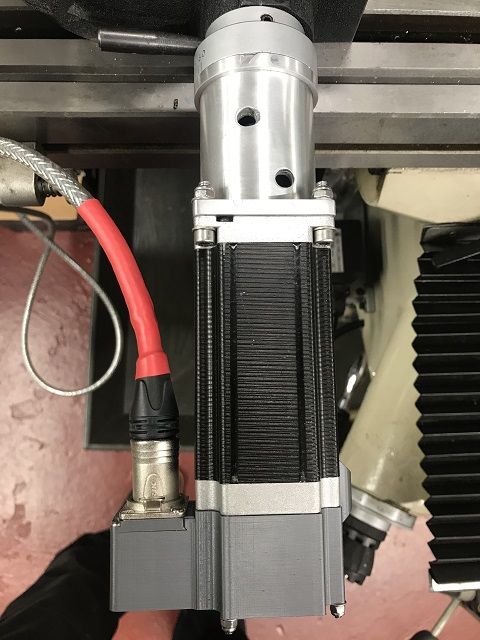
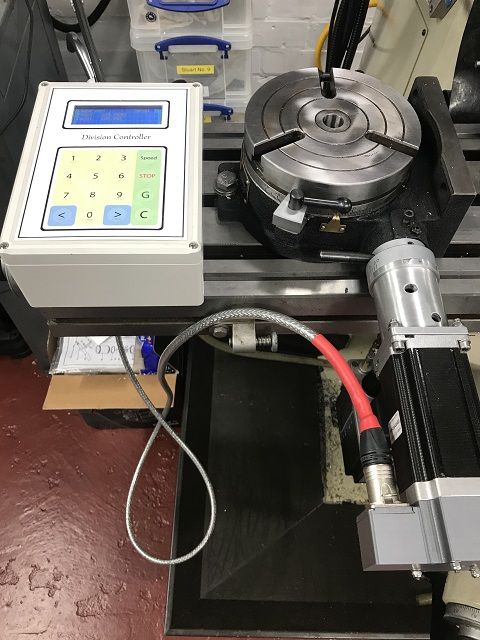
                  Finished off my Division Master Rotary Table Controller installation. I had finished the electronics a week or so ago and tested it all on the bench. The Oldham coupling arrived a couple of days ago so I could carry on with the stepper mount. It all went relatively well. When you look at the photos please ignore the ding in the mounting on the rotary table. (tube with bracket on decided they would rather not stay fixed in the 3 jaw chuck. Grrr.

                  The electronics are the Steve Ward controller which I purchased as a ready made tested circuit board and with his ready made tested keyboard. I took a lot of care with the hole layout for the buttons. I made a mock up front panel from MDF and cut all the holes in it to ensure the layout was spot on.

                  controllerres.jpg

                  The stepper motor end cover was one I found on Thingiverse, but this particular one was created using OpenSCAD and so could easily be amended size wise. I was able to increase the size at the back for the XLR connector.

                  stepperres.jpg

                  I opted for a long armoured flexy cable and power is courtesy of a spare Toshiba laptop PSU.

                  controllersetupres.jpg

                  It all ran very well.

                   
                  Colin


                  Edited By Colin Heseltine on 02/05/2020 22:21:39

                  #468722
                  Nicholas Farr
                  Participant
                    @nicholasfarr14254

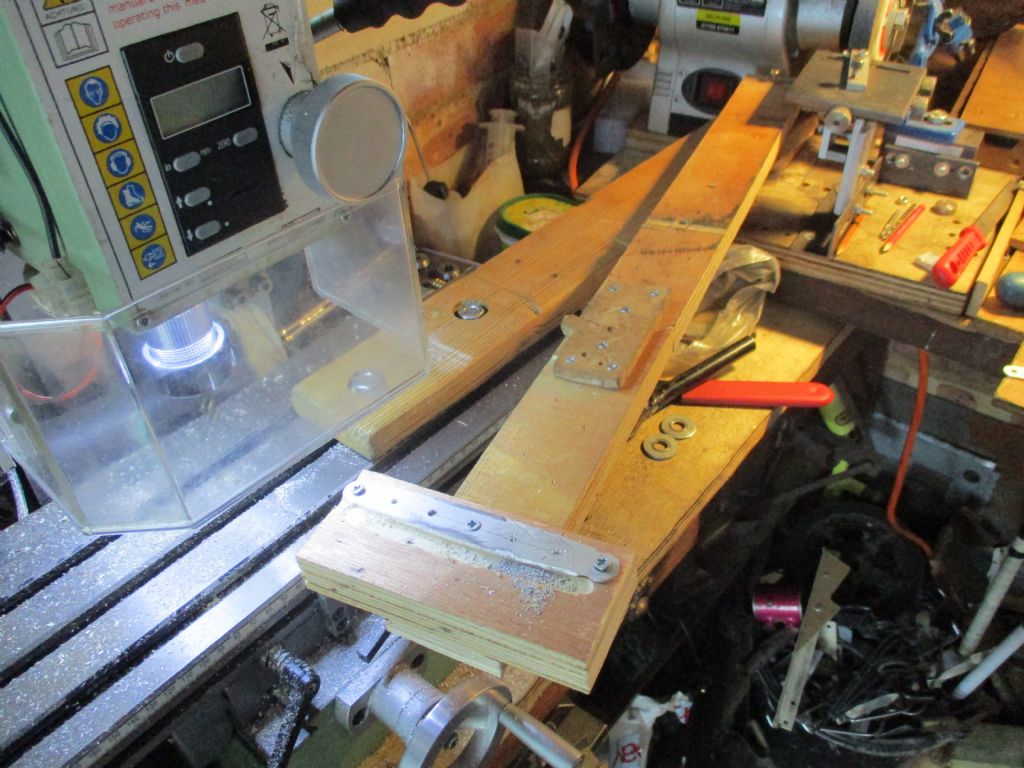
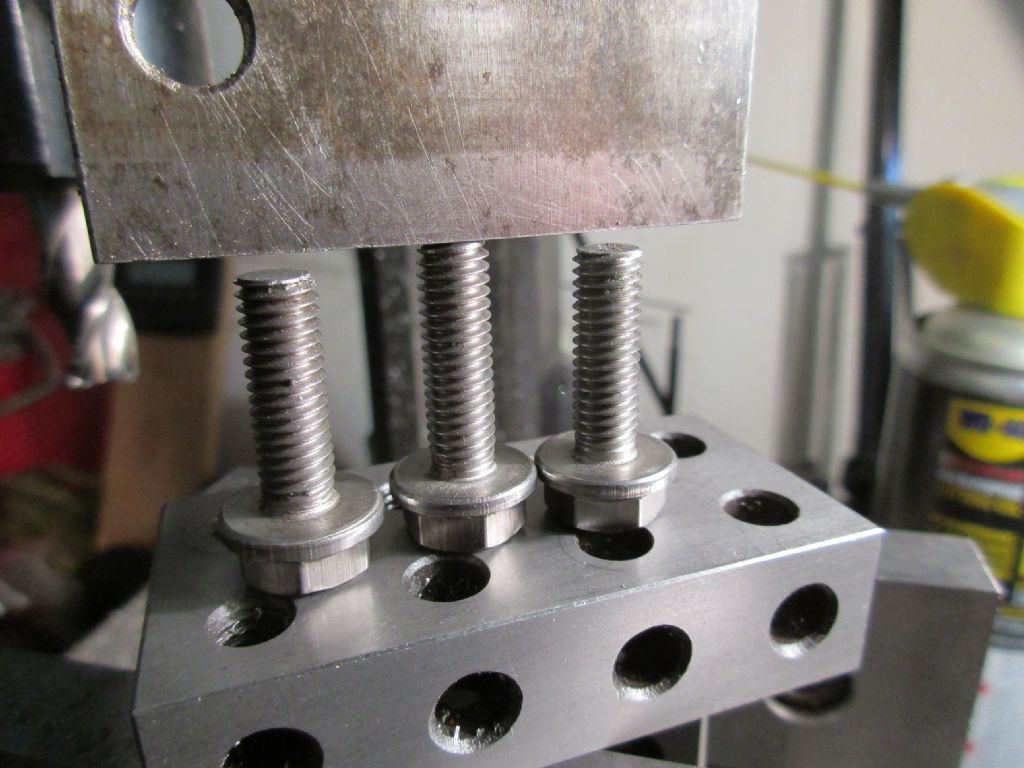
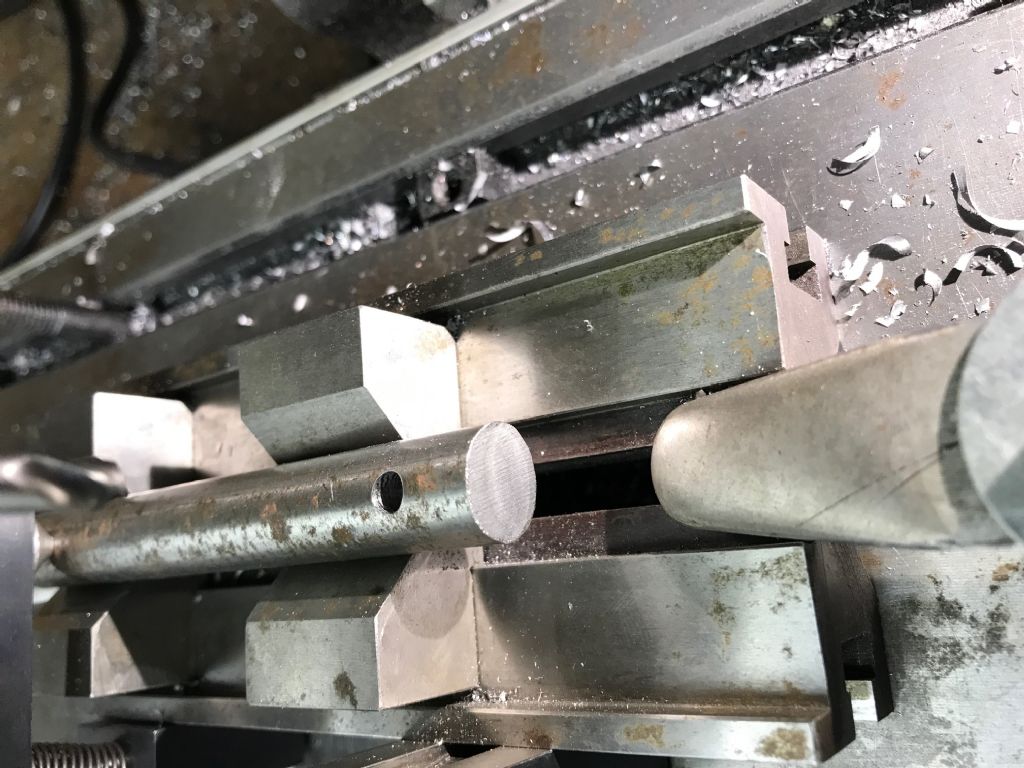
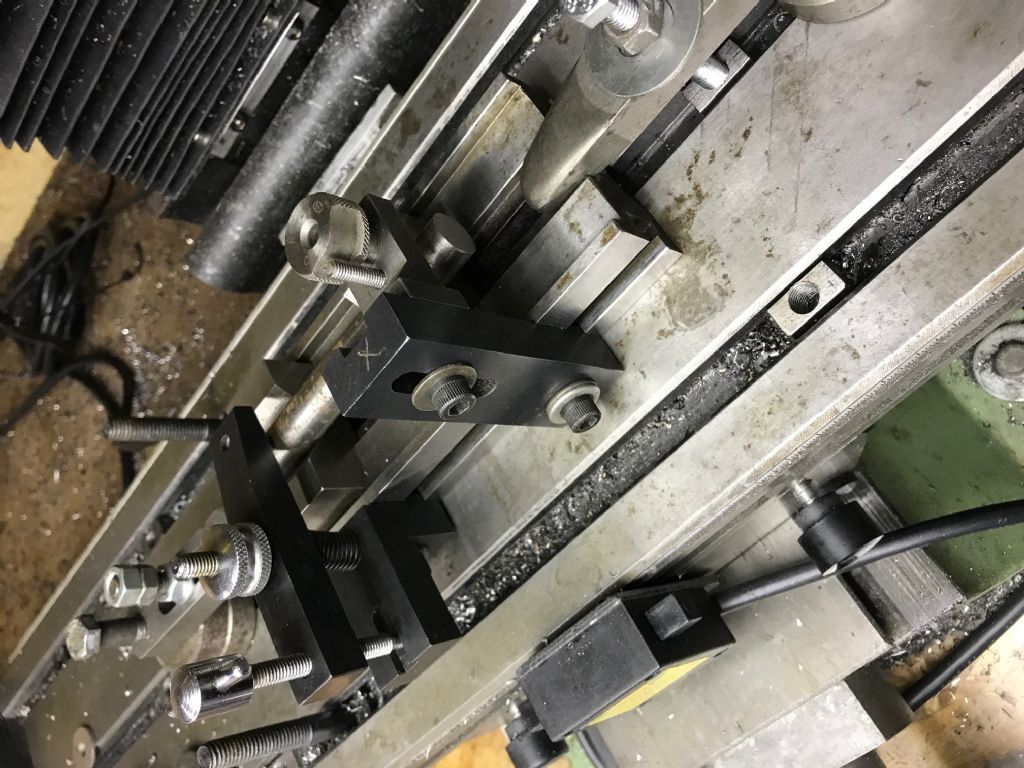
                    Hi, I had a fiddley job of cutting 2mm off the end of two S/S flange bolts, which are not easy to hold, let alone cut.

                    bolts 1.jpg

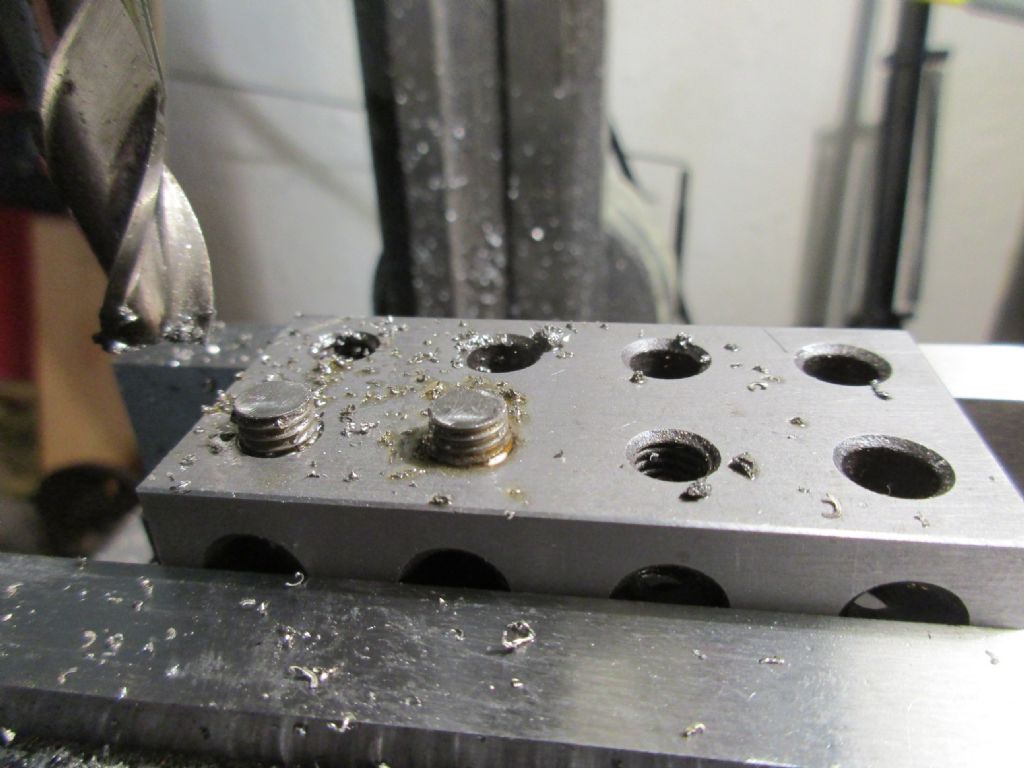
                    So, I did it like this.

                    bolts 2.jpg

                    Made the job easy peasy.

                    Regards Nick.

                    #468728
                    Emgee
                    Participant
                      @emgee
                      Posted by Colin Heseltine on 02/05/2020 22:09:54:

                      Finished off my Division Master Rotary Table Controller installation. I had finished the electronics a week or so ago and tested it all on the bench. The Oldham coupling arrived a couple of days ago so I could carry on with the stepper mount. It all went relatively well. When you look at the photos please ignore the ding in the mounting on the rotary table. (tube with bracket on decided they would rather not stay fixed in the 3 jaw chuck. Grrr.

                      The electronics are the Steve Ward controller which I purchased as a ready made tested circuit board and with his ready made tested keyboard. I took a lot of care with the hole layout for the buttons. I made a mock up front panel from MDF and cut all the holes in it to ensure the layout was spot on.

                      controllerres.jpg

                      Colin, did you print the graphics on the switches or buy them somewhere ?

                      Emgee

                      #468730
                      Nigel Graham 2
                      Participant
                        @nigelgraham2

                        Neat way of doing it, Nick. Thank you for the tip.

                        '

                        Me today? Continued with the steam-wagon but hit more problems, some from cumulative errors despite all care with handed-pair components; or from spotted-through bolt-holes having drifted. Others from having to design the thing as I go, often finding bits I made earlier (several years earlier!) interfere with the bits I am making now.

                        I'd envisaged the boiler sub-frame being also its lifting-frame but realised that would not be as straightforward as it seemed, so I am making a new tool for that purpose.

                        One unexpected snag will arise in making the new footplates necessary – 3 pieces of 16swg steel. I can cut it, by angle-grinder or manual sheet-saw if necessary, but the problem comes if I want to flange it. For the lock-down and travel restrictions bar me from a shared folder…. about 30 miles away.

                        My 'Warco' 3-in-1 tool is not designed for steel that thick. It may be pushing it to use the jenny I bought but have not yet used, though it's stated as up to 1.5mm. I could try MIG-welding flanges, but have limited welding skill and am worried about distortion.

                        '

                        Broke off in mid-afternoon for the usual cuppa but made something of it with appropriate props, to stage a humorous photo for my caving friends with whom I spend most normal Saturday afternoons underground then enjoying tea and cakes back at the club-house.

                        Our last caving session would have been seven weeks ago – my model-engineering club stopped earlier still, by some two or three weeks. Our track and club-room, and a public sports-centre, are in the grounds of a school that locked out external organisations earlier than the real lock-down. Leaves on the line? It'll be a linear compost-heap… Some of the society's ' Sixteen-Millers ' have been circulating videos of their own garden railways, which helps us all keep in at least some contact.

                        '

                        I do like what the good folk of Settle did for RNLI funds: a ' Bathe At Home Day '. Note – bathe not bath! A friend who lives in that fair town sent me a photo of her in cossie and brightly-coloured knitted bobble-hat, standing up to her tummy in the garden pond. She told me of another who used an old grow-bag filled with water.

                        #468732
                        Colin Heseltine
                        Participant
                          @colinheseltine48622

                          Emgee,

                          Steve Ward provides a .png file of the layout luckily I have two colour printers, an A3 and A4 the scale was fractionally wrong on one of them the scaling and layouts and colours can be changed used software called getpaint

                          He also provides a template for the hole layout. I used this as a guide and measured all the button and mounting hole spacings and created a spreadsheet with the coordinates for my DRO. Did a trial run on piece of MDF before attacking the box lid. I have copy of spreadsheet if any use to you.

                          colin

                          Edited By Colin Heseltine on 02/05/2020 23:50:02

                          #469029
                          Anonymous

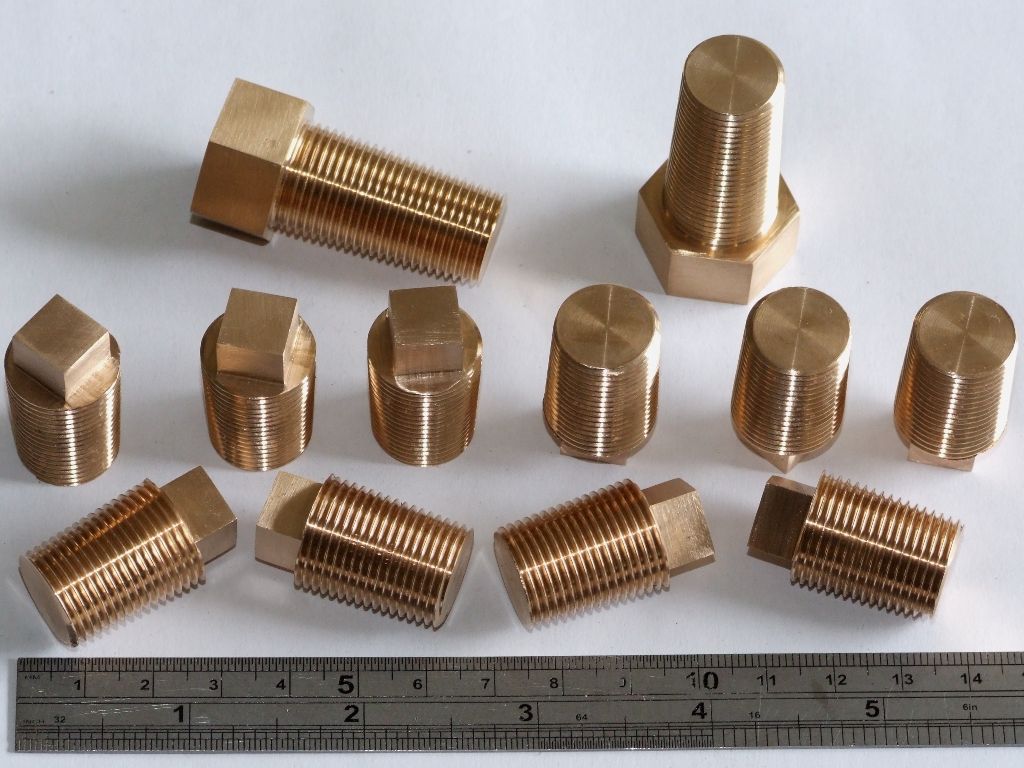
                            Finished my batch of 3/8" BSPT blowdown plugs:

                            blowdown_plugs_finished.jpg

                            At the top are a couple of embryo fusible plugs for a member of another forum, whose lathe will not cut 19 tpi threads. The gauge line on the blowdown plugs is pretty consistent from plug to plug. Given the shallow taper I estimate that the diameter at the gauge line is less than a thou across the set. Pretty pleased with that, especially given my previous hiccups with the hydraulic copy attachment trying to get consistent results.

                            So many jobs lined up I'm not sure what to do next. Even when the lockdown is downgraded looking for subbies is not going to be a priority for most companies. So I've probably got another couple of months at least of thumb twiddling to go.

                            Andrew

                            #469469
                            Mark Rand
                            Participant
                              @markrand96270

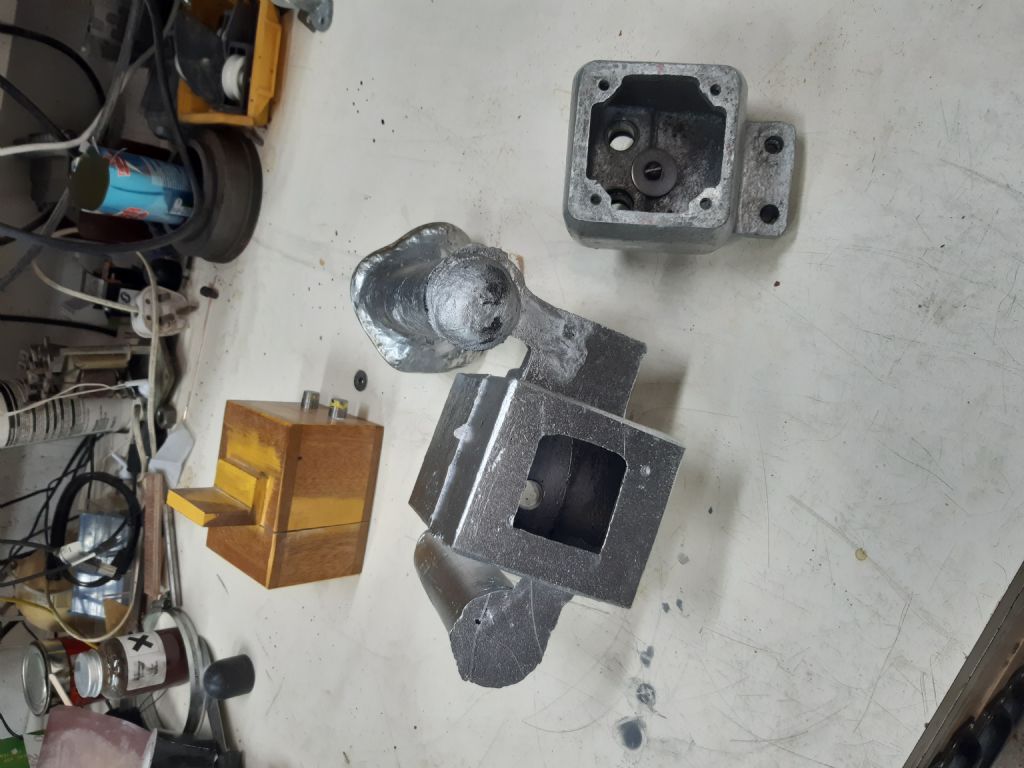
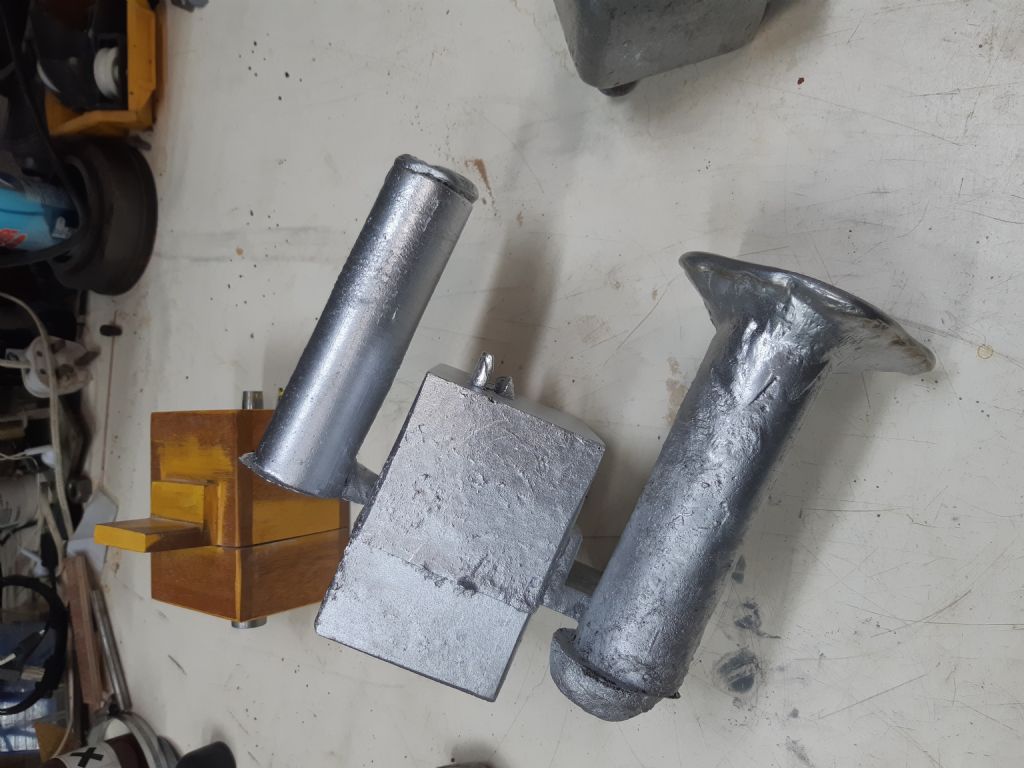
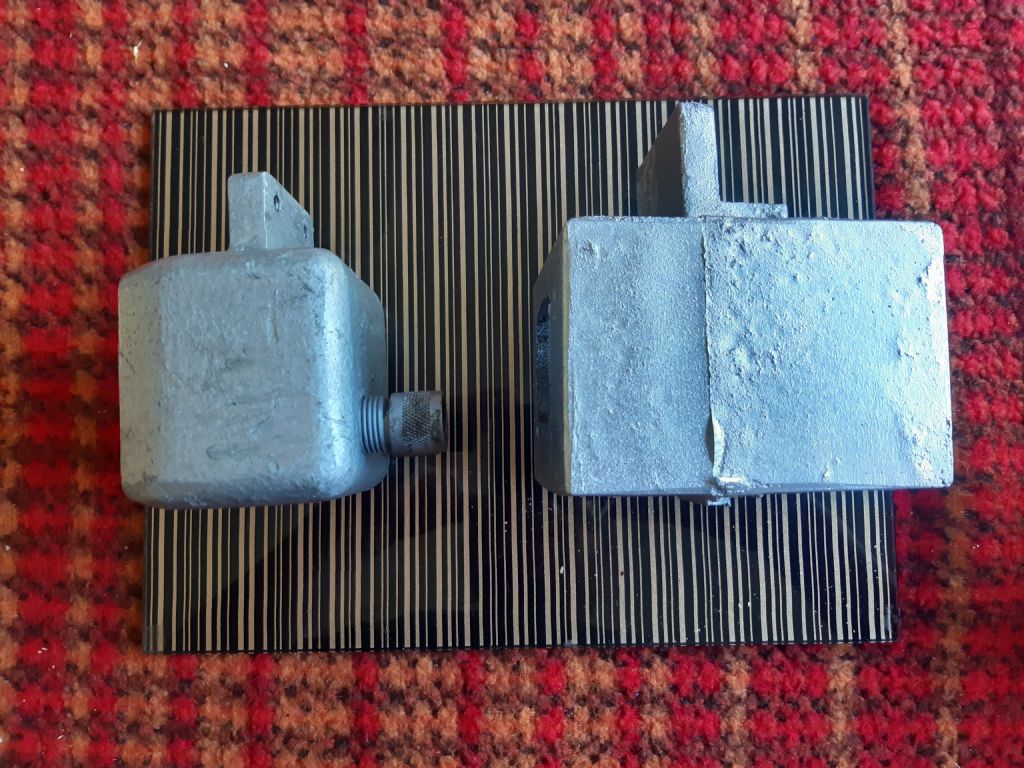
                              Cast a new box for the forward/off/reverse switch on the mill. The latest switch (after the one I got to replace the orignal burned out!) is quite a bit bigger than the original.

                              Need to work on my sand ramming technique against the sides of the pattern, but for this one the messy surfaces will get skimmed clean on the mill. Very happy with the finish on the inside of the box from the core.

                              box1.jpg

                              box2.jpg


                              box3.jpg

                              Edited By Mark Rand on 06/05/2020 00:37:48

                              #469494
                              Trevorh
                              Participant
                                @trevorh

                                Finally had need to use my drilling clamp jig, nothing too complicated or difficult by the standard of others but none the less Pleased to have used the jig and happy with the result, just not sure how to rotate the photo's

                                finished result.jpg

                                drilling jig.jpg

                                Edited By Trevorh on 06/05/2020 07:49:47

                                #469631
                                Henry Brown
                                Participant
                                  @henrybrown95529

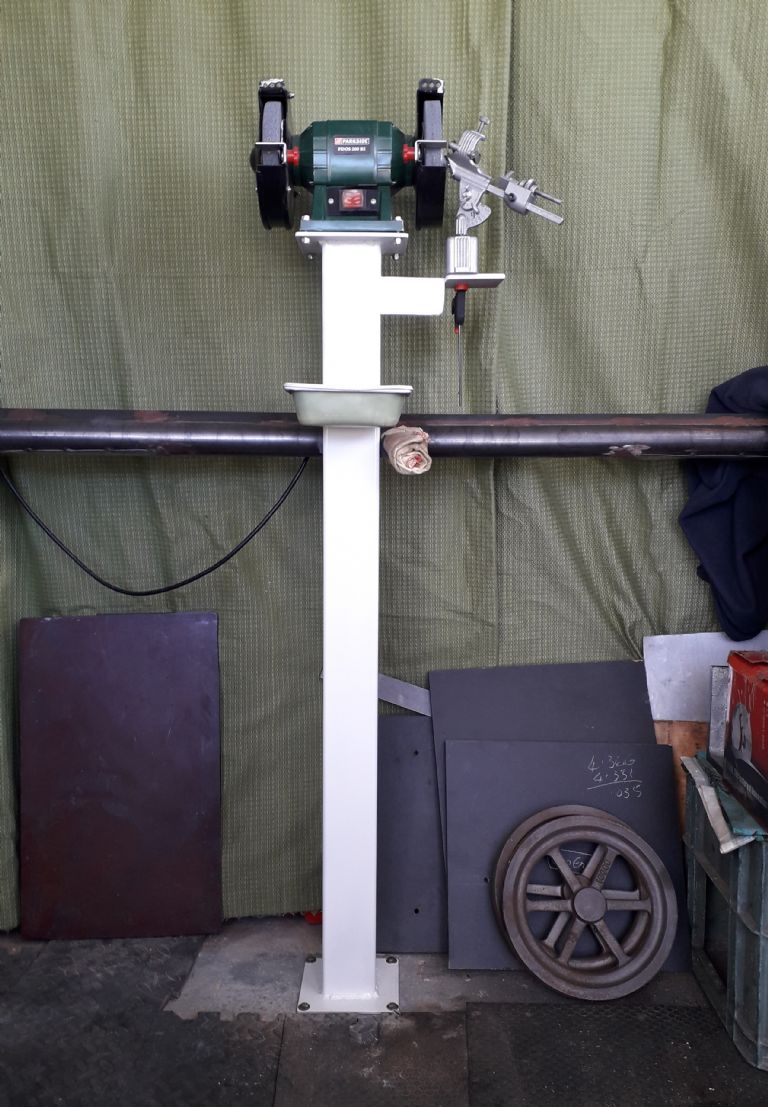
                                  Knocked this grinder stand up from a bit of scrap 80 x 80 box, a couple of 150mm square end plates and some odds out of the scrap bin. Couple of coats of paint Monday and yesterday, bolted it down today and part filled the upright with dry sand, a trick I learnt from making some high end speakers, to stabalise everything.

                                  The arm sticking out to the right is to support a Picador drill grinder, there is a tray for water just under the grinder.

                                  20.05.06 grinder stand.jpg

                                  #469863
                                  Samsaranda
                                  Participant
                                    @samsaranda

                                    What did I do today, well not today but yesterday and nothing to do with engineering, I got my first hive of bees. Last summer I constructed a beehive, not a conventional one but a top bar hive, beekeepers will know what I mean, and tried unsuccessfully to lure in a swarm of bees, problem was I didn’t finish the hive until mid July and it was a bit late in the season to catch a passing swarm. A friend of mine decided during the winter that he was downsizing from 4 to 3 hives so I could have the bees from the spare, we had planned for the exchange to happen late May, lockdown permitting. Yesterday I got a phone call from my friend, the bees in the spare hive had swarmed and he captured them and they were now available and ready for transporting. So as both of us are self isolating we arranged he would leave the box on his drive and I would pick them up. Well bees successfully transported to my house, only one escaped in transit inside the car but that was no problem. Moving the bees from their transit box into the hive was a baptism of fire for me, I had studied a lot of theory about beekeeping, but that doesn’t prepare you for the first time you handle bees especially when you have a whole swarm to coax into a new hive. Well I made one fundamental mistake, I left a small gap with the zips on my hood, I felt a sting on my chin and then became aware of a bee on the inside of my hood, removed said bee and made sure the zips were then fully closed. Well the bees successfully transferred and the stragglers left outside soon found the entrance and were all inside the hive by nightfall. It was quite daunting dealing with a full swarm all on my own for a first encounter with live bees but I was understandably chuffed to achieve success with only one sting, all part of the learning process, another enjoyable hobby on my list to look forward to now.
                                    Dave W

                                    #470298
                                    Mick B1
                                    Participant
                                      @mickb1

                                      Well, yesterday really.

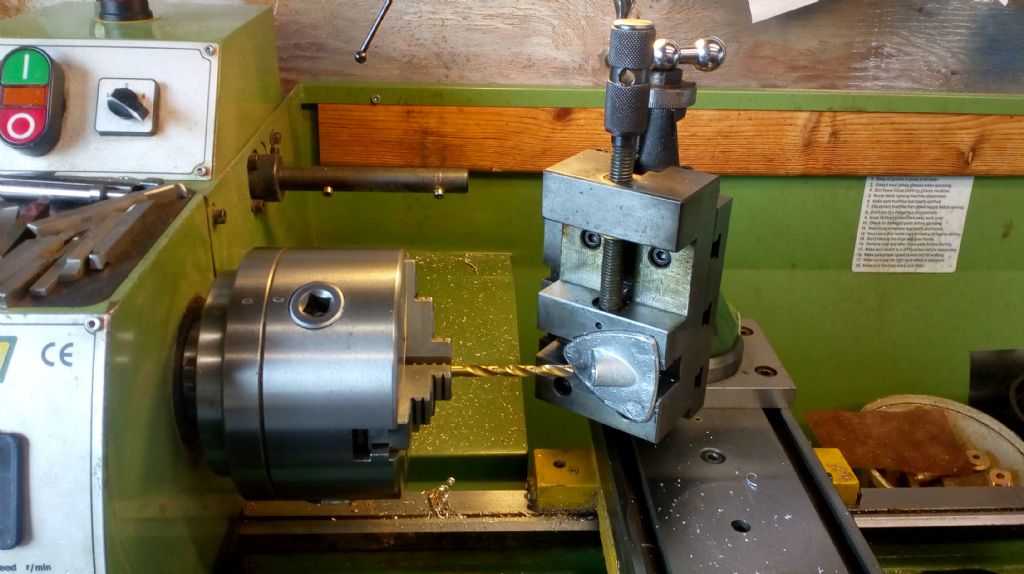
                                      Funny bracket on a classic vehicle for a bloke down the railway. He made an alli sand casting of the original and wanted me to drill the angled hole.

                                      img_20200508_124909.jpg

                                      He lent me an original to set up on, so I stuck it in the vice on the swivel vertical slide, then fiddled till I could get an 8mm drill through the 'ole without touching. Turned out to be about 53 degrees, but I dunno exactly 'cos the angle calibration on the swivel stops at 50. There's an added complication in that the hole's tapered, so I eyed-up the big-end clearance around the drill as equal all round as near as I could see – should be within a few thou. There were just 2 to do, and the castings were very slightly different, so there was little point in trying for a fully-repeatable setup.

                                      Whether the hole taper needs to be replicated, and if so how, is gonna hafta be another story. I certainly can't see a ready way to bore a tapered hole that small, in a thing looking like that, in my setup. If somebody down the railway's got a suitable tapered reamer somewhere, that'd be neat.

                                      Oh, social distancing of course. He dropped a polybag with the bits into my carrier, and I washed everything, plus my hands, in detergent water as soon as I got home.

                                      smiley

                                      #470328
                                      Nicholas Farr
                                      Participant
                                        @nicholasfarr14254

                                        Hi Mick B1, that's a neat and simple way of doing it.

                                        Regards Nick.

                                        #470330
                                        Mick B1
                                        Participant
                                          @mickb1
                                          Posted by Nicholas Farr on 09/05/2020 11:10:28:

                                          Hi Mick B1, that's a neat and simple way of doing it.

                                          Regards Nick.

                                          Ta. I'd thought I'd have to do it with trig. Sometimes it takes me a while to think of the simple way… smiley

                                          #470337
                                          Brian H
                                          Participant
                                            @brianh50089

                                            Looks like a bonnet catch housing for a pre-war car, if so the taper may be to stop rattles when driving, in which case there may be a matching taper on the actual catch.

                                            Brian

                                            #470389
                                            Journeyman
                                            Participant
                                              @journeyman

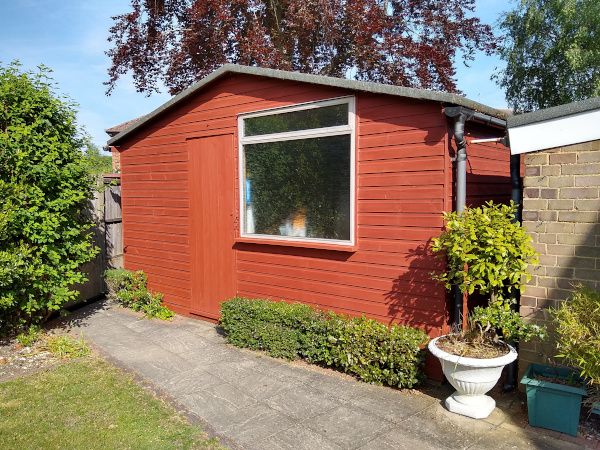
                                              Today I've mostly been painting the workshop with some red jollop.

                                              shed090520.jpg

                                              Somewhat akin to painting a sponge as I have not done it for a few years. Still should last another year or so now. Noticed that the T&G boards on the door have shrunk quite a bit and the door has bowed out, another job for another dayfrown

                                              John

                                              #470871
                                              Michael Gilligan
                                              Participant
                                                @michaelgilligan61133

                                                Not worth starting a thread for this, but the story popped-up on the Smithsonian and has an ‘engineering’ element:

                                                [quote] Sturminster Newton runs on a 25-horsepower water turbine installed in 1904. The turbine replaced two water wheels fitted in 1849 and capable of producing a combined output of 12-horsepower, according to the museum

                                                [/quote]

                                                **LINK**

                                                https://www.smithsonianmag.com/smart-news/1000-year-old-mill-grinds-again-supply-flour-uk-180974830/

                                                Might be worth a visit when life gets back to normal.

                                                Michael

                                                #470949
                                                Iain Downs
                                                Participant
                                                  @iaindowns78295

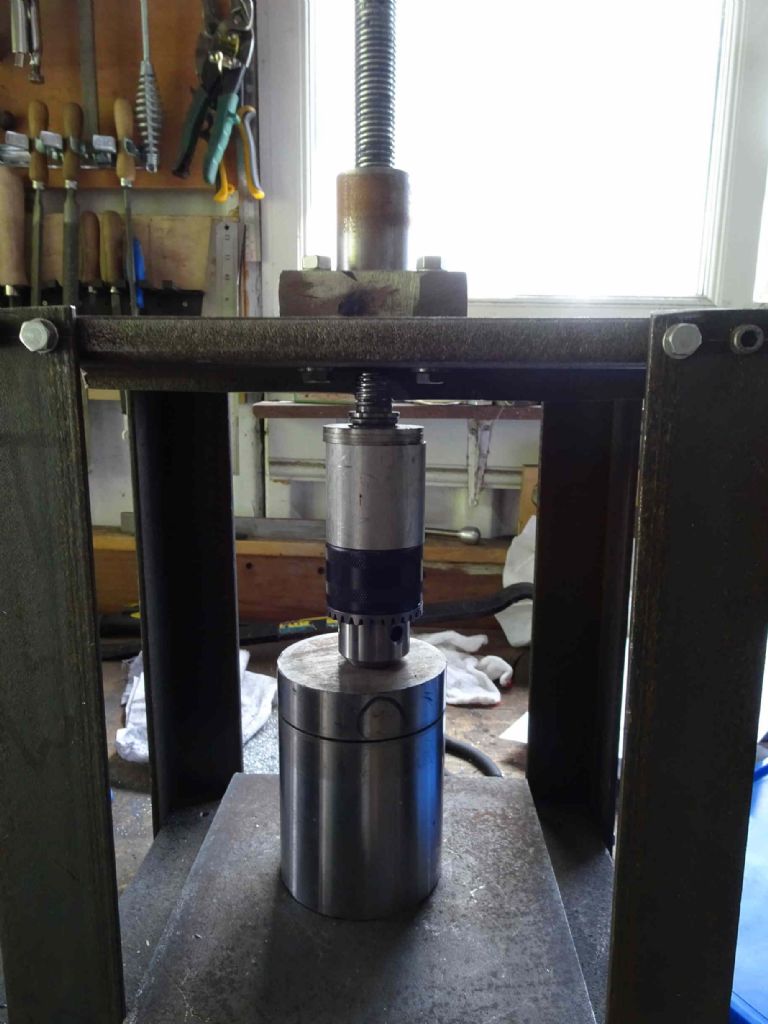
                                                  Some of you may have noticed me moaning about the drill chuck that came with my milling machine. I've been hathering about what to do, but today I decided to follow some instructions on the internet and disassemble it to see if there is grit or similar.

                                                  First I turned a pusher with a 39mm inside diameter (using new uncoated aluminium carbide. still trying to work out the best way of using them).

                                                  chuck pressing.jpg

                                                  In fact I needed to clamp the press to the bench. it was very tight.

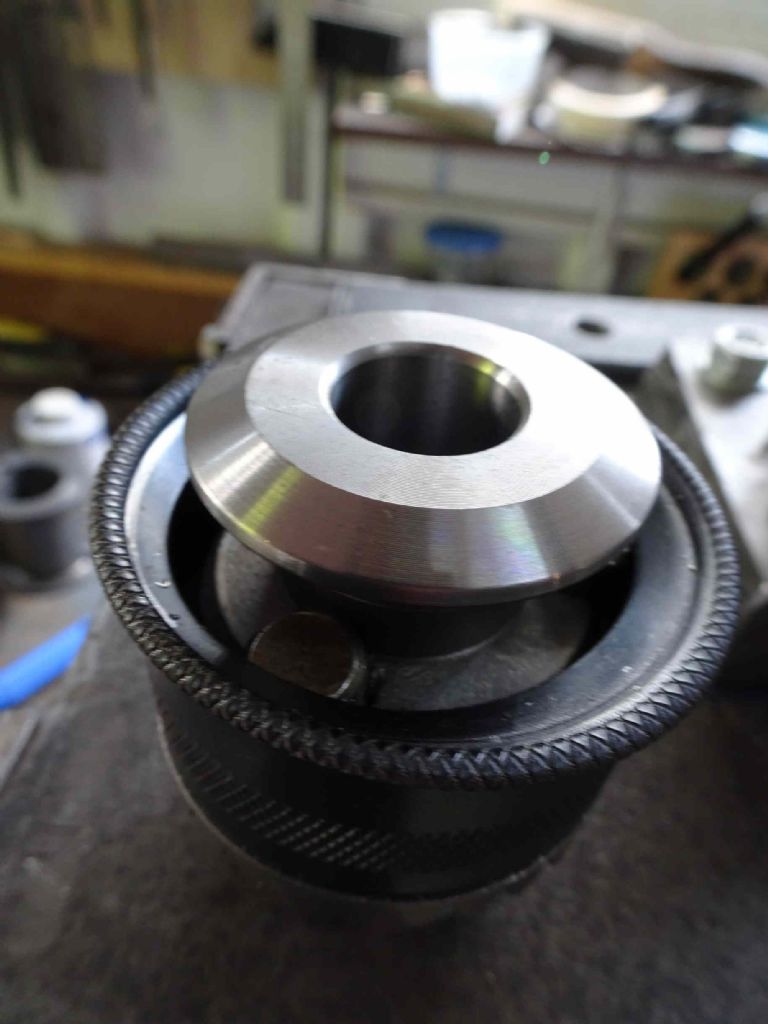
                                                  Sadly, the outcome was not what I expected

                                                  check pressed.jpg

                                                  What the internet says is that this cover pushes off to reveal the cracked ring. Hmm – we wary of the Internet!

                                                  I expect that cheap Chinese chucks just aren't made the way that real Jacobs chucks are.

                                                  A replacement is on the way!

                                                  Iain

                                                  #471363
                                                  John Hinkley
                                                  Participant
                                                    @johnhinkley26699

                                                    Last couple of days, actually, spent doing number of "back burner" jobs.

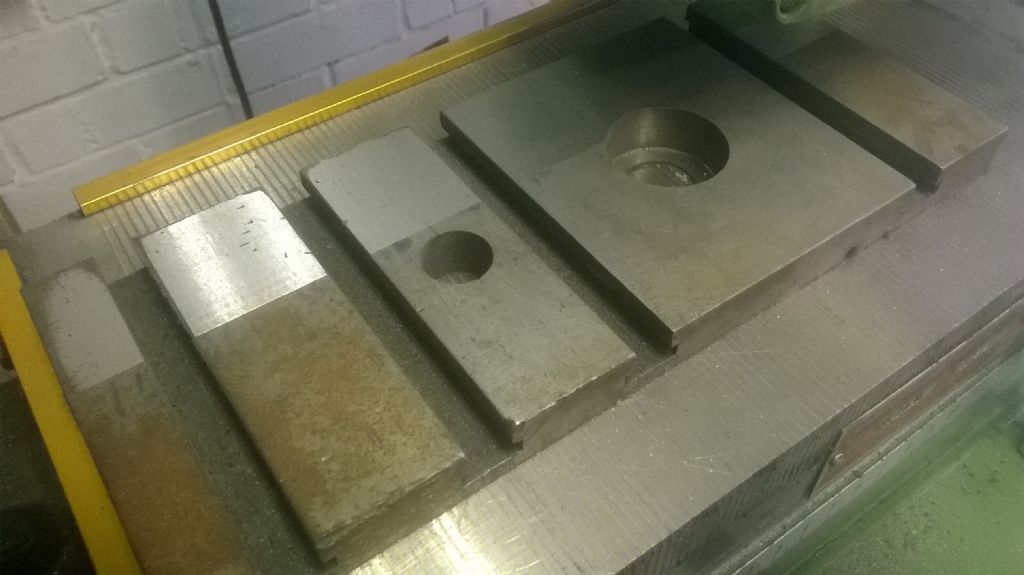
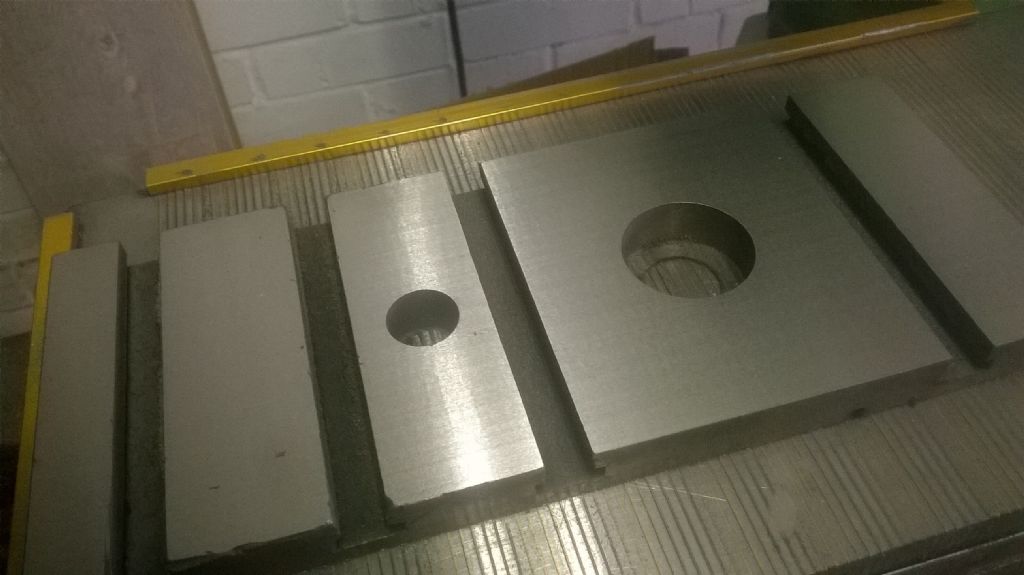
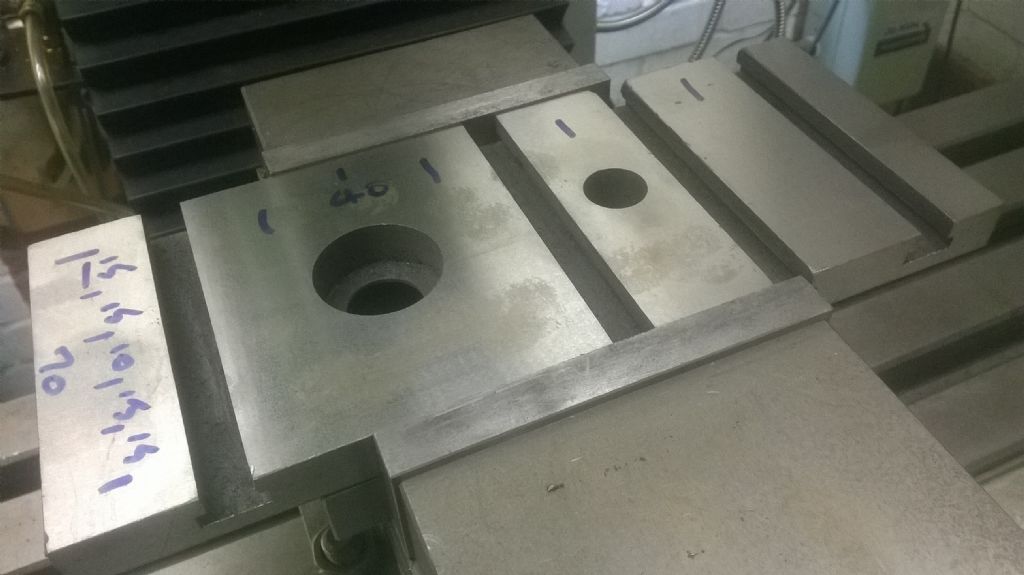
                                                    Decided to convert a secondhand Myford cross slide (unused for another project) into a pallet for the mill. I thought it might provide some useful alternative hold-down facilities by utilising the ready-made tee slots in addition to the proposed pattern of dowel holes and tapped holes. First job was to try to tidy up the surfaces, so I milled off the dovetails and whipped it over to the surface grinder to true up the top and bottom faces. (I can imagine all the Myford owners wincing at at my cavalier attitude towards their hallowed iron! Sorry if you're offended, but it had been badly abused by its previous owners.)

                                                    half-done top

                                                    Half done!

                                                    finished top

                                                    And finished.

                                                    Off to the mill and set it up, ready to drill and/or tap the dowel and clamp mounting holes. A quick measure and I decided on this pattern:

                                                    hole spacing layout

                                                    Having to compromise with the metric spacing I use and the Imperial slots. Marathon drilling session starts this afternoon.

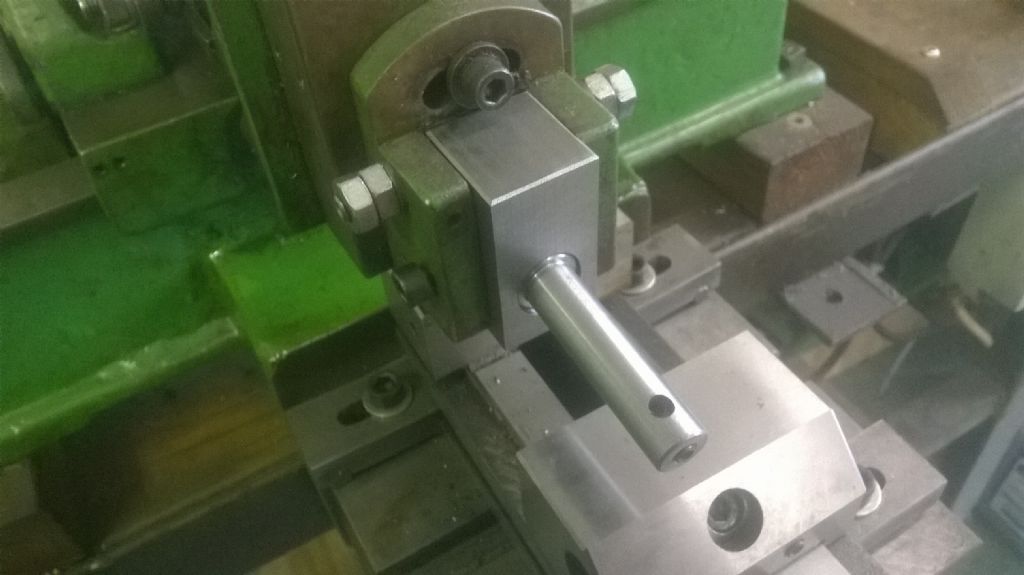
                                                    Also made two new tool holders for my Perfecto shaper. First one is a lantern-style one, so that I can use 10mm square tooling as well as the Imperial sized tooling it had when I bought it.

                                                    lantern-type toolholder

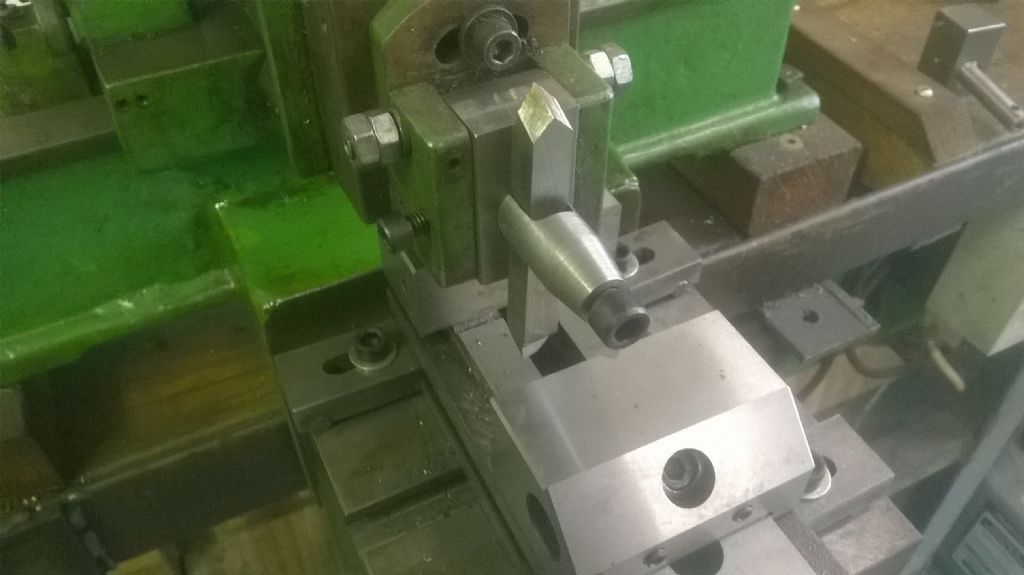
                                                    While as I was at it, I knocked up a keyway slotting tool holder à la Stefan Gotteswinter:

                                                    keyway slotting tool

                                                    The tool is fitted in a hole which is angled downwards by 5° for clearance. The tool holder block is held secure by utilising hole which a former owner had drilled and tapping it 6mm to take the socket head bolt seen on the left-hand side of the clapper box, The bolt was dog-pointed to engage in a matching hole in the tool holder.

                                                    Taken up too much space on this thread, so I'll stop now. Lunch is ready, anyway.

                                                    John

                                                    #471389
                                                    John Haine
                                                    Participant
                                                      @johnhaine32865

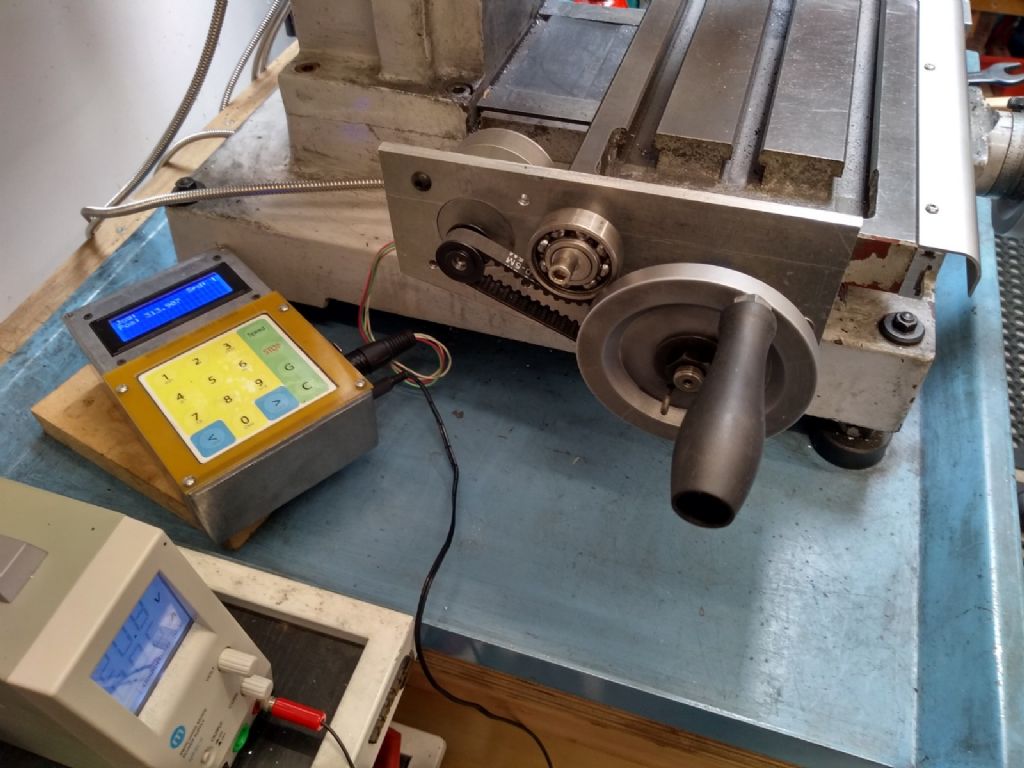
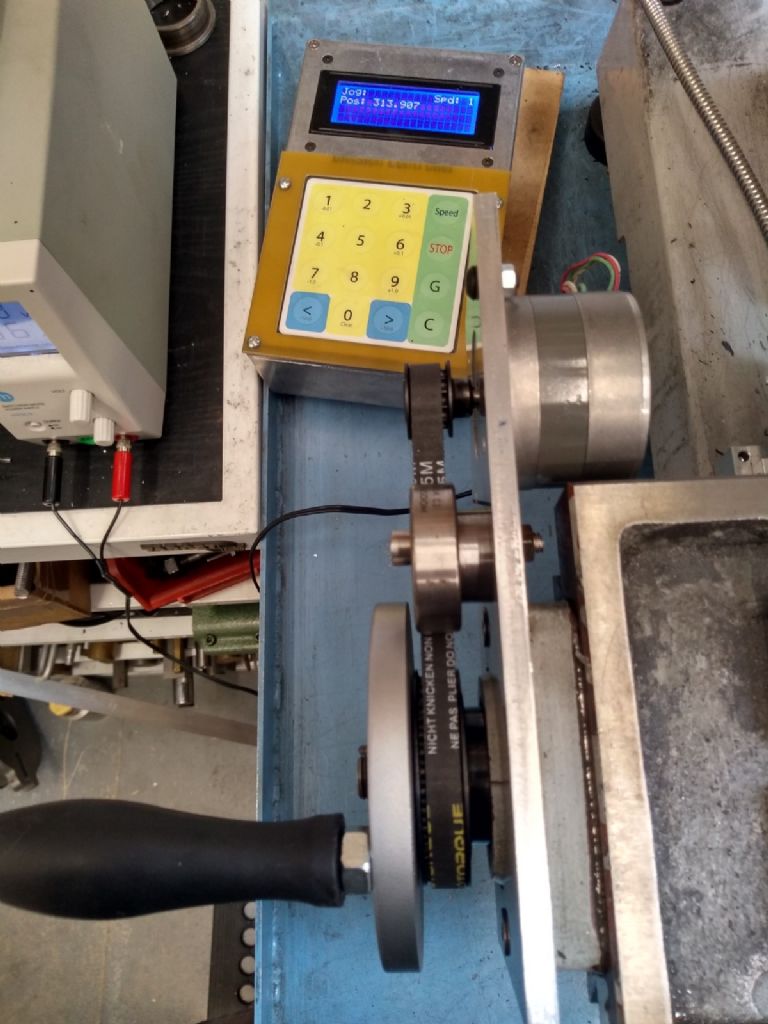
                                                      Nearly finished the mechanics of the power feed for my VMB. Couple of pics:

                                                      img_20200513_121629283_hdr.jpg

                                                      img_20200513_121657717_hdr.jpg

                                                      An alloy plate bolted on to the LH feedscrew bracket carrying an Astrosyn size 23 stepper that's been in my spares box for years and years. 3:1 drive to a timing pulley on the leadscrew – I turned down the central boss to 24mm and bored out the pulley to suit. Drive is transferred by a pin through the handwheel into the pulley. An old 40 od ballrace glued on to a post with an eccentric hole bolted through to the plate to adjust belt tension. For test purposes driven by my Ward divider controller, works very well. Just needs a strip along the top edge of the plate to stop chips flying into the belt.

                                                    Viewing 25 posts - 251 through 275 (of 636 total)
                                                    • Please log in to reply to this topic. Registering is free and easy using the links on the menu at the top of this page.

                                                    Advert

                                                    Latest Replies

                                                    Home Forums The Tea Room Topics

                                                    Viewing 25 topics - 1 through 25 (of 25 total)
                                                    Viewing 25 topics - 1 through 25 (of 25 total)

                                                    View full reply list.

                                                    Advert

                                                    Newsletter Sign-up