What did you do today (2015)

Advert

What did you do today (2015)

Home Forums The Tea Room What did you do today (2015)

Viewing 25 posts - 1,301 through 1,325 (of 3,154 total)
  • Author
    Posts
  • #191026
    Rainbows
    Participant
      @rainbows
      Posted by martin perman on 23/05/2015 20:27:16:

      Dismantled the magnetron today, will need to cut the metal work to remove the magnets, which are a nice size, a mate is coming round with an angle grinder so that I can open the garage door and get my Angle grinder out smiley

      Martin P

      Touch the berylium insulation with an angle grinder and that will be 10 years off your predicted lifespan.

      Advert
      #191028
      martin perman 1
      Participant
        @martinperman1

        Rainbows,

        Thanks for that, have had experience of it before so aware of its nastyness, will dismantle mechanically then by un-clipping tags.

        Martin P

        #191031
        Bowber
        Participant
          @bowber

          Now got the register right, a nice slide fit with a little bit of effort required so that'll do.

          Steve

          #191049
          Ed Duffner
          Participant
            @edduffner79357

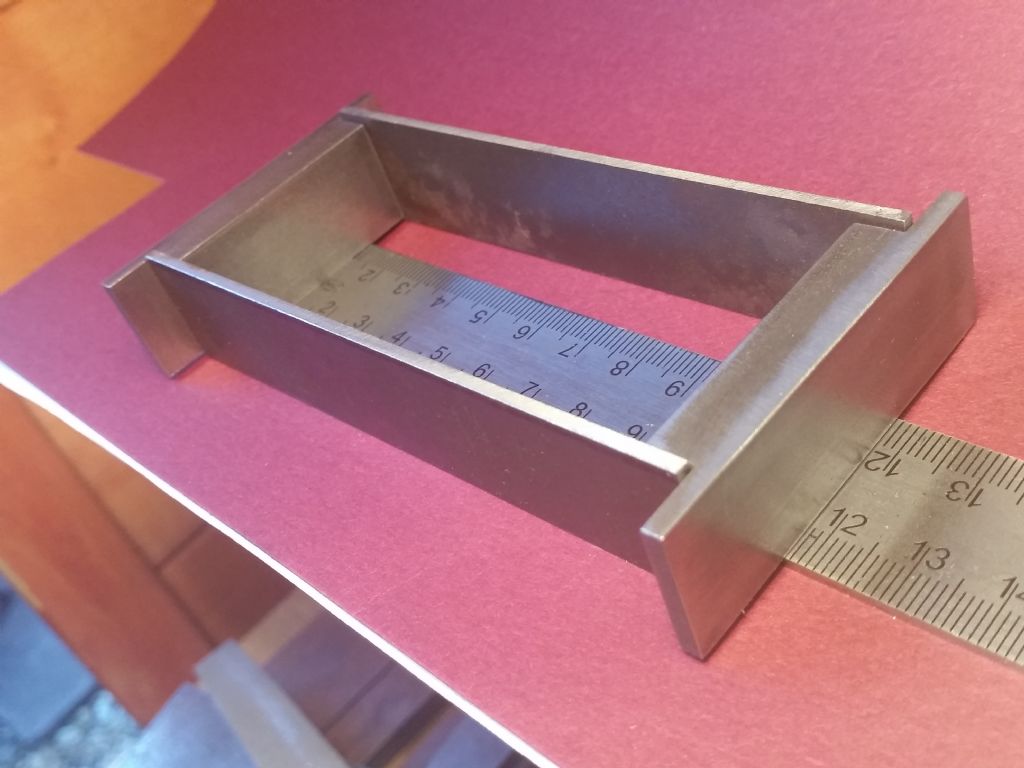
            Finished a small jig to aid alignment of hand punches.

            punchjig.jpg

            #191051
            Nicholas Farr
            Participant
              @nicholasfarr14254

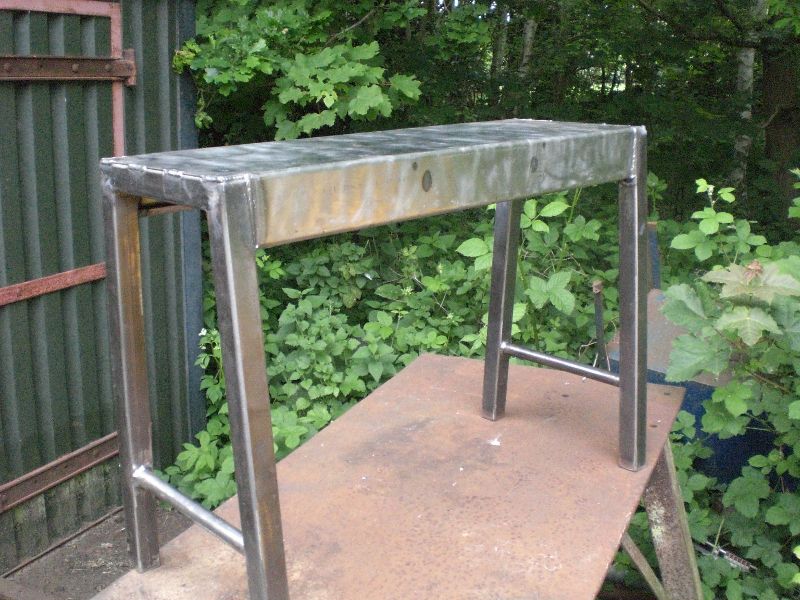
              Hi, this afternoon found time to weld the legs to the top of my new lathe stand that I'm making.

              cimg1979 - copy (800x600).jpg

              Just need to flush some of the welds down before giving it a coat or two of paint.

              Regards Nick.

              #191079
              Anonymous
                Posted by NJH on 21/05/2015 14:54:42:

                Good grief Andrew !

                I'm glad I don't live next door to you.

                Norman

                Norman: You can relax now, with the help of my neighbour the arbor press is now in the hall. Next issue is finding some clear bench space, or biting the bullet and getting rid of the pillar drill.

                Andrew

                #191083
                NJH
                Participant
                  @njh

                  Andrew

                  Here's an idea….

                  I know you are a keen glider pilot – why not donate that heap of old arbor pressing iron to your club's workshop. That way you will still have the use of it, they may find it useful ( and you will gain a few brownie points) , and you will free up ( by the looks of it much needed) space in your hall / workshop / equipment store. On no account get rid of your pillar drill – the " I can drill holes with the milling machine etc" never works. The very time that you urgently need to drill a hole there is a complicated set-up in the mill and …………. you know the result!

                  Norman

                  ( The down side to this suggestion is, I suppose, that you will need to ask your neighbours help to lift it back into the car. If I did live next door I know how I would respond – unless you were VERY persuasive!)

                  #191084
                  JasonB
                  Moderator
                    @jasonb

                    Bit of a pain draging half a traction engine upto the flying site whenever you want to close a couple of rivits, I assume you have got it to do the Burrell Rivits?

                    #191092
                    AndyP
                    Participant
                      @andyp13730

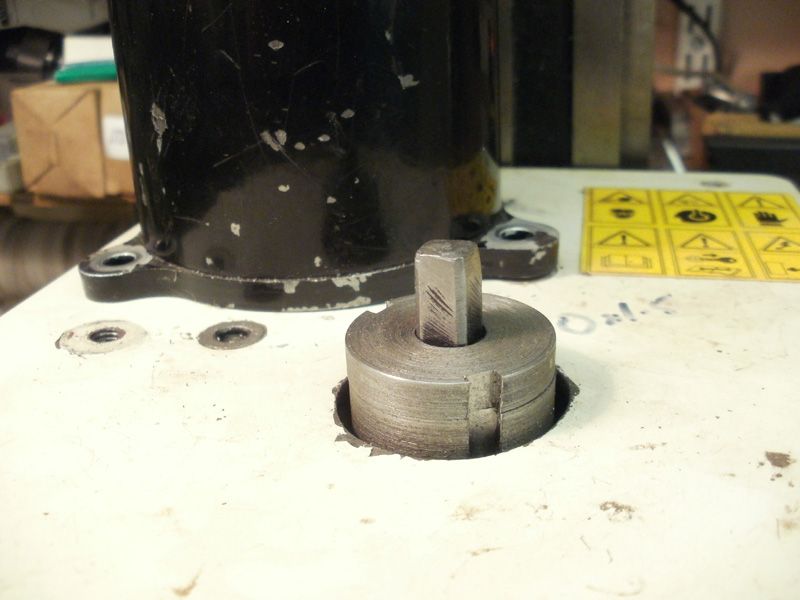
                      Completed my version of the self extracting drawbar from Mikesworkshop except the top of mine is removable via a left hand thread so that I can fit the imperial drawbar for my boring head – bad planning on my part I know but it is an Arrand and really nice to use. Slots are for the C spanner that sits by the mill anyway for the collet chuck.

                      millbar2.jpg

                      There are lots of good ideas on that site, I copied the table stops as well !

                      Andy

                      #191110
                      Anonymous

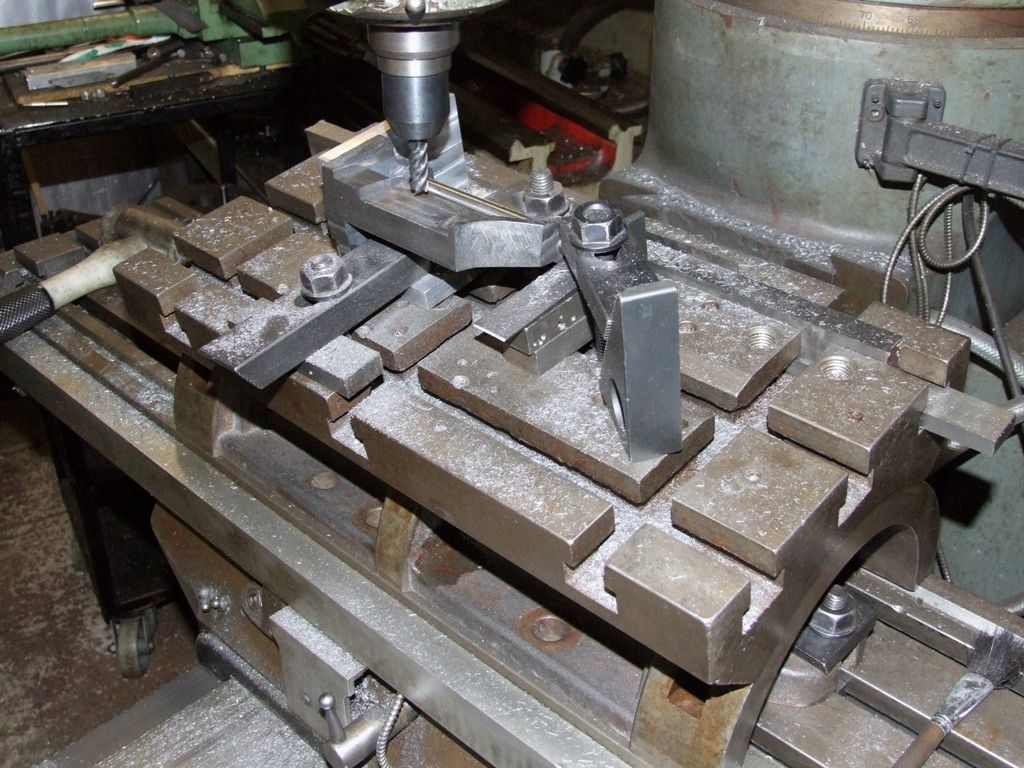
                        I've been machining the gear change brackets for the traction engines. This was the first outing for the tilting table I bought off Ebay last year, and has been sitting under the hall table ever since. It's a neat swap, tilting table out, arbor press in. thumbs up The tilting table has been well used, to put it politely, but it was cheap, and after a bit of a clean and oil here it is in action:

                        gear_bracket_machining.jpg

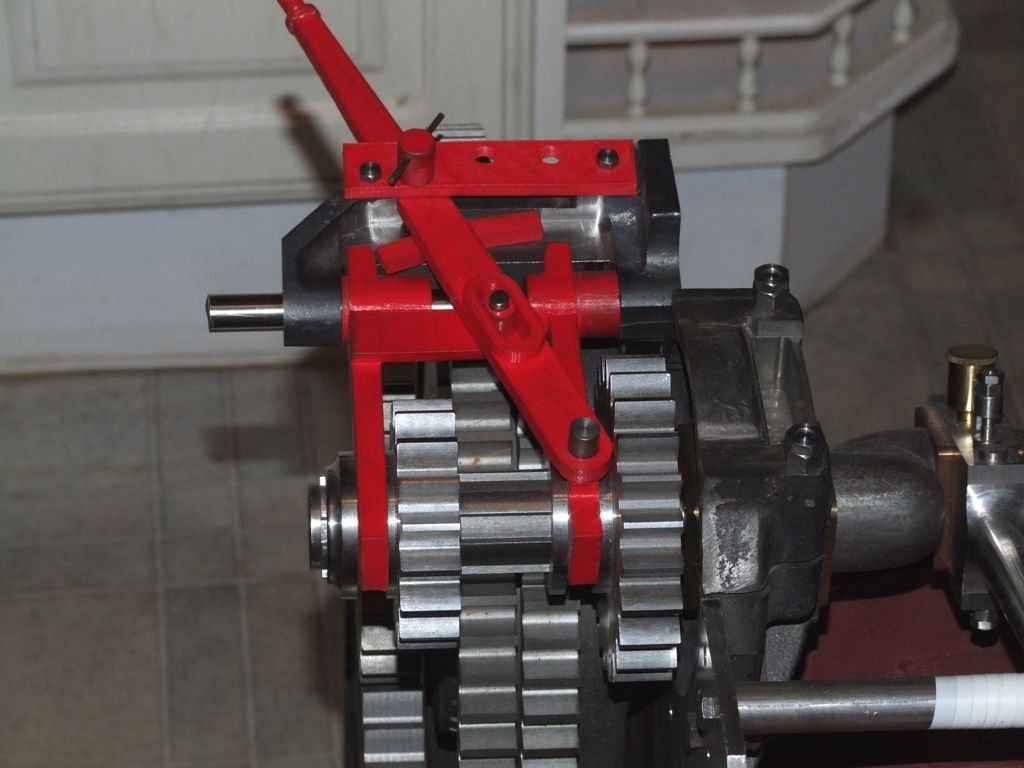
                        And here is the first bracket fitted and the remaining 3D printed parts fitted to prove the design:

                        gear_bracket_fitted.jpg

                        Designed in 3D CAD, machined to the drawings, and everything fitted; whatever next? wink 2

                        Andrew

                        #191113
                        Muzzer
                        Participant
                          @muzzer

                          Sickeningy good as ever! Coming along nicely…..

                          Murray

                          #191114
                          DrDave
                          Participant
                            @drdave

                            Finally got around to using my new roughing cutter in the mill. Goodness: why did I not try one before? I have been creating mounds of swarf in record time!

                            #191141
                            Paul Lousick
                            Participant
                              @paullousick59116

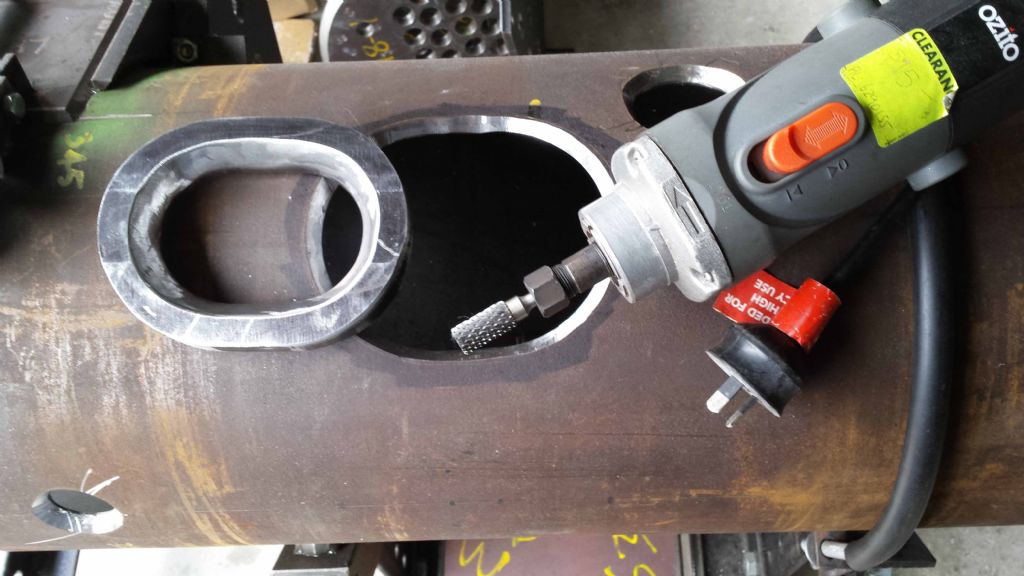
                              I bought a wood router in the bargain bin at a local hardware for $15 which was missing the base plate and accessories. It has a variable speed 850 watt motor, adjustable from 11,500 – 32,000 rpm. Makes an excellent electric die grinder when fitted it with a carbide rotary burr . I also have some air powered grinders but this is more powerful. Easily cut 12mm chamfers in steel plate.

                              Paul.

                              electric die grinder.jpg

                              #191156
                              Oompa Lumpa
                              Participant
                                @oompalumpa34302

                                Couple of weeks ago I was at Bog's house and he showed me a small "camera on a string" – a small cylindrical camera marketed as an Endoscope on the usual auction sites. I had been building a camera setup for the lathe/mill and promptly abandoned the idea and spent Eleven Pounds, Sterling, for this 2Megapixel 10mm diameter camera. It has six LED's at the lens and you can control the brightness from the USB end of the cable with a small thumbwheel.

                                No real use in day to day work of course but perfect for those times when the only way to see what you are doing is to stretch across the machine:

                                video-fullpic.jpg

                                vieo-pic.jpg

                                Next up – make a bracket for the computer.

                                graham.

                                #191188
                                Bob Brown 1
                                Participant
                                  @bobbrown1

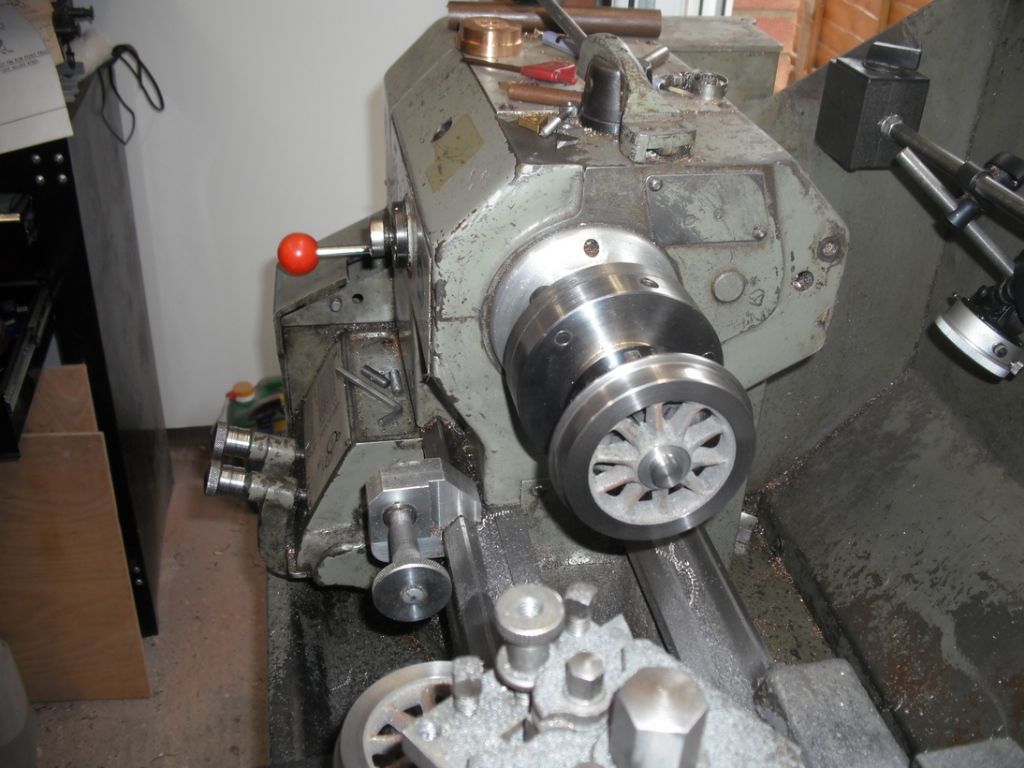
                                  Spent the afternoon making a mess on the lathe machining cast iron, made the pony wheels for Nigel.

                                  For those that may be interested in the process I used, which should apply to other parts like flywheels. I rough machined the castings in a 3 jaw chuck to plus 0.020" and machined the hole for the axle, drilled it 31/64" then used a 1/2" 4 flute end mill as a reamer. Mounted a piece of stock 16mm round bar in the ER40 collet chuck and machined the end such that the wheels were an interference fit so that they could be pressed on to the what is now a mandrel with the tail stock. Did all the final machining with the wheel on the mandrel, a few angles with the compound slide.

                                  w2.jpg

                                  Bob

                                  #191203
                                  Bob Rodgerson
                                  Participant
                                    @bobrodgerson97362

                                    Hi Graham,

                                    great idea with the camera. When I get back from over the pond I will investigate further. I will fit one to the Tormach and the Mini Lathe, they can run on the second screen on the Tormach.

                                    Nice and warm here at the moment and due to get hotter by the end of the week todays high is expected to be about 89 Deg F.

                                    Bob

                                    #191242
                                    ken king, King Design
                                    Participant
                                      @kenkingkingdesign

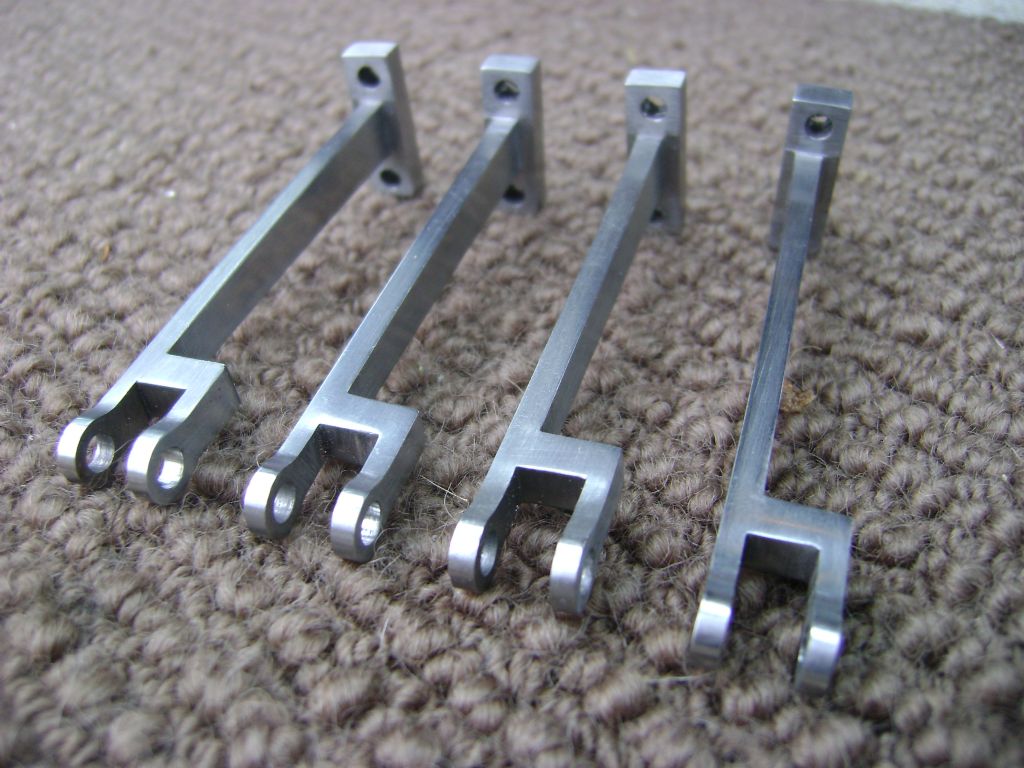
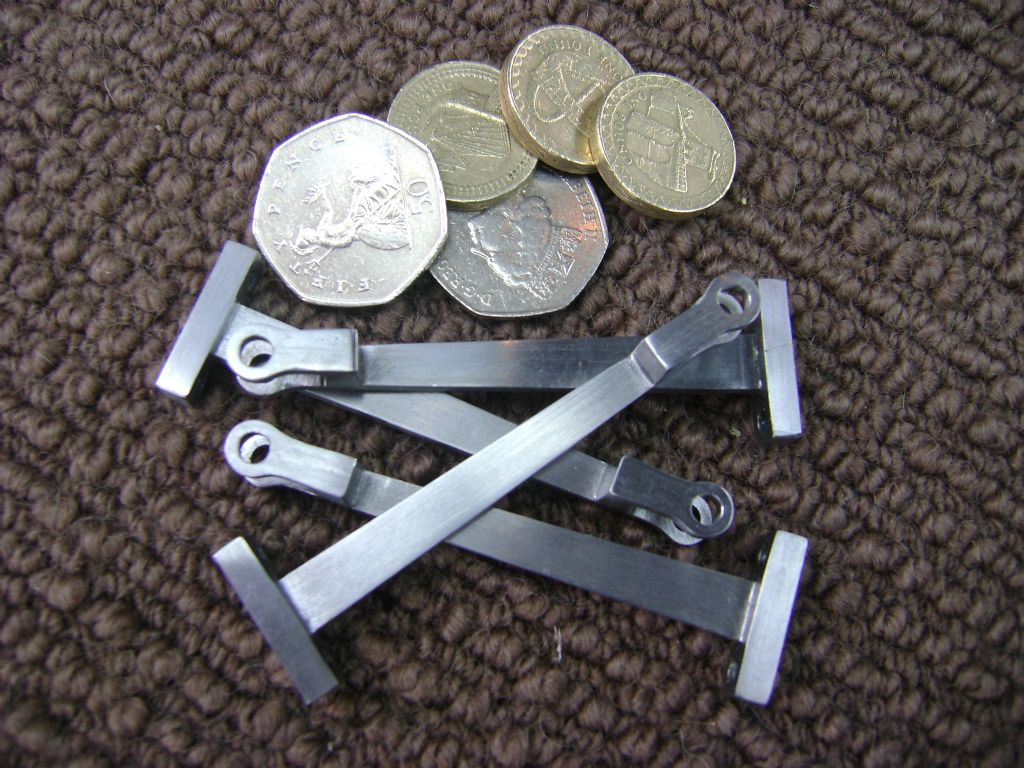
                                      Not a 'Today' activity, strictly speaking, but only a couple of days ago, so near enough I reckon. I finished and posted these four Eccentric Connector Rods to a client who is building a 5" gauge model of a GWR 28XX 2-8-0 .

                                      The drawing, by Martin Evans, calls for the clevis holes (nominally .156", 5/32&quot to be .1599 on one side and .155 on the other !! The best I could do to satisfy this requirement, for press fitting pins, was to make a test bar accordingly, then use the lead-in of a hand reamer to achieve the nearest agreement. In practice, it worked out pretty well, the tiny taper in the holes being immeasurable.

                                      rods3.jpg

                                      rods9.jpg

                                      The coins are to add scale only and are not representative of the value ! My brother-in-law tells me he used to see these locomotives regularly at Oxford, heading long freight trains. He remembers that they had very open cabs, some having been built back in 1910, and that in inclement weather there was often a tarpaulin pulled across to give the men on the footplate a little more protection from the elements.

                                      #191294
                                      Bob Brown 1
                                      Participant
                                        @bobbrown1

                                        Spent the morning aligning the tailstock to machine a shaft 9/16" diameter from 5/8 304 ss, I know I could have purchased a length of bar 9/16" but the shaft is reduced where the wheel press on at 1/2" and wanted them concentric with the shaft. Took a while to get the tailstock alignment to with in a 1/10, very small adjustments with the clock gauge in the bar to give me an idea how far it had moved, went from 0.002" to 0.0001 over 6" not bad me thinks.

                                        Now to sort the ends and middle section out machined 1/2" or to fit the wheels 0.502" as the holes are smidge over size.

                                        Bob

                                        BTW: not all stock bar is equal, had some 7/32 that measured as .2088" should be closer to 0.21875" too far out to be useful !

                                        #191324
                                        ken king, King Design
                                        Participant
                                          @kenkingkingdesign

                                          A correction

                                          I expect you all spotted my small oops when quoting Martin Evans' tolerance on a nominal .156 hole. The figures should have been – larger side .1559, smaller side .155 Sorry about that.

                                          #191339
                                          Steven Greenhough
                                          Participant
                                            @stevengreenhough56335

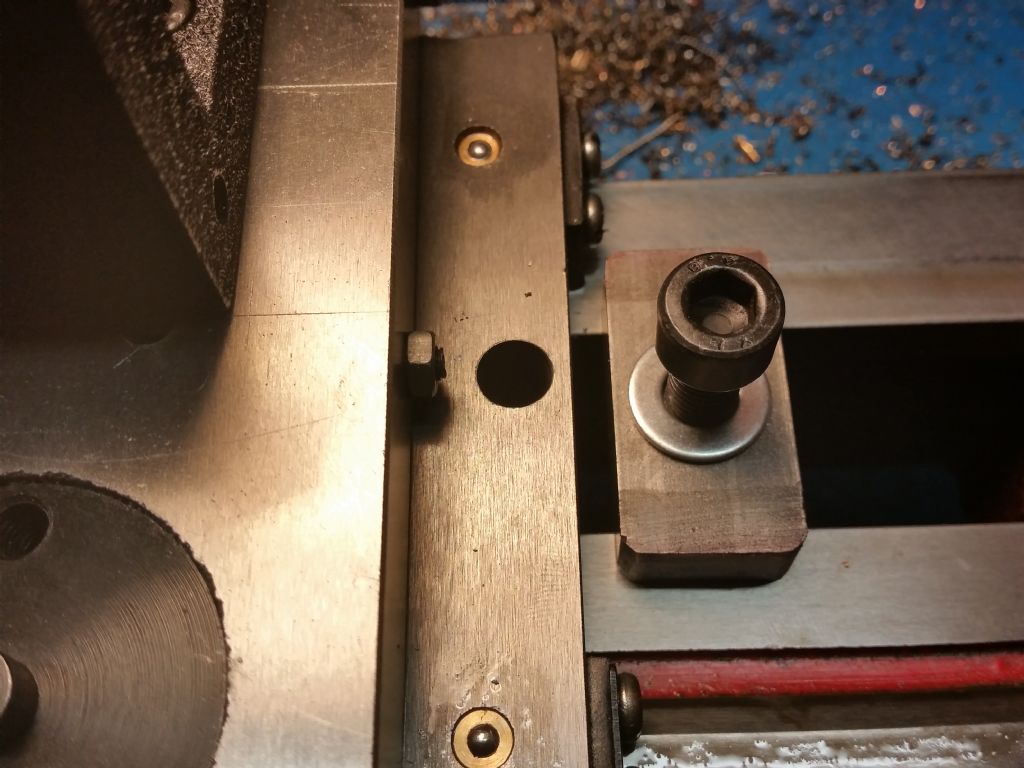
                                            Not today only but finished milling the 'steps' (recesses?) in the buffer bars for my Cracker build. This required me to knock up a quick carriage lock as the milling cutter kept dragging the carriage along and ruining the piece…

                                            20150516_205031.jpg

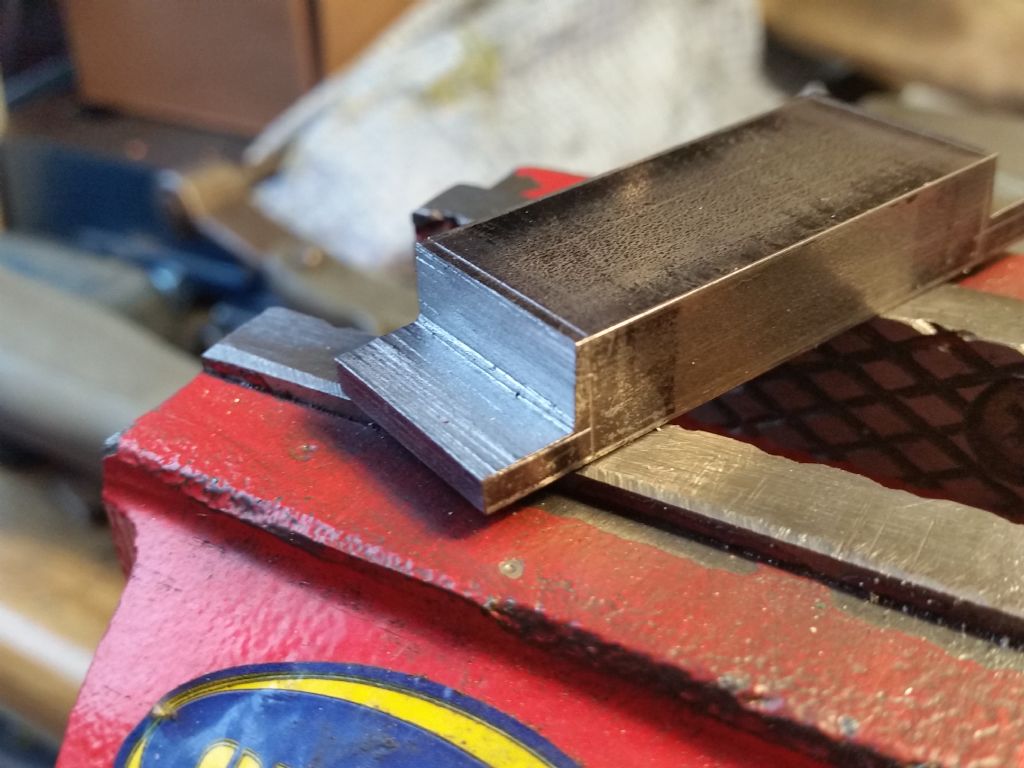
                                            Once that was fitted I set about milling the ends of the bars. Please note, my workholding set-up is very rudimentary and the finish is not to a high standard but the parts have ended up far squarer and to-dimension than I could manage by hand.

                                            Marked out and rouged out with a hacksaw (this one was actually a ruined piece but you get the idea)…

                                            20150515_192356.jpg

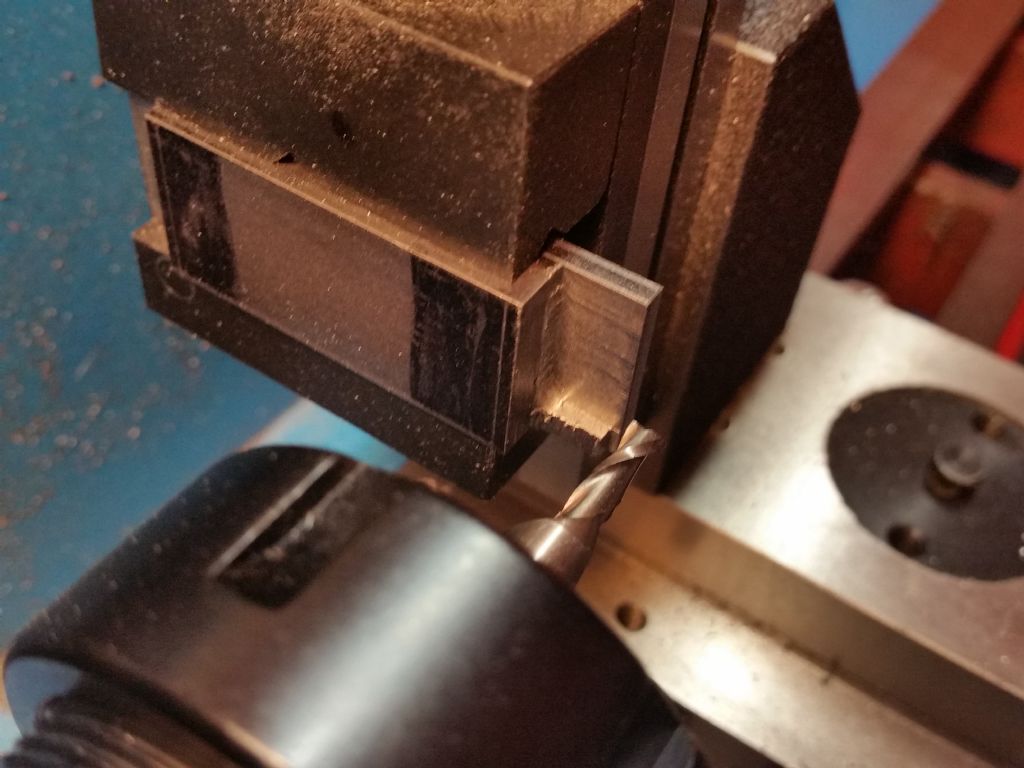
                                            Then into the milling vice…

                                            20150524_153431.jpg

                                            I have no idea if the 2-flute, 4mm cutter I used was right for the job. I tried to make sure the work was always fed 'at' the cutting flutes (climbing?) and used Tubal Cain's guide of 1/4 cutter diameter for 'plunge' depth and 1 diameter for maximum side cutting depth. Sometimes it 'felt' ok and sometimes it didn't. I settled on 2150 rpm. Cross-slide and vertical slide gibs are significantly tighter than when I started, as I kept tweaking them up a bit to keep it all moving in one plane only. So my fingers are a bit sore from turning the hand-wheels now.

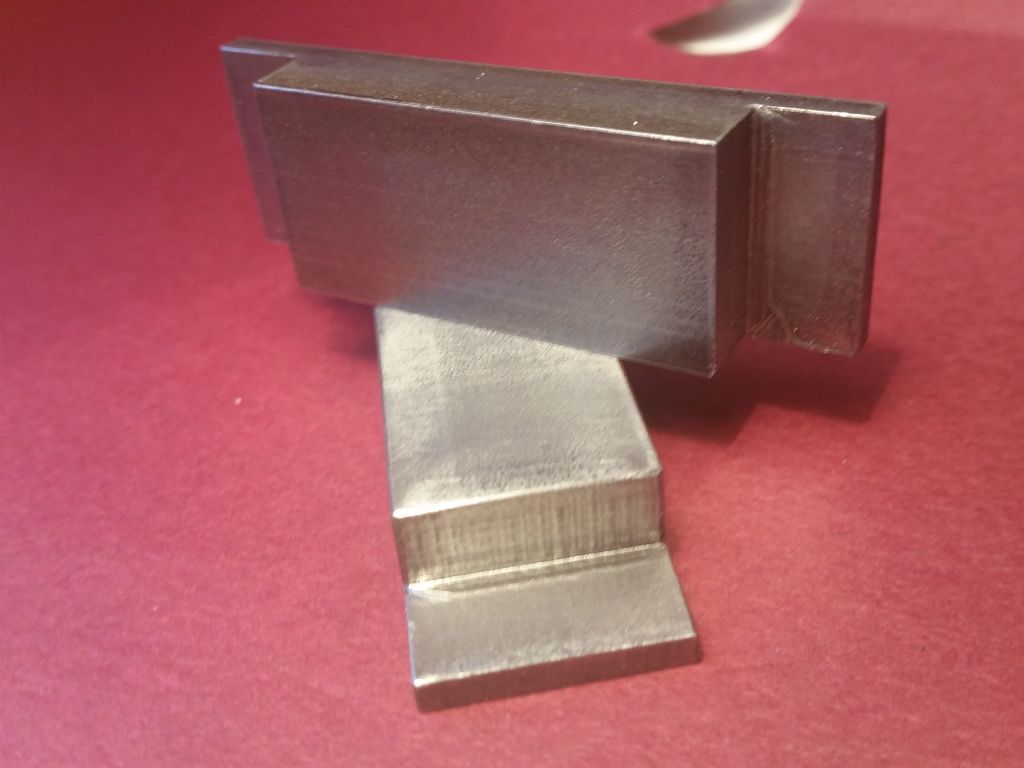
                                            Eventually, and after 2 scrappages, I ended up with two matching (well, very close, much better than I could have hoped to do by hand) buffer bars…

                                            20150526_204123.jpg

                                            After that I couldn't resist a quick mock-up of the frames…

                                            20150526_203933.jpg

                                            I've altered from the original design slightly. In the plan the buffers are only 10mm deep (instead of the 10X20 I used) and the frames are scalloped (?) to half depth for roughly their first and last third. I wanted to simplify the marking and cutting of the frames, and I think the end look will have a more British industrial NG vibe about it. Possibly.

                                            Next will be drilling the frames, wheels/bushes/axles/gears(bought I'm afraid…), then I'll make a start on the oscillating motor. For those who don't know the model, it has a single, single-acting oscillating cylinder, mounded vertically on one side with a flywheel on the other.

                                            I start my passenger hauling 2-10 Austerity next week…. Yeah in my dreams

                                            #191349
                                            Raymond Sanderson 2
                                            Participant
                                              @raymondsanderson2

                                              Some real nice work going on in previous posts yes

                                              My ML7 has been out of action for a few weeks while some electrical upgrading has been going on.
                                              I had to bow to greater knowledgeable gents/mates to rewire power to motor, motor to On/Off switch and install a new to me Forward Reverse switch. The previous owner had done the last wiring and we found the relay had scourch marks, wires fell of relay pins, scourch marks on wires in the motor as well,

                                              Mate Tony an electrician works with much bigger machine normally, it took two one day sessions to check all was going to work with the Dewhusrt type switch and re-wire and refit.

                                              Happy to say I drilled tapped and mounted the Dewhurst type switch this morning and am up and running again.

                                              dscf8577.jpg

                                              #191380
                                              ChrisH
                                              Participant
                                                @chrish

                                                Last night I read Roderick Jenkins' article in MEW No.229 of fitting a chuck backplate with some interest, as I had followed the exact same path last Christmas in machining a backplate in my 3 jaw chuck to fit my new 160mm 4 jaw chuck, except my register was 46mm diameter and the thread 45mm x 3.5mm pitch. So pleased was I with the new 4 jaw that I have used it continually, except for when I have needed to use a collet in the lathe, ever since, the 3 jaw hasn't had a look-in! Sat redundant, in the lathe cupboard.

                                                But today I needed to use the 3 jaw chuck, as the 4 jaw had a part finished job set up in it.

                                                So off with the 4 jaw, on with the 3 jaw, and then off again as I found the jaws had seized up in the 3 jaw due to all the cast iron dust from making the backplate. Botheration! Well, worse than that actually, but this is a public forum not my shed.

                                                So today, so far, I have just spent over an hour and a half 'persuading' the jaws to come out (used Plus-Gas to help in the end, I feared it might cause it to seize more but it helped tremendously) and then completely stripping down the chuck, cleaning it out with paraffin, drying it off, spraying it with silicon which will dry off as I have lunch leaving just a dry film to provide a bit of dry lub. Hopefully. The dust was everywhere!

                                                So now, back to where I was just over two hours ago, with a now clean chuck but no further on with the turning required. Ho humm.

                                                Roderick, hope you cleaned your chuck well after! Enjoyed your article though!

                                                Chris


                                                Edited By ChrisH on 27/05/2015 14:08:31

                                                #191382
                                                Stewart Hart
                                                Participant
                                                  @stewarthart90345
                                                  Well finally got round to posting a video I've had a couple of good running sessions with it now, at first I had a few teething problems bit coming lose, plumbing not quite correct that I just had to deal with.

                                                  Plus I was really struggling with how to drive it, I was very nervous of it, in the end I handed it over to an experiance driver at the club and he took it out, his conclusion was not much wrong with that Stew (thanks John), this gave me the confidence to get to grips with it.

                                                  I've not had so much fun since my honeymoon

                                                  :D :D :D :D :D :D

                                                  Stew

                                                  Modify message

                                                   
                                                  #191392
                                                  Clive Hartland
                                                  Participant
                                                    @clivehartland94829

                                                    More Bee stuff today, having taken 3 swarms a few weeks back now is the time to expand them into a full size hive. My main hives are Nationals which are pretty standard and at my age the boxes when full are just about what I can lift! I looked at the first Nuc./swarm I took and they had filled the 5 combs and had brood on the outside of the frames so time to get them in a bigger box. As its only 5 frames I had to make up another 7 to fill the National brood box. All the bits done I went down and transferred the 5 combs into the National having put it in the same place as it was before. Within minutes they were happily flying in and out as if nothing had happened. 2 more to go now. Oh, I, got a sting on my thumb by trapping a bee as I moved a frame.

                                                    Clive

                                                    #191396
                                                    Bob Brown 1
                                                    Participant
                                                      @bobbrown1

                                                      Clive,

                                                      As a point of interest we have an evergreen shrub in the garden that has a lot of bees around it and the seem to be collecting something off the leaves/stems and I know it is not in flower so can rule that out. Any idea what they are collecting?

                                                      image1.jpg

                                                      Bob

                                                      Edited By Bob Brown 1 on 27/05/2015 17:02:36

                                                    Viewing 25 posts - 1,301 through 1,325 (of 3,154 total)
                                                    • Please log in to reply to this topic. Registering is free and easy using the links on the menu at the top of this page.

                                                    Advert

                                                    Latest Replies

                                                    Home Forums The Tea Room Topics

                                                    Viewing 25 topics - 1 through 25 (of 25 total)
                                                    Viewing 25 topics - 1 through 25 (of 25 total)

                                                    View full reply list.

                                                    Advert

                                                    Newsletter Sign-up