Tramming the Sieg SX3

Advert

Tramming the Sieg SX3

Home Forums General Questions Tramming the Sieg SX3

Viewing 25 posts - 1 through 25 (of 32 total)
  • Author
    Posts
  • #284315
    Nicholas Lee
    Participant
      @nicholaslee

      Hi,

      I'm trying to improve my Sieg SX3 milling machine by tramming it in properly.

      (Ref this link: Sieg SX3 )

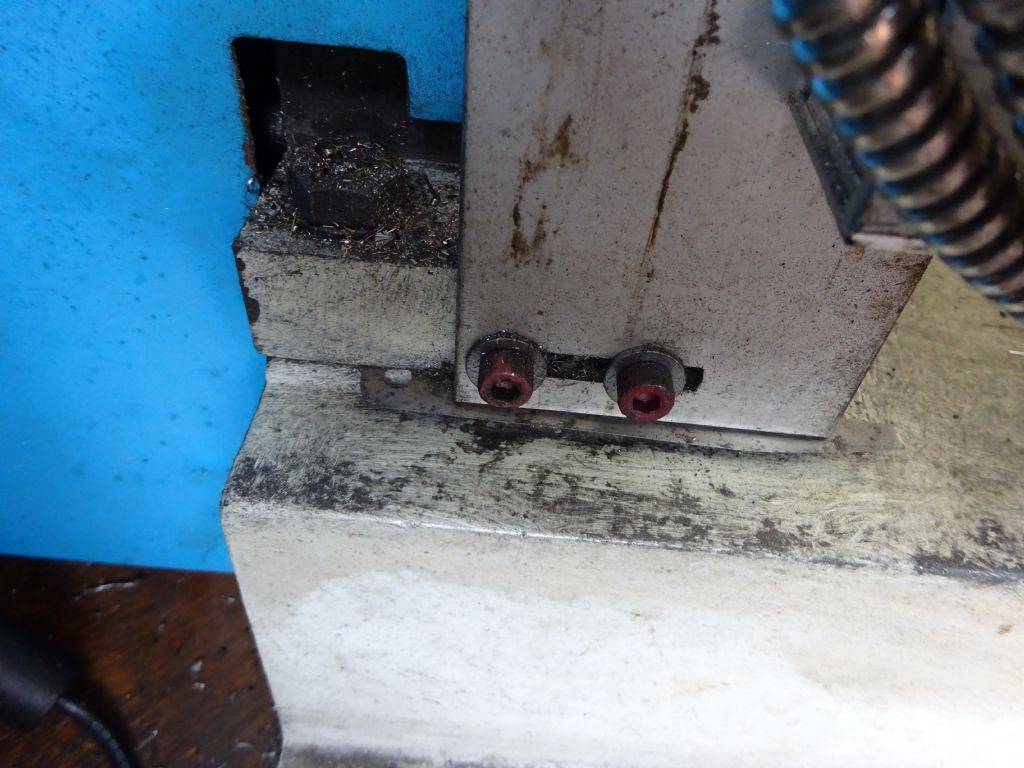
      This would be straight forward on something like a Bridgeport, where you can adjust the front-back and left-right tilt angle of the head. However, the Sieg SX3 just has a square column bolted directly onto the base with four M10 bolts.

      There's no way to adjust this except by loosening the bolts, slipping some combination of shims in the gaps and doing the bolts back up again.

      This is a very laborious process as you have to calculate four thicknesses of shim stock (one for each bolt), based on your DTI measurements of the errors between front-back, and left-right of the stage.

      I have tried doing this and I can get down to about 70um (2.75 thou) of TIR across 300mm of the stage.

      This is less than half the error it was delivered with, so it is an improvement at least.

      The choice of shim stock thicknesses I have seen for sale seems too limited to get any more accurate, (e.g. a 3 thou shim is too small, and a 4 thou shim is too big.)

      Is there a better way of tramming a mill like this?

      What is a realistic tramming accuracy to aim for on a machine of this construction?

      After all, if this small milling machine flexes by 'X' amount when cutting metal, then there's little point trying to tram it more accurately than 'X'.

      Regards,

      Nicholas Lee


      Edited By Nicholas Lee on 14/02/2017 23:53:42

      Advert
      #25081
      Nicholas Lee
      Participant
        @nicholaslee

        Advice sought regarding better methods of tramming a Sieg SX3

        #284317
        Martin 100
        Participant
          @martin100

          Not an SX3 but you could use a similar method  (Belzona do a range of epoxies here in the UK that could be used)

          Tramming a milling machine with epoxy


          Edited By Martin 100 on 15/02/2017 00:05:44

          #284321
          Nick Hulme
          Participant
            @nickhulme30114
            Posted by Nicholas Lee on 14/02/2017 23:52:37

            This is a very laborious process as you have to calculate four thicknesses of shim stock (one for each bolt), based on your DTI measurements of the errors between front-back, and left-right of the stage.

            You are over-thinking the job, you can do front to back first, then side-to-side after. It isn't necessary to do it all in one and calculate 4 shims, adding 2 shims for each axis still works and allows you to fine tune each axis. the shims add themselves

            #284323
            Hopper
            Participant
              @hopper

              If you want adjustment of less than one thou, you could scrape the base to suit, but it's not a beginner's job.

              #284325
              John Stevenson 1
              Participant
                @johnstevenson1
                Posted by Nicholas Lee on 14/02/2017 23:52:37:doing the bolts back up again.

                The choice of shim stock thicknesses I have seen for sale seems too limited to get any more accurate, (e.g. a 3 thou shim is too small, and a 4 thou shim is too big.)

                Regards,

                Nicholas Lee

                .

                1.5 thou + 1.5 thou is 3 thou but 2 thou + 1.5 thou is 3.5 thou.

                You can add shims and for really fine tuning then use baking foil.

                #284334
                Paul Lousick
                Participant
                  @paullousick59116

                  Aligning the column a slow process with a lot of trial and error. If you cannot get the exact thickness shim to put under the front (or rear) mounting bolts, you can also try adding different thickness shims under both the front and back so that the differenece between them is the correct dimension (if that makes sence). There is no need to tram the column for sideways alignment. This can be done by rotating the head. The indent pin only gives an approximate angular position of the head. OK for rough work but not for an accurate tram. I used to have an SX3 and have upgraded to an RF-45 type mill which also has a bolted on column which had to be aligned.

                  Paul.

                  #284338
                  JasonB
                  Moderator
                    @jasonb

                    As Nick says you are over thinking it, just get some old feeler gauges and poke them in the gap and see what that does to the readings. Another way to get a fine adjustment is to move the position of the shim material as it is basically just one leg of a right angle triangle, the further away you place it the less effect it will have on the column.

                    Did my X3 that way and not had to touch it again, must have been about 9yrs ago now.

                    dsc01508.jpg

                    #284339
                    Ex contributor
                    Participant
                      @mgnbuk

                      Have you checked the column to base squareness in both X & Y directions during your column shimming ?

                      This is what you are adjusting with the shims & what you should be checking with this adjustment. Aim for 0.001" per foot against a known accurate square. Ignore the spindle alignment while doing this. When the column is truly perpendicular to the table top (which should be parallel to the base), then check the spindle alignment . If it is out, adjust at the swivelling head joint, not with the column.

                      Pretty pointless having a spindle that trams "true" if the column is not perpendicular to the table IMO – raising the head when the column is out of square will move the datum point on the job. Tramming the spindle should be the last thing you do whan you know everything else is within spec.

                      Nigel B

                      #284342
                      john carruthers
                      Participant
                        @johncarruthers46255

                        Is there room to fit pairs of 'push / pull' bolts as used on lens cells, telescope mirrors and other optical components?

                        #284346
                        Neil Wyatt
                        Moderator
                          @neilwyatt

                          To be pedantic, you should only need shims in three places, not four

                          Neil

                          #284356
                          Douglas Johnston
                          Participant
                            @douglasjohnston98463

                            I need to do this on my Myford VMB mill and was thinking of using thin lead sheet under the column and hoping that I can tighten up the 4 bolts and rely on the squashability (is that a word? ) of the lead to make the necessary adjustment. I have seen 1mm thick lead sheet on ebay so that might be worth a try.

                            Doug

                            #284362
                            Martin Kyte
                            Participant
                              @martinkyte99762
                              Posted by Nicholas Lee on 14/02/2017 23:52:37:

                              After all, if this small milling machine flexes by 'X' amount when cutting metal, then there's little point trying to tram it more accurately than 'X'.

                              Would you not want to accurately set it over by x so it's right when cutting?

                              Martin

                              #284363
                              John Haine
                              Participant
                                @johnhaine32865

                                70 um is 1.7 thou surely? Over 300 mm that sounds quite good. +1 for baking foil to trim the shims, which I used also on my VMB. I think lead may continue to creep even after you have squashed it down Doug. I hope you find that the 4th bolt screws into the iron and is not held by paint into a blowhole like mine was!

                                #284369
                                Ex contributor
                                Participant
                                  @mgnbuk

                                  70 um is 1.7 thou surely?

                                  0.07mm / 25.4 = 0.002756" (rounded) is it not ?

                                  Nigel B

                                  #284378
                                  John Haine
                                  Participant
                                    @johnhaine32865

                                    Oops! Sorry, wrong way round, multiplied instead of divided. Too early for me.

                                    #284384
                                    norm norton
                                    Participant
                                      @normnorton75434

                                      Nigel B has hit on the problem that I faced when doing the same to a Sieg X3 (with fixed head).

                                      There are two things to align: the column being perpendicular to the table in both planes, and the spindle being truly parallel with the column. Mine was out on the column by about 0.001" per 1" of vertical travel (ignore which plane for now to keep the discussion simple), and a similar amount on the spindle in both planes  – 0.0009" and 0.0013" per 1".

                                      The problem I found was that if I shimmed the column, using a pair of dial gauges rotating on the table, then the error in the spindle resulted in the column still being non-perpendicular.

                                      I think that what I needed to do was 1) clamp a dial gauge on the spindle outer and clock the column ground ways in X and Y while raising and lowering the spindle (with a locked head to column). Then correct the head mountings so that the spindle was able to raise and lower with no change in clock readings – this seemed a tricky job. Then, 2) conventionally 'tram' the column to the table by shimming under the column, knowing that the rotating spindle was now parallel to the column.

                                      If anyone disagrees, or can even understand what I am trying to say, I will be pleased to hear. I actually set the spindle true to the table by shimming the column, knowing that this left the column non-perpendicular. I simply stuck a label on the side of the machine telling me of the head lift X and Y error! It was only ever a problem if I was taking a zero point from the top of a job (e.g. gearbox casing), and wanting to bore precisely a hole 4" down inside which meant dropping the head on the column. I am now fortunate enough to have big second mill so I never went back to fix the Sieg properly.

                                      Norm

                                      " and ) smiley removal!   Edited By norm norton on 15/02/2017 10:23:26

                                      Edited By norm norton on 15/02/2017 10:24:28

                                      #284462
                                      John Stevenson 1
                                      Participant
                                        @johnstevenson1
                                        Posted by Douglas Johnston on 15/02/2017 09:12:51:

                                        I need to do this on my Myford VMB mill

                                        Doug

                                        Good heavens, Myford making rubbish after all the fine machining and even finer hand fitting and they didn't get it right before charging a premium price ?

                                        And people call imports even though they are probably all a lot of folk can afford.

                                        However if we are to believe what we read in this current ME one intrepid person couldn't bring himself to purchase a mini lathe because it didn't have a hand wheel at the end of the leadscrew unlike a previous Myford he owned, Although correct me if I'm not wrong but not all Myford's were turned out with a leadscrew handwheel as standard ?

                                        Instead our hero chose to buy an EW lathe and before you all rush off and get one as well they went out of business in 1960.

                                        But it had a leadscrew handwheel, in fact it NEEDED a leadscrew hand wheel as it had no half nuts and every thing had to be wound by hand up and down the bed and because they couldn't get the thread right it went the wrong way. How far we will never know because even though it had a hand wheel it had no graduations.

                                        Puts a mini lathe in a different light now doesn't it. ?

                                        #284509
                                        Michael Gilligan
                                        Participant
                                          @michaelgilligan61133
                                          Posted by Douglas Johnston on 15/02/2017 09:12:51:

                                          I need to do this on my Myford VMB mill and was thinking of using thin lead sheet under the column and hoping that I can tighten up the 4 bolts and rely on the squashability (is that a word? ) of the lead to make the necessary adjustment. I have seen 1mm thick lead sheet on ebay so that might be worth a try.

                                          Doug

                                          .

                                          Doug,

                                          I've never tried this on a mill, but something we did successfully in the vibration test lab. was to use Loctite 638 as a 'liquid shim' … You could use your 'squashable' material as a means of adjustment, and when the Loctite cures, it should squash no more.

                                          Note: Epoxy resin, or other materials, may be equally effective.

                                          MichaelG.

                                          #284521
                                          Alan Vos
                                          Participant
                                            @alanvos39612
                                            Posted by Neil Wyatt on 15/02/2017 08:42:28:

                                            To be pedantic, you should only need shims in three places, not four

                                            Neil

                                            I got an early model SX2 Plus from Arc. They stated that one pad in the base is intentionally made the highest so you can tell which one not to shim.

                                            It was easy to identify the high pad. I used brass shim, with a torque wrench for consistency while finding the best sets of shims. I don't recall whether or not I then tweaked the torque.

                                            #284525
                                            Dan Carter
                                            Participant
                                              @dancarter89683

                                              When I was trying to work out how to tram both column and head without a particularly good reference square, I found this very helpful: **LINK**

                                              The gist is:

                                              1. Get the spindle parallel to the column in both directions by raising and lowering the head with an indicator on a longish bar in the spindle. The spindle should be rotated 180 degrees at top and bottom, and the centre point used to check parallel, eliminating runout. This should be done for both x and y. Easy for X by tilting the head, hard for Y as the head to column connection needs shimming

                                              2. Once done, tram the mill (sweeping on the table) by shimming the column.

                                              3. Declare success.

                                              #284544
                                              Nicholas Lee
                                              Participant
                                                @nicholaslee

                                                Thanks for all the replies. Too many points to reply to individually.

                                                It has highlighted that I am making the beginner's error of just tramming the spindle to the table, rather than both the column to the table, and also the (rotatable) head's spindle to the table.

                                                I keep forgetting that the head can rotate 90-degrees on this mill, as I have never dared to adjust it out of vertical!

                                                It was correctly pointed out that if I only tram the spindle, but the column itself is crooked, then when I raise or lower the head then my calibration is invalidated.

                                                I think I might try Dan's suggested method, as I don't have a big reference square, but I do have a mag-base holder for my DTI.

                                                I'm also going to hunt around more for some thinner shim steel.

                                                Feeler guage sets are cheap on eBay, so I might buy and sacrifice one of those.

                                                Regards,

                                                Nicholas Lee

                                                #284547
                                                Paul Lousick
                                                Participant
                                                  @paullousick59116

                                                  Video on Youtube about tramming a milling machine column with metal impregnated epoxy as a shim material.

                                                  Paul

                                                  **LINK**

                                                  #284552
                                                  Hopper
                                                  Participant
                                                    @hopper

                                                    If you don't have a large reference square you may be able to make a large circular square by turning a piece of pipe in the lathe, turn the OD and face one end in one setting and you have a square (providing your lathe turns true!)

                                                    #284560
                                                    Ex contributor
                                                    Participant
                                                      @mgnbuk

                                                      I don't have a big reference square

                                                      If you have a lathe, as Hopper said above make a cylinder square. A bit of round bar 2 1/2 – 3" diameter by 8 or 9" long – recess the end(s) leaving a ring at the o/d to sit on, then centre drill. Turn between centres to as parallel as you can get & face the ring at the end at the same time and you are good to go.

                                                      To use, sit the cylinder square on end on the table, set a dial gauge pointing in the direction you wish to check from the head & set zero by passing the square past the dial gauge and zero on the high point. (i.e. point the dial gauge along the X axis (table) & "wipe" the square past the gauge tip with the Y axis). Move the head up as far as practicable & pass the square past the dial gauge again, noting the high/low reading which is the error. Working this way rather than running the gauge up the side of the square only shows the error in the direction you are checking, rather than a compound error. Then repeat for the other direction.

                                                      I don't have access to precision granite squares any more, but did find a rusty cylinder square where I work now that had come in with a job lot of stuff from an auction. After de-rusting, a check between centres showed it wasn't parallel, so a couple of hours messing about with the tailstock position & taking light passes had it parallel with about 0.005mm over 350mm, near as I could measure. I know it isn't perfect, but a quick check on a couple on vertical maching centres showed no more than 0.01 mm / 300 mm squareness error. I am not confident enough in the setup to claim that the readings are gospel, but they did suggest that the machine alignments were in the right ballpark,

                                                      Nigel B

                                                      Edited By Nigel B on 16/02/2017 08:21:50

                                                    Viewing 25 posts - 1 through 25 (of 32 total)
                                                    • Please log in to reply to this topic. Registering is free and easy using the links on the menu at the top of this page.

                                                    Advert

                                                    Latest Replies

                                                    Home Forums General Questions Topics

                                                    Viewing 25 topics - 1 through 25 (of 25 total)
                                                    Viewing 25 topics - 1 through 25 (of 25 total)

                                                    View full reply list.

                                                    Advert

                                                    Newsletter Sign-up