Stuart Twin Victoria (Princess Royal) Mill Engine
Stuart Twin Victoria (Princess Royal) Mill Engine
- This topic has 1,261 replies, 33 voices, and was last updated 9 May 2025 at 18:35 by
 Dr_GMJN.


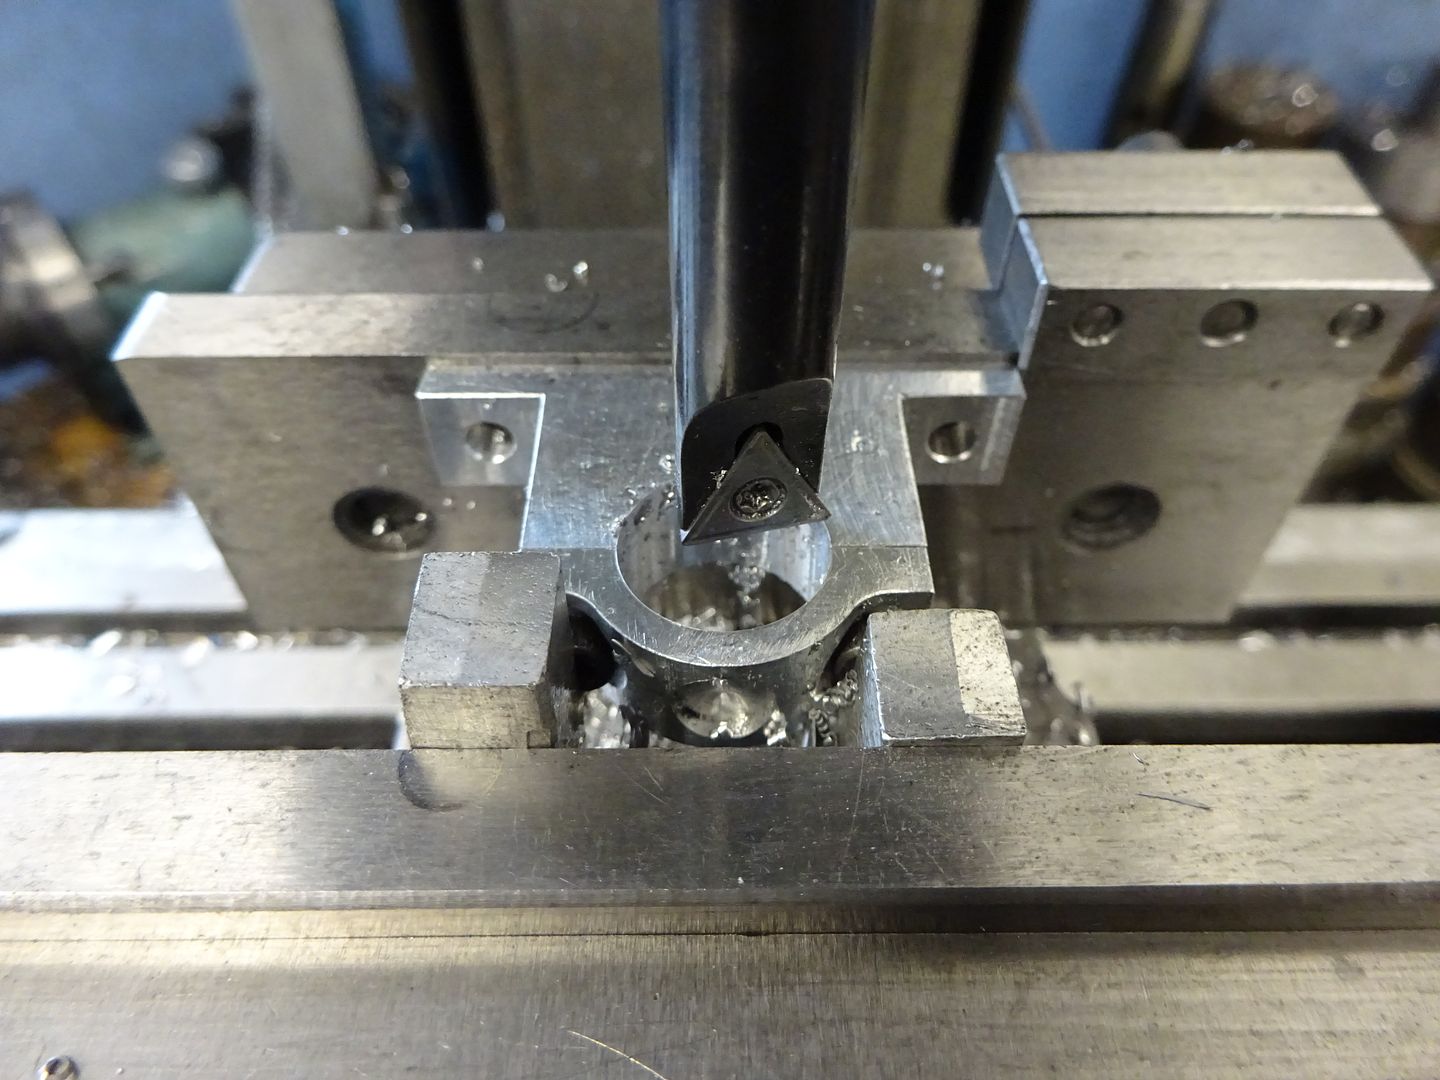
![20220715_165735[1].jpg](/wp-content/uploads/sites/4/images/member_albums/44290/911358.jpg "20220715_165735[1].jpg")

.jpg")
.jpg")
.jpg")


- Please log in to reply to this topic. Registering is free and easy using the links on the menu at the top of this page.
Latest Replies
-
- Topic
- Voices
- Last Post
-
-
Fuel resistant adhesive/sealant?
Started by:
Fulmen
in: Related Hobbies including Vehicle Restoration
- 7
-
13 May 2025 at 00:59
howardb
-
110v motor – 2.2kw – on a domestic power supply?
Started by:
ell81
in: Beginners questions
- 10
-
12 May 2025 at 23:16
Nicholas Farr
-
MC2 collet on myford
Started by:
davp1971
in: Beginners questions
- 6
-
12 May 2025 at 23:01
davp1971
-
Serious Sun-Glass
1
2
Started by:
Michael Gilligan
in: The Tea Room
- 16
-
12 May 2025 at 22:57
Michael Gilligan
-
What Did You Do Today 2025
1
2
…
4
5
Started by:
JasonB
in: The Tea Room
- 28
-
12 May 2025 at 22:41
Nigel Graham 2
-
feed reversing lever not engaging
Started by:
manfromthemist
in: Beginners questions
- 5
-
12 May 2025 at 22:35
Taf_Pembs
-
“What about the drains in Finchley?”
Started by:
Plasma
in: The Tea Room
- 7
-
12 May 2025 at 22:13
Plasma
-
DC Wasp Rebuild
Started by:
William Chitham
in: I/C Engines
- 7
-
12 May 2025 at 21:59
Neil Lickfold
-
S&B Sabel lathe quick change tool post
Started by:
gerry45
in: Beginners questions
- 8
-
12 May 2025 at 21:09
bernard towers
-
New member looking for help
Started by:
manfromthemist
in: Introduce Yourself – New members start here!
- 4
-
12 May 2025 at 21:00
SillyOldDuffer
-
How many rings per piston?
Started by:
Arthur Jones 2
in: Locomotives
- 13
-
12 May 2025 at 20:13
duncan webster 1
-
Surface gage recommendation
Started by:
Sonic Escape
in: The Tea Room
- 15
-
12 May 2025 at 19:55
Pete
-
3 1/2” gauge diesel loco?
Started by:
Paul McDonough
in: Locomotives
- 3
-
12 May 2025 at 19:50
Paul McDonough
-
Boxford Model A back gear
Started by:
jilly5599
in: General Questions
- 6
-
12 May 2025 at 19:43
Clive Brown 1
-
FreeCAD v1.0 tutorials
1
2
Started by:
Michael Gilligan
in: CAD – Technical drawing & design
- 11
-
12 May 2025 at 18:31
Michael Gilligan
-
Half Scale 1/4HP A J Weed Engine
Started by:
JasonB
in: Stationary engines
- 4
-
12 May 2025 at 17:52
Diogenes
-
Spindle speeds of tom senior s type head
Started by:
david newman 9
in: Manual machine tools
- 3
-
12 May 2025 at 17:51
david newman 9
-
Help Wire 3 Phase 2 Speed Motor
Started by:
Allan Day
in: Electronics in the Workshop
- 5
-
12 May 2025 at 11:35
SillyOldDuffer
-
Kia Ora from the bottom of the world. Tool hoarder & enthusiast.
1
2
Started by:
gimme72
in: Introduce Yourself – New members start here!
- 10
-
12 May 2025 at 11:18
JohnF
-
3D Filament Printer Upgrade
Started by:
Julie Ann
in: 3D Printers and 3D Printing
- 3
-
12 May 2025 at 09:48
noel shelley
-
Newall DRO Adjustment
Started by:
Metalhacker
in: Help and Assistance! (Offered or Wanted)
- 6
-
12 May 2025 at 00:47
Neil Lickfold
-
How to make tommy bar nuts?
Started by:
Ian Parkin
in: General Questions
- 9
-
11 May 2025 at 23:37
Nigel Graham 2
-
Help needed to price a Myford lathe going for sale
Started by:
Mick Durkin
in: Help and Assistance! (Offered or Wanted)
- 10
-
11 May 2025 at 23:03
JohnF
-
LMS 2F Experiences
Started by:
Bryan Cedar 1
in: Locomotives
- 11
-
11 May 2025 at 18:41
duncan webster 1
-
Farm Boy
1
2
3
4
Started by:
Dalboy
in: I/C Engines
- 15
-
11 May 2025 at 18:12
Dalboy
-
Fuel resistant adhesive/sealant?
Latest Issue

Newsletter Sign-up
Latest Replies
- Fuel resistant adhesive/sealant?
- 110v motor – 2.2kw – on a domestic power supply?
- MC2 collet on myford
- Serious Sun-Glass
- What Did You Do Today 2025
- feed reversing lever not engaging
- “What about the drains in Finchley?”
- DC Wasp Rebuild
- S&B Sabel lathe quick change tool post
- New member looking for help

