Holding piston

Advert

Holding piston

Home Forums General Questions Holding piston

Viewing 25 posts - 1 through 25 (of 26 total)
  • Author
    Posts
  • #22936
    Old School
    Participant
      @oldschool
      Advert
      #134795
      Old School
      Participant
        @oldschool

        I want to hold a piston on. a mandrel so I can machine the OD to size I want to hold it in place with some type of glue hot melt and hold it with a centre on the crown as well any ideas on the type of glue

        Thanks Oliver

        #134796
        Ian Welford
        Participant
          @ianwelford58739

          Best one I've come across is for holding carpets down BUT you need an industrial glue gun to get it hot enough. It then becomes EXTREMELY RUNNY but sets like rock when cold. It is highly fragile though so couldn't handle an intermittent cut.

          You'll have to take very gentle cuts so as not to generate enough heat to remelt the glue.

          I think you might be better off with loctite and then warm it up afterwards to break the bond. Take care as fumes as loctite breaks down are not good for you !

          Ian

          #134798
          JohnF
          Participant
            @johnf59703

            Oliver, I agree with Ian regarding loctite, you don't say what size your piston is but regardless of size I would also suggest you use a support with your running centre.

            To do this make an extension to go inside the piston with a large 60deg cone to mate with the running centre, no need to fix to the centre just hold it in place until you have applied a reasonable pressure and the lock the tailstock barrel.

            In fact you may well find you can do the job without any glue providing you have a large enough "driver" in your chuck Do the 60 deg cone with either a large centre drill or set the compound to 30deg and turn one in the bar — use a collet or 4 jaw to ensure concentricity.

            #134799
            Muzzer
            Participant
              @muzzer

              Presumably you could put a gudgeon pin in and then use an eye bolt to hold the thing against a faceplate or into a short mandrel. Might be more secure than adhesive, less bu99ering about and less chance of splitting the blessed thing on a cone?

              Muzzer

              #134801
              julian atkins
              Participant
                @julianatkins58923

                hi oliver,

                my method (for miniature loco work) is to turn the piston a bit over size (say 10 thou) then fit the piston rod and either hold the piston rod in the 4-jaw clocking it with a DTI or hold in a collet, then turn to size. i dont see the point of trying to turn the piston to OD size without the piston rod being fitted as there is the possibility of error creeping in there, plus i usually hold the piston in the chuck whilst screwing in the piston rod hard with loctite added which you wouldnt be able to do if you had already finished the piston to size coz the jaws will mark the finished piston.

                hope this makes sense!

                cheers,

                julian

                #134802
                Danny M2Z
                Participant
                  @dannym2z

                  G'day.

                  A decent piston holder for turning and lapping etc. may be of use based on the design at **LINK** Tech Tip Of The Month for July 2007. Different collars may be made to suit various bores.

                  Regards from the land of the kangaroo

                  * Danny M *

                  #134804
                  Michael Gilligan
                  Participant
                    @michaelgilligan61133

                    Oliver,

                    Watchmakers traditionally use a "wax chuck" for this sort of work [albeit usually on a small scale], where the "wax" is Shellac.

                    … but, I agree that Loctite should do the job nicely.

                    MichaelG.

                    #134807
                    JasonB
                    Moderator
                      @jasonb

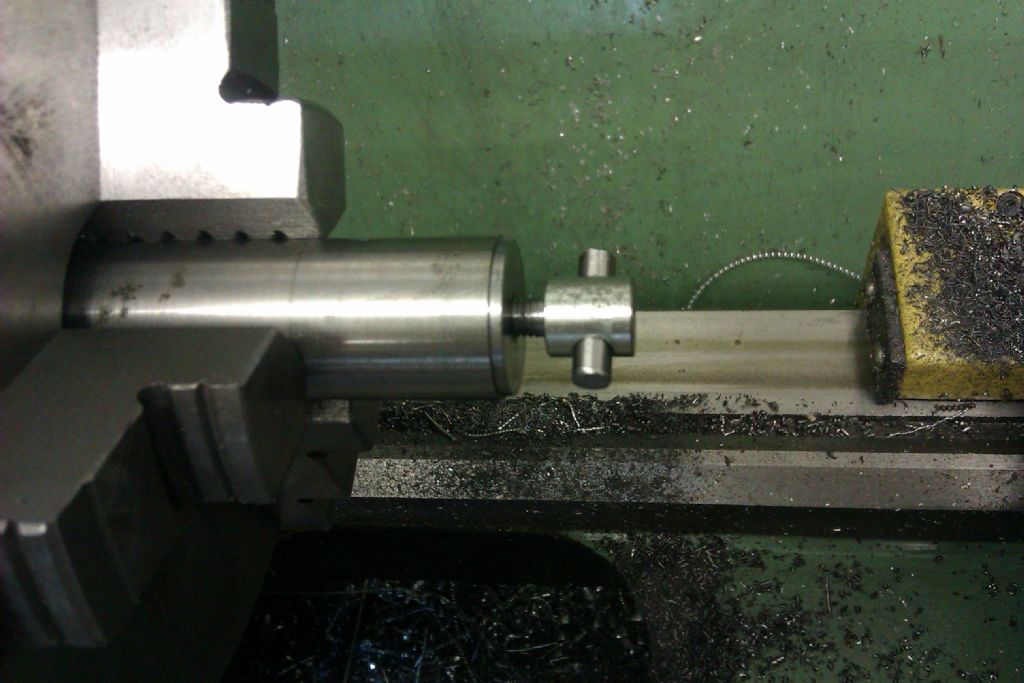
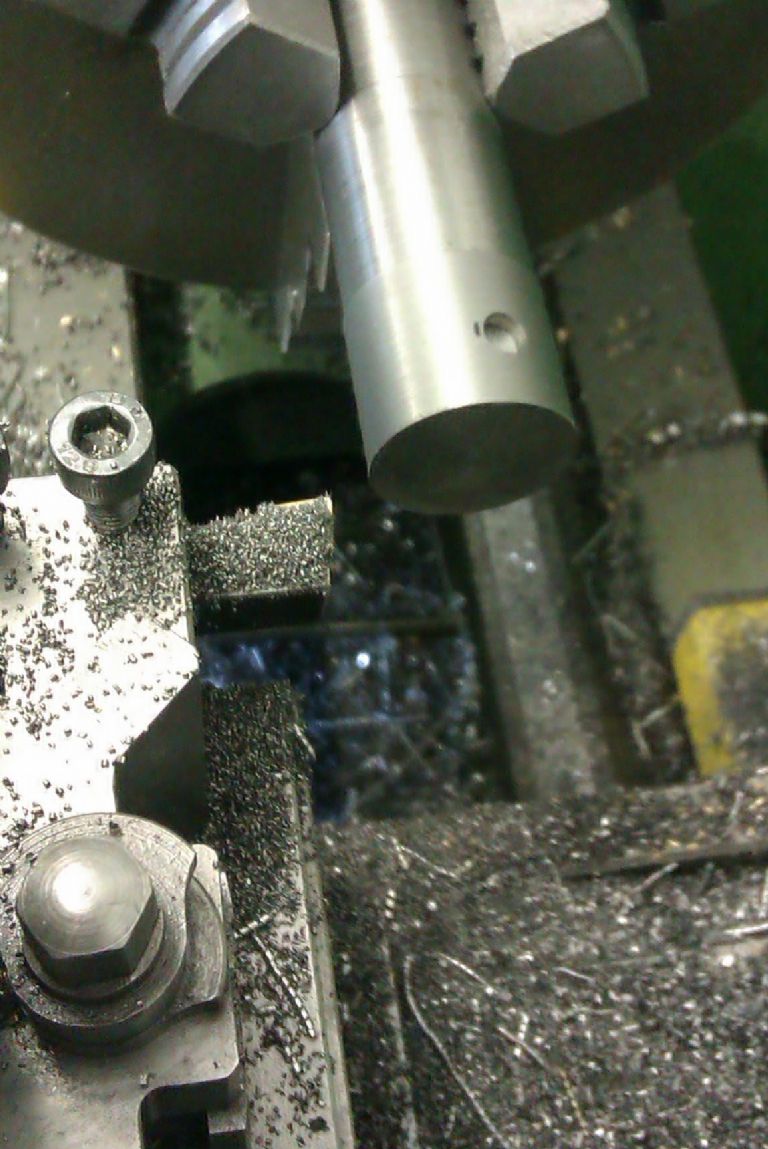
                      Assuming its an IC engine then I yse the gudgeon pin and a tapped mandrel

                      Firefly131

                      Firefly132

                      Firefly133

                      #134822
                      Ian S C
                      Participant
                        @iansc

                        The pistons for my hot air engines are made with a threaded hole in the crown, this in the finished piston takes the forked piece for the con rod. To turn the out side of the piston, I use a short rod that fits neatly in side the piston, with a threaded bit on the end that screws into the crown of the piston. Using this method I can take the skirt down to about 1mm thick (some times I have gone a bit too far, Oh well start again), basically I'm out to get minimum weight from the moving parts. Ian S C

                        #134829
                        Howard Lewis
                        Participant
                          @howardlewis46836

                          In the high volume commercial production of pistons for engines, (Cars, Lorries, Tractors,Machines etc) the inside of the skirt is first turned with a short precise register.

                          This is then used to locate the piston on a dedicated bung, pulled onto it by a pin in the Gudgeon Pin bore, and a drawbolt arrangement.

                          The Ring Belt, Lands, and Skirt, are then turned to Barrel and Oval form, and any Combustion Chamber, using this one set up.

                          I would suggest that you follow this route, so that you do not have to worry about adhesives softening or failing, and can be sure that Ring Grooves and Skirt are concentric.

                          Howard

                          #134830
                          Old School
                          Participant
                            @oldschool

                            Thanks for the replies, the pistons are for my 2.5cc tether car engines, it has an ABC set up Aluminium piston Brass liner Chrome plated and ground to a highly polished finish. The pistons have a short life and the liners are resuable after a little work a decoke basically. These engines work hard and have an rpm of about 39500. By best run with this car has been 260kph.

                            The pistons are made from high silicon content about 35% aluminium and they fit in the liners tapered bore and are an interference fit at the top of the stroke. The OD of the piston is 15mm.

                            The plan was to hold the piston on the madrel will a centre with a cup to protect the piston crown and glue it in place so I could move the centre to check the fit to the liner.

                            I had thought about loctite but no sure how hot I would have to get it to unstick it.

                            This is my first go at making opistons for such high performance pistons I have been told how to do it by one of the top Swedish racers and egine builders but the glue part is lost in translation he suggests that its the type used in holding glass for grinding but have been unsuccesful at finding any

                            Thanks

                            Oliver

                            #134849
                            Michael Gilligan
                            Participant
                              @michaelgilligan61133

                              Oliver,

                              For info. Loctite degrades completely at somewhere round 200°C, but softens before that.

                              However: Given what you are doing, I think Shellac might be the best answer.

                              MichaelG.

                              .

                              Edit: There is an excellent article about using Wax Chucks, here.

                              Edited By Michael Gilligan on 07/11/2013 15:31:19

                              #134862
                              JA
                              Participant
                                @ja

                                Super Glue. An American, W R Smith, wrote a very interesting chapter in his book "Clockmaking & Modelmaking – Tools and Techniques" on using Super Glue instead of Shellac on wax chucks. I have used Super Glue to hold small difficult to hold parts when machining. I have not had the glue fail during any operation but I have kept machining loads low. After machining the part can be separated from the mounting, or chuck, by a light tap with a mallet. If that does not do the trick boil the assembly in water for about five minutes and repeat.

                                Super Glue is amazing stuff but not really a very good general glue!

                                JA

                                #134873
                                Michael Gilligan
                                Participant
                                  @michaelgilligan61133

                                  JA,

                                  Agreed … Super Glue [Cyanoacrylate] is excellent for many of these jobs.

                                  It does, however, lack the very useful feature of softening with heat. The beauty of Shellac is that you can "adjust" the position of the component, to make an existing surface run concentric.

                                  MichaelG.

                                  #134877
                                  Clive Hartland
                                  Participant
                                    @clivehartland94829

                                    Oliver, if your Swedish mates talk about ,' Glue' for gluing glass then possibly they are talking about optical cement that is cured by Ultra Violet light. Much like the dentist now uses UV to cure the tooth filling. What the UV does is accelerate the curing time. This cement is available from optical glass manufacturers, the name of a company I know is, 'Edmundson' who can supply all optical things.

                                    As an aside the old optical cement (Balsam) was made from tree resin and refined until it was clear, this matched the lenses glued together and it was cured by heating.

                                    This was superceded by a soft plastic glue that again was cured by heating but had a longer life and better adhesion to the glass.

                                    This again has been superceded by the resin which is cured by UV. and is very strong and gives time to adjust the position of the glass parts and cures almost instantly. No heat being required.

                                    I have had a further thought, perhaps they refer to the glue used to stick glass to glass on cars, like the blocks on car windows. The sliding type.

                                    Clive

                                    Edited By Clive Hartland on 07/11/2013 22:28:52

                                    #134878
                                    Michael Gilligan
                                    Participant
                                      @michaelgilligan61133

                                      Posted by Old School on 07/11/2013 11:50:51:

                                      I have been told how to do it by one of the top Swedish racers and egine builders but the glue part is lost in translation he suggests that its the type used in holding glass for grinding but have been unsuccesful at finding any

                                      .

                                      Oliver,

                                      Sorry, I had missed that part of your post, until Clive commented.

                                      The "glue" used for holding lenses whilst grinding the edges is, again, Shellac [sometimes mixed with Pitch, to make it less brittle] … This version is sometimes known as Dop Wax, and is also used in Gemstone Cutting.

                                      In traditionally-built camera and microscope objectives, the lens elements are made slightly oversize on the diameter. They are then centred, on a Wax Chuck, and the [now probably slightly eccentric] edge is ground to be (a) concentric with the optical axis, and (b) the correct size.

                                      Hope that helps

                                      MichaelG.

                                      #134885
                                      Clive Hartland
                                      Participant
                                        @clivehartland94829

                                        Michael, things have changed a bit over the years, as you say the lens is polished to a satisfactory quality and what they do now is fix it in the lens holder, and the brass or Alu with lens is then centered as a complete unit and the metal body machined to take out the eccentricity. It was a bit of a surprise to receive a new replacement lens and notice the glass was off to one side in its mount. They are centered using a Laser device and it takes only seconds to complete. The errors are usually very small.

                                        We have used shellak and cellulose to fix circles in instruments but it is all the UV type glue now, they come centered and are put straight into the instrument and software takes up any errors in face to face errors in centricity. Prisms are held in position by grubscrews, then cemented and the grubscrews pressure released to stop pressure marks in the glass. Shellak is used to lock screws and plates so that they hold position.

                                        Clive

                                        Edited By Clive Hartland on 08/11/2013 07:37:55

                                        #134887
                                        Michael Gilligan
                                        Participant
                                          @michaelgilligan61133

                                          Clive,

                                          Thanks for the additional info.

                                          Yes, I realise that things have changed for production work … but I think the traditional adhesives are more relevant to what Oliver wants to do.

                                          Just found this supplier of vaious waxes.

                                          MichaelG.

                                          .

                                          P.S.  This page from Nikon might be of interest.

                                          Edited By Michael Gilligan on 08/11/2013 07:53:53

                                          #134892
                                          Ian S C
                                          Participant
                                            @iansc

                                            Loctite make Glass Bond, a UV setting adhesive, it comes in a 3 ml plastic tube, I got some years ago to repair a fish tank, just sat the tank out in the sun light, it worked very well, but it's only useful where the UV light can cure it. Ian S C

                                            #212674
                                            Neil Lickfold
                                            Participant
                                              @neillickfold44316

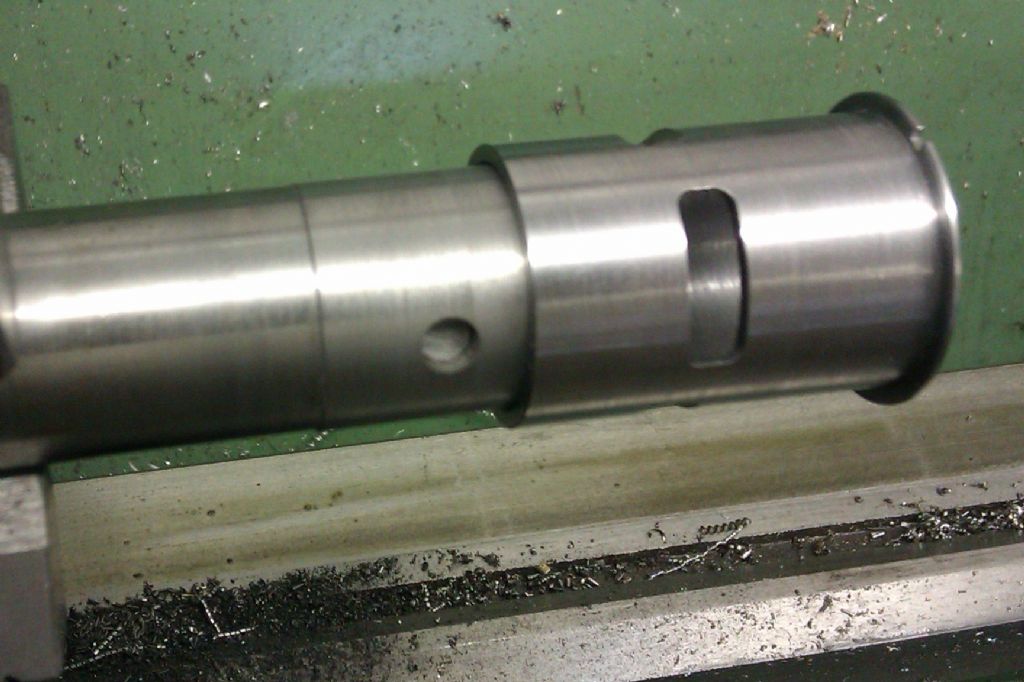
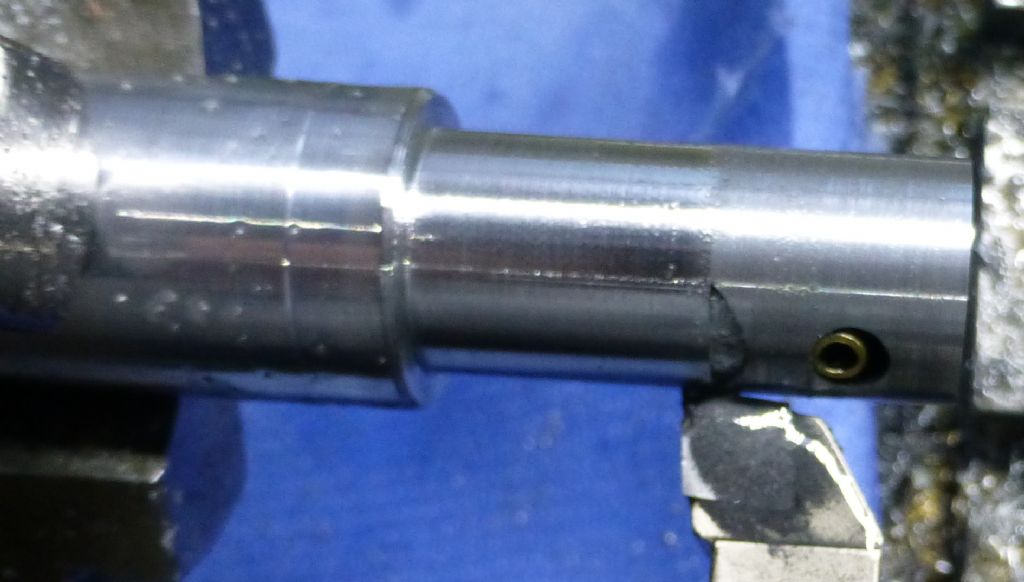
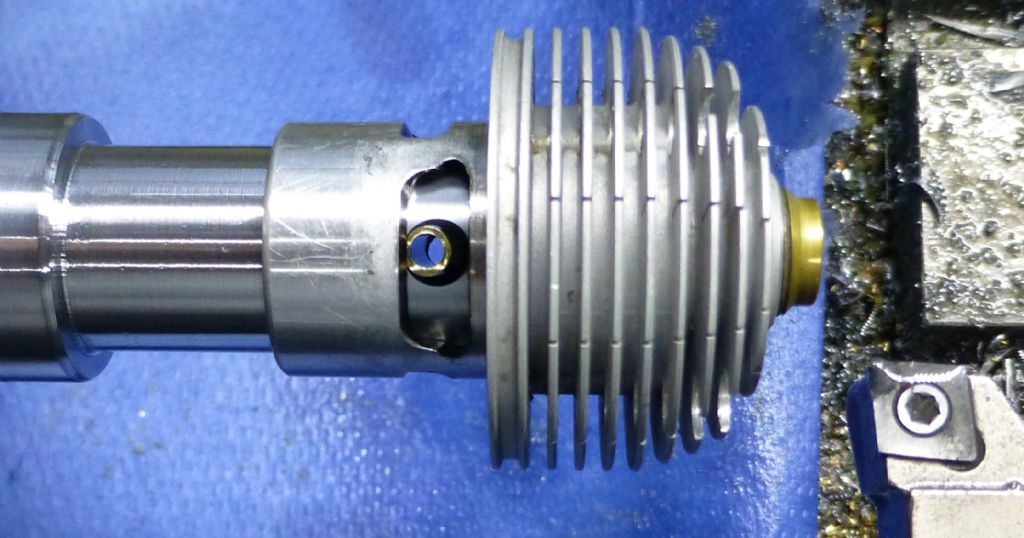
                                              Here is a piston I am trimming for a friends model diesel engine, 2.5cc

                                              I set the compound over to about 0.75 deg, it is actually at an angle so that
                                              every 0.04mm that the compound moves backwards is 0.001mm diameter cut.
                                              With a dti it is set at 0.05mm per 40 mm travel.
                                              One picture shows the colour change with a 0.003mm diameter cut and the other shows the liner at it's
                                              fitted position and the oil colour change for the amount taken off to fit the piston 0.5 mm more up the bore.
                                              The bore taper is about 0.00061mm per 1mm of travel, so about Ø 0.0012 per 1mm travel.
                                              Measured taper is Ø 0.012 for 10mm

                                              p1030994.jpg

                                              p1030995.jpg

                                              #212695
                                              Emgee
                                              Participant
                                                @emgee

                                                Oliver

                                                I always use the same method as Jason, no worries about glue release and repeatable set-up each time.

                                                Emgee

                                                #212850
                                                Old School
                                                Participant
                                                  @oldschool

                                                  Neil

                                                  i am using these inserts Sumitomo CCGT 09T304 NAG-H1 Carbide Insert (Non-Ferrous) but am not able to get the very small cuts that you manage to achieve. For the next pistons I am going to lap them to final size. I know I will loose some rpm but I won't scrap so many Pistons during machining.

                                                  #212866
                                                  Neil Lickfold
                                                  Participant
                                                    @neillickfold44316

                                                    Old School, This is the RSA-444 piston material, 30% silicon. With these hypereutectic alloys with high silicon, carbide will not take fine cuts on this material. I finish the end face/ piston crown and rough the outside to about 0.1mm diameter. I then change to the PCD, insert is NP CCMH060204 MD220 , it is a 0.4mm radius and is positive cutting. I chose this small size because of the positive cutting geometry which I could not see in the larger 9mm insert . image here ,http://www.mitsubishicarbide.net/mmc/ja/turning_inserts/no_srs/20043582 I used RiceBran oil in a spray can, usualy us canola oil but ran out, so grab what was in the kitchen. Now have to buy another, she won't use it because I had it in the shed.My win. Anyway, I learnt something new in trimming these pistons. Normally, I have to clean the piston and liner with contact cleaner to get the oil off to work out the dry fit height of the piston. But with the rice bran oil, if I just blew the piston off with compressed air, made sure it was clean and tried the fit. I could get the same fit if I cleaned it all with brake clean or if I just blew off the micro turnings.The diamond insert is expensive, but well worth it. I run my myford at about 500-600 rpm, top speed in the low main pulley. The cut is put on by winding backwards the compound slide. On my one, each division is 0.04mm of pitch, so the slide is set at 0.05mm in 40 mm of travel of the compound slide. I turn the main diameter to about 0.02mm of size, then do not touch the cross slide until it is finished.The cross slide centre gib screw is tightened slightly to not make the axis so free on the hand wheel. I keep oiling the saddle slide quite often as well. after the cut, I wind the compound handle exactly 1 turn forward to bring the tool away from the work piece. I hand feed the saddle at a rate of about 30 seconds to cover the 14 mm or so distance. Measure or try piston and then take another pass. The tool is set as close as I can get it to centreline. Neil

                                                    #213265
                                                    Neil Lickfold
                                                    Participant
                                                      @neillickfold44316

                                                      Edit, It should read 0.5mm per 40mm, not 0.05mm. Not sure how to edit the post to correct the wrong data.Neil

                                                    Viewing 25 posts - 1 through 25 (of 26 total)
                                                    • Please log in to reply to this topic. Registering is free and easy using the links on the menu at the top of this page.

                                                    Advert

                                                    Latest Replies

                                                    Home Forums General Questions Topics

                                                    Viewing 25 topics - 1 through 25 (of 25 total)
                                                    Viewing 25 topics - 1 through 25 (of 25 total)

                                                    View full reply list.

                                                    Advert

                                                    Newsletter Sign-up