Facing Error

Advert

Facing Error

Home Forums Beginners questions Facing Error

Viewing 25 posts - 1 through 25 (of 101 total)
  • Author
    Posts
  • #366944
    SillyOldDuffer
    Moderator
      @sillyoldduffer

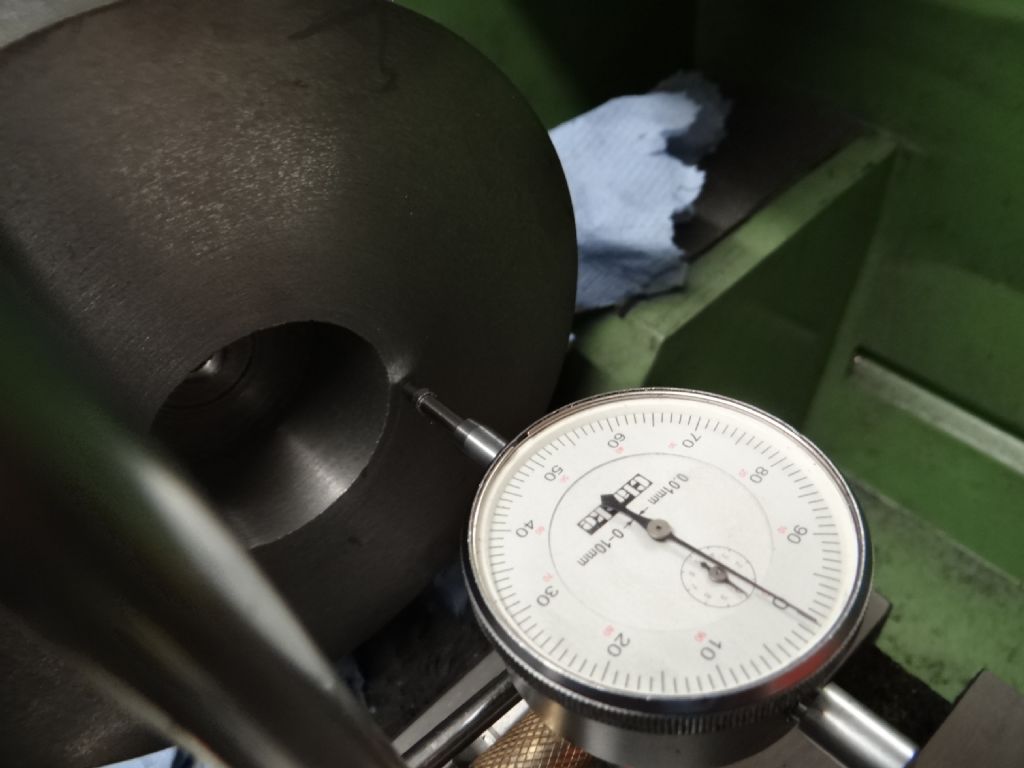
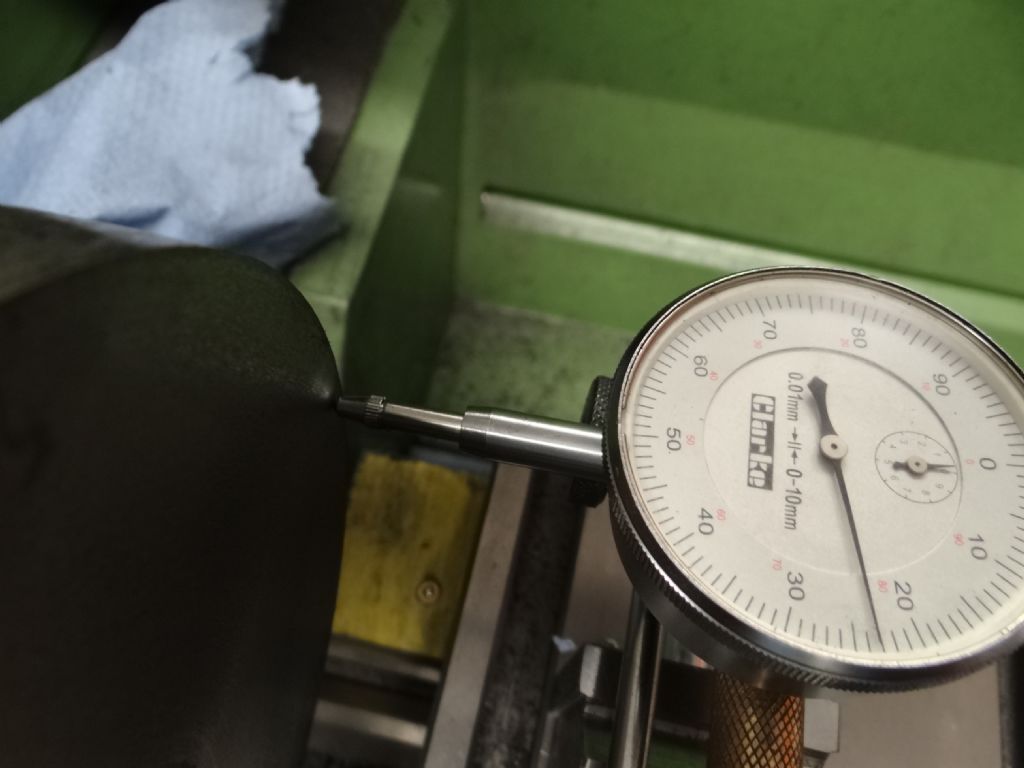
      Today I faced off a new chuck backplate (180mm diameter) and was surprised to find what looks to be a largish error – about 0.23mm over 55mm, low at the centre.

      dsc05317.jpg

      dsc05319.jpg

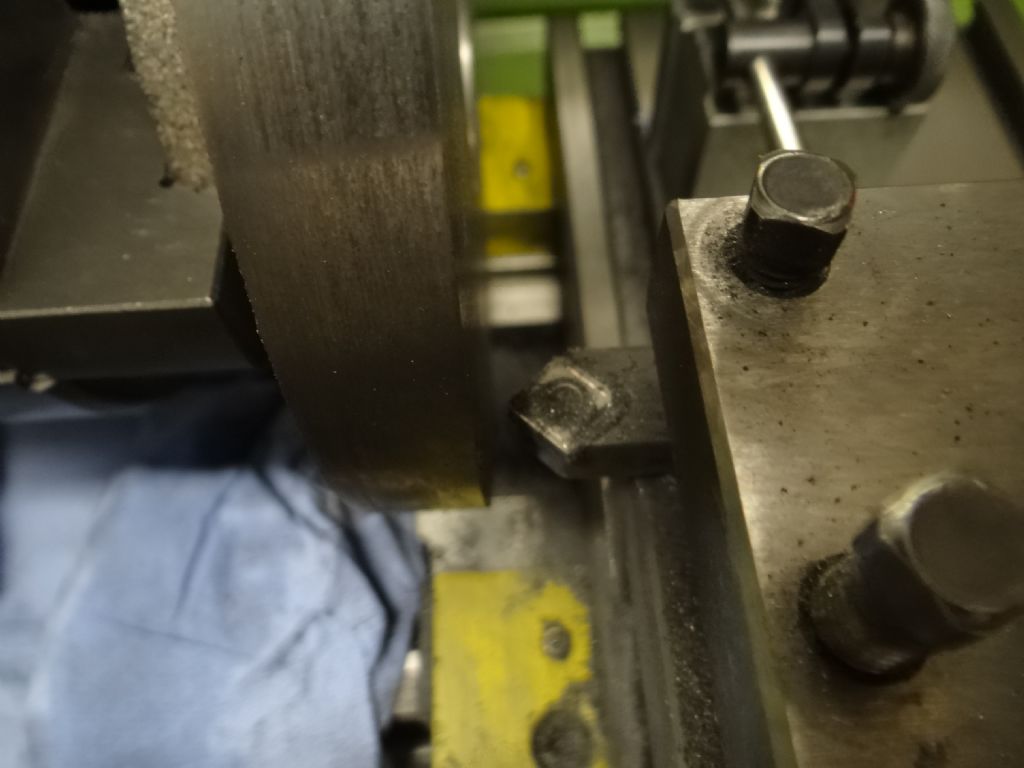
      The face was cut 0.2mm deep with carbide at 200rpm traversed under power with the saddle locked in X, and the Y gib lock nipped sufficient to provide a little friction.

      The carbide insert is a 90 degree 4 cornered type on a 12mm shank.

      dsc05320.jpg


      Is this degree of out of truth excessive on a lathe? Any suggestions as to cause?  I don't think the saddle or tool-post are moving under cutting pressure – everything seems firm.

      Thanks

      Dave


      Edited By SillyOldDuffer on 12/08/2018 17:09:23

      Advert
      #9295
      SillyOldDuffer
      Moderator
        @sillyoldduffer
        #366945
        Michael Gilligan
        Participant
          @michaelgilligan61133

          Low at the centre is much better than high

          It's a 'fail-safe' arrangement for things that fit face-to-face

          BUT Schlesinger would not 'pass' that number !!

          MichaelG.

          #366946
          JasonB
          Moderator
            @jasonb

            Any movement on the topslide?

            #366947
            Nick Hulme
            Participant
              @nickhulme30114

              Few lathes face flat, if they did fitting parts together would be a pig.

              #366948
              JasonB
              Moderator
                @jasonb

                Just by way of comparrison I have just put a straight edge across a CI backplate that I machined on my 280 and can't get a 0.05mm feeler gauge under it.

                #366949
                SillyOldDuffer
                Moderator
                  @sillyoldduffer
                  Posted by JasonB on 12/08/2018 17:12:14:

                  Any movement on the topslide?

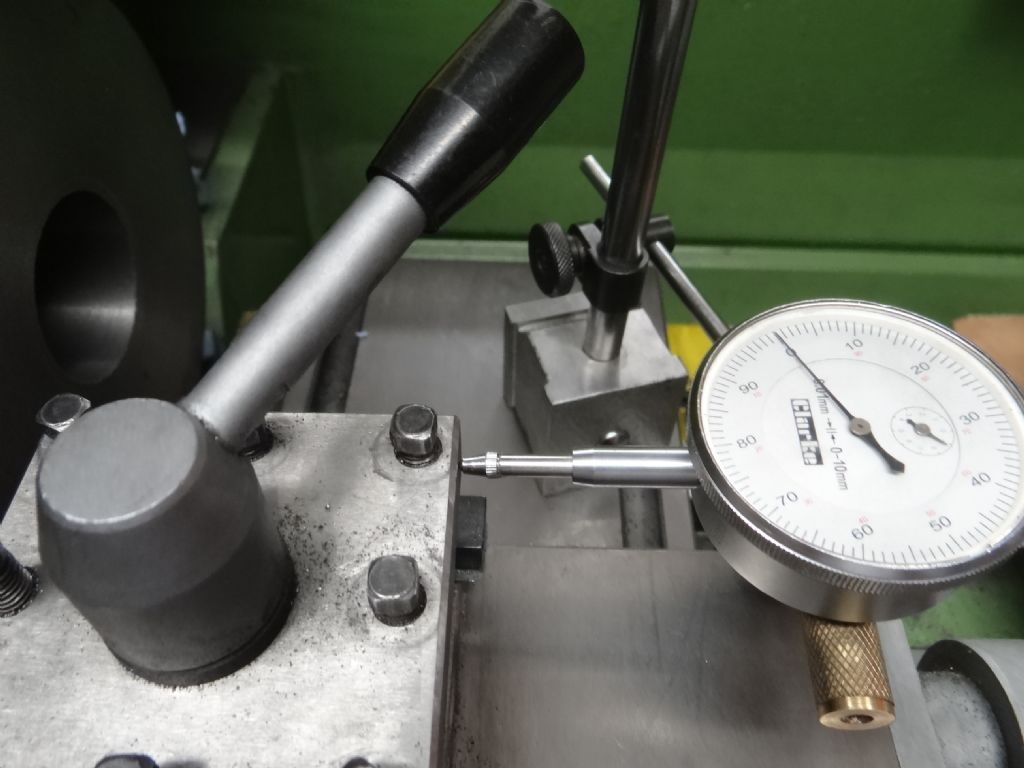
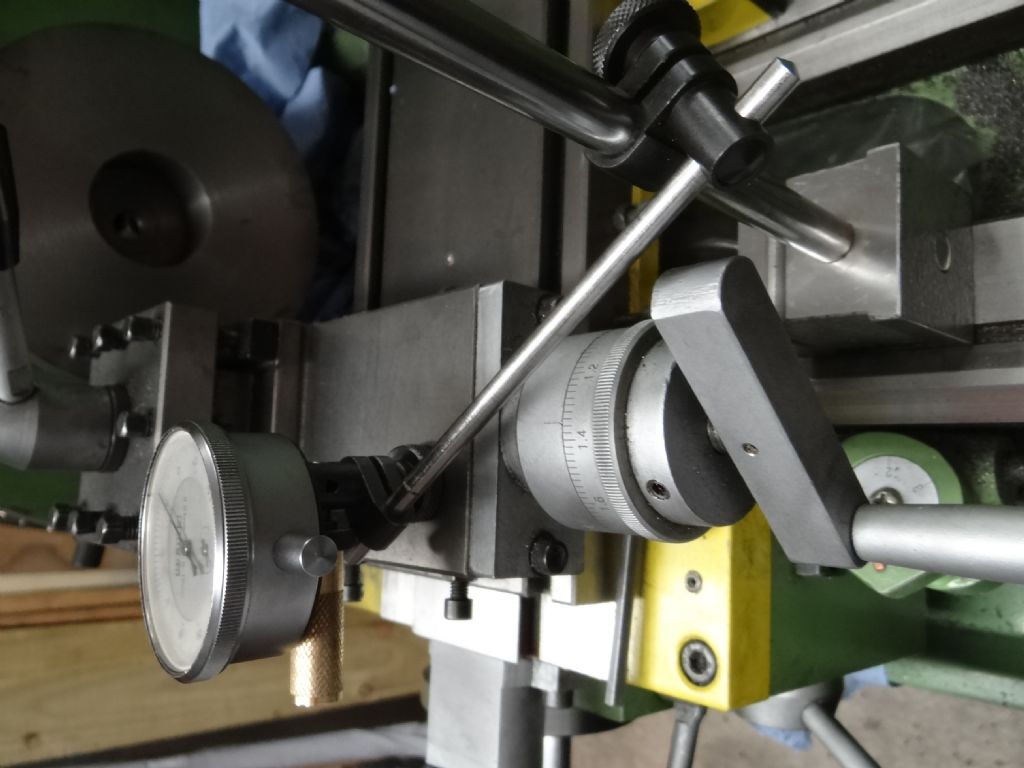
                  If I lean heavily on the tool-post I get less than 0.01mm with the DTI on the saddle and on the bed.

                  dsc05321.jpg

                  dsc05322.jpg

                  Sorry about the orientation.

                  Dave

                  #366950
                  JasonB
                  Moderator
                    @jasonb

                    I meant movement of the slides, you did not say that you locked the topslide so I wondered if it had would itself in.

                    #366952
                    speelwerk
                    Participant
                      @speelwerk

                      In theory you messure double the error of around 0.12 mm. Niko.

                      #366954
                      Neil Wyatt
                      Moderator
                        @neilwyatt

                        How are you measuring? If by moving the cross slide you can't be finding the result of top slide error..

                        What does it look like if you put a straight edge across it.

                        Could the top slide or saddle have moved during the cut?

                        Neil

                        #366960
                        Mick B1
                        Participant
                          @mickb1

                          I guess one basic verification is to stick a straight edge across and see:-

                          (i) whether a 0,2+ feeler would go into any daylight close to the centre, and

                          (ii) whether the dishing looks straight conical or radiused.

                          Not that these would diagnose it but they'd confirm and give pointers.

                          #366961
                          Pete Rimmer
                          Participant
                            @peterimmer30576

                            If you swept the face by mounting the dial gauge on the same cross-slide that you used to face the part with the tool, you should see no movement regardless of whether it's face is truly flat or not.. Since you do it points to a worn or maladjusted cross-slide.

                            #366965
                            blowlamp
                            Participant
                              @blowlamp

                              Remember that running the DTI via the cross slide over the far side of the backplate (first picture) will show double the actual error.

                              Martin.

                              #366967
                              SillyOldDuffer
                              Moderator
                                @sillyoldduffer
                                Posted by Neil Wyatt on 12/08/2018 17:43:46:

                                How are you measuring? If by moving the cross slide you can't be finding the result of top slide error..

                                What does it look like if you put a straight edge across it.

                                Could the top slide or saddle have moved during the cut?

                                Neil

                                Not a good photo, taken with a torch behind a set-square in the dark and the blurring makes it look worse than it is:

                                dsc05323.jpg

                                Jason may have it – I would have sworn the top-slide was locked and it isn't.

                                Also, Niko (speelwerk) points out the apparent error is doubled if you measure on the opposite side of from the cut. I think he's right, so the error is 'only' 0.12mm. (Still too big.)

                                I'm going to try again and make sure everything is 'just so'. If it's not, Pete's mal-aligned cross-slide will need looking at.

                                For what its worth there is no rotational error, it's only dished excessively.

                                Watch this space…

                                Thanks,

                                Dave

                                #366968
                                I.M. OUTAHERE
                                Participant
                                  @i-m-outahere

                                  ILooks like the nib on your dial indicator is loose .

                                  #366970
                                  blowlamp
                                  Participant
                                    @blowlamp

                                    If you run your DTI on the near side of the backplate, you'll get an indication of how much deflection happened during the facing cut.

                                    Martin.

                                    #367022
                                    Perko7
                                    Participant
                                      @perko7

                                      Have you checked that the cross-slide is actually running at 90deg to the bed? If the gibs have been adjusted incorrectly it may have skewed the cross-slide slightly, even though it is tight and does not move when pressured. Not noticeable on longitudinal cuts but will definitely show up on a large diameter facing cut.

                                      Maybe clamp a test bar horizontally across the face of the chuck or backplate, bring the dti up to it close to one end, then use the cross-slide to move to the other end and see how much run-out. Rotate the spindle through 180deg and do it again. Assuming no play in the spindle or the chuck mounting, the difference in run-out for each pass will be a measure of the accuracy of your cross-slide adjustment.

                                      #367031
                                      KWIL
                                      Participant
                                        @kwil

                                        Why is Pete Rimmer's comment being ignored?

                                        He is correct, you cannot measure the cross slide error by using the cross slide as your fixed plane of reference, better Jason's straight edge and feeler gauge.

                                        #367033
                                        John Haine
                                        Participant
                                          @johnhaine32865

                                          I have always understood that lathes are built/adjusted to face slightly concave as that's better from a fit p.o.v. than convex, and this is done by slightly offsetting the headstock but having the cross slide perpendicular to the axis. So this may indicate that the h/s has too much offset.

                                          #367035
                                          Anonymous
                                            Posted by John Haine on 13/08/2018 09:50:57:

                                            ……………. and this is done by slightly offsetting the headstock but having the cross slide perpendicular to the axis.

                                            That would mean you'd be doomed to turn taper. I've got a swivelling workhead on my cylindrical grinder, specifically for grinding tapers. It's much more likely it is done by machining the cross slide dovetails slightly off perpendicular to the saddle.

                                            Andrew

                                            #367037
                                            SillyOldDuffer
                                            Moderator
                                              @sillyoldduffer

                                              I've confirmed there is a problem. I took another 0.2mm off the face last night and got a similar result. Locking the top-slide properly nearly halved the error, so that was part of the problem, but locking didn't eliminate it.

                                              The test I believe confirms the error is the amount of visible light appearing under a straight-edge. The straight-edge shows the lathe is cutting concave (which is correct). Assuming I'm applying it correctly, a DTI shows the error to be excessive (about 0.08mm over 50mm) . For comparison Schlesinger's target for facing is 0.02mm over 300mm. (Thank you Michael for that information.)

                                              I need to finish the job I'm doing and then investigate further. At the moment the lathe is filthy (cutting cast-iron), and everything needs a good clean before jumping to conclusions. Sleeping on it, I thought of a few more checks. I don't think they're likely to be loose but I need to confirm the tool-shank is clamped firmly to the top-slide and that the top-slide is tight on the saddle.

                                              After that, I shall proceed as per Perko7, thank you for the suggestions.

                                              As an observation, I've seen dozens of posts discussing Rollie's Dad, tailstock and other 'along the spindle axis' alignment tests, but I don't recall similar interest in facing accuracy. Perhaps flat facing isn't critical for many jobs, provided concavity prevents rocking. Even so, has anyone else measured their lathe's facing performance?

                                              Dave

                                              PS Certainly not ignoring Pete Rimmer!


                                              Edited By SillyOldDuffer on 13/08/2018 10:20:28

                                              #367039
                                              Michael Gilligan
                                              Participant
                                                @michaelgilligan61133
                                                Posted by KWIL on 13/08/2018 09:45:29:

                                                Why is Pete Rimmer's comment being ignored?

                                                He is correct, you cannot measure the cross slide error by using the cross slide as your fixed plane of reference.

                                                .

                                                So perhaps we need to pause for thought …

                                                … What exactly is Dave's measurement illustrating ?

                                                My current guess is that the nascent faceplate was deflected by the force applied for cutting, and sprung back when that force was removed. … A very light finishing cut, with a very sharp tool, would quickly confirm or refute.

                                                MichaelG.

                                                #367043
                                                SillyOldDuffer
                                                Moderator
                                                  @sillyoldduffer
                                                  Posted by Michael Gilligan on 13/08/2018 10:22:06:

                                                  Posted by KWIL on 13/08/2018 09:45:29:

                                                  Why is Pete Rimmer's comment being ignored?

                                                  He is correct, you cannot measure the cross slide error by using the cross slide as your fixed plane of reference.

                                                  .

                                                  So perhaps we need to pause for thought …

                                                  … What exactly is Dave's measurement illustrating ?

                                                  My current guess is that the nascent faceplate was deflected by the force applied for cutting, and sprung back when that force was removed. … A very light finishing cut, with a very sharp tool, would quickly confirm or refute.

                                                  MichaelG.

                                                  The faceplate is nearly 18mm thick, but I wonder if the casting is rocking in the chuck. It seems firm enough, but the chuck isn't gripping a perfect round section. Now I think of it, I wish I'd used my 4-jaw.

                                                  When domestic duties permit, I'll face off with a sharp HSS tool and report back.

                                                  Ta,

                                                  Dave

                                                  #367045
                                                  Hopper
                                                  Participant
                                                    @hopper

                                                    I think Michael G is on the right track. A light cut with a sharp tool is in order before conclusions can be drawn.

                                                    As for the original measurement with a dial indicator mounted on the cross slide; it's measuring nothing much. Certainly not the amount of dish in the faced surface as the dial indicator is following the original tool path, which could be anywhere, depending on wear, looseness etc.

                                                    BUT, repeating the test with a known flat (or near flat within Schlssinger limits) faceplate will give a meaningful measure of how far out of alignment the cross slide may be sitting to the lathe axis.

                                                    The test suggested by Perko way back when is again more accurate, if you use a ground parallel strip held in the four jaw. Set it so that each end gives teh same reading on a dial indicator when rotated 180 degrees end to end. Once set like this, it is dead square to the spindle axis. So then repeating the test of running the cross-slide mounted dial indicator along it gives a very accurate read of cross-slide to spindle axis alignment.

                                                    It this test shows that the cross slide is out of square with the spindle axis, the next step is to check the spindle axis is parallel with the bed ways by a simple turning test piece test, which will measure tapered if the spindle//bed alignment is out.

                                                    #367046
                                                    Anonymous
                                                      Posted by SillyOldDuffer on 13/08/2018 10:19:39:

                                                      Even so, has anyone else measured their lathe's facing performance?

                                                      Can't say I've ever really worried about it, possibly due to insouciance.

                                                      However, I've just measured the smokebox door I've been working on recently. There's a flat ring on rhe outside, a gap, and then a central boss, all aligned. So not complete facing, but all done at one setting. A rule shows some light, but I can't get a 1.5 thou feeler gauge in anywhere under the rule. Diameter of the door is 210mm.

                                                      Andrew

                                                    Viewing 25 posts - 1 through 25 (of 101 total)
                                                    • Please log in to reply to this topic. Registering is free and easy using the links on the menu at the top of this page.

                                                    Advert

                                                    Latest Replies

                                                    Home Forums Beginners questions Topics

                                                    Viewing 25 topics - 1 through 25 (of 25 total)
                                                    Viewing 25 topics - 1 through 25 (of 25 total)

                                                    View full reply list.

                                                    Advert

                                                    Newsletter Sign-up