Stuart 6A engine

Advert

Stuart 6A engine

Home Forums General Questions Stuart 6A engine

Viewing 24 posts - 1 through 24 (of 24 total)
  • Author
    Posts
  • #23770
    anthony daborn
    Participant
      @anthonydaborn40216

      Crankshaft

      Advert
      #183102
      anthony daborn
      Participant
        @anthonydaborn40216

        Can anyone help me with a forging co. who can stamp out a crankshaft blank for the 6A or is there already a supplier for this item ?

        #183105
        JasonB
        Moderator
          @jasonb

          Have you thought about turning from solid or a built up one with silver soldered and then pinned joints. Thos eare the two ways I usually make crankshafts.

          Could possibly be lasered, waterjet or flame cut from flat then heated and twisted to get the 90deg offset. or stitch drilled from plate and then twist it


          J

          Edited By JasonB on 13/03/2015 18:30:12

          #183125
          nigel jones 5
          Participant
            @nigeljones5

            I wouldn't go to the trouble or huge expense, 4 crank webs, some bright bar and solder and its done! Sort of.

            #183127
            JasonB
            Moderator
              @jasonb

              I suppose a lot depends on if its going to have to work for a living, if its going into a working steamboat then the last thing you want in the middle of a lake is a slipped joint on the crank.

              There is quite a good account of machining a two throw crank from solid round bar here or to put it anotherway how to reduce 281kg of steel into a large pile of swarf as you try to find a 27kg crankshaft hidden within. Starts just less than half way down the page.

              #183137
              John Olsen
              Participant
                @johnolsen79199

                I used a spheroidal graphite casting for the crankshaft for my steam launch. This depends on having a reliable foundry that can do SG iron, but makes for an easier job with less material to be removed than cutting from solid…which I have also done for smaller shafts.

                I made up a pattern with a bit of allowance and with the crank webs filled in. The offset pieces were also provided on the ends. Almost all of the machining was done in the milling machine with the shaft held between centres, as was done with the crankshaft in JasonB's link. This is a good way to machine shafts, suggested many years back by Professor Chaddock. I described it in an article in ME a few years ago. I used chain drilling and the bandsaw to remove as much of the excess in the webs as possible. When I finished, I was able to test the material by putting a piece about quarter of an inch thick by an inch wide and 2 or three inches long into the vice and hammering it. It bent to right angles after many blows, before finally starting a crack on the outside of the bend, but did not break off. So the material does not behave like cast iron and is very suitable for a crankshaft. You do need a reliable foundry because the SG effect is obtained by adding something to the molten iron as it comes out of the furnace, and if it is left too long before being poured it will revert to behaving like ordinary iron. After milling to slightly oversize, my shaft was ground to finish by an automotive machinist.

                The 6A shaft is not heavily loaded compared to automotive shafts, so you don't really need high tensile steels.

                John

                #183147
                anthony daborn
                Participant
                  @anthonydaborn40216

                  Thanks to all for the comments. I started this project many years ago having built the launch, and I believe that then there was a source of forged crankshafts down in Devon. I appreciate that I can fabricate it but thought that a forged one would be quicker to machine thus saving time and look more professional. So it looks like a rethink is required.

                  Tony

                  #183156
                  John Olsen
                  Participant
                    @johnolsen79199

                    Why settle for a forgery when you can have the real thing??

                    Actually some of Jasons suggestions further back are quite applicable…eg cut a blank out of bar or thick sheet, get a blacksmith to put the twist in the centre and then machined. Probably if someone was making blanks this would be what they were doing. It is not likely that someone would have made the dies to stamp out Stuart 6A cranks in the sort of way that spanners and so on are done. I've seen video of car sized cranks being made like this…it is certainly not a small scale endeavour. But putting a twist into a flat blank would not be beyond most blacksmiths, and I would attempt it myself for one within the reach of the heating gear I have.

                    See Model engineer Volume 200 issue 4316 Page 19 for my article on milling crankshafts, including pictures of the one I cast for the Leak engine…which is a little larger than a 6A.

                    John

                    #183158
                    JasonB
                    Moderator
                      @jasonb

                      May be worth asking the Steam Boat Association, there may be someone there who has had one done.

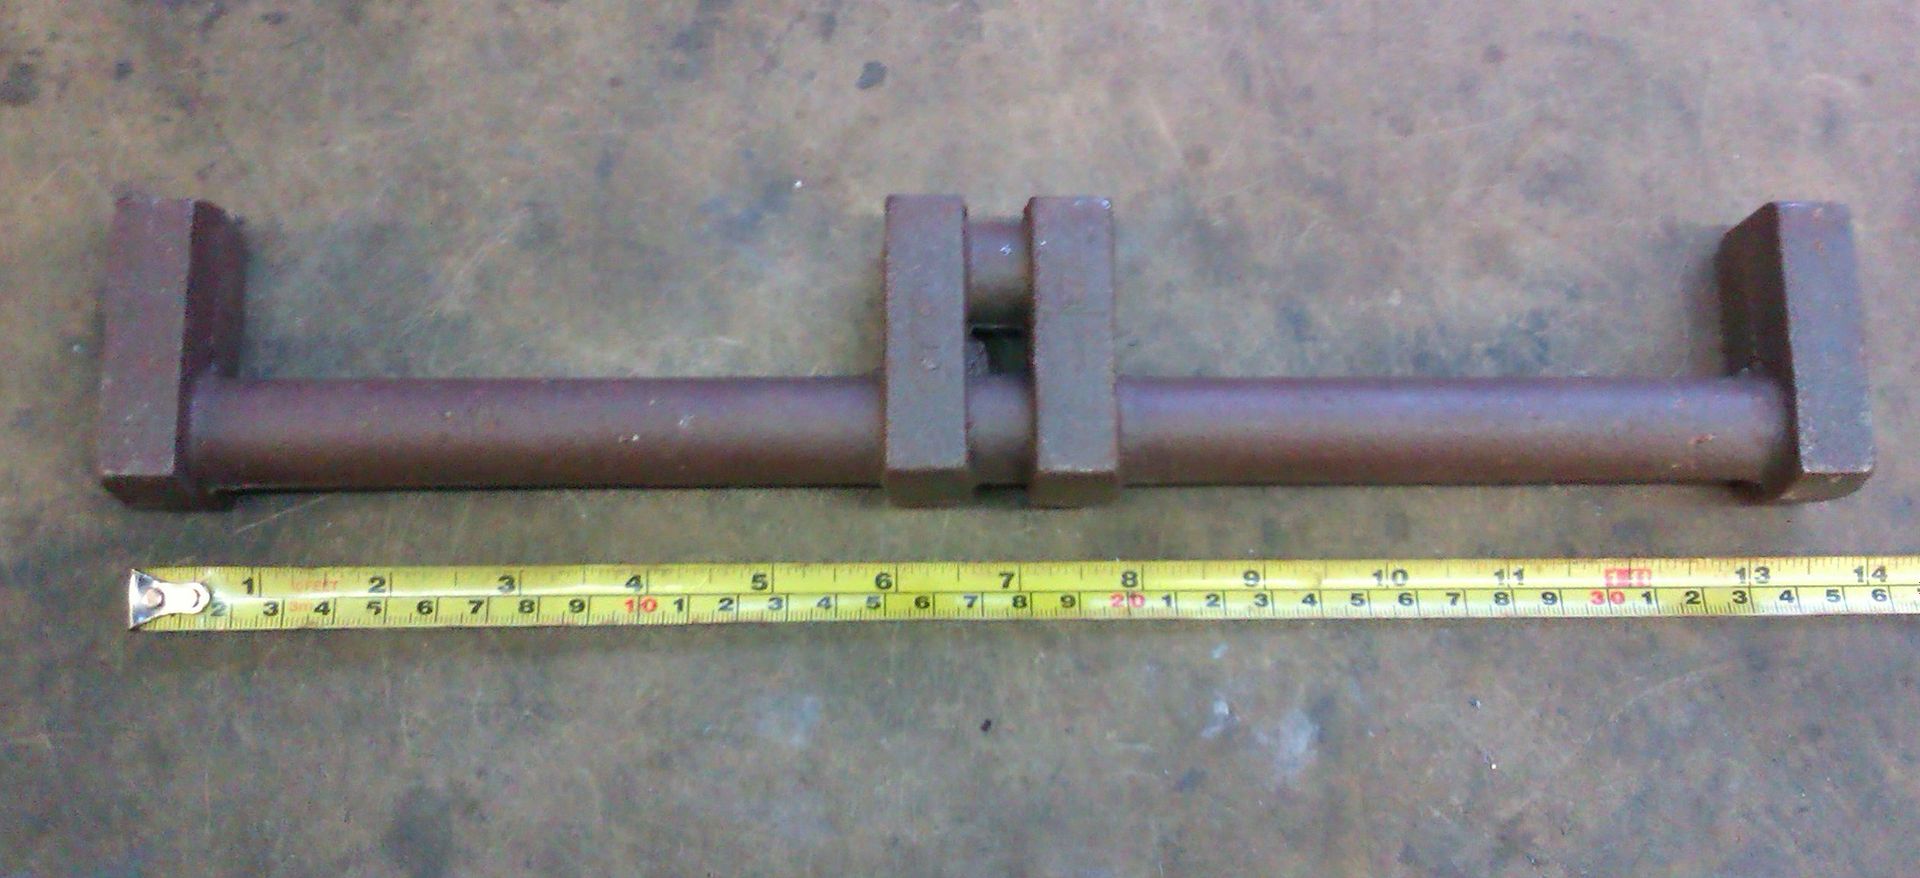
                      Johns suggestion of SG iron is also a good one I have done a couple of cranks that were cast from this and they are much more like steel to work than iron. If you do make a pattern then get the throws cast on teh ends which can be cut off and machined away once the pins have been completed. This is a single throw I've recently done and you can see how the ends are done, a circular disc would do for you, not much smaller than the 6A this is 13.5" long

                      #183162
                      JasonB
                      Moderator
                        @jasonb

                        Also worth a look at 4464 to see how James Lauder did his prize winning Leak crankshaft from 80mm square black bar.

                        J

                        #210271
                        Lionel Connell
                        Participant
                          @lionelconnell35623

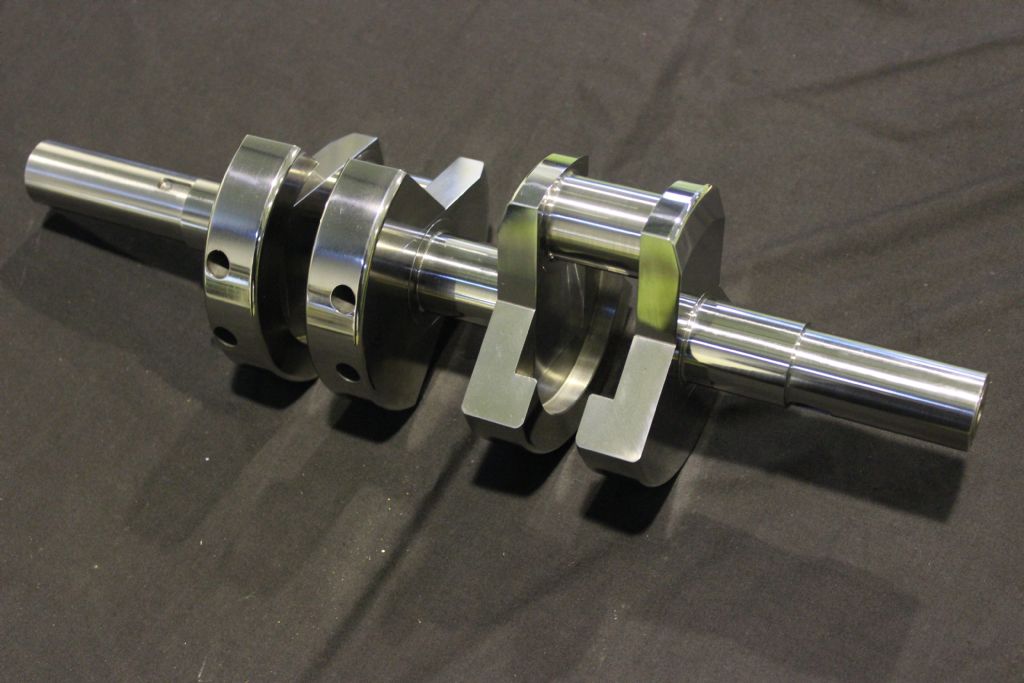
                          6A Crankshaft machined from solid P20 Tool steel with bolt on CI counter weights

                          Here is my 6A crankshaft turned from solid

                          #210274
                          JasonB
                          Moderator
                            @jasonb

                            Lionel, have a read about how to get photos into your posts here

                            #210396
                            Lionel Connell
                            Participant
                              @lionelconnell35623

                              Take 2, hopefully thie will now include a picture. 6A Crankshaft from P20 Tool steel.

                              #210397
                              Lionel Connell
                              Participant
                                @lionelconnell35623

                                Crankshaft roughing out

                                Roughing out 6A crankshaft

                                #210399
                                JasonB
                                Moderator
                                  @jasonb

                                  I don't think its going to work with Dropbox images, either create an album here and upload to that or host the image on something like Photobucket or Flickr.

                                  Or if you want to private message me the sharing link to the dropbox image I'll see what can be done

                                  Edited By JasonB on 03/11/2015 07:18:05

                                  #210586
                                  Ian S C
                                  Participant
                                    @iansc

                                    Lionel, you better start an album(top of page, 4th from left, reduce the size of photos to 640 x480, or there abouts) just follow the dots, even I managed it.

                                    Ian S C

                                    Edited By Ian S C on 04/11/2015 10:04:38

                                    #210588
                                    Neil Wyatt
                                    Moderator
                                      @neilwyatt

                                      You don't need to reduce photo album pictures (except to reduce upload time) they are automatically converted to 1024 pixels in the largest dimension if they are larger than that.

                                      They are displayed in messages at 512 pixels wide, but increase to 1024 if clicked.

                                      Neil

                                      #210589
                                      Lionel Connell
                                      Participant
                                        @lionelconnell35623

                                        Hi Ian,

                                        Mate I don't get it….When I look at this tread online I see my photos perfectly in my post.

                                        Lionel

                                        #210596
                                        Bob Unitt 1
                                        Participant
                                          @bobunitt1

                                          At a rough guess, what you're actually seeing is on your own hard disk, not the forum photo album.

                                          #210715
                                          Ian S C
                                          Participant
                                            @iansc

                                            I reduce mine, as being on dial up anything larger just won't load. Promises of super fast broadband in the next year or so, we'll see.

                                            Ian S C

                                            #210857
                                            Lionel Connell
                                            Participant
                                              @lionelconnell35623

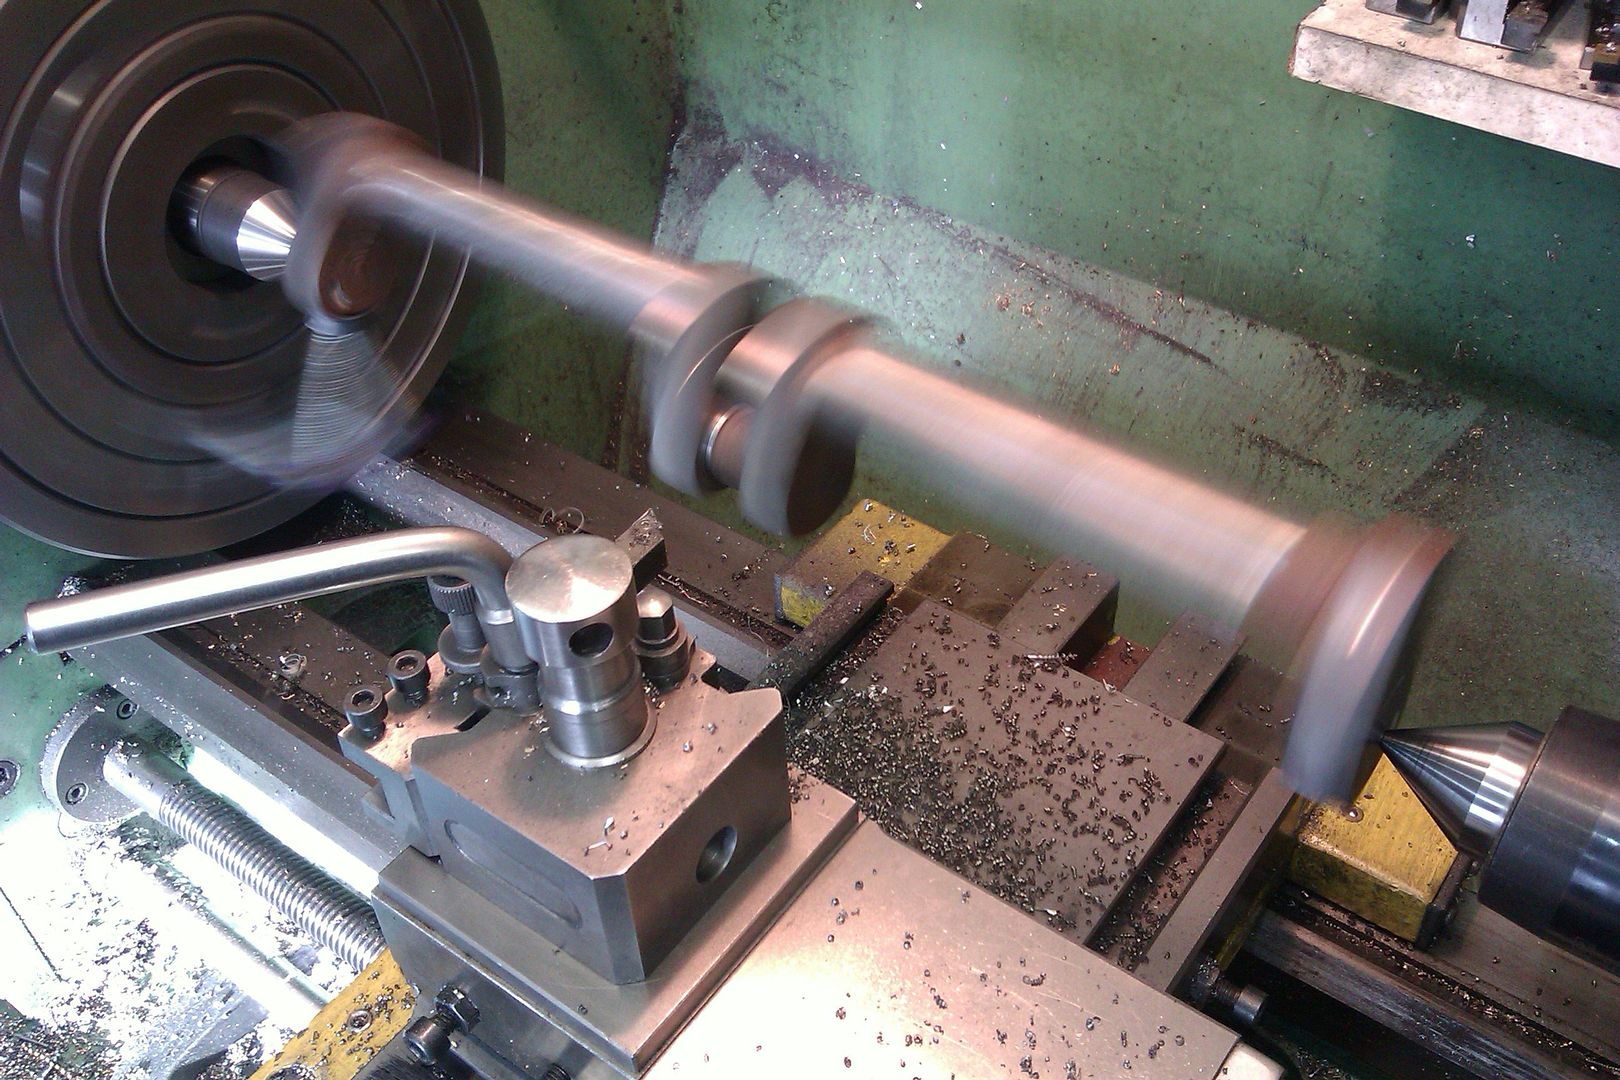
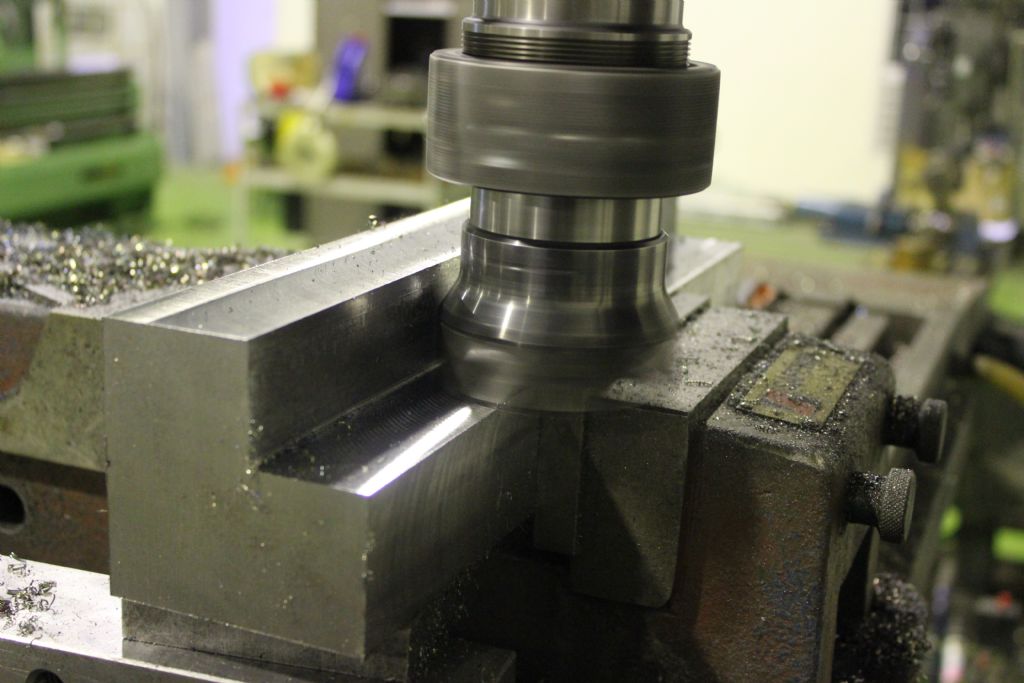
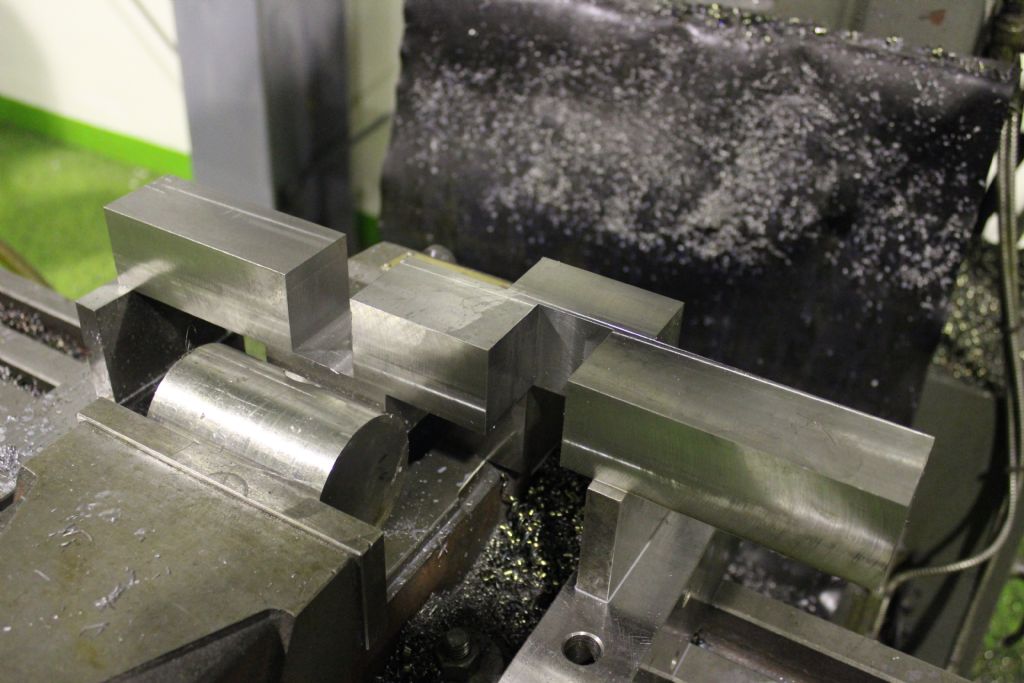
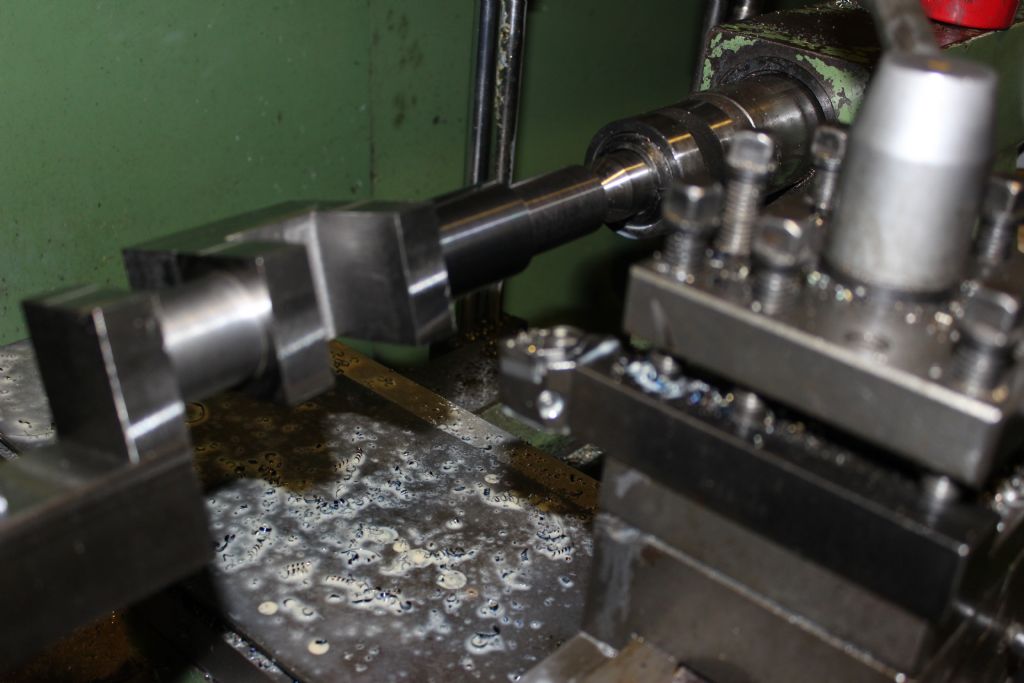
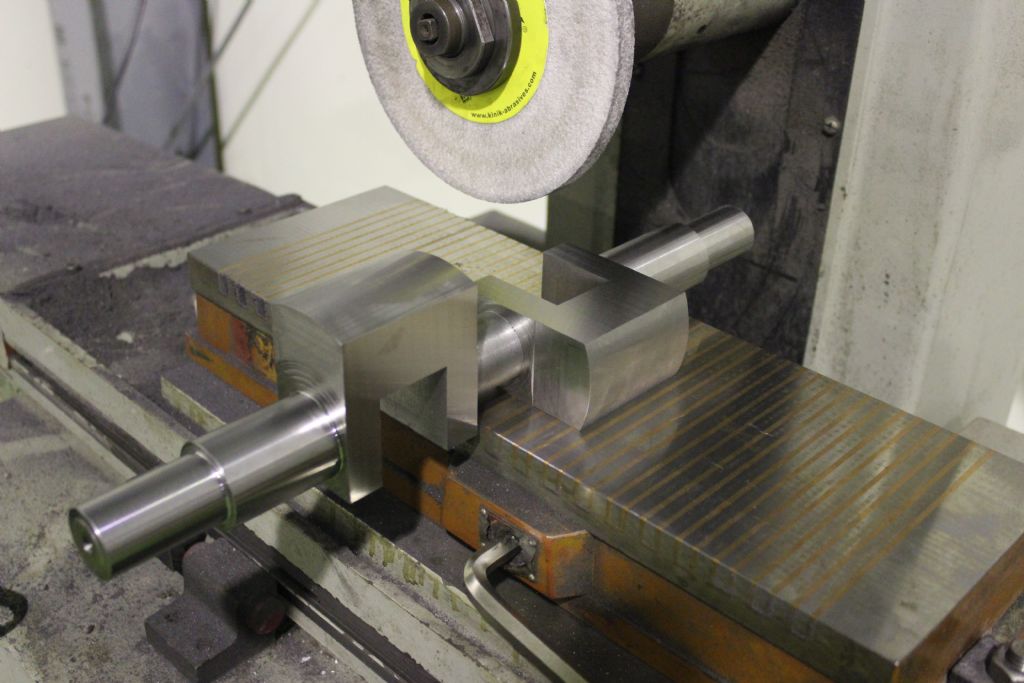
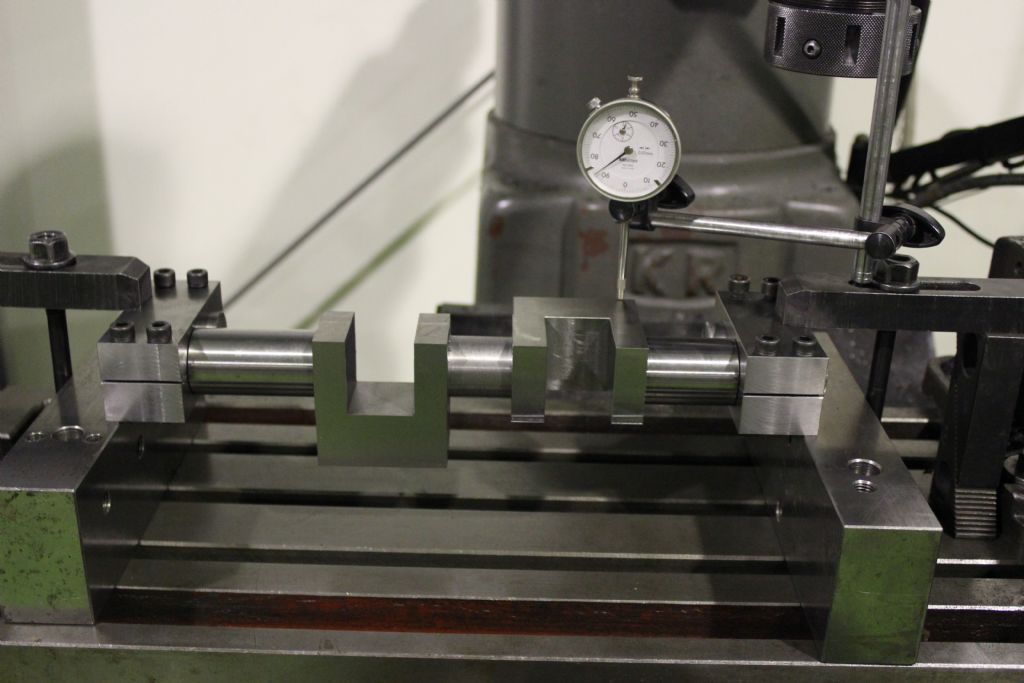
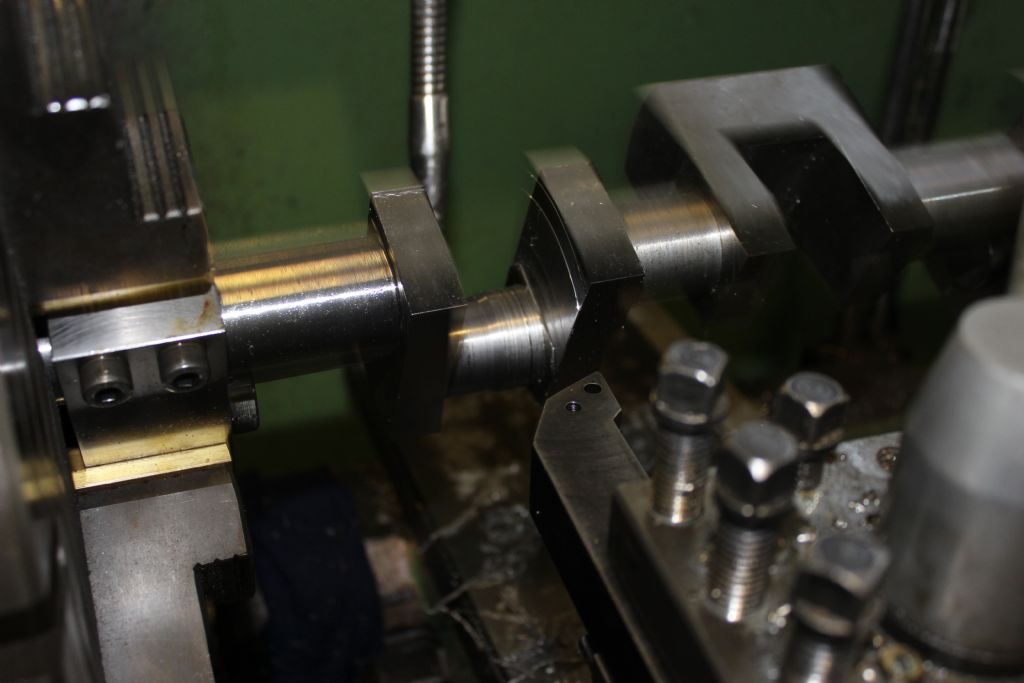
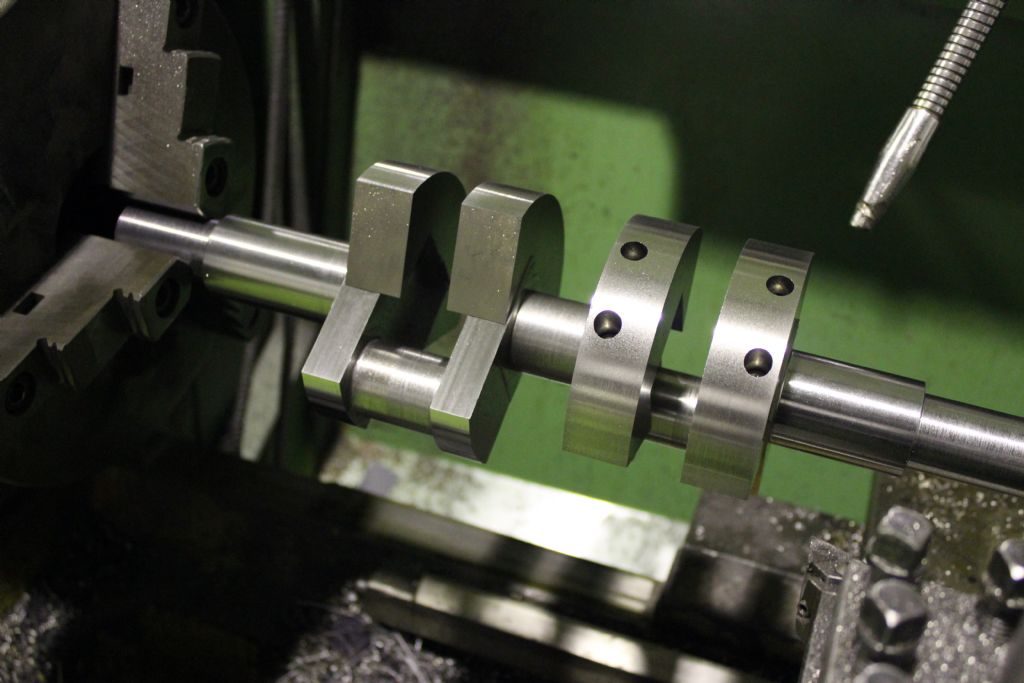
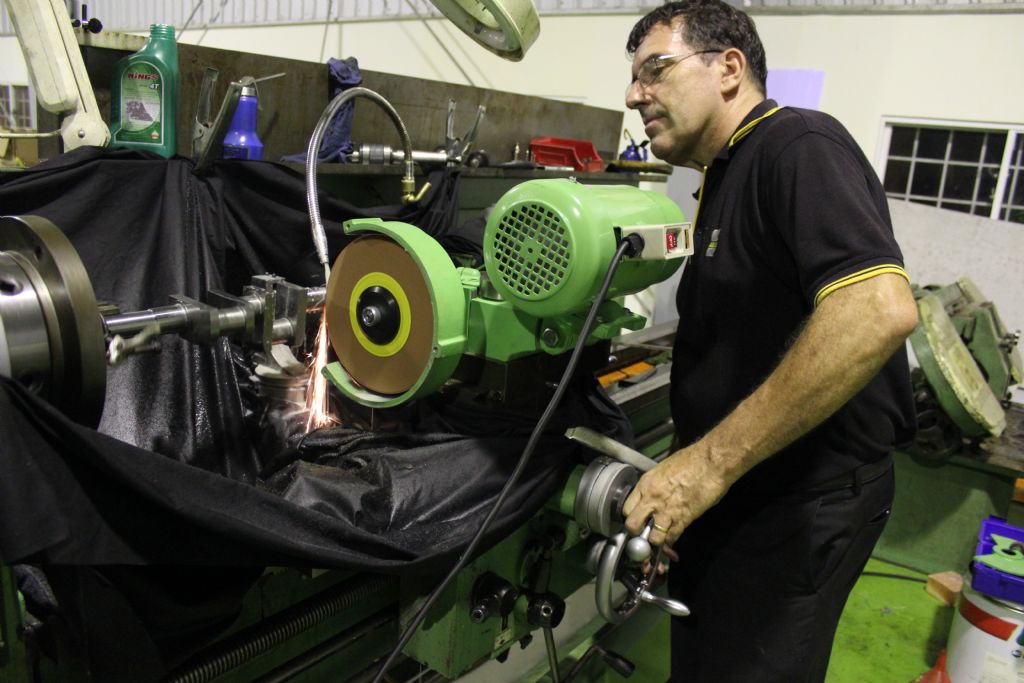
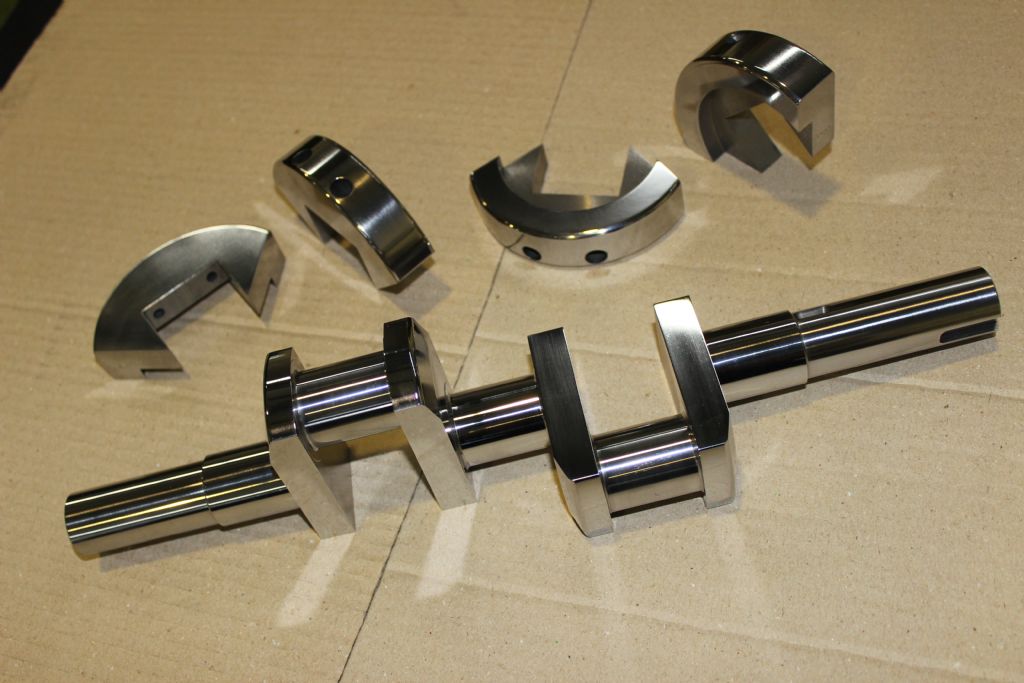
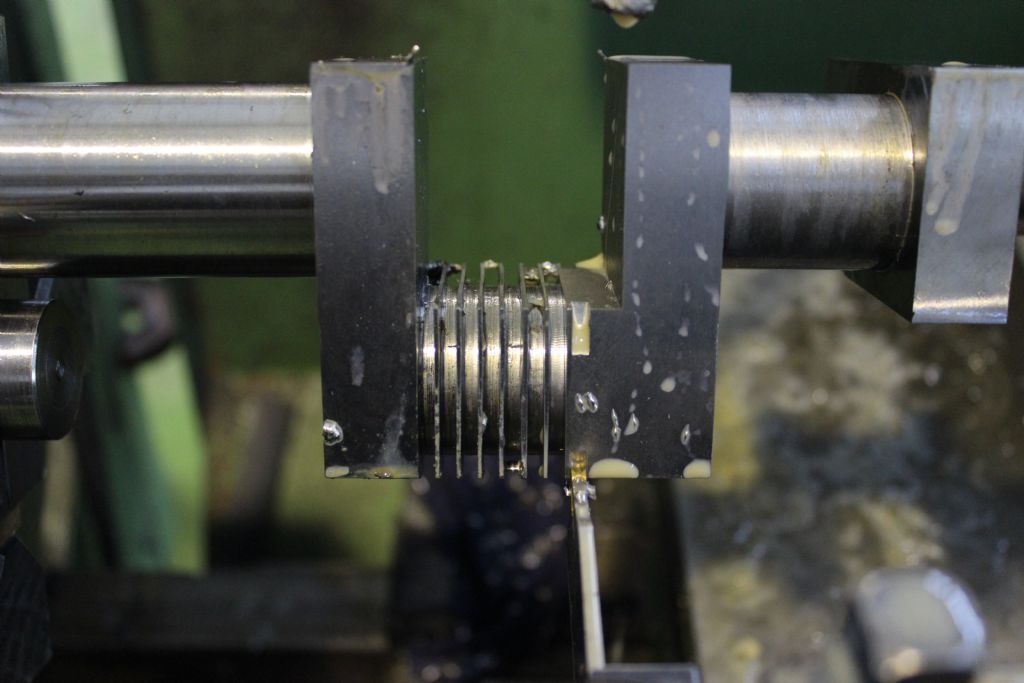
                                              Thanks guys I will have another go at it here. I am building a 6A for use in a Launch. I am a toolmaker and just like many other builders of steam models I spent much time pondering over many ways of making a crankshaft. My engine will work for a living and I was not prepared to compromise on strength or longevity. Fortunately I have some larger equipment and so I opted for starting with a big block steel. I chose P20 tool steel because it is pre-hardened to 40HRC, it is fully stress relieved so it doesn't change shape as you cut big pieces out of it, and P20M version that I used has added sulfur to improve cutting. I milled 16Kg off the square blank with an 80mm x 4 insert tip cutter, it took 8 hours and I didn't need to change or rotate the tips. The counter weights are the Standard Stuart Castings. crank shaft rough milling blank 1.jpgcrank shaft rough milling blank 5.jpgcrank shaft turning 2.jpgcrank shaft turning 3, squaring web sets  to each other.jpgcrank shaft turning 4 seting the turning jigs in milling machine.jpgimg_6906.jpgimg_6953.jpgimg_7291.jpgimg_7321.jpgimg_7348.jpg

                                              #210858
                                              Lionel Connell
                                              Participant
                                                @lionelconnell35623

                                                Sorry I missed this one, the big end pins were roughed out like this.

                                                crank shaft turning grooving out the crank pins.jpg

                                                Total machining time for the crank including grinding 48 hours. I am sure that I could not have made the crank any quicker by fabricating it, and I am not left wondering about the quality of any brazed joints or voids in castings. The three main journals were machined between centers first, after machining the big ends and facing the webs the crank was put back between centers for grinding, I clocked the main journals before grinding and the run out on the middle main journal was less than one thou . Here is where the pre-hardened and fully stress relieved material is worth it's weight in gold, it stays put.

                                                Cheers

                                                Lionel

                                                #210861
                                                JasonB
                                                Moderator
                                                  @jasonb

                                                  Thanks for finally getting the phoptos onto the site, well worth the wait.

                                                  #210910
                                                  Michael Gilligan
                                                  Participant
                                                    @michaelgilligan61133

                                                    Impressive work, Lionel !!

                                                    MichaelG.

                                                  Viewing 24 posts - 1 through 24 (of 24 total)
                                                  • Please log in to reply to this topic. Registering is free and easy using the links on the menu at the top of this page.

                                                  Advert

                                                  Latest Replies

                                                  Home Forums General Questions Topics

                                                  Viewing 25 topics - 1 through 25 (of 25 total)
                                                  Viewing 25 topics - 1 through 25 (of 25 total)

                                                  View full reply list.

                                                  Advert

                                                  Newsletter Sign-up