Colchester Student Mk1 Won’t Start

Advert

Colchester Student Mk1 Won’t Start

Home Forums Help and Assistance! (Offered or Wanted) Colchester Student Mk1 Won’t Start

Viewing 25 posts - 176 through 200 (of 797 total)
  • Author
    Posts
  • #459558
    Richard Kirkman 1
    Participant
      @richardkirkman1

      Thanks Phil, great to hear

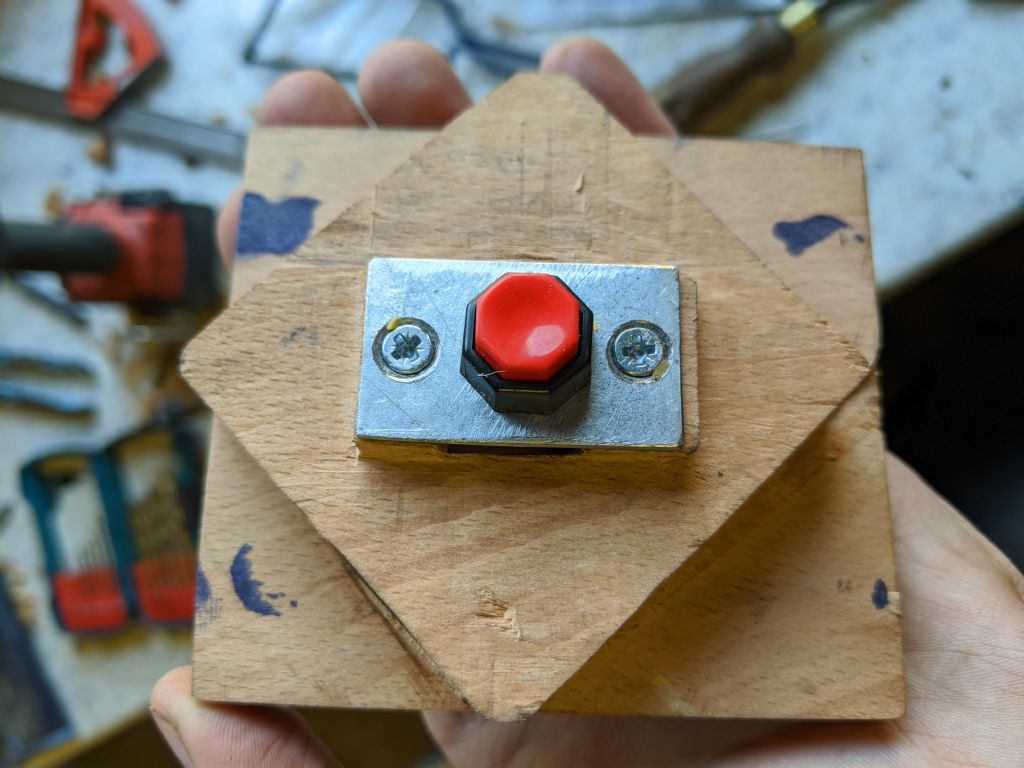
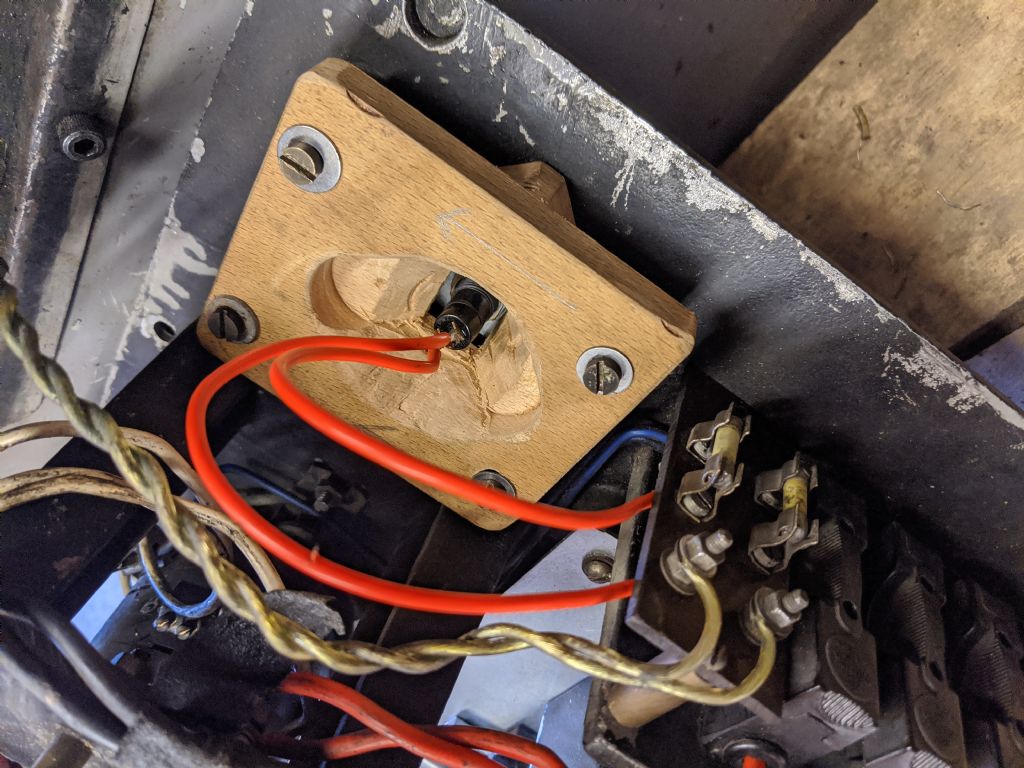
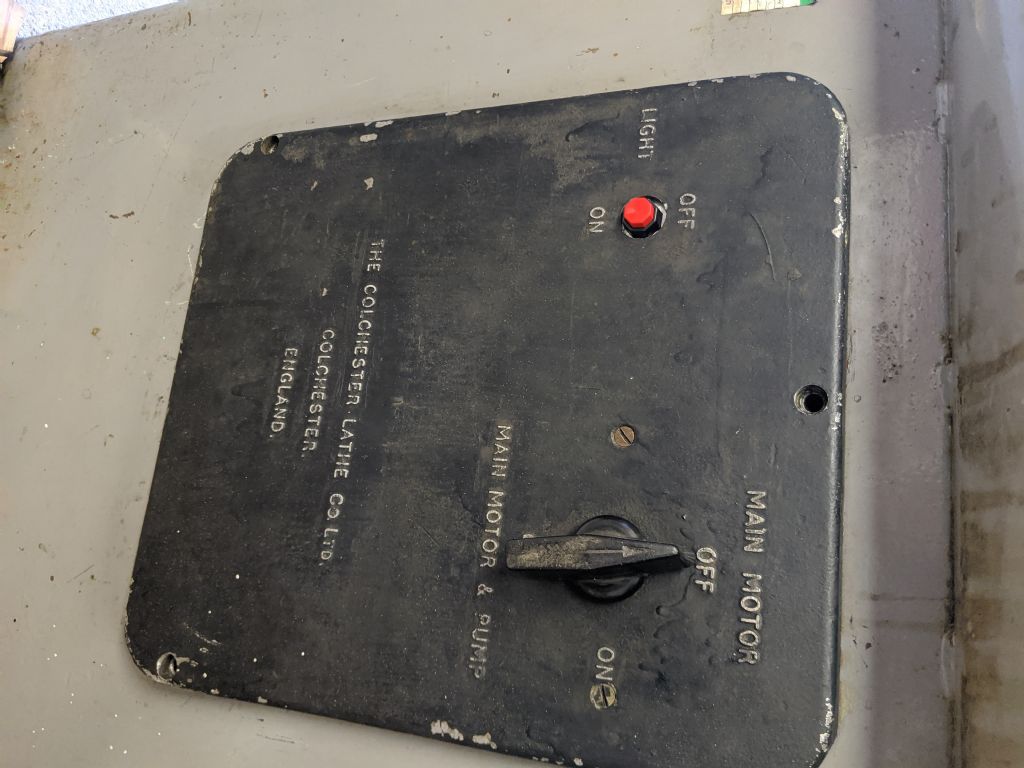
      I've just finished the light switch mounting things, so that's looking quite nice, especially considering you'll never see any of it.

      I need to order some new belts from Rs anyway so may as well make an order.

      What do I really need to ask them, as I still don't really know what I need. This would be preferable as it's cheaper.

      Contactor should arrive tomorrow, so I'll start on the gaskets now!

      Thanks again

      img_20200325_133124.jpg

      Hopefully this doesn't make you go AAAAAAARGH!!!

      img_20200325_145609.jpg

      img_20200325_145839.jpg

      Advert
      #459614
      Johnboy25
      Participant
        @johnboy25

        Hi Richard. I agree with ‘Phil on this. 👍

        John

        #459661
        Richard Kirkman 1
        Participant
          @richardkirkman1

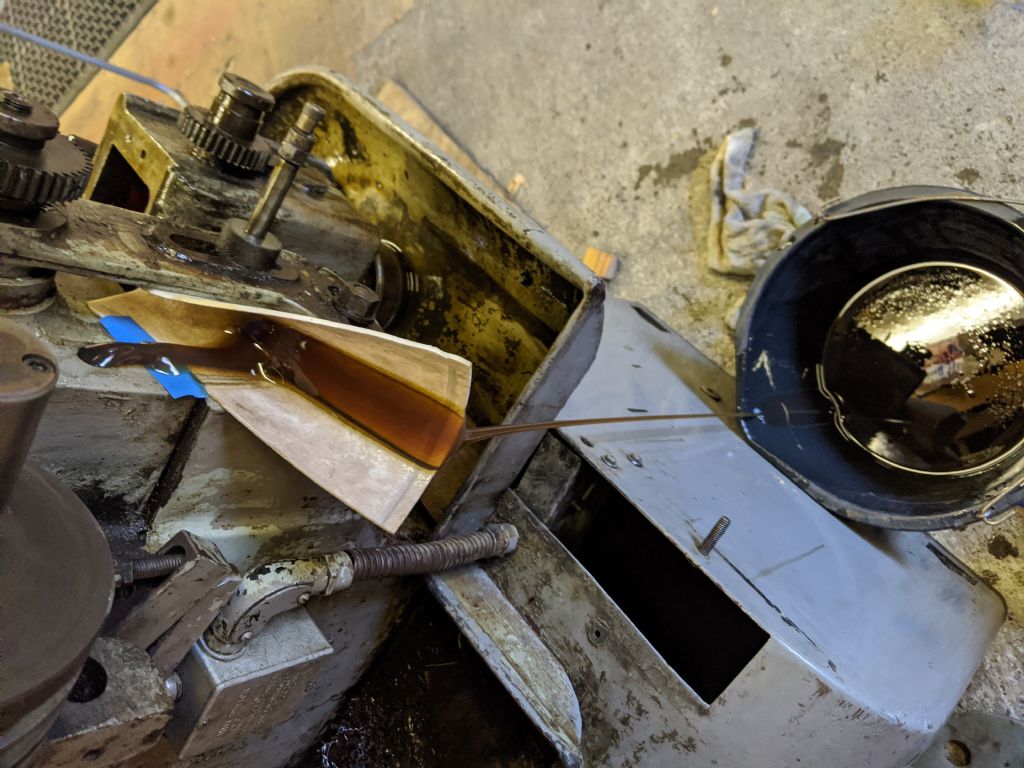
          Little break from electronics, I have started on the gaskets finally. Or disassembly at least…
          img_20200325_164527.jpg

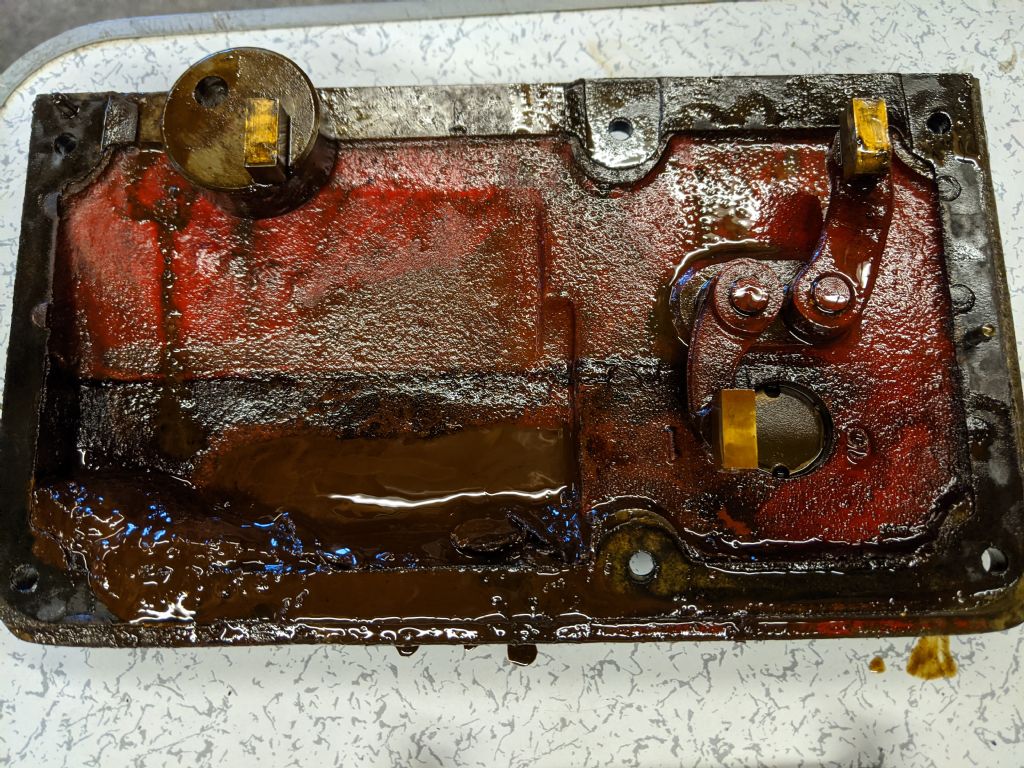
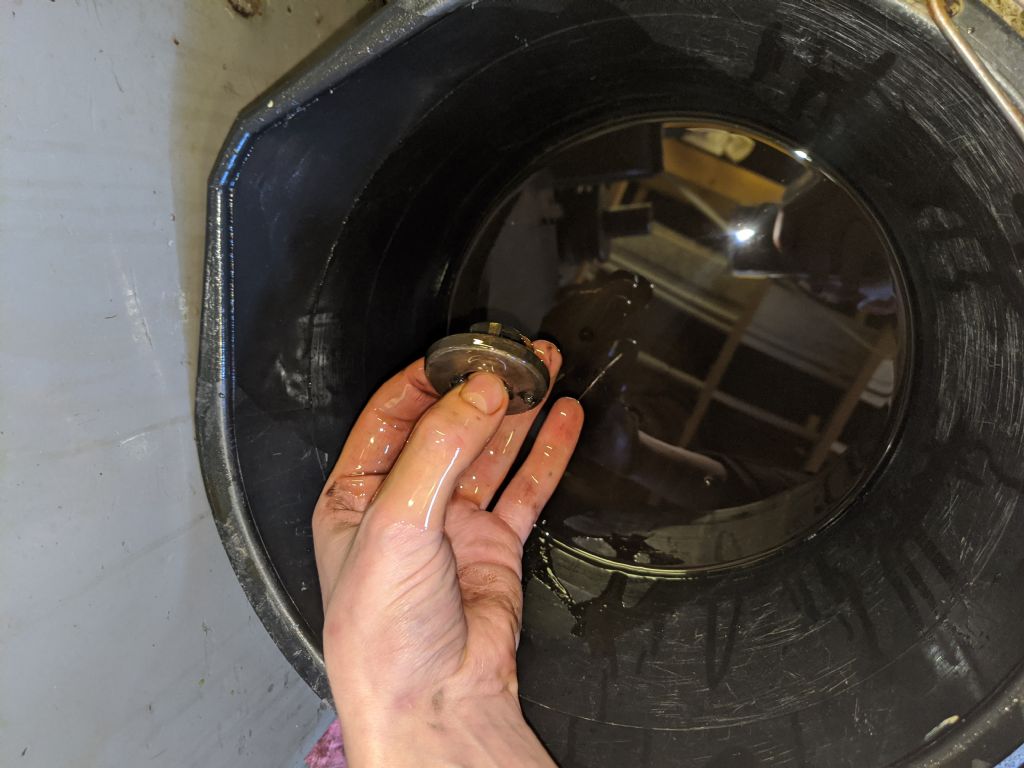
          Definitely not the same colour as when I put it in, I kept reusing the oil to try to flush the headstock a bit, but i still need to get in properly and give it a good scrub

          img_20200325_174844.jpg

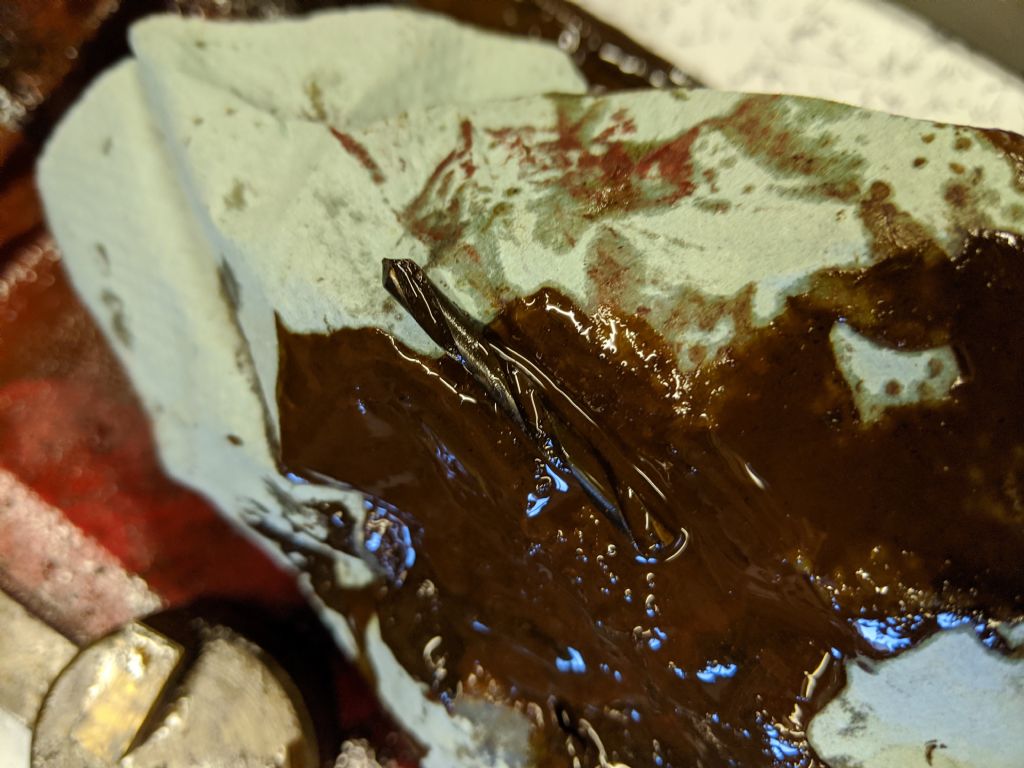
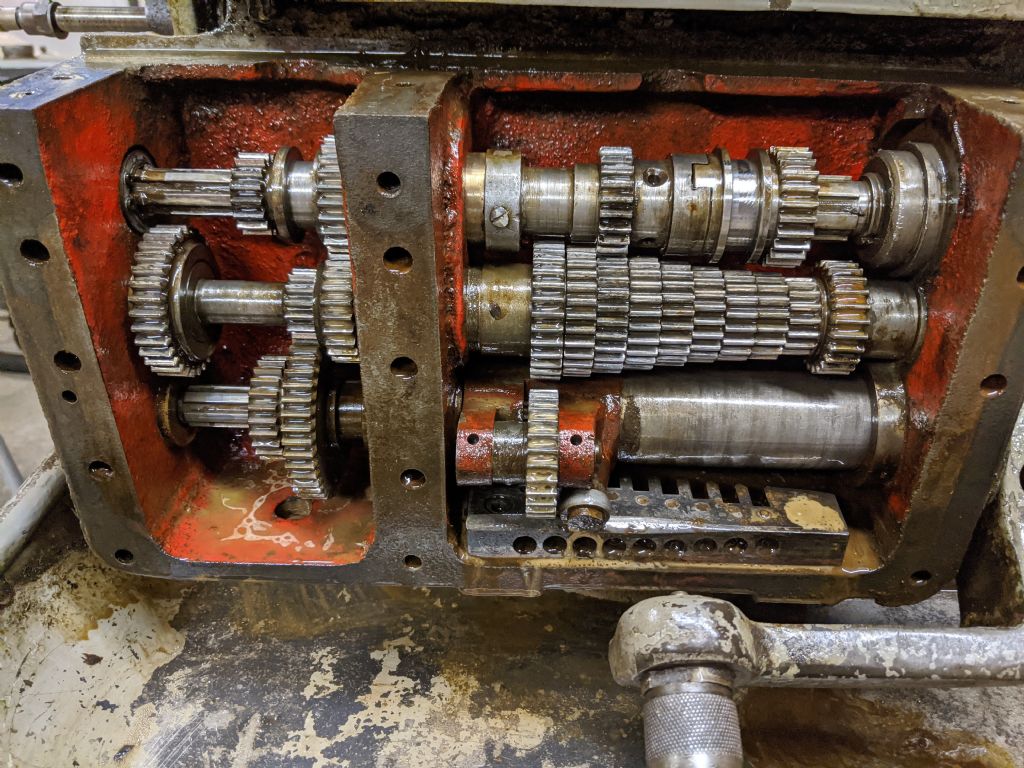
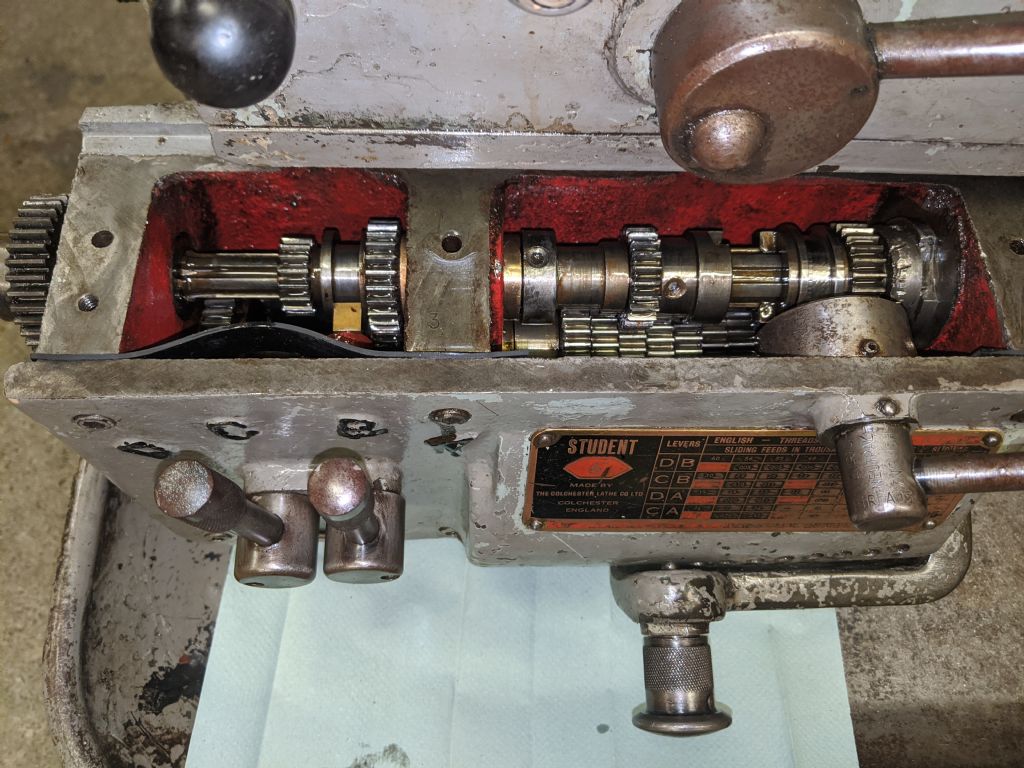
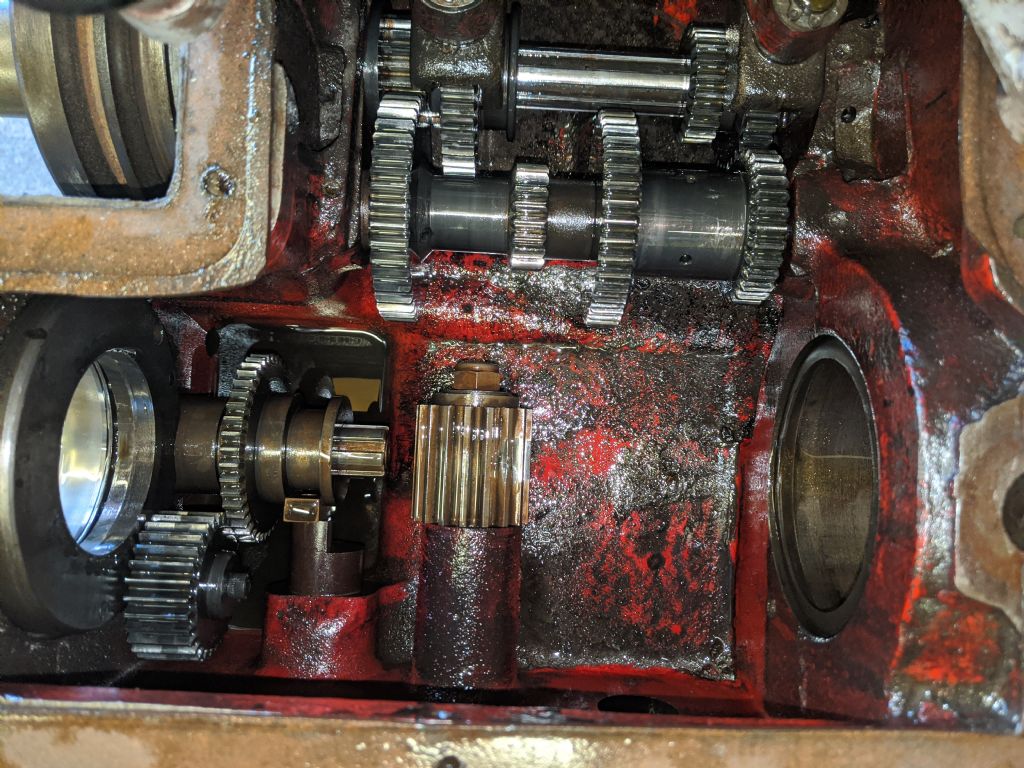
          The gearbox was absolutely full of crap, I even found a drill bit in there. There was so much gunk that it was probably reducing the actual amount of oil I could put in significantly.
          img_20200325_175235.jpg

          img_20200325_185316.jpg

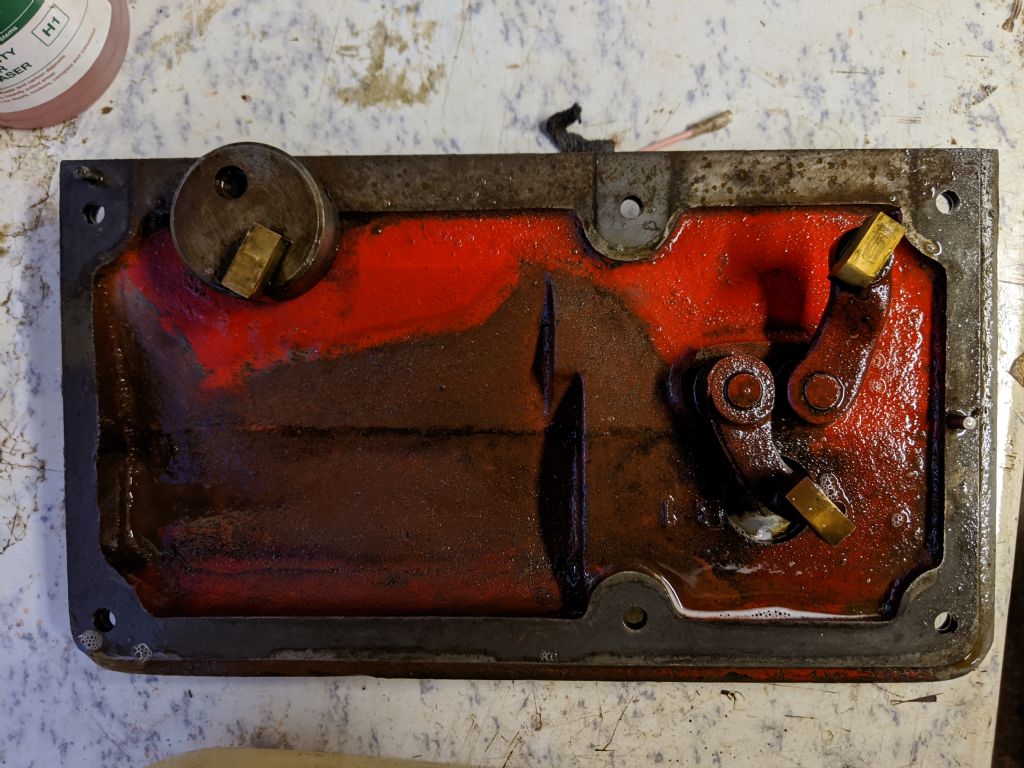
          Not perfect, still needs a good scrub, I've left it covered in degreaser

          img_20200325_174848.jpg

          This was after I'd cleaned it a little, the bottom was full with nutella sludge up to about the top of the black bit with lots of holes in it. So progress has been made. The gasket didn't seem to be in too bad shape, but I'll still replace it.

          Contactor should arrive tomorrow so I'll post pictures of that when I get it.

          Also, I think the sight glasses could do with being replaced, can't seem to clean them

          img_20200325_185303.jpg

          #459770
          Richard Kirkman 1
          Participant
            @richardkirkman1

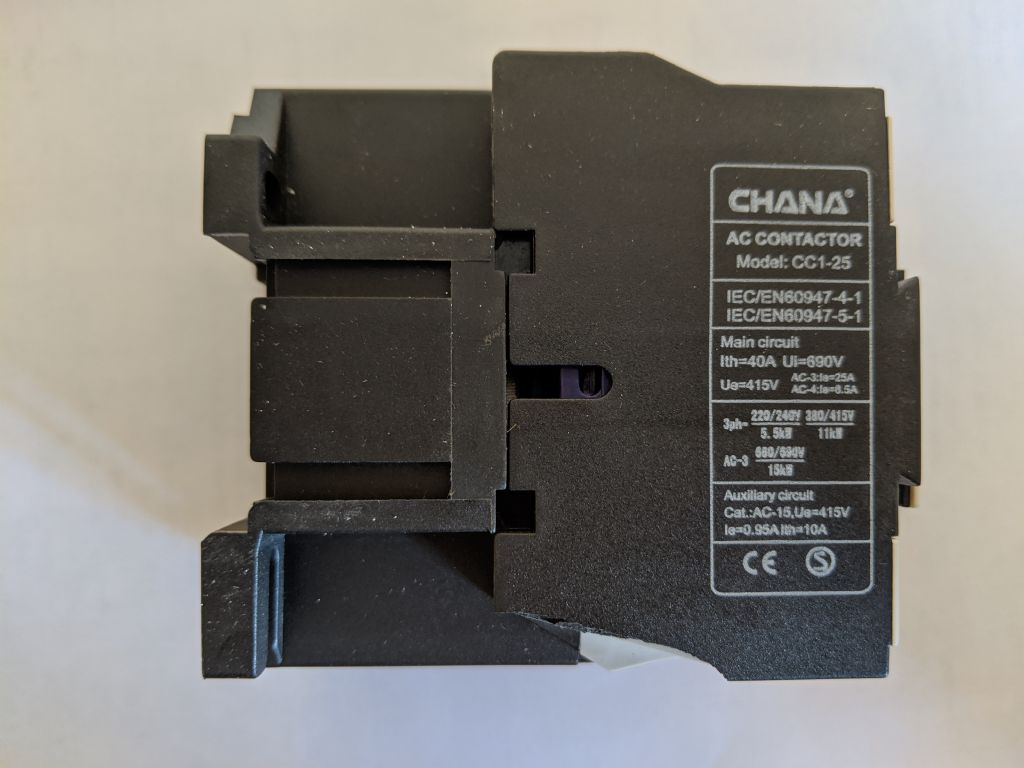
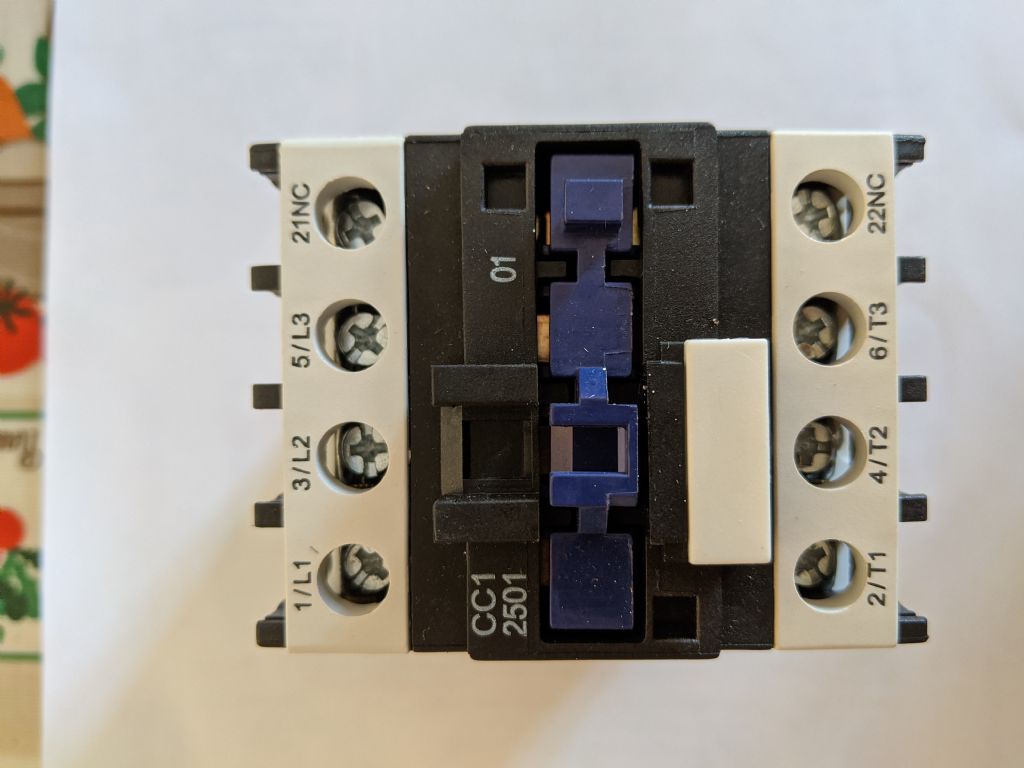
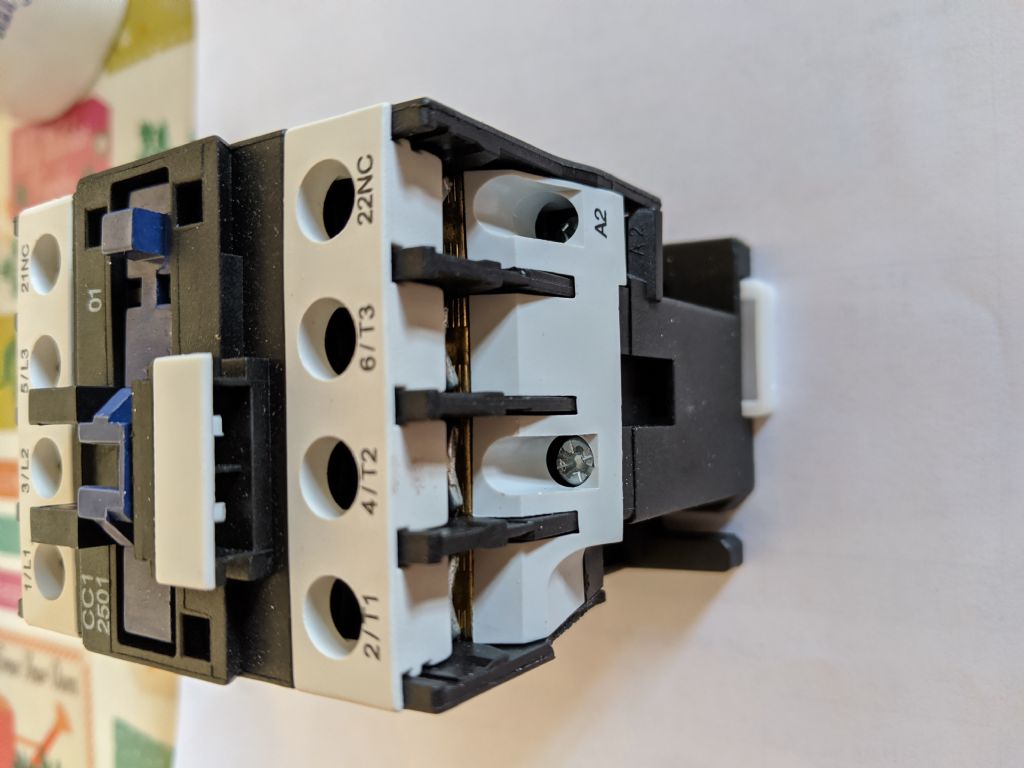
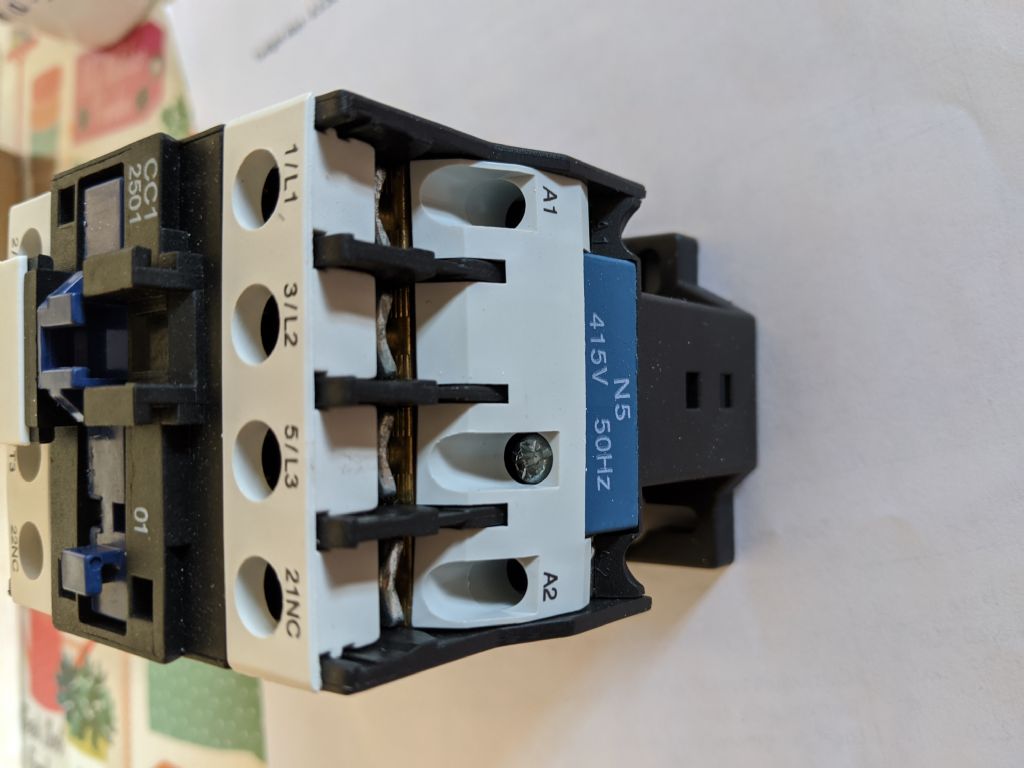
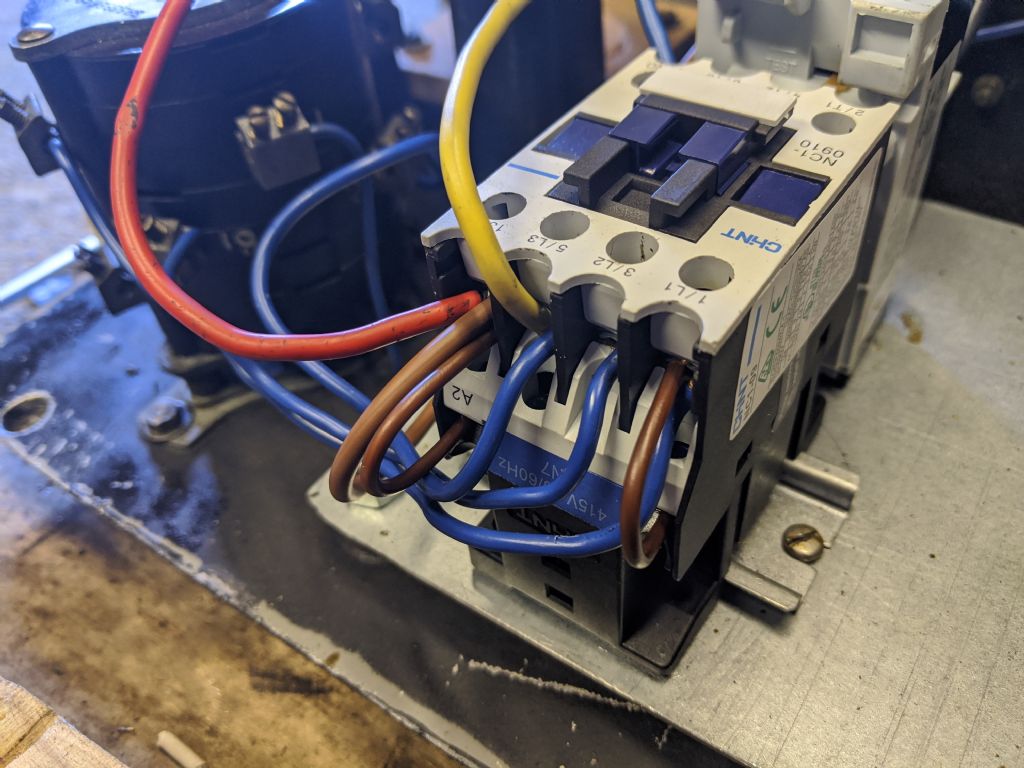
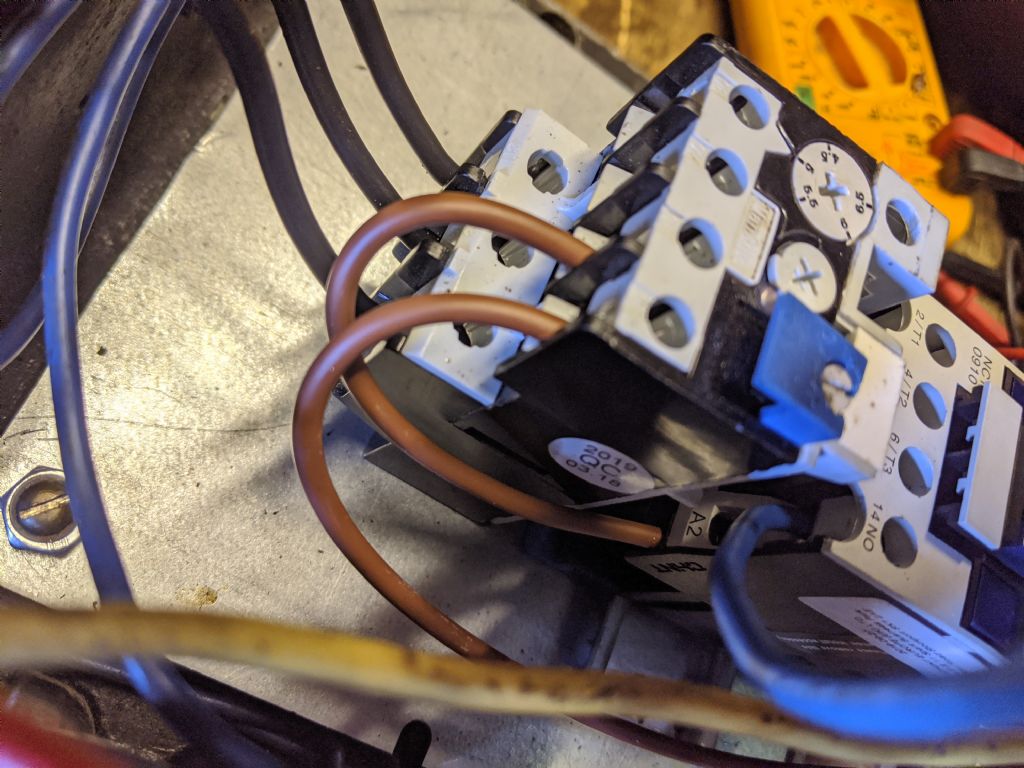
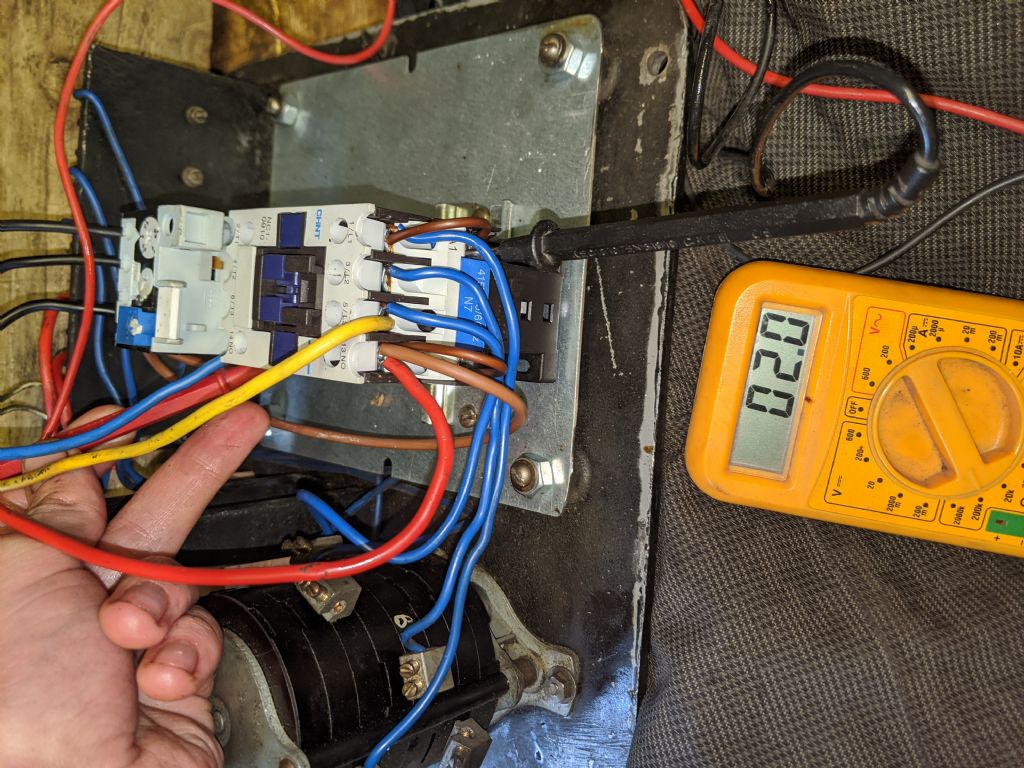
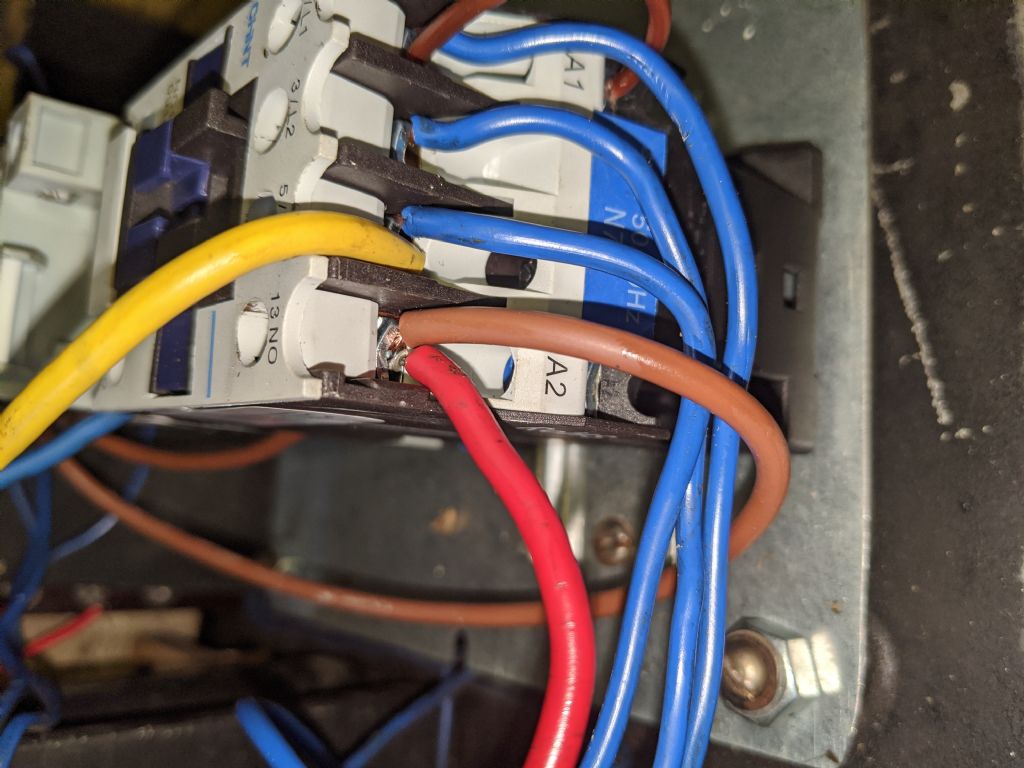
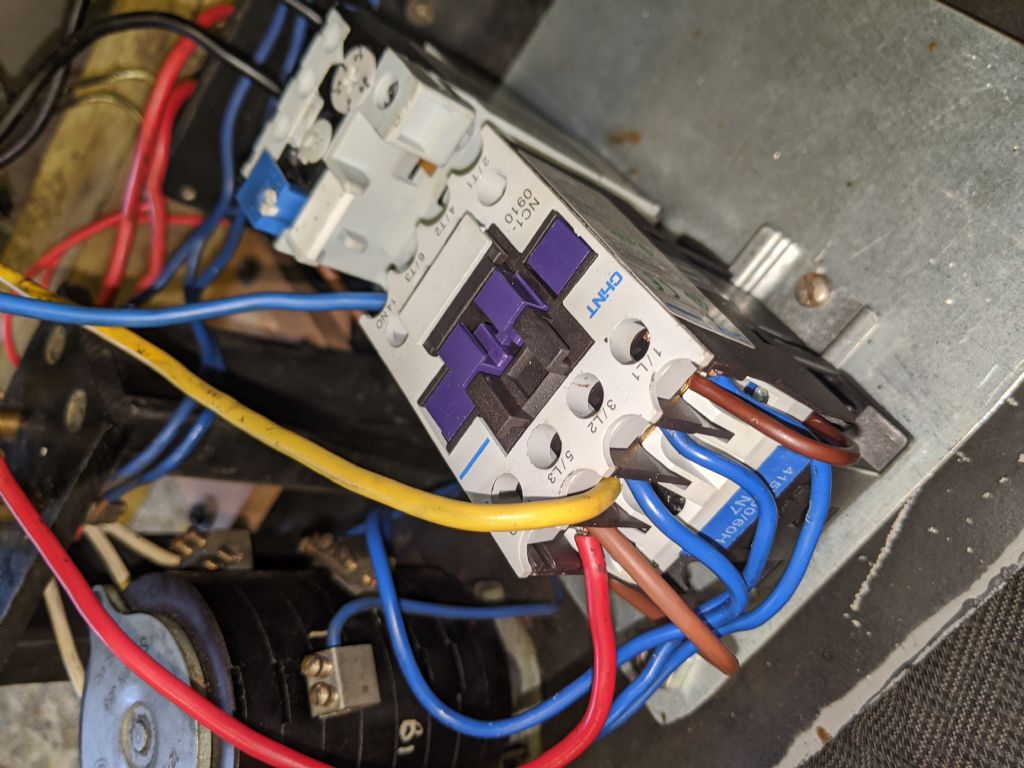
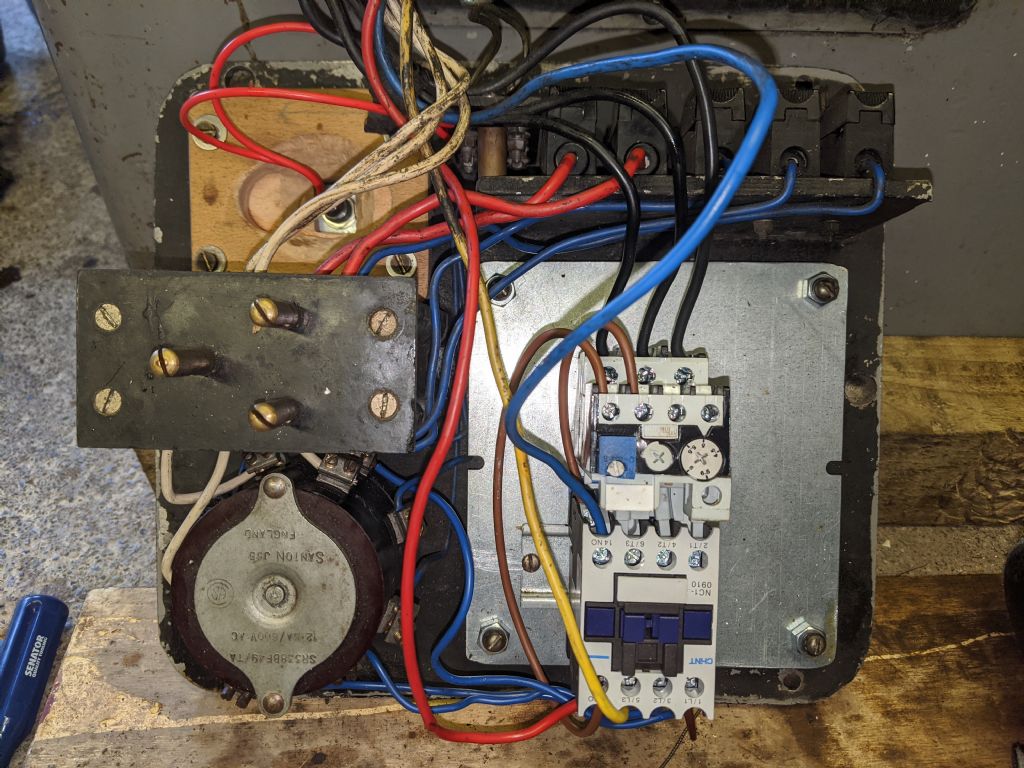
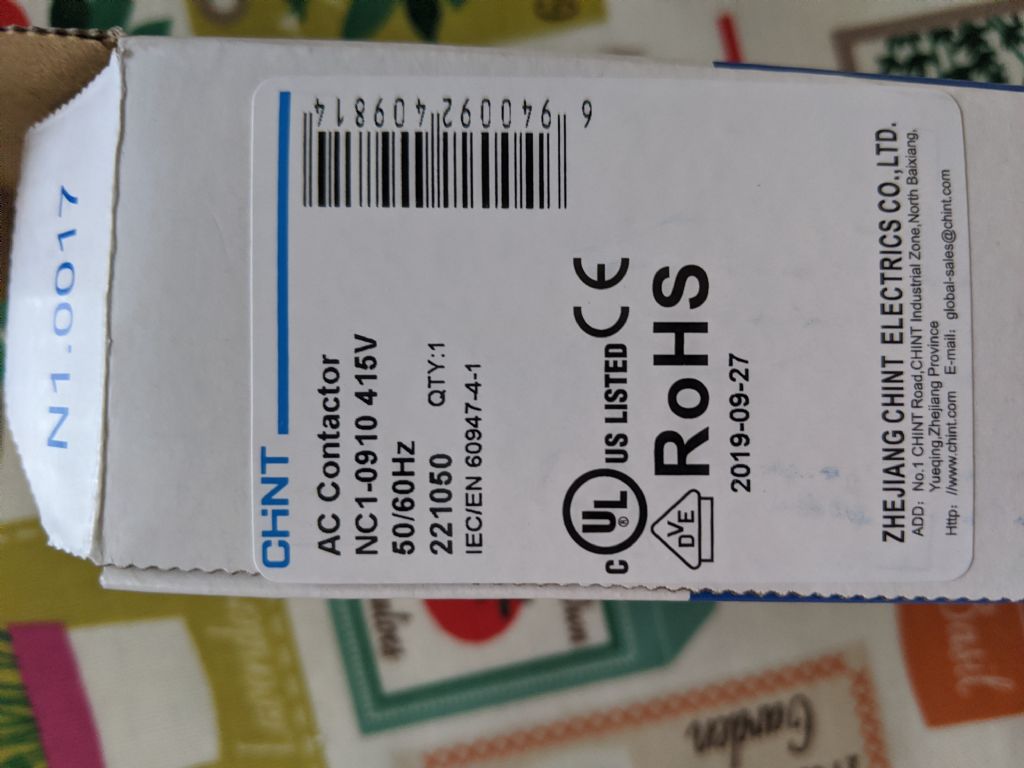
            Contactor arrived

            So, where do I need to stick the wires in?

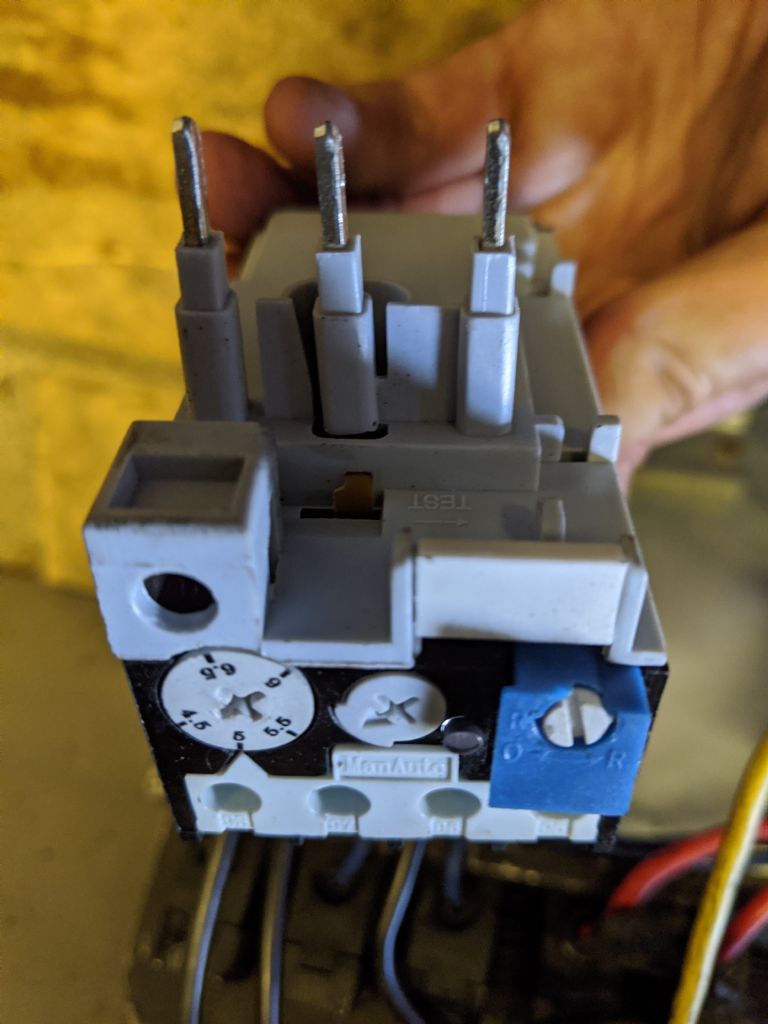
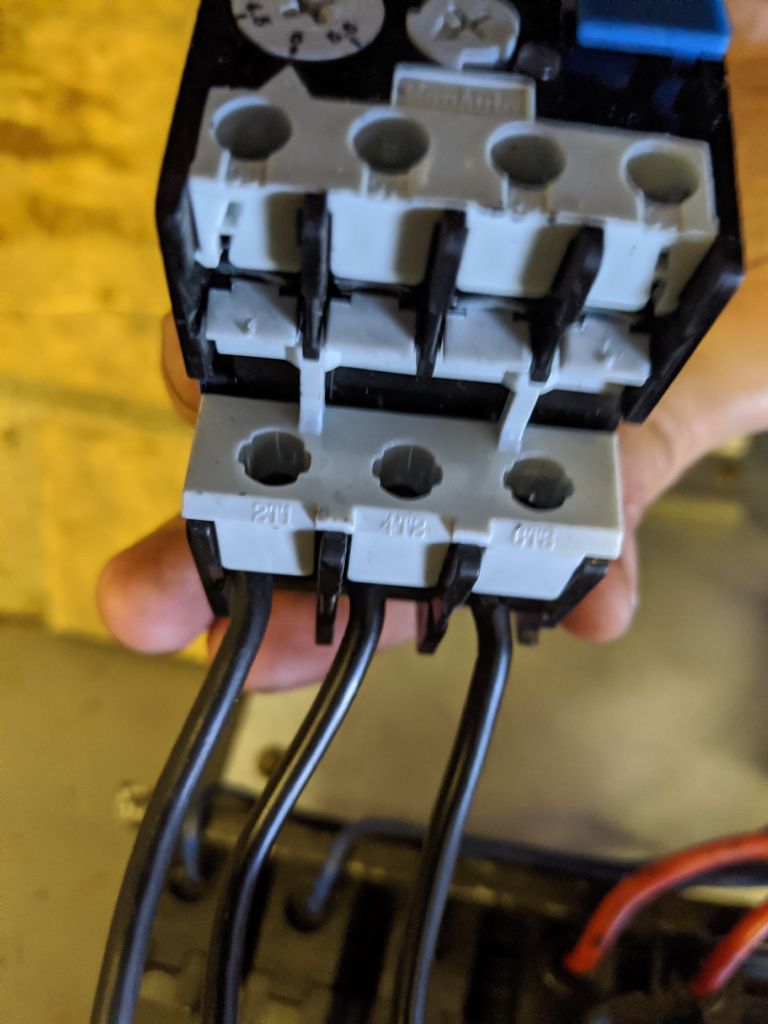
            The overloads will go into the same part as before. but will the motor wires go back into the same L1 L2 L3 as before too?

            img_20200326_105435.jpg

            img_20200326_105444.jpg

            img_20200326_105450.jpg

            img_20200326_105457.jpg

            #459782
            noel shelley
            Participant
              @noelshelley55608

              I saw this thread at the start and have come back. Just a thought, I have a clarkson with lo volt lighting in which the pri is 415v but the sec is 48v ac. I would not be affraid of putting a neutral into the machine ,the extra cost would be a plug. Some inverters (transwave) have 5 pins and it can be a real bonus as cheaper 240v gear can be used. If you wish to use dc lighting ie LED then a dropping resistor if needed to get to the required voltage and a bridge rectifier + capacitor will be cheap and easy in conjunction with the transformer you have . Do not discount incandesant lighting, it avoids the dangers of strobe effect and is cheap, 12v, 24v and 48v bulbs are available.

              Good luck, Noel.

              Have looked at more of the story. IF you bring in a neutral then an OLD 12v battery charger is just what you need. 3amps or more will do. just put a capacitor across the output to stop flicker. This will drive LED lighting and may even cost 0. Do NOT use a modern charger as many have electronic control that will spoil the game. The mobillity scooter models and sealed Pb gel types will NOT work due to far to clever gubbins also. N

              Edited By noel shelley on 26/03/2020 12:13:00

              #459788
              Phil Whitley
              Participant
                @philwhitley94135

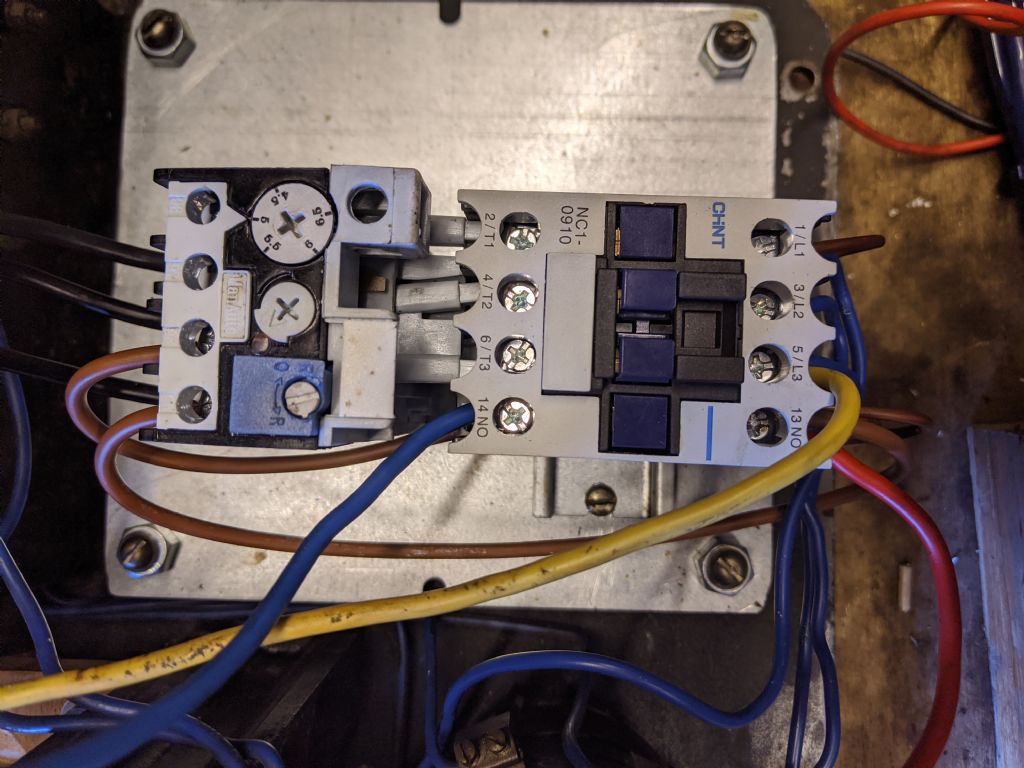
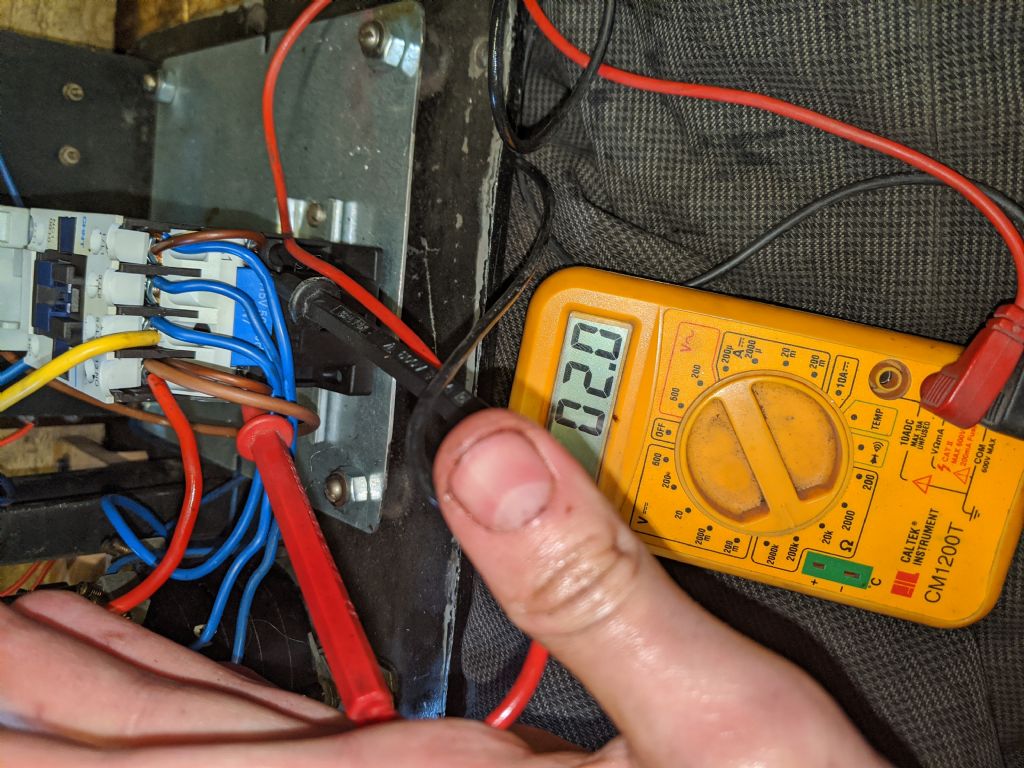
                Hi Richard, First off, I am confused!! the terminals 21 &22 should read NO, not NC, but I am hoping this is due to chinese confusion in terminology. put a multimeter across them, there should be no connection until you push the contactor down, if this is the case, they are NO, and have been labeled incorrectly.

                Connect the incoming three phases from the rotary switch to L1 L2 and L3 fit the overload to the contactor to T1 T2 and T3, connect the motor wires to the three outputs from the overload

                on the contactor, put a wire link betweenA1 (coil connection) and L1.

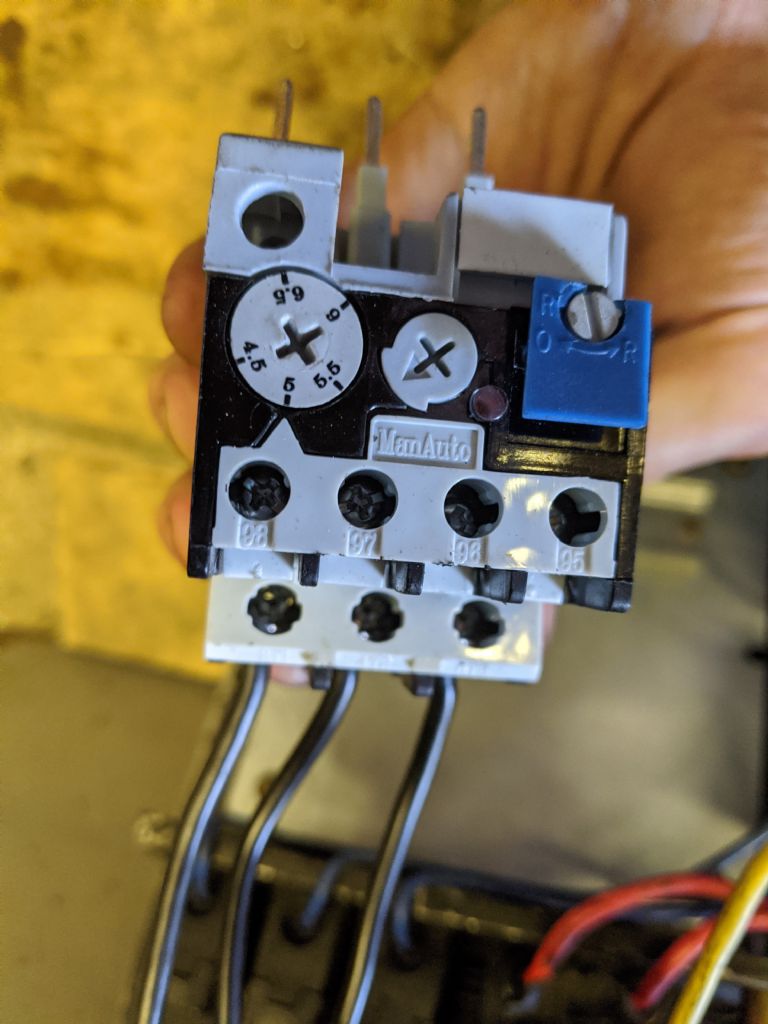
                put a link from A2 (other coil connection) to one of the NC connections on the overload (Need a pic of the overload connections!)

                Put a link from the other NC connection on the overload to one of the NO connections on the contactor holding in contacts along with the red wire from the C&D limit switch

                Connect the blue wire from the C&D limit switch to the other NO connection on the contactor.

                Connect the yellow wire from the C&D limit switch to L3 on the incoming side of the contactor.

                With the end cover fitted, and the key switch on, check continuity between L3 and the yellow wire in the C&D limit switch, this confirms that the switches are working.

                power up the lathe and lift the stop/ start handle, lathe should start and continue to run.

                Press down stop start handle, lathe should stop.

                start lathe again and turn off mains power, lathe stops.

                turn on mains power, lathe should not restart until stop/start handle is moved to stop position, and then back to start.

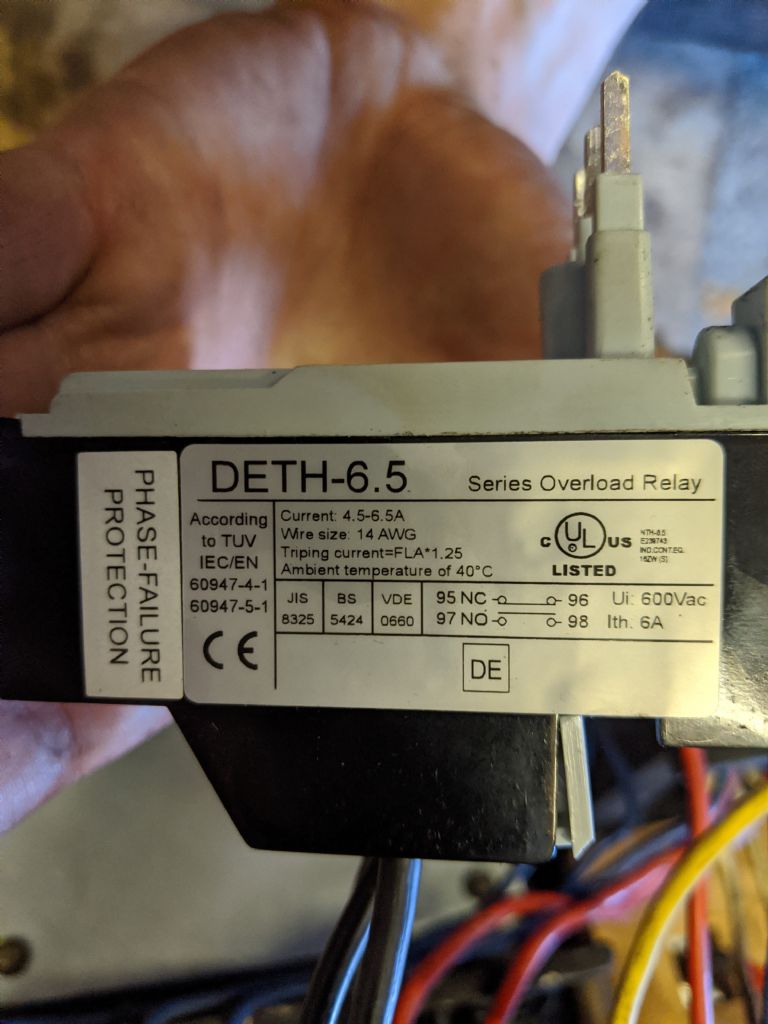
                This is a peliminary instruction set!! I need to confirm that the contactor connections marked 21/22 are actually NO, and close when the contactor is energised, and also need a pic of the connections on the overload to confirm the connection designations.

                BTW! if you get it wrong it will simply not work As long as you have got the coil connections correct!

                I need to go lie down for a bit!

                If you compare the above instructions with the wiring diagram I did earlier in the thread, you will see they are in compliance.

                Phil.

                Edited By Phil Whitley on 26/03/2020 15:23:06

                #459792
                Richard Kirkman 1
                Participant
                  @richardkirkman1

                  The 21 and 22 have continuity when the contactor is NOT pushed down. So they are normally closed? Hence the NC? Is this a problem?

                  The listing for the contactor stated this "Chana CC1-2501 3 Pole Contactor with 1 normally closed auxiliary contact on body of contactor, 2NO auxillary contacts supplied loose to fit on top of contactor. "

                  I'm not sure what it means by auxillary contacts supplied loose to fit on the top, but I didn't receive anything else in the box?

                  Overload pics coming right up

                  #459797
                  Richard Kirkman 1
                  Participant
                    @richardkirkman1

                    img_20200326_123049.jpg

                    img_20200326_123058.jpg

                    img_20200326_123102.jpg

                    img_20200326_123109.jpg

                    #459805
                    Richard Kirkman 1
                    Participant
                      @richardkirkman1

                      I suspect I've just bought the wrong contactor againblush At least I'm learning, hopefully it doesn't frustrate you too much.

                      Do I need to get one with NO?

                      If so, I'll order this one right away and return the other

                      **LINK**

                      #459891
                      Phil Whitley
                      Participant
                        @philwhitley94135

                        Hi Richard, Yes, swap the contactor for one with a NO contact. Pity you didnt get the auxillary contacts supposedly "supplied" with it, as they would have done the job. turn the overload screwdriver switch from manual to auto. this means it will reset automatically when it cools down (although in practice it will probably never, ever trip) on the overload use 95 and 96, connect a link from the A2 coil connection to 95 and then put a link from 96 to one of the contactor NO contacts, along with the red wire from the C&D limit switch, if you follow the instructions, whilst looking at the wiring diagram I drew, it will make more sense! after this carry on as above! I bet your 3 phase hook up is on hold now! never mind, we will get there!

                        Been to the workshop for a couple of hours today, making cold frames for my youngest daughters roof garden. My woodworking skills are more "Creative" than precise!!

                        Phil

                        #459923
                        Richard Kirkman 1
                        Participant
                          @richardkirkman1

                          Definitely the right contactor ordered this time (should be here 28-30th). I hope I've kept you from getting too bored by making you explain it all!

                          I'll follow all your instructions when the new new contactor arrives. Meanwhile, it's gasket replacement and cleaning poop out of the lathe gearbox. It's an absolute state. I wouldn't be surprised if its never been cleaned. Plus its definitely been run without the gearbox top on too, since the drill bit was in there. previous owners must have not cared one bit!

                          Yep, I will not have three phase for a very long time it seems. Should have stuck with the converter.

                          I'm sure your woodworking is fine, it's all about being creative anyway. Just hide your mistakes well and no one will look twice!

                          Thanks

                          Richard

                          #459989
                          Richard Kirkman 1
                          Participant
                            @richardkirkman1

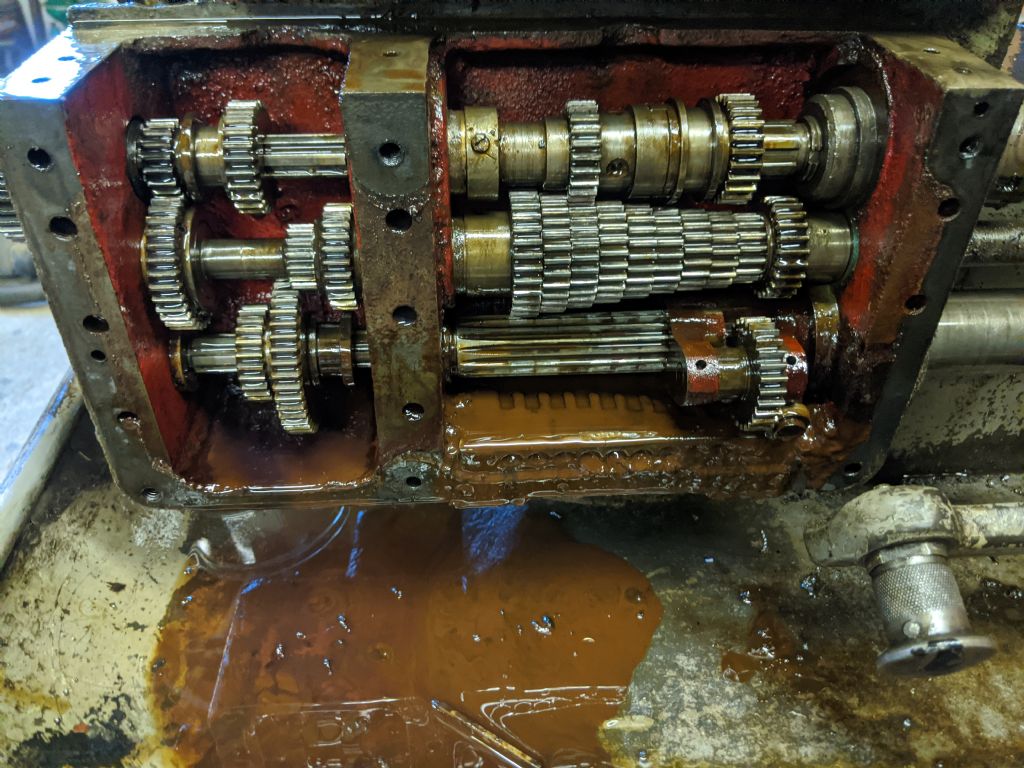
                            I just finished putting the gearbox back together. Cutting the gasket was very easy since the old gasket was still in decent shape.

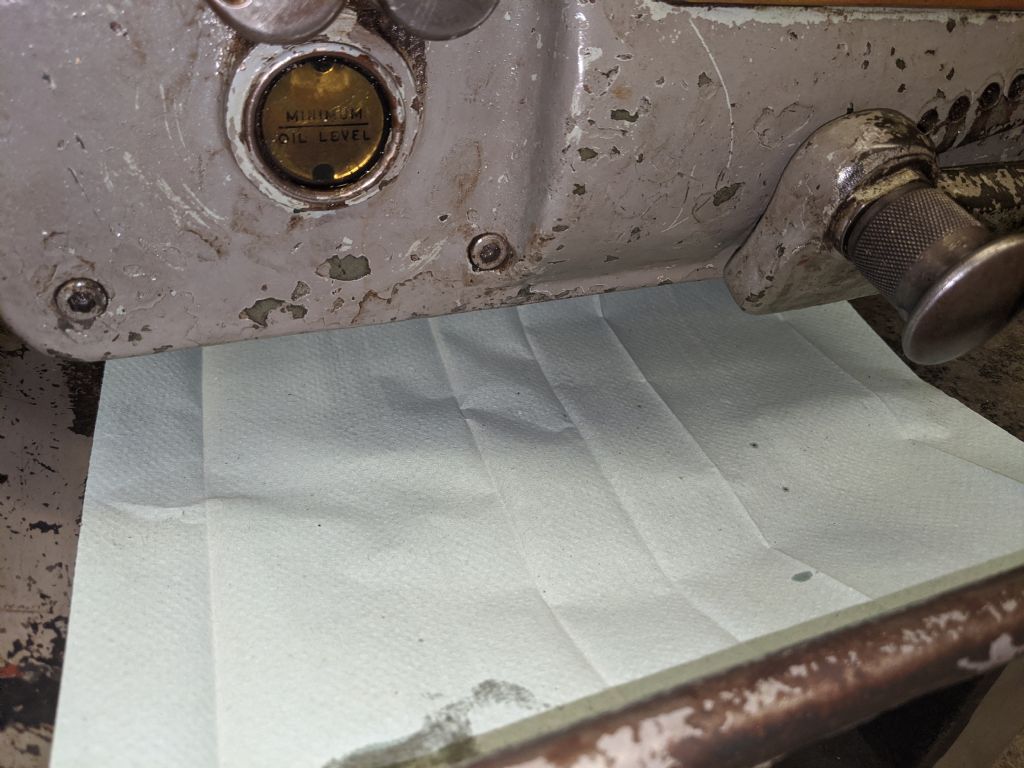
                            I've filled it back up with some old oil I had from the last time I filled it up, hopefully this will stay in this time. However, I will empty it out again and put in the proper tellus 41/Iso100 oil that's needed, I'm just using this oil to check for leaks.

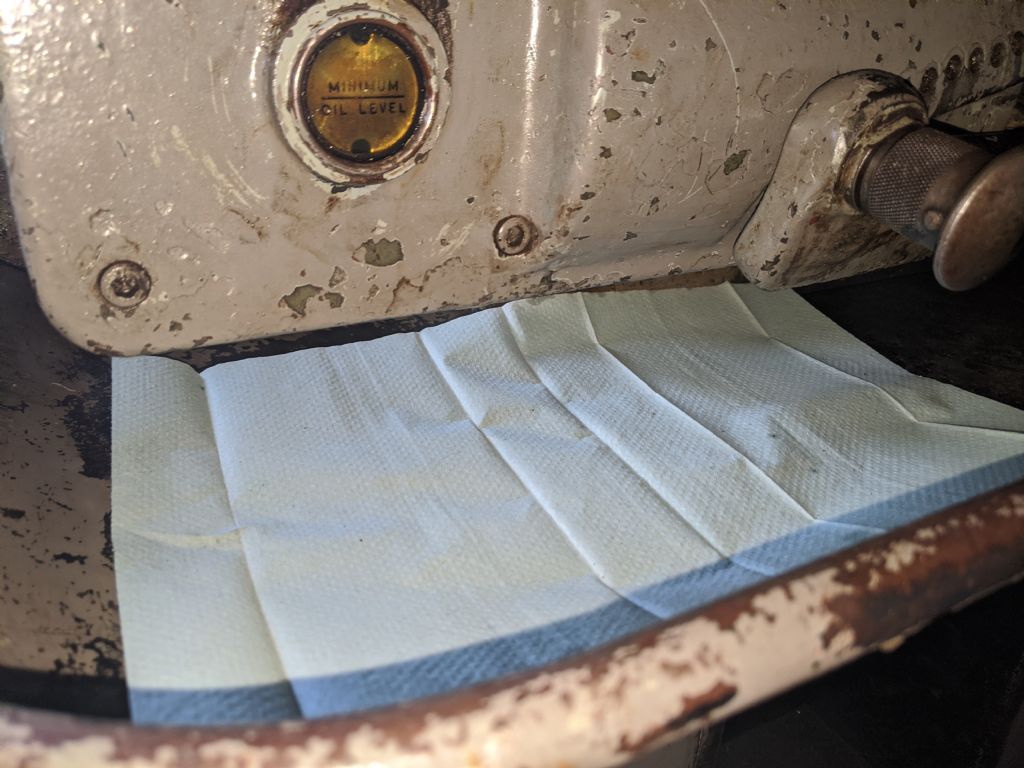
                            I've cleaned everything up and put a paper towel under it, so leaks should be very easy to spot. I'm hoping for the best, only time will tell. 1 gasket down, 3 to go.

                            img_20200326_193013.jpg

                            img_20200326_200009.jpg

                            img_20200326_200015.jpg

                            #460079
                            Phil Whitley
                            Participant
                              @philwhitley94135

                              Hi Richard, funny you finding a drill bit in the gearboxm I found a circlip jamming one of the slots, and a spacer, both parts of the gearbox, which had been removed, "lost" and the box reassembled without them! keep the drill bit, it will be old and good quality!

                              Phil

                              #460094
                              Phil Whitley
                              Participant
                                @philwhitley94135

                                Nitrile gasket is a good idea, I am using a thick paper one, the first one leaked, but the cover on my gearbox was a very tight fit over the dowels, I have a feeling it might be a foreigner, fitted after the original was broken in an accident, one of the gear selector levers is brazed on the inside too! I improved the fit with some needle filing, and it is fine now, though there is a slight dribble from selector shaft at the end. It is British, of course it leaks oil!!

                                Phil

                                #460102
                                Richard Kirkman 1
                                Participant
                                  @richardkirkman1

                                  Unfortunately, the drill bit is snapped so not much use!

                                  I don't seem to have any leaks this morning, But, I'll leave it sitting for another day or two before I flush it and put the correct oil in.

                                  The nitrile seems to be doing a good job. I think the old gasket was paper.

                                  My cover was also quite tight, but did go back on eventually. I expected it to be a lot harder.

                                  I contacted the ebay shop about the auxhillary connectors that should have come with the contactor and they said they must have forgotten them. I also mentioned that there was a corner snapped off it, so they've refunded the whole thing, even postage! So I now have a spare 415v contactor. Who knows when I might need one!

                                  I still can't seem to get the gear selector off the shaft, I've undone the bolt in the handle and the one in the end of the shaft, but it doesn't seem to want to budge.

                                  img_20200327_102733.jpg

                                  img_20200327_102743.jpg

                                  #460107
                                  Bob Unitt 1
                                  Participant
                                    @bobunitt1
                                    Posted by Phil Whitley on 27/03/2020 10:40:44:

                                    . It is British, of course it leaks oil!!

                                    Phil

                                    It's like an old Triumph motorbike – the oil leak was to let you know there was still some oil in it.

                                    #460279
                                    Phil Whitley
                                    Participant
                                      @philwhitley94135

                                      Actually Bob, I got that from the original saying about triumphs, and British bikes in general!


                                      Edited By Phil Whitley on 27/03/2020 20:36:33

                                      #460280
                                      Phil Whitley
                                      Participant
                                        @philwhitley94135

                                        Hi Richard, the reason you cannot get the handle off the shaft, and many have broken them trying, is that there is a difficult to see allen screw in the end of the shaft, between the shaft and the handle, acting as a "dutch key", when you remove this it comes off with ease, so check the hole to see if there is a second one in there!, but you must get it back in exactly the right place, or the gears dont select properly. Also I think the bolt needs to come right out of the handle, but can't definitely remember. In practice, it is a bit of a faff, but not impossible by any means. set the shaft right in to the gearbox, then fit the handle, counterintuitive, but makes it easier! Then check that the gears line up and mesh fully in each position. You can try a VERY gentle tap on a wedge or screwdriver to open the handle clamp slightly, but it is cast, and it will break, be carefull, try a bit of heat, hot air gun is good!

                                        Phil

                                        Edited By Phil Whitley on 27/03/2020 20:38:10

                                        Edited By Phil Whitley on 27/03/2020 20:45:29

                                        #460296
                                        Richard Kirkman 1
                                        Participant
                                          @richardkirkman1

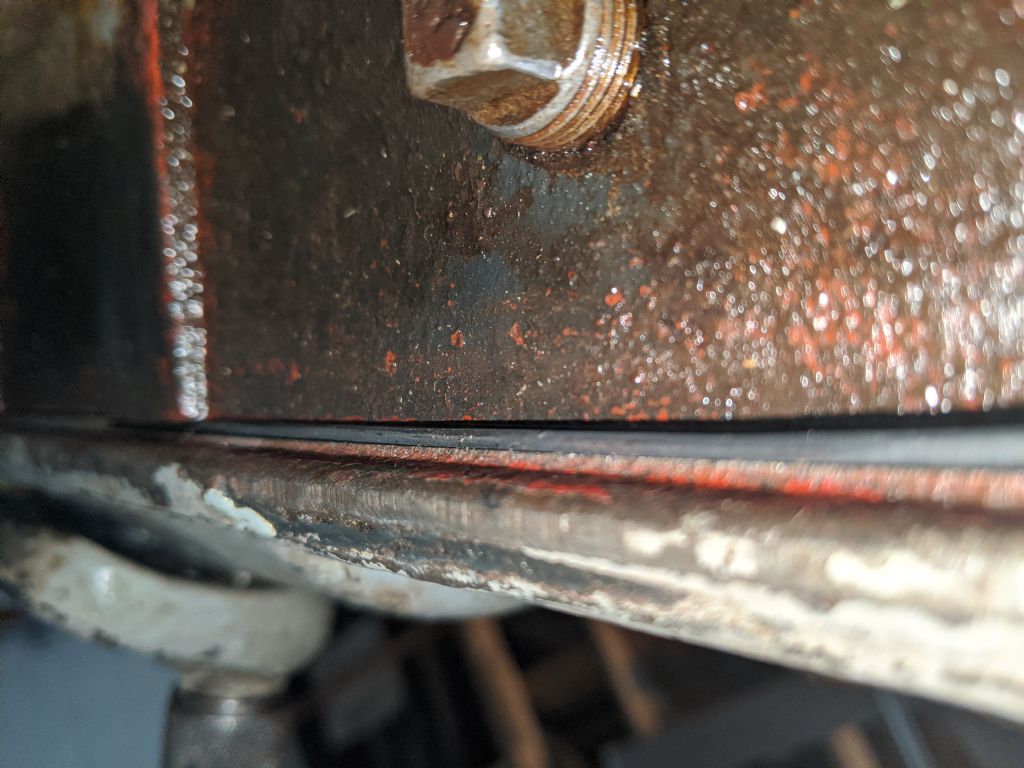
                                          After a full day of oil sitting in the gearbox, we have a leak. The gasket is absolutely fine, nice and tight, but I must have not tightened the drain plug in the bottom tight enough as oil was leaking out of there.

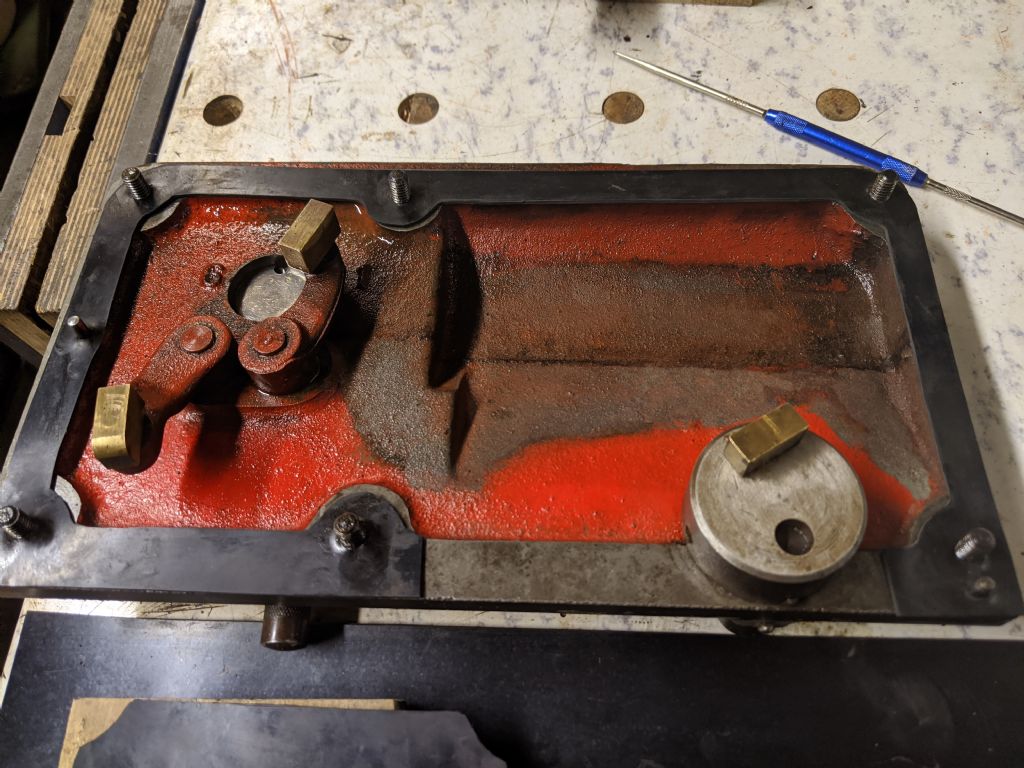
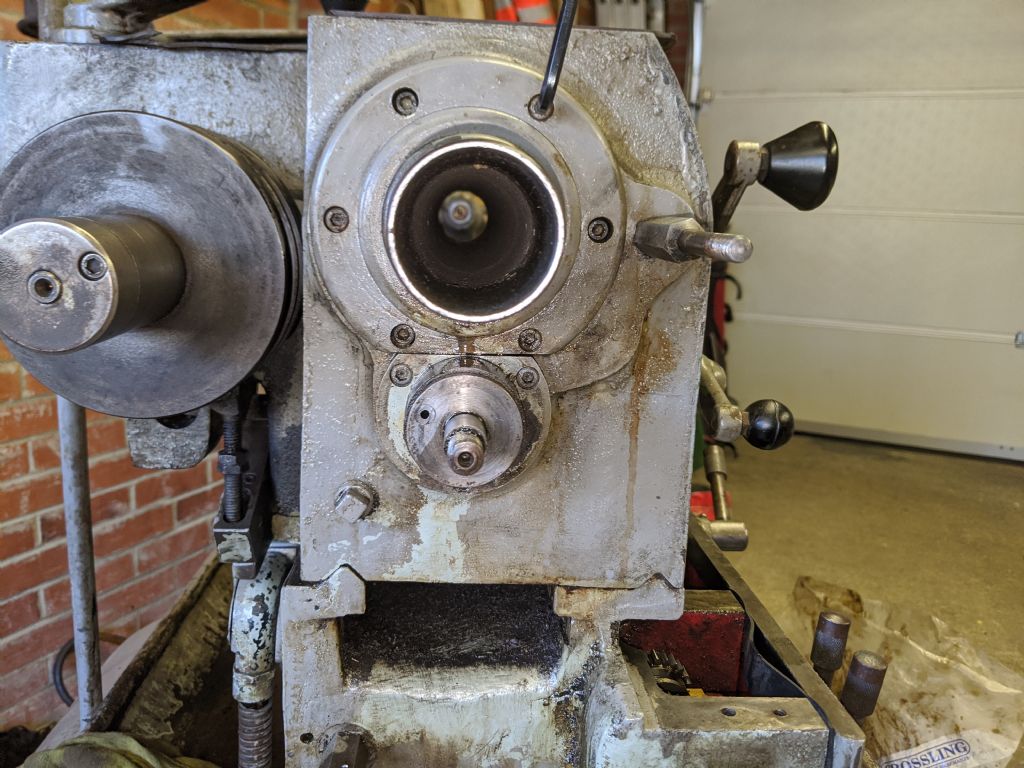
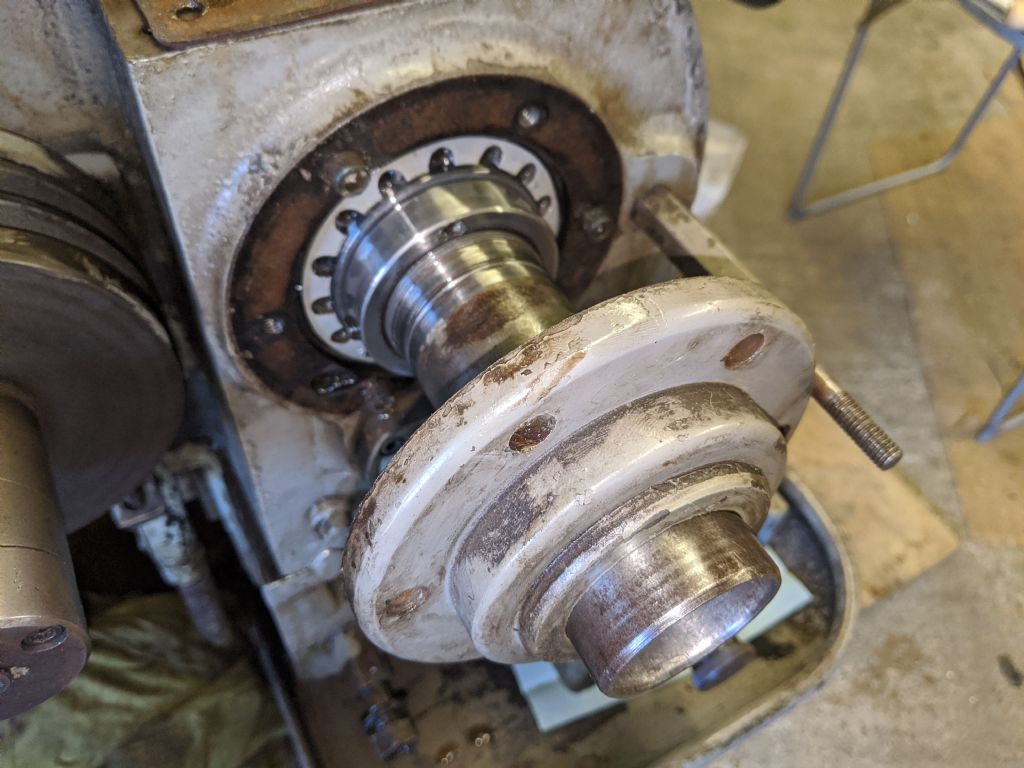
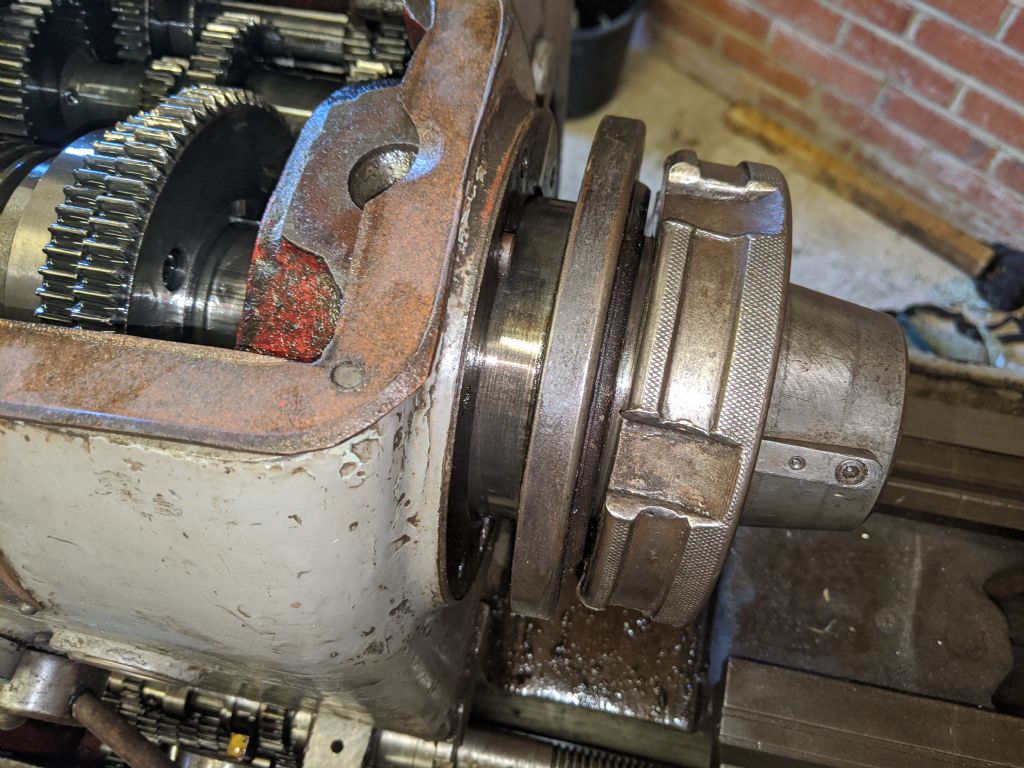
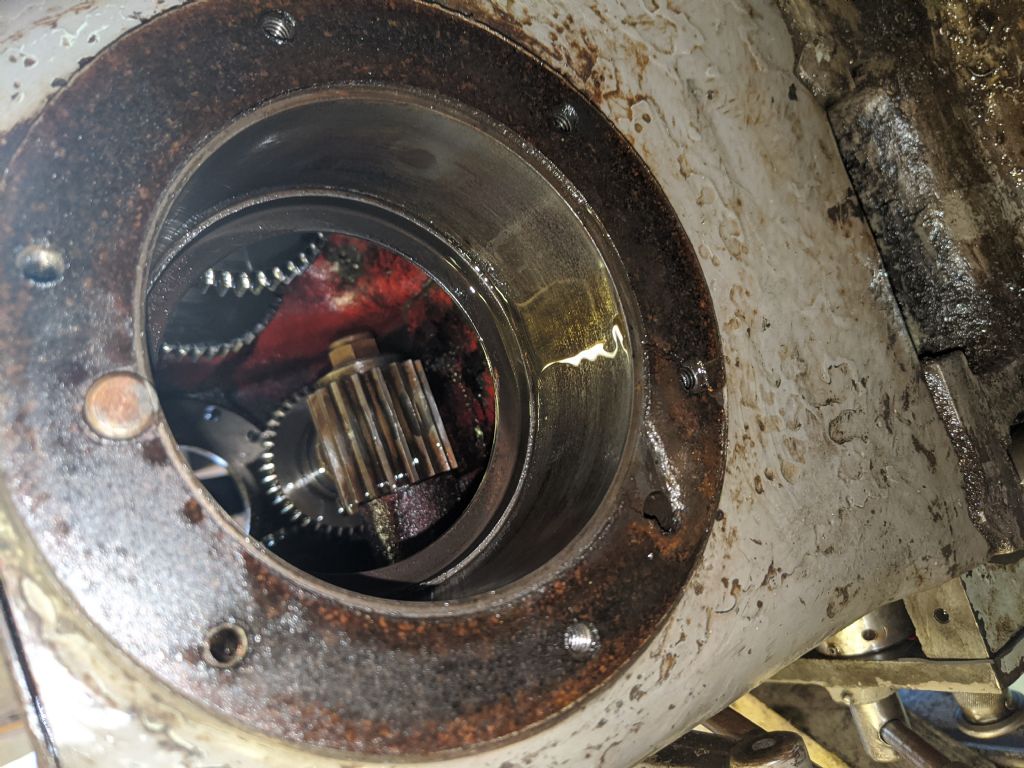
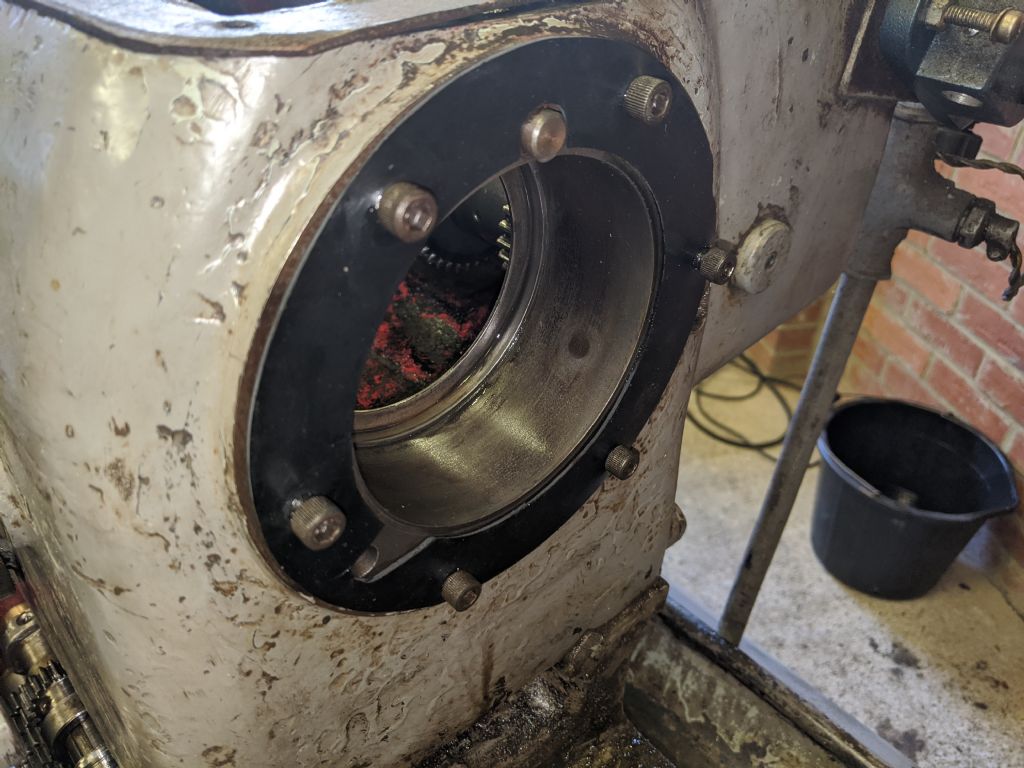
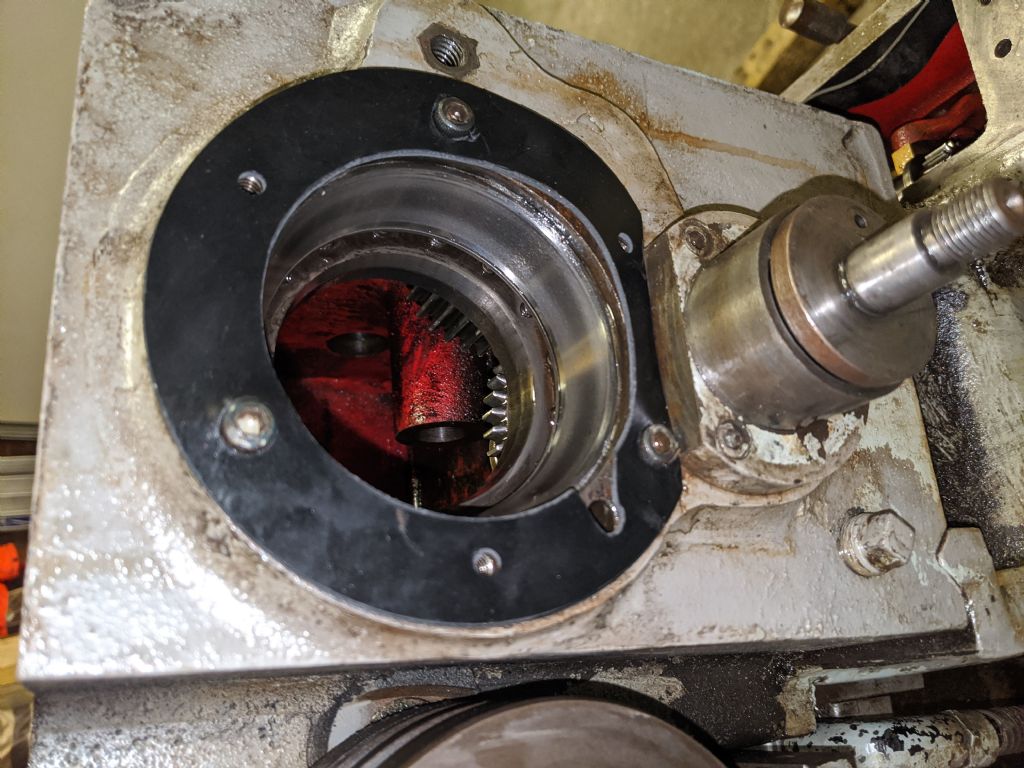
                                          I started to take the main spindle out again today so I can replace the gaskets.

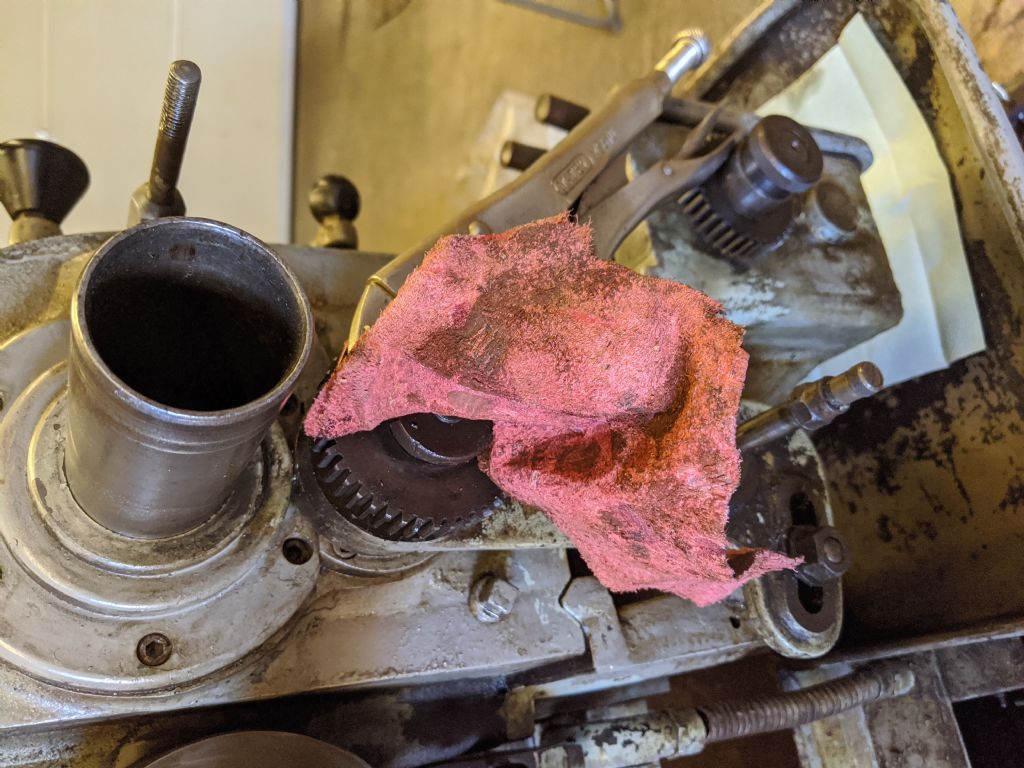
                                          So, first step, remove the gears from the end of the lathe. It's essential that you keep a bucket of the old headstock oil right below what you're doing, so when you drop your parts they land in there.

                                          img_20200327_130939.jpg

                                          img_20200327_131231.jpg

                                          Then you need to remove 3 of the 6 end screws in the top plate. Only the 3 that are protruding more. As the others are through holes

                                          img_20200327_131833.jpg

                                          img_20200327_131956.jpg

                                          Then undo the grub screw in the collar and twist it off using the two holes in the front. I just used a pinch to twist it off as I already did that last time, but the proper tool would be much better

                                          img_20200327_132140.jpg

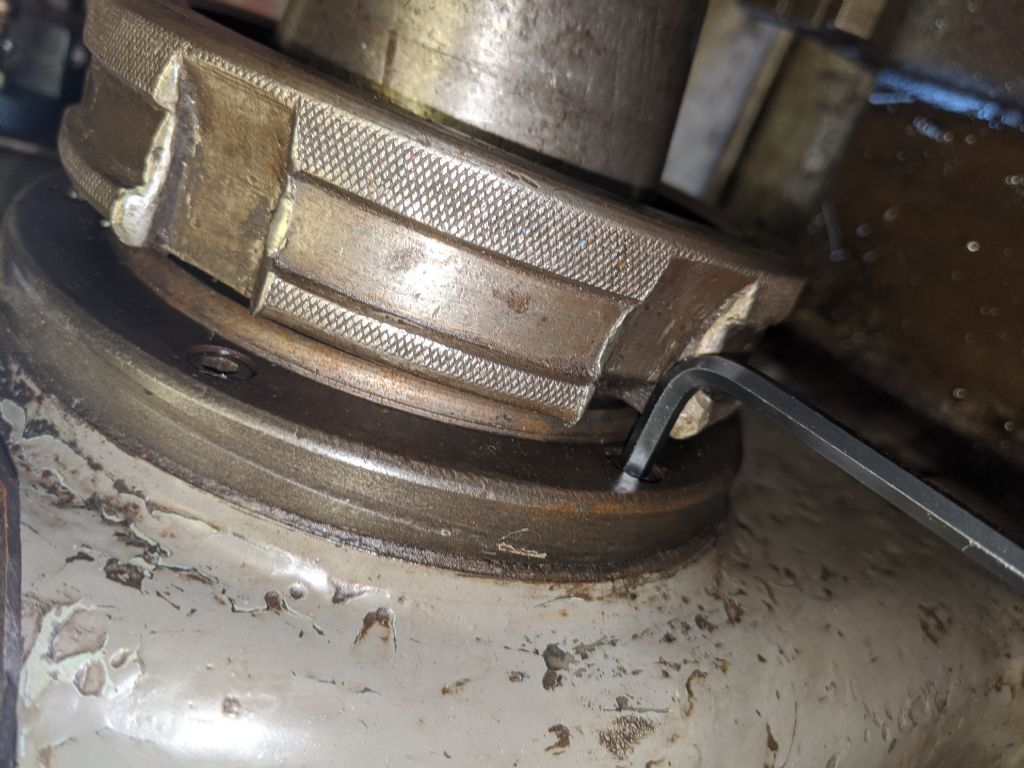
                                          Then once that collar is off, that's that end free. So you go to the chuck end and start to take the bolts out there

                                          img_20200327_132524.jpg

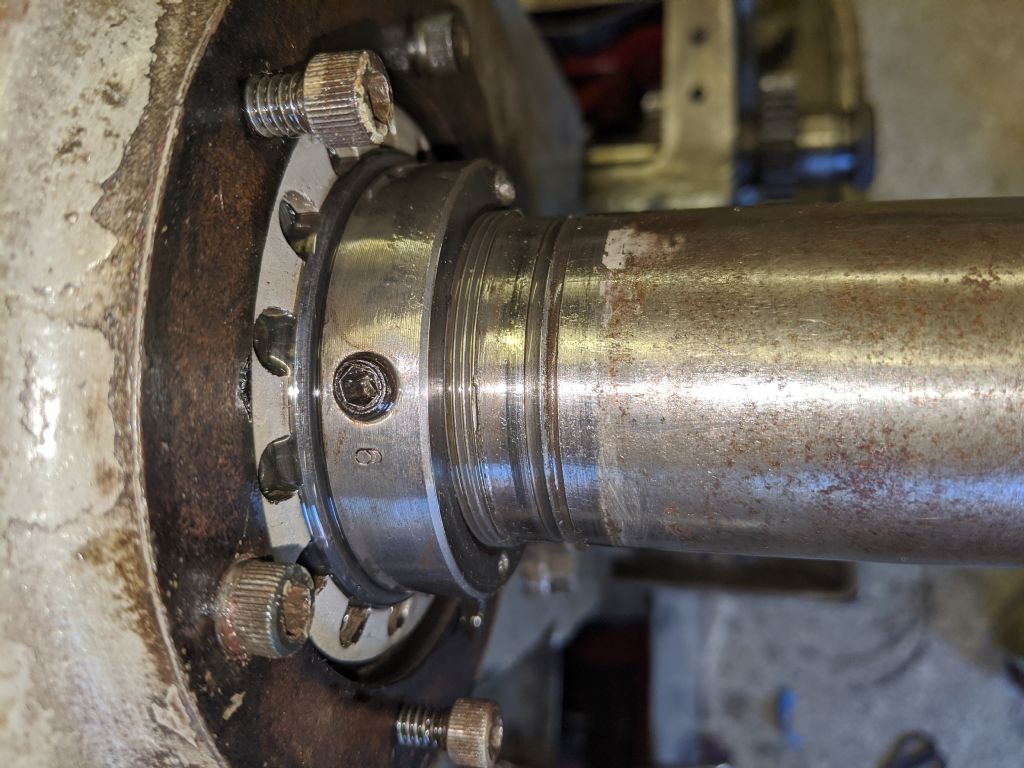
                                          The locking ring for the L0 taper has different slots in it so you can get a hex key in there. Much easier if you have ball ended hex keys

                                          img_20200327_132620.jpg

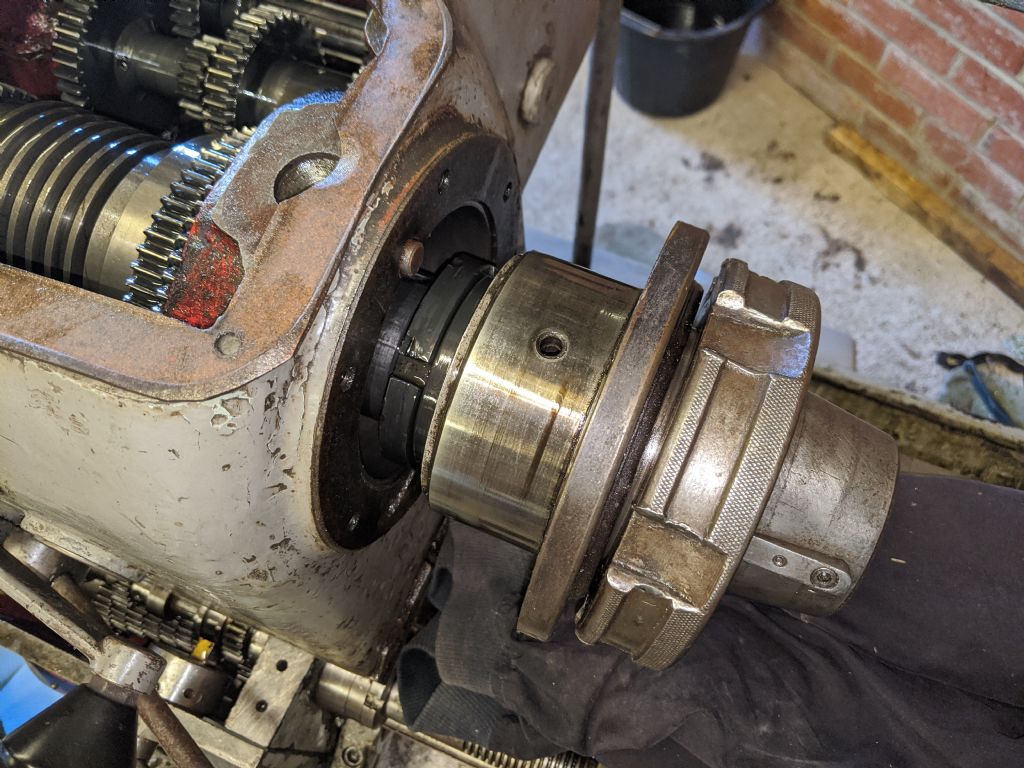
                                          Once they're out, the spindle can be tapped out with a block of wood. Once the head comes out of the bore, make sure to hold onto it as you tap it the last bit.

                                          img_20200327_133205.jpg

                                          img_20200327_133614.jpg

                                          Then the gears slide off the spindle as you pull the spindle out.

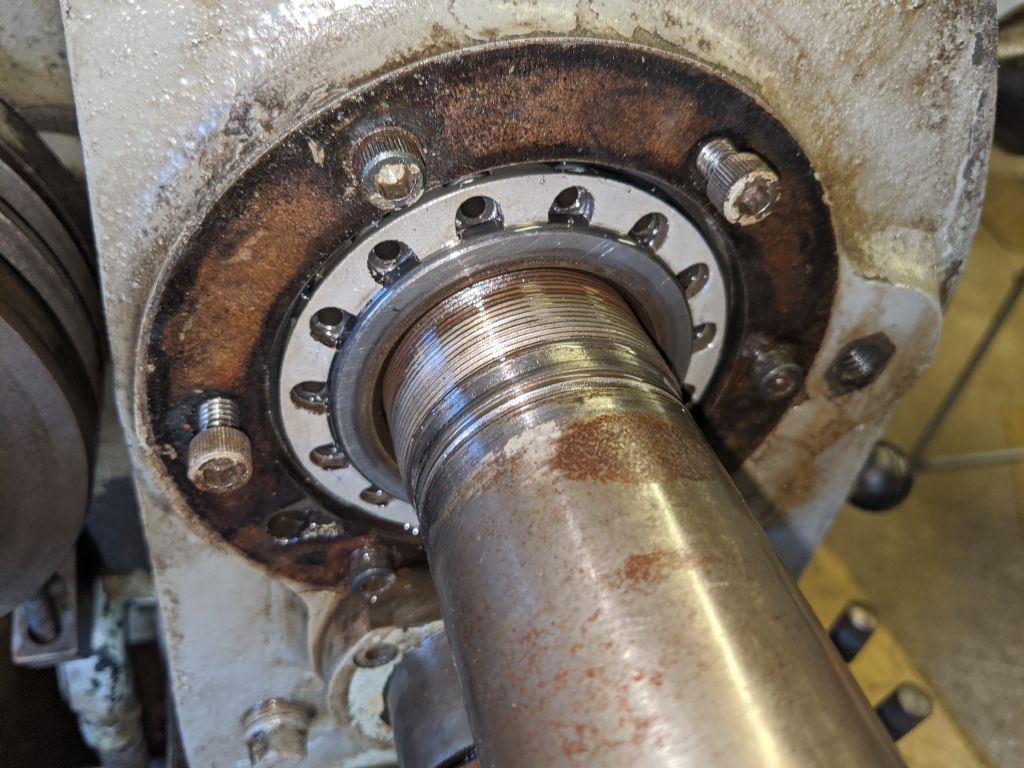
                                          Then there are some locking nuts on the front part which I presume holds the bearings in somewhere but mine are fine so I'll leave them be.

                                          img_20200327_133823.jpg

                                          Inside is really grimy, I didn't realise how bad it was last time I took it out. I've started cleaning, but it's taking a long time.

                                          I cut the new gaskets using the old ones as templates. I used my dividers to actually cut out the circles as they were just sharp enough to cut the rubber

                                          img_20200327_133917.jpg

                                          Old vs new

                                          img_20200327_141143.jpg

                                          img_20200327_183000.jpg

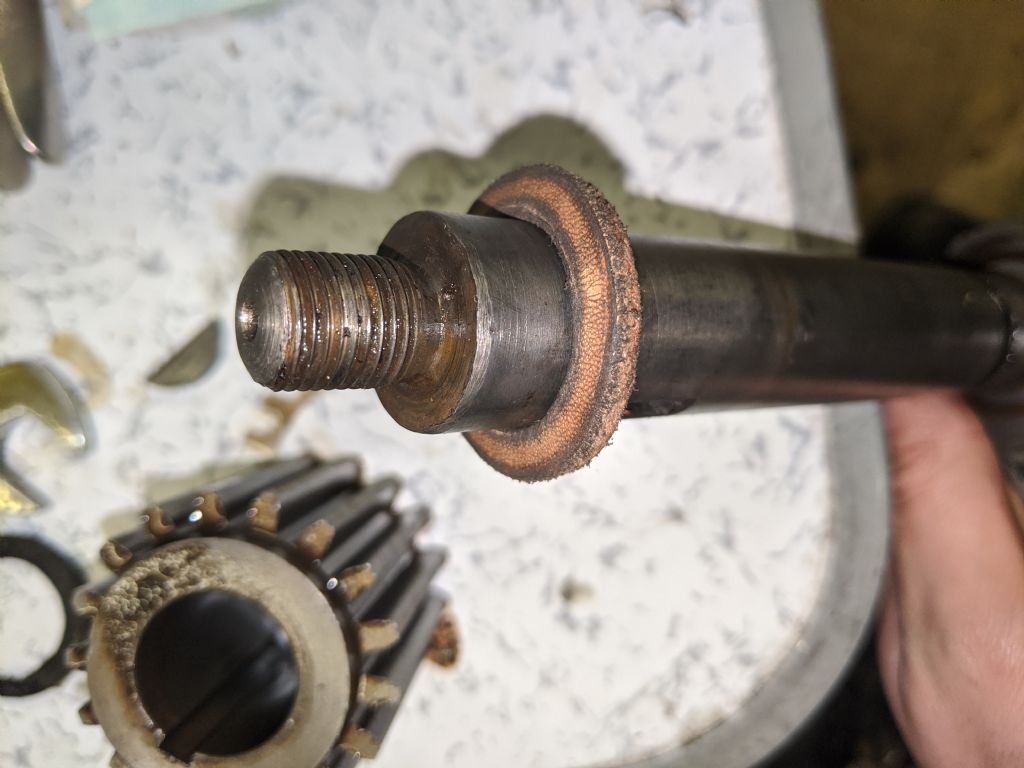
                                          I noticed that it was leaking from the high low speed selector at the front of the lathe, so i made a new leather gasket for it a while ago. Finally took it to pieces and the old one was pretty much gone. The new one is a very tight fit on the shaft so should hopefully seal nicely.

                                          img_20200327_184221.jpg

                                          Still, lots of cleaning inside to do, then reassembly, and that should be all as far as oil and gaskets go.

                                          Contactor should arrive tomorrow so I'll wire as directed

                                          As for the tumbler arm, I had a good look at the end for the dutch key, since I remember you mentioning it when I was looking at your lathe. But the only grub screw I could find was in the middle of the shaft. I'll look again tomorrow

                                          Thanks

                                          Richard

                                          #460386
                                          Richard Kirkman 1
                                          Participant
                                            @richardkirkman1

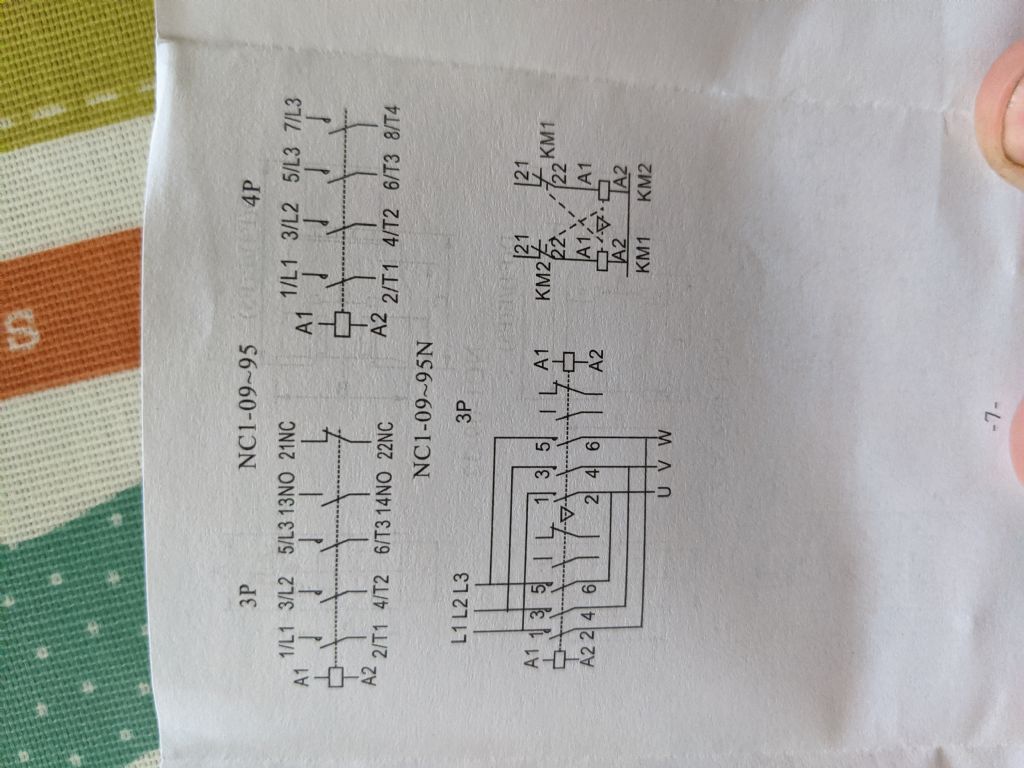
                                            Finally got some wiring diagrams with this contactor, 3rd time lucky. I'll go and wire it as directed in Phils messages

                                            img_20200328_105930.jpg

                                            img_20200328_105934.jpg

                                            #460441
                                            Richard Kirkman 1
                                            Participant
                                              @richardkirkman1

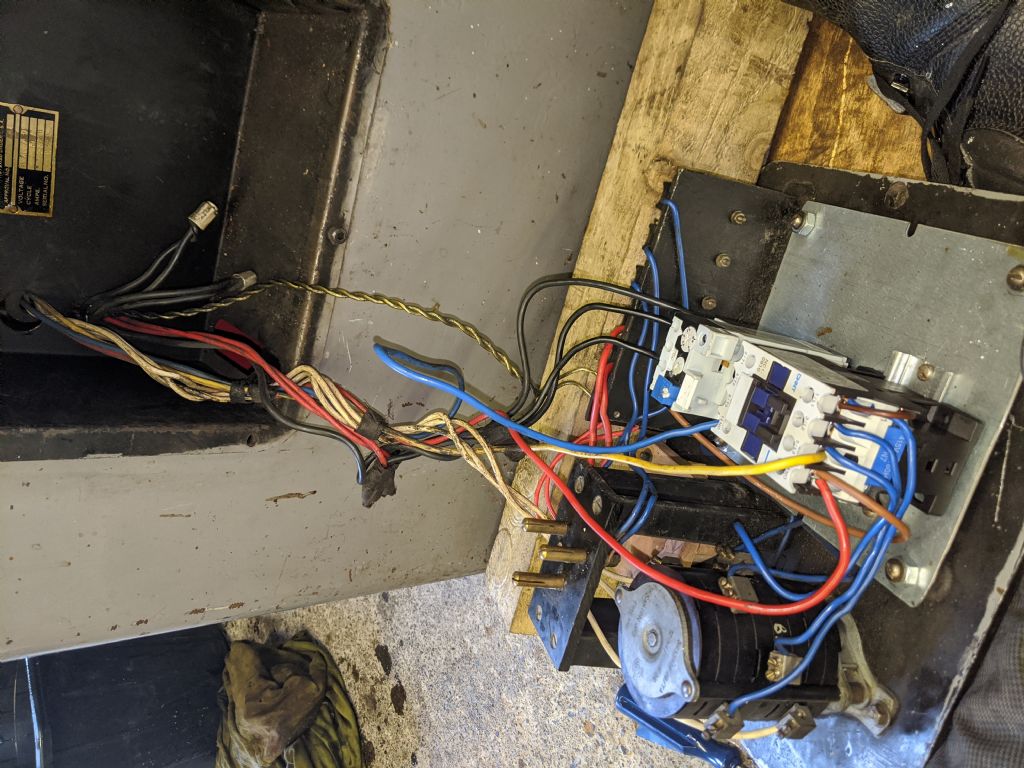
                                              Alright, all wired, as far as I could work out from the directions in the long messages.

                                              Please can this be checked over meticulously as I'm not confident that I did it correctly

                                              I checked the cnd switch for continuity with the yellow wire, the safety circuit is working.

                                              Thanks

                                              img_20200328_124629.jpg

                                              img_20200328_124619.jpg

                                              img_20200328_124637.jpg

                                              Edited By Richard Kirkman 1 on 28/03/2020 13:32:20

                                              #460456
                                              Phil Whitley
                                              Participant
                                                @philwhitley94135

                                                Hi richard, the dutch key is in a hole which is drilled between the steel shaft and the cast handle, half the hole is in the shaft, and half in the handle, and it is usually full of grime so you cant see it. I am looking at the wiring now, I will get back to you on that presently. Thanks for the pics re spindle removal, that gearbox heeds a good flush out!

                                                Phil

                                                #460461
                                                Richard Kirkman 1
                                                Participant
                                                  @richardkirkman1

                                                  I'll go have a look again, I suspect it might have been filled with paint!

                                                  I'll try to do spindle reassembly too, but that's the tricky but.

                                                  The gearbox doesn't need flushing out yet, the muck is caked on so badly I'm having to get in there with a tooth brush. Somehow it's still red under there!

                                                  #460467
                                                  Phil Whitley
                                                  Participant
                                                    @philwhitley94135

                                                    Hi Richard, We have one two many A2 connections! If the A2 terminal on the overload end of the contactor is common with the one on the other end (multimeter check, look for the same resistance between A1, and either of the A2 connections. and check with the contactor pushed down to make sure that it is not switched by the contactor) then it is a common and we can use that one. Remove the link between the other A2 connection and the 13NO(the one with the red wire in it) There is confusion here, because the two wiring diagrams refer to NC-09-95 and NC-09-95N and your contactor is an NC-09-10, an example of Chinese inscrutability if ever I saw one!

                                                    Alternatively, you can use the A1 and A2 connections on the same end of the contactor, and wire from that A2 to the NC on the overloads, then from the other NC overload contact to the 13NO. there should be only two wires at this connection, and it should not be linked to A2.

                                                    This sounds a lot more complex than it is!, referring to the diagram will make it easier. You only need use one of the A2 connections, as the coil only has two ends, one end goes to a supply line (A1 to L1) and the other end goes into the switching and safety circuits and uses them to get back to L3 via the yellow wire, and when L1 and L3 are across the coil the contactor pulls in, and the motor starts. rewire it like this and post more pics! Tedious, but then, what else can we do in the present "interesting" times?

                                                    Phil

                                                    Edited By Phil Whitley on 28/03/2020 15:12:47

                                                    #460485
                                                    Richard Kirkman 1
                                                    Participant
                                                      @richardkirkman1

                                                      I've removed the link between A2 and the 13NO as suggested

                                                      I think I understand what's going on, but I was confused by there being two A2 points.

                                                      I used a multimeter and the resistance was the same for A1-A2 and A1-otherA2

                                                      Is this wiring correct now?

                                                      img_20200328_155453.jpg

                                                      img_20200328_155523.jpg

                                                      Now just two wires out of that one

                                                      img_20200328_155744.jpg

                                                      img_20200328_155847.jpg

                                                      img_20200328_155919.jpg

                                                      img_20200328_155851.jpg

                                                      Lots of pictures, because why not?

                                                      Cleaning the headstock is very nasty work. I keep hitting my hands off the gears in there as I scrub and cutting the backs of my hands. I've just about had enough, but it seems a lot cleaner. I'm currently flushing with the old oil again, then I'll clean it one last time and reassemble. Awfully cold out there today.

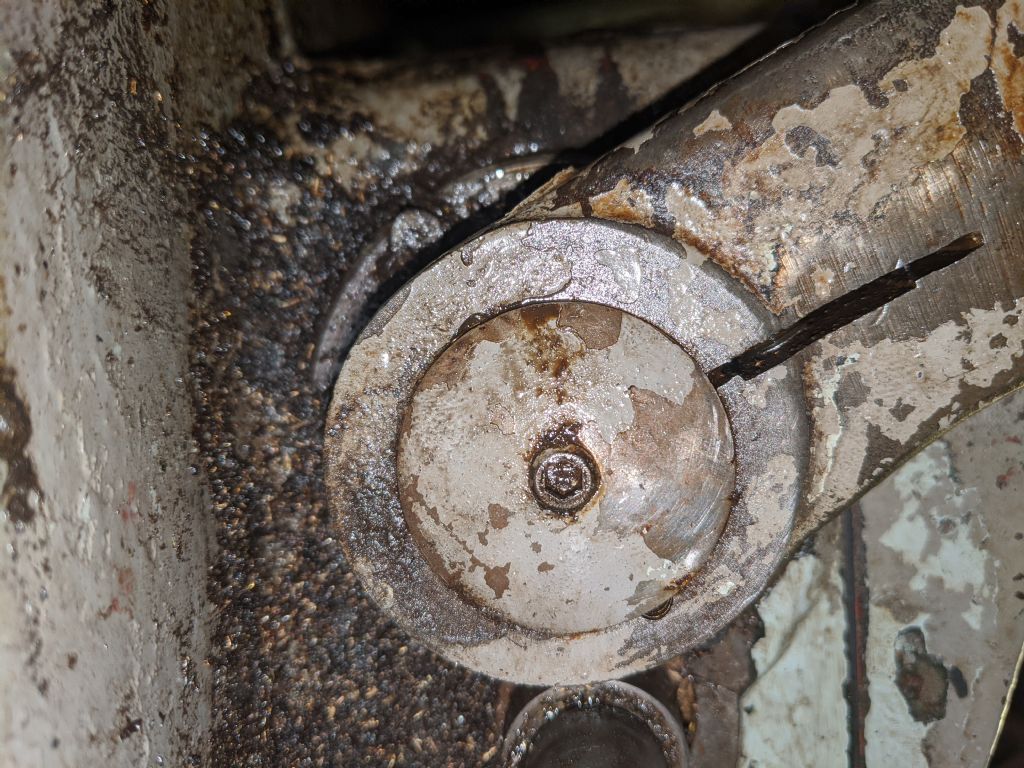
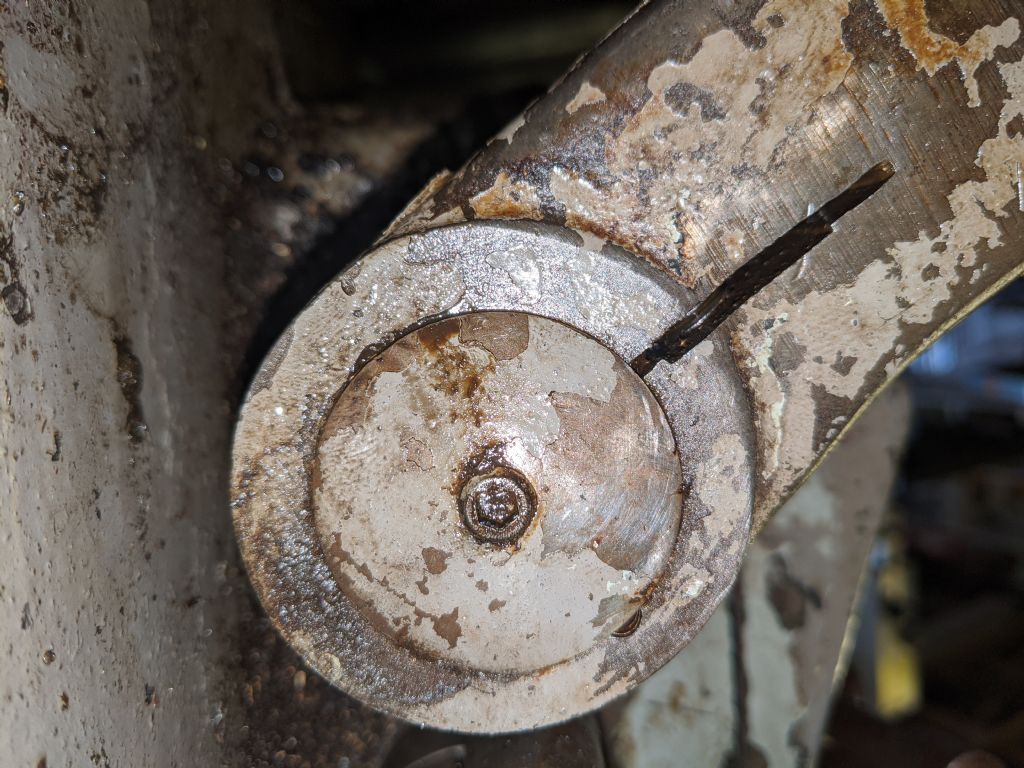
                                                      As for the tumbler arm mystery, you tell me if I'm being blind, I can't see a dutch key!

                                                      Looks like there's the starts of the threads on one the actual tumbler arm, but the shaft doesn't seem to have anything?

                                                      img_20200328_145602.jpg

                                                      img_20200328_145616.jpg

                                                      Edited By Richard Kirkman 1 on 28/03/2020 16:28:10

                                                    Viewing 25 posts - 176 through 200 (of 797 total)
                                                    • Please log in to reply to this topic. Registering is free and easy using the links on the menu at the top of this page.

                                                    Advert

                                                    Latest Replies

                                                    Viewing 25 topics - 1 through 25 (of 25 total)
                                                    Viewing 25 topics - 1 through 25 (of 25 total)

                                                    View full reply list.

                                                    Advert

                                                    Newsletter Sign-up