Colchester Student Mk1 Won’t Start

Advert

Colchester Student Mk1 Won’t Start

Home Forums Help and Assistance! (Offered or Wanted) Colchester Student Mk1 Won’t Start

Viewing 25 posts - 726 through 750 (of 797 total)
  • Author
    Posts
  • #490816
    Mat Stoeckle
    Participant
      @matstoeckle91130

      looking good! you're doing all this work and not painting the castings .. are you pressed for time or what's your rational? The only reason I'm painting is because I figure WHILE I have it apart like this I might as well .. Looking forward to your next installment .. best threads to read with morning coffee

      Advert
      #490850
      Richard Kirkman 1
      Participant
        @richardkirkman1
        Posted by Phil Whitley on 15/08/2020 20:48:11:

        Richard, If the deal doesnt go ahead on the QCTP and topslide, let me know, as I wouild love one! Cash waiting!!

        Phil

        AHHH no, Phil. If I'd known sooner you could have had it for next to nothing. I'll let you know. But I'm pretty sure James wants it. Plus if I'm getting the half nut from him I can't really just cancel. I would have loved for it to go to you, so I'm disappointed too! Who knows, hopefully, he'll pull out for you! I've been saving this weeks video to watch tonight, I can't wait to see what you've been up to!

        Hi Mat, thanks for your post, I am pressed for time. I have some turning I want to get done before I get back to University. So I will paint it next year. This year can be considered more of a research year on how to take it to pieces, since I've pretty much taken everything off now, so I know exactly how to do it next year, it should be really easy! It's nice to hear someones still entertained! I do worry that this thread is far too long at this point, but people like you make it worth continuing (and for the help I still need!)

        #490851
        Mat Stoeckle
        Participant
          @matstoeckle91130

          Meh, I wouldn't worry about how long or detailed the thread becomes .. for those readers who restore their own vintage tool, the more detailed the better and any side tangent can bring up something the readers may need to know for the next step of their tool restoration .. it's community teaching and I for one can't get enough of it So, make sure you keep providing a structure of a thread that people fill with additional info

          I'm about to start chiseling the paint off of my stand and bed .. I tried chemical stripping but the original filler just becomes a gooey mess .. and still sticks .. very unpleasant .. wire-wheels are messy/dusty and I can't / dont' want to afford sandblasting / dustless blasting at this point .. so, blood sweat and tears it will be with a couple of chisel pointed files .. A guy on youtube is restoring a Monarch 16 .. just came across his way of paint stripping yesterday .. check it out … Machining 360: Monarch 16 CY restoration P15: Stripping and Painting .. Beautiful machine and great restoration .. we should all make these kinds of videos

          #490864
          Herman van der Merwe
          Participant
            @hermanvandermerwe76509
            Posted by Mat Stoeckle on 16/08/2020 03:40:55:

            I'm about to start chiseling the paint off of my stand and bed .. I tried chemical stripping but the original filler just becomes a gooey mess .. and still sticks .. very unpleasant .. wire-wheels are messy/dusty and I can't / dont' want to afford sandblasting / dustless blasting at this point .. so, blood sweat and tears it will be with a couple of chisel pointed files .. A guy on youtube is restoring a Monarch 16 .. just came across his way of paint stripping yesterday .. check it out … Machining 360: Monarch 16 CY restoration P15: Stripping and Painting .. Beautiful machine and great restoration .. we should all make these kinds of videos

            Now you know why I took mine to bare metal. My lathe had seven layers of paint. The last three refused to budge with anything and I then used the trusted old method. Coat it with brake fluid. The next morning all the paint was soft except the original and the second layer. These were gooey as was all the putty and filler below it. Then I used a head gun with sharpened scrapers and a wire brush on a polisher to get this mess removed.

            The Monarch guy spent AGES to get the inside of his lathe clean. And had many injuries caused by the rough sand paper finish from the casting process. He earned my respect as I know what a thankless job this is.

            Make sure your scrapers are sharpened correctly and the paint comes off quickly for a while and then you need to sharpen again. Use a single cut file to do the sharpening.

            Looking good Richard. I would still do the brazing as you will then have learned a lot! I am just a bit concerned that the very blingy handle can blind you when you switch on your new light!

            #490911
            Phil Whitley
            Participant
              @philwhitley94135

              Mat, if you have a compressor, you could use a needle gun (wear eye protection!!) they are really good at removing hard enamel paints from castings,BUT, if you get back to sound paint, there is no point in removing it, it just makes extra work, and damages the filler on the castings, far better to fill up the damage on the good paint, then flat, prime and paint, and the finish you get is better than a bare metal repaint unless you put an enourmous amount of work into filling the castings before primer. The original castings were totally covered in filler, which was then flatted and primed, and it is very hard to replicate this highly skilled process today. Have a look at the Colchester factory films (https://www.youtube.com/watch?v=nQaAKUAzK0w) This is my lathe which I resprayed. I removed all the repainting with paint thinners untill I got back to the original damaged finish, filled the damage, flatted, primed and resprayed, the whole job took about a week! Unfortunately if you have already damaged the original filler with chemical strippers, and it has gone soft and sticky, it will have to be removed, but the way to go is to cover the whole casting with a thin layer of filler, then flat , prime and paint. the contrast you get between paint on bare casting and paint on filler makes the machine look like a piebald pony! See my repaint here https://www.youtube.com/watch?v=5TYqaiPS8b8


              Edited By Phil Whitley on 16/08/2020 13:15:36

              Edited By Phil Whitley on 16/08/2020 14:09:24

              #490912
              Phil Whitley
              Participant
                @philwhitley94135

                Richard, Don't worry about the QCTP, my bad, I should have jumped at it, you getting a good half nut is more important, Que sera sera! If in the fullness of time it is still available, I will have it!

                Phil

                #490917
                Richard Kirkman 1
                Participant
                  @richardkirkman1

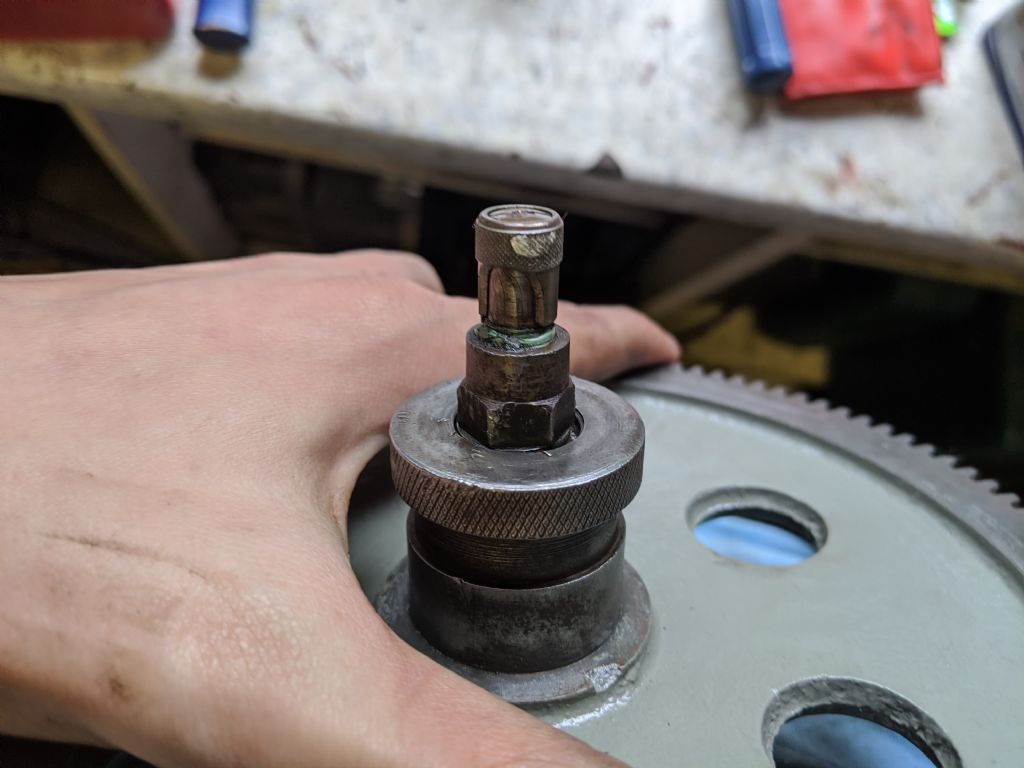
                  Phil, I might have a little something for you instead. I seem to remember when I saw your lathe that it was missing a little oiler from the end of the shaft, and I happened to get a spare one from Traci. So I'll bring it to Hull and see if I can get it to you somehow. Just the oiler on the end of here, pic below. I think you just had a nut or something. It won't make a huge difference, but if I've got one spare then why not!

                  I still plan to machine my original topslide to take a QCTP one day, so that will be interesting.

                  img_20200816_125024.jpg

                  Anyway, I've had a quick tidy up and a little play this morning. I've been trying to clear workspace so I can start to make a few things. Need to sort birthday presents for my flat mates… Much better to make them something than to buy. Point is that meant deciding to stop painting for the year completely. No more painting this year. So I had some bits to put back together

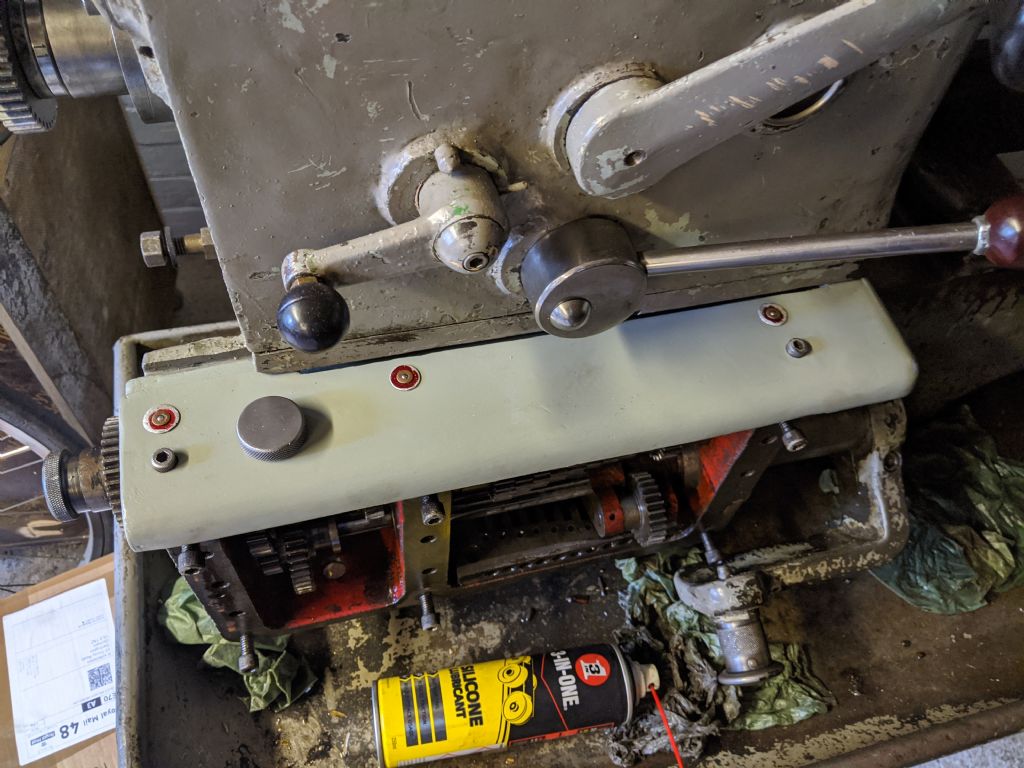
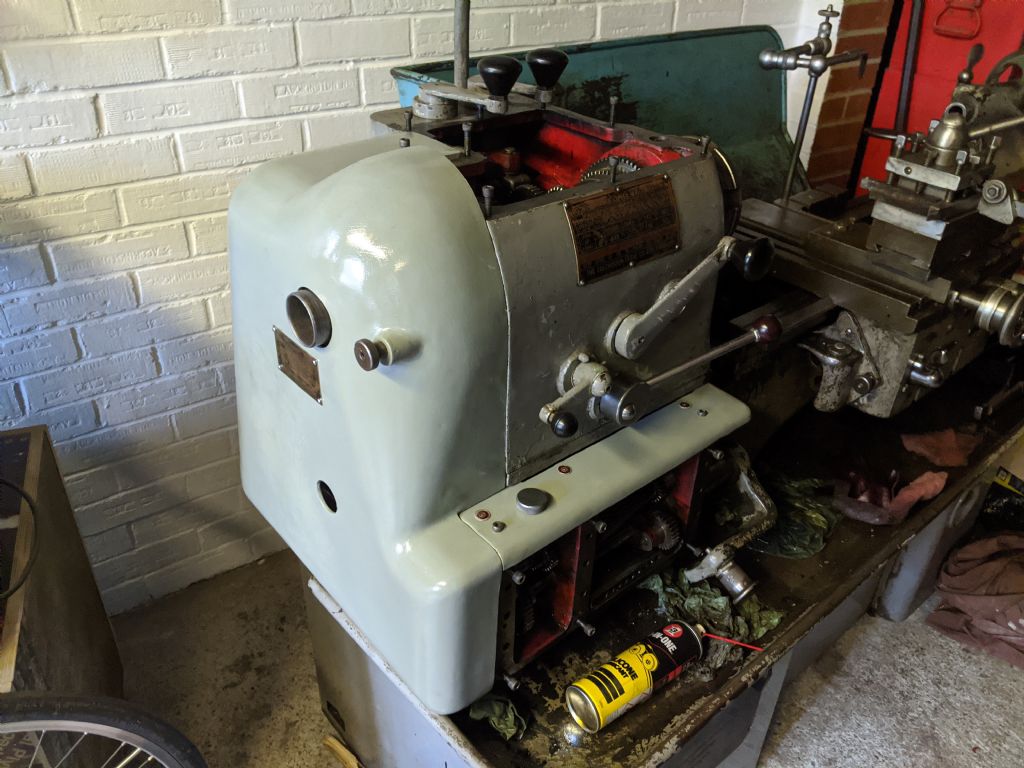
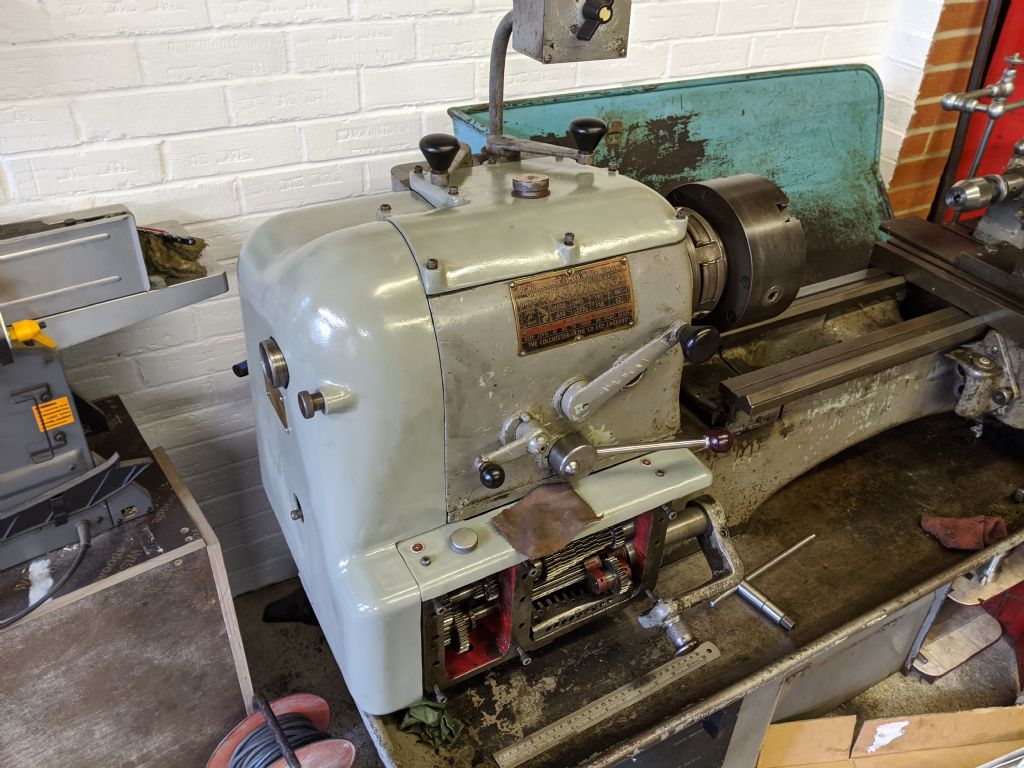
                  First was the gearbox lid. I put all the oilers back in then put the oil cover on too. it's not bolted down fully since it'll need to come off again, but its better to store it there than anywhere else. And yes, the colour difference isn't the best. Definitely not going to have a matching lathe for a year. This may annoy a few, but It will be fully painted eventually. The colour is actually quite different. The new dove grey is much lighter. However, I like the colour and I'm not too bothered about it being an original colour, as long as it looks nice.

                  img_20200816_121608.jpg

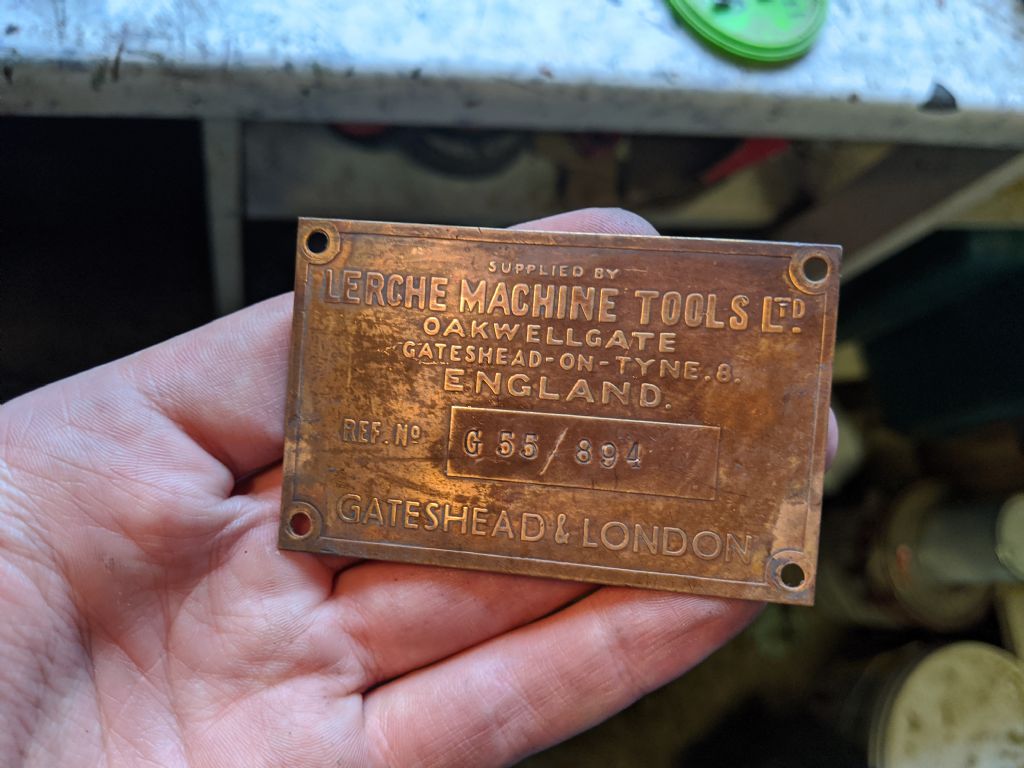
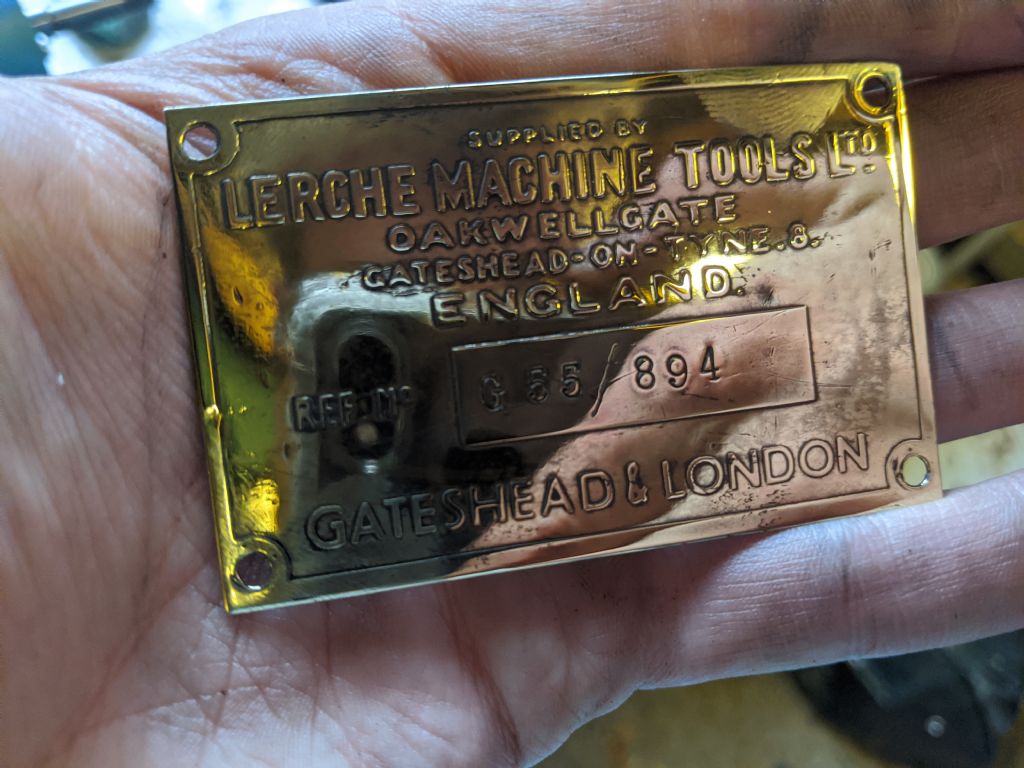
                  Then, I needed to polish up this tag for the end cover. I also polished all the little hammer in pin heads, so they're all shiny too

                  img_20200816_122311.jpg

                  Not that it needed to be shiny, but now it can patina again and look nice for a while

                  img_20200816_123105.jpg

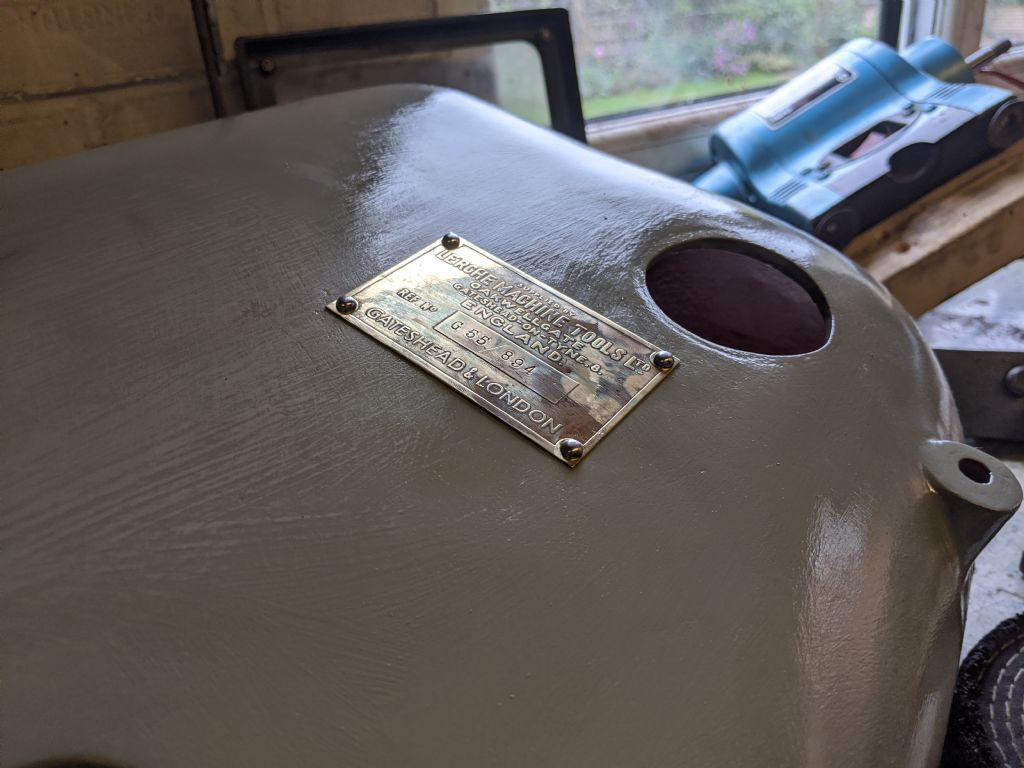
                  And then reinstalled onto the semi painted/unfinished end cover. Once again, good enough for now, but not permanent

                  img_20200816_124046.jpg

                  I really am a fan of the light grey. It's going to look very nice when it's done properly

                  img_20200816_124433.jpg

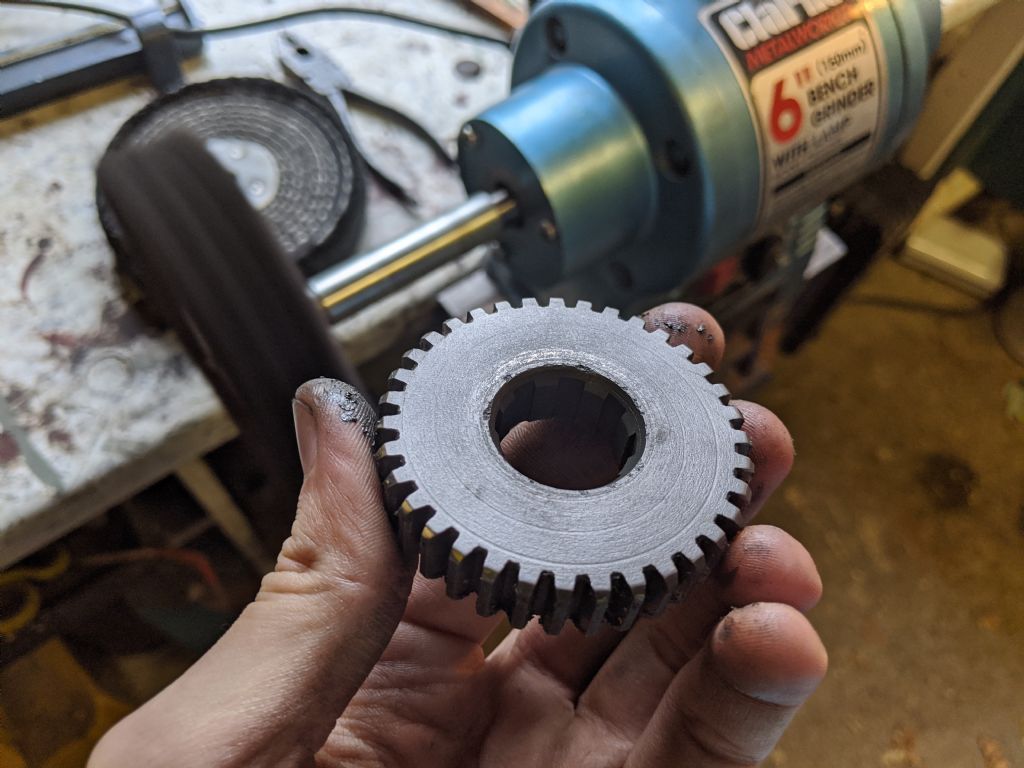
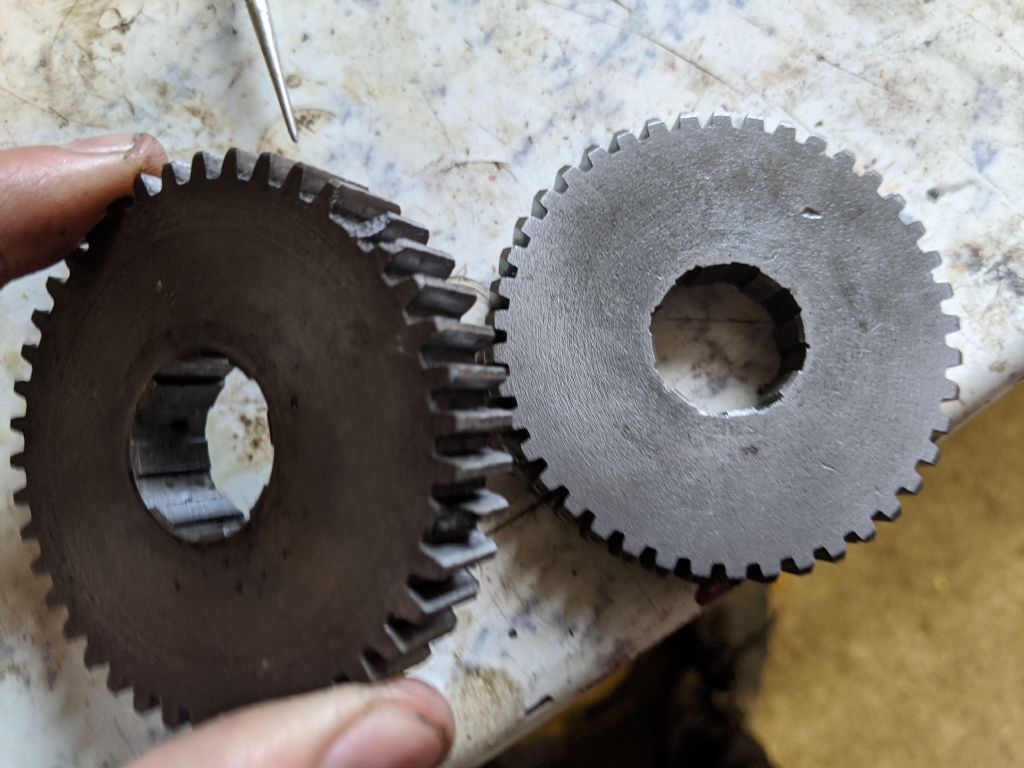
                  Then I cleaned up the gears that I'm replacing

                  img_20200816_124602.jpg

                  img_20200816_124647.jpg

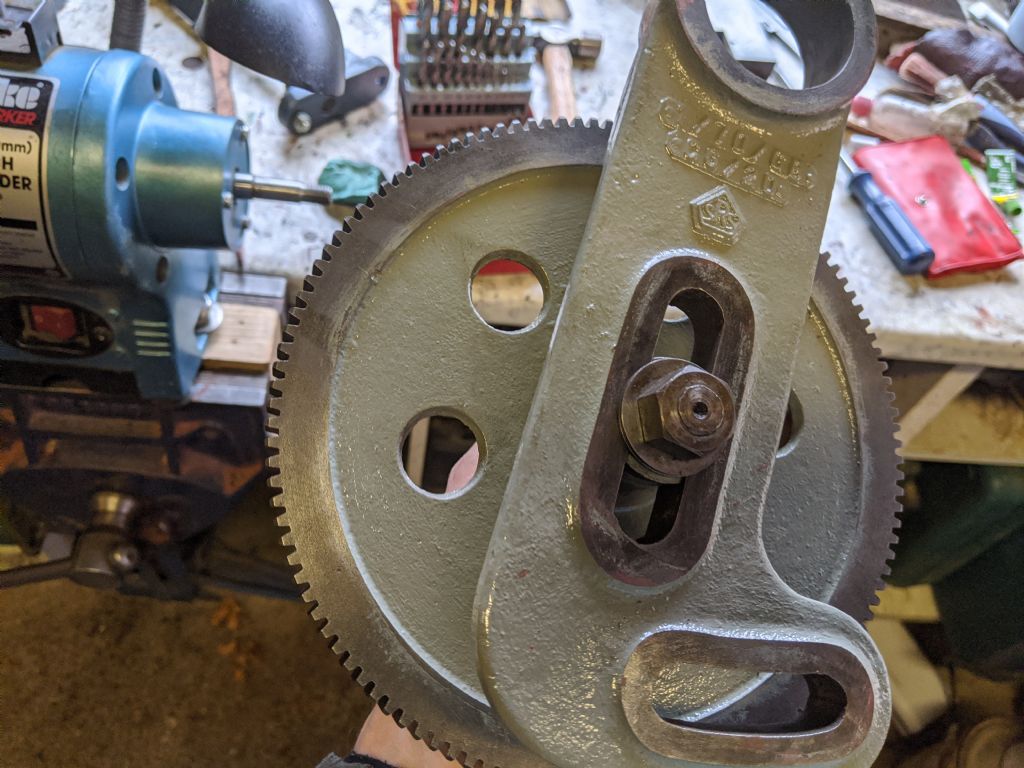
                  I also put my gear back onto the swing frame, so that takes up less space too

                  img_20200816_125016.jpg

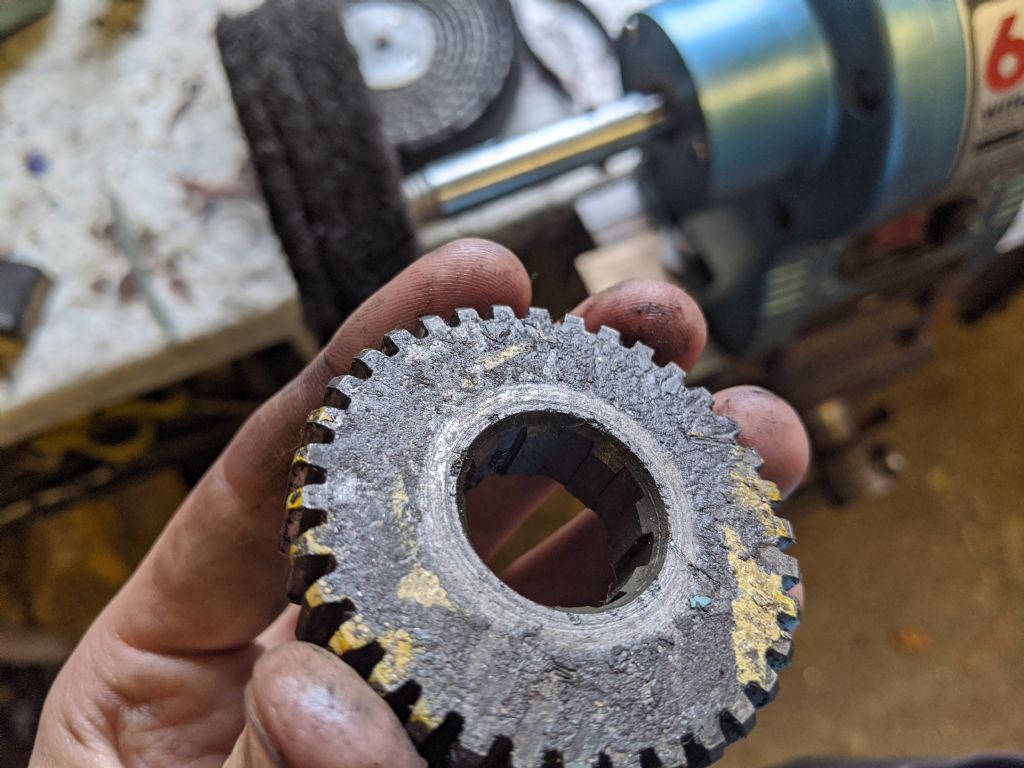
                  You can see why I need to replace this gear

                  img_20200816_125145.jpg

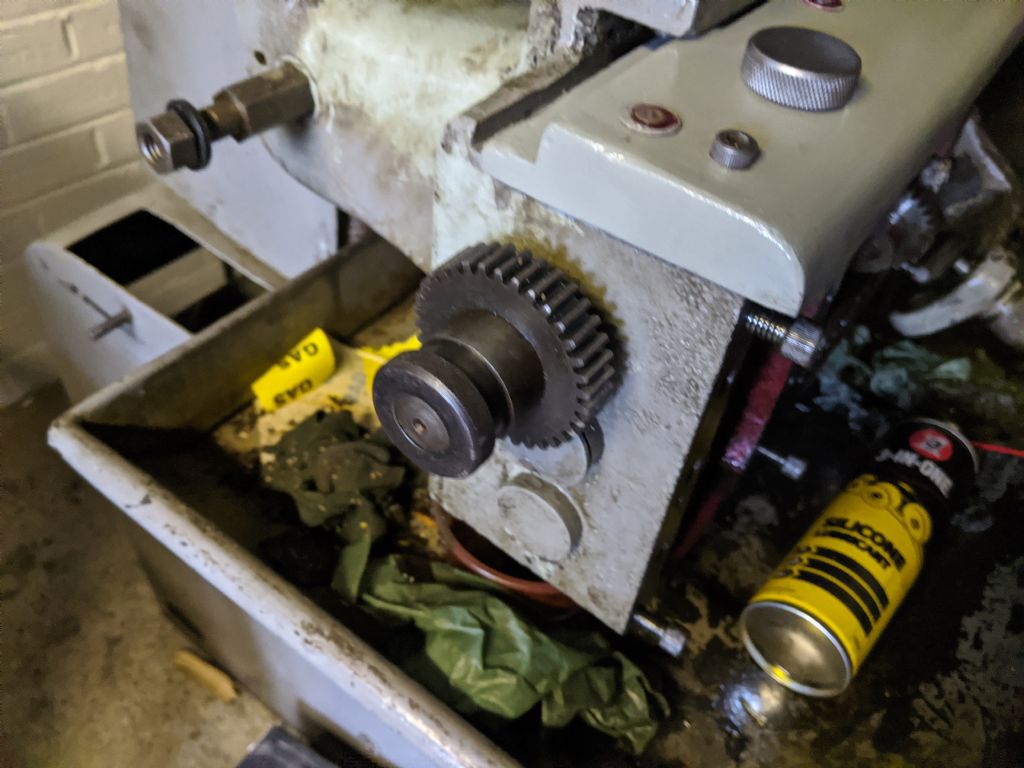
                  However, I cannot seem to get this last gear off. The nut on the end is really tight and I can't get it to budge. That gear is okay, but if i'm replacing the other then I may as well do both.

                  img_20200816_130606.jpg

                  I think I'll probably fit the belts back on next and try to align the motor perfectly with that string method or some way. I need to get it right this time! Since hopefully the oil seal won't leak so it shouldn't have to come off again for a while

                  Edited By Richard Kirkman 1 on 16/08/2020 13:47:02

                  #490922
                  Mat Stoeckle
                  Participant
                    @matstoeckle91130

                    Hey Herman, yeah I haven’t fully decided to go that route. Phil’s method makes somewhat sense to me, leaving intact paint alone. I used a wirewheel and got this blotchy type lepropsy pattern. I’m just afraid it’ll continue to come off even with new bondo on top .. Phil, how did you ascertain the quality of the paint below?

                    Richard, great progress

                    #490925
                    Phil Whitley
                    Participant
                      @philwhitley94135

                      Mat, if it wont scrape off easily then leave it and fill the damaged areas. Try using a blowgun (if you have a compressor) to see if the paint lifts. To be honest the original finish is usually so good that only areas where there has been mechanical damage, or the paint has literally worn through will require filling.

                      Phil

                      #490926
                      Phil Whitley
                      Participant
                        @philwhitley94135

                        Richard, yes the oiler is missing on mine, that would be great! The new grey paint looks excellent! that knurled(?)nut should only be finger tight, hence the knurling. There should be two gears on there, one in use, and one just stored there. They are swapped over for different pitches and feeds.

                        Phil

                        Edited By Phil Whitley on 16/08/2020 14:22:41

                        Edited By Phil Whitley on 16/08/2020 14:26:23

                        #490937
                        Mat Stoeckle
                        Participant
                          @matstoeckle91130

                          Phil, that's what had me worried, I wirewheeled the c**p out of it and thought I'm down to solid stuff .. then took the blowgun to it and little specs lifted off everywhere .. oh well … I'll keep wirewheeling until nothing lifts any longer and then bondo the thing .. I just ordered a full gallon of it .. I'm talking about the stand btw for now .. haven't dealt with the bed yet ….

                          #490953
                          Herman van der Merwe
                          Participant
                            @hermanvandermerwe76509
                            Posted by Richard Kirkman 1 on 16/08/2020 13:38:15:

                            However, I cannot seem to get this last gear off. The nut on the end is really tight and I can't get it to budge. That gear is okay, but if i'm replacing the other then I may as well do both.

                            img_20200816_130606.jpg

                            I think I'll probably fit the belts back on next and try to align the motor perfectly with that string method or some way. I need to get it right this time! Since hopefully the oil seal won't leak so it shouldn't have to come off again for a while

                            Edited By Richard Kirkman 1 on 16/08/2020 13:47:02

                            Did you remove the grub screw in the nut? If not, remove it, screw a bolt in there, put a strap wrench on the nut and put tension on it. While under tension give the bolt a wack. Will come loose …

                            If yours does not have a grub screw, drill a hole and use a pin C-spanner to undo it.

                            Edited By Herman van der Merwe on 16/08/2020 16:50:57

                            #491261
                            Richard Kirkman 1
                            Participant
                              @richardkirkman1

                              A day behind now! I haven't been up to much.

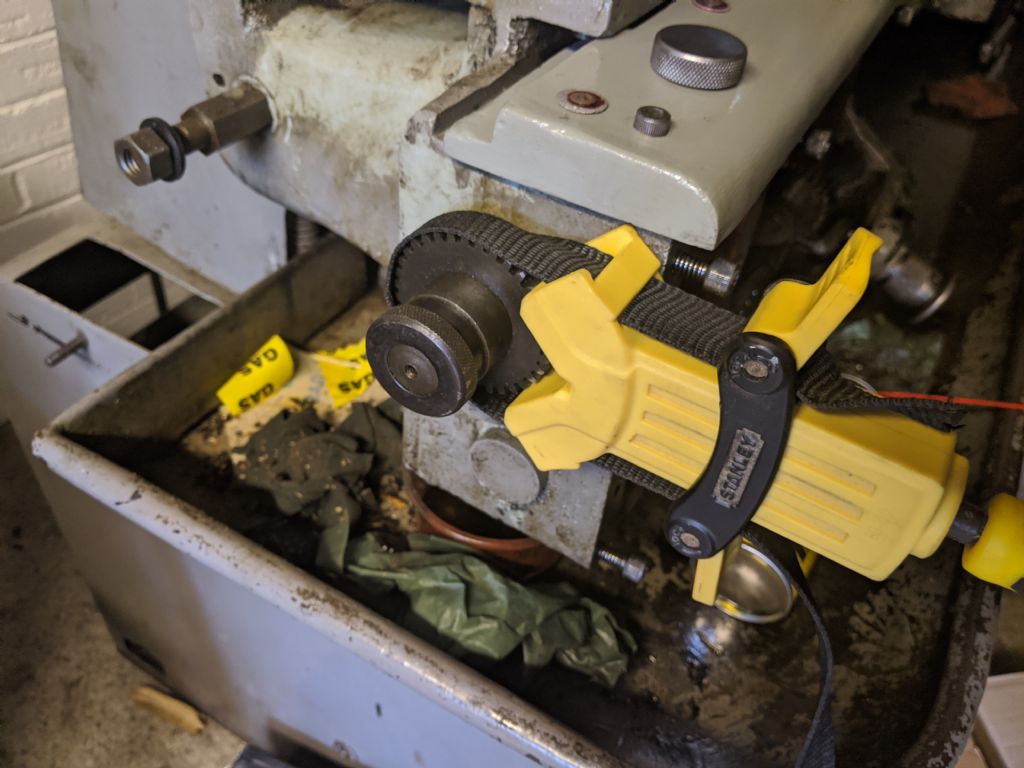
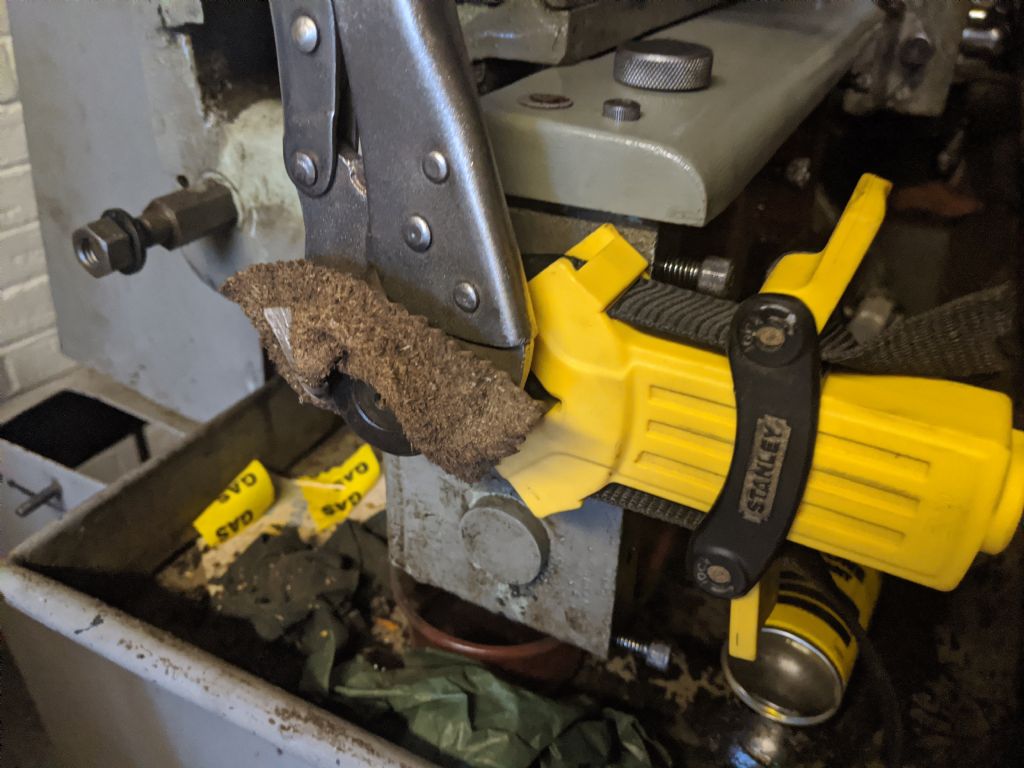
                              I managed to get the knurled nut off with my band clamp and some mole grips

                              img_20200816_175554.jpg

                              img_20200816_175712.jpg

                              Then it popped off quite easily

                              img_20200816_181159.jpg

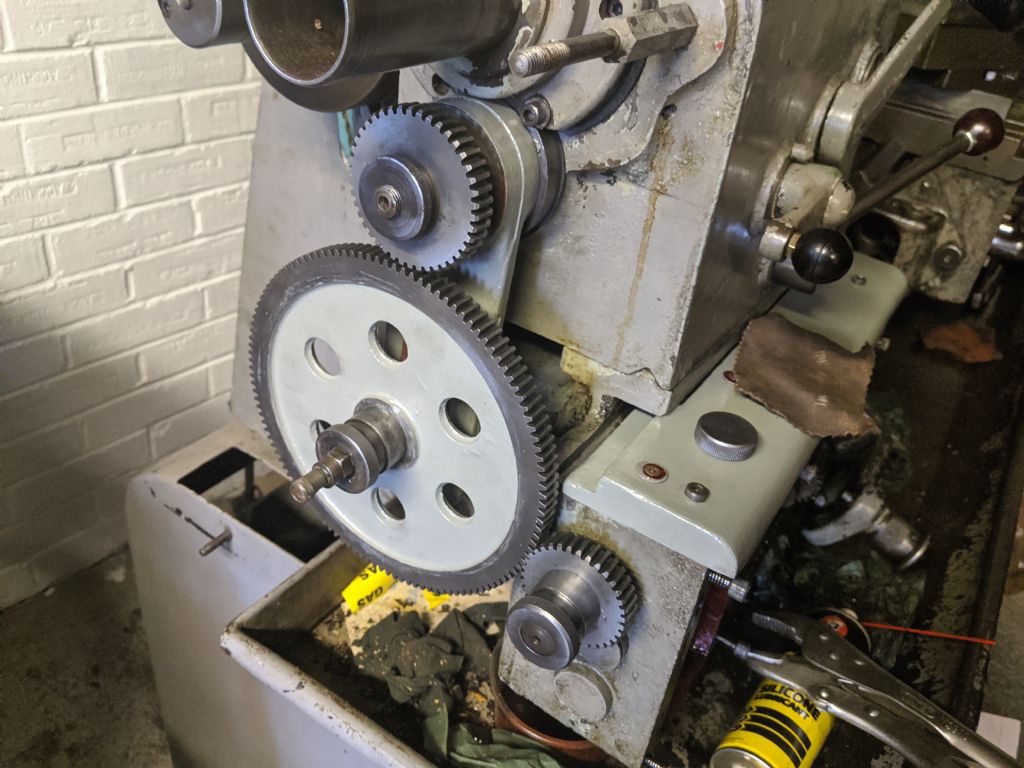
                              And the gears have all been replaced. No more chipped teeth!

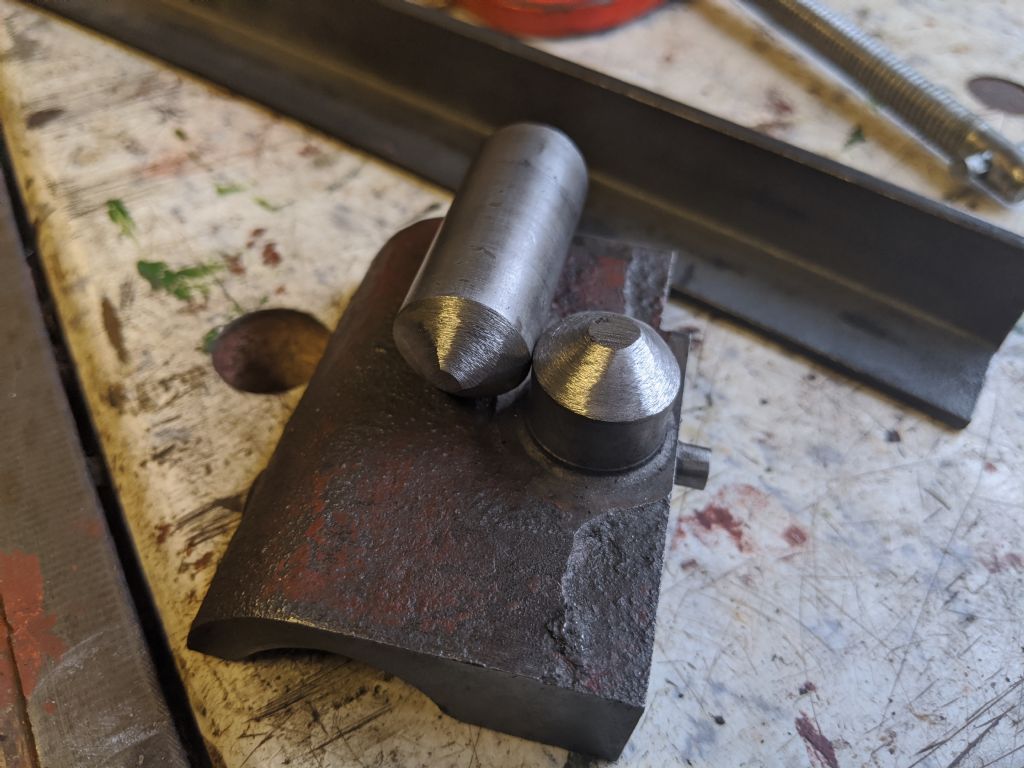
                              Then I got to work on the half nut. I ground a chamfer on each end with a really rough 24grit belt on my belt grinder, it made light work of it. I haven't gone down to a point, as i don't want to take any more off.

                              img_20200816_182813.jpg

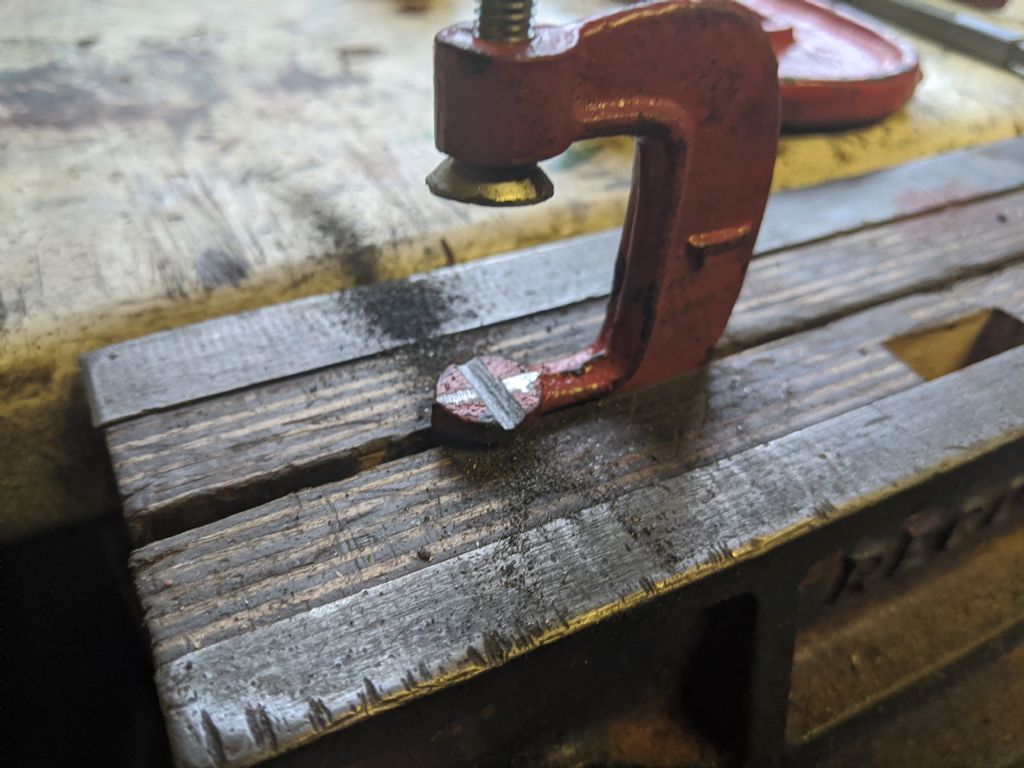
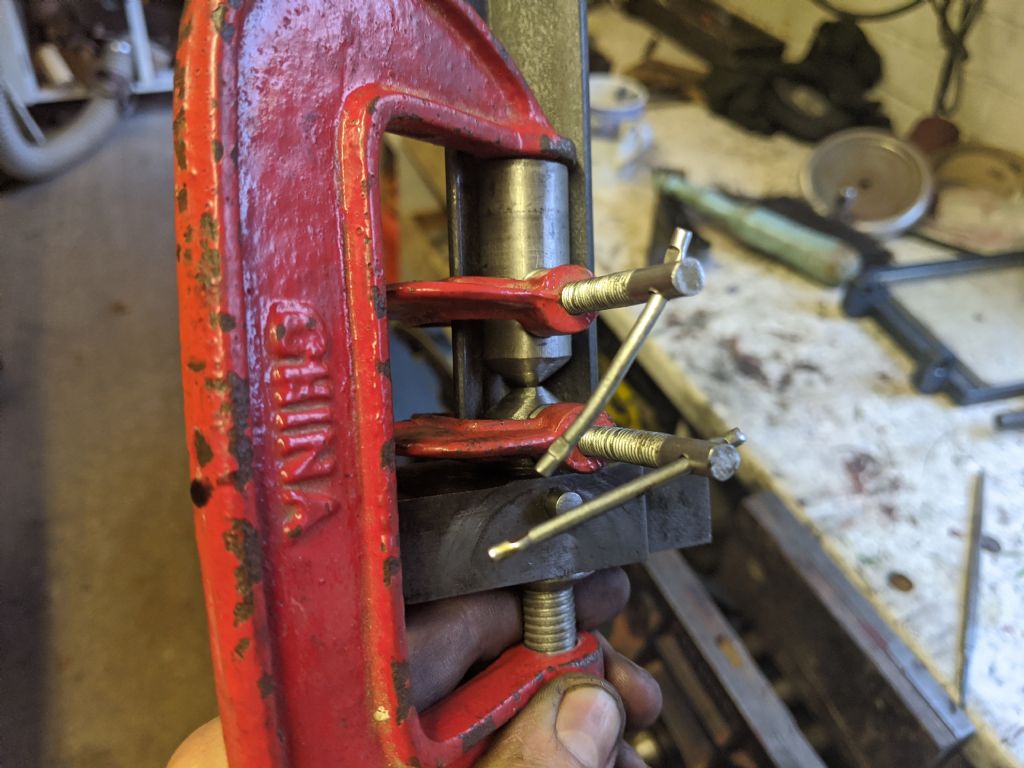
                              The little clamps kept slipping and not tightening properly, so i filed a groove for the angle iron to sit in

                              img_20200816_183518.jpg

                              It is very close quarters, so I'm not sure how easy it will be. But they're the smallest clamps that will fit. I can't clamp it any other way and I don't have any smaller clamps. So this'll have to do. Hopefully, I'll be going to braze tomorrow

                              img_20200816_184437.jpg

                              Then I've spent today packaging the topslide and chuck guard for James. Very securely so there should be no trouble with it. The new lights are going in today too, so hopefully there will be better lighting for me to see with

                              #491309
                              Herman van der Merwe
                              Participant
                                @hermanvandermerwe76509

                                I would remove the big C-clamp. Braze a nut or two in the angle iron with a bolt through it and tension the shaft with this. That big clamp is going to move with heat and it is just simply awkward, huge and made in China.

                                I would still clamp the shaft with a short section of smaller angle iron with the grooved C-clamp riding on the corner of the smaller angle iron. You need stability when things get hot. Remember to wear gators over your safety boots. Last thing you need for some blob of brazing to jump loose and into your boot. This is not welding where you can grit your teeth while your flesh is going up in smoke.

                                Have fun brazing.

                                Your lathe is starting to look good. Your fingernails not …

                                #491440
                                Richard Kirkman 1
                                Participant
                                  @richardkirkman1

                                  Today has been fun!

                                  Brazing is definitely an interesting topic. But let's start with the fun bits

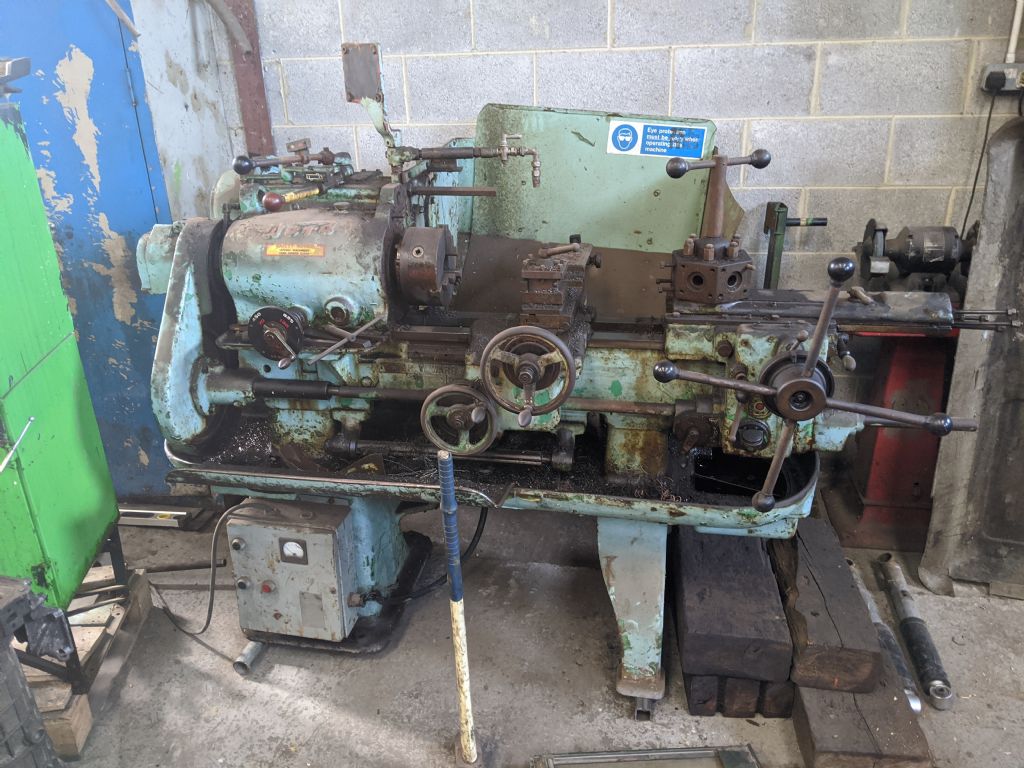
                                  My friend has a very large lathe, its a bit of a workhorse. Although I've never seen him use it! It made my skin crawl, a fantastic machine that just needs a good clean

                                  img_20200819_082332.jpg

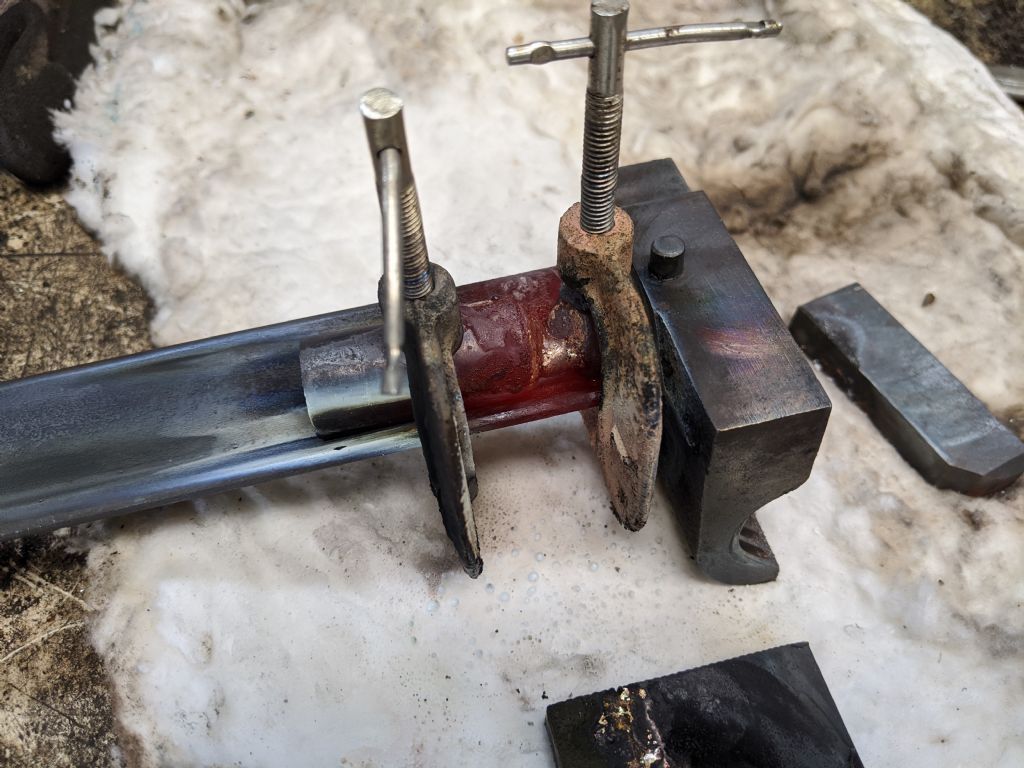
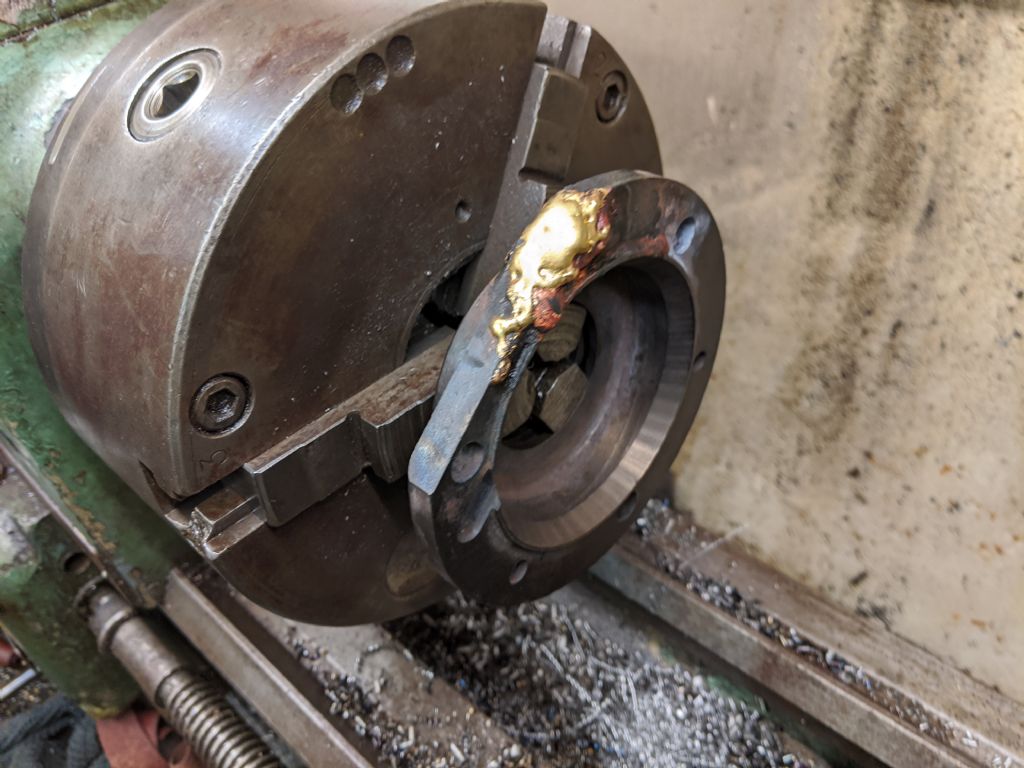
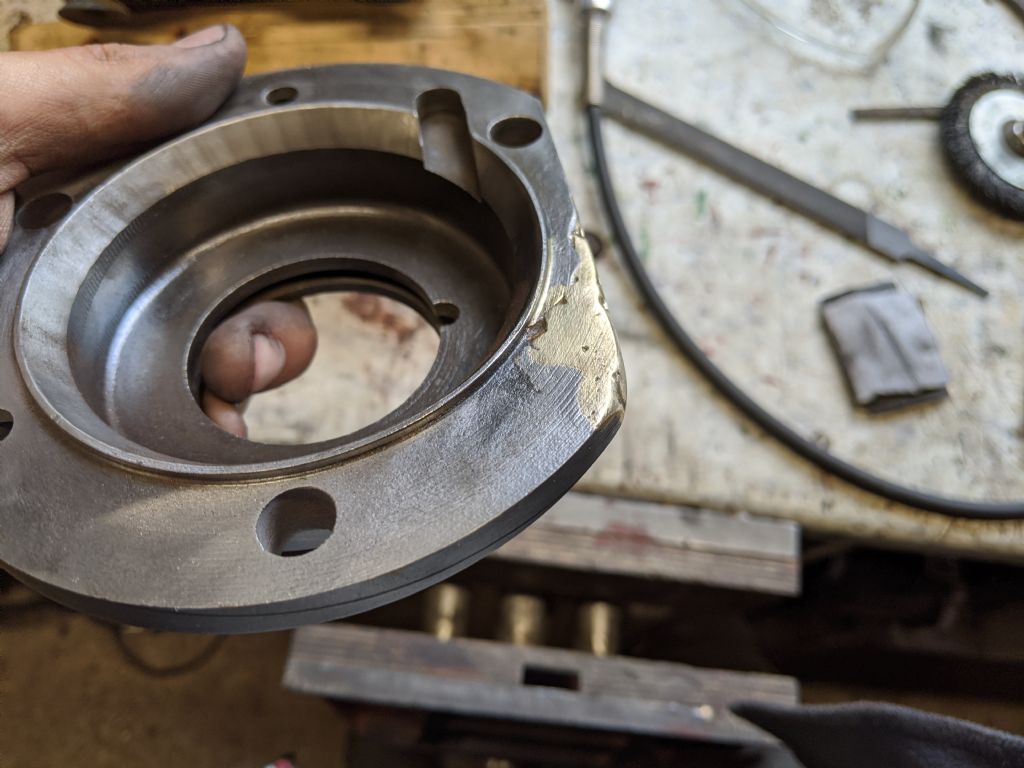
                                  Anyway, so I had 2 things to braze at my friends, the rear bearing housing and the half nut

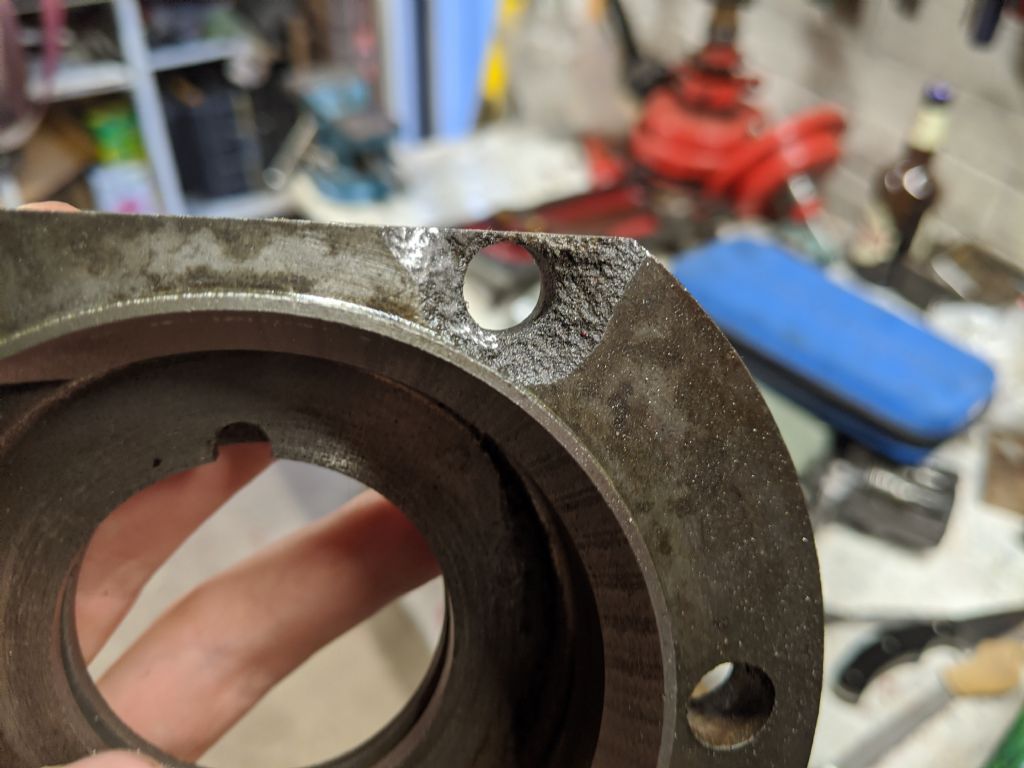
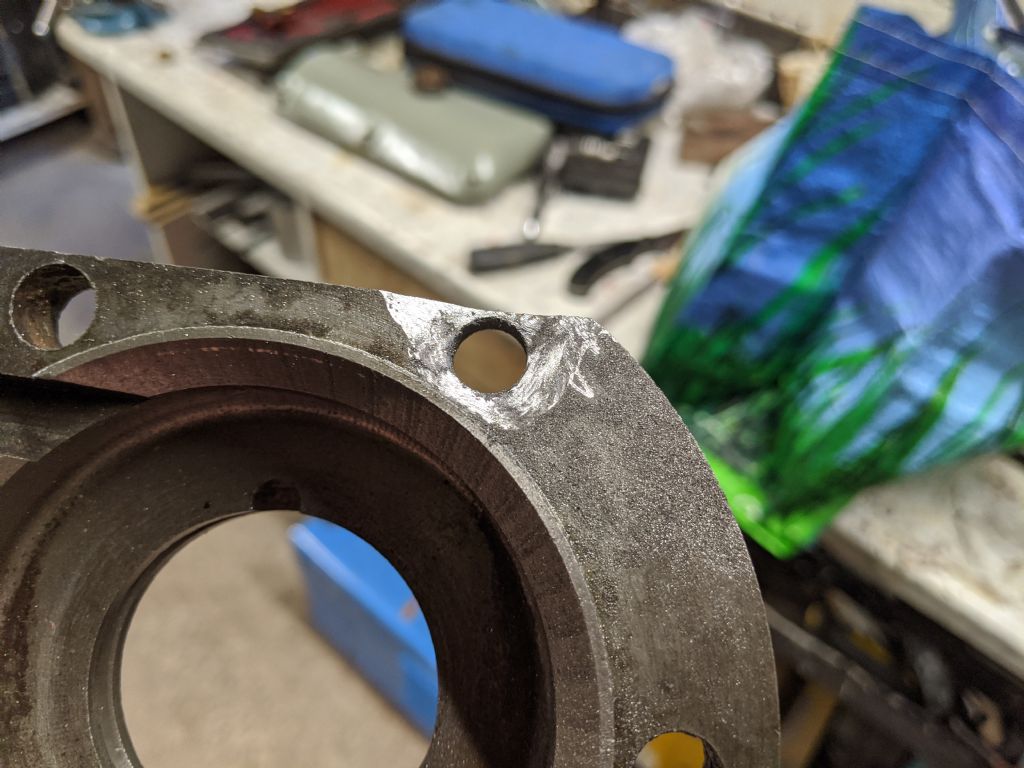
                                  Last night I took the housing and ground down the broken area so it was smooth

                                  img_20200818_201309.jpg

                                  img_20200818_201517.jpg

                                  So this should all be clean and good to braze

                                  I did a sample on some mild steel, but I found that the mild steel glows differently to the cast iron, so I should have tested on some of that instead. Oh well, I've learned a lot today

                                  img_20200819_121325.jpg

                                  I found tacking the shaft to be very difficult, so difficult that I just decided to not bother and just braze it all together, then if it all worked, I would have to clean it up on the lathe anyway.

                                  I found that there was not enough meat on the lower bit of the shaft to clamp it properly into the angle iron, so they had not joined at the right angle. I am not going to bother wasting any more time with this part. I'm just going to wait for the spare one to get here

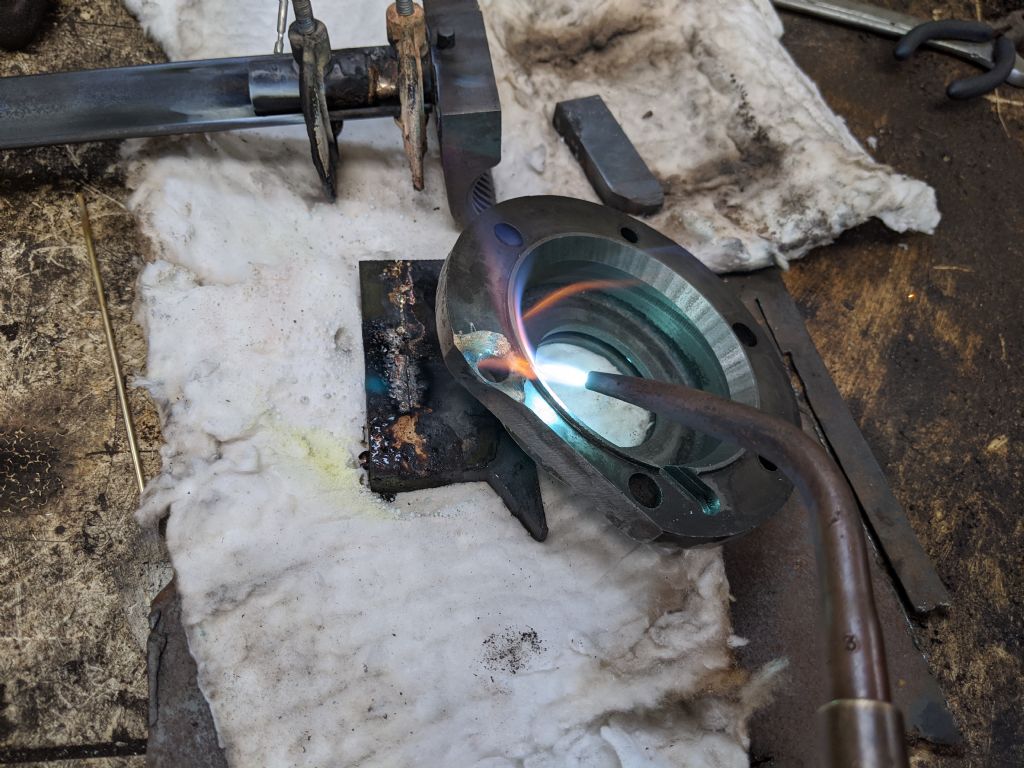
                                  So, onto the housing. The housing was very tricky since the hole had a very thin wall, which I ended up meltingcheeky

                                  So this then became just a very large area to fill with braze.

                                  img_20200819_121556.jpg

                                  I did change tips and get to a better flame so it was sufficient for heating

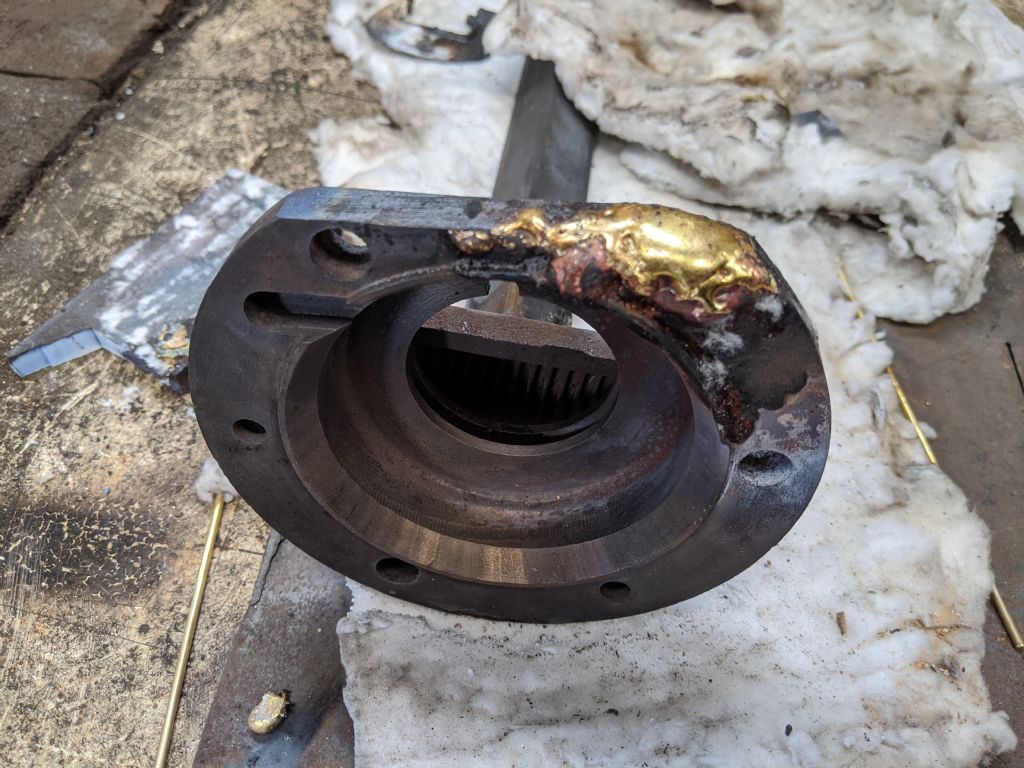
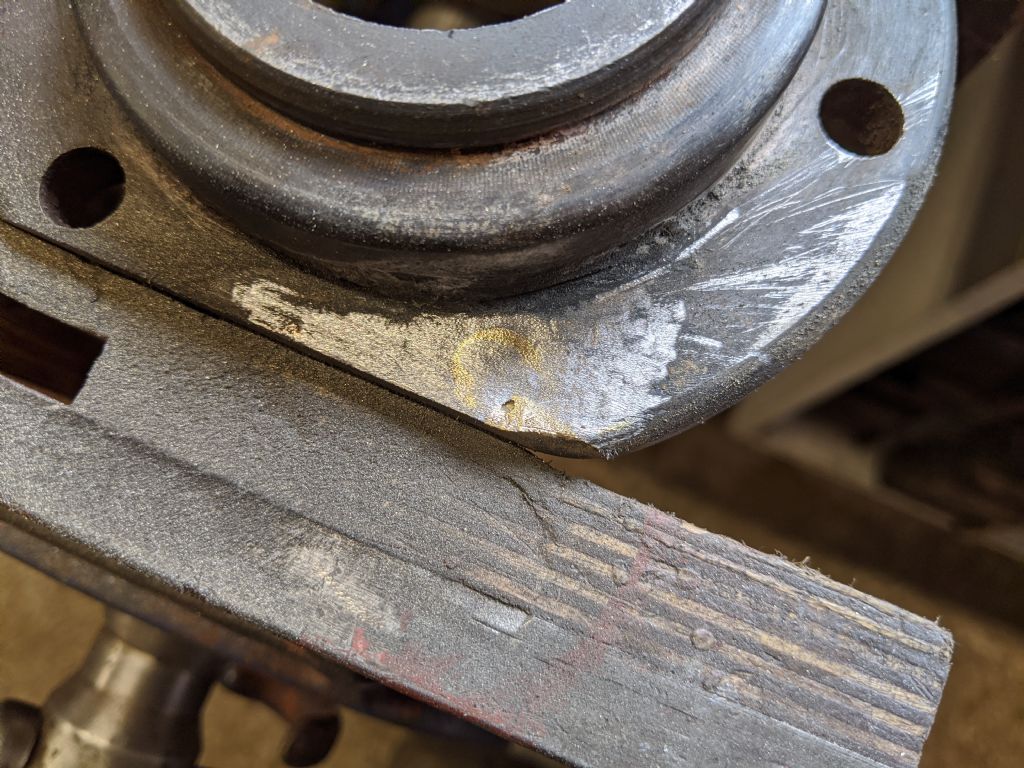
                                  All filled up, but a mess. I went to use the other mans lathe to clean up all of the excess bronze, but not to really touch the metal.

                                  img_20200819_142655.jpg

                                  I don't have any pictures of the actual turned surfaces, but there will be one in the next post. Its been a long day and I'll do it tomorrow

                                  img_20200819_145241.jpg

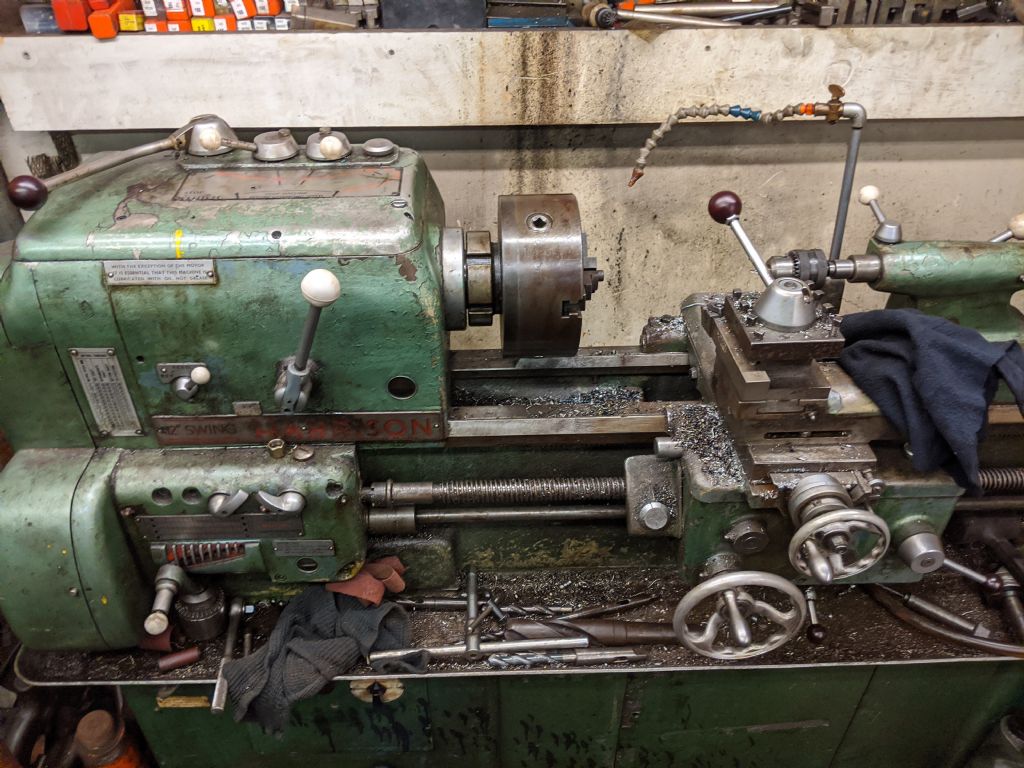
                                  It was quite a nice lathe. A harrison model. Still, it needed a good clean as well, but at least it worked.

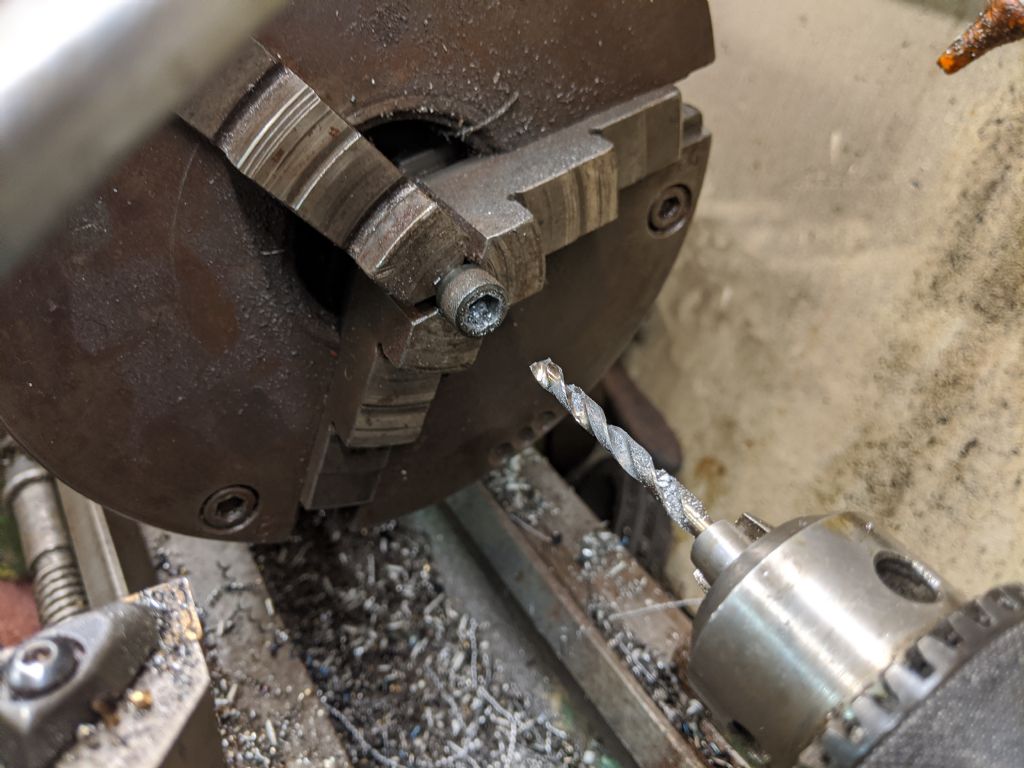
                                  I also used the lathe to drill the center of 2 bolts out to 5mm

                                  img_20200819_141659.jpg

                                  Then I tried to tap them m6, but the tap got stuck. It is still in there, but I didn't want to risk trying to get it out at my friends. I'll do a better job at home. I'll get them tapped somehow.

                                  Anyway, the housing is machined down closely enough so i will be able to finish it off with files and sandpaper or whatever. Good progress. Then I'll just put the rest of the lathe back together

                                  My only issue will be getting the hole that i have filled redrilled in the correct location, but I have a plan!

                                  #491443
                                  Richard Kirkman 1
                                  Participant
                                    @richardkirkman1

                                    This is the lathe I was using. It felt like a very long bed. The owner is about a foot shorter than me, so this lathe was quite low. And the ceiling was low too. So I knocked my head a few times by accident!

                                    img_20200819_141115.jpg

                                    #491451
                                    Herman van der Merwe
                                    Participant
                                      @hermanvandermerwe76509

                                      A big old capstan lathe … made for working …

                                      You did not heat the flange to red hot and then not enough flux you did add … also the incorrect flame type.

                                      So you learn, so you learn!

                                      #491452
                                      Richard Kirkman 1
                                      Participant
                                        @richardkirkman1
                                        Posted by Herman van der Merwe on 19/08/2020 18:36:26:

                                        You did not heat the flange to red hot and then not enough flux you did add … also the incorrect flame type.

                                        Maybe so, maybe not. Either way, I'm happy with the braze and once its smoothed, it is solid. I think it was plenty hot enough. I think I would have struggled to get the whole thing red hot. The flame type was restricted. My friend only had a few tips. It was either that or a cutting torch. So I've made the best of it. Am I a professional now? No, but I had fun!

                                        #491467
                                        Herman van der Merwe
                                        Participant
                                          @hermanvandermerwe76509
                                          Posted by Richard Kirkman 1 on 19/08/2020 18:51:47:
                                          No, but I had fun!

                                          And that is what it should all be about!

                                          #491805
                                          Richard Kirkman 1
                                          Participant
                                            @richardkirkman1

                                            No progress yesterday. It turned out to be my brothers birthday, so I was required to do family activities! I did not force my family to do the same for mine…
                                            Anyhow, big progress today. Or at least progress that I am extremely happy with

                                            To begin the day I thought I would deal with the bearing cover that needed filling down and smoothing. This went quite well. Although the hardened flux was a pain to deal with, I'd rather file metal than try to remove flux!

                                            img_20200821_120947.jpg

                                            img_20200821_123548.jpg

                                            Anyway so that was relatively cleaned up, so I used my scotch brite wheels to give it a nice surface finish. I use the scotch brite wheels more than I ever thought I would. It's very handy having multiple grades so you can do different finishes or removal rates. I would highly recommend anyone to try them, although the lower grits cut through flesh pretty well too, just ask my fingers…

                                            Then I got onto drilling the hole. Tricky work since I was drilling through a mix of cast iron and bronze, due to my EXTREMELY HIGH quality brazing!!!!!

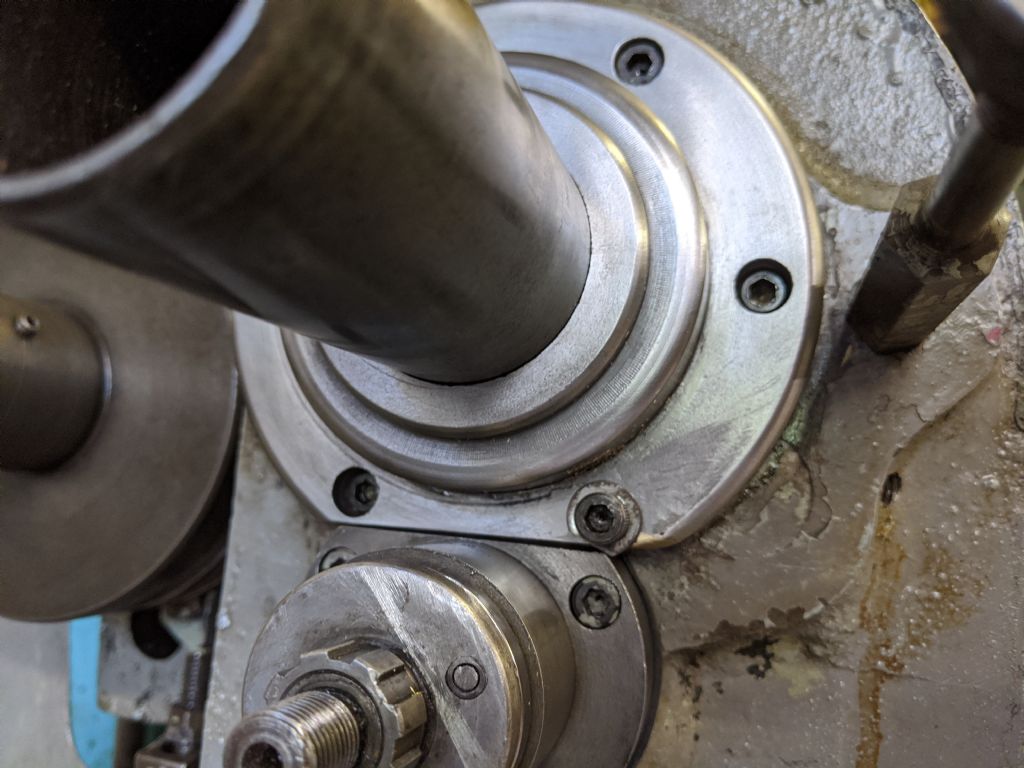
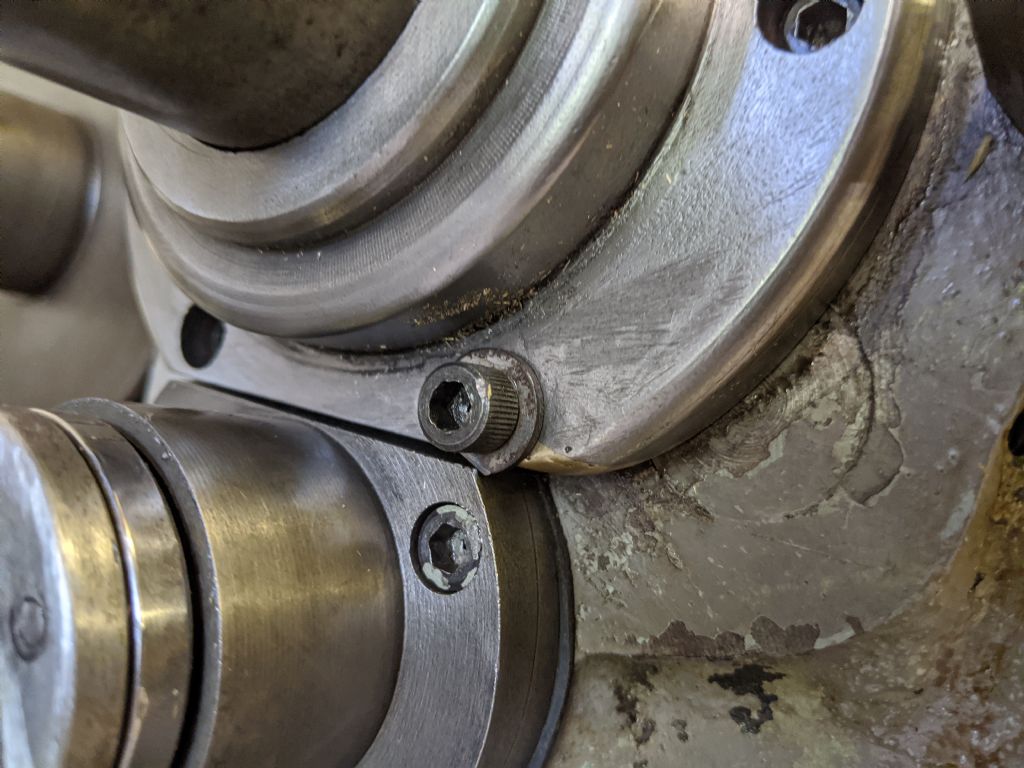
                                            This meant that the hole I drilled did not line up with the previous hole and was off by a bit. However, this did not matter in the big picture since its just for mounting and I was just going to use the washer and bolt anyway. So I am happy with this fix being permanent since there is now a significant increase in the pressure being applied to the gasket, so hopfully it won't leak. Although the leak before was not significant. It's just a more permanent fix than filler/epoxy

                                            I will not be repainting this until next year. I want to use my lathe !!!!

                                            img_20200821_145206.jpg

                                            img_20200821_145209.jpg

                                            As I said, big progress today, so the top cap could be temoporarily reinstalled so no more dust got in while the lights were being replaced. Big differences approaching. My painting may look okay, but that's why the picture is so far away!

                                            img_20200821_150850.jpg

                                            So, the big post you've all (not) been waiting for…

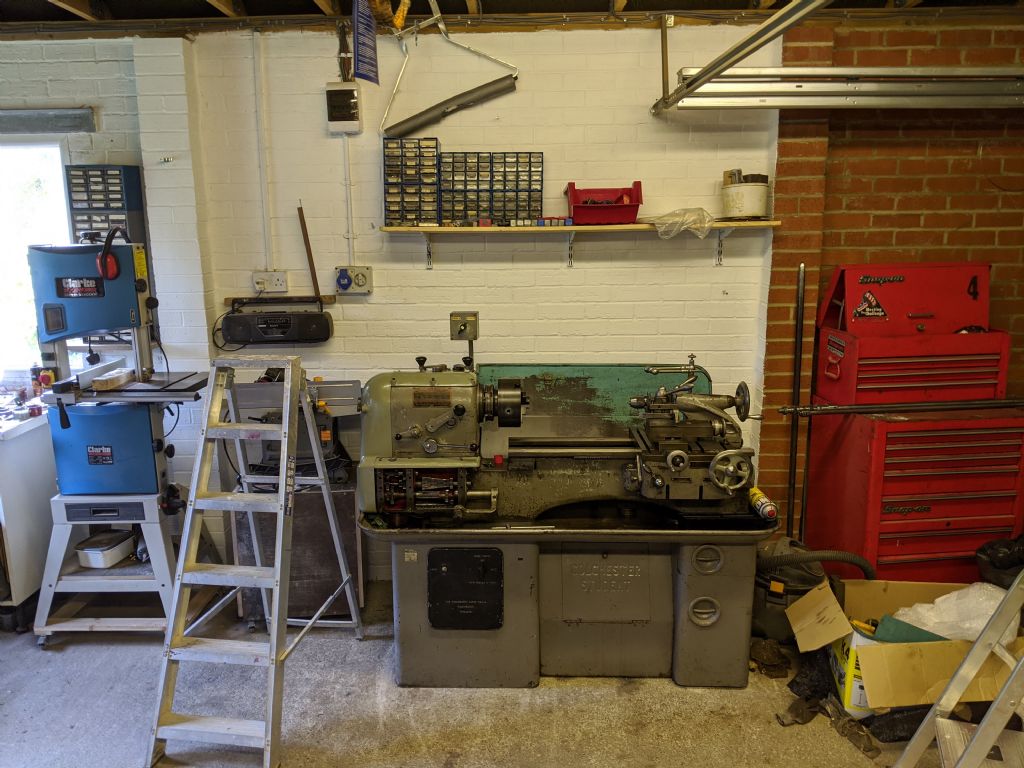
                                            This is with my (dads) fluorescent lighting(before)

                                            img_20200821_152322.jpg

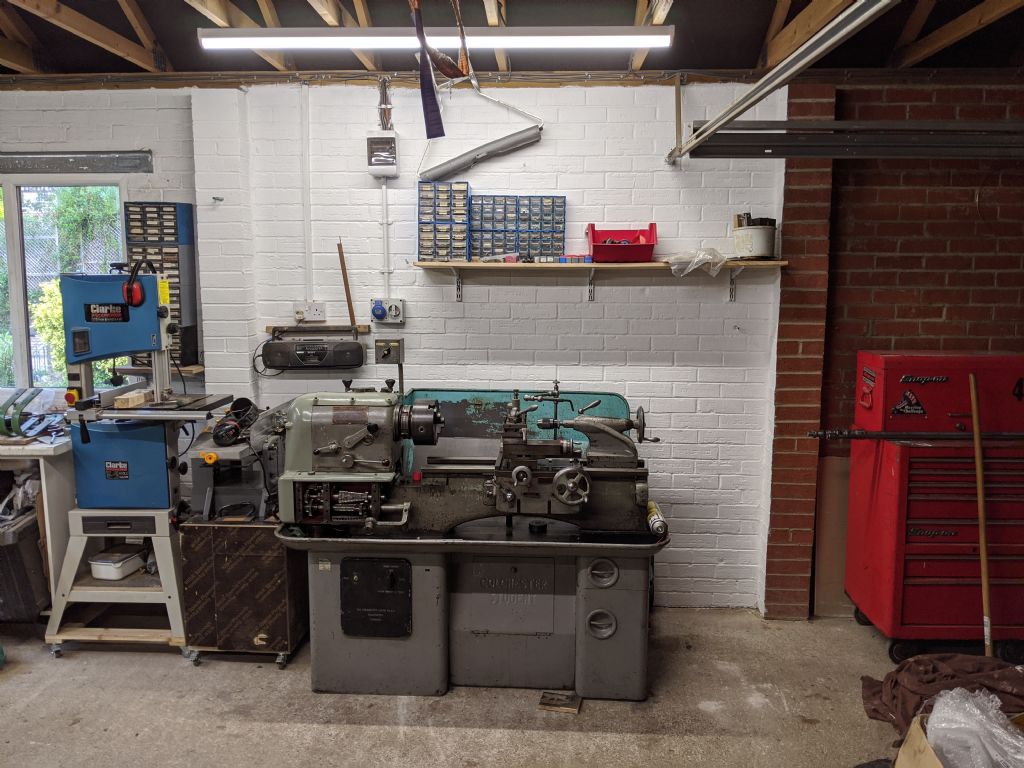
                                            And after!

                                            img_20200821_164220.jpg

                                            I've moved the lathe along a bit so I have space to slide in my table saw next to it for when I'm not using it. This means my dad has much more length in the garage to put the car in, also reducing the chance that he damages my table saw on his car or vice versa.

                                            The real difference can be seen through the window, the exposure of the pictures is completely different. The first pic shows the light outside to be much brighter than inside, however, the second shows the light inside to be similar to outside. I don't care what anyone says, LEDs or better lighting in any form is well worth the investment. I am absolutely astounded in the difference. Especially since the lighting has been placed over machinery and workbenches, rather than behind, so I can see what I'm doing now.

                                            Anyway, I will get the lathe back together tomorrow, I will put the cover onto the gearbox and fill the headstock with oil and put the belts back on. The feed shaft and leadscrew do not need to go back in until I have the replacement half nut. Just waiting on James to get back to me! His package of the topslide should have arrived today, or at least the tracking say it has.

                                            #491807
                                            Mat Stoeckle
                                            Participant
                                              @matstoeckle91130

                                              Looking good! I'm always amazed how small these lathes look when you see them from afar .. nothing compared to what it feels like to deal with the individual pieces .. I guess it's because they're rather stout .. I know I can't wait to use mine again, I'm sure Herman and you feel the same way

                                              cheers!

                                              #491814
                                              Herman van der Merwe
                                              Participant
                                                @hermanvandermerwe76509

                                                Yeah Mat, looks tiny 'till you wanna lift them …

                                                Lights are like clamps. You can never have enough!

                                                #491841
                                                Richard Kirkman 1
                                                Participant
                                                  @richardkirkman1

                                                  I'm really enjoying your posts Mat, keep them up. I'll need entertainment when I'm back at uni! (20 days to go… need to use my lathe imminently)

                                                  Herman, you're so right. Although I've ordered another 2 batons, so the small garage with 6 8000lumem 6ft batons should be more than enough. If not a bit blinding if I look up! Wood working will never be the same again!

                                                  #492176
                                                  Herman van der Merwe
                                                  Participant
                                                    @hermanvandermerwe76509

                                                    Richard, would it be possible for you to measure the end cover's hole diameters for me as well as distances from the small fastening hole so that I can locate and size the holes correctly on my cover? Mine has been cut oval with a cutting torch for some reason.

                                                    I see the bottom hole on Phil's and Mat's lathe is also elongated and not round. What is the reason for this? Any ideas?

                                                    Edited By Herman van der Merwe on 23/08/2020 19:07:57

                                                    Edited By Herman van der Merwe on 23/08/2020 19:12:30

                                                    #492186
                                                    Herman van der Merwe
                                                    Participant
                                                      @hermanvandermerwe76509

                                                      RIchard, please take some pictures of the Colchester lamp you have. I want to show someone in SA what it looks like so that he can ID a lamp he has.

                                                    Viewing 25 posts - 726 through 750 (of 797 total)
                                                    • Please log in to reply to this topic. Registering is free and easy using the links on the menu at the top of this page.

                                                    Advert

                                                    Latest Replies

                                                    Viewing 25 topics - 1 through 25 (of 25 total)
                                                    Viewing 25 topics - 1 through 25 (of 25 total)

                                                    View full reply list.

                                                    Advert

                                                    Newsletter Sign-up