Colchester Student Mk1 Won’t Start

Advert

Colchester Student Mk1 Won’t Start

Home Forums Help and Assistance! (Offered or Wanted) Colchester Student Mk1 Won’t Start

Viewing 25 posts - 501 through 525 (of 797 total)
  • Author
    Posts
  • #478051
    Phil Whitley
    Participant
      @philwhitley94135

      Richard, clean the boss out with paint thinners, and use some fine surface car body filler, the one you add hardner to, not the stopper! flat it with fine abrasive paper, and put a smear of gasket cement over it when you fit the seal. silicon RTV will do it. I would recomend Red Hermetite or Hylomar, but under the VOS regs, they have been reformulated, and they are both crap!

      Phil

      Advert
      #478054
      Richard Kirkman 1
      Participant
        @richardkirkman1
        Posted by Freddybear on 06/06/2020 17:54:47:

        I replaced the bearings and the seals. ( and I seem to remember there is a gasket at the rear too).

        However. I did have the entire headstock stripped at the time. Also I was sick and tired of all the oil leaks everywhere

        Incidentally, I also bored my wormbox true and bushed it. Action is much more positive now.

        Yes, I've replaced the gasket already and it's holding fine. It's just the seal that's leaking.

        Phil, this stuff?

        Filler

        Sealent

        #478059
        Herman van der Merwe
        Participant
          @hermanvandermerwe76509

          Did you polish the shaft that goes through the oil seal before you installed it? It seems it is weeping past the seal on the shaft.

          #478060
          Phil Whitley
          Participant
            @philwhitley94135

            Thats the stuff Richard!

            #478065
            Richard Kirkman 1
            Participant
              @richardkirkman1
              Posted by Herman van der Merwe on 06/06/2020 19:55:32:

              Did you polish the shaft that goes through the oil seal before you installed it? It seems it is weeping past the seal on the shaft.

              Nope, just cleaned with a cloth, no abrasives were used

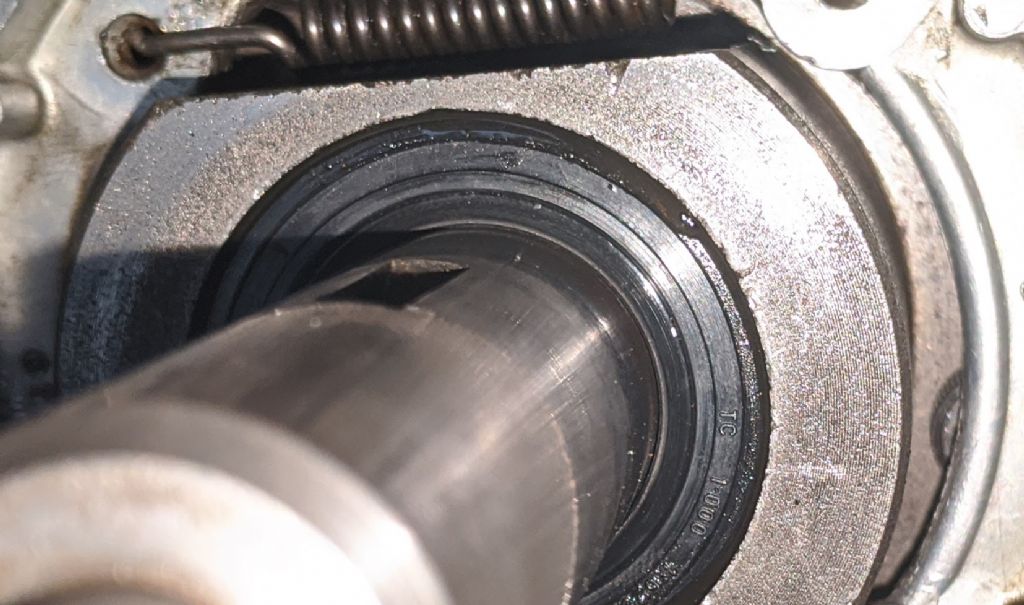
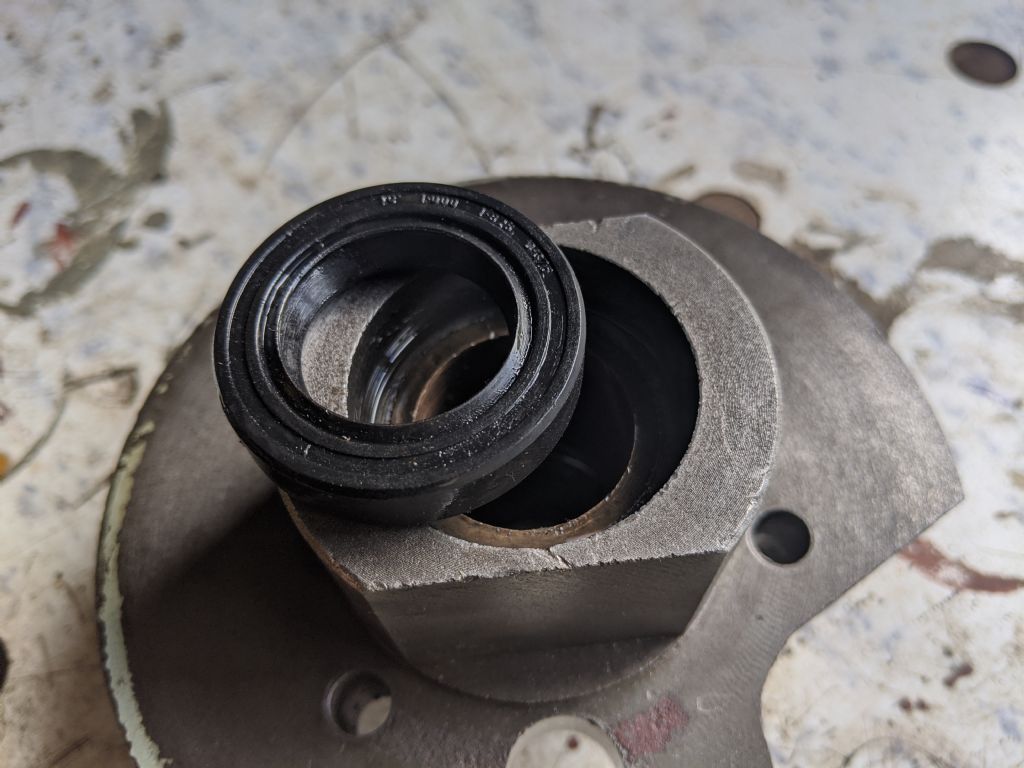
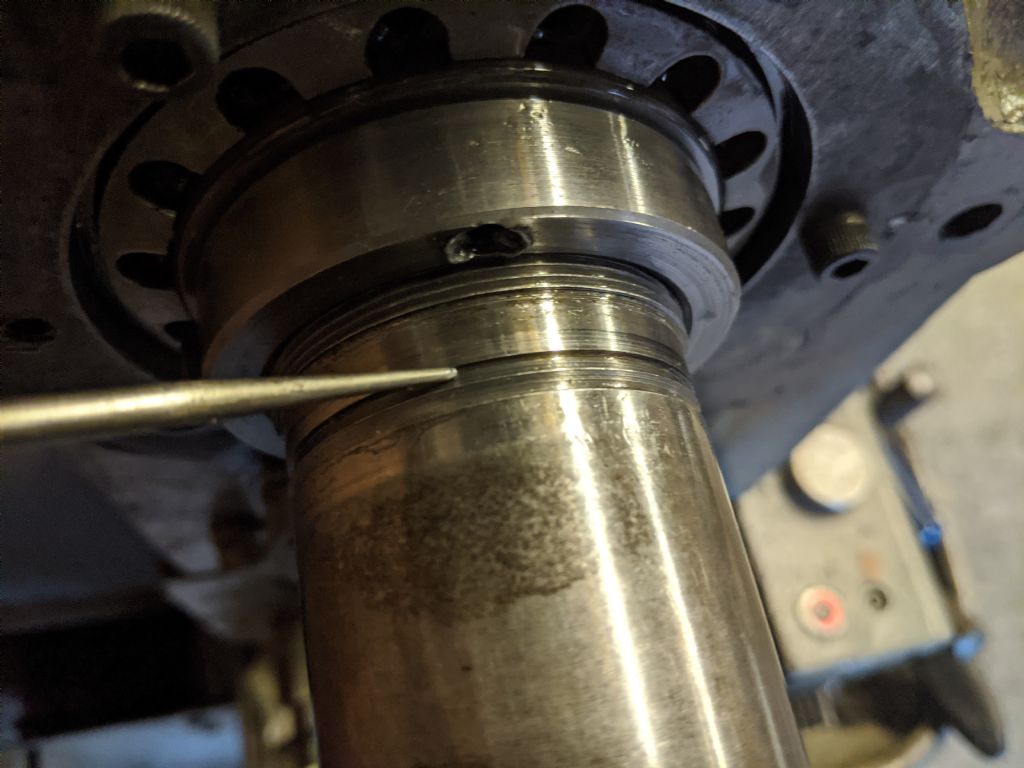
              It's coming out through the outer bit. Pretty much where i carved a channel in. Exactly where you told me to fill it and I didn't. I should have listened. I'll fix it

              If you look carefully in the top right, its definitely leaking from there. That's the exact spot

              img_20200606_184955.jpg

              #478080
              Herman van der Merwe
              Participant
                @hermanvandermerwe76509
                Posted by Richard Kirkman 1 on 06/06/2020 20:13:48:

                Posted by Herman van der Merwe on 06/06/2020 19:55:32:

                Did you polish the shaft that goes through the oil seal before you installed it? It seems it is weeping past the seal on the shaft.

                Nope, just cleaned with a cloth, no abrasives were used

                It's coming out through the outer bit. Pretty much where i carved a channel in. Exactly where you told me to fill it and I didn't. I should have listened. I'll fix it

                If you look carefully in the top right, its definitely leaking from there. That's the exact spot

                img_20200606_184955.jpg

                As we would say in SA … Eish! It means something like: "Oh no that is terrible and there is no solution"

                You will have to pull the seal and buy a new one. You cannot reuse an oil seal. You also need to polish the shaft where the lips fit to a mirror finish to ensure that the shaft does not sand away the lips.

                With oil seals there are no short cuts … you need to ensure everything is perfect before installing an oil seal. Please put some of the sealant I recommended on the outside of the new seal and lots of oil on the whole shaft before installing the seal and then the shaft.

                Edited By Herman van der Merwe on 06/06/2020 20:56:23

                Edited By Herman van der Merwe on 06/06/2020 20:56:56

                #478087
                Richard Kirkman 1
                Participant
                  @richardkirkman1

                  I've ordered a new seal, I'll polish it till I can see myself. It'll probably be a week before it arrives.

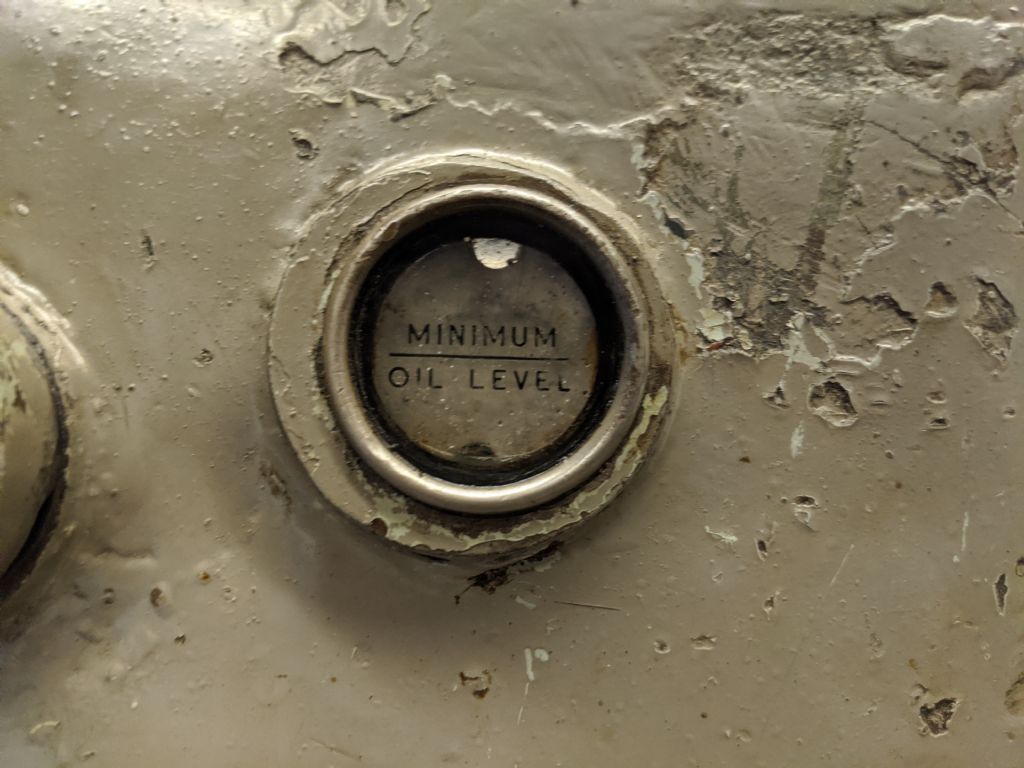
                  The plus side is I'll have to drain the headstock, so I'll be able to try to clean the sight glass!

                  #478488
                  Richard Kirkman 1
                  Participant
                    @richardkirkman1

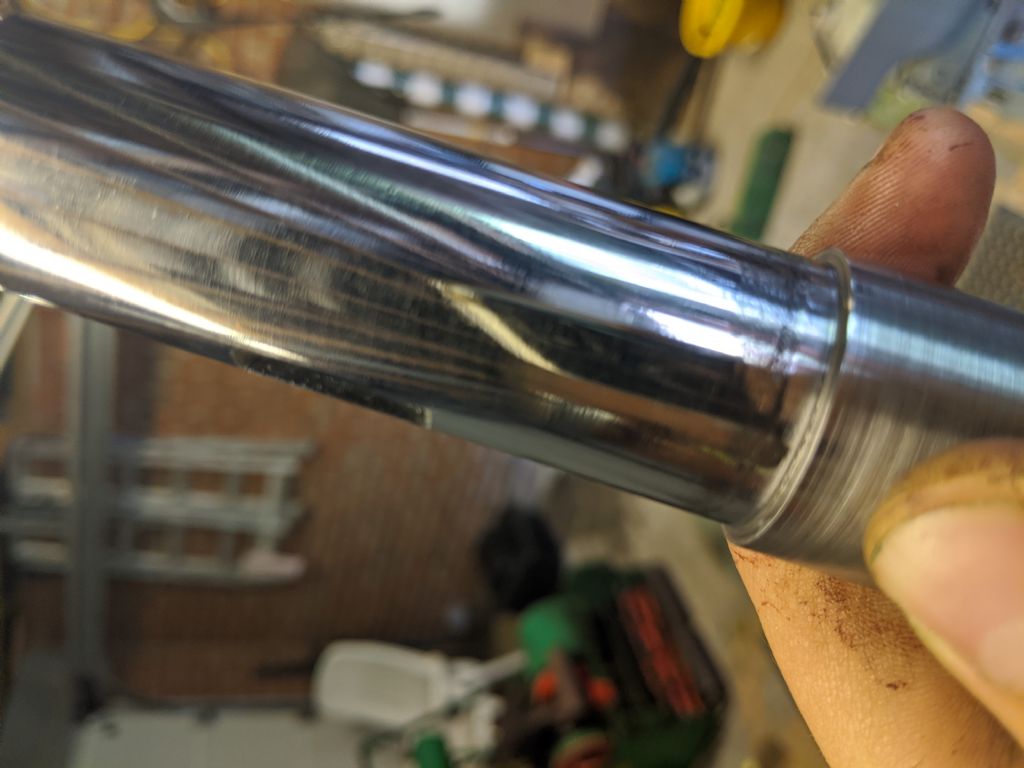
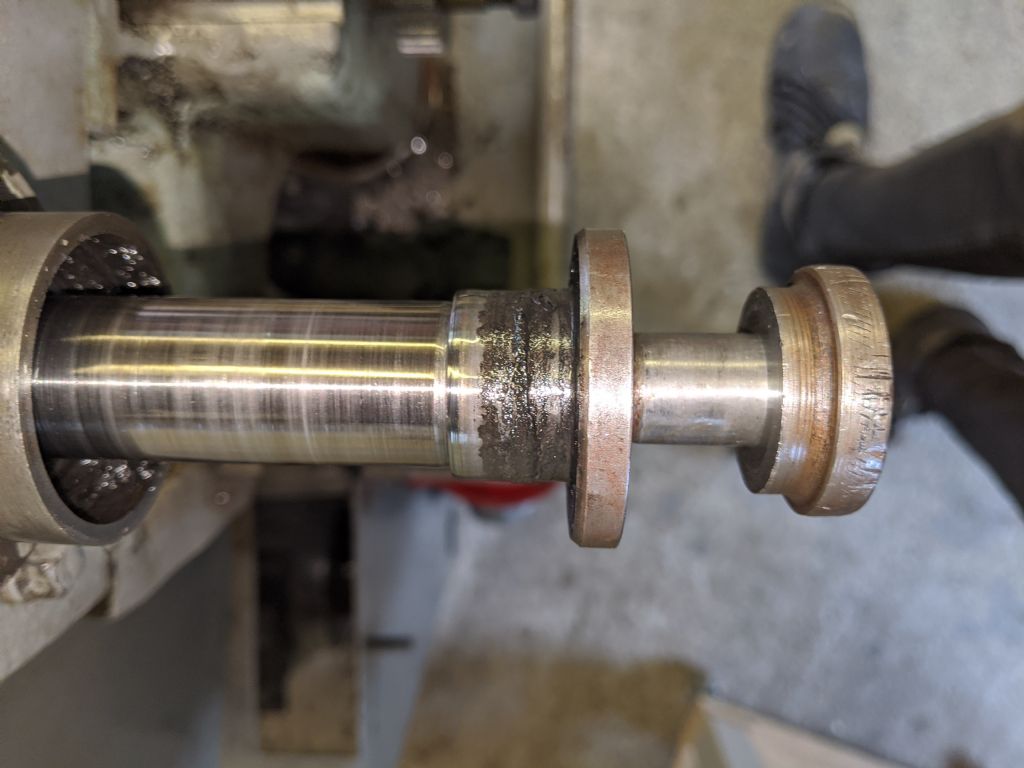
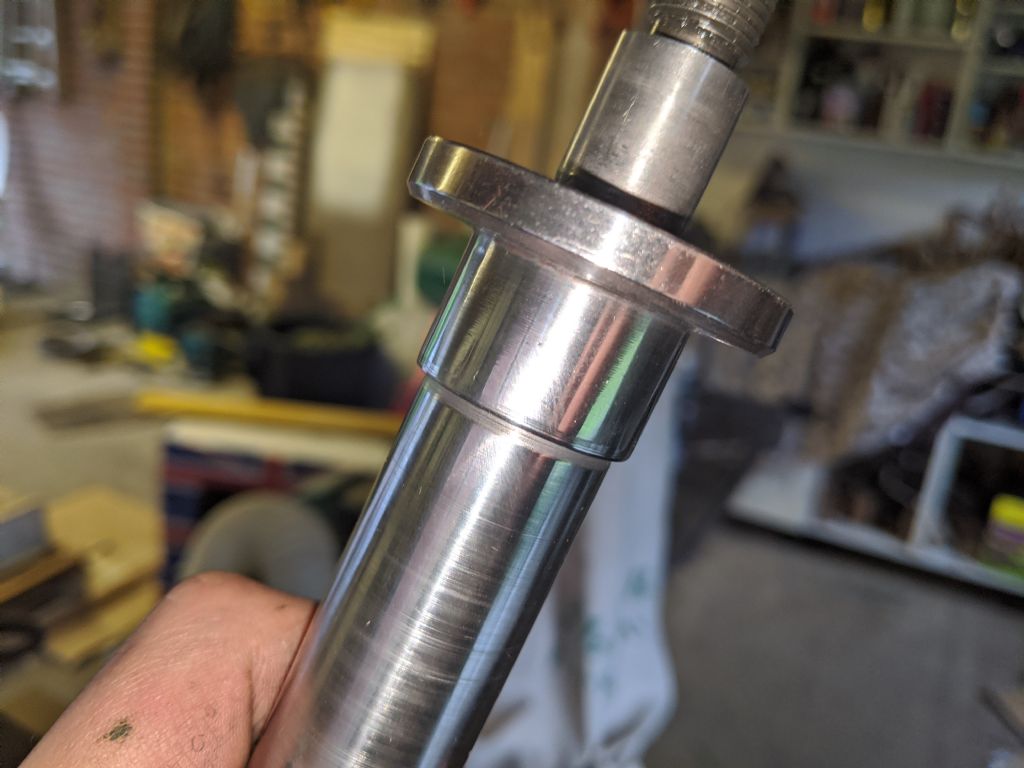
                    Just finished taking the oil seal and shaft back out. Polished the shaft up nicely. It's brighter in person, the camera doesn't quite do it justice.

                    The seal came out quite easily. I would have been tempted to reuse it, but I have ordered another so I'll wait for that. I think it came out so nicely because there was oil in the hole, so it slid easily. Looking in it after you can definitely tell that it leaked through the outside. Although it may have leaked through the shaft as well.

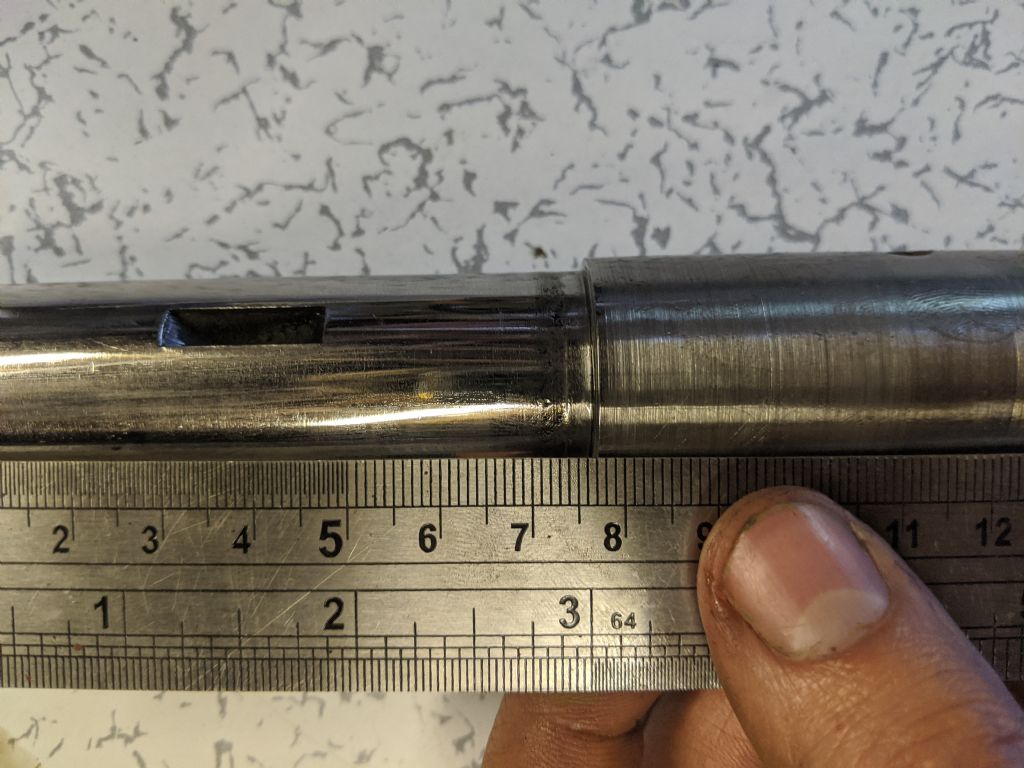
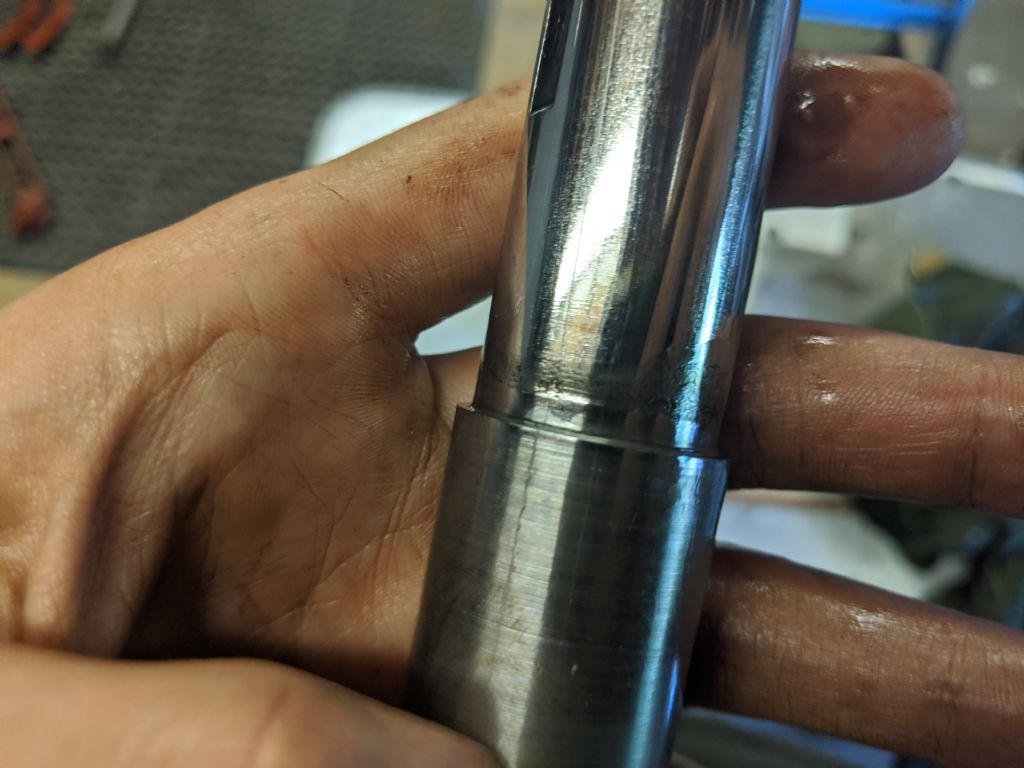
                    The shaft seems to have a little bit of pitting on it, I think it's minor and won't matter, but your thoughts and opinions are welcome as always. It's around where the seal is, so maybe it needs dealing with? I don't particularly know how tight it needs to be.

                    The sight glass definitely needs a good clean, but I can't really get to it without taking the main spindle out. Luckily that's a lot easier for me than it is for Herman! So, I may take the spindle out and give it a go.Undecided yet

                    img_20200608_154940.jpg

                    img_20200608_160134.jpg

                    img_20200608_160515.jpg

                    img_20200608_160535.jpg

                    img_20200608_161122.jpg

                    img_20200608_161345.jpg

                    #478545
                    Howard Lewis
                    Participant
                      @howardlewis46836

                      When you install the new seal, ensure that the lip is away from the track made by the original seal. 1/8" will quite sufficient (That is the advice given by engine manufacturers ).

                      In that way, the new seal will lap itself the shaft, and not running on a worn shaft with loss of lip/shaft intereference and sealing pressure

                      Catch 22 is making a dolly, a few thou smaller in diameter than the seal body, so that you drive on the metal body of the seal to install it. But, for that you need a functioning lathe!.

                      Howard

                      #478549
                      Herman van der Merwe
                      Participant
                        @hermanvandermerwe76509
                        Posted by Howard Lewis on 08/06/2020 20:59:00:

                        When you install the new seal, ensure that the lip is away from the track made by the original seal. 1/8" will quite sufficient (That is the advice given by engine manufacturers ).

                        In that way, the new seal will lap itself the shaft, and not running on a worn shaft with loss of lip/shaft intereference and sealing pressure

                        Catch 22 is making a dolly, a few thou smaller in diameter than the seal body, so that you drive on the metal body of the seal to install it. But, for that you need a functioning lathe!.

                        Howard

                        It is for this reason I recommended that he replace the seal with a double lip seal. Just make sure as @Howard said that the lip does not run on the shaft in the same location as where the old seal lip was. Your shaft is badly eaten away!

                        Your polishing will help drastically! Good job!.

                        Put the RTV silicone around the whole bearing's outer edge and hammer it in. A correctly sized socket works a treat as a dolly. Use acetone or thinners to clean the housing where the seal will fit before installing so as to ensure that the silicone will bond to the metal.

                        Edited By Herman van der Merwe on 08/06/2020 21:05:31

                        #478551
                        Phil Whitley
                        Participant
                          @philwhitley94135

                          I think you mentioned earlier that you replaced the single lip seal with a double lip? If so this would put at least one, and possibly both lips in a slightly different place on the shaft, so the pitting/scoring may not be in the lip area any more! The reason not to reuse seals is that a worn seal will never go back in the same place, and is highly likely to leak, and also the difficulty in getting the seal out without damaging it. You seem to have got this one out intact, and I would say this is a case where you might get away with reusing it, but in general, always fit a new one. Could you get a tin of spray brake cleaner with a long nozzle pipe and spray it into the sight glass, even WD40 might do a decent job of cleaning it. You can buy new sight glasses from Nipple shop (online).

                          Phil

                          #478591
                          Richard Kirkman 1
                          Participant
                            @richardkirkman1

                            Thank you Howard, Herman, and Phil.

                            Some valuable insight there. I hadn't considered that the single to double lip would make a difference, but it does make a lot of sense.

                            I think the pictures make the damage look worse than it really is.

                            As for the sight glass, the body filler won't arrive for potentially another week, so I may as well take the spindle out and have a good go at cleaning the sight glass. I need something that I can squirt in that will break up the thick muck, but I'm not sure what would be best. The filler may also come in handy If I want to fix any casting imperfections when I get around to repainting. Still practicing on the traveling steady, I'm almost happy with the finish.

                            Phil, I don't think I have a local nipple shop anyway. I'll just try to keep these ones

                            I'll try putting some window cleaner in and let it sit for a while. I may have some pipe cleaners I could try as well.

                            Oh dear! Now I've just though, if the spindles out maybe I should try to replace the final gasket too. I've opened a can of worms within a can of worms. Still better than being bored!

                            #478779
                            Richard Kirkman 1
                            Participant
                              @richardkirkman1

                              Fantastic progress today, I'm very satisfied with what I've done

                              I began by moving the lathe away from the wall and starting to remove the main spindle. It must be the 4th or 5th time I've taken it out now, so it was very easy.

                              Side note, Phil and Herman. If you decide to use the nitrile rubber gasket material you should know that it creates a very tight seal, almost sticks the two faces together, so it was a little bit of a struggle to get the parts off. But well worth the effort for it to not leak

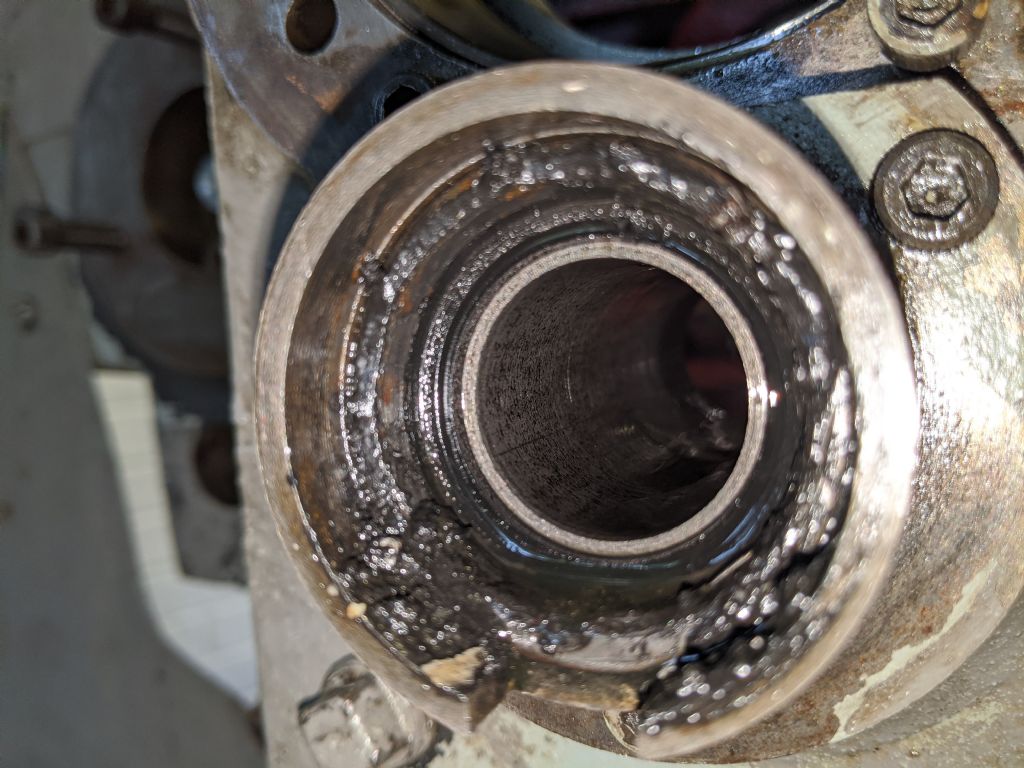
                              Anyway, as I was taking it to pieces I saw the usual leaking spots. It drips out from below here, however, this could also be leaking from the main spindle where the casting is broken. Either way, I need to replace the gasket

                              img_20200609_125759.jpg

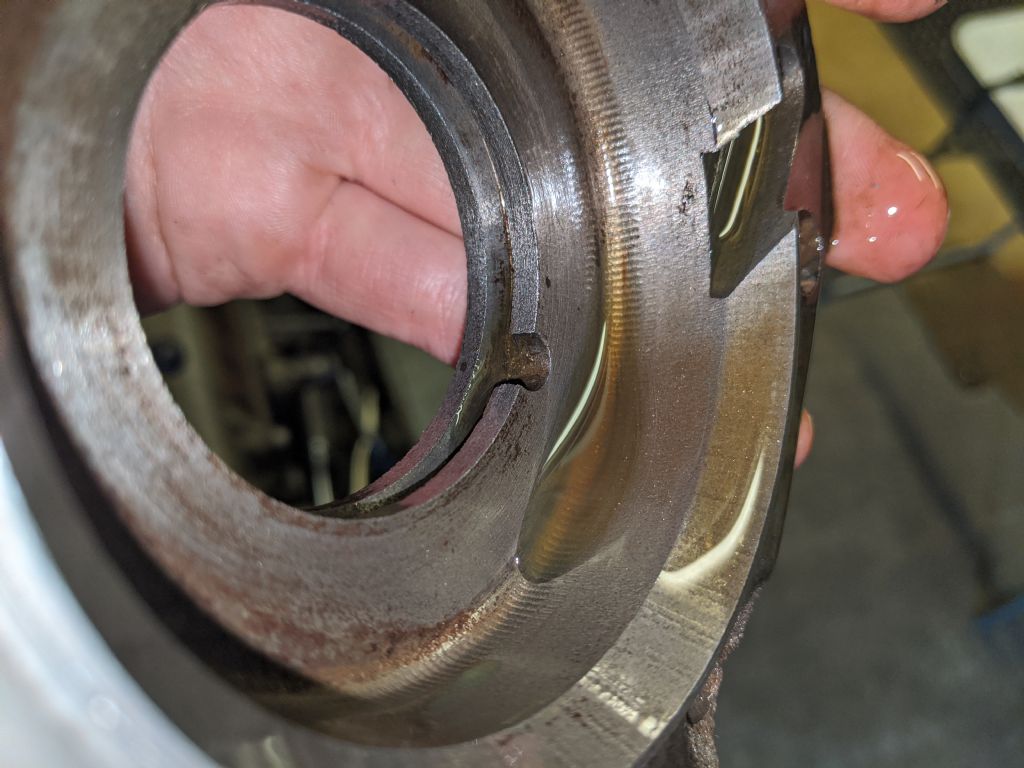
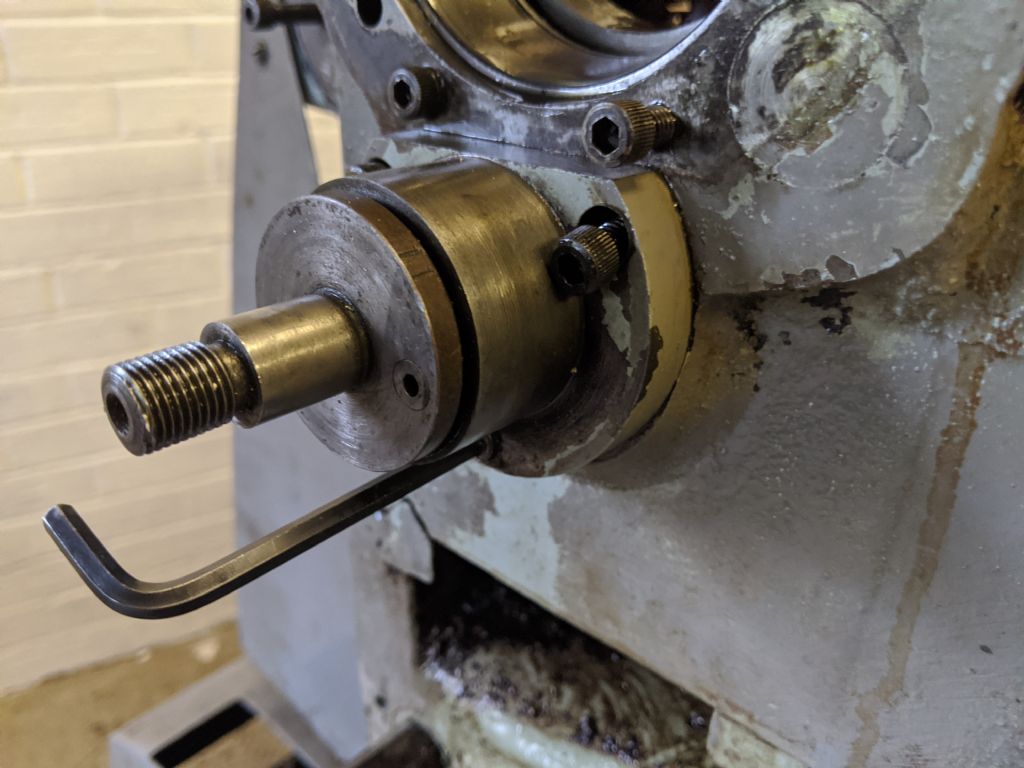
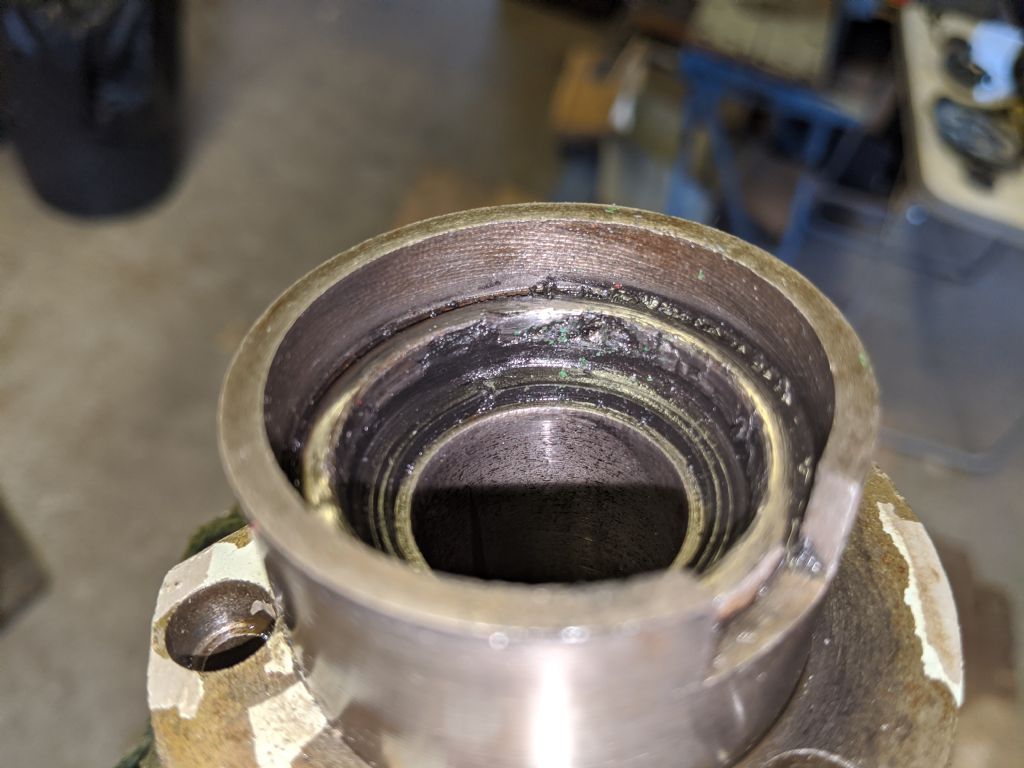
                              Looking at the back bearing cover housing there is definitely space for a ring of some sort to be placed, and there are grooves in the main spindle too. I am sure there must be some sort of seal here too since a little oil leaks out. But I can't find anything in the manual about it. Thoughts???

                              img_20200609_130520.jpg

                              img_20200609_130734.jpg

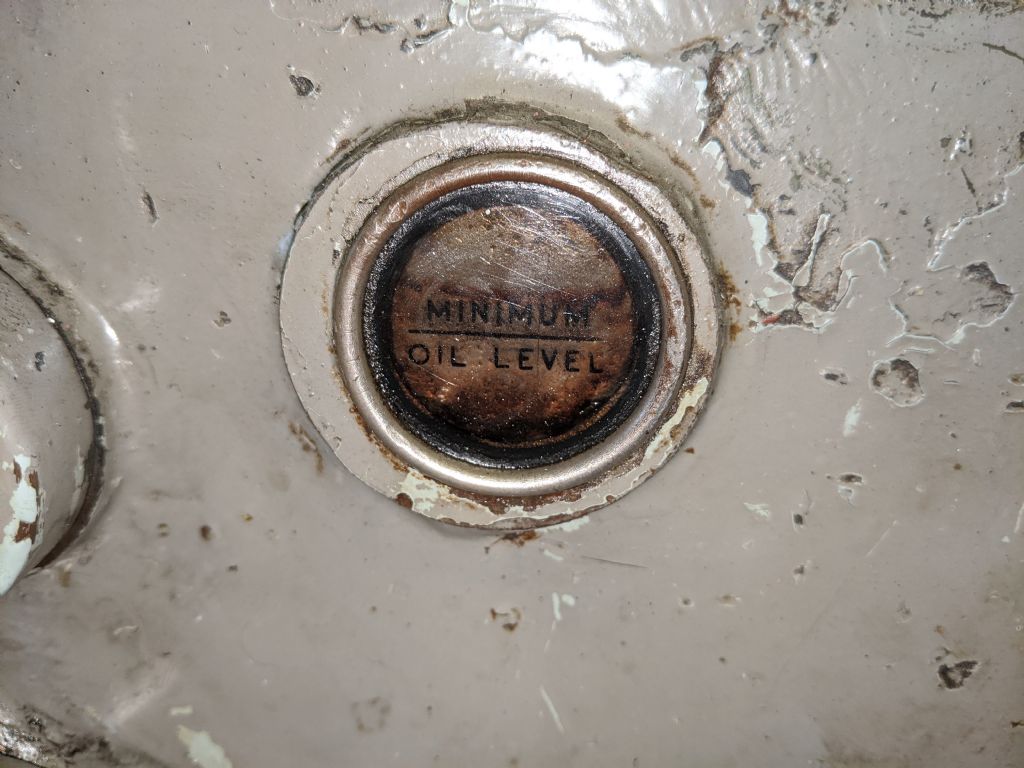
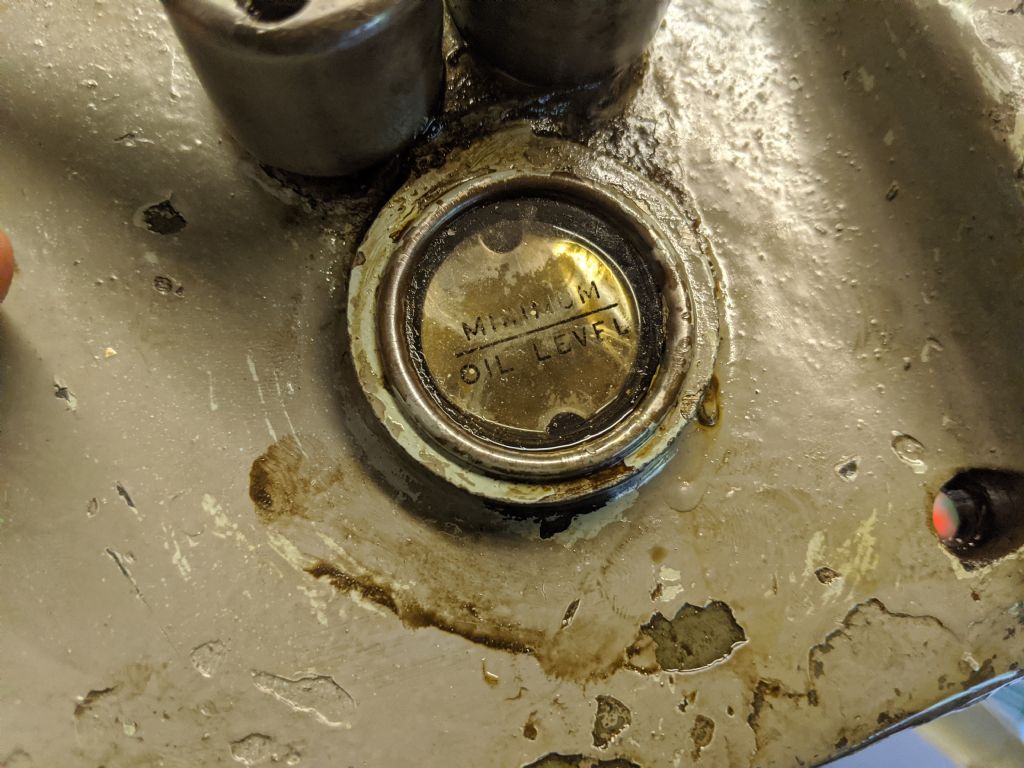
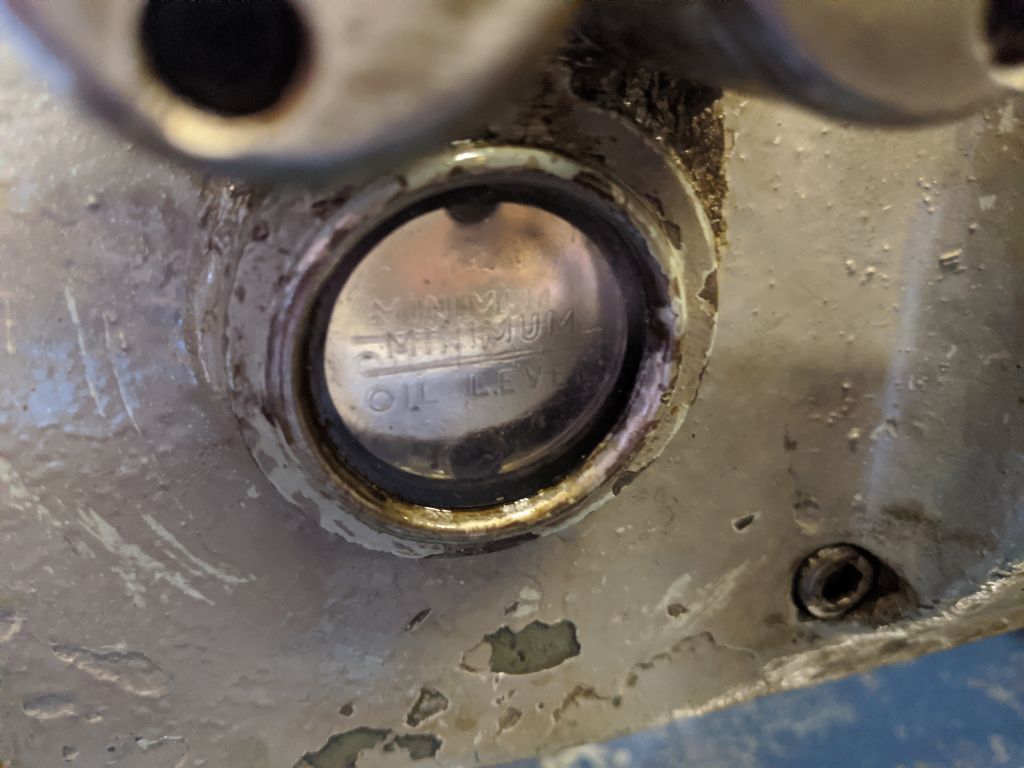
                              Then I proceeded to remove everything else. I blocked the bottom hole of the sight glass with a rag, then I used a pipette to repeatedly fill it with glass cleaner. I managed to find some pipe cleaners in my grandpa's old toolbox so that was a great help. It was tricky, but maneuvering them inside helped to clean it out. I let it sit, then cleaned, then filed it back up and let it sit many times. And I am very pleased with the result. Looking closely it seems like there is a crack on the inside of the glass, or maybe a scratch, but it doesn't go all the way through and I'm not quite sure how it got there, so I'll leave it.

                              img_20200609_161439.jpg

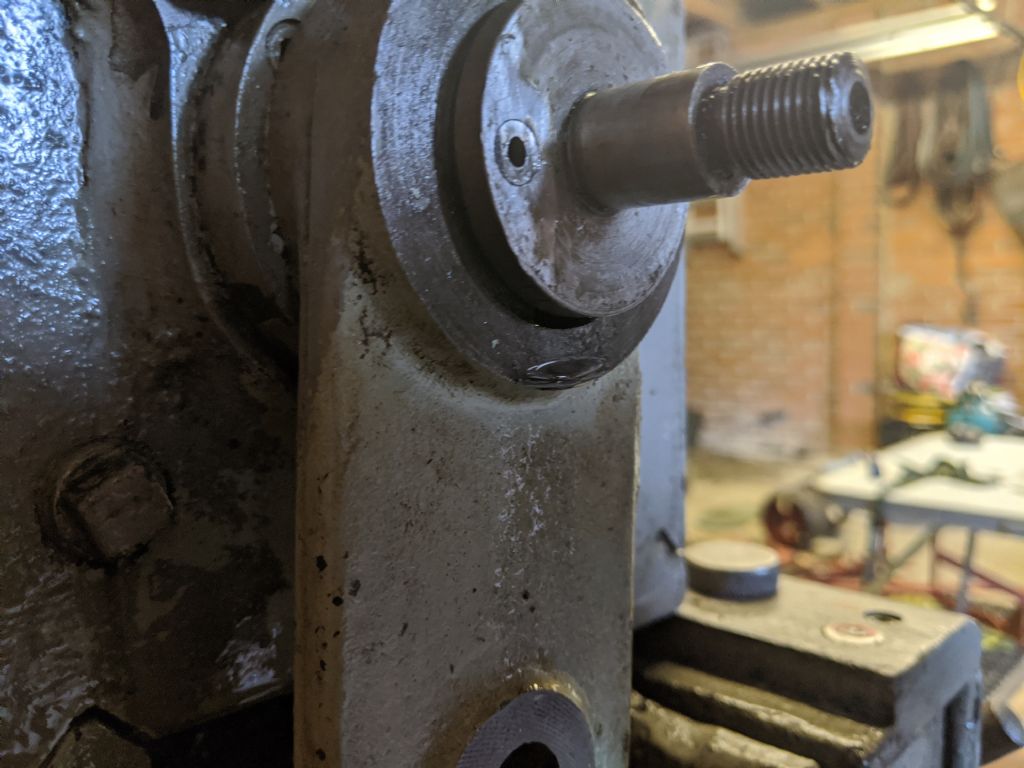
                              Then I moved onto the removal of the forward-reverse spindle. This stopped pretty quickly since its held in by a circlip which I need 90-degree circlip pliers for, but I only have straight ones. So I'm stuck for now, however, I have ordered some. Click and collect from Screwfix so they'll be ready soon I hope.

                              img_20200609_182139.jpg

                              Looking at the manual of the lathe, there is a bearing and an oil seal on this shaft, so I will replace both.

                              This means ordering more parts and waiting a while, so I will take the threading gear box to pieces again and clean the sight glass in there the same way. I'll also take the tumbler arm off again and put that back on properly since after I played with it it has started leaking a little.

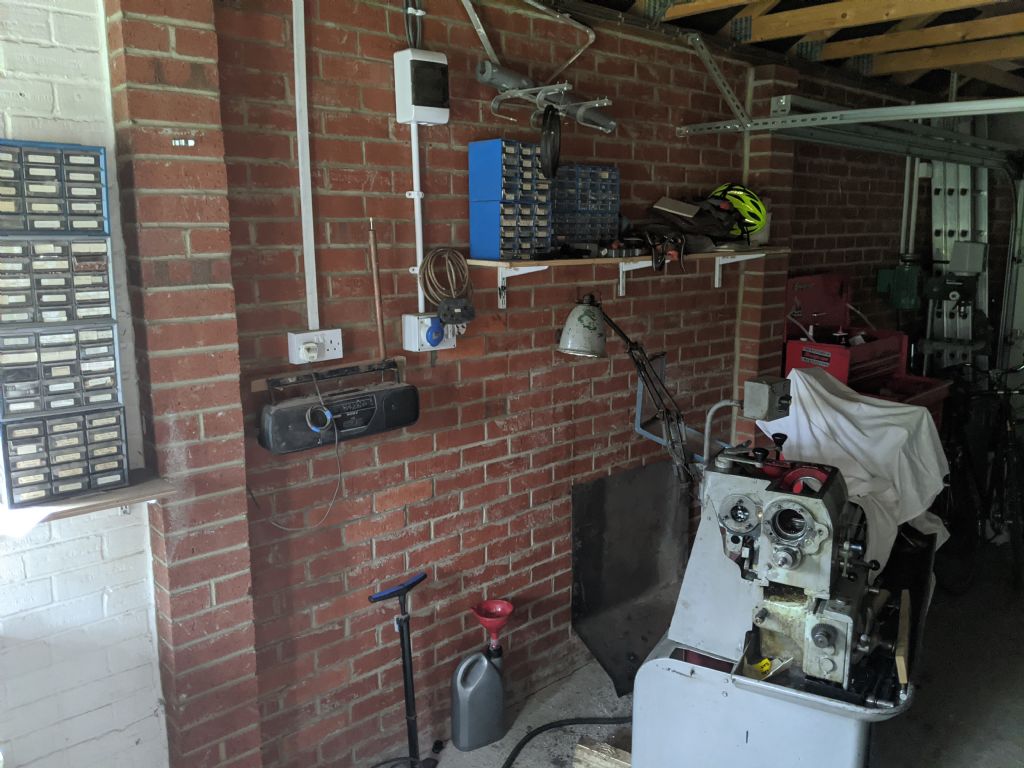
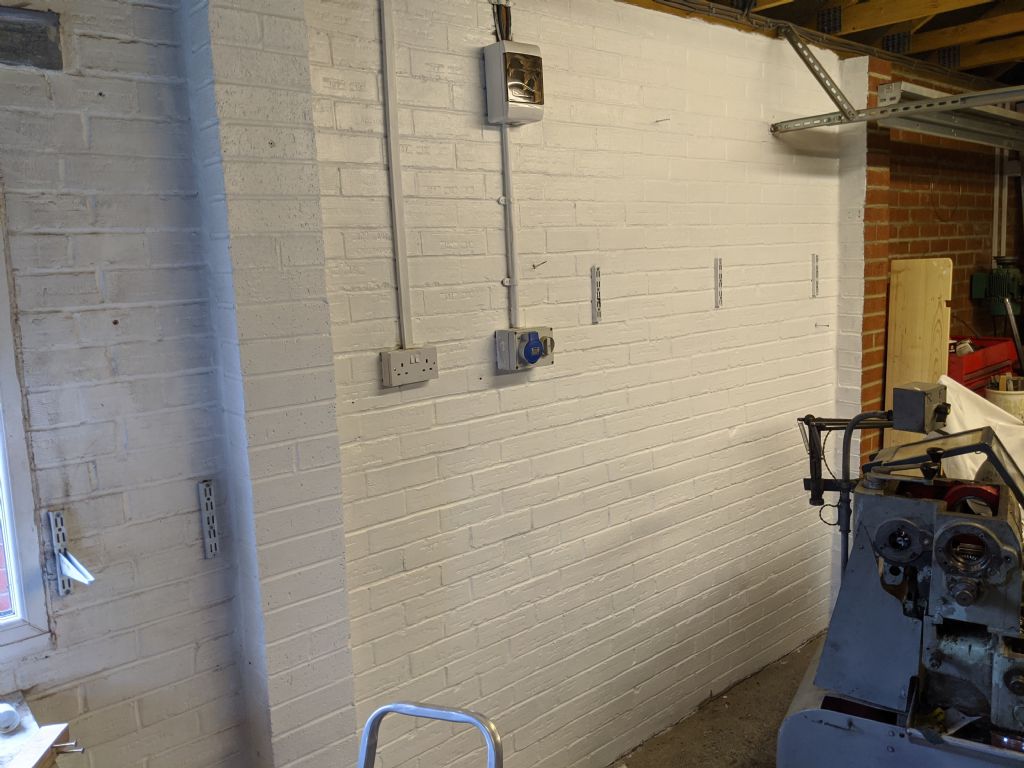
                              While I was waiting between the sight glass marinading I painted the wall behind the lathe white. I'll do a second coat tomorrow, but It's looking a lot brighter. It should make lathe work a bit easier.

                              The threaded hole in the headstock used for mounting the splash guard in my lathe has been used for a chuck guard. I don't tend to use the chuck guard as it just gets in the way, So I'll take it off. I will also try to get the splash guard from Tracys lathe and fit it to mine if possible, but postage may be an issue, and that's if she ever gets back to me!

                              Plenty to do

                              #478781
                              Herman van der Merwe
                              Participant
                                @hermanvandermerwe76509

                                After your polishing exercise I went to look at the condition of my shafts where the oil seals are. Not too bad, but definitely some wear.

                                I measured the depth of the housing and found that while the breadth of the seal is 9,2mm, the recess is more than 13mm. This made me check if I could fit two narrow seals instead of only one. Yep, it was possible.

                                I will replace the two seals with two thinner seals on each shaft.

                                To make my life easier I decided to sit down today and compile a spreadsheet of each bearing, oil seal, O-ring and circlip on my lathe.

                                Here are the details of the two oil seals in the headstock.

                                Edited By Herman van der Merwe on 09/06/2020 21:50:12

                                #478816
                                Herman van der Merwe
                                Participant
                                  @hermanvandermerwe76509
                                  Posted by Richard Kirkman 1 on 09/06/2020 21:27:27:

                                  Anyway, as I was taking it to pieces I saw the usual leaking spots. It drips out from below here, however, this could also be leaking from the main spindle where the casting is broken. Either way, I need to replace the gasket

                                  img_20200609_125759.jpg

                                  Looking at the back bearing cover housing there is definitely space for a ring of some sort to be placed, and there are grooves in the main spindle too. I am sure there must be some sort of seal here too since a little oil leaks out. But I can't find anything in the manual about it. Thoughts???

                                  img_20200609_182139.jpg

                                  Looking at the manual of the lathe, there is a bearing and an oil seal on this shaft, so I will replace both.

                                  I would definitely fix the casting. You need even pressure on the flange to get a good seal. You can either braze it or use metal epoxy. Me? I would use metal epoxy as these days the resulting material is better than the old steels.

                                  Yes, the second seal I mentioned is inside this bearing. There is no bearing. The cast iron flanged unit is the bearing.

                                  Good work on the sight glass!

                                  #478849
                                  Herman van der Merwe
                                  Participant
                                    @hermanvandermerwe76509

                                    There should be no seals in the back bearing cap. Notice the notch in the lip? That is the return slot for oil to flow back into the bearing. Basically the oil is spun around in the cap, gets caught by the grooves and drips back into the bearing. Some shafts I dealt with had what is something like normal felt (real wool) cut into a strip and with ends located over the notch. You can try this if there is a lot of oil running from between the spindle and the cap.

                                    #478869
                                    Richard Kirkman 1
                                    Participant
                                      @richardkirkman1
                                      Posted by Herman van der Merwe on 10/06/2020 08:19:46:

                                      I would definitely fix the casting. You need even pressure on the flange to get a good seal. You can either braze it or use metal epoxy. Me? I would use metal epoxy as these days the resulting material is better than the old steels.

                                      Yes, the second seal I mentioned is inside this bearing. There is no bearing. The cast iron flanged unit is the bearing.

                                      Good work on the sight glass!

                                      Thanks, Herman

                                      I should be eventually getting a replacement flange, so I haven't bothered with trying to fix it. I'm not sure epoxy would be strong enough since the countersunk head has been pulled through, so it would need to be strong. Hopefully, I'll get the part.

                                      Your explanation about the spinning oil grove makes a lot of sense so thank you again.

                                      The circlip pliers are not going to be here today, so my dad borrowed some from work, hopefully, I'll be able to make them work. Only time will tell

                                      Edited By Richard Kirkman 1 on 10/06/2020 10:49:20

                                      #478899
                                      Richard Kirkman 1
                                      Participant
                                        @richardkirkman1

                                        Unfortunately, the circlip pliers didn't fit so I'll have to wait.

                                        Meanwhile, the threading gearbox sight glass leaned up very well, although the paint from the words disappeared.

                                        As you can see, it was cleaner than the headstock one, but now they're both fully clear. Or at least as clean as I want to get them.

                                        img_20200610_112325.jpg

                                        img_20200610_130650.jpg

                                        Then I did a second coat of paint on the wall. The wall now reflects the light much better, and it's the wall that the lathe sits against, so it's a big improvement. I can't have a white backsplash like Phil, so i'll make do with a white wall!

                                        Now we're just back to waiting for parts to arrive…

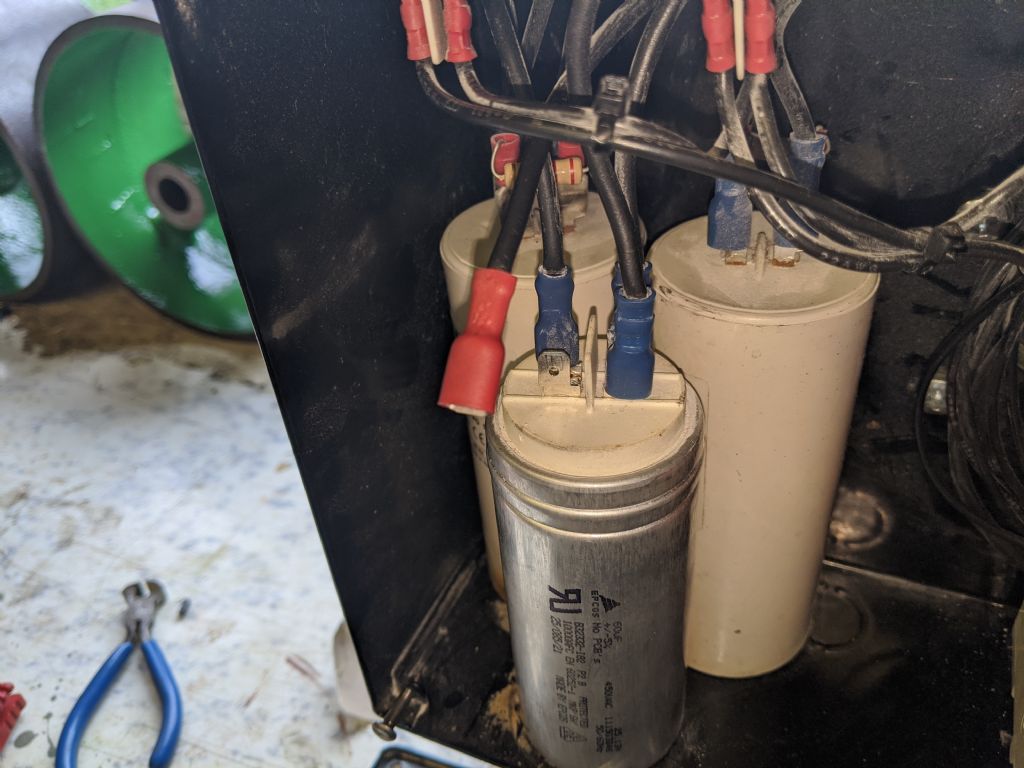
                                        The caps are past their delivery date, so I expect them any day now. As is the toggle switch. I have the new spade connectors but I'll wait till the wall has dried so I can tidy everything up

                                        img_20200609_133144.jpg

                                        img_20200610_132147.jpg

                                        #479199
                                        Richard Kirkman 1
                                        Participant
                                          @richardkirkman1

                                          Another productive day!

                                          Firstly, I decided to replace the spade connector, which went okay. Nothing new, just strip and crimp. Caps will be replaced as soon as they arrive. Don't know when that will be. It seems to me that we only get post once a week these days.

                                          img_20200611_124743.jpg

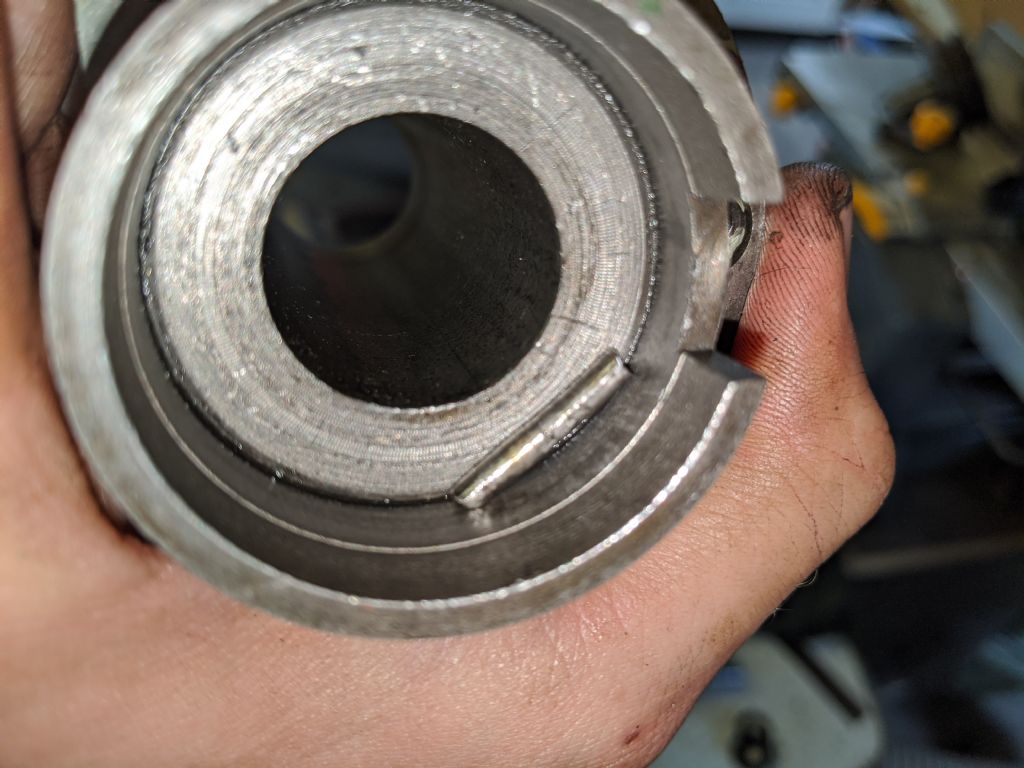
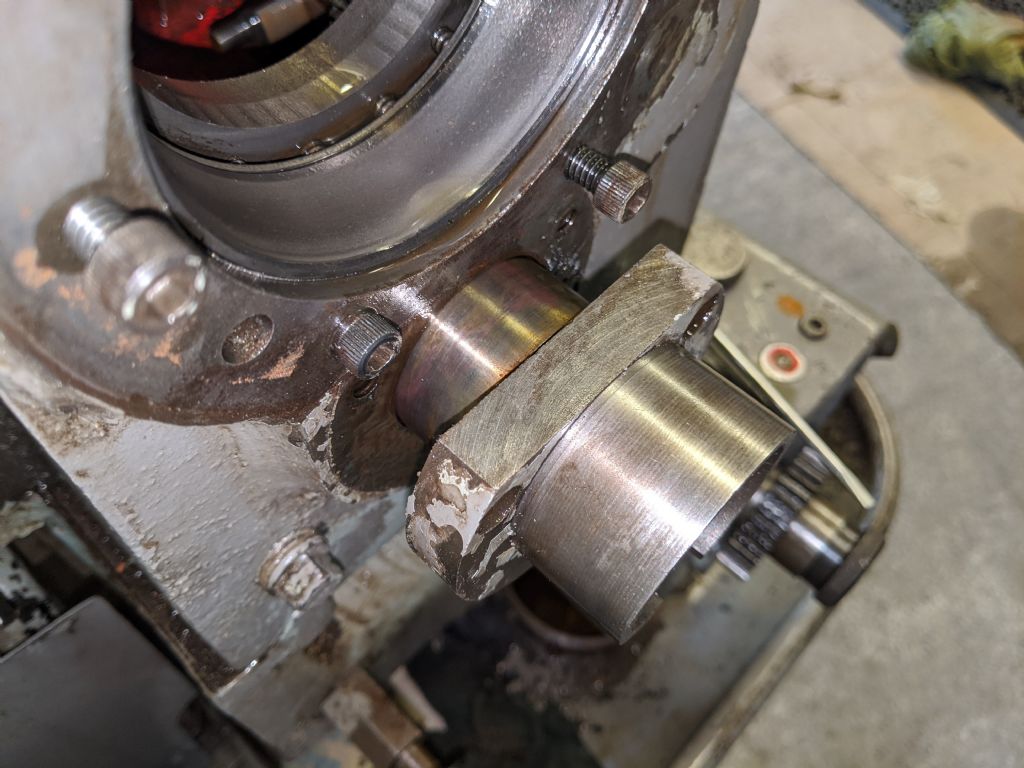
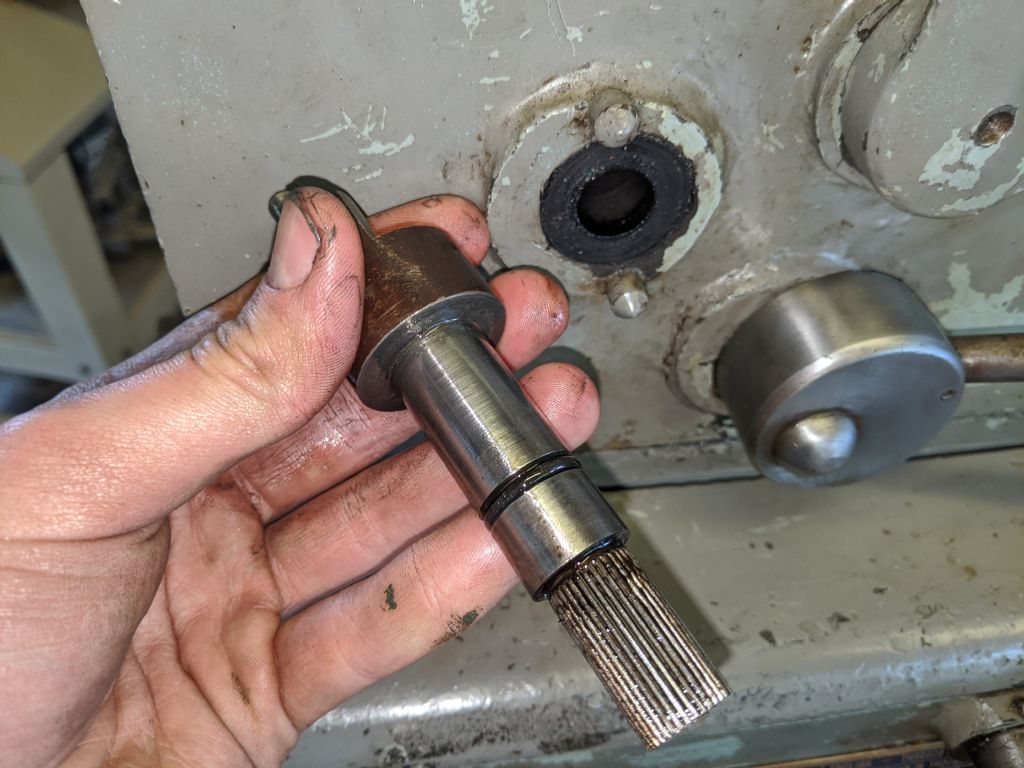
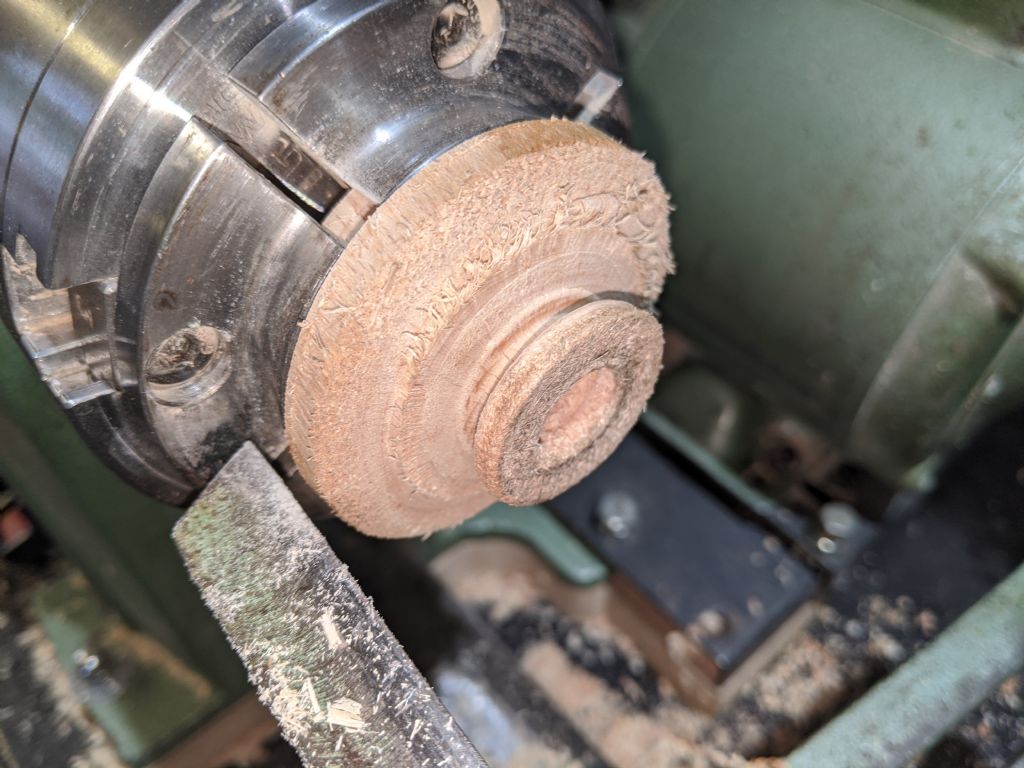
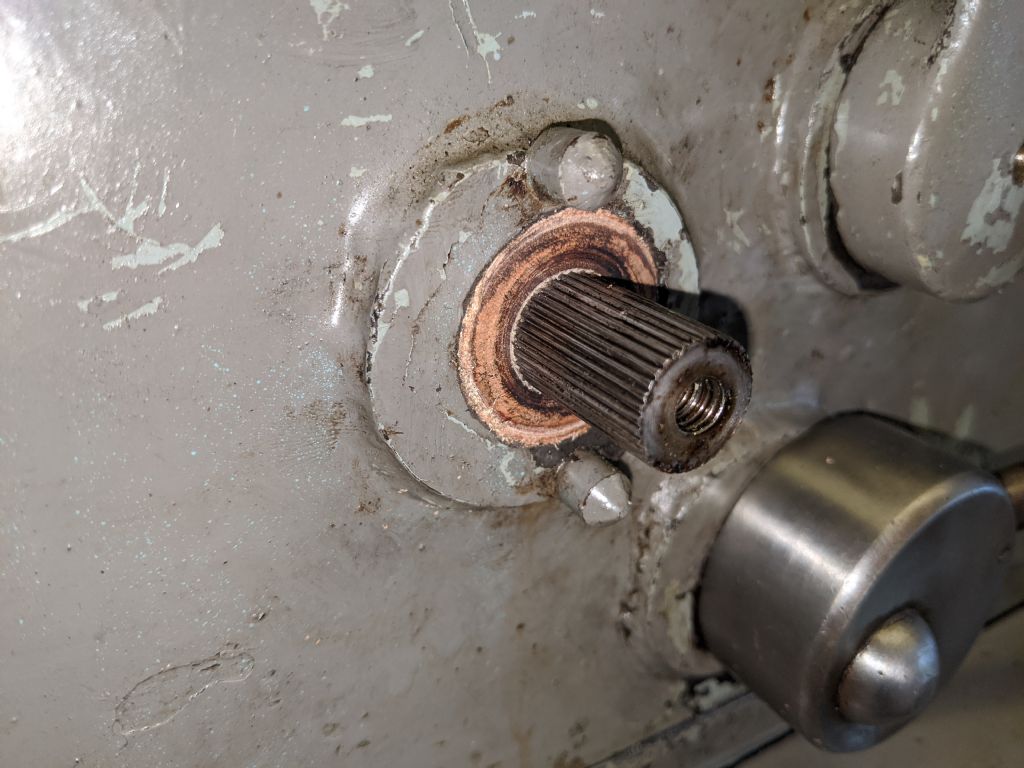
                                          Then I went and picked up the circlip pliers. The circlip wasn't easy to remove, but I managed eventually. Then the shaft just slid out quite nicely.

                                          img_20200611_142404.jpg

                                          img_20200611_142617.jpg

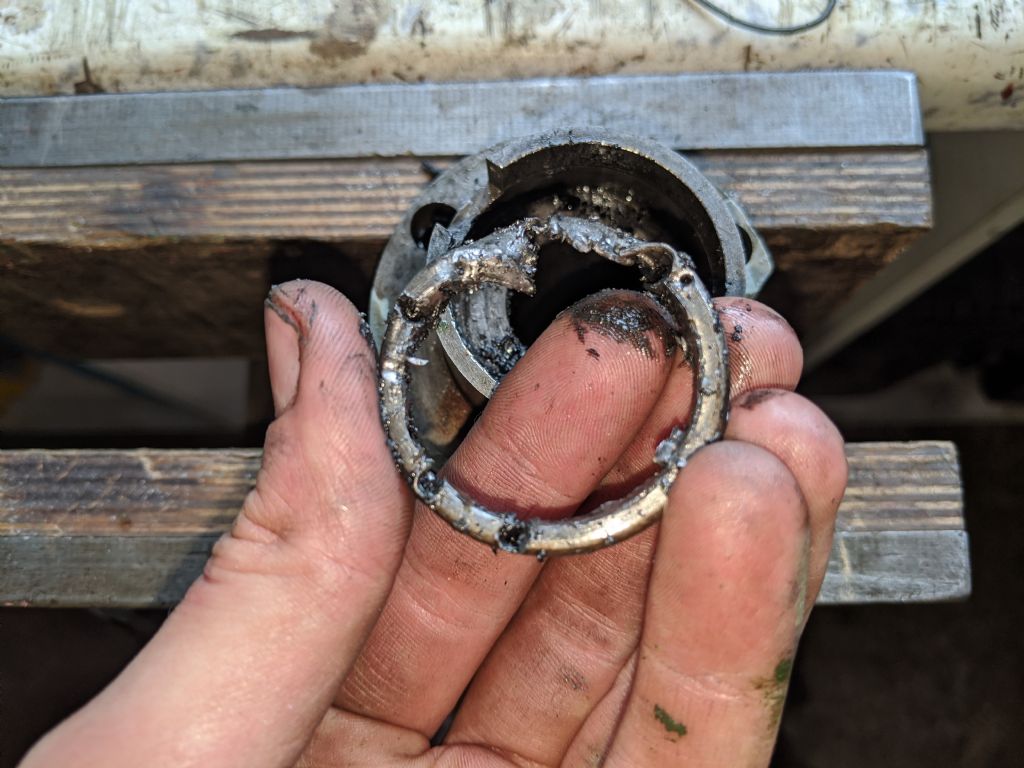
                                          Pretty messy inside. Initially when I took this to pieces last time, I tried to clean up the inside of this through the slot at the bottom. i found some pins inside and I had no idea where they came from. Thinking about this more today, 3 months later, They must have been spare shear pins, but why on earth would they have been stuck up there with loads of gunk? Judging by the quality of the seal it can't have done it any good.

                                          That's the pin I found in the pic below. But after I removed out the old seal.

                                          img_20200611_161249.jpg

                                          I managed to get the seal out without cutting into the shaft this time. I just drilled it and punched it till it came out. Quite easy

                                          img_20200611_143156.jpg

                                          img_20200611_150132.jpg

                                          Then the img_20200611_143009.jpg

                                          The shaft came out quite easily but there was no sign of a gasket. Every other place has had a gasket in, but this one doesn't. It wasn't leaking, but I've made a gasket anyway, It can't harm.

                                          img_20200611_151429.jpg

                                          img_20200611_152702.jpg

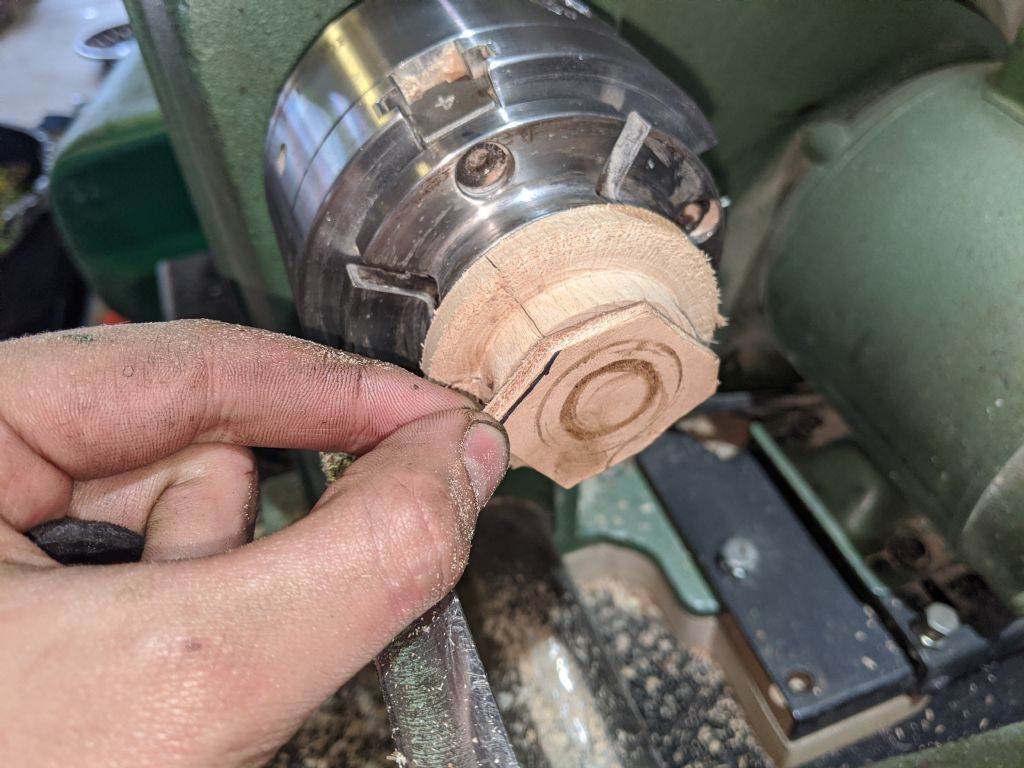
                                          Since I had access, I removed the forward reverse lever. It wasn't leaking but I thought i'd replace the leather gasket since I can't harm and I can make one tighter.

                                          img_20200611_153949.jpg

                                          Same as the last one, Glued to a bit of wood, then turned by hand

                                          img_20200611_155757.jpg

                                          img_20200611_160346.jpg

                                          It fits really nicely, much tighter than the last.

                                          img_20200611_171911.jpg

                                          Then I polished the shaft where the new oil seal is going to go.

                                          I measured it to be 1 1/16 inside, 1 5/8 outside, 5/16ths thick so a new one that size has been ordered. Exactly the size you said Herman!

                                          I would have loved to submit a picture for the cover, but my lathe isn't exactly in pieces to take a picture of, or painted nicely!

                                          Back to waiting for parts to arrive. So I'm making some drawers and working on the lawnmower

                                          #479203
                                          Herman van der Merwe
                                          Participant
                                            @hermanvandermerwe76509

                                            Great job @Richard!

                                            Your shear pins surely are a lot smaller than the ones on my lathe. Would you mind measuring the diameter for me?

                                            Next time when you move a seal over a splined shaft (or vice versa) wrap some insulation tape over the splines to protect the seal's inner face. As you move the seal over the uncovered splines, these will cut small slots ruining the seal's inner sealing surface.

                                            #479204
                                            Herman van der Merwe
                                            Participant
                                              @hermanvandermerwe76509

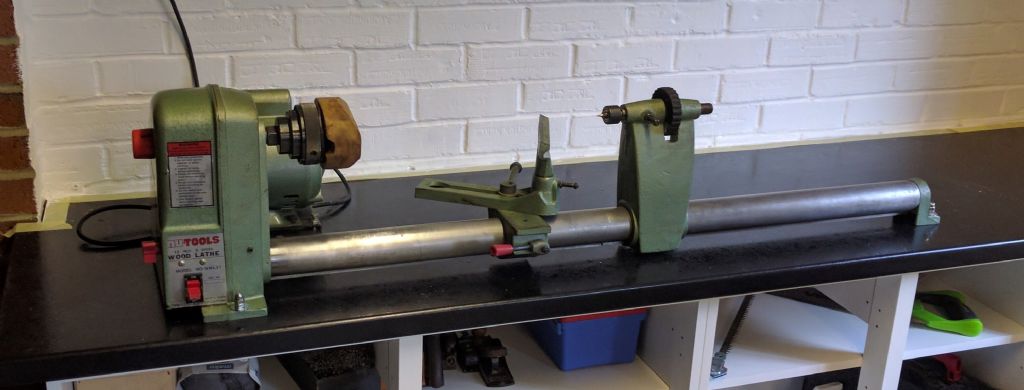
                                              BTW what make and model is the small green lathe?

                                              #479209
                                              Richard Kirkman 1
                                              Participant
                                                @richardkirkman1

                                                The shear pin seems to have a collar that it fits into, possibly of some harder steel so the rest of the shaft can be made softer. I'll measure what's there tomorrow. I still don't know why there would have been a shear pin lodged in there.

                                                The leather seal I made was such a tight fit it would not have gone on if I had put tape on it. It doesn't matter too much since it's unlikely to leak anyway as there is an O-ring on the shaft too.

                                                It's just a really cheap wood lathe. I've been turning wood almost 4 years now, mainly wooden bowls. The brand is nutool.

                                                img_20161015_163759.jpg

                                                #479212
                                                Herman van der Merwe
                                                Participant
                                                  @hermanvandermerwe76509

                                                  Please measure the shear pin setup with some photos. Mine is obviously missing the sleeve then!

                                                  O-ring on the reverse shaft? Photo please.

                                                  #479214
                                                  Herman van der Merwe
                                                  Participant
                                                    @hermanvandermerwe76509
                                                    Posted by Richard Kirkman 1 on 11/06/2020 21:59:40:

                                                    It's just a really cheap wood lathe. I've been turning wood almost 4 years now, mainly wooden bowls. The brand is nutool.

                                                    img_20161015_163759.jpg

                                                    You know, I was wondering today what I can use to turn the leather washers with. I clean forgot I have a wood turning lathe! It is disassembled at the moment so I am not using it. Will get it going tomorrow.

                                                    #479215
                                                    Richard Kirkman 1
                                                    Participant
                                                      @richardkirkman1

                                                      I'll take lots of pictures tomorrow

                                                      The O ring is on the lever shaft. It seals fine so I'm not going to bother to replace it

                                                      img_20200611_152702.jpg

                                                    Viewing 25 posts - 501 through 525 (of 797 total)
                                                    • Please log in to reply to this topic. Registering is free and easy using the links on the menu at the top of this page.

                                                    Advert

                                                    Latest Replies

                                                    Viewing 25 topics - 1 through 25 (of 25 total)
                                                    Viewing 25 topics - 1 through 25 (of 25 total)

                                                    View full reply list.

                                                    Advert

                                                    Newsletter Sign-up