What Did You Do Today 2020

Advert

What Did You Do Today 2020

Home Forums The Tea Room What Did You Do Today 2020

Viewing 25 posts - 276 through 300 (of 636 total)
  • Author
    Posts
  • #471554
    Nigel Graham 2
    Participant
      @nigelgraham2

      Firstly, very efficient service from CuP Alloys – I made use of their should-be-at-Doncaster offer elsewhere on this site, and the goods I ordered last Wednesday or Thursday, just before the Bank Holiday, arrived yesterday.

      So big Thank-you to them!

      The delivery driver knocked on the door but didn't take a signature, just a photo of the carton on my doorstep, with me standing behind it.

      '

      Today:

      First, walked into town and back – about 2 miles each way – returning loaded with two back-packs and a carrier-bag in which was a Pyrocantha (Fire-thorn) sometimes jabbing my leg with a stray thorn.

      The walk was eased by an old railway route now an asphalted cycle-track and footpath, cutting off a large corner formed by the main roads and reducing the climbing over an intervening ridge – the railway cut through it.

      Planted the fire-thorn with a view to training it eventually along the boundary wall for added security, along with a dog-rose I had rescued from growing through points on a small museum's narrow-gauge railway.

      This took some thinking. I did not want it to obstruct the side-gate, or more particularly, obstruct moving the model steam-lorry through the gate, so I wheeled the vehicle to the gate, and moved the shrub still in its pot, around to find the best position also to not take up too much lawn, shadow existing plants, or be in the wall's rain-shadow. I bet Gardener's Question Time doesn't have many questions about spikey bushes in the way of miniature steam-wagons.

      .

      Then completed all but a few details on the workshop's travelling-hoist cross-beam, by welding two assemblies each consisting of 4 pieces of square-section steel tube. I took advantage of the long evenings and cold wind driving the neighbours indoors, so not disturbing anyone with bursts of angle-grinding outside the workshop.

      "Welding"… LOL! Throwing molten steel at the joints on the 1-in-50 occasions I could create and maintain an arc.

      I use welding as little as possible, and only to take light loads and where appearance doesn't matter. These are the only welded components on the frame, and most of their stresses will be taken by bolts.

      16 joints each one-inch long, in 3mm wall square tube. I estimated the yield of rod – i.e. length of electrode used to length that became a functional part of the structure – about 10 to 1, in making enough welded and re-welded bridges of fused steel between gaps and slag, to hold the parts sufficiently.

      That's why I usually avoid welding – making lovely, tidy, cohesive, slag-free, full-depth weld beads the full joint length in one pass from a single strike is a hermetic art, like playing the piano to Rachmaninov concerto standard, or unravelling the dark mysteries of the mathematical matrix.

      Steady hands helps too, and mine never were, but even guiding the electrode over a (gloved) finger didn't help much.

      Flattened a curve or two (or 16) – of lumps of steel and slag – and squared everything away for the evening. Just some minor turning, then the frame can be dismantled, cleaned and painted; then erected. Phew! Only I will have to find suitable supplies of fastenings, a bit tricky at present. Might have to be by mail-order..

      A sign of how dry the weather has been, even at night, is that despite leaving the frame outside on a few nights, there are only light traces of rust on sawn and drilled surfaces. They won't harm it, and it will soon clean off.

      Advert
      #471594
      Danny M2Z
      Participant
        @dannym2z

        Stripped, cleaned and lubed my fishing reels.

        Re-spooled a few with new Japanese J-Braid X8 as it has a good reputation locally J-Braid X8

        Rigged up a clip for my drone so I can fly the tackle much further than my casting abilities.

        Yep – Yesterday the Vic. Govt. permitted fishing and after nearly 3 months of lockdown I can get some fresh air and excercise at last.

        During lockdown I have literally made hundreds of flies and lures so now I can see if any work as planned.

        * Danny M *

        #471705
        John Hinkley
        Participant
          @johnhinkley26699

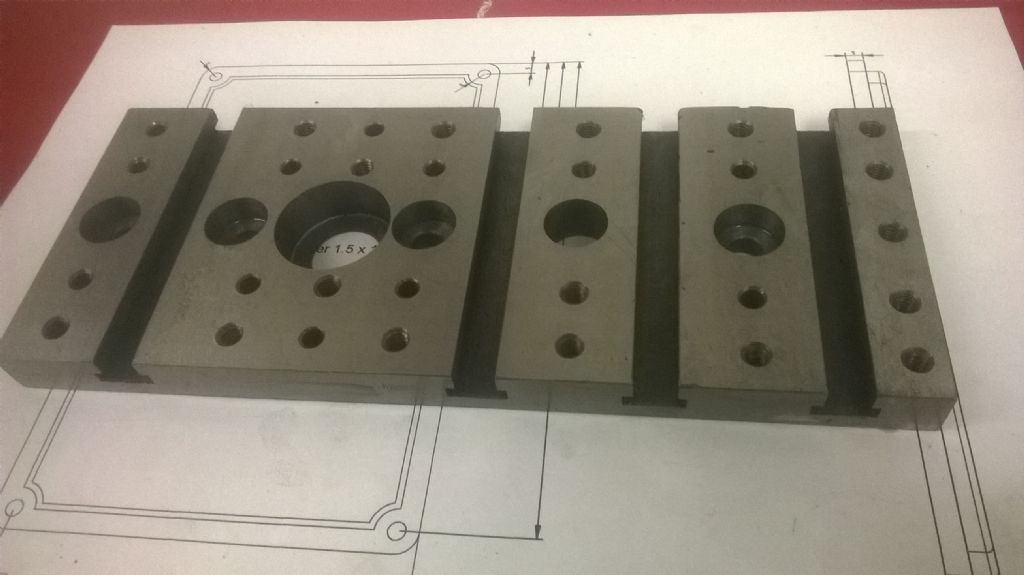
          Finished the mill pallet that I started a couple of days ago, shown above. Tapped a number of the holes and left others plain for dowel pins. Recessed holes along the centreline drilled out to 8mmØ in case I need to bolt directly to the mill table. Quite pleased that I've made something potentially useful from what was, essentially, a scrap part.

          Finished pallet

          John

          #472047
          Nigel Graham 2
          Participant
            @nigelgraham2

            Discovered the waste under the kitchen sink was leaking. It has a short, horizontal stub probably intended for a washing-machine drain, but someone had plugged it with a plastic union nut that fitted properly, vaguely holding a "borrowed" rubber bung that fitted not properly at all!

            While searching for plastic rod from which to turn a bung to fit, I found a box of electrical grommets whose largest blind type fitted exactly. Clipped it in, screwed on the union nut, reassembled and tested…. Job done!

            I did wash the pipe fittings thoroughly to make the task more pleasant, taking no comfort from thinking that my mate Pete gets paid for being involved with waste-pipe gunge, as he's a self-employed plumber!

            +++

            That done, carried on with painting the workshop hoist parts and searching my fastenings collection for the bolts and screws for finish-fits. Also realised a planned modification, a simple turning task, was not needed after all.

            I've now to obtain the correct length bolts and suitable top-coat paint, then the thing can be erected and I can resume working on the steam-wagon.

            #472173
            Neil Wyatt
            Moderator
              @neilwyatt
              Posted by Journeyman on 09/05/2020 16:52:57:

              Today I've mostly been painting the workshop with some red jollop.

              Fast Show fan?

              Neil

              #472293
              Nicholas Farr
              Participant
                @nicholasfarr14254
                Posted by Iain Downs on 11/05/2020 17:09:30:

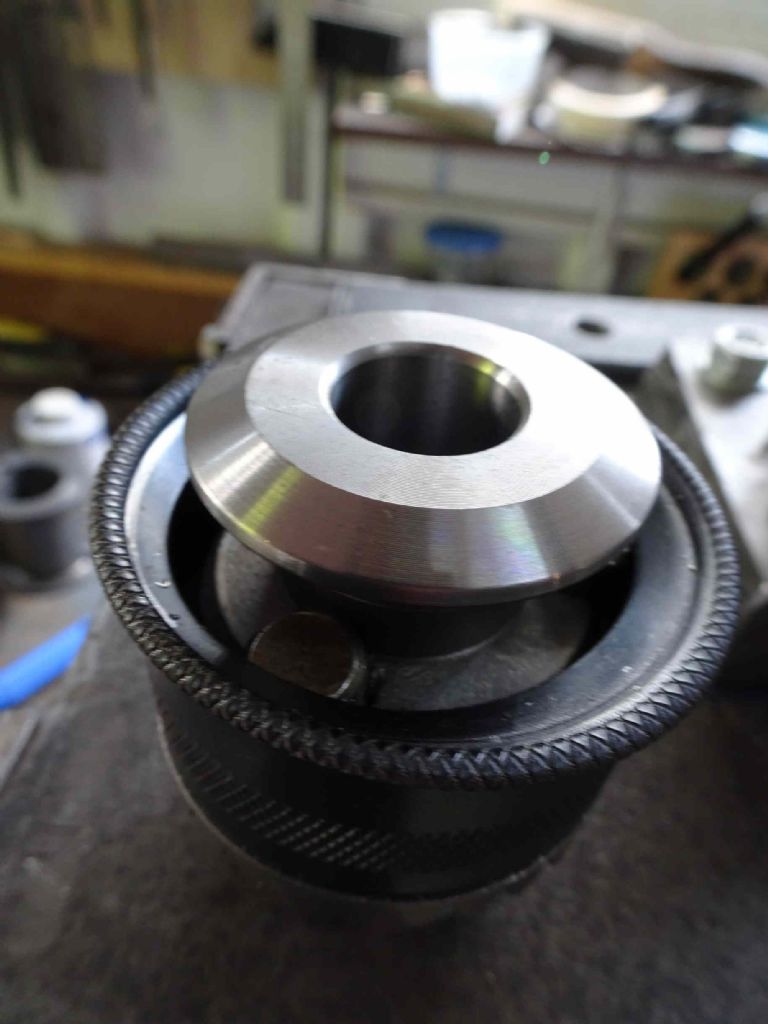
                Some of you may have noticed me moaning about the drill chuck that came with my milling machine. I've been hathering about what to do, but today I decided to follow some instructions on the internet and disassemble it to see if there is grit or similar.

                First I turned a pusher with a 39mm inside diameter (using new uncoated aluminium carbide. still trying to work out the best way of using them).


                In fact I needed to clamp the press to the bench. it was very tight.

                Sadly, the outcome was not what I expected

                check pressed.jpg

                What the internet says is that this cover pushes off to reveal the cracked ring. Hmm – we wary of the Internet!

                I expect that cheap Chinese chucks just aren't made the way that real Jacobs chucks are.

                A replacement is on the way!

                Iain

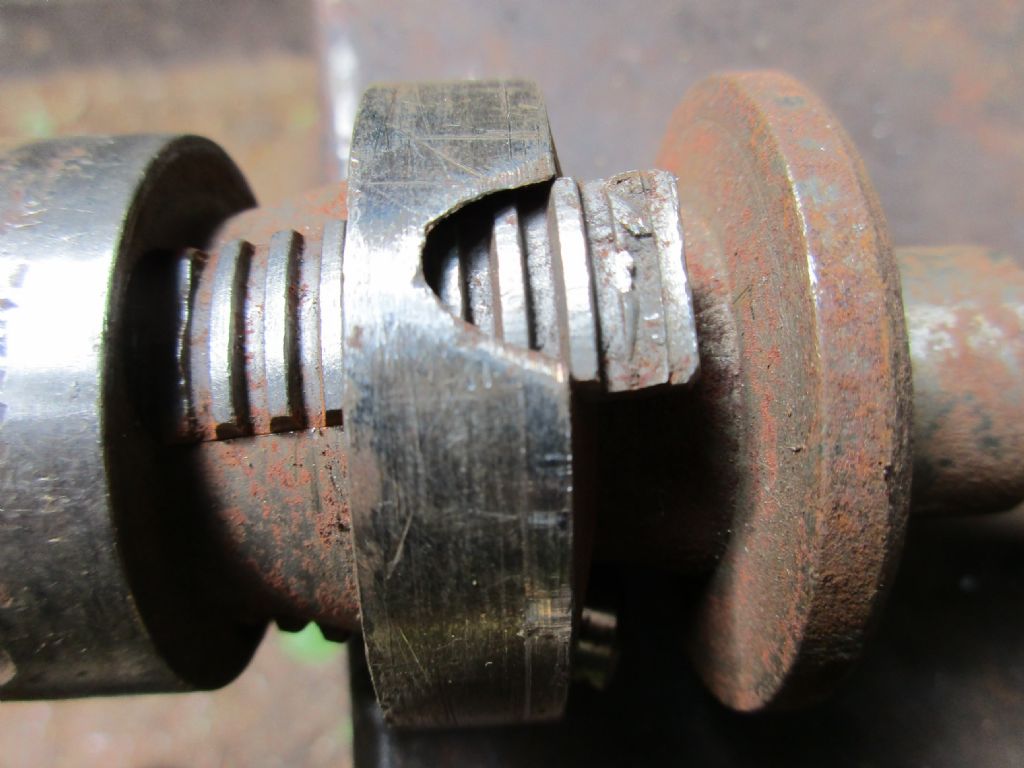
                Hi Iain, you made the mistake of having the jaws retracted, just the same as I did once, however mine must have not been as far in as yours were, as mine just took a couple of teeth off two of the jaws.

                001.jpg

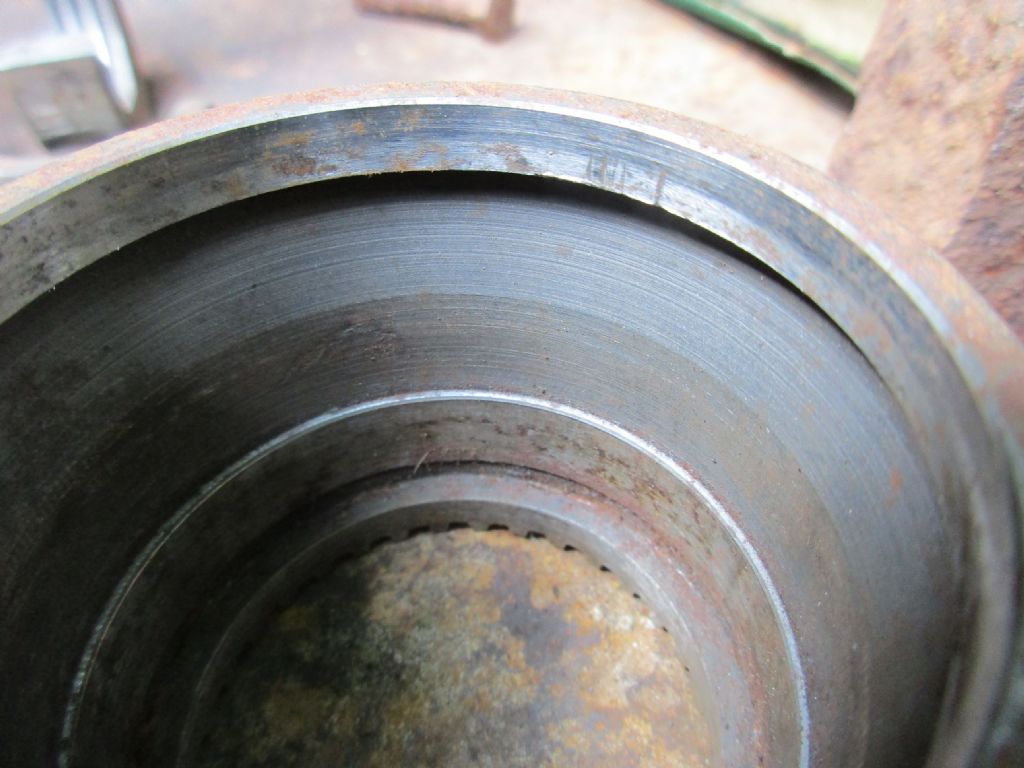
                when they are completely retracted, the tops of them sit in a recess just below a rim on the tube the chuck key turns, so if yours were fully retracted, you were pushing directly onto the ends and ended up with the shape you got, mine on the other hand were low enough for the rim to break the teeth. Always best to have them protruding and stand the chuck body on a tube.

                003.jpg

                My chuck still works, but I have to remember not to close it more than about 3mm or the jaws drop out of mesh.

                Regards Nick.

                Edited By Nicholas Farr on 16/05/2020 21:39:02

                #472435
                John Hinkley
                Participant
                  @johnhinkley26699

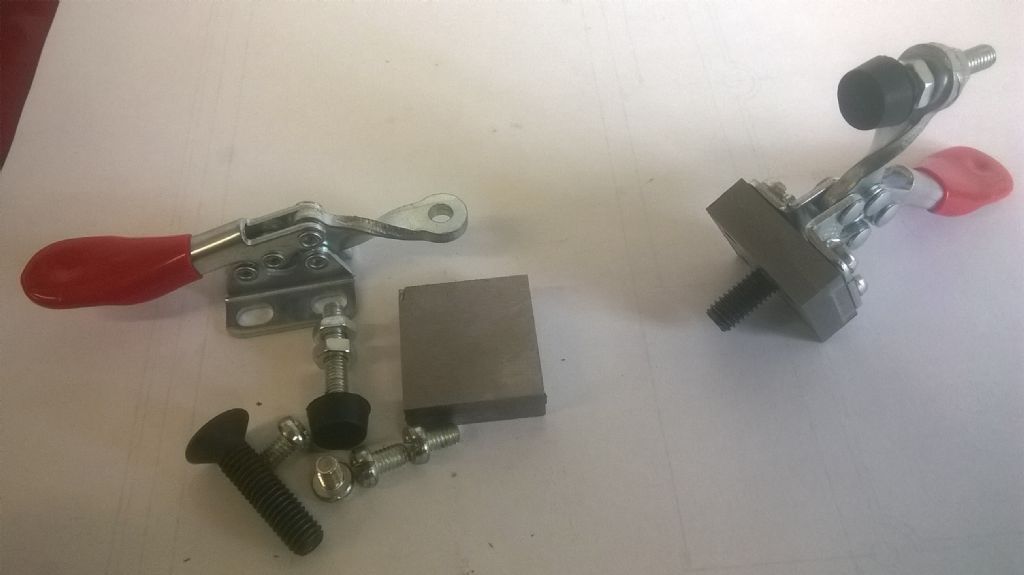
                  Some while ago, now, I bought eight mini over-centre clamps from an eBay seller, just to see what use they might be. They got stuck in a drawer and forgotten about until I finished the mini pallet for the mill (above). Today I raided the scrap bin and found some 25mm wide steel. Chopped it up into suitable lengths and cleaned them up all round. Drilled and tapped four mounting holes and a 6mm central hole. (Broke my new 4mm spiral flute tap while over-enthusiastically machine tapping – two new ones ordered from Arc). Countersunk one side for the central mounting hole and reduced the size of the screw to sit flush. This is a before and after picture:

                  Kit of bits and a finished one

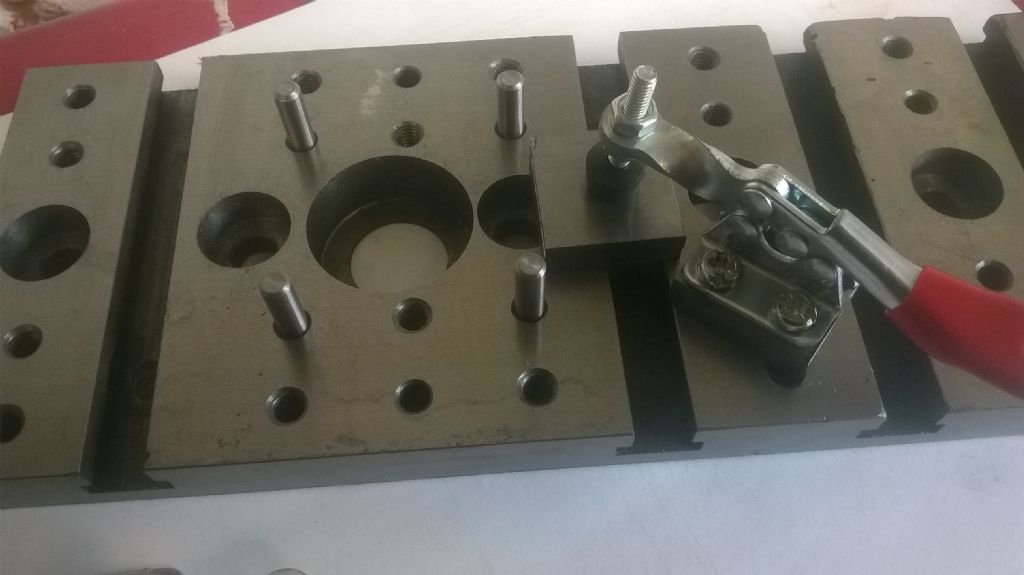
                  Kit of bits on the left and assembled fixture on the right. Mounted it on the mini pallet to see what sort of grip it gave – surprisingly good, actually. Hope to finished three more tomorrow, carefully using my remaining straight-flute tap set!

                  Mounted on the pallet:

                  Clamp in use

                  Used in multiples, they should be OK for light work.

                  John

                  #472515
                  Peter Spink
                  Participant
                    @peterspink21088

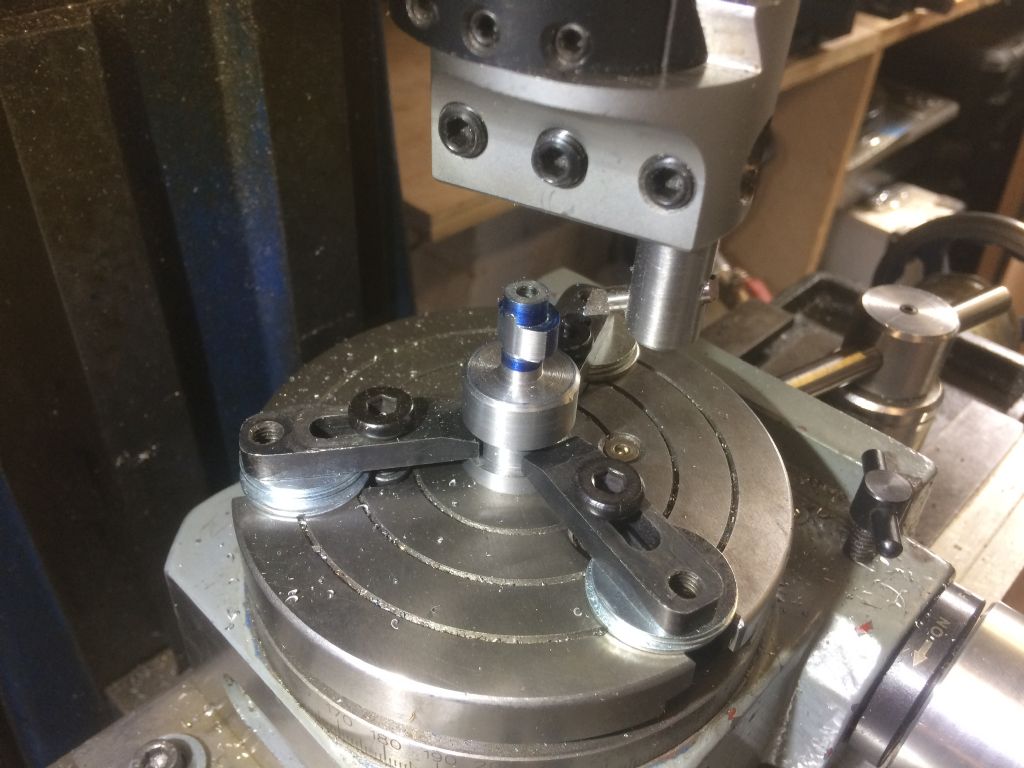
                    First time machining cams and something I'd not been looking forward to.
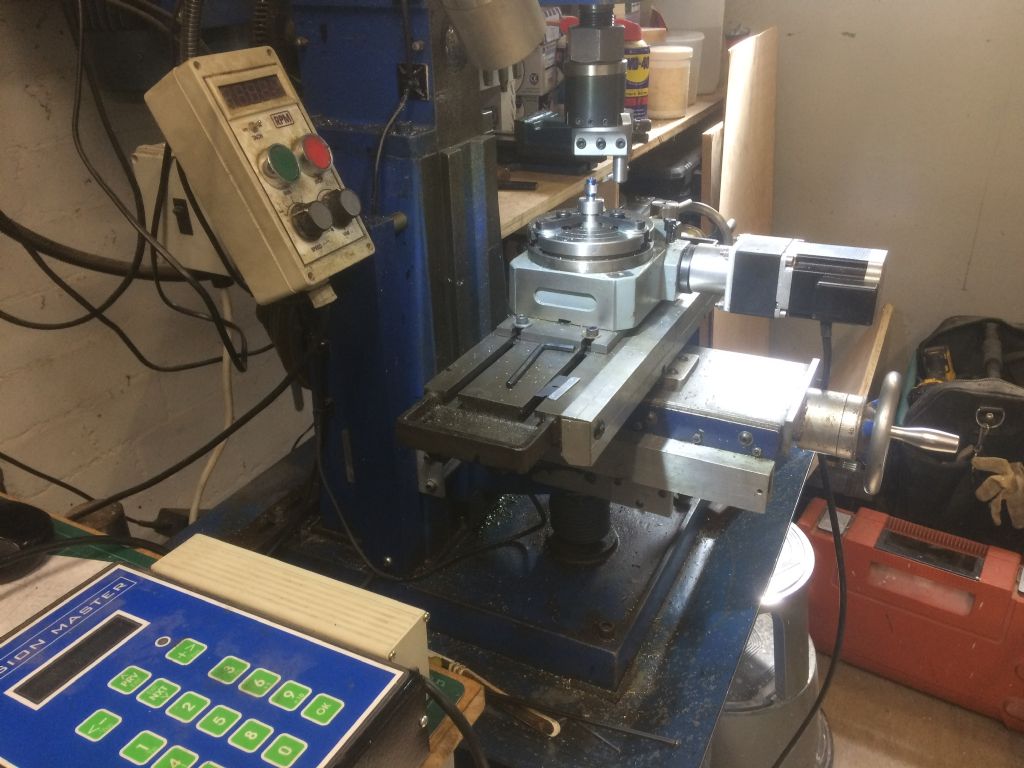
                    Boring head and rotary table seemed like the best approach for me but problem was lack of headroom on the mill so had to machine up cam blanks to fit directly into the table.

                    Waste of metal for such small parts but once set up a very easy process and pleased with the end result!

                    Cam set up1.jpeg

                    Cam set up 2.jpeg

                    Cam 5.jpeg

                    Ready for parting off and finishing.

                    #473084
                    Iain Downs
                    Participant
                      @iaindowns78295

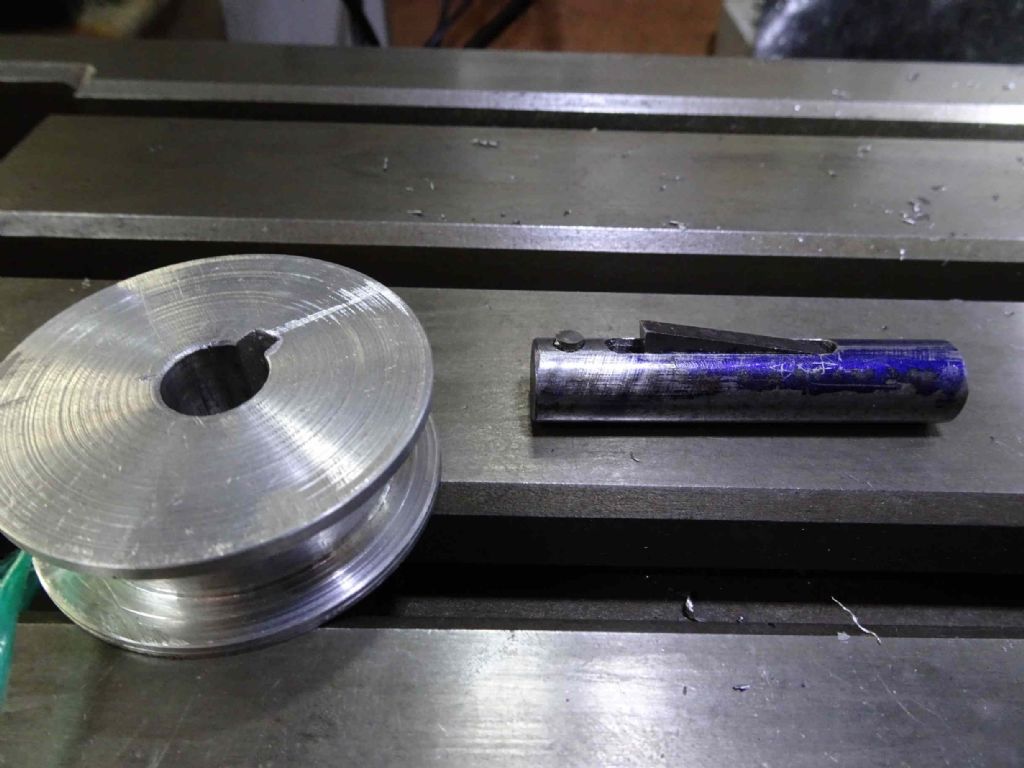
                      Some time back I made what I called a 'poor man's broach', This was a piece of rod of the correct diameter with a bit of tool steel sticking out, pushed up by a set screw. this I hammered through a dozen times raising the tool bit 0.1mm or so each time. THis worked but keeping it aligned was a challenge.

                      I had occasion to broach a keyway of a different size so I thought I'd make another, but improved.

                      the only difference is that there is a raisable guide at the front which leads the broach in correctly.

                      poor mans broach.jpg

                      The other improvement was that I used the mill spindle to press the broach through. This worked fine on ally, but I'm not sure I'try it that way on steel.

                      The other thing I might do is to drill a 'spoils pit' in front of the blade. If I went too wild with how much I took off the swarf could clog up the front of the tool.

                      Iain

                      #473085
                      Windy
                      Participant
                        @windy30762

                        Done some more on the countershaft

                        countershaft blank

                        countershaft machining 008.jpg

                        Another stage

                        2020_0517plateaplate0003.jpg

                        polished countershaft0005.jpg

                        polished countershaft0006.jpg

                        #473088
                        V8Eng
                        Participant
                          @v8eng

                          Very good looking work there Windy well done.

                          Edited By V8Eng on 19/05/2020 20:26:19

                          #473138
                          Mark Rand
                          Participant
                            @markrand96270

                            Started off setting up a casting to be machined in the mill. Centred it, did some calculations, then set up the DRO for a bolt circle.

                            At this point, I somehow got completely distracted. I disassembled and cleaned the Hardinge 5" three jaw chuck off the lathe.

                            Assuming that it's the same age as the lathe is and it hadn't been opened before (didn't look like it), then it's not surprising that the grease had turned to varnish after a mere 68 years…

                            Everything moves a lot more freely now. I might even get a new set of jaws for it (maybe some false teeth as well laugh)

                            #473139
                            Nigel Graham 2
                            Participant
                              @nigelgraham2

                              Planted a squash seedling my neighbour gave me, improved the plumbing on one of the water-butts, fought back brambles trying to muscle in on the competition between a climbing rose and self-settled hawthorn.

                              Then back to the serious stuff.

                              Finished erecting the workshop travelling-crane beam, load tested it by an arms pull-up while looking for any visible deflection (I weigh a little over 1cwt); applied primer to a few patches of paint damaged in erecting the assembly..

                              I've still to make the crab but the cross-beam is useable by hanging a block-and-tackle from a bar placed across the rails.

                              I'm building the whole thing in 3 phases: the rails first so I could use them to support a simple scaffold-tube with the tackle hung from that. The last 6 feet of rails needs fitting up yet but they are at the less important end.

                              Then the cross-beam just erected. Next will be the crab, after a break to resume trying to build the steam-wagon.

                              '

                              The paint, by the way, is Rustins "Small Jobs" range gloss. Their only green – "Buckingham Green" – is too dark for my liking; darker than the green bars between the threads here. So I bought a tin of white in the same range and made an estimated 50/50 – ish mix in a jar. It came out well – a very bright green, a bit startling even, but I am happy with it.

                              '

                              It was a struggle to assemble, and welding the two end-frames was a mistake. I should have bolted them, using generous clearance holes for adjustment. It also has a couple of other minor niggles and I don't like the messy welding, but overall it worked out more or less as intended.

                              Having done that I worked out where, and fitted, 2 Aldi-special, four-foot l.e.d. flourescents to replace a single pendant fitting, to be clear of the crane beam and illuminate both ends of the shed.

                              A change enforced by the beam hitting the original lamp fitting – or foist by hoist!

                              #474036
                              geoff walker 1
                              Participant
                                @geoffwalker1

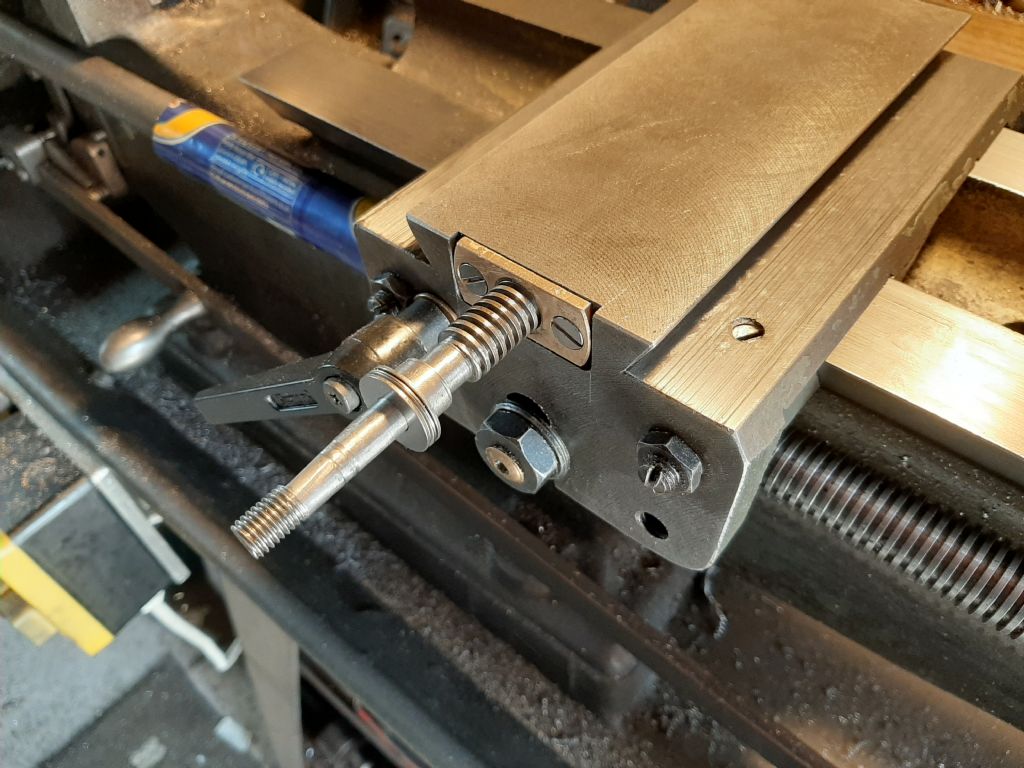
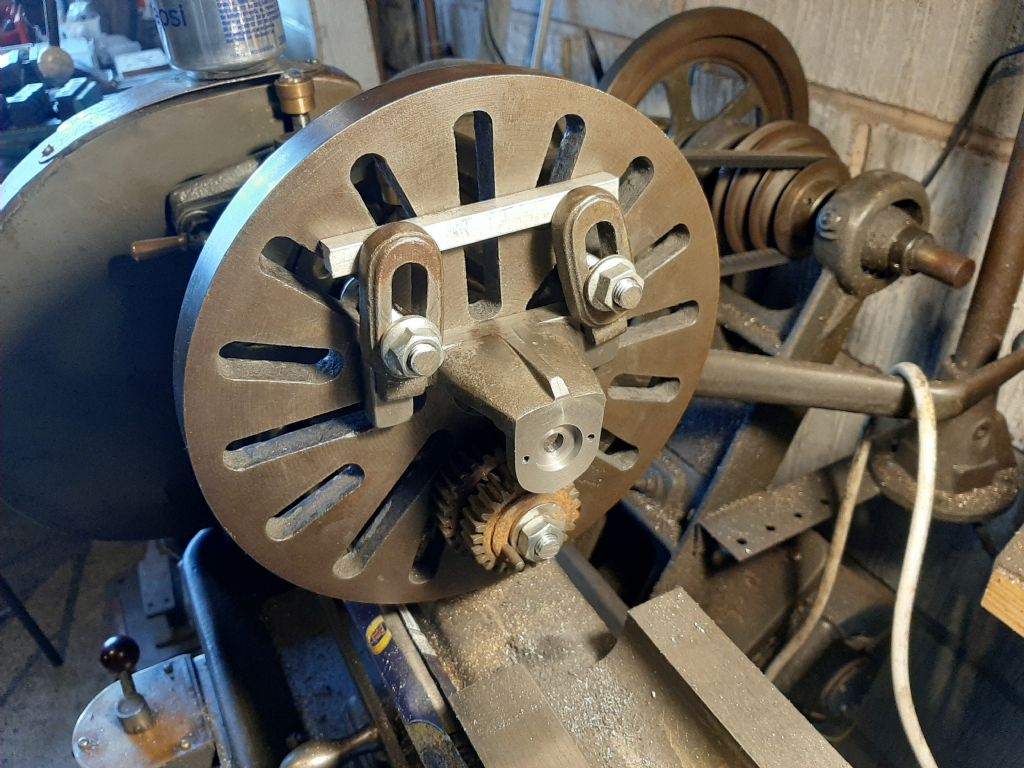
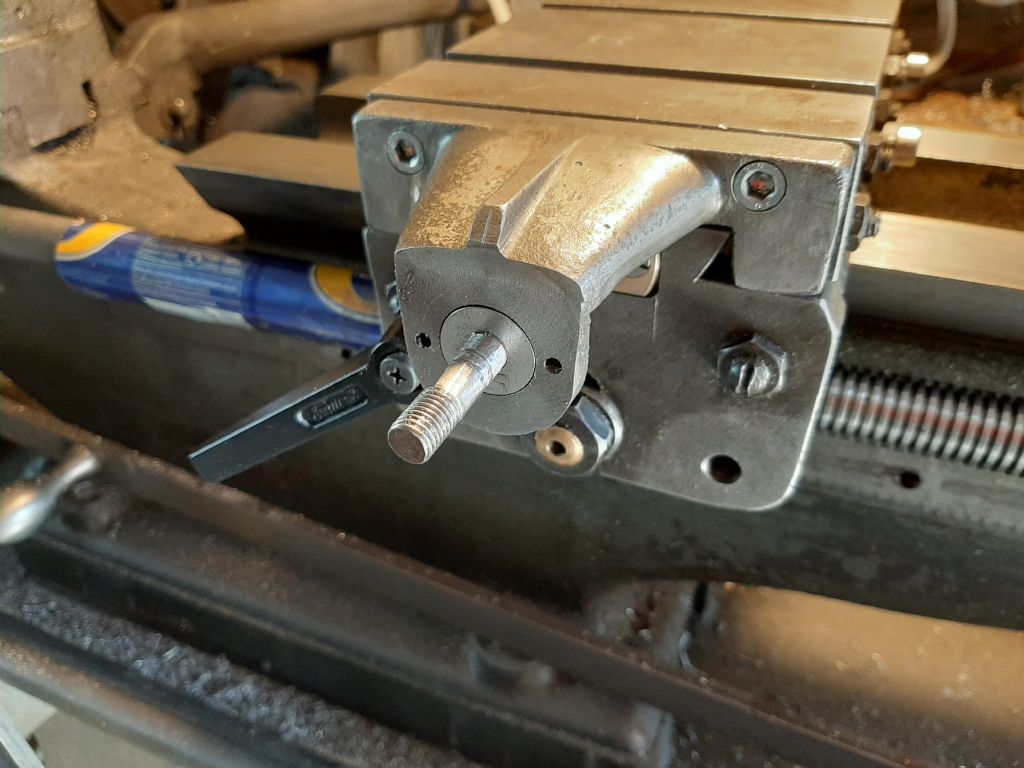
                                20200522_120155.jpgToday I completed a long overdue upgrade on the m type20200522_104459.jpg

                                A new bronze cross slide nut fitted, supplied by David George, thanks again David.

                                The nut has been made very accurately and the feedscrew is a near perfect fit with just a tiny amount of backlash

                                Also took the opportunity to add mini thrust bearings front and rear of the bridge plate, similar to the ml7 improvement.

                                The whole job makes for an amazing improvement, feels like I have a new lathe

                                20200522_120727.jpggeoff

                                #474050
                                David Noble
                                Participant
                                  @davidnoble71990

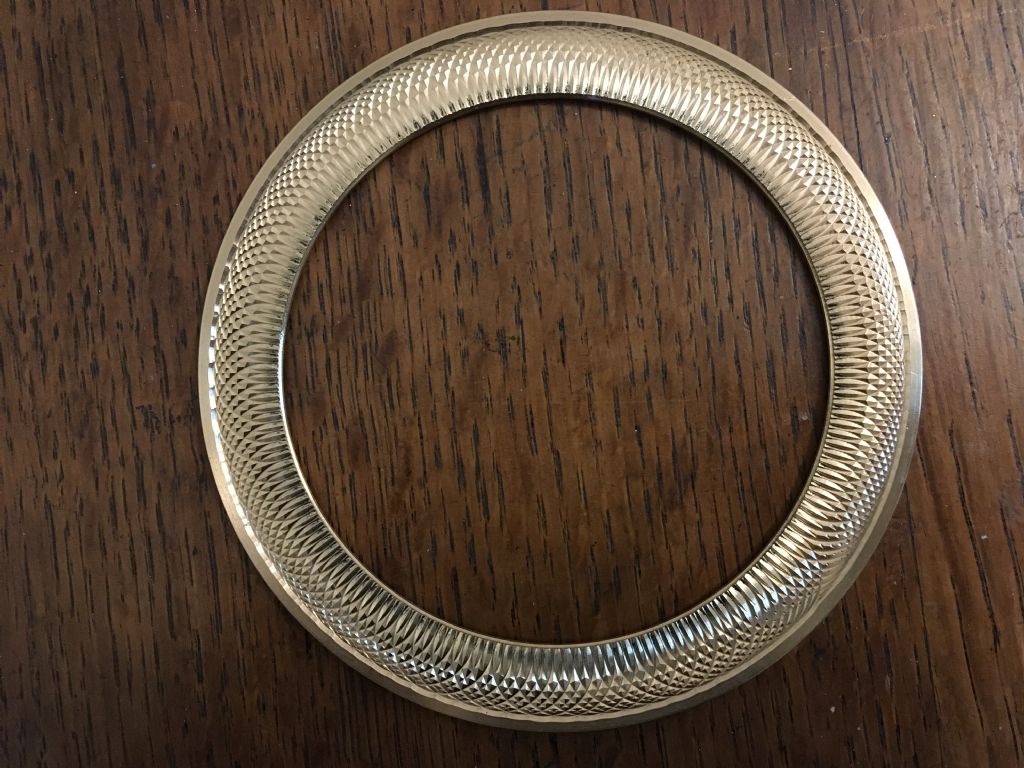
                                  After seeing Clickspring's bezel that he made for his clock, I made a blatant copy!

                                  img_2599.jpg

                                  #474187
                                  Danny M2Z
                                  Participant
                                    @dannym2z

                                    Today i started machining a Sparey .8cc model diesel engine from plans discovered in this ancient Aeromodeller magazine. Aeromodeller May 1947

                                    The cover painting is quite amazing considering that the magazine was printed 73 years ago,

                                    #474222
                                    Mick B1
                                    Participant
                                      @mickb1

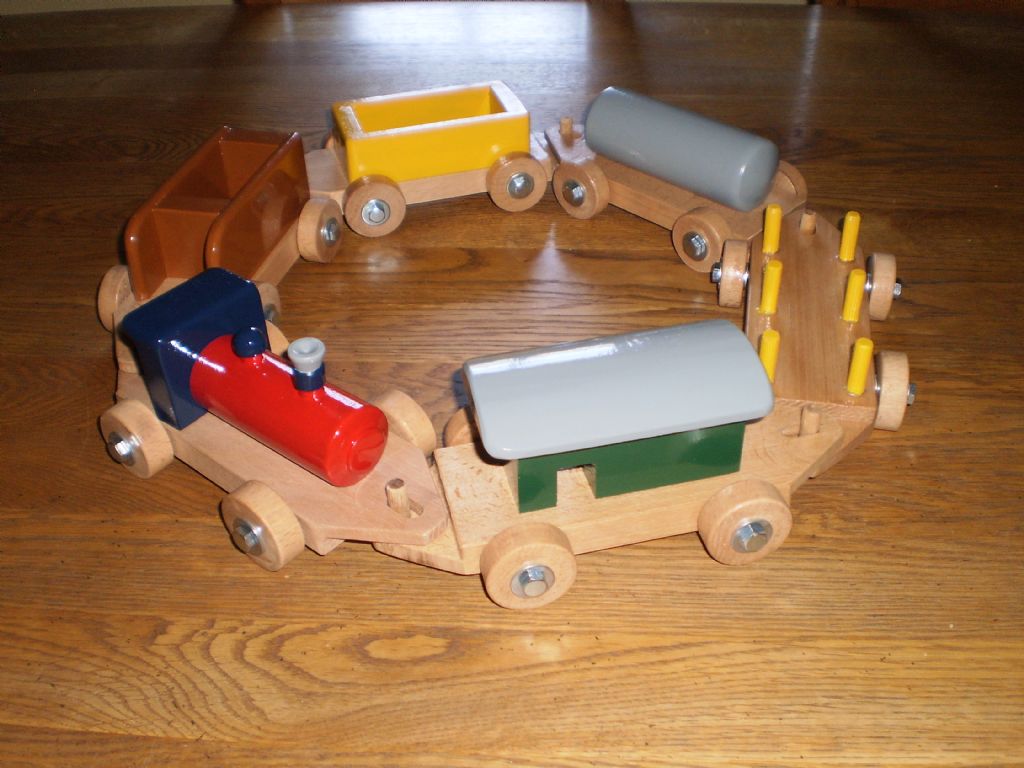
                                      Finished the basic engine for the twin grandkids (19 months). Still a bit of prettying up to do, and buffers and things to add plus a truck or two.

                                      Olivewood/Rosewood/Imbuya/brass; all done on the Warco WM250V with Myford double-swivel vertical slide:

                                      twintrain.jpg

                                      #474224
                                      Richard Marks
                                      Participant
                                        @richardmarks80868

                                        Made this a while ago for a friends grandchild, now made another one to be raffled for a local charity and still making toys for friends kids.p1010962.jpg

                                        #474320
                                        jimmy b
                                        Participant
                                          @jimmyb

                                          I spent some time drawing up and printing an ER40 collet, inspired by Neil's 3D printing book.

                                          5 hours run time and looked perfect! Showed the wife and an over enthusiastic squeeze shattered the print.

                                          Time for a drink!

                                          Jim

                                          #474378
                                          duncan webster 1
                                          Participant
                                            @duncanwebster1

                                            Over the last couple of days I've dug out a Tich I started nearly 50 years ago. It's been finished several times, but you can always think of ways to make it better. Today's job was to machine the pistons to take orings. 2mm section, so I made the grooves to gives 5% squeeze. Result, one side ok, the other too tight, so set up and take 0.001" off the bottom of the groove, now seems much better, at least the wheels go round.

                                            I've also made a new water pump, to get the original design out you have to take the front axle out, which means taking the rods off. I know it doesn't need to come out very often, but that's just poor design in my book. The new one has the barrel screwed in from the back (eccentric side), so it can be got out in a few minutes. Also used oring seated valves, I can never get balls to seat without leaks.

                                            When the bits for the real project come from China Tich can go back in his box, probably not for another 50 years

                                            #474488
                                            mechman48
                                            Participant
                                              @mechman48

                                              Last couple of days really; my 'X' axis drive went 'pop' & stopped, wondering what happened had me thinking ( doh my brain 'urts face 5&nbsp as all was working ok last time in use, I did a bit of deducing, I was cutting a deep slot in a wedge jack body starting with 12 mm hogging cutter followed up by a 1/2" 4 tooth end mill 0.5 mm doc which shouldn't have been a problem,when the drive unit 'popped' & magic smoke appeared,obviously the PWM unit.
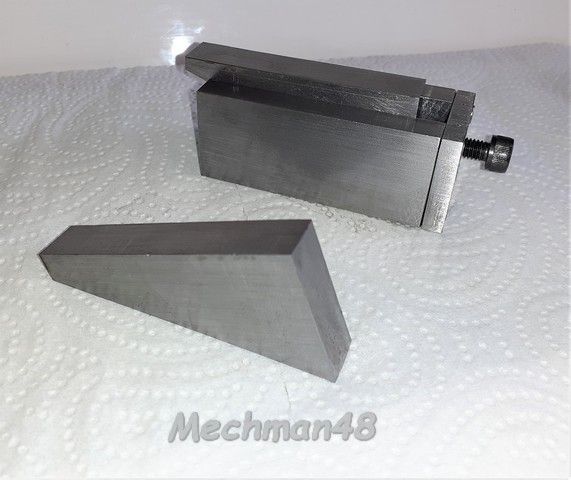
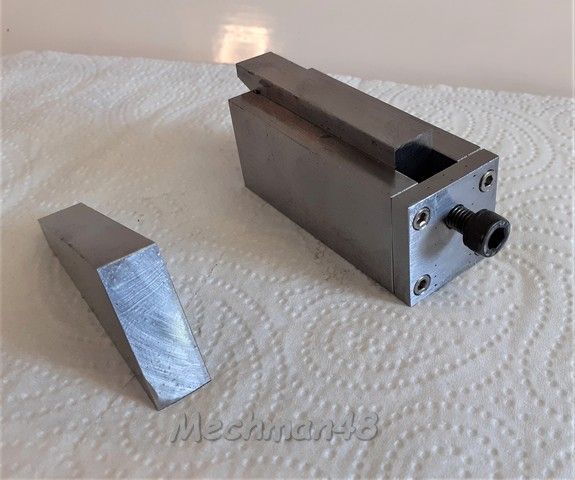
                                              Having a spare PWM ( had bought 2 initially ) I changed it out switched on & all ok I had disconnected the mill lead screw initially as was thinking maybe it had gone tight as it obviously overloaded the PWM amps but it was free enough.Checking again I found that the 'X' axis lock handles had somehow been 'just' nipped up … voila.. cause& effect!. looking at the defunct PWM i noticed what I assume to be a capacitor; ( not being elektrikery aux faix I googled it & came up with it being a 'capacitor' ) had 'popped its barrel', the in line fuse was fine so why the capacitor & not the fuse..??. So all is well .

                                              George.

                                              #474492
                                              mechman48
                                              Participant
                                                @mechman48

                                                As mentioned above in the process of making a wedge type machinist jack for future use from drawings linked to by 'Double boost' ( thanks John )… with slight variation on design

                                                the original wedge sits 3mm above base block in fully down position…

                                                wedge jack (1).jpg

                                                2nd wedge sits 6 mm higher

                                                wedge jack (2).jpg

                                                Still have the retaining slot to do .. maybe? thinking

                                                George.

                                                #474494
                                                Speedy Builder5
                                                Participant
                                                  @speedybuilder5

                                                  Nice trains Mick and Richard, I copied one of the ones my Dad made during WW2 when toys were at a premium.

                                                  train dylan.jpg

                                                  #474539
                                                  Martin King 2
                                                  Participant
                                                    @martinking2

                                                    Hi All,

                                                    My neighbour's eldest son has just been given his first Royal Navy command (minesweeper) and he asked me to make a set of six "shot glasses" from used steel 30mm shell casings.

                                                    Did this for him and they turned out and polished up well, he is going to put a resin coating on the inside.

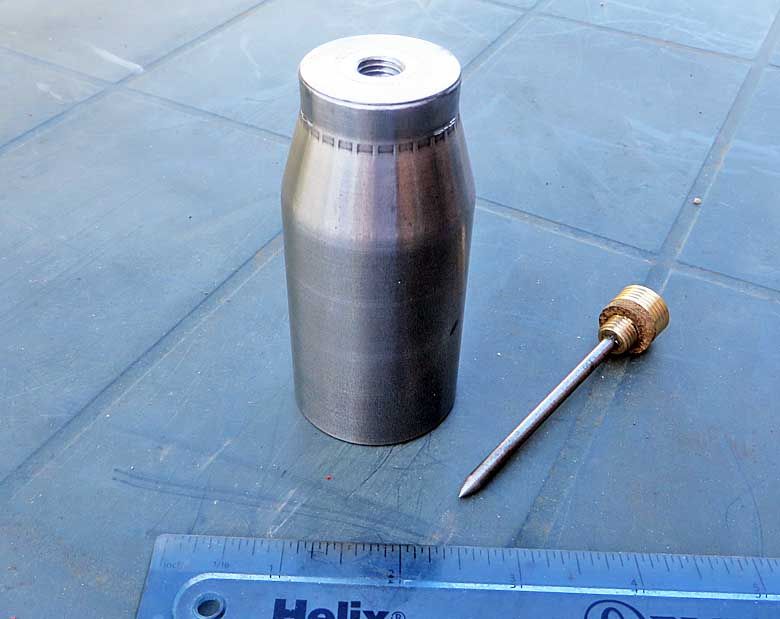
                                                    This left me with 6 shell casing tops that were going in the scrap so I had a go and made this small oil flask:

                                                    shelloiler 1.jpg

                                                    Good practice at parting off and working out how to hold the damn thing! Shame they no longer make them out of brass!

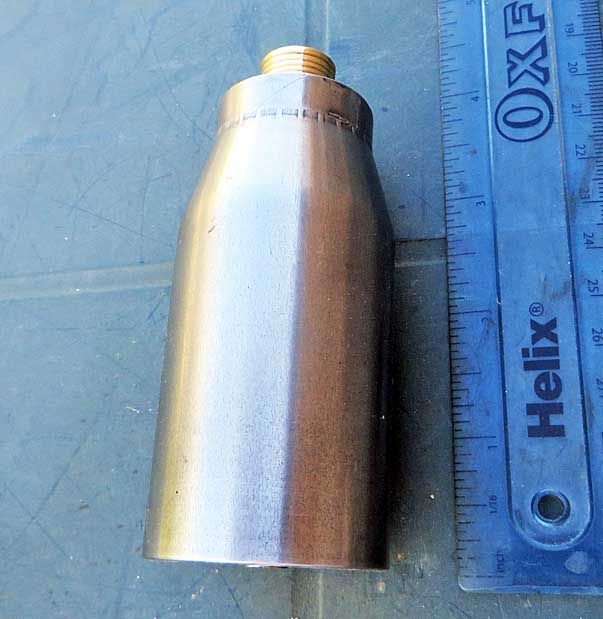
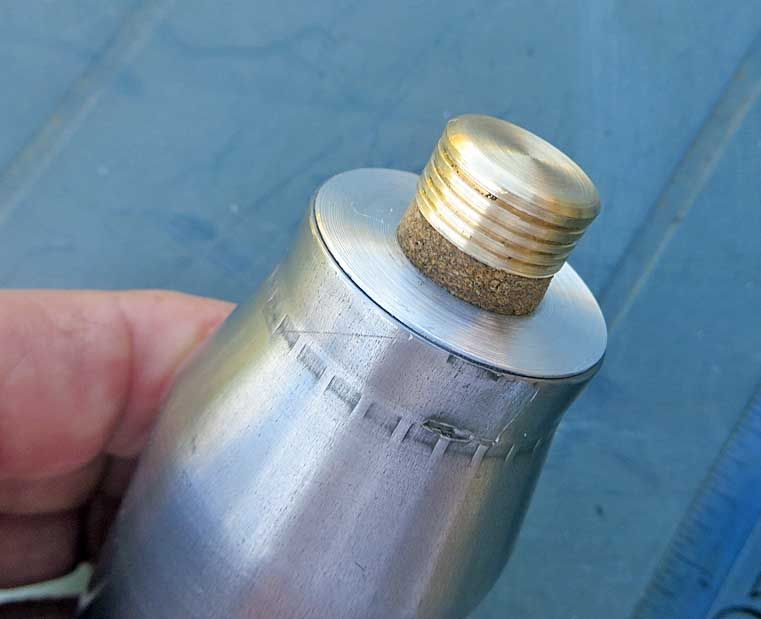
                                                    Loctited in an alloy top, but soldered a small piece of brass into the bottom; this scrap had a hole in it which I plugged with steel, should have used brass as it is now really hard to hold the can to clean up the bottom without marking the sides; l can only grip by the narrow end.

                                                    shelloiler 2.jpg

                                                    shelloiler 3.jpg

                                                    Made a dribbler spike and cork washer and job done! Fun thing to do and no waste of material!

                                                    The marks on the narrow neck are from the ejector mechanism.

                                                    Regards to all and stay safe.

                                                    Martin

                                                    #474590
                                                    Dave Wootton
                                                    Participant
                                                      @davewootton

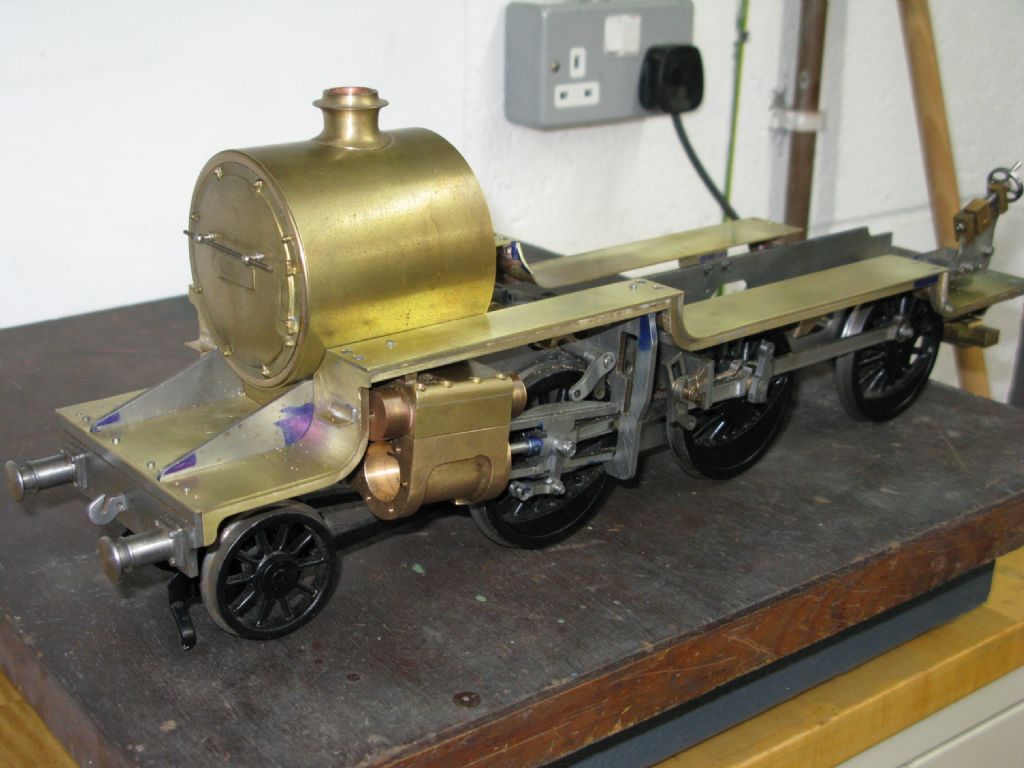
                                                      Tonight I finally finished making the running boards for my 2 1/2" Crab, thought a bit of sheet metalwork would be light relief from making the fiddly valve gear . I forgot it was just as fiddly and took ages!001.jpg

                                                    Viewing 25 posts - 276 through 300 (of 636 total)
                                                    • Please log in to reply to this topic. Registering is free and easy using the links on the menu at the top of this page.

                                                    Advert

                                                    Latest Replies

                                                    Home Forums The Tea Room Topics

                                                    Viewing 25 topics - 1 through 25 (of 25 total)
                                                    Viewing 25 topics - 1 through 25 (of 25 total)

                                                    View full reply list.

                                                    Advert

                                                    Newsletter Sign-up