Using a radius cutter

Advert

Using a radius cutter

Home Forums General Questions Using a radius cutter

Viewing 8 posts - 1 through 8 (of 8 total)
  • Author
    Posts
  • #23608
    Chris Parsons
    Participant
      @chrisparsons64193
      Advert
      #171189
      Chris Parsons
      Participant
        @chrisparsons64193

        Having just got a nice new 5mm radius cutter, I am struggling a bit with it's geometry!

        The diameter of the shank is 16mm, so I thought ok, centre line is 8mm and so centre of radius would be 4mm…so I set up for 4mm in from the edge of the work, touched off and then couldn't work out how much to drop!

        The cutting edge does not extend to the centre axis – and there is a 'peg' in the centre so I guess I have to measure this and add 2.5mm to get to the distance on the Z axis?

        Of course I can 'wing it' but wondered if there was some formula in the geometry I could use to get it set up accurately?

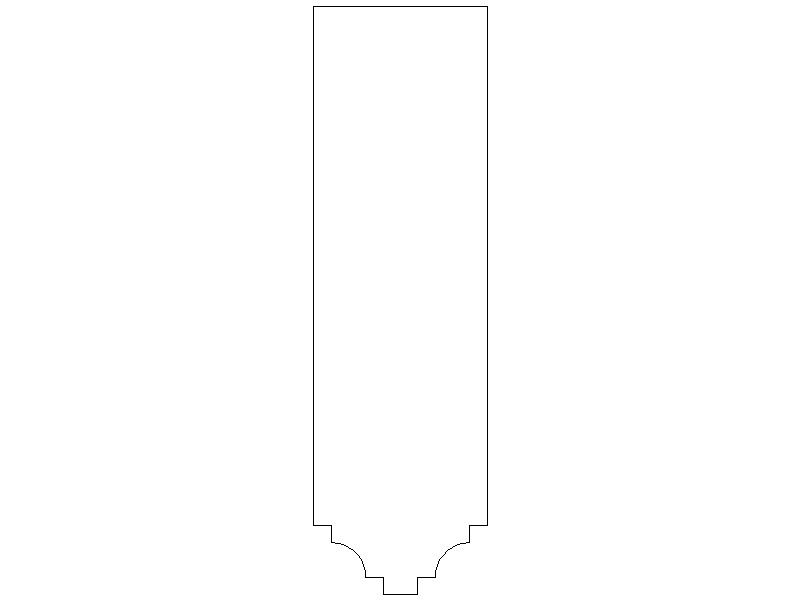
        I have done a (very) rough line drawing to show the profile…

        radius cutter profile.jpg

        #171193
        Bazyle
        Participant
          @bazyle

          Looks more like a woodworking cutter. The size of all the steps is going to be important. I suggest you measure and draw it out nice and big then you will get a better feel for how to move it.

          #171205
          JasonB
          Moderator
            @jasonb

            Just measure how much the spigot sticks out the bottom. Touch off and lower by the spigot length + radius

            #171391
            Jon
            Participant
              @jon

              The shank size has no resemblance to where the cutting edges are so ignore 16mm shank and start from scratch.

              Easiest way is touch the job at bottom shoulder and zero depth, then touch job at top shoulder and zero Y axis. 5mm in Y axis would be full profile 5mm down.

              5R rad would cut a 10mm roundover leaving no pip if made correctly. I have a chinese 1/4"R cutter that's not full profile being 6mm with a taper at ends from an advertiser on here.

              Carbide woodworking cutters work well on aluminiums.

              #171392
              Chris Parsons
              Participant
                @chrisparsons64193

                Thanks all – I thought there was some 'magic' formula that I didn't know about, but it seem to be a simple case of measuring things and working it out…

                I see the ArcEuroTrade rounding cutters show the 'tip' diameter so perhaps this would be a good place to start – half the radius down minus the tip as Jason has said.

                My diagram was wrong, the 'top' cutting edge is not stepped in so the side movement would be 5mm in I guess.

                I'll so some experimentation of a bit of scrap aluminium

                Chris

                #171411
                Neil Wyatt
                Moderator
                  @neilwyatt

                  I recall Marcus Bowman suggesting you cut just less than the full radius, as the slight break in the slope is invisble compared to a tiny step caused by any inaccuracy.

                  Neil

                  #171415
                  Nick Hughes
                  Participant
                    @nickhughes97026

                    Hi Chris,

                    This is the procedure we use at work,

                    1, Set the end of the cutter to the top face of the job using a feeler gauge of your prefered thickness, set your Z axis Dial/DRO to ZERO.

                    2, Set the SHANK of the cutter to the side of the job (X or Y Axis) using the SAME thickness feeler gauge as in step 1. Set the axis used (X or Y) Dial/DRO to ZERO and watch out for backlash if not using a DRO.

                    3, Cut the trial piece untill youre happy with the result, then make a note of the distance moved from Zero, in both the Z and X (or Y) axis, together with the size of feeler gauge used in the initial zero setting. This information can now be kept with the cutter for future use.

                    Just be carefull not to introduce backlash during the setting and trial cutting phases if you don't have a DRO fitted.

                    Nick.


                    Edited By Nick Hughes on 03/12/2014 20:12:30

                    Edited By Nick Hughes on 03/12/2014 20:14:35

                  Viewing 8 posts - 1 through 8 (of 8 total)
                  • Please log in to reply to this topic. Registering is free and easy using the links on the menu at the top of this page.

                  Advert

                  Latest Replies

                  Home Forums General Questions Topics

                  Viewing 25 topics - 1 through 25 (of 25 total)
                  Viewing 25 topics - 1 through 25 (of 25 total)

                  View full reply list.

                  Advert

                  Newsletter Sign-up