Tailstock too high on Harrison M250, how to lower?

Advert

Tailstock too high on Harrison M250, how to lower?

Home Forums General Questions Tailstock too high on Harrison M250, how to lower?

Viewing 18 posts - 26 through 43 (of 43 total)
  • Author
    Posts
  • #202804
    Hopper
    Participant
      @hopper

      Just saw your latest posted pic. Looks like sag in that rig could be a possibility. The indicator needs to be right close to the chuck and those knurled knob friction joints are always dodgy. I would take any reading from this set up with a grain of salt. Something like this is preferable:

      You don't actually need to be able to swing the indicator down to the full 'south' position. If you have 0-0 at east and west, the reading at north is telling you the exact amount of vertical misalignment. (This is providing of course that the tailstock quill is perfectly round) So, to get spot-on alignment you want N, W and E readings to all be zero, or in the real world within about .001" or so.

      Chuck concentricity holding this type of test rig is not a factor. The indicator tip will describe a perfect circle in alignment with the headstock spindle bearing surface regardless.


      Edited By Hopper on 01/09/2015 13:05:59

      Edited By Hopper on 01/09/2015 13:08:38

      Advert
      #202812
      John McNamara
      Participant
        @johnmcnamara74883

        Hi Ian

        If the tailstock has never been dismantled could it be that some handy soul has placed a packer between the base and the tailstock body. Or maybe there is dirt there left over from a time when the tailstock was set over. If there is a separate cross key look under it too.

        On my own lathe I did exactly this to correct wear

        Regards
        John.

        Edited By John McNamara on 01/09/2015 13:36:02

        #202813
        Ian P
        Participant
          @ianp

          My indicator mounting is not as bad as you think it is. There is one thumbscrew with a plastic knob but that was tightened by rotating the 12mm square MS bar round it. The indicator end has a HT bolt. Firm-ish finger pressure on the indicator body (far in excess of the overhanging weight) shows a movement of about a couple of thou.

          Its true that its not essential to have 360 degrees rotation, when I used the finger type indicator the overhang was much less and I could get full rotation over the saddle. I might go back and use it again or just use partial rotation with less overhang similar to your setup. That way I could eliminate any gravity effects,

          If the error was less than 0.001" I would be more than happy but 5 thou is too much (for the present task at least)

          Ian P

          #202815
          Ian P
          Participant
            @ianp
            Posted by John McNamara on 01/09/2015 13:34:50:

            Hi Ian

            If the tailstock has never been dismantled could it be that some handy soul has placed a packer between the base and the tailstock body. Or maybe there is dirt there left over from a time when the tailstock was set over. If there is a separate cross key look under it too.

            On my own lathe I did exactly this to correct wear

            Regards
            John.

            Edited By John McNamara on 01/09/2015 13:36:02

            In my original post I eliminated any assembly errors and in fact assemble everything bone dry for the initial tests.

            Ian P

            #202816
            Martin Kyte
            Participant
              @martinkyte99762

              Any chuck run out is irrelevent. The dial indicator will rotate about the headstock bearing centre.

              Martin

              #202821
              John McNamara
              Participant
                @johnmcnamara74883

                Hi Ian

                Sorry I missed that you had dismantled it.

                I guess the next test is to see it the tailstock is pointing up to the left or the barrel is parallel to the bed.

                When I restored my own lathe the bed was worn badly near the chuck which is normal with older lathes. There was also some wear a little more to the right where the tailstock rides on the ways. Although not visible the bed is effectively dished in these areas. (And so is the tailstock and saddle bearing surface)

                It would be interesting to check the maybe 3/4 extended and clamped tailstock barrel against the bed at the extreme right end of the bed where on most lathes there is almost no wear. The ways have flat tops; placing ground flat bar across them and using an indicator without the saddle should be more accurate to perform this test.

                If it is more than a couple of tenths up it may suggest uneven wear to the underside of the tailstock at the right end is causing it to point up.

                The following search should allow to find Schlesinger's book on machine alignment if you do not have a copy.

                https://www.google.com.au/?gfe_rd=cr&ei=5y9GVM7kJMON8Qf_goC4Dw&gws_rd=ssl#q=schlesinger+alignment+book

                Regards
                John

                Edited By John McNamara on 01/09/2015 14:14:24

                Edited By John McNamara on 01/09/2015 14:16:38

                #202824
                Neil Wyatt
                Moderator
                  @neilwyatt

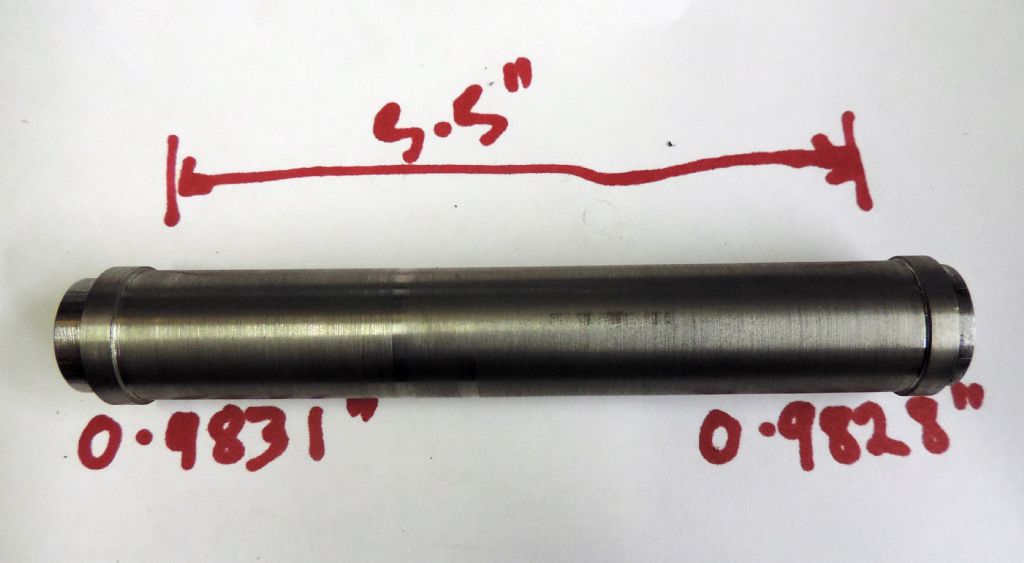
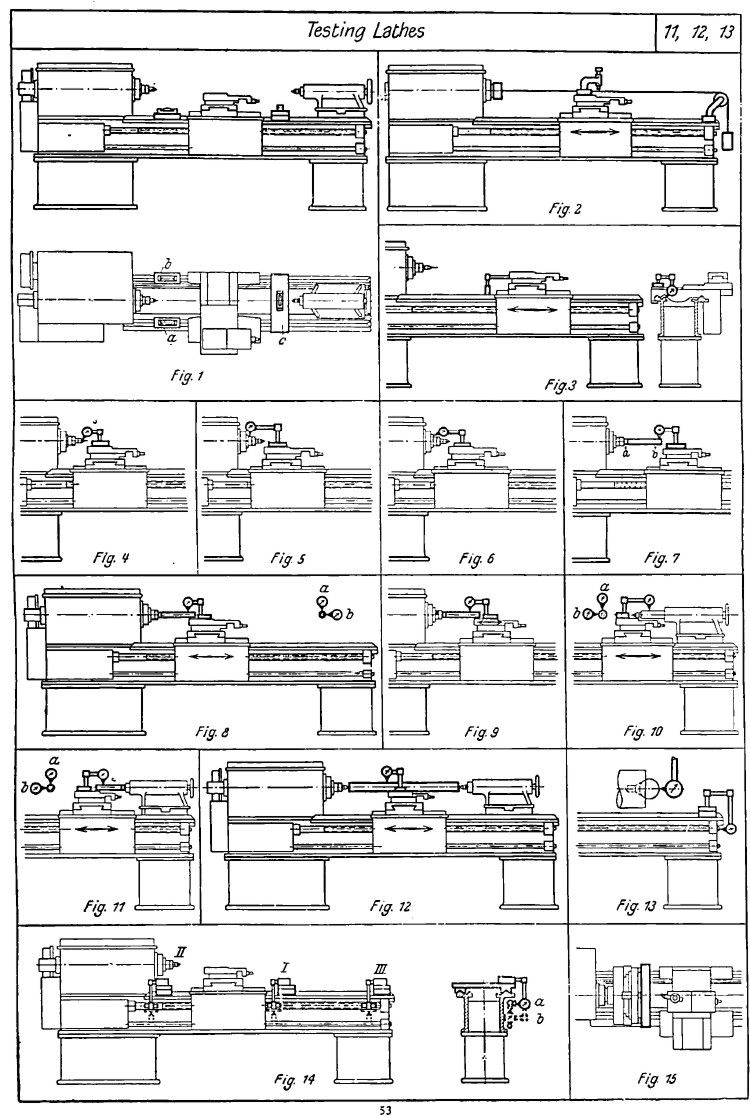
                  The best test is a test bar with good concentric lands held between centres.

                  Not that schelsinger only tests the tailstock for parallelism – the height is tested using a test bar.

                  That will show you how accurate the lathe actually is, rather than measuring a proxy.

                  Neil

                  test bar.jpg

                  lathe tests.jpg

                  #202826
                  Ian P
                  Participant
                    @ianp

                    John

                    As far as I can measure there is no tilt whatsoever to the barrel. It seems absolutely parallel to the bed/lathe axis.

                    I would say that any bed wear is a only a microscopic amount and its a lathe that I feel was good purchase from a condition point of view. This high tailstock error might be because its not the original tailstock or some other silly reason. I would be quite happy removing metal from the tailstock or its baseplate to solve the problem but it would have to be done very expertly so as not to induce any tilt error, although in theory that could be corrected later by differential shimming.

                    Ian P

                    #202829
                    Nigel McBurney 1
                    Participant
                      @nigelmcburney1

                      On a Harrison or Colchester the bed ways for the saddle and tailstock are separate so the ways for the tailstock do suffer anything like the wear the saddle ways receive,so there is no real need to check the tailstock in various positions along the bed, I think that the measurements of the misalignment are suspect,already had two or three variations stated ,so the set up needs to be more rigid, industrially one finds that dial gauge stands and fittings are relatively large and rigid,the current arrangement shown is too springy. Have been working on my Colchester this morning and was thinking about this problem, the likelihood of Harrison making errors on a tailstock would be minimal ,and they would be made in batches using the same jigs and fixtures,to what could have gone wrong,well all manufacturers do make errors,if they did not there would be no need for inspection or quality depts, So what if the bed ways for the tailstock were left high when grinding,and it was not noticed, find another Harrison and compare beds. Until some really accurate dimensions can be taken as i said previously i would not start machining the tail stock, There are an awful lot of worn lathes around with low tailstocks I think I could live with a tailstock 3 thou high though 5 thou might get to be a nuisance.

                      #202831
                      Nigel McBurney 1
                      Participant
                        @nigelmcburney1

                        As i finished my last post,I have just noticed the diagram for testing with a bar between centres ,this can only done on new machines ,any wear on the bed of a used machine would affect the dial gauge reading when it is applied to the top of the test bar.

                        #202834
                        John McNamara
                        Participant
                          @johnmcnamara74883

                          Hi Ian

                          Very strange; Clearly a high quality machine.
                          I agree with Nigel Removing metal is the last resort.

                          The flats on the top of the ways on modern machines are usually ground at the same time as the ways. You can use them as a datum to measure your test bar height. these surfaces are what I used to determine what action was needed to correct my lathe bed.

                          Chances are the tailstock on your lathe runs on a V and flat. It is also likely the flat is not covered by the tailstock leaving an unused portion along the entire length. (well it was on mine anyway) If its there is very useful as a reference point. Indicating of that will give you a good indication of any tailstock way wear error

                          One way of checking for error between the tailstock ways and the saddle ways is to attach a magnetic indicator base and indicator to the tailstock and indicate on the surface of the saddle ways while sliding the tailstock along, this will determine if there is any differential wear.

                          Regards
                          John

                          Edited By John McNamara on 01/09/2015 14:58:22

                          #202840
                          Michael Gilligan
                          Participant
                            @michaelgilligan61133
                            Posted by John McNamara on 01/09/2015 14:08:18:

                            The following search should allow to find Schlesinger's book on machine alignment if you do not have a copy.

                            **LINK**

                            Regards
                            John

                            .

                            John,

                            I'm not sure why, but Google UK takes exception to that antipodean link.

                            So … for the benefit of UK readers who may need a copy … it's here

                            MichaelG.

                            .

                            Edit: how strange … the forum software has converted my quotation of your link  dont know

                            Edited By Michael Gilligan on 01/09/2015 15:40:30

                            #202931
                            Hopper
                            Participant
                              @hopper
                              Posted by Ian Phillips on 01/09/2015 13:43:06:

                              My indicator mounting is not as bad as you think it is. There is one thumbscrew with a plastic knob but that was tightened by rotating the 12mm square MS bar round it. The indicator end has a HT bolt. Firm-ish finger pressure on the indicator body (far in excess of the overhanging weight) shows a movement of about a couple of thou.

                              Its true that its not essential to have 360 degrees rotation, when I used the finger type indicator the overhang was much less and I could get full rotation over the saddle. I might go back and use it again or just use partial rotation with less overhang similar to your setup. That way I could eliminate any gravity effects,

                              If the error was less than 0.001" I would be more than happy but 5 thou is too much (for the present task at least)

                              Ian P

                              You might be a bit surprised if you put a dial indicator on there that reads in tenths of a thou and see how those long-armed set ups wave about like trees in the wind. Plenty enough to make a difference of a couple of thou, which is basically half the error you are reading of five thou. Believe me. I have been through this, more than once, on machinery ranging from sewing machines to power station turbines. Metal moves more than we think. Even a six-inch long test bar, one inch diameter, held in the chuck at one end can have a sag of more than half a thou at the other.

                              Yes, going back to using the finger indicator would be a good idea, mounted back close to the chuck on a sturdy bracket.

                              Even if you do decide to remove metal from the tailstock — this is the last in a number of steps to get a lathe running true all over. Before attacking the tailstock with your angle grinder (well flat scraper and rubbing stone maybe), the lathe bed must be set dead level along its full length to eliminate twist and wind. Tricky on a used lathe with worn bed without getting the scrapers out. Then the headstock must be measured for alignment to bed in all directions at operating temperature and corrected if necessary. (or to the tailstock ways on the bed as the case may be). Only then is the tailstock tested and adjusted as needs be. Initial testing on the OD of the quill is ok, but really you need a precision ground morse taper test bar to test both concentricity and angular alignment of the tapered tailstock hole, as well as the height and east-west alignment.

                              There is little point in lowering the tailstock if the problem is actually bed twist or misaligned headstock that has the headstock spindle axis pointing that five thou above the tailstock axis.

                              #202934
                              Hopper
                              Participant
                                @hopper

                                PS, have you checked the fit of the tailstock to its bed ways with a very thin smear of bearing blue?

                                With the tailstock running on an inverted V way like that, this would be the prime suspect for sitting the tailstock up high. As anyone who has turned a tapered shaft to fit a tapered hole, a tiny bit of difference in the measurment across the taper can make a huge difference to how far the male taper fits into the female. IE, it would take only a tiny bit of misalignment, dent, burr, grit, paint etc on that V surface of either bed way or tailstock way to jack the tailstock up a few thou. It might be worth carefully rubbing a small fine stone over the mating surfaces to knock off any dents or burrs.

                                #202940
                                Ian P
                                Participant
                                  @ianp

                                  I agree with the contents of you last two posts and wont be doing anything drastic until I am confident that I know the cause of the error.

                                  I have not blued the bed/tailstock fit but I have gone over every surface with a dull fine flat file. From completely dry one spot of oil spreads over the whole contacting area of each surface so I think I have eliminated burrs.

                                  My first tests were with finger indicator that reads in microns, it only has a very short operating travel so was quite fiddly to use, needed a mirror to see it and then I got the decimal point wrong.

                                  For the time being I will find another way of drilling these small holes, and then when I get time will do some bed/headstock testing. After all I don't yet know whether the tailstock is high, or the headstock is low!

                                  Ian P

                                  #202945
                                  Hopper
                                  Participant
                                    @hopper

                                    Ian, you might want to check your drill chuck too. It may be the source of more misalignment too. At a pinch, if you know your drill bit is .005" high and this is causing you problems on drilling a test piece, you could put a .005" piece of shim between one jaw and the drill bit. Then fit the chuck to the tailstock with that jaw at the top. A bit of experimentation might get you to where you want to be.

                                    #202962
                                    Bob Brown 1
                                    Participant
                                      @bobbrown1

                                      You could also place a piece of round bar in the tailstock chuck and drill a hole in it the same size as the one you want to drill using the lathe chuck stick the drill in the hole with Loctite, put a witness mark on it and it should the be at centre height or at least the same height as the lathe chuck. I do this for small drills less than 2mm as they can be outside the range of the drill chuck.

                                      Bob

                                      #202973
                                      Ian P
                                      Participant
                                        @ianp
                                        Posted by Bob Brown 1 on 02/09/2015 13:58:40:

                                        You could also place a piece of round bar in the tailstock chuck and drill a hole in it the same size as the one you want to drill using the lathe chuck stick the drill in the hole with Loctite, put a witness mark on it and it should the be at centre height or at least the same height as the lathe chuck. I do this for small drills less than 2mm as they can be outside the range of the drill chuck.

                                        Bob

                                        Thats quite a good idea, worth remembering.

                                        I have chucks that can grip a drill less than 0.5mm so in my case I will offset the chuck mount rather than making an adapter for each drill size.

                                        Ian P

                                      Viewing 18 posts - 26 through 43 (of 43 total)
                                      • Please log in to reply to this topic. Registering is free and easy using the links on the menu at the top of this page.

                                      Advert

                                      Latest Replies

                                      Home Forums General Questions Topics

                                      Viewing 25 topics - 1 through 25 (of 25 total)
                                      Viewing 25 topics - 1 through 25 (of 25 total)

                                      View full reply list.

                                      Advert

                                      Newsletter Sign-up