Thanks for the responses.
I removed the saddle assembly and tailstock to lighten the machine for transport home. On inspection the original saddle was obviously massively worn, on closer inspection the oilers were full of hardened grease so no idea when it last had a proper oiling.
I was OK with scraping the bed, but the saddle would need more serious work so I bought a used (late model, wide guide) saddle with virtually zero wear – factory machine marks still very obvious – hardly any visible wear. Should save me a lot of time in the long run.
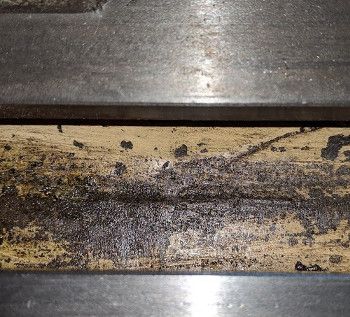
So I didn't try the saddle to bed fit before the bed scrape, but after many, many hours of tedious scraping I got the bed flat – Well as flat as I can and a whole lot better than it was previously. The main wear on the bed was on the front edge of the front rail, starting around 1 1/2" from the headstock end.
I made myself a carbide scraper, used a thick sheet of float glass as a surface plate and it took around 3 weeks scraping for 2 or 3 hours most evenings until I got even blue spotting all over the top of the bed. Obviously most of the hard scraping work was at the unworn tailstock end, and more on the rear rail than the front.
I decided not to scrape under the headstock, so as to leave the original reference there, thinking that I can shim up the tailstock later if required so the centres match. I realise this isn't 100% perfection but I think I can live with it. I can always revisit this in the future if It throws up noticable errors.
I miked up the verticals measuring from the untouched rear one, not too much wear there but to correct it I welded up a square steel frame, bolted 2 sealed bearing races on the back and a piece of square section aluminium tube on the front. I then stuck some sandpaper (the Klingspor self adhesive backed stuff that bodyshops use, not regular stuff), to the ali extrusion, put plastic pads underneath so not to mark the freshly scraped bed – then slid it backwards and forwards along the bed using the bearings as rollers against the rear vertical, and the sandpaper to clean up the other verticals till they all came in parallel to the rear.
As for the undersides of the rails, after a good clean up I went round with a micrometer and got good readings all the way along. As I was going from narrow to a wide guide I didn't need to check the inner ones.
I had problems when fitting up the apron to the new wide guide saddle, the handwheel wouldn't turn and the split nut wasn't centred on the leadscrew. Turns out the bolt holes in the later saddles are approx 2mm further inboard than the early one, so I have had to slot out the holes and make up some custom washers. That's all working nicely now, no tight spots taking the saddle end to end. I just used the shim stacks that came with the later saddle I bought, they seemed loose before I oiled it up so I tried peeling off one shim, refitted them and it clamped up solid, so I have put the shims back and all free again, now I have oiled it I cannot detect any play by hand.
A question though – If I was to check with feeler gauges, what sort of clearance should I expect between saddle & bed in a perfect world ?
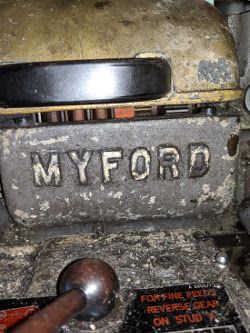
I'm currently working on the headstock assembly at the moment – all looks good so far except the rear bearings have also had a dose of grease instead of oil although they seem fine by hand. I am seriously considering the taper roller conversion (what do you chaps think ?) – but I'll need to get it running first so I can machine the collars to suit.
There's also the drip oiler. I unscrewed the sight glass whilst stripping for clean up & paint – Unfortunately the white plastic insert behind it has cracked, I would be amazed if they are still available, but although I could make a replacement I cannot get the brass drip tube out, and that holds it in place. Does anyone know how the brass tube fits to the headstock casting ? I'm guessing it's on a taper. ?
At the moment I have used a bolt, a large washer and a big nut as a spacer to put some tension on it, given it a good dose of plus gas but still no joy. I have tightened the bolt down as far as I dare, but I don't want to do any damage.
I'm leaving it under tension overnight – well you never know. 
Was thinking of applying some gentle heat but then if I understand correctly brass expands more than cast iron so that's probably going to make it tighter ?
Any suggestions / ideas welcome.
Cheers – Dave.
Edited By Dave Whipp on 03/12/2018 23:56:14
Edited By Dave Whipp on 03/12/2018 23:58:03
ega.


