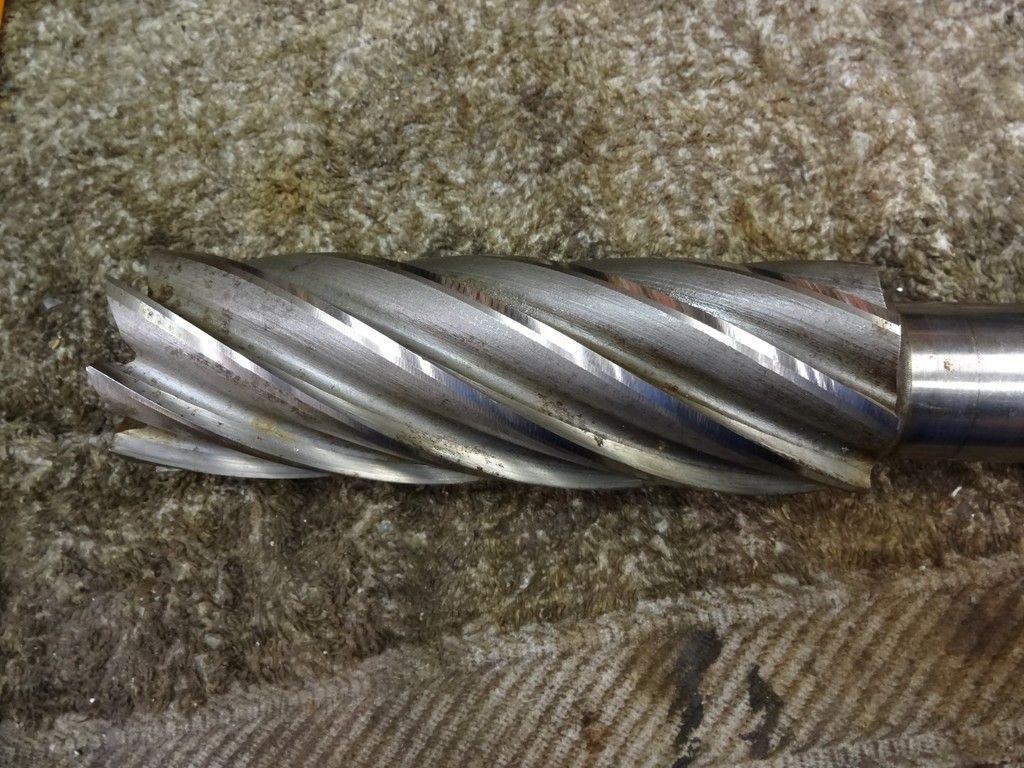
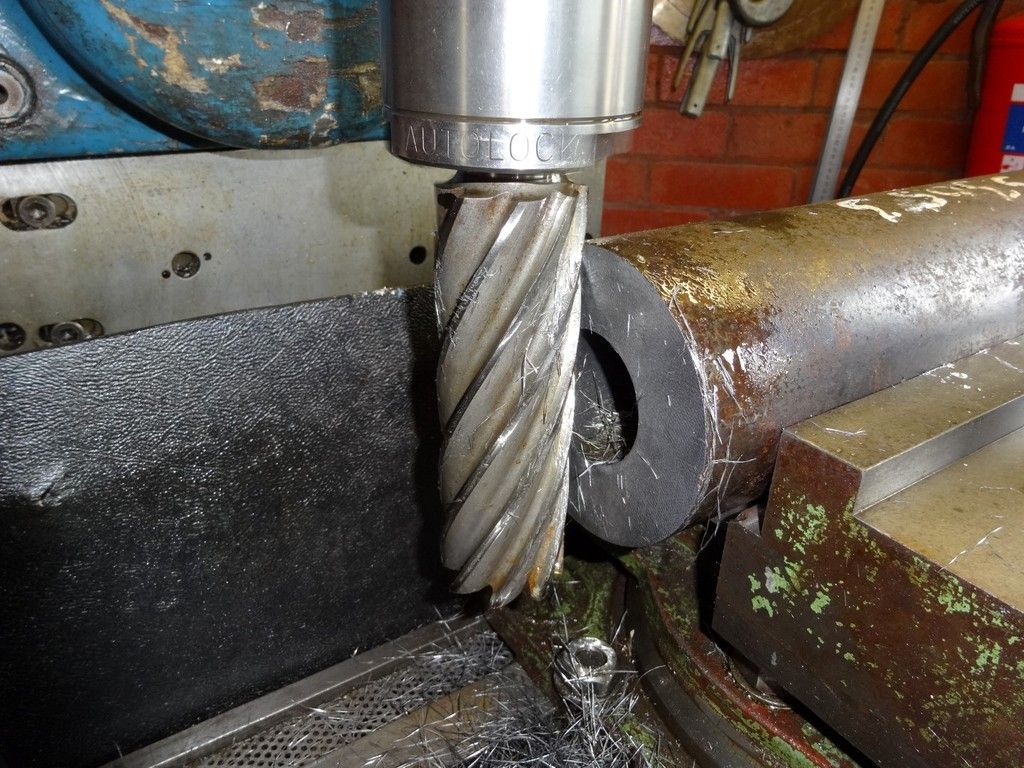
Grinding the flutes of an end-mill
Grinding the flutes of an end-mill
- This topic has 17 replies, 6 voices, and was last updated 6 July 2016 at 22:55 by
 Bernard Wright.
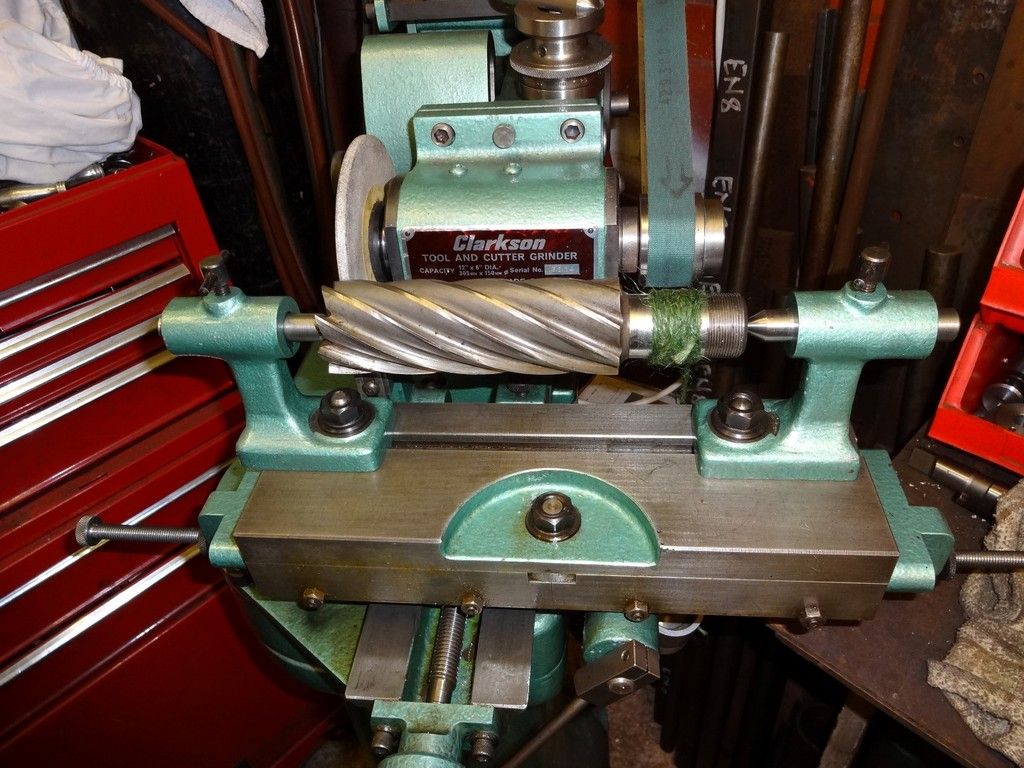
 Odd really because the instructor said look at this carefully as you might want one day and some cutter grinders are very complicated. This one can do them all with pretty simple adaptations.
 - Please log in to reply to this topic. Registering is free and easy using the links on the menu at the top of this page.
Latest Replies
-
- Topic
- Voices
- Last Post
-
-
Smart Meter Change-over Problems
Started by:
Alistair Robertson 1
in: The Tea Room
- 8
-
6 August 2025 at 11:44
SillyOldDuffer
-
Help recommend a milling machine?
1
2
Started by:
richard1989
in: Beginners questions
- 21
-
6 August 2025 at 11:36
JasonB
-
MD65 leadscrew cross-slide stuck in nut
Started by:
leov
in: Manual machine tools
- 9
-
6 August 2025 at 11:07
leov
-
Pratt Bernard Grip true issues
Started by:
teamricky
in: Workshop Tools and Tooling
- 7
-
6 August 2025 at 11:00
SillyOldDuffer
-
F360 stock from solid
Started by:
Roderick Jenkins
in: CNC machines, Home builds, Conversions, ELS, automation, software, etc tools
- 9
-
6 August 2025 at 10:34
John Haine
-
Save your Swarf!
Started by:
Vic
in: The Tea Room
- 7
-
6 August 2025 at 10:20
Bo’sun
-
Depth of cut cowells me90
1
2
Started by:
kinross1
in: Manual machine tools
- 13
-
6 August 2025 at 10:15
Hollowpoint
-
Boiler Design – issue 4765
1
2
…
9
10
Started by:
Charles Lamont
in: Model Engineer & Workshop
- 29
-
6 August 2025 at 08:53
JasonB
-
Bandsaw vs Powered Hacksaw vs Chop Saw?
Started by:
MarkS
in: General Questions
- 17
-
6 August 2025 at 05:48
Perko7
-
Collet identification
Started by:
David Colwill
in: General Questions
- 7
-
6 August 2025 at 05:28
AJAX
-
Arc Euro Trade Ltd.
1
2
3
Started by:
Ketan Swali
in: General Questions
- 54
-
5 August 2025 at 23:33
howardb
-
Cutting down a linear glass DRO encoder
Started by:
Robin Graham
in: Beginners questions
- 9
-
5 August 2025 at 20:41
Mark Hall
-
Ultra Newcomer Lathe Setup Query
Started by:
Brahma
in: Beginners questions
- 10
-
5 August 2025 at 19:49
Dave Halford
-
Will iron rivets expand to fill oversized hole?
Started by:
Arthur Jones 2
in: Locomotives
- 6
-
5 August 2025 at 19:46
Robert Atkinson 2
-
New Compressor
Started by:
Andy Brocklehurst
in: General Questions
- 8
-
5 August 2025 at 19:40
noel shelley
-
14mm mild steel tube – I thought this would’ve easy…..
Started by:
Mick Bailey
in: Materials
- 6
-
5 August 2025 at 18:48
Mick Bailey
-
MIG Welder Won’t Weld
Started by:
Martyn Nutland 1
in: Workshop Techniques
- 14
-
5 August 2025 at 17:51
simondavies3
-
New member (a young’un)
Started by:
tomread12
in: Introduce Yourself – New members start here!
- 5
-
5 August 2025 at 15:20
tomread12
-
Model Engineer Magazine Collection
Started by:
mfengine1
in: Books
- 9
-
5 August 2025 at 15:12
Norman Blackburn 1
-
Model Turbines
1
2
…
24
25
Started by:
Turbine Guy
in: Stationary engines
- 28
-
5 August 2025 at 14:50
Turbine Guy
-
Precedent Perkasa MTB plans
Started by:
jamesrot
in: General Questions
- 2
-
5 August 2025 at 14:21
Colin Bishop
-
UK Steel Supplier? 125 x 125 x 50 BMS
1
2
Started by:
MarkS
in: General Questions
- 13
-
5 August 2025 at 07:43
JasonB
-
How many rings per piston?
1
2
Started by:
Arthur Jones 2
in: Locomotives
- 15
-
4 August 2025 at 23:59
duncan webster 1
-
Meek style dog-clutch for a Colchester
Started by:
Taris Jewell
in: Manual machine tools
- 7
-
4 August 2025 at 19:51
Taris Jewell
-
Chuck- Lathe yet another type.
Started by:
Speedy Builder5
in: Workshop Tools and Tooling
- 9
-
4 August 2025 at 19:38
Pete
-
Smart Meter Change-over Problems
Latest Issue

Newsletter Sign-up
Latest Replies

