Colchester Student Mk1 Won’t Start

Advert

Colchester Student Mk1 Won’t Start

Home Forums Help and Assistance! (Offered or Wanted) Colchester Student Mk1 Won’t Start

Viewing 22 posts - 776 through 797 (of 797 total)
  • Author
    Posts
  • #515031
    Mat Stoeckle
    Participant
      @matstoeckle91130

      Nice work Richard .. must be good to get your hands on the ol lathe .. I know I miss mine after a day of work away from the shop

      I'm pretty sure I'm squeezing down on the rubber but I did order the 1mm (1/16 inch) stuff .. I believe you have 2mm (1/8?) stuff going right? I'll see how tight it gets without anything in there and maybe that was my problem .. the paper gasket would've been even thinner .. maybe I'll double up on the 1mm stuff ..

      Back to my burning question on preload however .. there is the one locking collar right behind the main spindle bearing (front bearing) that's inside the gearbox .. how tight? and how do you even measure that?

      then there's the locking collar at the tail end of the spindle .. you mentioned "get it really tight" .. but how tight is that? and how do you gauge it or what do you gauge it by? I'm really unfamiliar with preload and don't know what to wiggle to check for play or how much and where and such .. so, any info would be great to get it right-ish ..

      thanks!

      Advert
      #515032
      Herman van der Merwe
      Participant
        @hermanvandermerwe76509

        Mat, the tension should be the same as per this message.

        https://colchesterlathe.groups.io/g/main/message/3292?p=,,,20,0,0,0::relevance,,spindle+tension,20,2,0,59019379

        and

        https://colchesterlathe.groups.io/g/main/topic/59016048#1793

        and

        https://colchesterlathe.groups.io/g/main/topic/59013653#852


        Let us know which one is correct!

        Edited By Herman van der Merwe on 23/12/2020 05:52:17

        #515191
        Richard Kirkman 1
        Participant
          @richardkirkman1

          Yeah Mat, it's really satisfying to come home to a working machine after 3 and a bit months at uni with no practical work!

          I think mine was 1.5mm or something. I can't imagine the difference in thickness is making that much of a difference.

          As for preload, I haven't done anything specific. I left the bearing closest to the chuck alone. I just tightened the other one enough. Not too sure really. I do know preload needs to be set so the machine functions. Phil's lathe turns much more freely than mine, so It may be worth setting my preload correctly one day. Perhaps when I do a full repaint.

          Hermans links will tell you more than I know. Thanks Herman

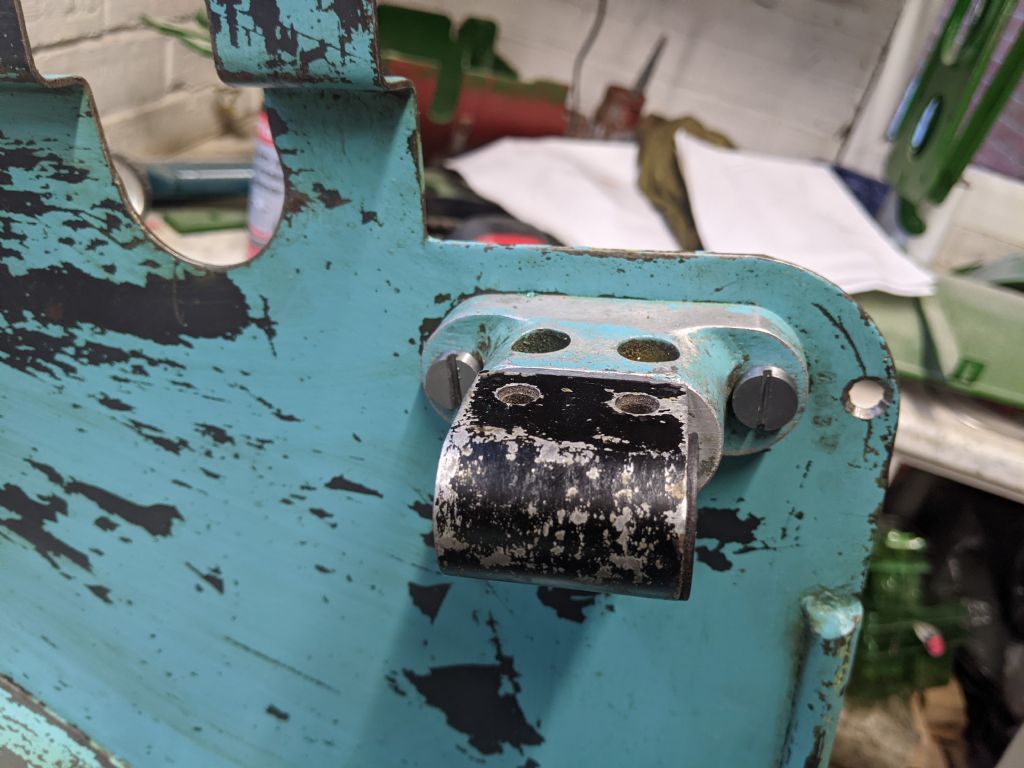
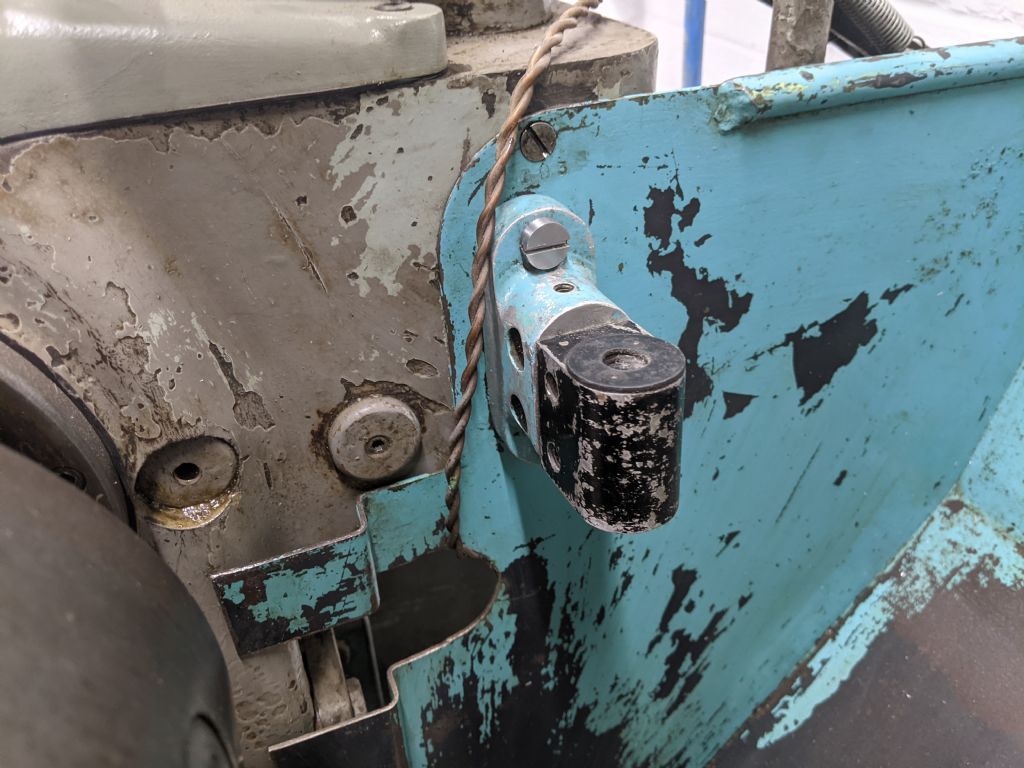
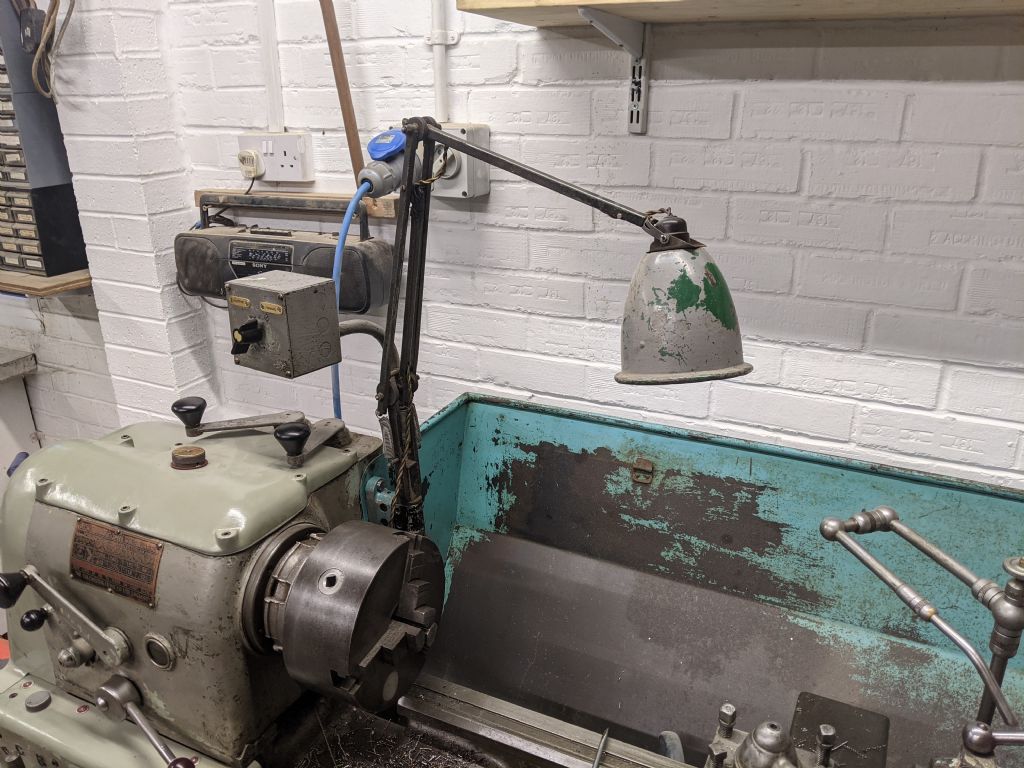
          Anyway, I got the light mount mounted today, so the lathe is almost in one piece!

          pxl_20201223_150806470.jpg

          pxl_20201223_151042704.jpg

          pxl_20201223_151248048.jpg

          It seems to be in just the right position for me, so I'm very happy. I need to find some more turning to do now…

          #515196
          Howard Lewis
          Participant
            @howardlewis46836

            Maybe we should all collaborate and produce a book on "The Joy of Turning"

            Having once experienced the use of a lathe at a moments notice, if, for any reason, it is out of commission, you feel absolutely vulnerable.

            With it functioning, you feel confident to attempt almost any task.

            You have all done a splendid job.

            Good on yer, boys!

            Howard

            #516016
            Richard Kirkman 1
            Participant
              @richardkirkman1

              Thanks Howard, It really is a weird feeling just having access to such an amazing machine.

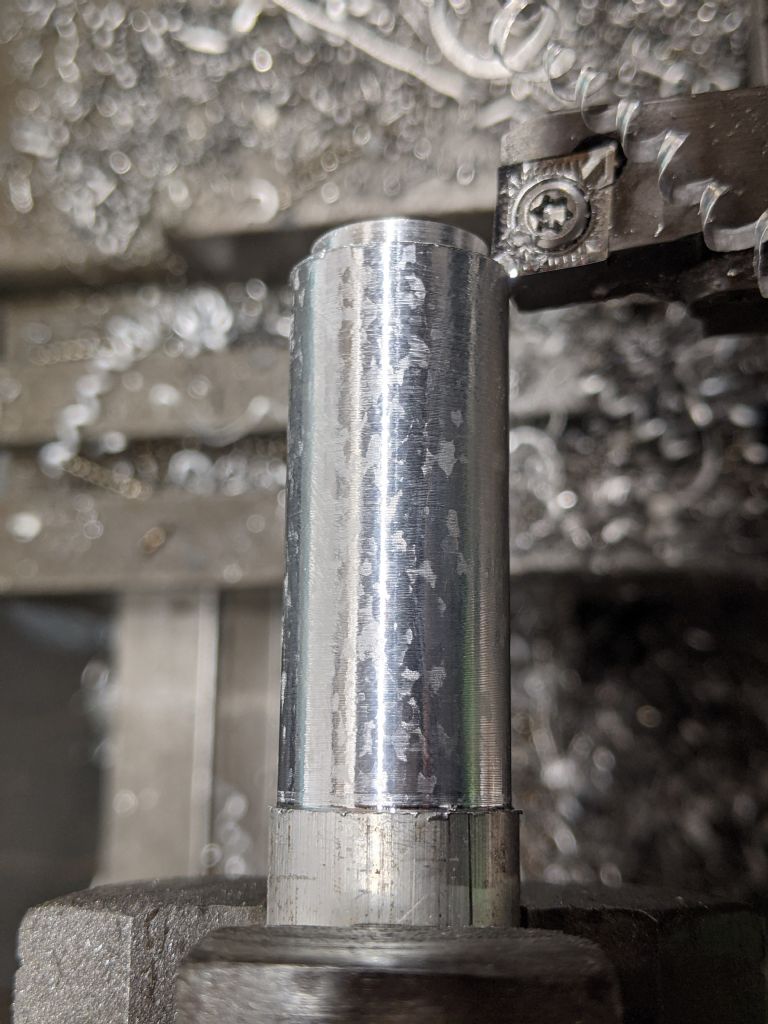
              Speaking of which, I did a bit more turning today, just a little aluminium for a project I'm working on (some incense burners made from wood, but need metal inserts to hold the incense)

              Anyway, when I was turning I did a finishing cut with my cutter and it produced a lovely surface finish, as do most cuts on aluminium. However, I saw imperfections in the surface finish. Having studied metallic structures at university I really should know what this is. However the steel samples I've looked at only showed their structure under microscope after being polished and etched.

              pxl_20201228_143457626.jpg

              So, just out of interest my question is, are these lighter and darker spots in the aluminium impurities, spots of different hardness, or grain boundaries?

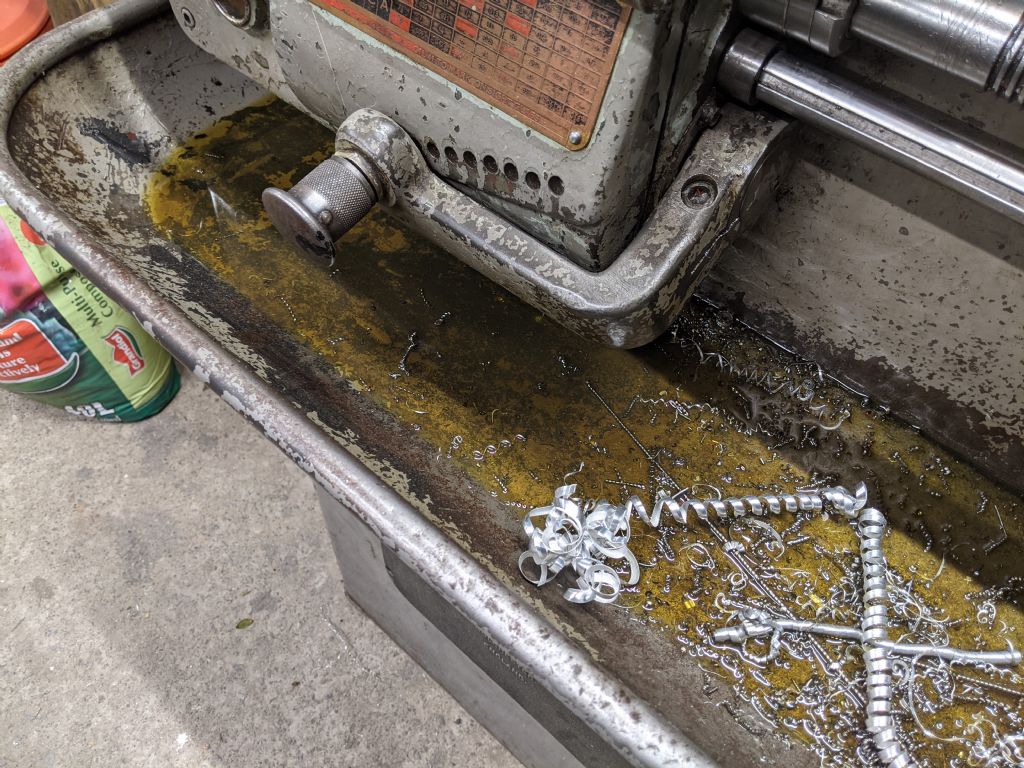
              Also, I took off the side cover after the lathe had been running for some time. I had noticed that the oil level had gone down a little so I thought I'd check to see if I could see the leak location. Pretty hard to miss, It was significantly dripping, even for an English machine, it's excessive. I think It needs sorting asap! Time to take it to pieces again!!!!!

              Back to University on Thursday, with assignments due and exams looming, I suspect a full lathe teardown will have to wait. But I should still be able to tighten the bolts to see if that stops it. Otherwise, it'll be the oil seals again! In which case I will have to order leather ones instead of the double lip rubber ones I used.

              #516051
              Herman van der Merwe
              Participant
                @hermanvandermerwe76509

                Me thinks those are oxidized aluminium. Was the raw stock stored in a sealed container of sorts?

                #516108
                Richard Kirkman 1
                Participant
                  @richardkirkman1
                  Posted by Herman van der Merwe on 29/12/2020 05:38:09:

                  Me thinks those are oxidized aluminium. Was the raw stock stored in a sealed container of sorts?

                  It was just some 20mm diameter. I didn't think oxidization would have penetrated that deep? That was immediately after a cut of around 1mm from the diameter. The raw stock is just kept on a shelf in the garage. I've not seen it on the other aluminium I've been turning. But I don't know what type this aluminium is, I was given it when I went to Scarborough.

                  #516126
                  Howard Lewis
                  Participant
                    @howardlewis46836

                    Not a metallurgist, but crystalline boundaries produced during the extrusion process?

                    Localised heating produced by the carbide tool?

                    I e Does the same happen with shallower cuts, or with HSS?

                    Someone on here MUST know

                    Howard

                    #516131
                    john fletcher 1
                    Participant
                      @johnfletcher1

                      Hello Richard, I see more progress with the lathe. All the other bits and pieces have almost gone from Howard workshop clearance. Lathe went to a club member and mill to a club members son, all local. What a job Brian and I had, there was quite a lot of metal as well to be moved, and access wasn't good. either so all had to man handled. Happy new you to all and I'll be looking out for Part 3 when its published.. John

                      #516194
                      Phil Whitley
                      Participant
                        @philwhitley94135

                        George Lodge at 80 English st in Hull have a good stock of NOS leather seals Richard, and they are real helpfull. Sorted me one out for my old Ben patents 22cu/ft/min compressor!

                        Phil

                        Edited By Phil Whitley on 29/12/2020 18:58:31

                        Edited By Phil Whitley on 29/12/2020 18:59:04

                        #516208
                        Richard Kirkman 1
                        Participant
                          @richardkirkman1

                          Howard, I'm not sure was much heat in the cut, it wasn't a massive cut. I didn't get time to try shallow cuts or any turning today, the car was in the garage.

                          Hi John, I'm glad to hear the toolings all gone to new homes, I'm definitely still using mine as much as I can! Happy new year to you too!

                          Thanks Phil, I'll look into them if I need to. I hope you've had a nice Christmas, especially considering how much you love it! cheeky Bah Humbug

                          As for today's progress, I've attempted to tame the leak.

                          This was the leak when I got home

                          pxl_20201221_183559255.jpg

                          And this was the leak today. Much more oil

                          pxl_20201229_160847098.jpg

                          I suspect the bolts and things have shrunk slightly due to the colder temperature in the garage. Alongside using the lathe heating up the oil will increase its viscosity so it'll leak faster.

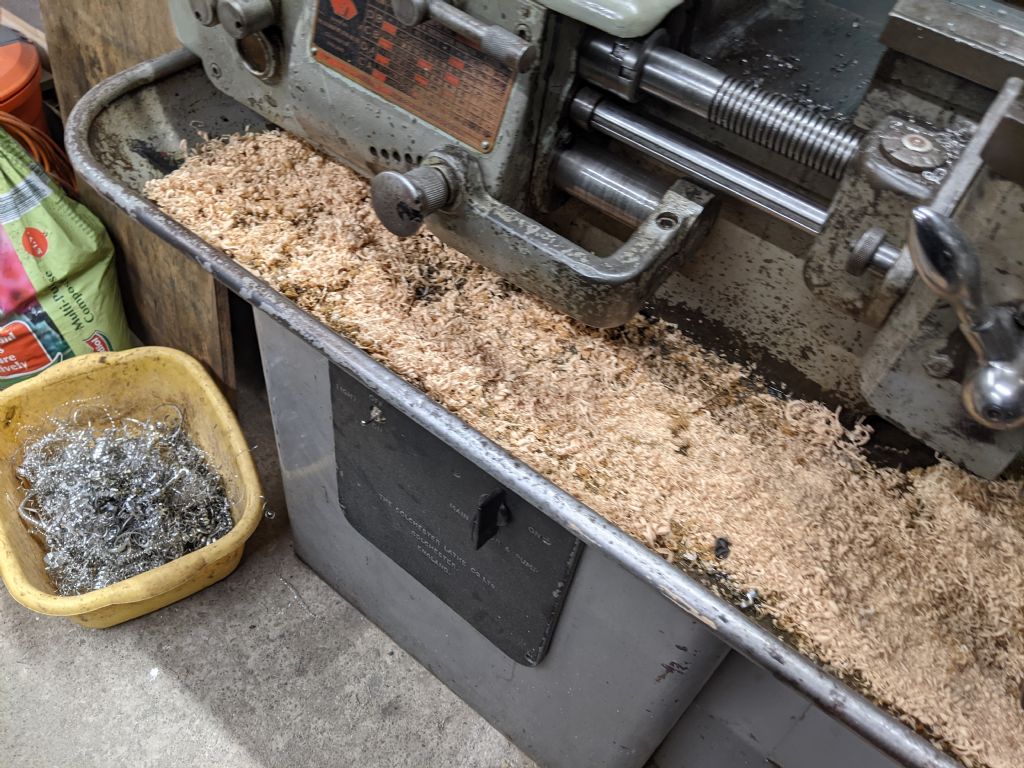
                          Luckily I have been doing some wood turning, so it was very easy to mop up the oil. I haven't used this method before, I was surprised how well it worked with nice dry shavings. Very minimal mess!

                          pxl_20201229_161828501.jpg

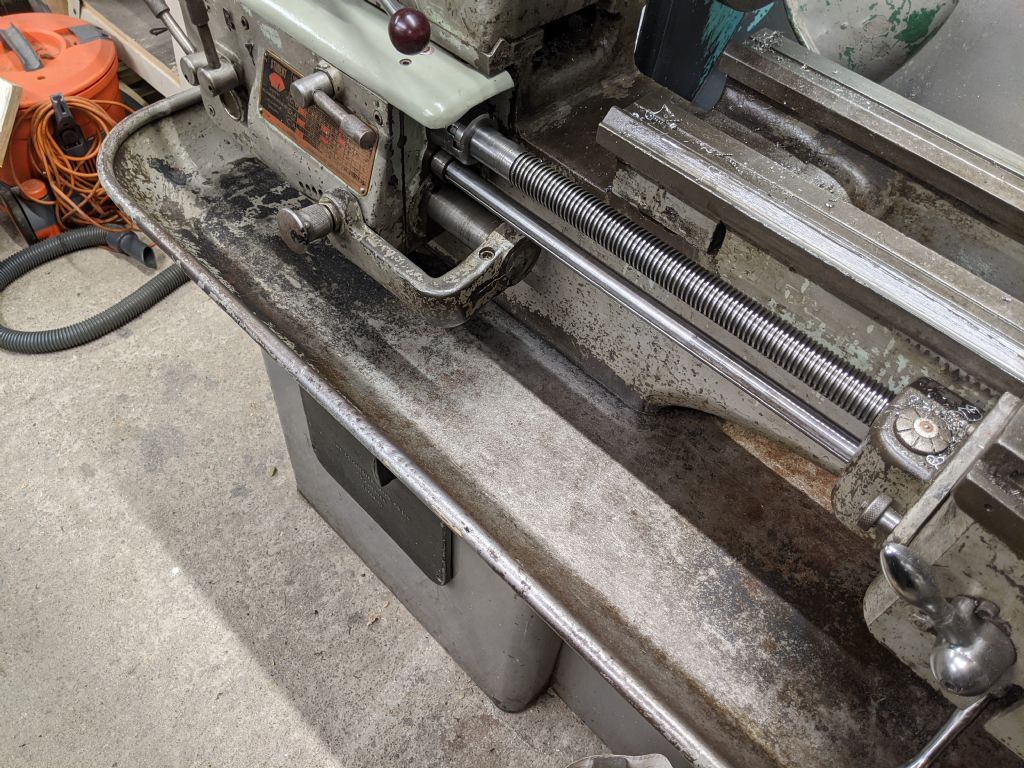
                          All clean once again. Much easier to see future leaks!

                          pxl_20201229_165309017.jpg

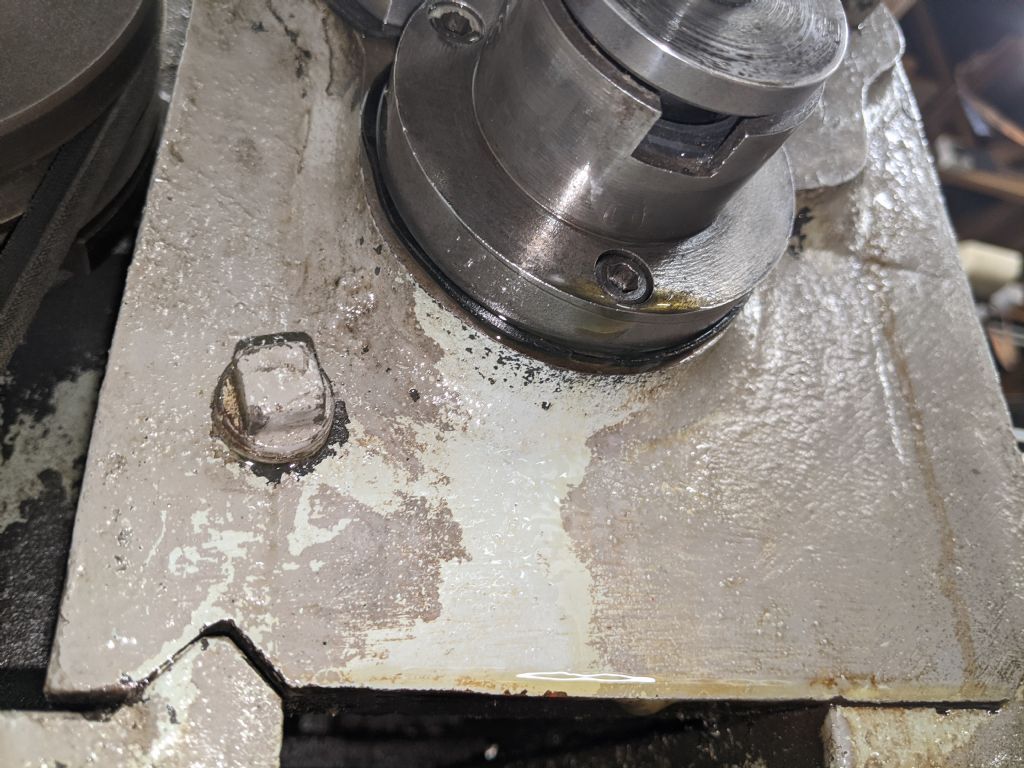
                          So once it was all cleaned I went to where I suspected the leak was coming from

                          pxl_20201229_162444306.jpg

                          The bolts holding these gaskets tight were not fully tightened as snugly as they should be. So I have just tightened them up a little more. Still not overly tight, but I think they're good now

                          I checked to see if the oil seal in there had leaked as well, but it seemed dry when I stuck my finger in the slot. Very surprising. It looks like I've made it work.

                          Anyway I'll turn some more tomorrow. Last day at home so I need to make the most of it. I'll do a little turning playing with the surface finish on that bar, I'll go deeper too and see if its still there. And hopefully warming the lathe up will tell me if it leaks or not! If not, new gaskets need to be made

                          Happy New Year to all!

                          #516246
                          Herman van der Merwe
                          Participant
                            @hermanvandermerwe76509
                            Posted by Richard Kirkman 1 on 29/12/2020 11:56:48:

                            Posted by Herman van der Merwe on 29/12/2020 05:38:09:

                            Me thinks those are oxidized aluminium. Was the raw stock stored in a sealed container of sorts?

                            It was just some 20mm diameter. I didn't think oxidization would have penetrated that deep? That was immediately after a cut of around 1mm from the diameter. The raw stock is just kept on a shelf in the garage. I've not seen it on the other aluminium I've been turning. But I don't know what type this aluminium is, I was given it when I went to Scarborough.

                            At what depth do these disappear? It can oxidize quite quickly especially in the absence of oxygen.

                            #516260
                            roy entwistle
                            Participant
                              @royentwistle24699

                              It can oxidize quite quickly especially in the absence of oxygen. ?

                              Roy cheeky

                              #516264
                              Oven Man
                              Participant
                                @ovenman
                                Posted by roy entwistle on 30/12/2020 09:57:37:

                                It can oxidize quite quickly especially in the absence of oxygen. ?

                                Roy cheeky

                                It's the same principle as Richards oil viscosity increasing when it gets hot. But we all know exactly what he means.

                                Peter

                                #516278
                                Herman van der Merwe
                                Participant
                                  @hermanvandermerwe76509
                                  Posted by roy entwistle on 30/12/2020 09:57:37:

                                  It can oxidize quite quickly especially in the absence of oxygen. ?

                                  Roy cheeky

                                  Sorry, the correct word would be "corrode" in the absence of oxygen. Oxygen is the only thing protecting alu. Take it away and you have many problems. Richard, if I remember lives next to the coast so he most probably is seeing inter-granular corrosion.

                                  #519496
                                  Herman van der Merwe
                                  Participant
                                    @hermanvandermerwe76509

                                    @Richard you have lost some images on page 1 …

                                    #519511
                                    Richard Kirkman 1
                                    Participant
                                      @richardkirkman1
                                      Posted by Herman van der Merwe on 13/01/2021 09:14:31:

                                      @Richard you have lost some images on page 1 …

                                      Thanks Herman

                                      They're on a post by SillyOldDuffer so it's not too do with my album. I presume something may have happened on their end. Deleted the album perhaps?

                                      All my pictures are still there

                                      #542474
                                      Richard Kirkman 1
                                      Participant
                                        @richardkirkman1

                                        I hope everyone is well.

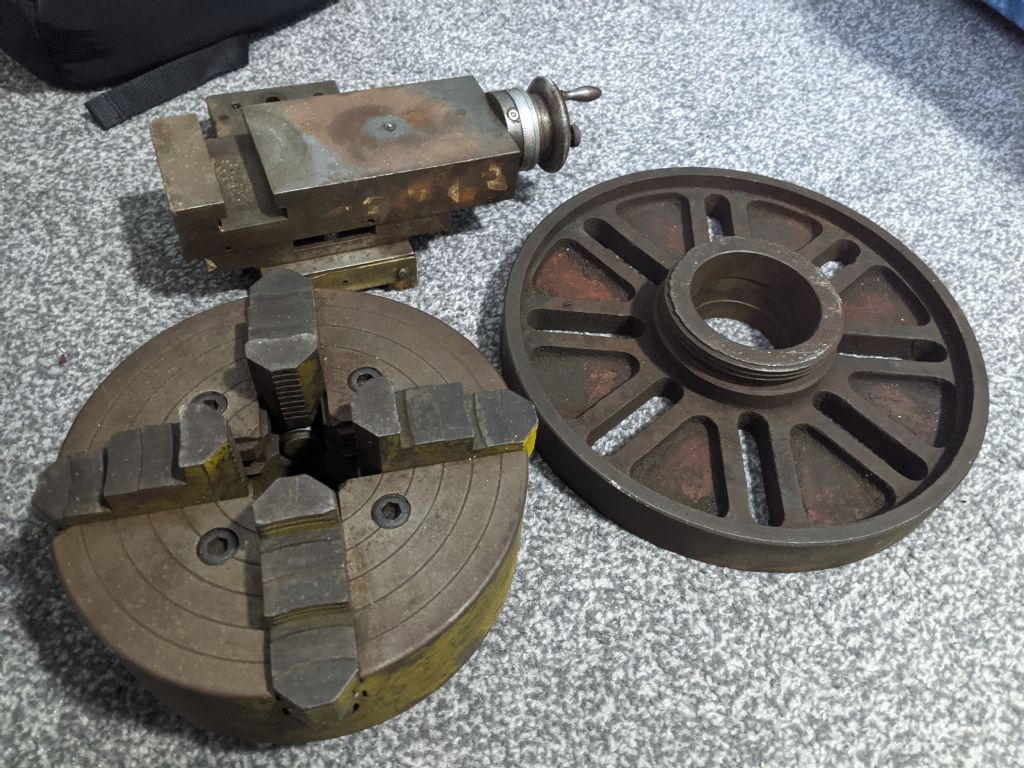
                                        I seem to have acquired a few new toys. I saw these pop up in Grimsby and the seller offered to deliver them to Hull for a very reasonable price. Not extremely cheap, but I'm very happy.

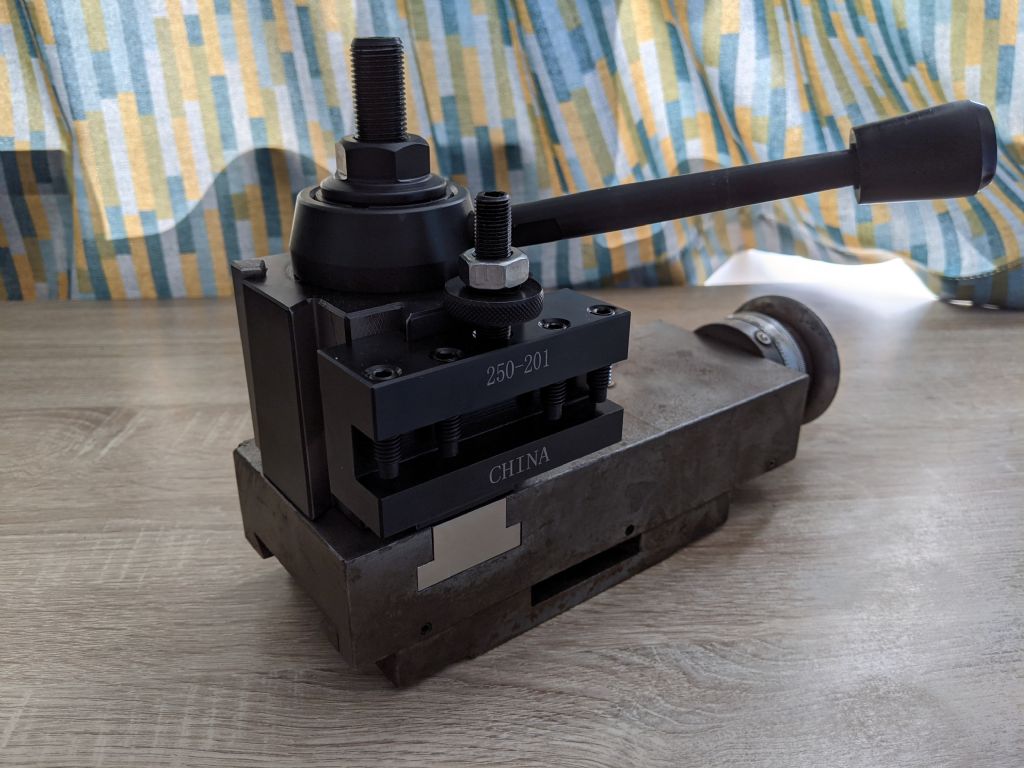
                                        Now I won't have to cut up my 4-way tool post in order to attach a QCTP. Hopefully, there will be a fun build making the T bar to go in the slot and making the mounting post(depending on if the QCTP comes with one) I'm considering this one. Alongside this being a nice upgrade for the lathe, my topslide is quite worn and is easy to turn at one end, and very difficult to turn at the other, so this should be an all-around improvement. I'll take the best parts from each and put them together.

                                        Arc QCTP

                                        I didn't really need the 8 Inch 4 jaw, but it's not often I see them come up, and for the price, it was worth it. The faceplate may come in handy at some point as well. Plus it'll be fun to clean and paint them both.

                                        I did pop home for easter as I was allowed, however, the lathe did not get touched as I was busy making wooden things! I suspect it is still leaking so this will be addressed at some point in the summer.

                                        pxl_20210430_190913631.jpg

                                        #542500
                                        SillyOldDuffer
                                        Moderator
                                          @sillyoldduffer
                                          Posted by Richard Kirkman 1 on 13/01/2021 10:21:21:

                                          Posted by Herman van der Merwe on 13/01/2021 09:14:31:

                                          @Richard you have lost some images on page 1 …

                                          Thanks Herman

                                          They're on a post by SillyOldDuffer so it's not too do with my album. I presume something may have happened on their end. Deleted the album perhaps?

                                          All my pictures are still there

                                          Just checked. The images in my post were linked to Richards google album at https://photos.app.goo.gl/eWFpzzp7p7Wasart9, which is now a dead link. Richard started by hosting images on Google and later moved to to hosting them directly on the forum, in his album. This is where they probably are now, but the move broke the links in my post. 'Gone away, not known at this address!'

                                          Out today, not sure if it can be fixed, I'll have a look this evening.

                                          Dave

                                          #542517
                                          Richard Kirkman 1
                                          Participant
                                            @richardkirkman1
                                            Posted by SillyOldDuffer on 01/05/2021 09:16:57:

                                            Just checked. The images in my post were linked to Richards google album at https://photos.app.goo.gl/eWFpzzp7p7Wasart9, which is now a dead link. Richard started by hosting images on Google and later moved to to hosting them directly on the forum, in his album. This is where they probably are now, but the move broke the links in my post. 'Gone away, not known at this address!'

                                            Out today, not sure if it can be fixed, I'll have a look this evening.

                                            Dave

                                            Thanks Dave

                                            I suspect I have probably had a tidy out on my google photos at some point

                                            I'm not sure how important the images are at this point, but if you can fix it, it would be appreciated

                                            Thanks

                                            #548394
                                            Richard Kirkman 1
                                            Participant
                                              @richardkirkman1

                                              Quick update

                                              I no longer have access to a milling machine at home, so I enlisted the help of Phil to machine me a 304 stainless steel t-nut for the top slide so I can mount the new tool post.

                                              I did initially go to the university engineering workshop to ask for their help but they were not interested as it was hard steel and they wouldn't let me in to do it either.

                                              So, Phil helped me out greatly. Big thanks to Phil for all of his help

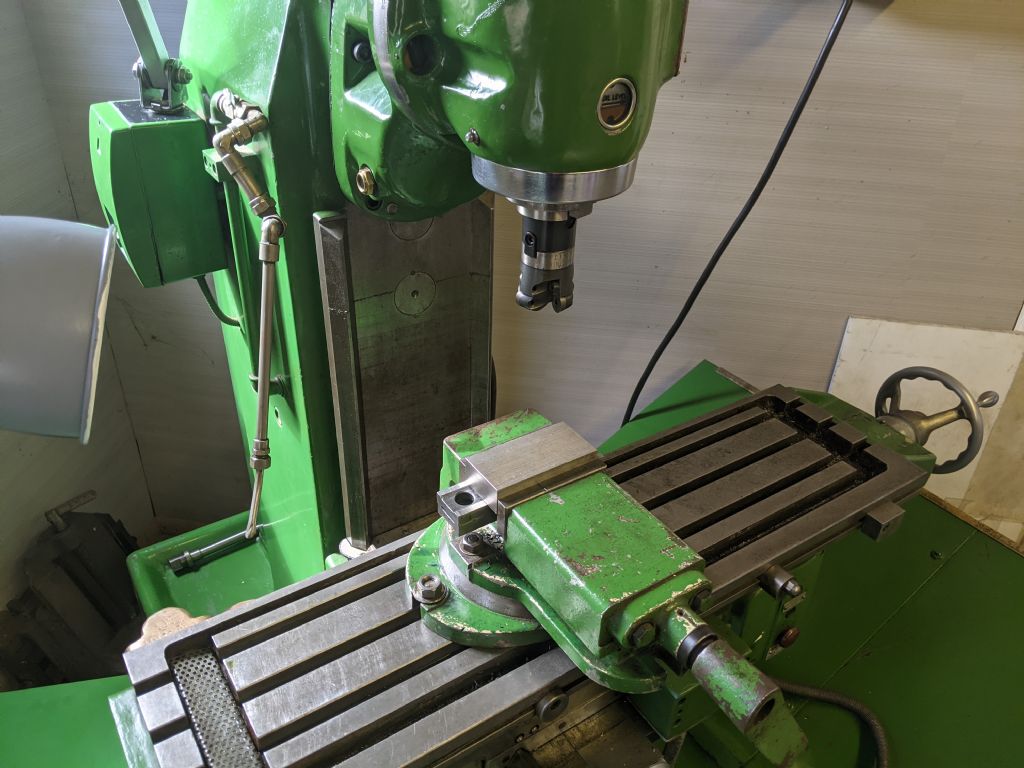
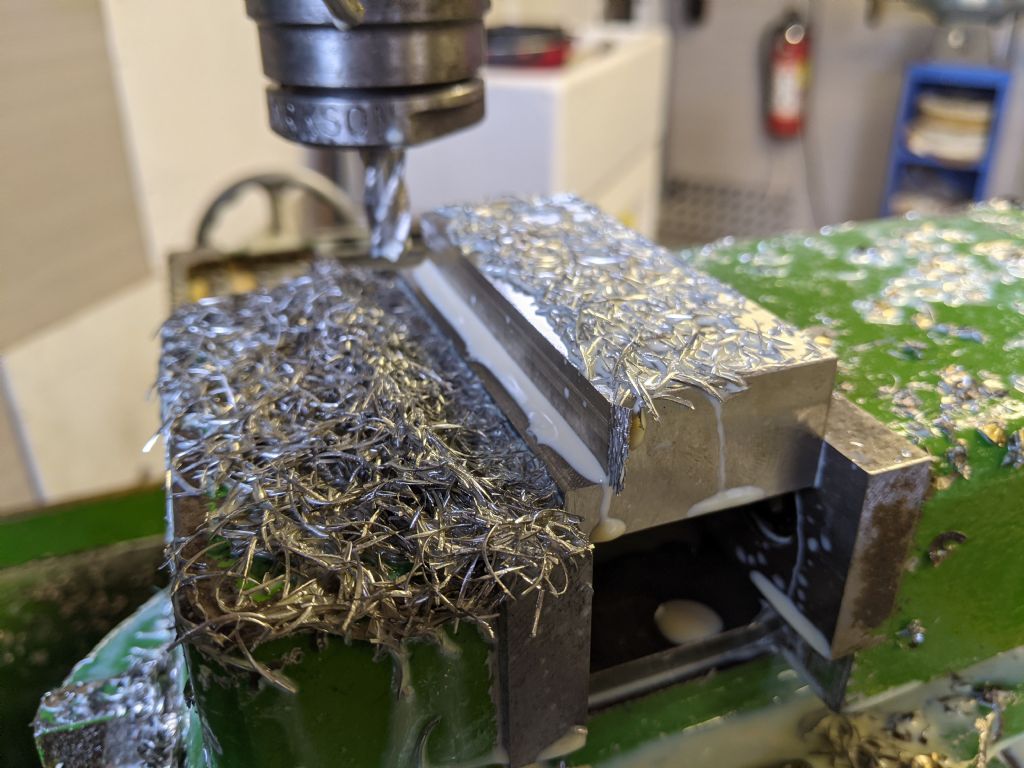
                                              304 is a pretty tough steel, especially for an unexperienced person like me, but we made the best of it. We started using a face mill to make the block square, then we took it to size.

                                              pxl_20210604_091139078.jpg

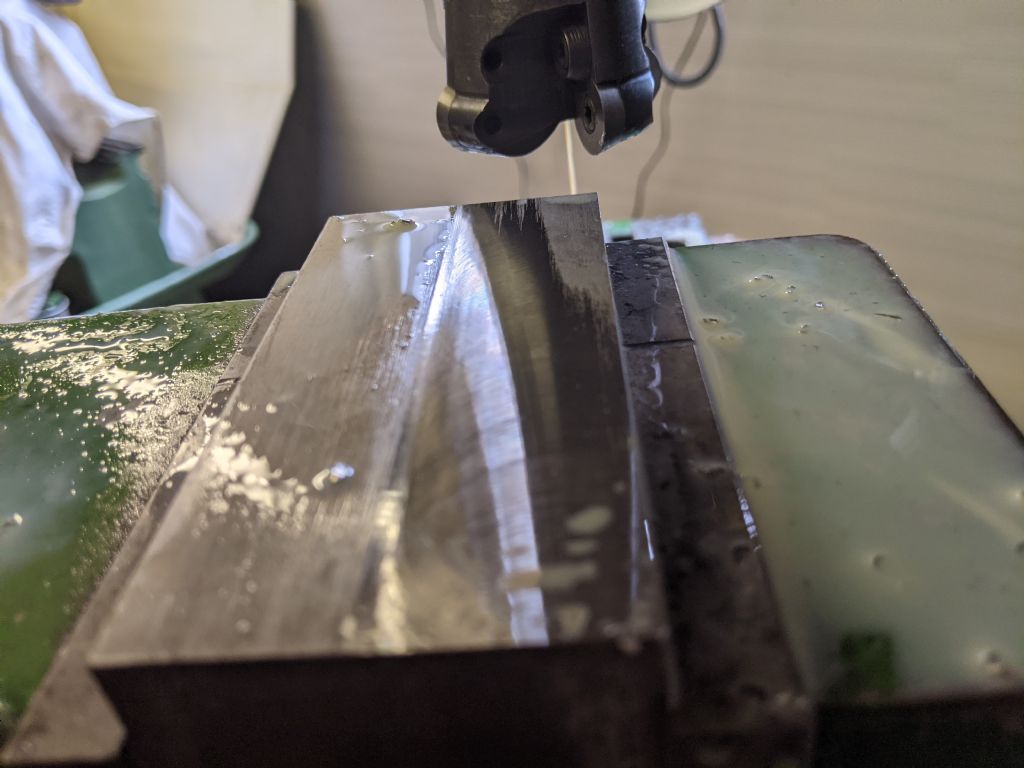
                                              Cleaning it up gave quite a nice finish. Although I did get some chatter later on.

                                              pxl_20210604_092539854.jpg

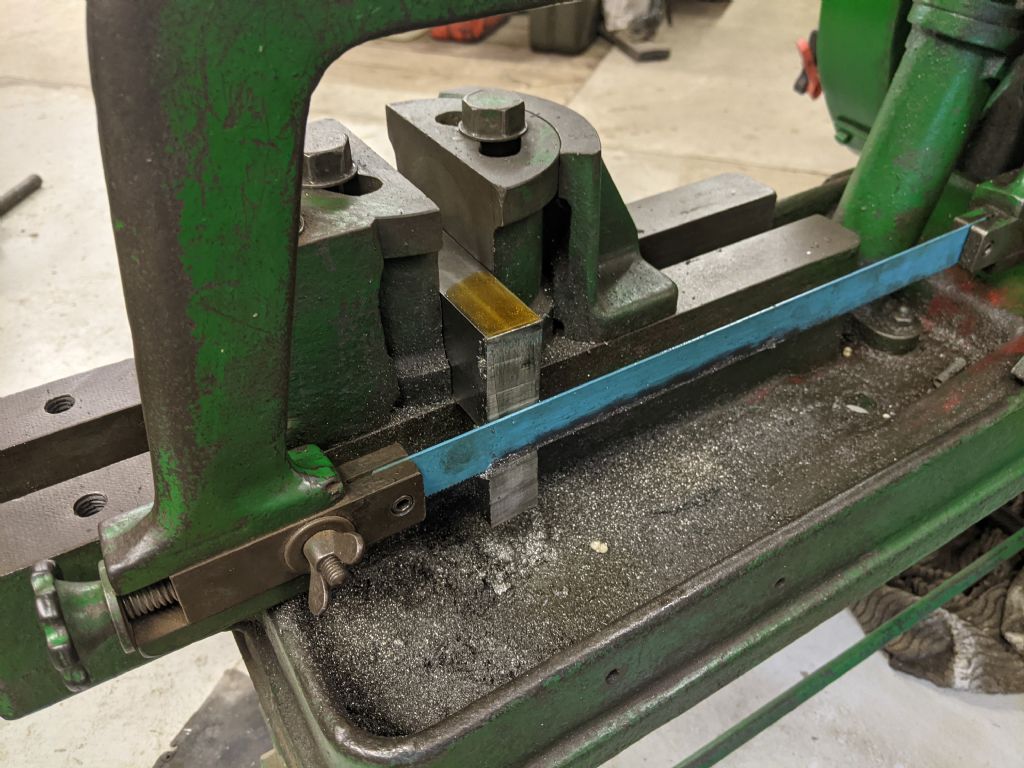
                                              The end dimension had 10mm to come off, so it was much quicker to cut it off with Phils very nice mechanical hacksaw.

                                              pxl_20210604_110157564.jpg

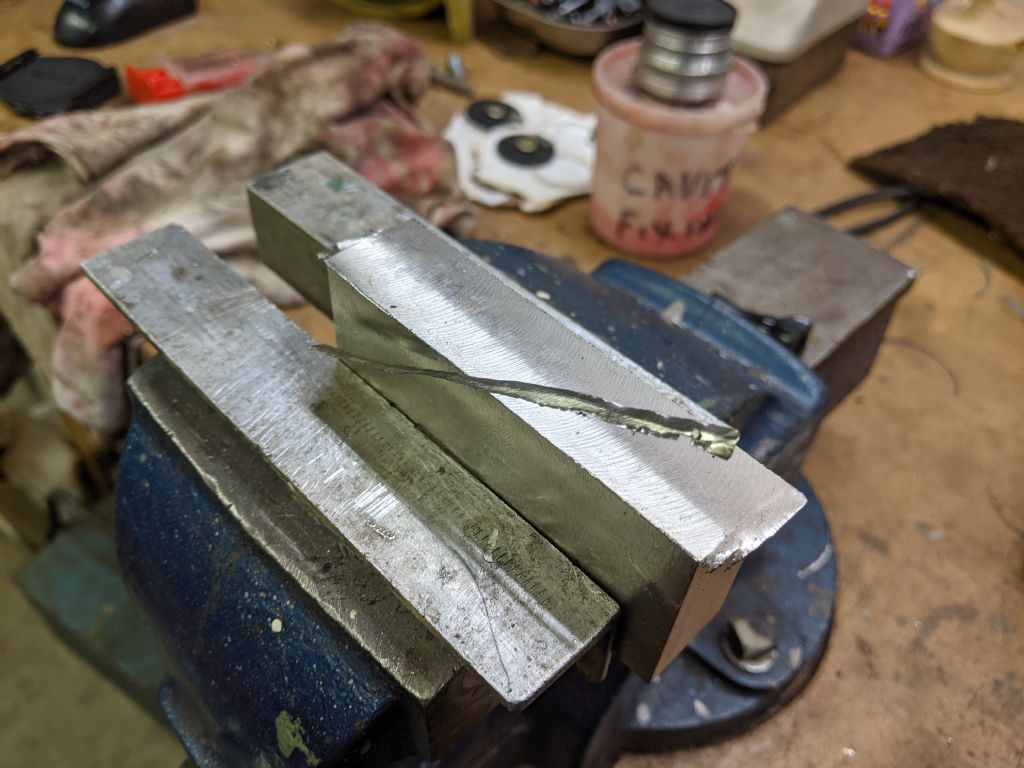
                                              Some faces had 1mm or two to come off, so It took me quite a while when taking 0.2mm cuts. The steel got some very nasty burrs too, if that's the right word when they're so large! I presume that'd due to the steel being hard and due to my milling direction.

                                              pxl_20210604_131910455.jpg

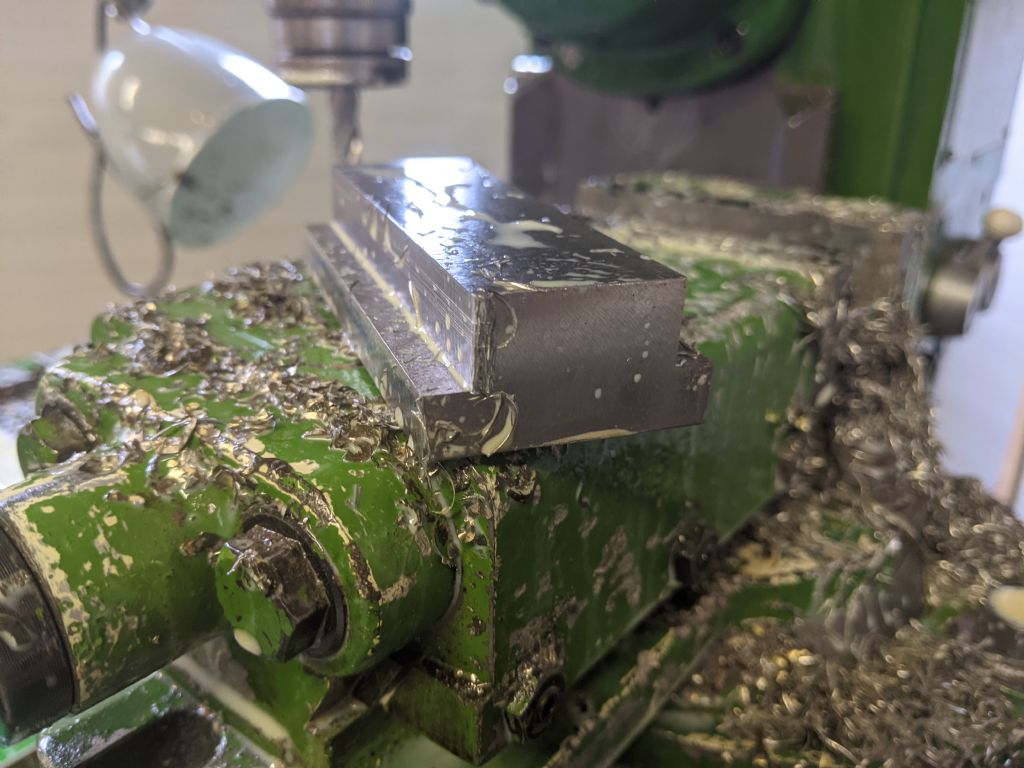
                                              Then I cautiously moved onto using a hss endmill to cut in the slots. After 30 passes of 0.2mm cuts we has a 6mm recess for one side, then the other side was done.

                                              pxl_20210604_141324141.jpg

                                              The hss worked surprisingly well. I had bought a carbide endmill to use, but it wouldn't fit in any of Phils chucks.

                                              pxl_20210604_144021188.jpg

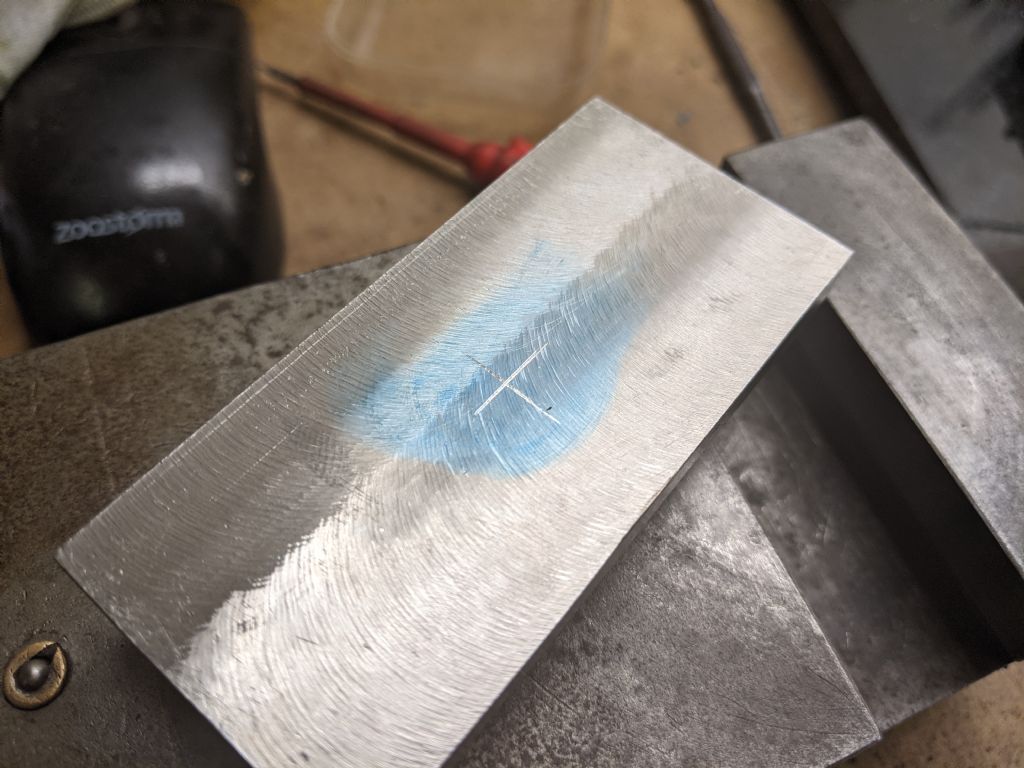
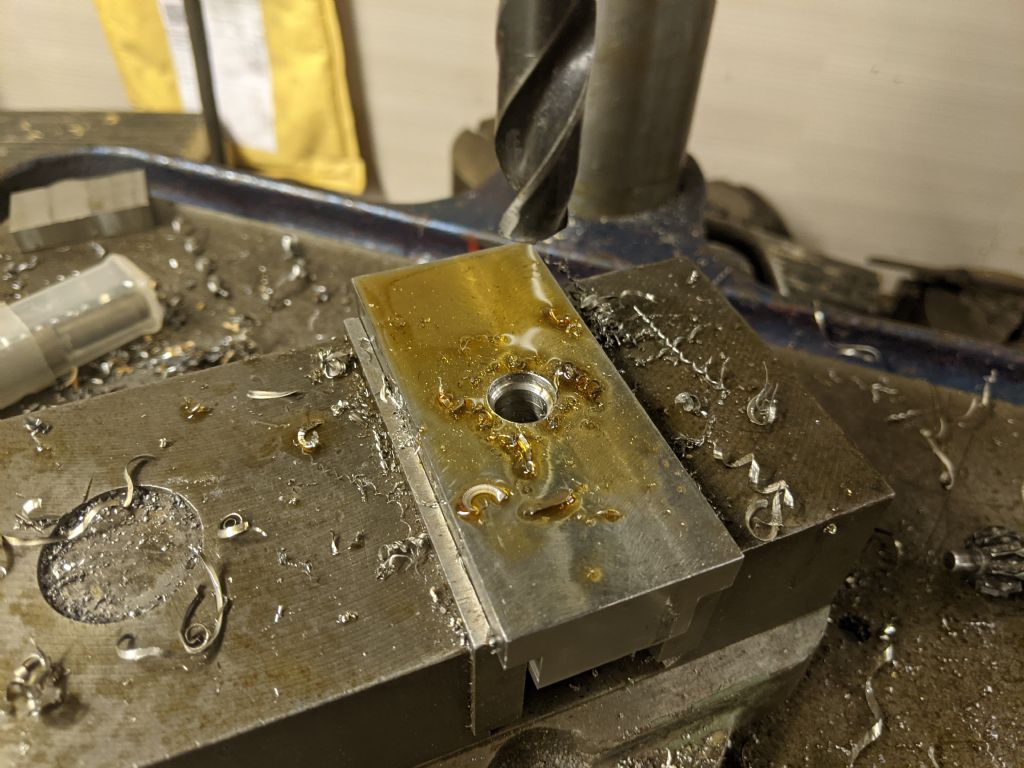
                                              Now to size, it was time to deburr and drill the hole

                                              pxl_20210604_152305144.jpg

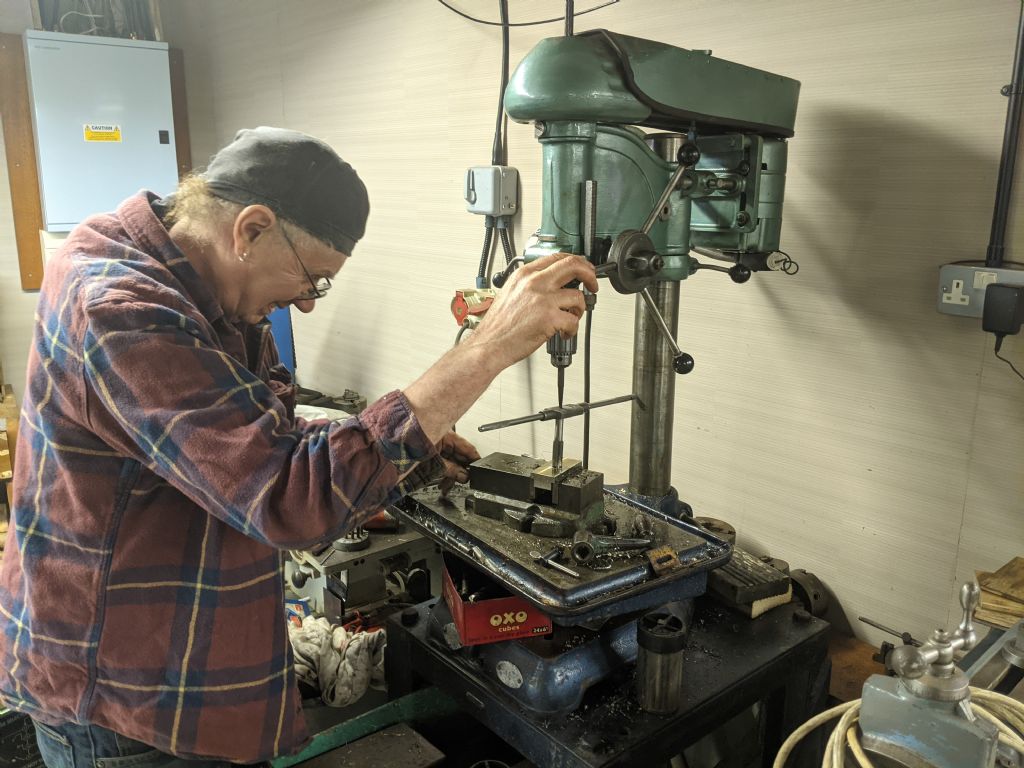
                                              The drill size was stepped up very gradually as the metal is tough and we didn't want to work harden it at all.

                                              pxl_20210604_153612519.jpg

                                              Then we got the 5/8ths sae tap to go in the hole and lead it in using the drill press to ensure it was square

                                              pxl_20210604_162128566.mp.jpg

                                              The tapping was slow but worked well with lots of lubrication. But it all went smoothly from that point. A very nice fit for a novice like me! Room for improvement in the future, but I'm happy.

                                              pxl_20210604_164920225.jpg

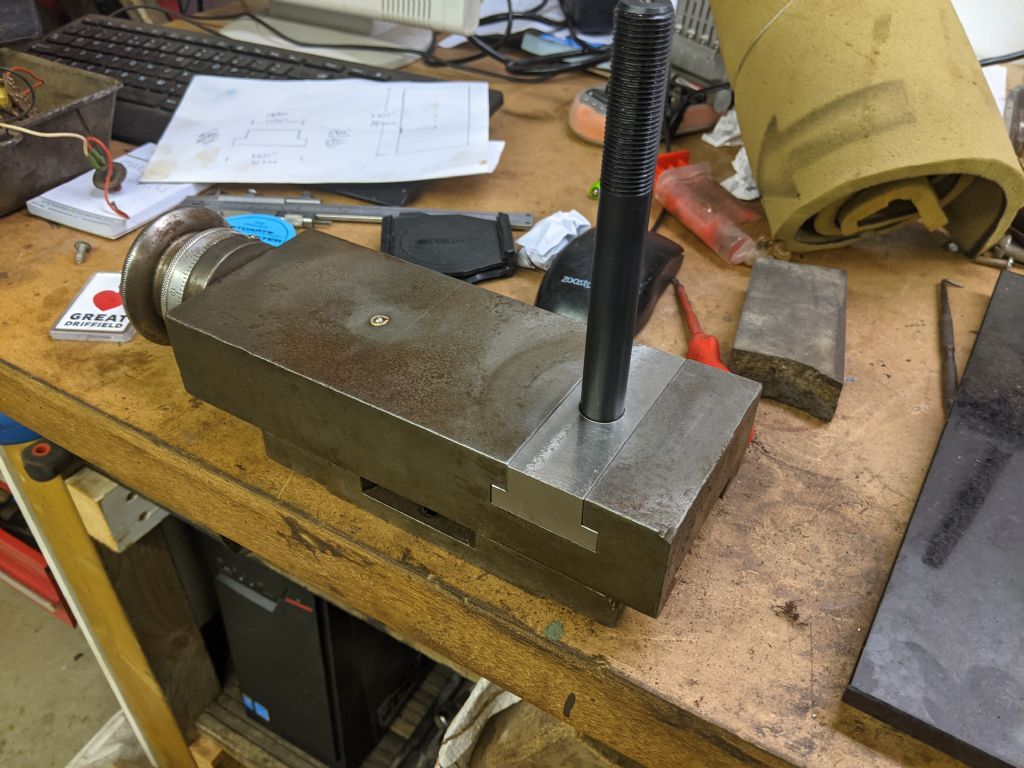
                                              Tool post fitted. I can't decide if I'll turn down the extra thread on the end. It doesn't add any value, but who knows if I'll need it in the future.

                                              pxl_20210605_095023172.night.jpg

                                              Next step is to get back home from university and disassembly everything to clean and get parts from both top slides to pick the best of each. Then onto some turning!

                                              Thanks again to Phil for his time and help, if you want to see more there will be some footage of the milling on his Youtube channel.

                                              #548418
                                              Phil Whitley
                                              Participant
                                                @philwhitley94135

                                                It was a pleasure mate, really enjoyed the day, anytime you need to borrow a mill! Richard is being modest about the drilling, it was tough going!! this morning a penny dropped when I remembered that I had not stiffened up the Y axis with the table lock, hence the chatter! My bad!!

                                                Phil

                                                Edited By Phil Whitley on 05/06/2021 16:36:58

                                              Viewing 22 posts - 776 through 797 (of 797 total)
                                              • Please log in to reply to this topic. Registering is free and easy using the links on the menu at the top of this page.

                                              Advert

                                              Latest Replies

                                              Viewing 25 topics - 1 through 25 (of 25 total)
                                              Viewing 25 topics - 1 through 25 (of 25 total)

                                              View full reply list.

                                              Advert

                                              Newsletter Sign-up