Coventry Gauge Micro Maag

Advert

Coventry Gauge Micro Maag

Home Forums General Questions Coventry Gauge Micro Maag

  • This topic has 16 replies, 5 voices, and was last updated 1 May 2015 at 18:49 by Capstan Speaking.
Viewing 17 posts - 1 through 17 (of 17 total)
  • Author
    Posts
  • #188254
    ANDY CAWLEY
    Participant
      @andycawley24921

      ihave a Coventry Gauge Micro Maag which I acquired some time ago.

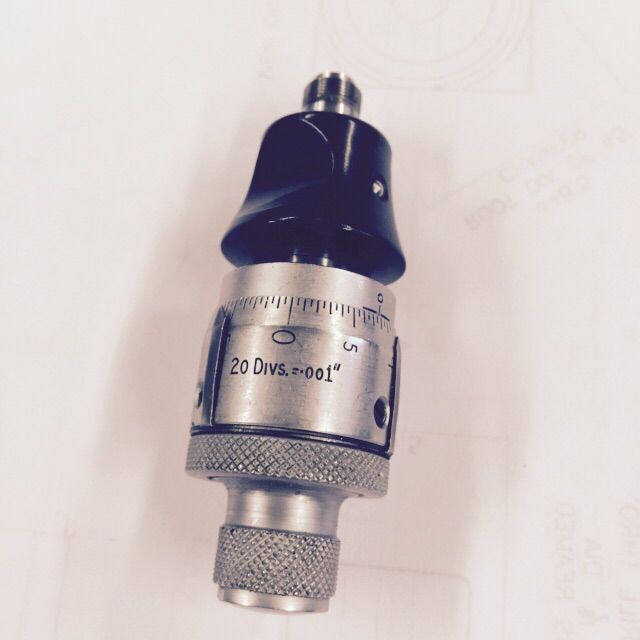
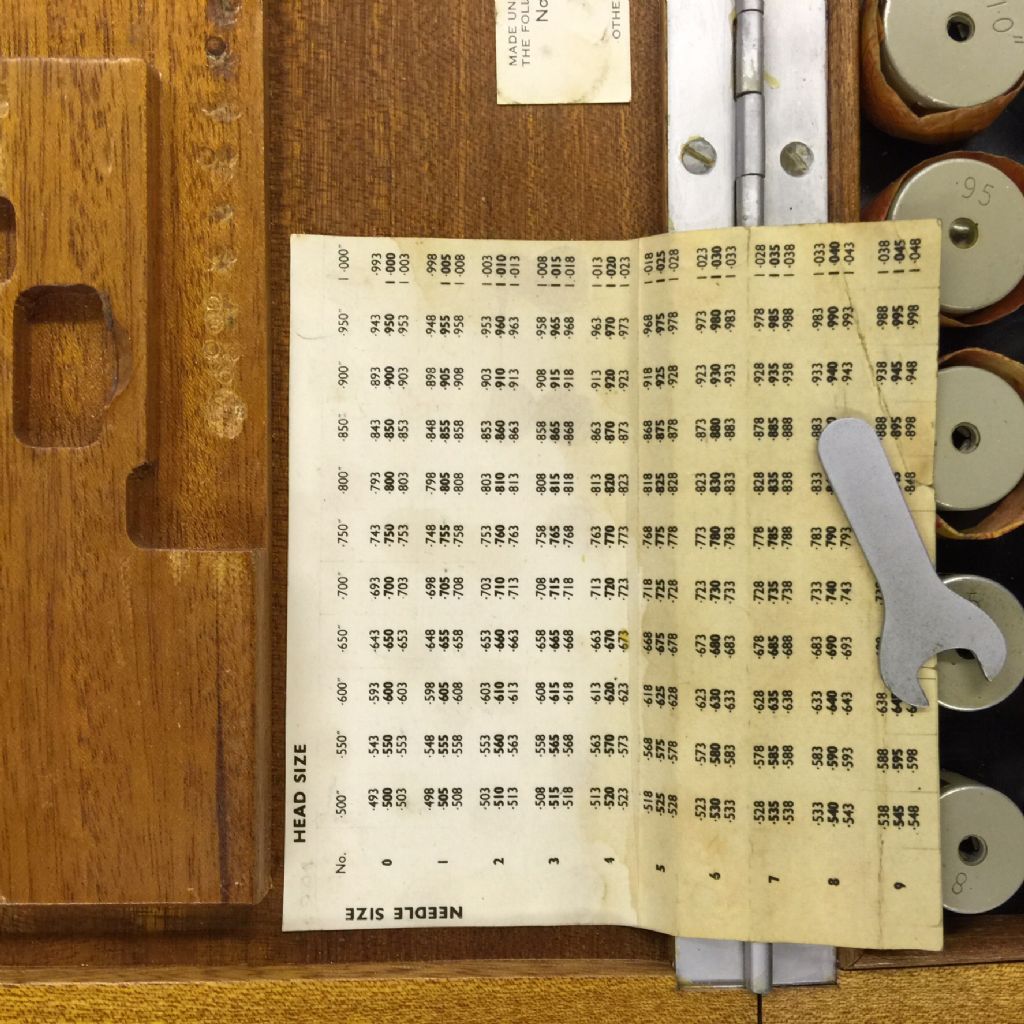
      image.jpgIt is a three point bore measuring device. There are several heads and the three points are forced outwards by a taper pin which is moved by a thimble . There are ten of these tapered pins each with a range of +/- 3 thou.


      image.jpg

      The black bit is a spring loaded plunger which moves the tapered pin however

      i can't figure out exactly how to use it properly.

      Can anybody hel?


      Edits he black ed By ANDY CAWLEY on 01/05/2015 01:

      Edited By ANDY CAWLEY on 01/05/2015 02:03:50

      Edited By ANDY CAWLEY on 01/05/2015 02:05:26

      Advert
      #23849
      ANDY CAWLEY
      Participant
        @andycawley24921
        #188255
        ANDY CAWLEY
        Participant
          @andycawley24921

          image.jpgimage.jpg

          #188261
          Michael Gilligan
          Participant
            @michaelgilligan61133

            That's very nice, Andy

            20 divisions to the thou smile p

            MichaelG.

            #188273
            ANDY CAWLEY
            Participant
              @andycawley24921
              Posted by Michael Gilligan on 01/05/2015 07:15:37:

              That's very nice, Andy

              20 divisions to the thou smile p

              MichaelG.

              Thank you very much

              It would be even nicer if somebody could tell me how to use itface 24

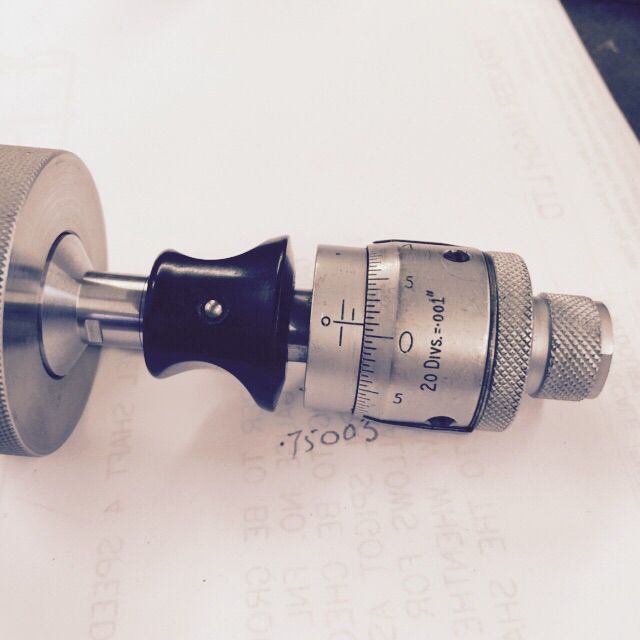
              The setting gauge is 0.75003 dia.

              When I attach the appropriate taper pin and set the thimble to =0.000 and insert it in the setting gauge by retracting the black sleeve and then releasing the sleeve the measuring head (that's what I call the bit with the three probes) is well and truly held tight in the setting ring.

              I don't know what to do next. Because it is such a precision piece of kit Im scared of damaging it through ignorance.

              I was rather hoping that some one on this forum might have experience in using one of these things and would be able to tell me what to do or point me to an instruction manual. I have Googled with out success.embarrassed

              Edited By ANDY CAWLEY on 01/05/2015 09:31:59

              #188277
              KWIL
              Participant
                @kwil

                Is the setting guage marked as being 0.7503" or is that what you are measuring with the guage head as presently set up?

                I would have expected the release of the black sleeve to leave you with a sliding fit when correctly set up with the thimble indicating +0.003" (ie the thimble is measuring 0.7503" if this figure is the true setting guage diameter)

                #188278
                ANDY CAWLEY
                Participant
                  @andycawley24921

                  KWIL, That's what I thought too.

                  I tried setting it below .750 (or so I thought) and it was still tight.

                  Maybe I'm being fooled by the 20 divisions to the thou and I'm being too clumsy. I'd better go back and have another go.

                  A bit of discussion and guidance always seems to helpsmiley.

                  It's too good a bit of kit to give up on or wreck!

                  #188280
                  Capstan Speaking
                  Participant
                    @capstanspeaking95294

                    It's a bore mic set. Micro Maags are very good ones though.

                    The black collar is the quick release to change heads. Each head covers a very narrow range of sizes.

                    So you have a nice bore, ideally a ground one;

                    1. Find the head that covers that size.
                    2. Wind the thimble all the way out.
                    3. Pull back the collar and slide the correct head on and release the collar. Make sure it is retained by the detent.
                    4. Fit the head into the bore.
                    5. Gradually wind the thimble in while moving the mic slightly to ensure it is centrally located and concentric. The three blades will extend.
                    6. Read the thimble just like an ordinary mic.

                    The other bits are extensions to extend the head for deep holes and a reference setting bore which may have been reground in its time.

                    "Feel" is important with these.

                    HTH smiley

                    #188282
                    ANDY CAWLEY
                    Participant
                      @andycawley24921

                      HTH,

                      Thanks, that's just the kind of advice I was looking for.

                      I realised that "feel" was very important, that's why I came here looking for guidance before I damaged anything.

                      I'll have another go and report back.cool

                      #188283
                      Capstan Speaking
                      Participant
                        @capstanspeaking95294

                        HTH is net speak for hope that helps wink

                        After so many posts it occurs that I may be being rude so it's actually Mark.

                        ..and you're welcome.

                        #188285
                        ANDY CAWLEY
                        Participant
                          @andycawley24921

                          Chortle, chortle ! smiley, no you're far from being rude, it's me that's being gormless!

                          I must get my grand children to post for me.

                          Thanks again.

                          #188286
                          Bob Rodgerson
                          Participant
                            @bobrodgerson97362

                            BobHi Andy,

                            I bought a set of these a good few years ago that where ex RAE owned and cost me an arm and a leg. They were bought to measure bores accurately, mainly in the 3-5" range for engine cylinders and smaller bores ground on my cylindrical grinder. They are beautifully made and measure very accurately so much so that you have to take into account the ambient temperature when measuring larger diameters. They carried all sorts of calibration stickers from the NPL. I have three or four cases with these in them and can measure from 1/2" to 8" dis. It took me ages to figure out how to use them but Capstan's description is correct.

                            #188290
                            Michael Gilligan
                            Participant
                              @michaelgilligan61133

                              Posted by ANDY CAWLEY on 01/05/2015 09:30:17:

                              Thank you very much

                              It would be even nicer if somebody could tell me how to use itface 24

                              .

                              Sorry I couldn't actually help, Andy

                              … I just wanted to keep the ball rolling for you; safe in the knowledge that someone would advise.

                              MichaelG.

                              #188328
                              ANDY CAWLEY
                              Participant
                                @andycawley24921

                                Right then! I've been in the shed and learned a bit more- I think I've cracked it.

                                The setting gauge was 0.75003 and thimble also needed adjusting. The fiducial line has three marks on it, one just on the thimble end, a short one and a long one. The short one represents mid point on the tapered peg and the two others represent + & – 3 thou for that particular peg.


                                I discovered that when the thimble is screwed right in when there is no measuring head in place the black slider will not slide. Wind it back a little bit and it slides back with a click.


                                Minus3thou.jpg

                                Edited By ANDY CAWLEY on 01/05/2015 18:24:05

                                #188330
                                ANDY CAWLEY
                                Participant
                                  @andycawley24921

                                  I don't seem to be able to type any text in below the photo nor add a second photo, what am I doing wrong.

                                  To continue:- Knowing the diameter of the setting gauge I thought that I would adjust the thimble until it registered the diameter of 0.75003 and then lock the thimble.

                                  Zero.jpg

                                  #188331
                                  ANDY CAWLEY
                                  Participant
                                    @andycawley24921

                                    Still cant get text below photo!embarrassed

                                    I was at this point that I discovered that the black sleeve will not slide when the measuring prongs are tight home on the bore.


                                    It seems that the method is:-

                                    1. Wind the thimble fully out.
                                    2. pull the slider back.
                                    3. Insert the measuring head into the bore.
                                    4. Wind the thimble in until resistance is met
                                    5. Check that the slider will not pull back

                                    Now that is really clever because it diminishes the need for "feel".

                                    Edited By ANDY CAWLEY on 01/05/2015 18:35:58

                                    #188332
                                    Capstan Speaking
                                    Participant
                                      @capstanspeaking95294

                                      The quick release allows you to remove it while it is still on size. That way you can take a measurement even when you can't see the scale in situ. Also you can remove it without dragging it across the surface.

                                      I also used to pull it back when screwing a head on so it couldn't jamb on the cone. Go easy with the spanners

                                      Still, whatever works for you is fine.

                                    Viewing 17 posts - 1 through 17 (of 17 total)
                                    • Please log in to reply to this topic. Registering is free and easy using the links on the menu at the top of this page.

                                    Advert

                                    Latest Replies

                                    Home Forums General Questions Topics

                                    Viewing 25 topics - 1 through 25 (of 25 total)
                                    Viewing 25 topics - 1 through 25 (of 25 total)

                                    View full reply list.

                                    Advert

                                    Newsletter Sign-up