Colchester Student Mk1 Won’t Start

Advert

Colchester Student Mk1 Won’t Start

Home Forums Help and Assistance! (Offered or Wanted) Colchester Student Mk1 Won’t Start

Viewing 25 posts - 551 through 575 (of 797 total)
  • Author
    Posts
  • #481168
    Phil Whitley
    Participant
      @philwhitley94135

      Once you get back to the original paint, leave it! feather the edges of any bare metal areas with a sander to thin the paint edge and make sure the paint is sound, then etch prime the bare metal. if you can still see the bare metal area, use a very thin layer of cellulose stopper or heavy coats of sprayed primer till there are no visible repairs, then denib it and put on the finish coats. Denibbing means sanding dry with fine abrasive 120 to 200 till the primer feels smooth. When using an oil based paint, you do not need the perfect primer coat that you need with cellulose paints, but you need a spraygun to speed up the whole process. Remember, remove all the overpainting, but leave any good areas of original finish or filler alone. You have seen the finish on my lathe, that is exactly how I did it! Stripping it back to bare metal is a nightmare, the castings are a lot rougher than they look, they used to cover the whole casting in stopper (cellulose putty) and then wet flat them and primer. Even in a heated paint shop, leave the stopper 24 hours for even a thin coat before you try to wet flat it. Fine surface filler to which you add hardener is better, but you have to put it on thicker than stopper, and it is tricky to rub down without breaking through, because it takes a lot more rubbing to get a good finish. several coats of sprayed on high build acrylic primer can save many hours of frustrating fill wait flat repeat cycles!

      Phil

      Advert
      #481172
      Phil Whitley
      Participant
        @philwhitley94135

        Richard, just read your new post, I have always stoppered or filled onto bare metal. You absolutley have to use etch primer on aluminium, it is optional on steel, but a good idea on cast iron, which has free graphite on the surface, wipe down the bare casting with a thinners damped rag and see the black come off! The etch primer is applied as a dust coat, one coat only, and you should be able to see through it, get spec sheet with the product you get for instructions, it should just tint the substrate, not blank it out completely. Any paint and filler which has been softened by the stripper will have to be removed, which is why I dont use stripper on machinery. Tractol is a very good product, and give excellent results when sprayed or brushed, I have used loads of it. but the finish comes from the preperation and the smoothness of the primer coats, the better they are , the better the finish! There is a knack to using and flatting stopper (cellulose putty), it is like thick primer that you apply with a knife or plastic card. Applied thinly to the bare casting (as they did at the factory) then wet flatted 24 hours later, can bring the areas of bare metal up to absolutely level with the existing flatted paintwork, and then a couple of thin primers are all that is needed. Have a look for some online tutorials on machinery refinishing/painting.

        Phil

        Edited By Phil Whitley on 20/06/2020 21:17:19

        #481335
        Richard Kirkman 1
        Participant
          @richardkirkman1

          Thanks Phil, that's very informative.

          I've been working on the lawnmower today. I've finally got some of the chains off, so it's coming to pieces so I can make some progress.

          Looking at the Tractol data sheet for their etch primer, it says I need

          1 x TRACTOL 729 (Etch primer)

          1 x TRACTOL 816 (Red oxide primer)

          1 – 2 x TRACTOL 329(Machinery enamel)

          So this means the etch primer still needs coating with normal primer too?

          Are there any more aluminium parts on the lathe that I need to worry about?

          I have aluminium parts on the lawnmower too, so I'll be able to spray a few things at once.

          #481385
          Herman van der Merwe
          Participant
            @hermanvandermerwe76509
            Posted by Richard Kirkman 1 on 21/06/2020 20:43:23:

            1 x TRACTOL 729 (Etch primer)

            1 x TRACTOL 816 (Red oxide primer)

            1 – 2 x TRACTOL 329(Machinery enamel)

            So this means the etch primer still needs coating with normal primer too?

            Are there any more aluminium parts on the lathe that I need to worry about?

            If that is what they say that is what you need to do.

            Having said that you need to remember that you need to level the surface you will require a fille primer coat and body filer and spot filler as Phil said. This filler coat should be light grey as you can see the dings much better. Especially when you have spray a misting coat of black and you have sanded it a bit.

            You can choose whichever paint you want, but I would seriously recommend that you use a painting system (in the above you looked at Tractol), but choose something with a filler primer in the system such as a 2K system. As per my thread I have once again learned the hard way not to mix paint types even though the separate paints were quality they did affect each other to the detriment of my mental health …

            #481387
            Herman van der Merwe
            Participant
              @hermanvandermerwe76509

              As far as I see, only the drive end cover is aluminium.

              The rest is cast steel or steel.

              #481406
              Phil Whitley
              Participant
                @philwhitley94135

                Hi Richard, yes! because the etch primer goes on in a thin dust coat, it tends to be uneven and knobbly, and you must not rub it down, so you bury it in primer, and flat it when dry. Like Herman, I use a 2k acrylic primer filler to which you add a hardener, it is high build (the highest I have ever used in fact) and it blanks out repairs quickly and dry sands well. If you are brushing the tractol primer, stir it well, as it seperates and all the filler part of the primer will be in the bottom of the can, then brush many thin coats, allowing the recomended drying time between each. fill in the repairs with primer first untill you have got the repaired areas back up to the original paint level, then flat off and give the whole job a couple of coats, let it dry thoroughly! Then wet flat and top coat. If you dont prime the whole machine, the repairs will show through because they will be darker than the original paint. The advantage with spraying is that you can put 4 or 5 coats of primer on in a day, then flat next day because the hardner in the paint ensures full overnight curing. Check with your tractol supplier to see if they carry "accelerator" to make their paint dry faster.

                Phil

                #481421
                Phil Whitley
                Participant
                  @philwhitley94135

                  No more alumilium as far as I am aware, just cast iron and steel, use good quality paint brushes especially for the finishing coats.

                  Phil

                  #481424
                  Richard Kirkman 1
                  Participant
                    @richardkirkman1

                    Herman, I know 2k might be better, but I already have tractol. I'll need to redo the brass lathe tags/plates like yours too. The work you did on the holes in yours was amazing.

                    So where can I use the p38 body filler?

                    Or do I need to get a different filler

                    When you say your using primer to fill, is primer meant to fill? Or should I be trying to fill all cavities with body filler then smooth then prime?

                    I'm beginning to wrap my head around this. Seems less daunting than it did initially

                    The plan was to brush on a few coats of the red oxide primer to fill it a bit, then sand it down. Then I was going to spray a final coat of primer so the surface was even. Then I was going to spray the topcoats of the enamel.

                    This would allow me to work on lots of the lawnmower parts at the same time as I've been brushing the primer onto those as I've been stripping them too. I'm not a fan of cleaning out my sprayer so i want to do lots at once.

                    #481452
                    Herman van der Merwe
                    Participant
                      @hermanvandermerwe76509
                      Posted by Richard Kirkman 1 on 22/06/2020 11:35:40:

                      Herman, I know 2k might be better, but I already have tractol. I'll need to redo the brass lathe tags/plates like yours too. The work you did on the holes in yours was amazing.

                      So where can I use the p38 body filler?

                      Or do I need to get a different filler

                      When you say your using primer to fill, is primer meant to fill? Or should I be trying to fill all cavities with body filler then smooth then prime?

                      I'm beginning to wrap my head around this. Seems less daunting than it did initially

                      The plan was to brush on a few coats of the red oxide primer to fill it a bit, then sand it down. Then I was going to spray a final coat of primer so the surface was even. Then I was going to spray the topcoats of the enamel.

                      This would allow me to work on lots of the lawnmower parts at the same time as I've been brushing the primer onto those as I've been stripping them too. I'm not a fan of cleaning out my sprayer so i want to do lots at once.

                      The way I am doing it at the moment is as follows.

                      I cleaned the surfaces to bare metal. I removed EVERYTHING. There are many casting holes and scares and uneven areas that needs to be leveled.

                      I wash the area with Parco cleaner and let it dry.

                      I then wipe the area with a lint free cloth.

                      Then one layer of two pack yellow Strontium etch primer.

                      Once this is set, I level the metal surface to be filled and spray one level of 2K filler primer. Once this is dried, I then use a self leveling body filler with activator and apply this to all the dings and holes I can see. The 2K primer is a light grey, so when you look against a light it allows you to see all the areas to be filled. When this has leveled off and set, I give the area a mist spray with black rattle can.

                      Once the mist coat has dried, I start sanding. Areas where low spots are, will remain full of black speckles. I keep on sanding until I see the yellow etch primer start showing and stop. Then depending on the area of black speckles and depth of the depression, I fill again with the self leveling body filler or just give another layer of 2K filler primer.

                      So I repeat the process until no black speckles show once the area is sanded. Each time I need to turn the stand and get it level before using the filler primer and self leveling body filler, so it is a long process.

                      Then it is time for the top coat.

                      Hope this helps in your approach with the Tractol painting system.

                      #481472
                      Richard Kirkman 1
                      Participant
                        @richardkirkman1

                        Thank you Herman that does help a bit. I have a good idea of what I need to do now. I'll run it through before I start to paint properly.

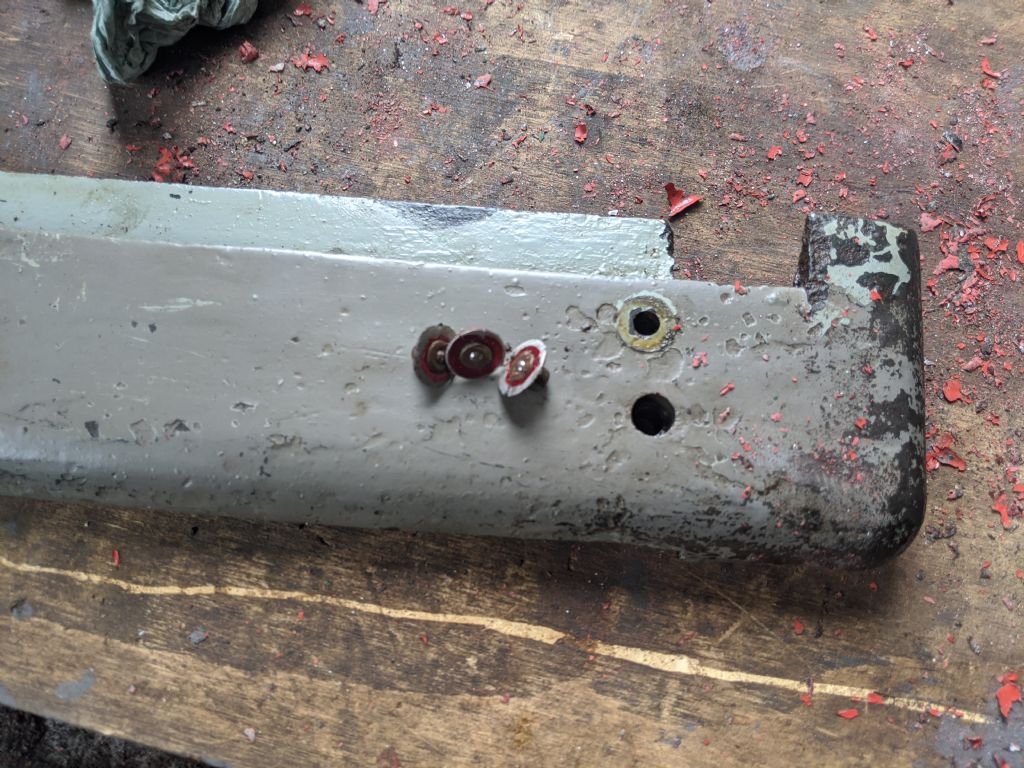
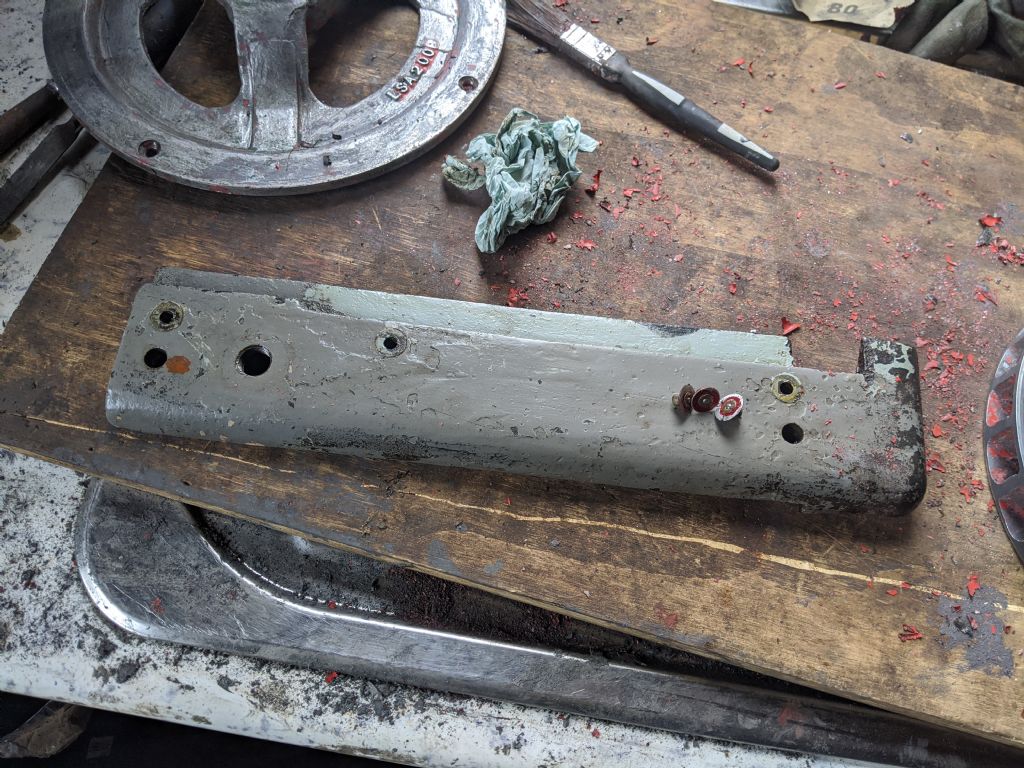
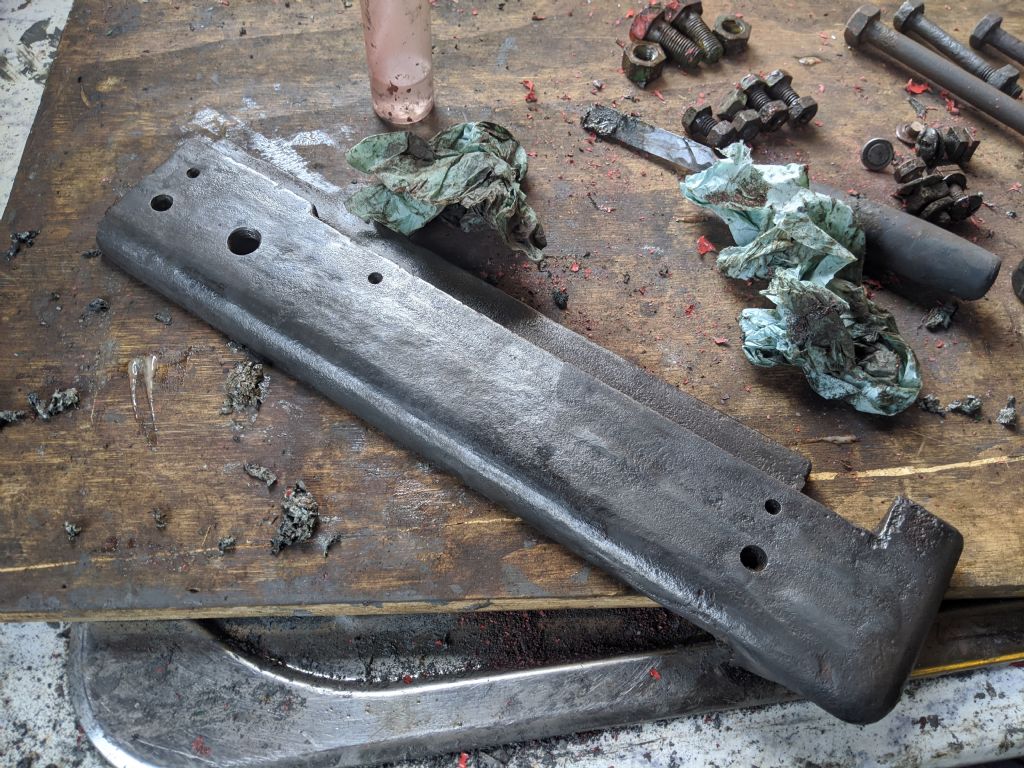
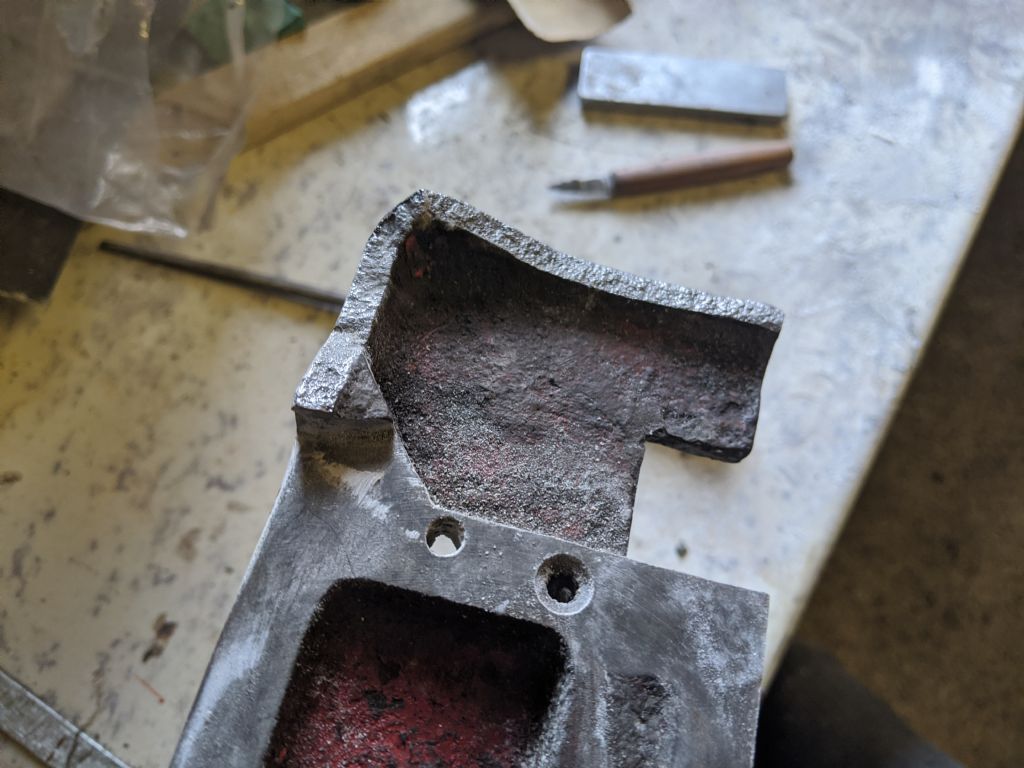
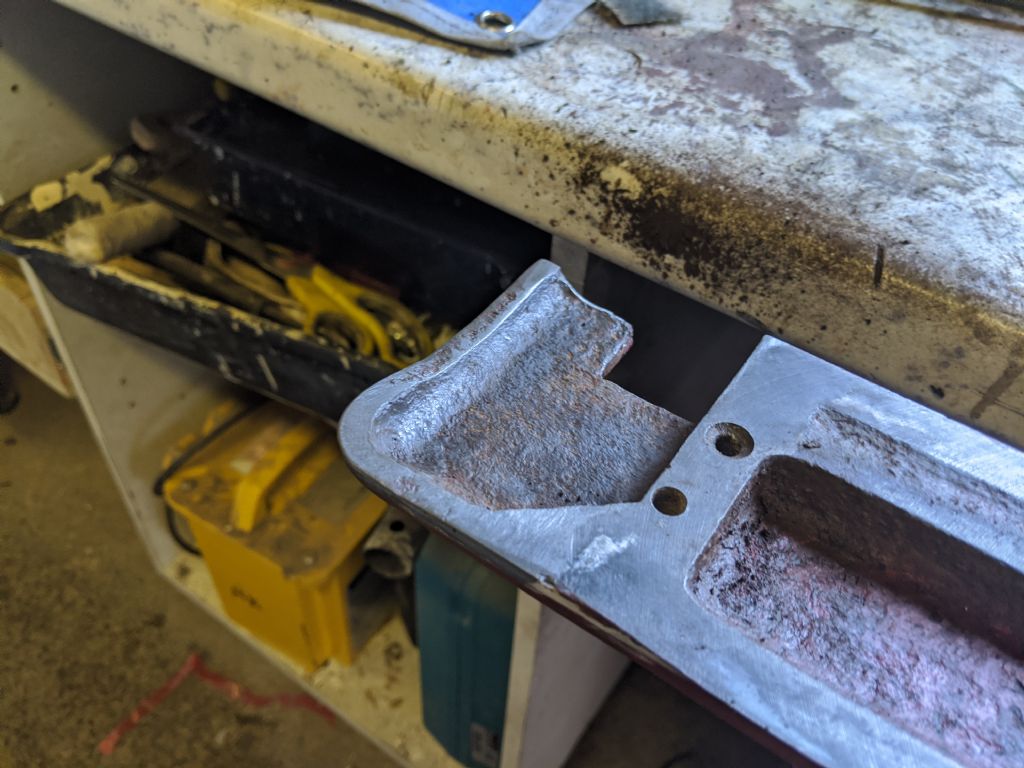
                        I stripped the threading gearbox lid today. My one is broken, but I don't plan on replacing it. Unless I find someone breaking the exact same model at some point in the future, since these lids vary in shape.

                        Removing the oilers was quite easy. I have some that are broken, not on this part. Is there a place to buy the oilers with the red aluminium discs too? Or should I just remove all the discs, they're looking quite tatty and worn.

                        img_20200622_120951.jpg

                        img_20200622_120954.jpg

                        img_20200622_134912.jpg

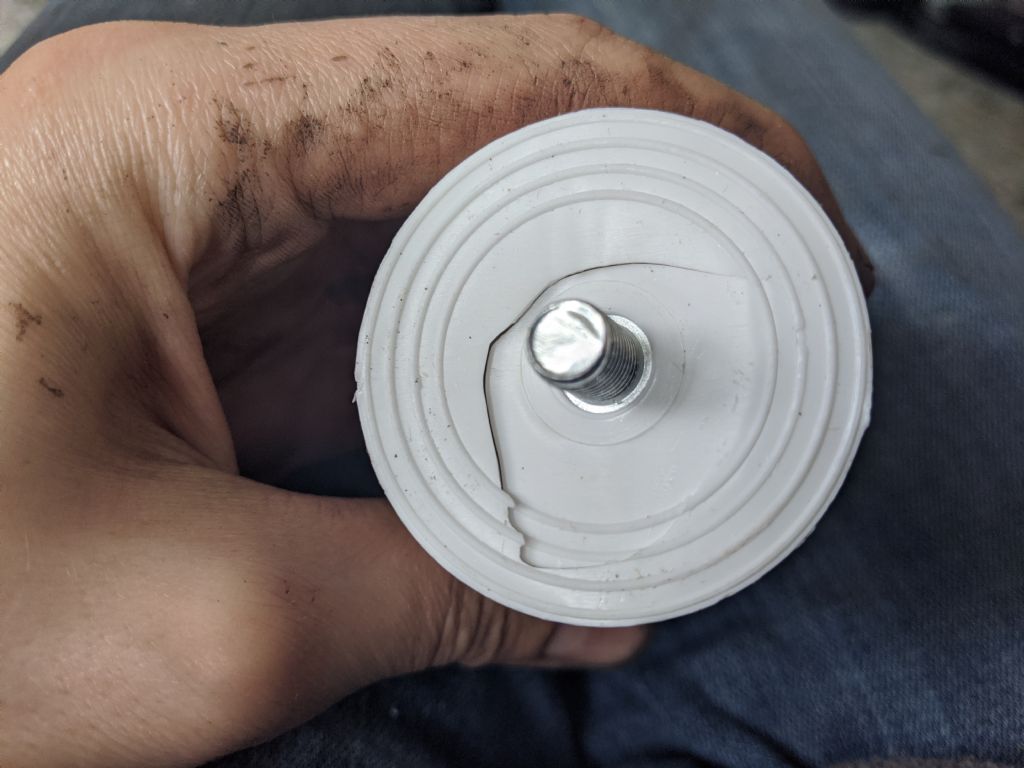
                        Also, capacitors finally arrived. I had to get them to send me some more since the originals were lost!

                        However, one is cracked. Will this be an issue?

                        Also, the numbers are slightly, instead of the 25/85/21 on the front, it says 25/70/21. From my understanding this means they are only rated to max of 70 degrees. Will this be an issue? Or should I send them back for being mislabeled?

                        img_20200622_141157.jpg

                        #481476
                        Herman van der Merwe
                        Participant
                          @hermanvandermerwe76509

                          Posted by Richard Kirkman 1 on 22/06/2020 15:12:38:

                          I stripped the threading gearbox lid today. My one is broken, but I don't plan on replacing it. Unless I find someone breaking the exact same model at some point in the future, since these lids vary in shape.

                          Removing the oilers was quite easy. I have some that are broken, not on this part. Is there a place to buy the oilers with the red aluminium discs too? Or should I just remove all the discs, they're looking quite tatty and worn.

                          You can buy these at any machine part supplier. I can even obtain it over here in SA! You can make your own as well.

                          What is wrong with your lid? The square gap? Just braze a piece of cast iron in there and paint it over.

                          #481477
                          Herman van der Merwe
                          Participant
                            @hermanvandermerwe76509

                            However, one is cracked. Will this be an issue?

                            Also, the numbers are slightly, instead of the 25/85/21 on the front, it says 25/70/21. From my understanding this means they are only rated to max of 70 degrees. Will this be an issue? Or should I send them back for being mislabeled?

                            Cracked is bad news.

                            Yes you need a rating of around 90C in the hot environment inside the steel case.

                            I would send these back …

                            #481525
                            Richard Kirkman 1
                            Participant
                              @richardkirkman1

                              It's just the corner has been broken off, but it doesn't bother me so i'll leave it

                              Plus I don't have the facilities to braze.

                              I've asked to send back all the capacitors. The old ones still work within tolerance so I think I'll just leave it, especially since I found that the light issue was the switch. (then again I still haven't tested the new switch)

                              img_20200622_165206.jpg

                              #481569
                              Phil Whitley
                              Participant
                                @philwhitley94135

                                File or grind the cracked area into two straight lines and it will be much less noticable. The bench centres hade a small piece missing at the extreme end of one of the slots, I cut it square with a cutting disk then filed it up and painted it up the the ground edge, it now looks like it was made like that!

                                Phil.

                                #482076
                                Richard Kirkman 1
                                Participant
                                  @richardkirkman1

                                  Good advice Phil, it blends a little better now

                                  Also, I purchased a litre of the tractol 729 etch primer, so i will be able to prime the cover. However, since I'll be spraying it, I want to get 4 parts from the lawnmower sprayed in it at the same time, so they still need stripping. One piece is a fan and is taking ages. I'll get it done eventually, but i've been tasked with refinishing a family friends G-plan table and chairs, and I agreed to look another friends lawnmower to get it working better. Who said lockdown needed to be boring…

                                  img_20200624_123013.jpg

                                  #482700
                                  Phil Whitley
                                  Participant
                                    @philwhitley94135

                                    Neat!

                                    #482744
                                    Howard Lewis
                                    Participant
                                      @howardlewis46836

                                      Richard,

                                      A LONG time ago, I learned to beware of the person asking "Can you just…) They think it's a ten minute job. With luck, it will only take you ten hours! Their "loose bolt" often is a stripped thread in a cracked casting with too little meat to do anything decent about it!

                                      But, you've found some of those already?

                                      Howard

                                      #482763
                                      Richard Kirkman 1
                                      Participant
                                        @richardkirkman1

                                        Actually Howard, this time it turned out to be quite simple. I just had to take it to pieces, sharpen the mower, and adjust it to make it work better. Although I did have to make new rollers for the front as well. But, it was still more work than described as usual!

                                        I've had a fun day. I decided it was time to finish removing all of the red oxide primer from the aluminium, then I thought I'd do a test patch to see how thinly I could paint on the self-etching primer.

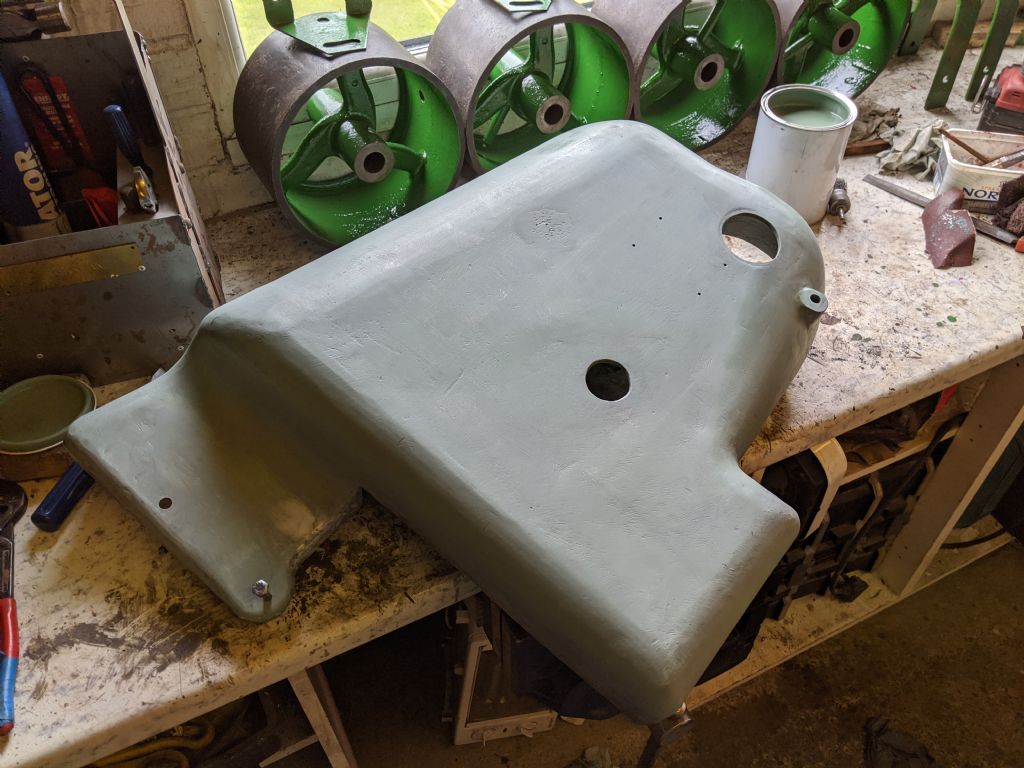
                                        I found the self-etching primer to be quite easy to brush on thinly. The picture makes it look thicker than it is. I was very careful. It was meant to be grey, but almost had a sort of blue tinge to it

                                        img_20200628_151738.jpg

                                        Then I let it dry for a couple of hours as instructed by the datasheet

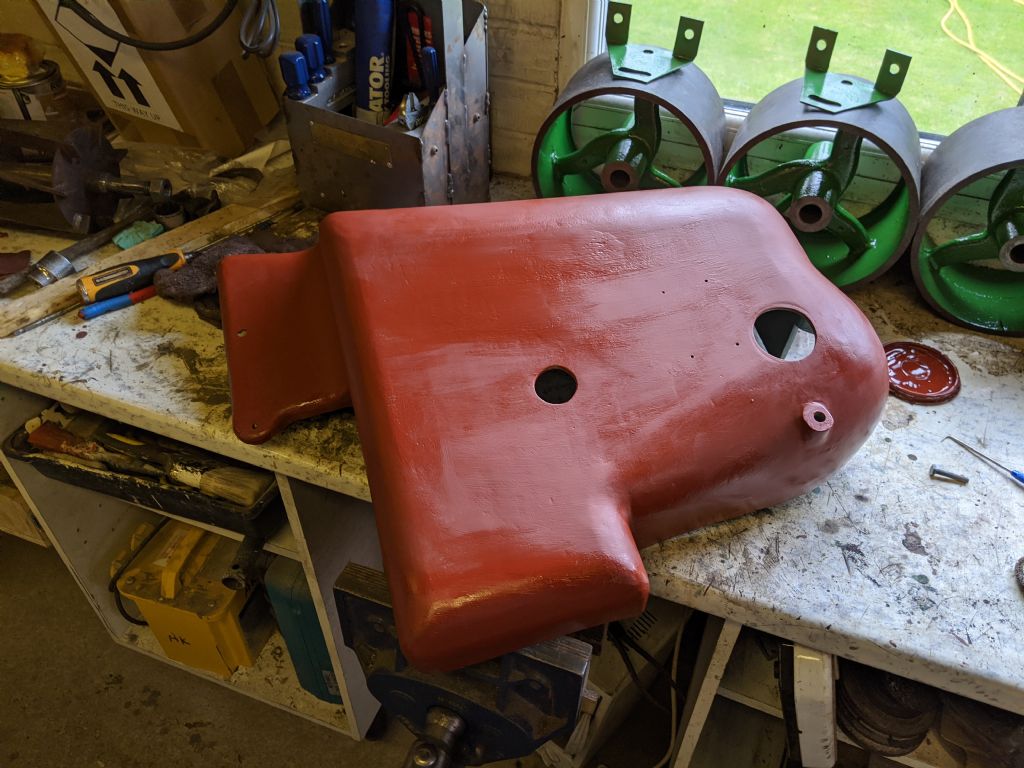
                                        Then painted with the red oxide primer!

                                        img_20200628_171121.jpg

                                        img_20200628_180305.jpg

                                        I also gave the green wheels their final coat of paint today, so they can now be reassembled and put somewhere else. More space for lathe disassembly!

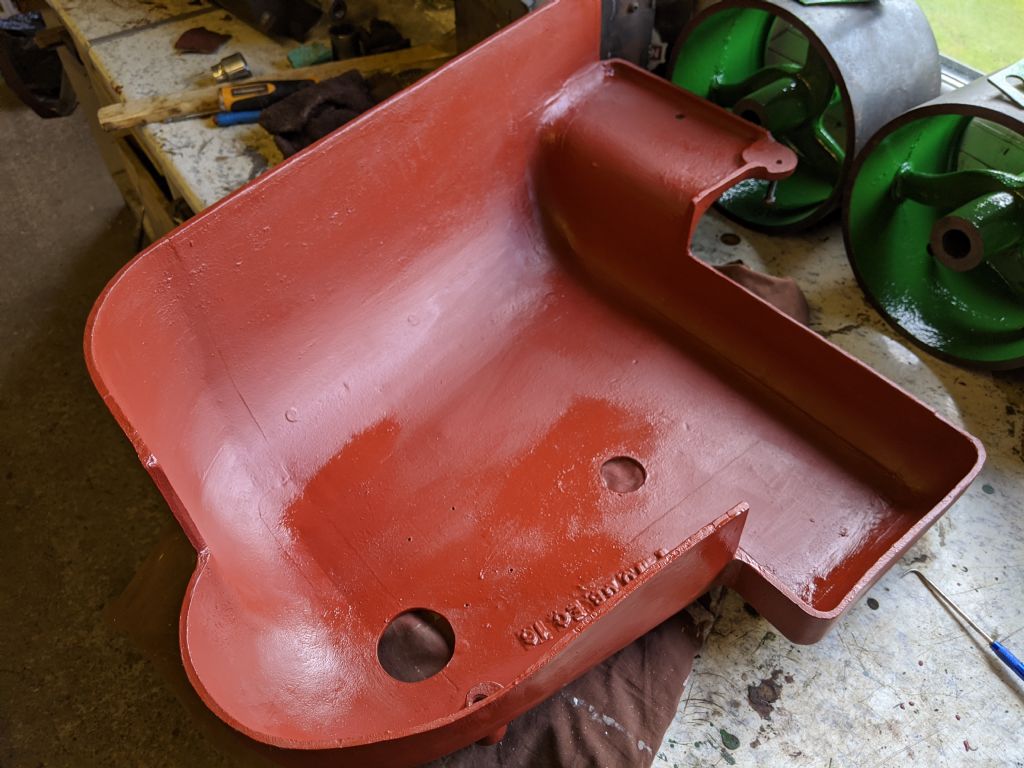
                                        The G plan table is arriving tomorrow for refinishing, so that will be a priority, It might take me a day or two, I'll have spare time while the varnish is drying. However, once the primer is dry I will sand it down and repaint. I'm still going to paint the inside of the cover red/orange, I honestly cannot wait to get it painted to see how it looks.

                                        Apart from that, other parts on the lathe are looking very tempting to take off and strip

                                        I've managed to get myself a well used interchangeable Pryor steel type, so I'll be able to fancy up the forward-reverse sign!

                                        If anyone wants to see some proper painting, Hermans thread is getting even more interesting

                                        Edited By Richard Kirkman 1 on 28/06/2020 19:16:10

                                        #482973
                                        Phil Whitley
                                        Participant
                                          @philwhitley94135

                                          Ruchard, can you post the link to Hermans rebuild, I have lost it!

                                          Phil

                                          #482976
                                          Richard Kirkman 1
                                          Participant
                                            @richardkirkman1

                                            HERMANS REBUILD

                                            Last week's video was great Phil. Very interesting with the test bar and how the accuracies stacked with the rotation of the taper sleeve. I'm interested to see the bearings come out too!

                                            Also, the original LED turned up today, it says it was posted on the 17th of April, so it only took 2 months and 12 days to come. Pretty quick delivery from Royal Fail

                                            Edited By Richard Kirkman 1 on 29/06/2020 19:57:52

                                            #482980
                                            Phil Whitley
                                            Participant
                                              @philwhitley94135

                                              Thanks Richard! I am going to blue up the spindle taper, and test the bush, and then do the reverse, to see if I can get a better fit, and more concentricity, it will be in next weeks video, I was going to start it today, but didn't get to the workshop till 1-30, so I tidied up and put the labels on the welder, and cut the wood for the bottle shelf. I did have a brief look and found that by fitting a MT3 live centre into the bush, I could manage to turn it gently for enough time to get a print before it grabbed the taper, and even without blue, it did mark up a few high spots, so I am hopefull that improvement can be made! Not going tomorrow, as it is annual service and mot day for the car, So I am going to spend the day applying for planning permission for a flue that has been on my workshop for years, but unfortunately, I can't prove it! Apparently, my neighbour has complained! Such is life.

                                              Phil

                                              #483046
                                              Herman van der Merwe
                                              Participant
                                                @hermanvandermerwe76509
                                                Posted by Phil Whitley on 29/06/2020 19:46:49:

                                                Ruchard, can you post the link to Hermans rebuild, I have lost it!

                                                Phil

                                                Here is a better thread (a duplicate) with more discussions.

                                                #483047
                                                Herman van der Merwe
                                                Participant
                                                  @hermanvandermerwe76509
                                                  Posted by Phil Whitley on 29/06/2020 20:06:23:

                                                  So I am going to spend the day applying for planning permission for a flue that has been on my workshop for years, but unfortunately, I can't prove it! Apparently, my neighbour has complained! Such is life.

                                                  Phil

                                                  Very easy to prove @Phil. Just go back in history on Google Earth and show the sat photo of when the flue was not there and then the one with a date when it first shows on GE.

                                                  Even more accurate is the GIS models for each council available on the internet. Just ask a GIS operator at the council to assist if you cannot find your council's models on the net.

                                                  #483113
                                                  Phil Whitley
                                                  Participant
                                                    @philwhitley94135

                                                    Hi Herman, thanks for that, I have already got proof of the flues existence in 2011 from a google earth image which shows the flue, in it's previous position, however, sometime around 2013, I moved it forward towards the front of the building by about 8 feet, but infortunately I have no proof of this date. I have however found further information that indicated what I have done is part of "permitted development" The GIS info is interesting, and I am doing research on that as I write this. Unfortunately I doubt one department of our local council would provide evidence willingly to prove another department wrong! I shall continue and see what I can find on GIS!

                                                    Phil

                                                    #483131
                                                    Herman van der Merwe
                                                    Participant
                                                      @hermanvandermerwe76509
                                                      Posted by Phil Whitley on 30/06/2020 11:29:07:

                                                      Hi Herman, thanks for that, I have already got proof of the flues existence in 2011 from a google earth image which shows the flue, in it's previous position, however, sometime around 2013, I moved it forward towards the front of the building by about 8 feet, but infortunately I have no proof of this date. I have however found further information that indicated what I have done is part of "permitted development" The GIS info is interesting, and I am doing research on that as I write this. Unfortunately I doubt one department of our local council would provide evidence willingly to prove another department wrong! I shall continue and see what I can find on GIS!

                                                      Phil

                                                      Surely you must have bought some hardware for this move? A receipt is fine.

                                                      No need to tell the one department why you need it. If you have hassle, ask an architect friend to request the data. If you PM me your address, I should be able to check for you as well from this side of the round blue dot.

                                                    Viewing 25 posts - 551 through 575 (of 797 total)
                                                    • Please log in to reply to this topic. Registering is free and easy using the links on the menu at the top of this page.

                                                    Advert

                                                    Latest Replies

                                                    Viewing 25 topics - 1 through 25 (of 25 total)
                                                    Viewing 25 topics - 1 through 25 (of 25 total)

                                                    View full reply list.

                                                    Advert

                                                    Newsletter Sign-up