What did you do Today 2018

Advert

What did you do Today 2018

Home Forums The Tea Room What did you do Today 2018

Viewing 25 posts - 1,451 through 1,475 (of 1,832 total)
  • Author
    Posts
  • #369576
    daveb
    Participant
      @daveb17630

      This is where you learn the difference between a cheap Allen key and the others. It helps if the Allen screws are good quality too, unfortunately, there are poor examples of both, either of which will make you wish you were doing anything, absolutely anything else. Daveb.

      Advert
      #369611
      Michael Gilligan
      Participant
        @michaelgilligan61133
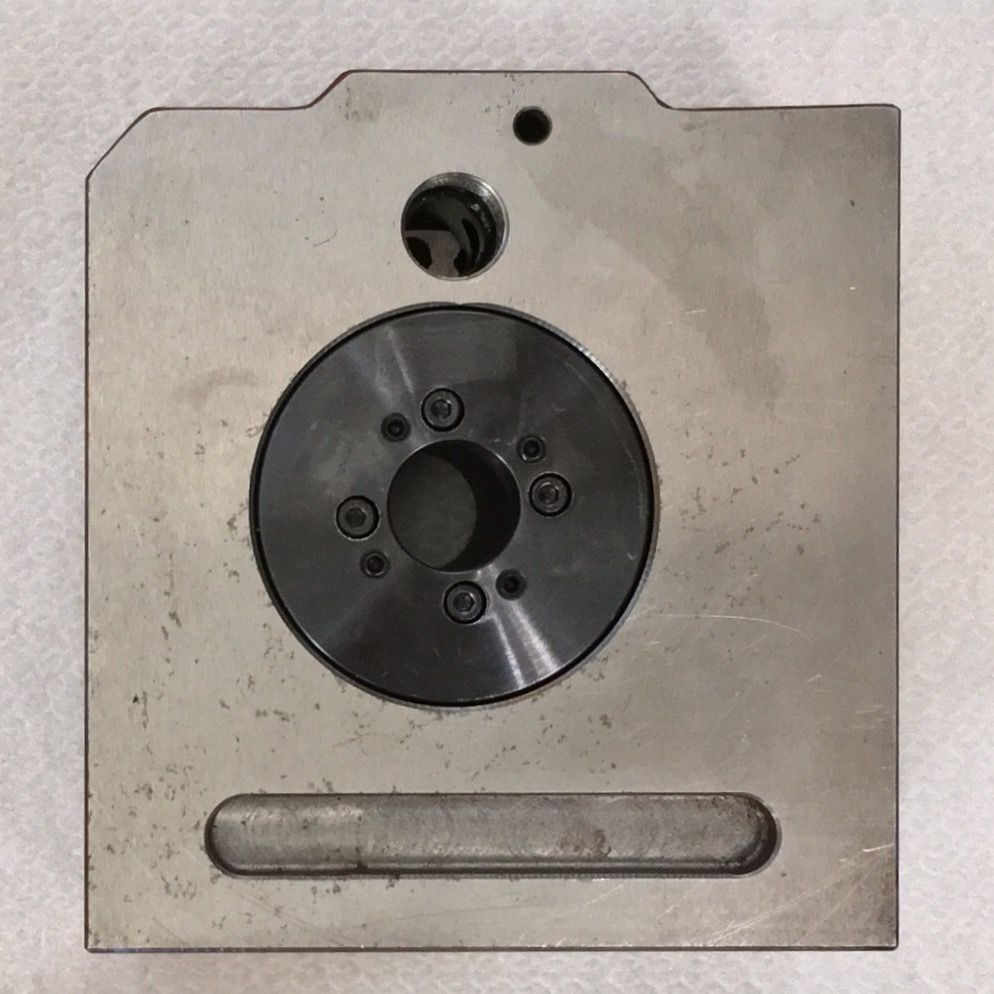
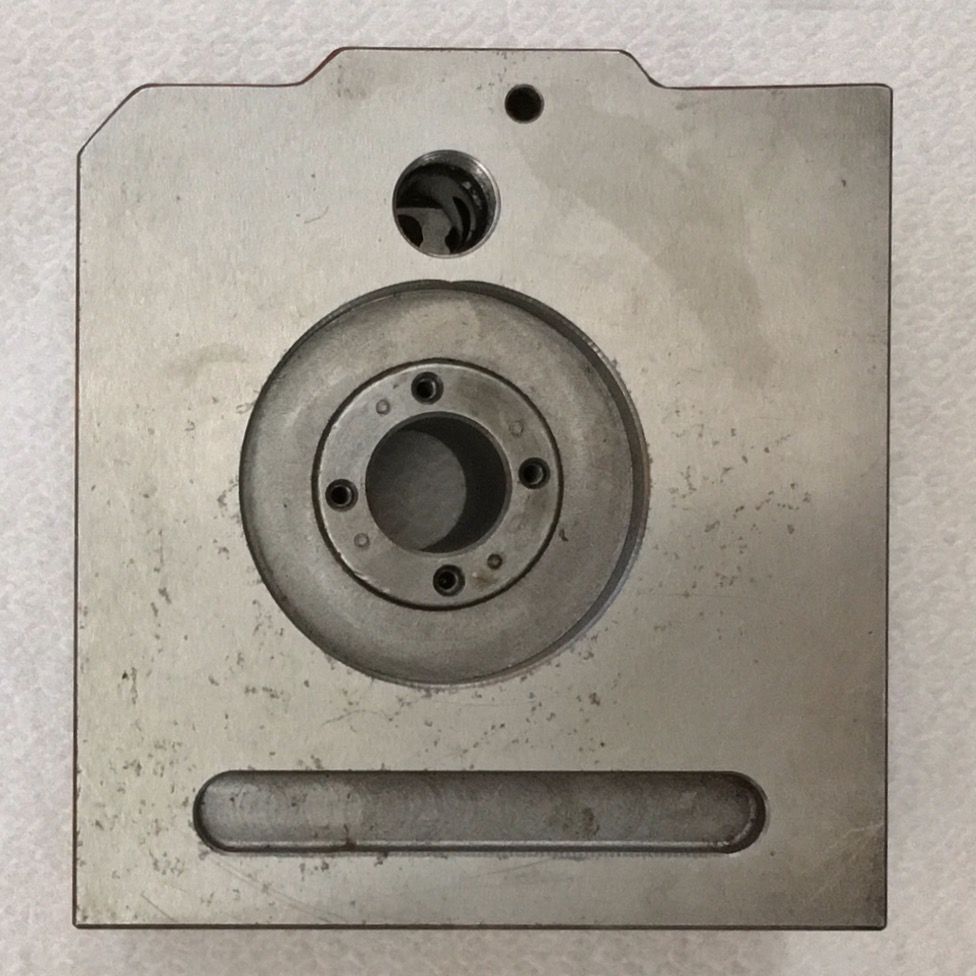
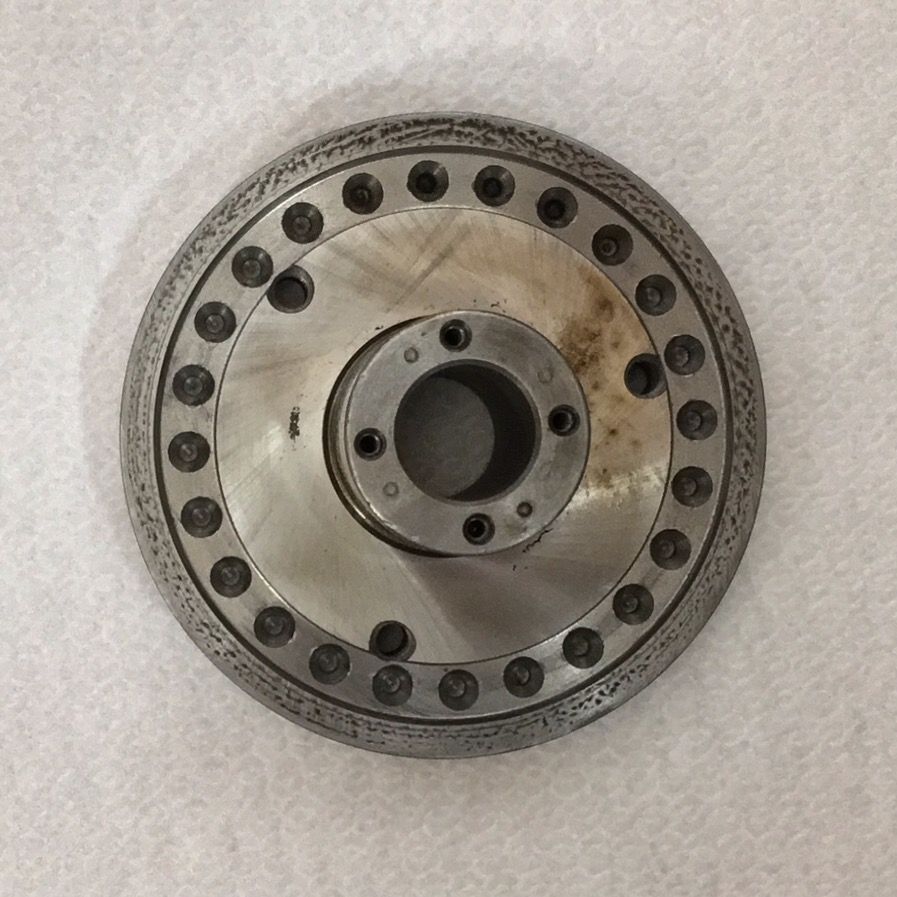
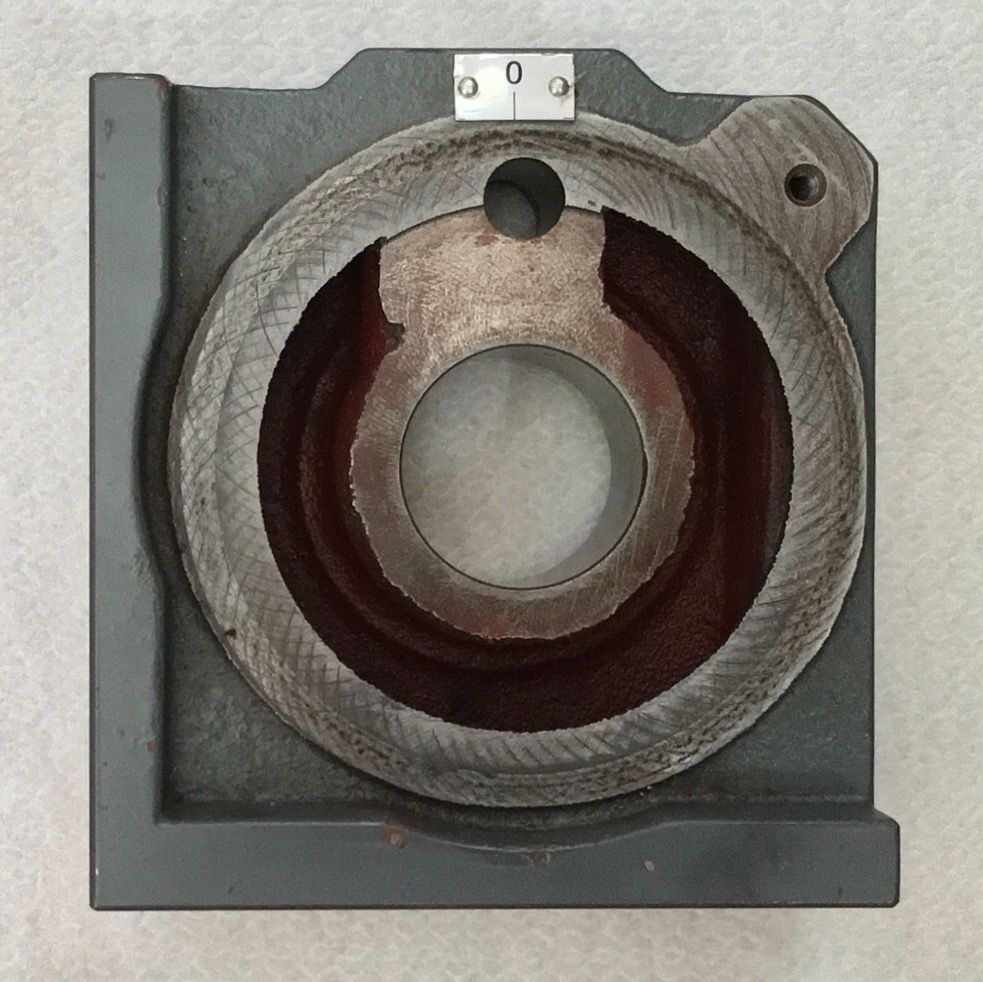
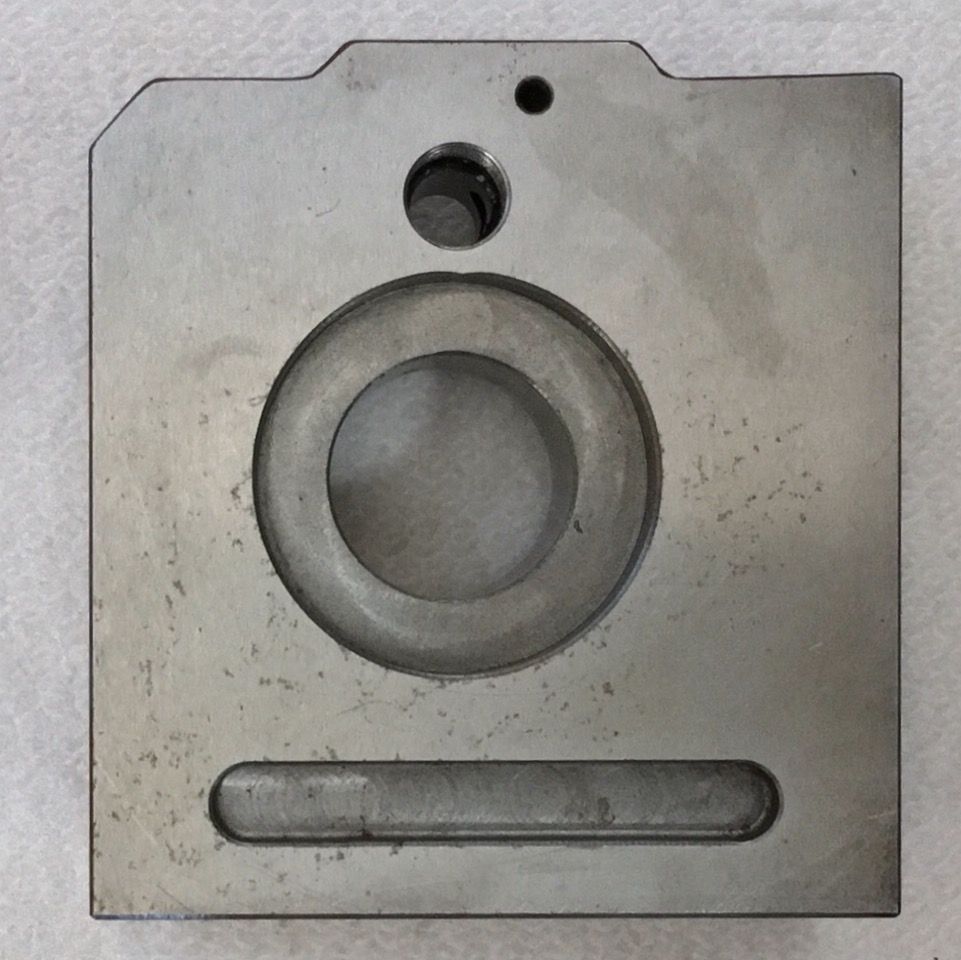
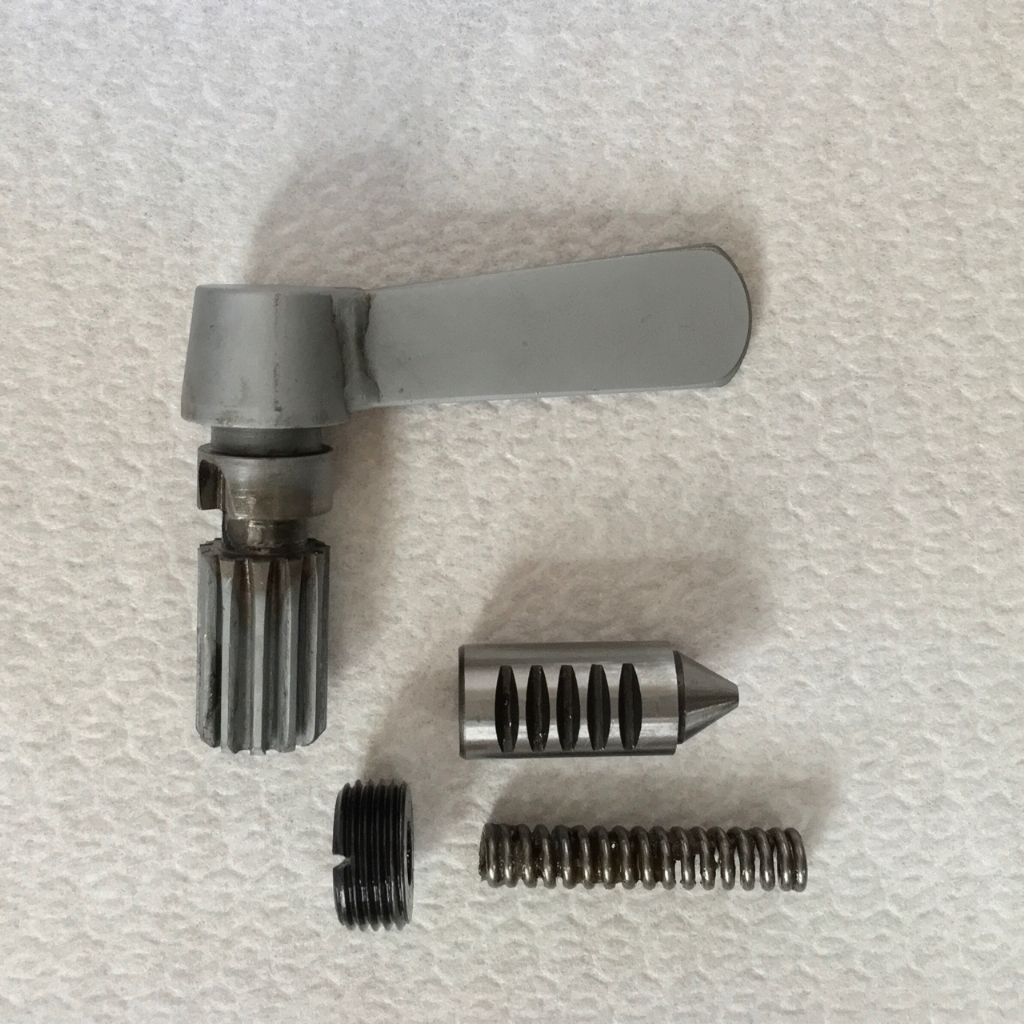
        Posted by Ian S C on 29/08/2018 12:22:00:

        It will be interesting to see the works once you get it opened up.

        .

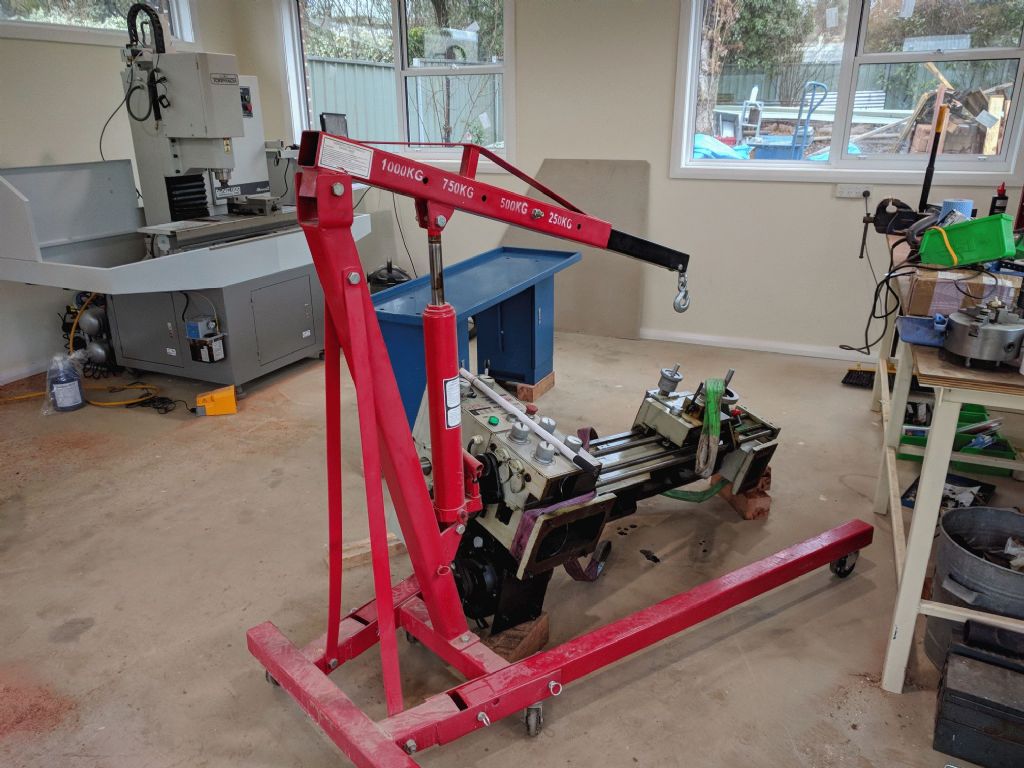
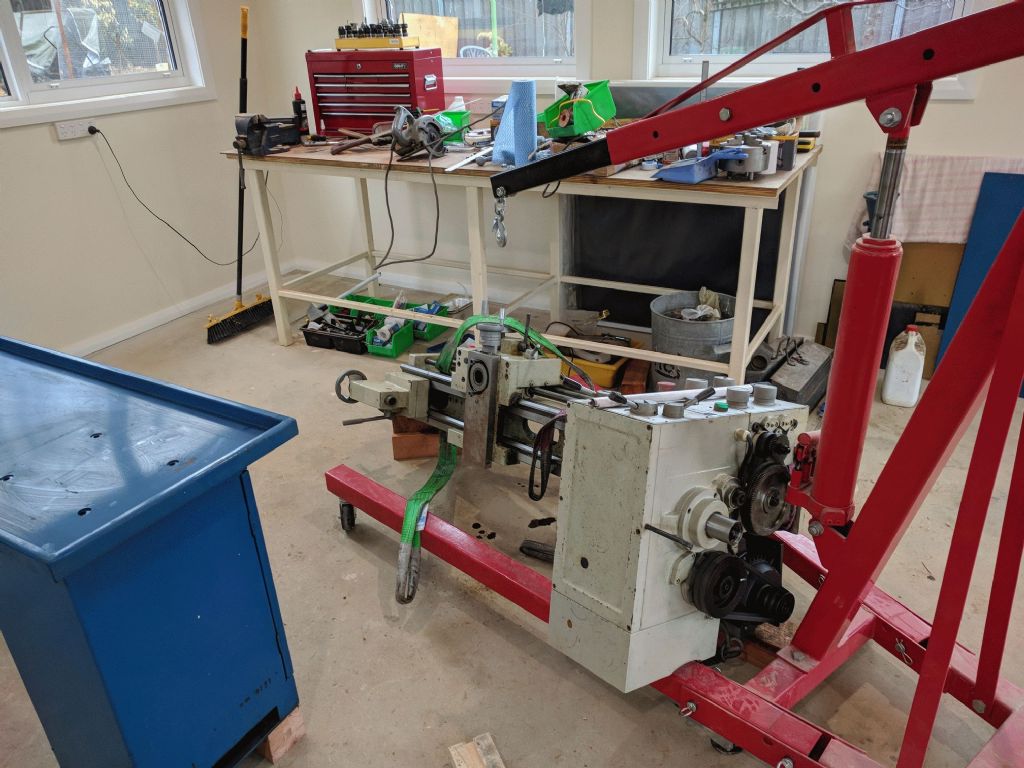
        Here you go, Ian

        img_2226.jpg

        img_2228.jpg

        img_2230.jpg

        img_2232.jpg

        img_2234.jpg

        img_2235.jpg

        Should be self-explanatory, I think …

        MichaelG.

        #369615
        Swarf, Mostly!
        Participant
          @swarfmostly

          It looks like the early bird got the worm!

          (I'll get me coat.)

          Best regards,

          Swarf, Mostly!

          #369618
          Michael Gilligan
          Participant
            @michaelgilligan61133
            Posted by Swarf, Mostly! on 29/08/2018 20:04:14:

            It looks like the early bird got the worm!

            .

            < groan > smiley

            Yes, it's a 'Rapid Indexer'

            MichaelG.

            #369620
            Muzzer
            Participant
              @muzzer

              Neil – when are you going to fix the "for sale" panel (again)??

              It's been stuck at the misnamed "colchester student roundhead" entry for ages now (weeks?). Thought you'd fixed it last time?

              Murray

              #369643
              Sam Stones
              Participant
                @samstones42903

                Yesterday, Michael Gilligan wrote …

                I used a small "toolmaker's clamp" [as distinct from a "small toolmaker's" clamp], which worked quite nicely.

                Michael, I could easily have been one of those small toolmakers.

                Except that I grew to a mid-range height of 5’-7¼"wink 2

                Those photographs are great, and explain all that's needed.

                Sam smile d

                #369687
                Neil Wyatt
                Moderator
                  @neilwyatt

                  Bought a new mouse…

                  I spent the last four weeks convincing myself the right button of the old one wasn't reliable. I stroll wasn't 100% convinced, but I bought a new one anyway, big and ergonomic.

                  Now I have it it's obvious the old mouse was well on the way out, I was obviously compensating by repeat clicking /pressing and holding without realising it. I bit like being used to an battered old bicycle that steers left when you take your hands off the bars!

                  Neil

                  #369712
                  Alan Vos
                  Participant
                    @alanvos39612

                    That nameplate on an Ultimaker 3. 0.4mm nozzle, 0.06mm layers (best). No tweaks. I will try and get a better photo, the charger for the decent camera is AWOL. There is a black version. It looks fine in sunlight, but I gave up trying to photo it. I will ask the graphics guy at work tomorrow to assist.

                    It is a bit hairy, but nothing that would not clean up. Ironing seemed to make the flat layer worse. This is consistent. Ironed was a mixture of ironed and less well ironed.

                    img_20180830_181351.jpg

                    #369718
                    Mick Henshall
                    Participant
                      @mickhenshall99321

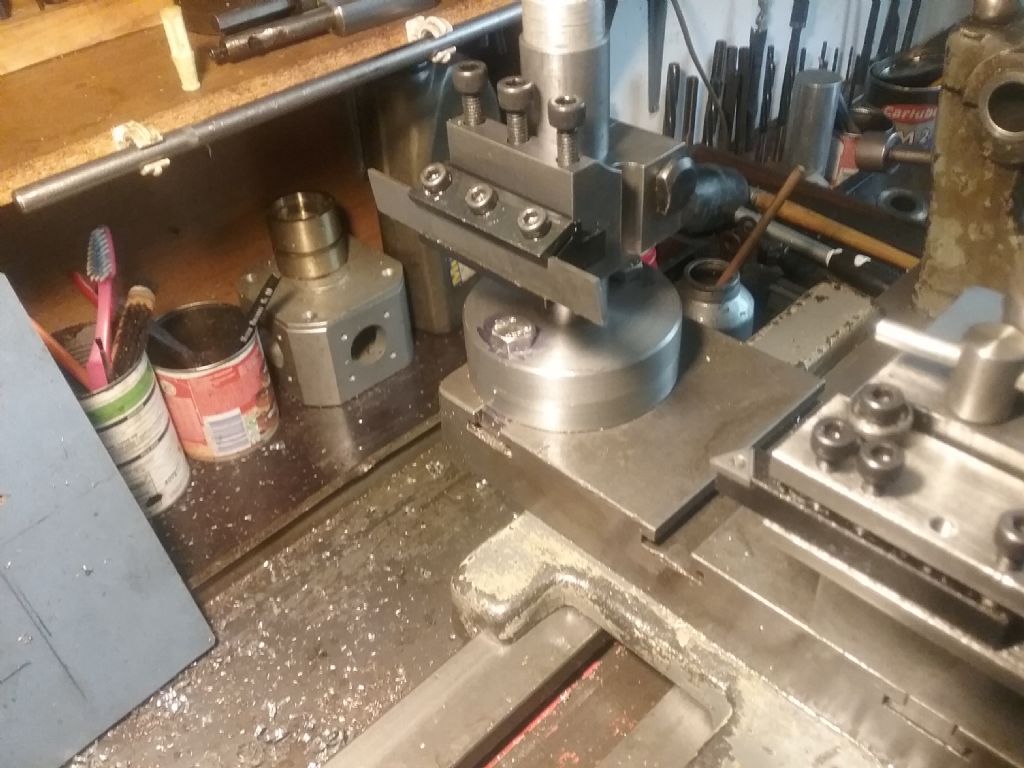
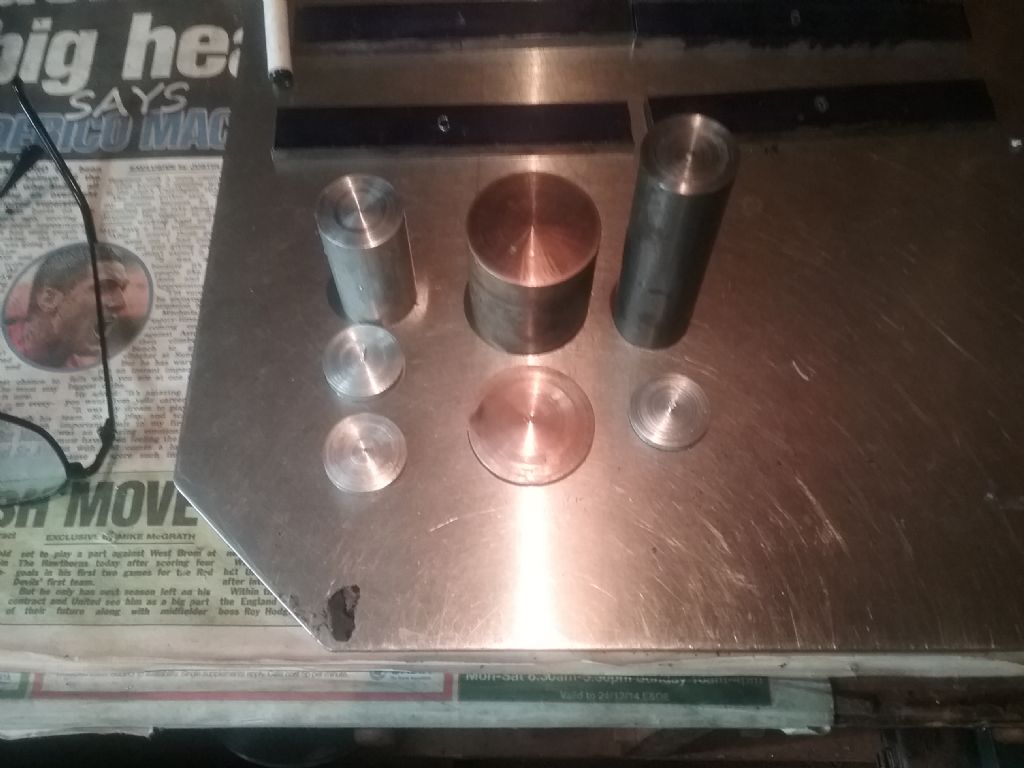
                      Mick20180830_121242.jpgFinished my rear toolpost, gave it a trial all well no hiccups, some tidying up to do and gine cutter a sharpen, tried it on some aluminium bronze and steel20180830_114221.jpg

                      #369719
                      Mick Henshall
                      Participant
                        @mickhenshall99321

                        And pic I missed

                        Mick20180830_114301.jpg

                        #369734
                        Neil Wyatt
                        Moderator
                          @neilwyatt
                          Posted by Alan Vos on 30/08/2018 18:34:21:

                          That nameplate on an Ultimaker 3. 0.4mm nozzle, 0.06mm layers (best). No tweaks. I will try and get a better photo, the charger for the decent camera is AWOL. There is a black version. It looks fine in sunlight, but I gave up trying to photo it. I will ask the graphics guy at work tomorrow to assist.

                          It is a bit hairy, but nothing that would not clean up. Ironing seemed to make the flat layer worse. This is consistent. Ironed was a mixture of ironed and less well ironed.

                          img_20180830_181351.jpg

                          Hi Alan,

                          A stiff brush is quite good at tidying up a print like that which is basically a good un'.

                          I think the 'ironing' needs to be treated as a work in progress. With thin layers it can throw up hefty burrs and it leaves unpleasant scars at multiple locations. It shows promise, but clearly more work is needed.

                          #369754
                          Ed Duffner
                          Participant
                            @edduffner79357

                            Some of the folks on a vintage computer forum I'm a member of, place 3D prints in a sealed container with acetone – non-contact. The vapors soften the edges and apparently it also makes the model very shiny.

                            I'm not sure about length of time 'soaking' sorry.

                            Ed.

                            #369760
                            Neil Wyatt
                            Moderator
                              @neilwyatt

                              Hi Ed,

                              That works well for ABS (although it can obscure detail) but it doesn't work for PLA. Exposure times are quite short.

                              Neil

                              #369761
                              Grotto
                              Participant
                                @grotto

                                Got my 3 phase converter (rotary?) installed today. Had done all the cabling but needed a qualified electrician to hook it up.

                                I was expecting the converter to be a bit noisy, but you can hardly hear it running.

                                I can now use my mill which has been sitting for a week, unbelievably pleased, it far exceeds all my expectations. I really need to get it into position (it’s currently sitting on a pallet in the middle of the garage) but that can wait a day or two.

                                Can also put the 3 phase motor back on my Myford (have been running a pretty dodgy single phase which sparks a bit).

                                Overall an exceptionally good day

                                #369765
                                Perko7
                                Participant
                                  @perko7
                                  Posted by David Taylor on 26/08/2018 07:46:53:

                                  Following my recent theme of stress in the workshop and being sick of moving machines, this is what I did today. Hopefully the only damage is to the electrical box. A club member who knows about moving things said he'd come and help me get it back on its feet tomorrow.

                                  Note the hardwood blocks under the lathe stand cabinets to raise the working height. What's the opinion on that?

                                  Will they be strong enough, or will they or the cabinet sag? I made a hell of a mess dressing them so they're the same height, give or take 0.5mm, as well as you can with wood. The floor probably has more variation than that!

                                  David.

                                  img_20180826_163029x.jpg

                                  img_20180826_163037x.jpg

                                  Hi David, IMO provided the footprint of the support provided by the hardwood blocks is no smaller than that of the stands themselves then all should be ok. I've used sections of 70×70 SHS under mine to raise the height, and sat the whole thing on 70x70x6 thick rubber feet cut from a floor mat to sit on a concrete floor. It's been that way for 2 years now and has never shown any sign of falling over despite much use and abuse.

                                  Geoff P.

                                  #369768
                                  Anonymous
                                    Posted by Alan Vos on 30/08/2018 18:34:21:

                                    That nameplate on an Ultimaker 3. 0.4mm nozzle, 0.06mm layers (best). No tweaks.

                                    That looks pretty good, especially since the lettering widths are on the order of 0.5mm. Thanks for giving it a trial. thumbs up

                                    Andrew

                                    #370117
                                    Anonymous

                                      Weeded one half of the drive early this morning. sad

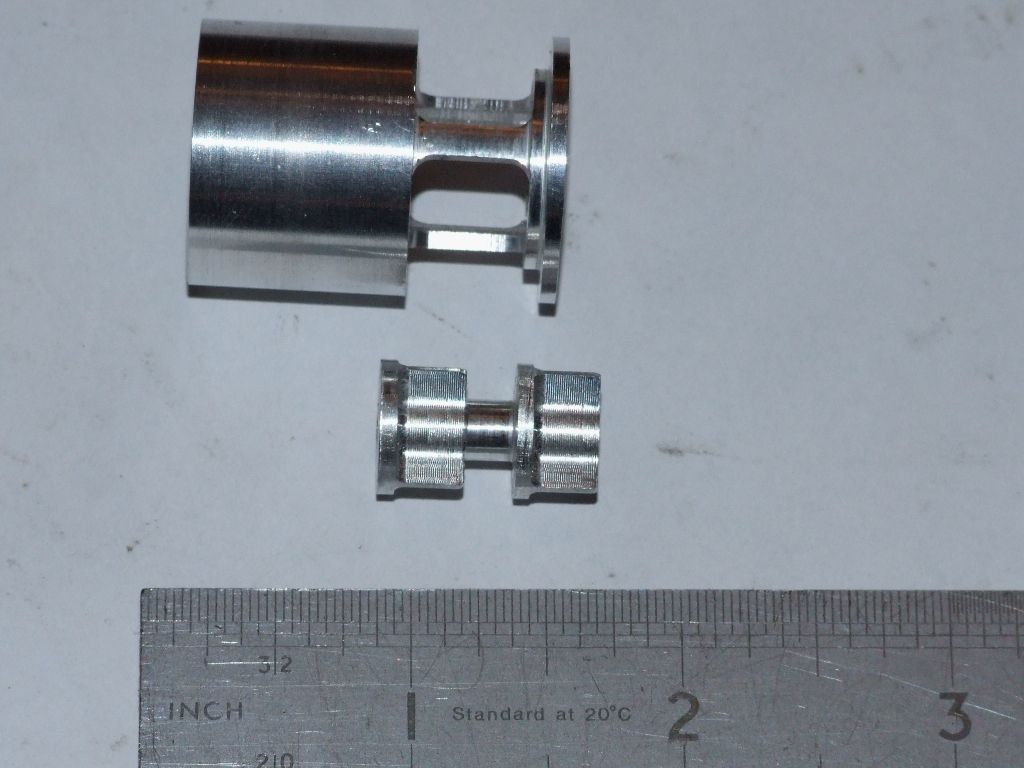
                                      Then I made a balanced valve and body in aluminium as test pieces for the traction engine governor:

                                      balanced valve and body me.jpg

                                      The balanced valve was a mix of manual turning and CNC milling. The valve body was all manual turning and milling. I learnt a few things about making the balanced valve which I will carry forward when I make the final items in bronze.

                                      Andrew

                                      #370136
                                      bricky
                                      Participant
                                        @bricky

                                        Spent yesterday afternoon scraping the rocker arm and con rods on the Rockerblock engine I am building.The push rods needed shortening to get the cams in.The water jacket is next and I am not looking forewards to it.

                                        Frank

                                        #370146
                                        David Taylor
                                        Participant
                                          @davidtaylor63402

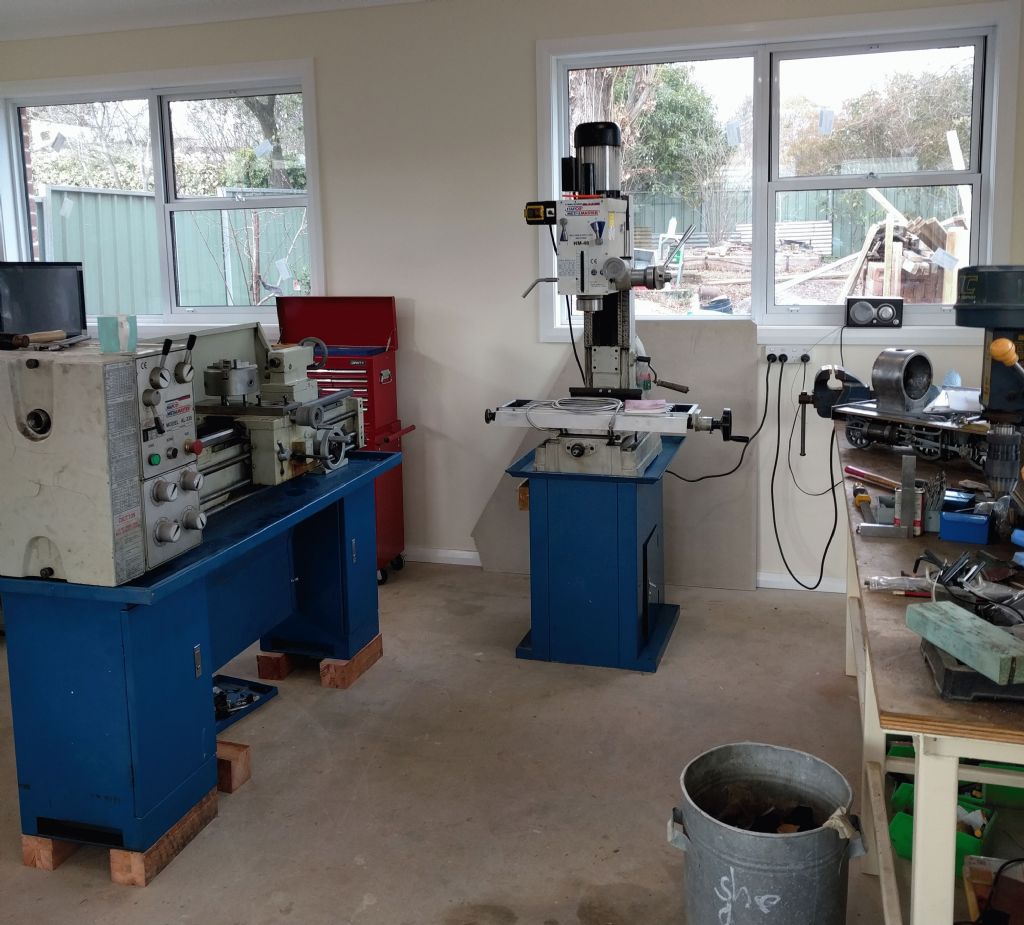
                                          I moved the milling machine. Couldn't find a better place for it so I'll try this.

                                          Thanks Perko. It wobbles at the moment so needs shimming under the cabinets. But it also needs to move towards the camera in the photo below now the milling machine has been placed. The bench needs to come towards the camera too, the vice is barely usable now and I'm left-handed.

                                          img_20180903_152457x.jpg

                                          I also did some work on the 5" mogul and tried an example file in Cut2D. The Tormach post-processor has something nasty in the preamble code that plunged my slot drill right through my workpiece, which luckily was thick wood, hanging off the end of the vice! I copied the preamble from a Fusion generated file and things got better. I still didn't get to the E-stop in time, even though I was expecting trouble and had slowed the machine moves down… I think the problem is you don't want to wait forever so set the moving height to say 20mm, but that doesn't give you enough time to kill it if it continues to rapid move down.

                                          #370159
                                          Anonymous
                                            Posted by David Taylor on 03/09/2018 08:27:50:

                                            The Tormach post-processor has something nasty in the preamble code that plunged my slot drill right through my workpiece, which luckily was thick wood, hanging off the end of the vice! I copied the preamble from a Fusion generated file and things got better. I still didn't get to the E-stop in time, even though I was expecting trouble and had slowed the machine moves down… I think the problem is you don't want to wait forever so set the moving height to say 20mm, but that doesn't give you enough time to kill it if it continues to rapid move down.

                                            Almost certainly a tool change problem. It's normal to set X, Y and Z zeros using tool 0, the master tool. When you change to tool 1, say, which is a different length the machine needs to take that into account. With the old Mach3 setup you could tweak the Z postion on the screen. But PathPilot doesn't allow that so you need to account for the different length in the tool table, either manually or automatically.

                                            In the end I got sufficiently pee'd off manually zeroing each tool and typing the numbers in that I bought an electronic tool height setter.

                                            Andrew

                                            #370187
                                            Mark Rand
                                            Participant
                                              @markrand96270
                                              Posted by David Taylor on 03/09/2018 08:27:50:

                                              The bench needs to come towards the camera too, the vice is barely usable now and I'm left-handed.

                                              Being also left handed, I reasoned that all the vices in the school woodwork shop and apprentice training school were set up for right handed folk. So I put my vice at the other (right) end of the bench in my shed. Works for me smiley.

                                              #370202
                                              David Taylor
                                              Participant
                                                @davidtaylor63402
                                                Posted by Andrew Johnston on 03/09/2018 09:16:09:

                                                Almost certainly a tool change problem. It's normal to set X, Y and Z zeros using tool 0, the master tool. When you change to tool 1, say, which is a different length the machine needs to take that into account.

                                                I've been looking at the code from Fusion, PP conversational, and Cut2D. I think the problem is that the Cut2D post-processor turns off tool length compensation (G49), then travels to Z20.320 which the post-processor is calling the home Z position. But when there is a tool sticking 70mm out this means it will plunge 50mm into the material! Only after this does it do the G30 like the others. It makes no sense to me, even if I had an empty spindle it is just an unnecessary Z move which will be undone by the G30 so I can put the tool in.

                                                G0 G17 G21 G90 G40 G49 G64 P0.03
                                                G80
                                                G0 Z20.320 <— Waste of time?
                                                G0 X0.000 Y0.000
                                                G30
                                                T8M6
                                                (End Mill {8 mm})
                                                G43H8

                                                The G0s between G80 and G30 are not required – PP and Fusion don't do them.

                                                #370244
                                                Anonymous

                                                  Here's a snippet of my code with tool heights taken from the table at tool change:

                                                  N10 G21
                                                  N20 G0 G80 G17 G40 G94 G54 G49 G64 G90
                                                  N30 (2 1/2 Axis Profiling – Roughing-1)
                                                  N40 M09
                                                  N50 T01 G43 H01 M06
                                                  N60 S4000 M03
                                                  N70 G04 P3
                                                  N80 G90
                                                  N90 M08
                                                  N100 G00 Z1.500
                                                  N110 X-4.000 Y-85.100
                                                  N120 G01 Z-0.800 F600.0
                                                  N130 G01 Y-82.100 F150.0

                                                  There are a few oddities in the toolchange code, such as the G90, which is there for historical reasons, must get rid of it sometime. The G04 delay is to allow the spindle to get up to speed before moving axes when machine tapping. The following is the sequence I use after powering up the Tormach:

                                                  RESET the controller using the button on the screen

                                                  Reference all active axes using the buttons – I reference Z first in case there's anything in the way. This sets the machine co-ordinates using the limit switches

                                                  Set Z=0 on the mill table using tool 0, which in my case is a length of silver steel with a ballnose end and longer than any tool I'm likely to use

                                                  If I need to fill the tool table I use the electronic tool setter and the offsets screen making sure the tool number box represents the tool I want each time

                                                  Once the work is in place I set X=0 and Y=0 on the work, or fixture, according to where I've set the origin in the CAM program

                                                  I then set Z=0, using tool 0 with 0 selected in the tool window, on the work or fixture, again according to where the CAM program origin is set

                                                  Once that is done putting tool 1 in the spindle,and selecting tool 1 in the box, should give Z=0 at the same origin as set with tool 0

                                                  It may not be the most elegant method but it works for me. When I updated to PathPilot I had a disagreement with Tormach about using tool 0. They now recommend using the spindle nose rather than a master tool. But the spindle nose is big and clumsy, and you can't see what you're doing. So I don't use it.

                                                  The post-processor is part of the CAM program rather than part of the Tormach controller. It is normal to write ones own. Which is what I did for my CAM program (VisualMill). I've got two, one using tool tables and one not. I use tool tables 95% of the time. But when I use the high speed spindle I don't want to use tables, as the spindle has no repeatable way to swap tools.

                                                  Homing for tool changes is something I must sort out. At the moment I simply edit the G-code to put in a G0 Z100.00 to move the spindle up far enough for a manual tool change.

                                                  Roll on retirement, then I'll have time to sort out all these little issues!

                                                  Andrew

                                                  #370276
                                                  mechman48
                                                  Participant
                                                    @mechman48

                                                    Yesterday actually; replaced a defunct cooker hood fan that decided to stop working last week. managed to find a 'generic' replacement on 't'internet from electrical spares provider so with the aid of a builder friend & some fiddly manoeuvring managed to swap it out. Tested out fine before replacing hood on wall so job done, in the same context has anyone done the same /similar, & would any one know if these motors are repairable as it seem a waste to throw it out if it can be repaired, the replacement aint what I would call cheap, but a lot cheaper than buying a complete new hood.

                                                    TIA

                                                    George.

                                                    #370293
                                                    Neil Wyatt
                                                    Moderator
                                                      @neilwyatt

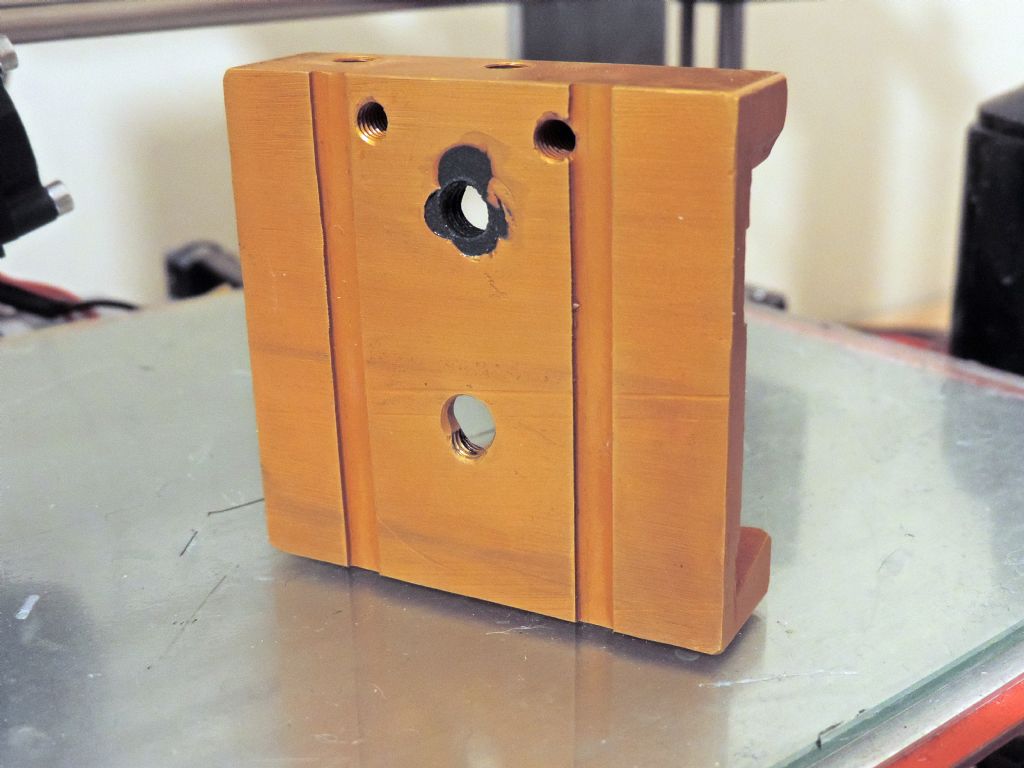
                                                      I tried my first experiment with anodising today.

                                                      Just a rough-finished block that I had knocked up as a temporary telescope dovetail clamp, as it was the right size. Don't judge the workmanship!

                                                      The result was a very impressive colour, although I had to microwave the (industrial) dye to get it to work and yes it faithfully kept all the original machining marks. I can run a hardened steel screwdriver ove the finish with light pressure and it doesn't mark it, which is good.

                                                      More noticeable was where I had filled some wrongly placed holes with Alutite – they went black in the caustic soda, didn't anodise and didn't take any die. They look like JB Weld but aren't!

                                                      Tomorrow I will try a couple of 'proper' parts.

                                                      anodising test.jpg

                                                    Viewing 25 posts - 1,451 through 1,475 (of 1,832 total)
                                                    • Please log in to reply to this topic. Registering is free and easy using the links on the menu at the top of this page.

                                                    Advert

                                                    Latest Replies

                                                    Home Forums The Tea Room Topics

                                                    Viewing 25 topics - 1 through 25 (of 25 total)
                                                    Viewing 25 topics - 1 through 25 (of 25 total)

                                                    View full reply list.

                                                    Advert

                                                    Newsletter Sign-up