What did you do Today 2018

Advert

What did you do Today 2018

Home Forums The Tea Room What did you do Today 2018

Viewing 25 posts - 1,301 through 1,325 (of 1,832 total)
  • Author
    Posts
  • #366816
    S.D.L.
    Participant
      @s-d-l

      Posted by Andrew Johnston on 09/08/2018 19:07:37:

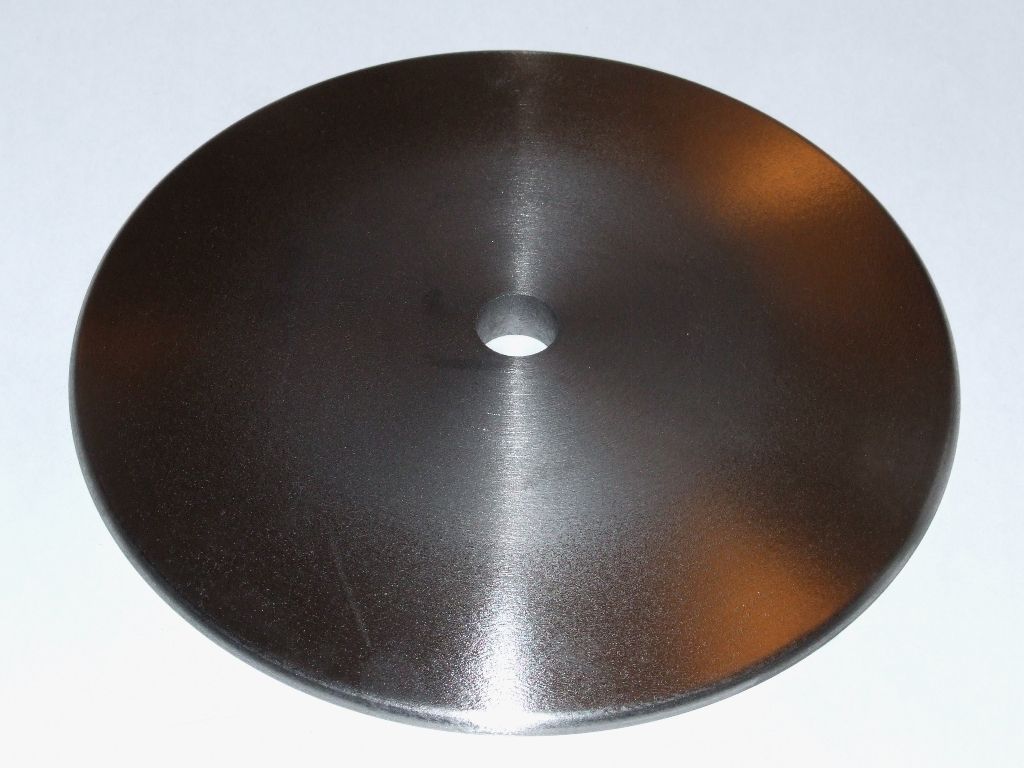
      Machined the second smokebox door last night. I got a better finish than on the first one, simply by reversing the feed direction from inside to outside to outside to inside:

      smokebox door me.jpg

      If I'd thought about it that gives a rather better cutting geometry for the tool with less chance of interference, especially near the centre.

      Andrew

      Was the door a casting or a solid disk of steel.

      Steve

      Advert
      #366817
      Anonymous
        Posted by S.D.L. on 11/08/2018 16:20:19:

        Was the door a casting or a solid disk of steel.

        Steve

        It was a casting. Initially I boo-boo'd and bought the smokebox castings from my nornal supplier. Don't know why I did that as they were light alloy. I bought more castings from Live Steam Models as theirs are cast iron. I live in hope of money back, or at least a credit note, for the original castings; plus a few others I will never use.

        Andrew

        #366818
        Anonymous
          Posted by JasonB on 11/08/2018 16:13:32:

          Yes it does look a bit like they used a bold typeface for the Burrell and normal for Thetford, or is it just the draft angle on the letters and less has been machined off the crests of Thetford?

          ………..

          Are you going to machine the back of the door to a matching profile so it is the same thinkness all across or won't you let the rivit counters look inside the fireboxwink

          I've cleaned up the inside with a wire brush and files; that's as much as it's going to get. Rivet counters will only be allowed to look into the smokebox via the chimney. smile

          There's quite a draft angle on the lettering and each letter detail is poorly defined. In addition the depth of the recess and lettering is skewed.So when you machine across the surface some letters are half removed and others barely touched.

          All four nameplate castings had internal voids of varying sizes. Fortunately none of them broke through to the front during machining.

          Andrew

          #366819
          Michael Gilligan
          Participant
            @michaelgilligan61133
            Posted by Michael Gilligan on 04/08/2018 08:43:36:

            Posted by Neil Wyatt on 04/08/2018 08:09:08:

            Wow, did it really take you 27 years to decide?

            .

            The decision was triggered by this particular copy being 40p

            For your amusement: You may like to plot the offer price of issue 1 against time surprise

            MichaelG.

            .

            daveb … did you miss the follow-up ^^^ question

            If I recall correctly, the price peaked at about £25

            but those silly days are long gone.

            MichaelG.

            #366821
            Nige
            Participant
              @nige81730


              After completing the milling on the arms and adjuster on my knurling tool I was in a position to put it all roughly together to see how it looked and to check all the parts would move relative to each other without anything getting in the way. It was all slotted onto some 6mm bolts to act as pivot points. At the moment the plan is that the pivots will be more clevis pins with circling to hold them in place as for the knurls. Below is a YouTube video which hopefully shows the principle of adjustment. The adjuster at the back will have a 6mm threaded rod to provide the in/out movement. Another side plate will enclose the ‘gubbins’ 

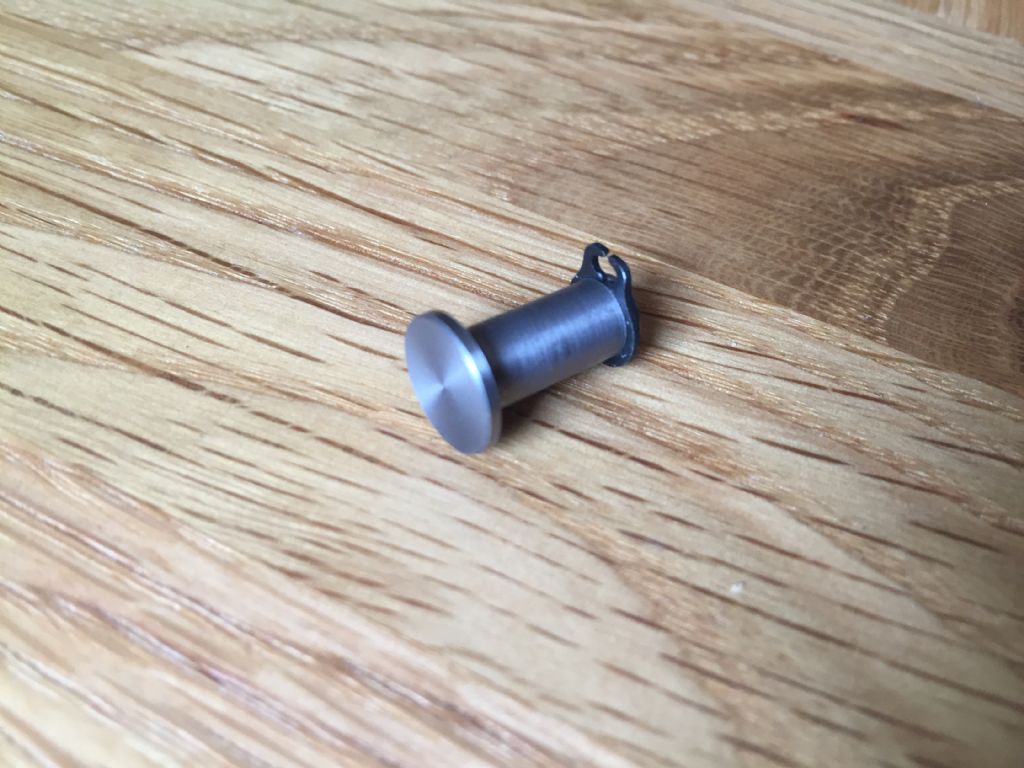
              A start on the clevis pins, this one with a circling slot the correct depth, not like the easy fit of the first two I made

              92d7851e-cb19-4390-bc3e-5ec9727e84e5.jpeg

              Edited By Nige on 11/08/2018 17:54:32

              #366823
              Michael Gilligan
              Participant
                @michaelgilligan61133
                Posted by Nige on 11/08/2018 17:41:49:

                A start on the clevis pins, this one with a circling slot the correct depth, not like the easy fit of the first two I made

                92d7851e-cb19-4390-bc3e-5ec9727e84e5.jpeg

                .

                That looks very tidy, Nige

                … Much nicer fit yes

                MichaelG.

                #366825
                Nige
                Participant
                  @nige81730

                  Thanks Michael. I was trying a tangential tool that Howard Lewis has loaned me and a new tool height gauge which worked a treat and accounts for the nice finish on the head of the pin. I measured the internal diameter of the circlip and actually turned the slot to the correct depth. I have been practicing making use of the micrometer to measure and then better use of the scales on the lathe to make cuts down to a calculated dimension.

                  #366829
                  Nige
                  Participant
                    @nige81730

                    The YouTube video that should have appeared above.

                    #366835
                    Jon Lawes
                    Participant
                      @jonlawes51698

                      I received an aquarium pump to see if it would pump enough air to turn over my Stuart 10H (once its complete). Tested it on an old Wilesco traction engine which rattle around beautifully, although the piston is a fraction of the size.

                      I will see how effective it is once the Stuart is complete. Busied myself with painting castings in the meantime.

                      #366857
                      Neil Wyatt
                      Moderator
                        @neilwyatt

                        Nige,

                        Congratulations on getting on and building something!

                        Good job so far, too.

                        Neil

                        #366862
                        Ian Skeldon 2
                        Participant
                          @ianskeldon2

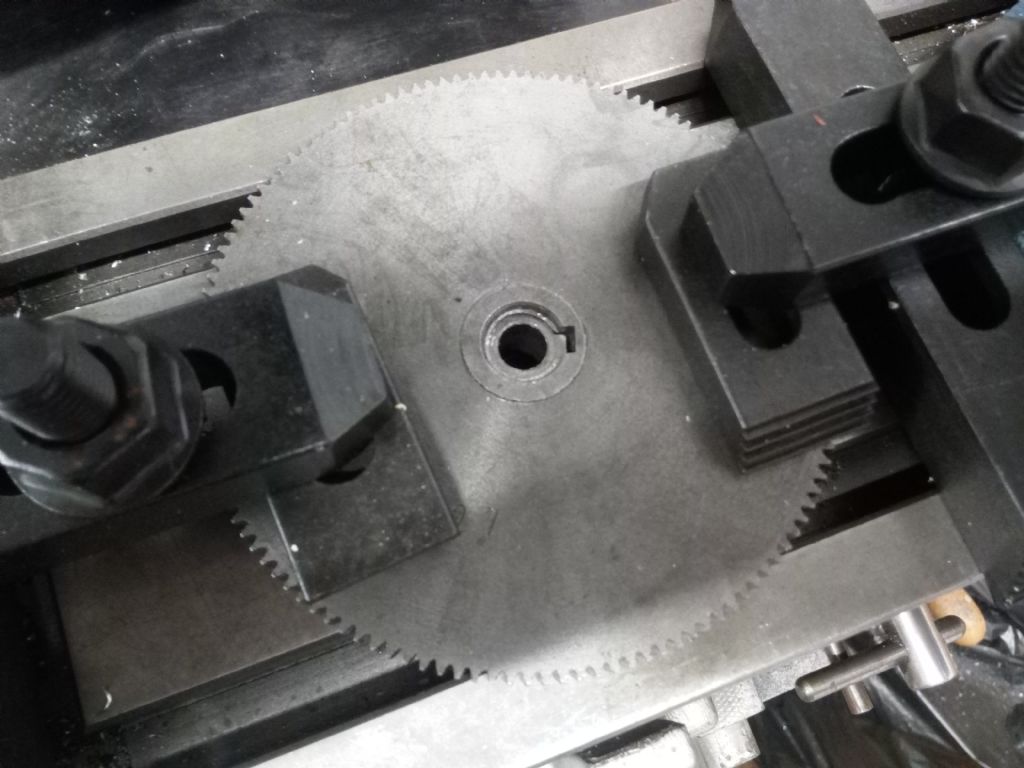
                          img_20180811_154827.jpgI spent several hours fitting my new 127 tooth change gear. First I had to get some good quality steel from my scrap box, turn the outside diameter to match the inside diameter of the new gear. Then drill and bore out the inner diameter to match the outside diameter of the spindle it runs on, then cut out a longtitudnal slot in the new bush for the key. Heat up gear, cool down bush and fit, balah bing.

                          Only to find that I then needed to mill one side of the hub boss off the new gear as it was too wide to fit the spindle as it was (photo to come soon).

                          Happy with all that I went to fit it to the lathe and found that I need to cut out a slot in the motor mount as the drive gear now fouls it, that will get done during the next week, all being well.


                          Edited By Ian Skeldon 2 on 11/08/2018 21:37:28

                          Edited By Ian Skeldon 2 on 11/08/2018 21:37:52

                          Edited By Ian Skeldon 2 on 11/08/2018 21:55:19

                          #366936
                          Bazyle
                          Participant
                            @bazyle

                            Being typically damp August weekend I have been listening to the test match while watching video of last Thursday's show on Youtube Okehampton Agricultural Show August 9, 2018 which starts with vintage tractors, features half a second of me chasing after one who hadn't stopped to ask his stand number then at about 7mins shows the steam roller followed by the stationary engines. Then it is all animals until 39mins when we get some more tractors.
                            This is the first steam we have had there since 2015 when there was a model baler run by a 4in? traction engine at 37 mins into this video which I think was Arthur Burge of EDMES who died earlier this year. Apologies if it is actually someone still alive.

                            #366938
                            Anonymous

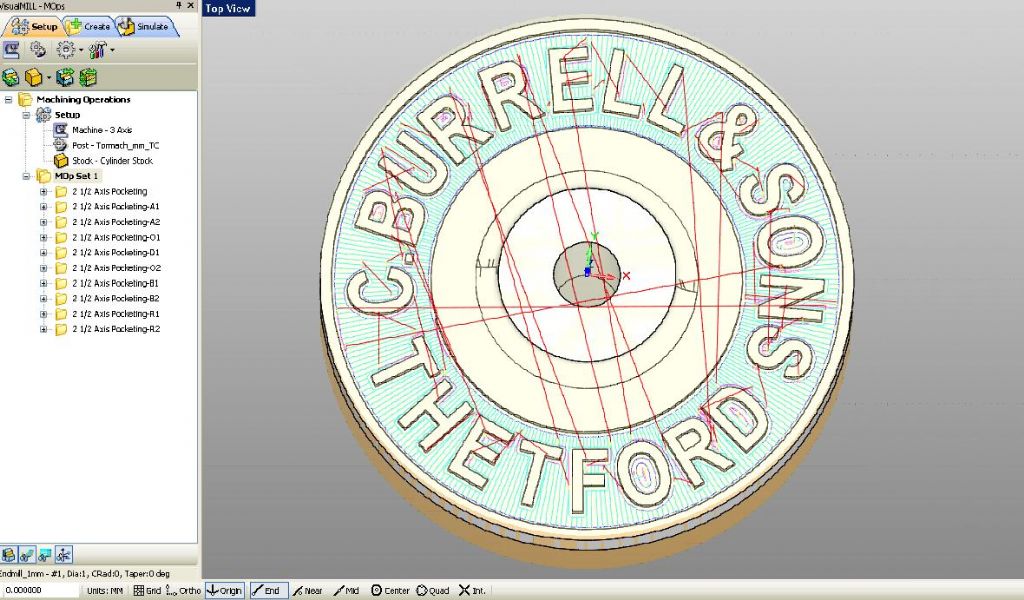
                              My tug pilot duty this afternoon has been cancelled due to the weather, although it hasn't actually rained yet. So I've been playing with CAD and CAM for the inner nameplate on my traction engines. Here's the 3D CAD model:

                              inner nameplate 11-8-2018.jpg

                              And here is the CAM toolpath:

                              inner nameplate cam.jpg

                              Only one level is shown, in reality several identical step down levels will be needed, or I'll break the cutter. I estimate that with a 1mm endmill at 24000rpm and 350mm/min it should take about 90 minutes. That's fine as I'll only be making two, well three as I'll do a trial run in aluminium, given the cost of 3" diameter gunmetal.

                              Now let jam making commence! I live in hope that this time I won't let the boiling jam overflow, with the resultant sticky mess. smile

                              Andrew

                              #366959
                              Roderick Jenkins
                              Participant
                                @roderickjenkins93242

                                Andrew,

                                I think you are wise to try out on a bit of ally first. My attempts at this sort of thing with a 1mm cutter were a bit disappointing, the lack of sharp corners, particularly on the "N"s showed up rather badly. My thought was to go around again with a pukka engraving cutter but I really run out of the necessary speed on my little CNC mill.

                                Gòod luck,

                                Rod

                                #366975
                                mechman48
                                Participant
                                  @mechman48

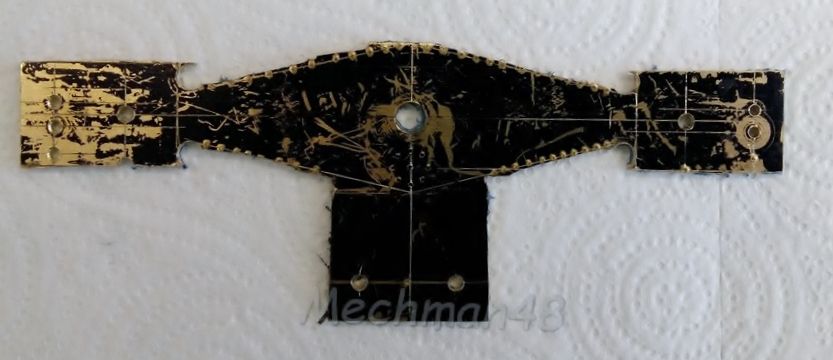
                                  Kicked off on my Boxer oscillator, first rough cut on the frame… nothing that a hacksaw & band saw couldn't get rid of…

                                  04.osc. first rough cut.jpg

                                  George.

                                  #366977
                                  henryb
                                  Participant
                                    @henryb

                                    I silver soldered the motion pad and cylinder pad in the minnie boiler i thought it best to do that first. i have been putting it off for ages as i was dreading soldering but it went well.img_20180812_192401.jpgimg_20180812_192351.jpg

                                    #366991
                                    richardandtracy
                                    Participant
                                      @richardandtracy

                                      Andrew, given the machining time, I'd be tempted to do a run with acrylic rather than aluminium – just reduces the chance of cutter breakage further. I managed to take an hour to cut a 10mm dia pen cap decal with a 0.3mm dia cutter in acrylic, and it didn't break.

                                      Regards

                                      Richard.

                                      #366993
                                      Anonymous
                                        Posted by Roderick Jenkins on 12/08/2018 18:05:09:

                                        I think you are wise to try out on a bit of ally first. My attempts at this sort of thing with a 1mm cutter were a bit disappointing, the lack of sharp corners, particularly on the "N"s showed up rather badly. My thought was to go around again with a pukka engraving cutter but I really run out of the necessary speed on my little CNC mill.

                                        Fair point. The main purpose of the test piece is to check toolpaths before using expensive material. But I'll definitely take the opportunity to see how it looks. After simulation in the CAM program it doesn't look too bad, but that's not the same as reality. Unless it looks really awful I think I'll go for it. At least I'll be able to say it's me wot made it, instead of buying a casting.

                                        Andrew

                                        #366996
                                        Anonymous
                                          Posted by richardandtracy on 12/08/2018 21:34:06:

                                          Andrew, given the machining time, I'd be tempted to do a run with acrylic rather than aluminium – just reduces the chance of cutter breakage further. I managed to take an hour to cut a 10mm dia pen cap decal with a 0.3mm dia cutter in acrylic, and it didn't break.

                                          The reason for using aluminium is to check toolpaths and that I've got speeds and feeds correct. The final parts will be made in gunmetal come what may. I've made a couple of parts using 1mm cutters with run times over 3 hours; I just go and do something else after initial checks. If the cutter breaks, it breaks the machine won't worry and that's life!

                                          Andrew

                                          #366997
                                          Roderick Jenkins
                                          Participant
                                            @roderickjenkins93242

                                            Posted by Andrew Johnston on 12/08/2018 21:47:43:

                                            … At least I'll be able to say it's me wot made it, instead of buying a casting.

                                            thumbs up That is very important

                                            Rod

                                            #367004
                                            Anonymous
                                              Posted by Roderick Jenkins on 12/08/2018 18:05:09:
                                              My thought was to go around again with a pukka engraving cutter but I really run out of the necessary speed on my little CNC mill.

                                              Bother, I knew there was something else I was going to mention last time around. The above is my experience with engraving cutters as well. Some years ago I spent a lot of time trying to engrave legends on some boxes I was machining for work. I tried engraving cutters of assorted styles, and chamfering cutters, but they all went ping. Like Rod I came to the conclusion that the maximium 5000rpm of my CNC mill simply wasn't adequate for engraving cutters.

                                              Andrew

                                              #367533
                                              SillyOldDuffer
                                              Moderator
                                                @sillyoldduffer

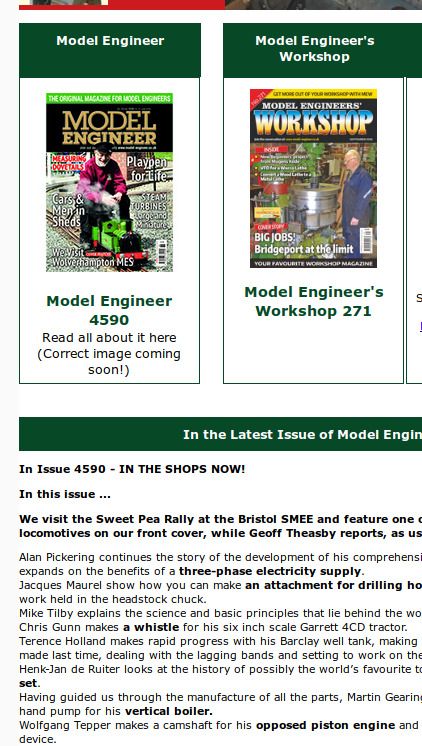
                                                Noticed a mistake on the forum. A special treat for all pedants. The ad for Model Engineer has got stuck in a time-warp:

                                                mag.jpg

                                                Not only that, but the correct image isn't coming soon.

                                                What a disaster, is counselling available for distressed gentlefolk like me?

                                                smiley

                                                Dave

                                                #367542
                                                V8Eng
                                                Participant
                                                  @v8eng

                                                  S.O.D.

                                                  You might like to read this thread about mew issue 271.

                                                  **LINK**

                                                  Can’t help you with 4590 though.

                                                  Edited By V8Eng on 15/08/2018 19:48:52

                                                  #367543
                                                  Limpet
                                                  Participant
                                                    @limpet

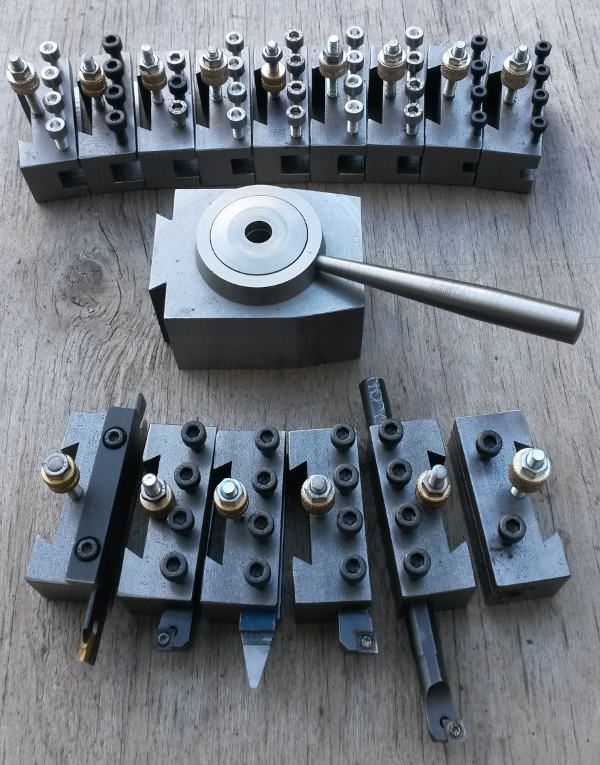
                                                    Ok I've only finished it all today but it is also my first proper project in metal. The main question is have I made enough?qctoolposts.jpg

                                                    #367548
                                                    Lathejack
                                                    Participant
                                                      @lathejack

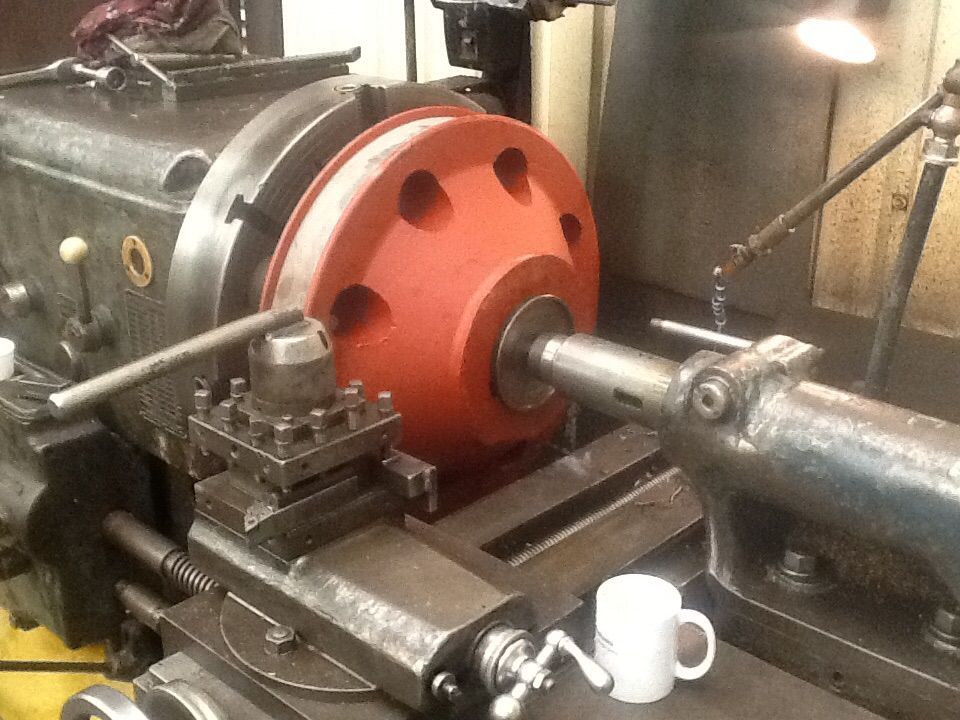
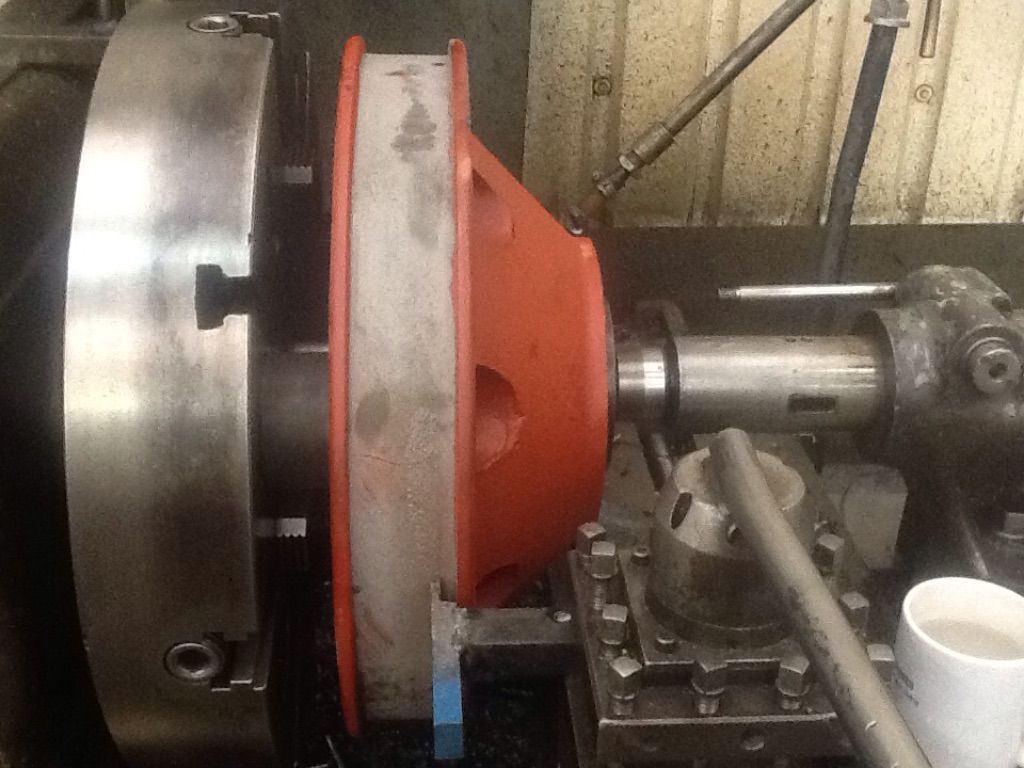
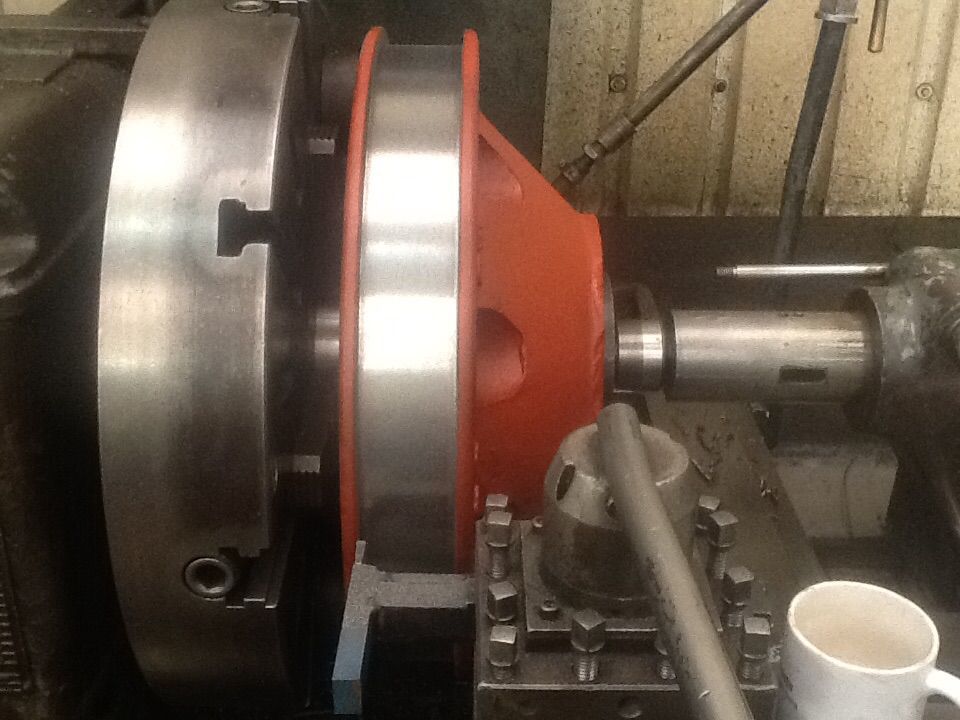
                                                      I've made a bit more progress on the full size Burrell. The brake drum was worn and pitted with corrosion in places, so it was mounted on the trusty Churchill Redmond lathe for a clean up.image.jpg……………A special cranked and beefed up cutting tool was knocked up to reach across the brake surface.image.jpg…………..The surface machined up nicely, after the wide brazed tip parting tool had a small notch ground into its cutting edge to eliminate slight chatter.image.jpg

                                                    Viewing 25 posts - 1,301 through 1,325 (of 1,832 total)
                                                    • Please log in to reply to this topic. Registering is free and easy using the links on the menu at the top of this page.

                                                    Advert

                                                    Latest Replies

                                                    Home Forums The Tea Room Topics

                                                    Viewing 25 topics - 1 through 25 (of 25 total)
                                                    Viewing 25 topics - 1 through 25 (of 25 total)

                                                    View full reply list.

                                                    Advert

                                                    Newsletter Sign-up