steambox for ply

Advert

steambox for ply

Home Forums Workshop Tools and Tooling steambox for ply

Viewing 12 posts - 1 through 12 (of 12 total)
  • Author
    Posts
  • #18948
    mick70
    Participant
      @mick70
      Advert
      #356598
      mick70
      Participant
        @mick70

        as anyone ever built one?

        just wondering on best way as need to put some curves in 6mm ply.

        30"x10" tapering to 6" for a recumbant seat.

        wondered if just soaking in hot water for while would do?

        need to do 2-3 pieces then glue them up.

        would do one at time put in jig to dry and hold shape.

        one in pic trial to see if right shape and made using strips of ply.

        actually very comfy..

        bike is just a test bed for trying out ideas on till happy hence all the hacking and adding bits to it then will make new frame 


        Edited By mick70 on 05/06/2018 13:07:14

        #356602
        JasonB
        Moderator
          @jasonb

          Easier to do it with a thinner birch "skinply" say 1.5mm thickness and have more layers, that way you don't need to steam it and once glue has set it will retain shape. Or use flexiply but that is not as rigid when glued up.

          This is 8 layers being bent around a former.

          they were then trimmed and veneered, draw front holds it shape fine others are built into the structure.

          End view of another job that tapered in thickness, 6mm – 4 layers on one side to 10.5mm -7layers on the other with tapered fillets to prevent steps


          Edited By JasonB on 05/06/2018 13:38:33

          #356603
          pgk pgk
          Participant
            @pgkpgk17461

            I have no idea how well this'd work with ply..depends on the glue I suppose. But this chap approach may be worth considering (about 12mins in) https://www.youtube.com/watch?v=iGjFQjss5bE&index=28&list=PLzlN3A2DLgNwE2RCpQ9vKCmeOwvKCRRjF&t=0s

            Or one might consider using thinner ply between fomers and glung it up in layers.

            I've also seen furniture made by cutting lots of the side-view profile of the seat out of sheet, laminating those up and sanding to the finish… not too tedious with a decent bandsaw and 15mm ply perhaps but manually takes dedication.

            or flexibale ply and build up the layers withoiut steaming: https://www.ebay.co.uk/itm/Flexible-Plywood-Sheets-5mm-Flexi-Ply-Bendy-Plywood-Flexi-Board-Curved-Plywood-/182543296033

            pgk

            #356621
            Tim Rowe
            Participant
              @timrowe83142

              Mick 70

              Jason B has it on the nail. 4 laminations or 1.5 mm will give you a fraction over 6mm finish as there will be a slight growth in the glue lines.

              Don't try to steam plywood as it will likely end in tears. In effect you are making your own.

              You will need a reasonably robust former and loads of clamps which you could make with suitable lengths of planed pine and studs. The clamps will need to be very closely spaced to get even closing of the laminates and to help this I would have a sacrificial layer top and bottom which is not glued but simply there to provide a more even clamping pressure and to stop the job itself getting marked.

              If I was doing this I would almost certainly use epoxy glues as the curing time can be made sufficiently slow to get everything lined up. It will also be durable.

              You will get a bit of spring back over the length of your application but that does not look to critical. If it is, you will have to slightly overbend and there you are on your own!

              #356623
              David Standing 1
              Participant
                @davidstanding1

                Were it me, I would mould that bike seat out of fibreglass, so simple to do something like that.

                #356624
                KWIL
                Participant
                  @kwil

                  I would use one of the urea formaldehyde glues, you will have around 20 minutes ti get it all correct, Aerolite 300, Casco etc, designed for laminating.

                  #356626
                  Bazyle
                  Participant
                    @bazyle

                    FYI ammonia greatly improves the bendability as used by model boat builders but not sure of concentration.

                    #356906
                    Ady1
                    Participant
                      @ady1

                      On wheeler dealers with Ed and Mike the amazing Ed had to do the wooden bit round the gearknob on one car and there was no known supplier

                      It was cherrywood laminate or walnut or sumfink like that

                      Anyway, he formed the bendy bit by putting the laminate into a strong vacuum bag

                      pulling the air out forced it around the bendy former and then it was left to harden up, nothing else needed, the vacuum bag did the hard bit of holding the curved shape and applying a constant even level of pressure over the entire workpiece

                      2cents

                      Edited By Ady1 on 08/06/2018 01:19:38

                      #356911
                      JasonB
                      Moderator
                        @jasonb

                        That is how I did the curved one I posted above, you do still need a sturdy former that won't distort or even worse collapse in the vacuum.

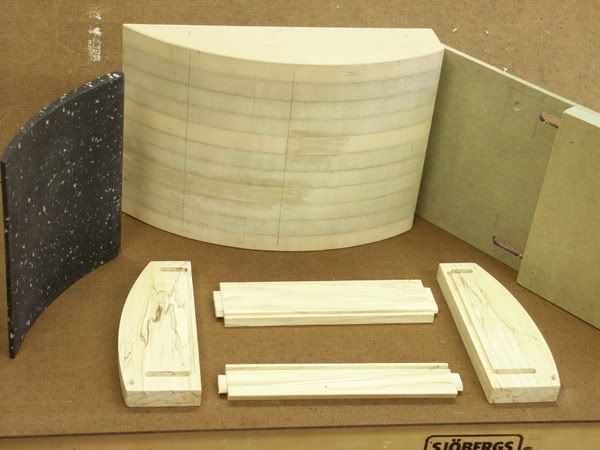
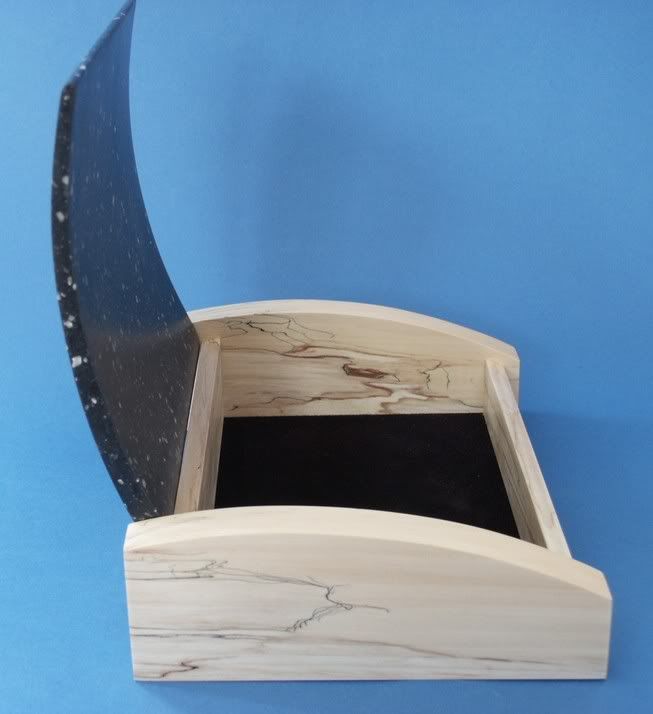
                        This pic was actually doing a Corian top for a matching box, corian needs to be thermoformed (hot) hence the cardboard caul to protect the bag

                        The solid MDF former is in the middle, corian top to the left.

                        #356912
                        Speedy Builder5
                        Participant
                          @speedybuilder5

                          I made a steam box about 10 feet long to steam some Douglas Fir which was 3" x 1.5" tor the gunwales of a wooden sailing cruiser. The steam generator was made from some SS flue pipe and a domestic immersion heater with the thermostat disconnected. From memory, I steamed the section for about 90 mins and set it to shape pretty smartish.
                          BobH

                          #357009
                          john carruthers
                          Participant
                            @johncarruthers46255

                            We used a large oil drum to bend 2x 8mm marine ply for shields, pushed steam from a wall paper stripper in one hole and out the other.

                          Viewing 12 posts - 1 through 12 (of 12 total)
                          • Please log in to reply to this topic. Registering is free and easy using the links on the menu at the top of this page.

                          Advert

                          Latest Replies

                          Viewing 25 topics - 1 through 25 (of 25 total)
                          Viewing 25 topics - 1 through 25 (of 25 total)

                          View full reply list.

                          Advert

                          Newsletter Sign-up