Start of Tom Senior refurbishment.

Advert

Start of Tom Senior refurbishment.

Home Forums Manual machine tools Start of Tom Senior refurbishment.

Viewing 25 posts - 1 through 25 (of 46 total)
  • Author
    Posts
  • #412107
    old mart
    Participant
      @oldmart

      I have started the refurbishment and modifications to the Tom Senior Light Vertical which was left in a will to The Helicopter Museum.

      We have some parts of the mill at the museum, and will collect the rest on Wednesday 5th June.

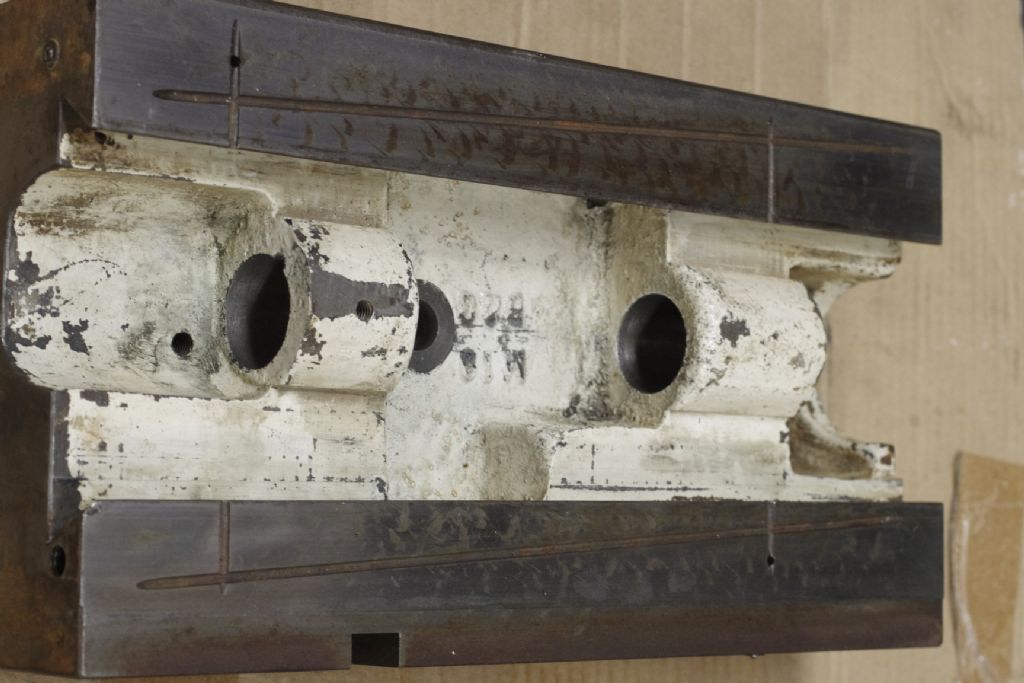
      The bed is the long version and has quite a lot of cutter abuse on it. The measured depth of the marks is 0.012", so by skimming about 0.015", 95% of the damage can be removed. The bed has been skimmed on the Drill mill using an 80mm Hertel fix perfect 6 tipped shell mill with inserts for steel/stainless. As the bed is almost the same size as the drill mills bed, we had to drill 5 x 8mm holes on the centreline to hold it down. It sat on 4 1-2-4 blocks for the milling. Because of the size, the milling was done in 6 sections.

      Missmatches of up to 0.001" resulted from this method, and we have started to get the bed looking nice and running true. I degreased the top of our surface table, laid out double sided tape and applied 180 wet and dry paper carefully, having degreased the backs of the sheets first. Mike and I spent some tome today rubbing the bed down. Lots of high spots showed up, but depth mic checking shows less that 0.0005" on any of them. To speed up the process, I have been hand scraping the high spots. The rubbing is along the X axis, it will take another couple of hours to complete. I would recommend that anyone trying this method use 120 paper, dry and use a vacuum cleaner to remove the dust.

      Advert
      #13538
      old mart
      Participant
        @oldmart
        #412170
        Simon Williams 3
        Participant
          @simonwilliams3

          Good morning and thank you for the update. As a "Senior" citizen myself – and also with a Light Vertical – I look forward to hearing how you get on with this project. Hopefully you will be able to add some photo's to augment the saga.

          You may be aware that there is a similar thread going on

          Light Vertical Mill Restoration

          Good luck with the project,

          Best rgds simon

          #412184
          Simon Williams 3
          Participant
            @simonwilliams3

            Continuing the theme, though it's taken me a little while to find the thread, here are some pictures of my repair to the bronze bearing located in the quill assembly supporting the driven pulley. The pulley is cantilevered above the bearing, so the belt drive forces pull the pulley sideways. In my case the inner of the bronze bush wasn't too bad, but the sleeve which runs in it and which carries the spindle drive key was badly scored and wasn't something I thought I could re-make. I thought at the time that this was the cause of a horrid rattle coming from the drive, but (as explained below) this was a mis-diagnosis.

            Anyway, here is a link to the pictures I took of my decision to swap the bronze bush for a pair of needle roller bearing, with proprietary hardened inner sleeve supporting the drive key bush. I've done a lot of work with it since, and it's not missed a beat.

            Driven pulley bearing mod'n

            You will also see there is some additional stuff about repairing the knadgered motor shaft.

            Good luck with your new toy, and I'm sure I'm not the only one interested in how you get on.

            Best rgd Simon

            #412242
            old mart
            Participant
              @oldmart

              I am also starting to get ready to upgrade the MT2 spindle to R8 and have posted on that subject on The Home Shop Machinist forum.

              I am getting very mixed up posting on two forums at once on a similar subject. 

               I have got a lot of helpful advice from reading the extensive coverage on Tom Senior mills on this forum, which is the reason I have joined it.

              Edited By old mart on 02/06/2019 16:28:53

              #413635
              old mart
              Participant
                @oldmart

                The rubbing of the bed is proving slower than wished for, but the smooth areas are gradually getting bigger.

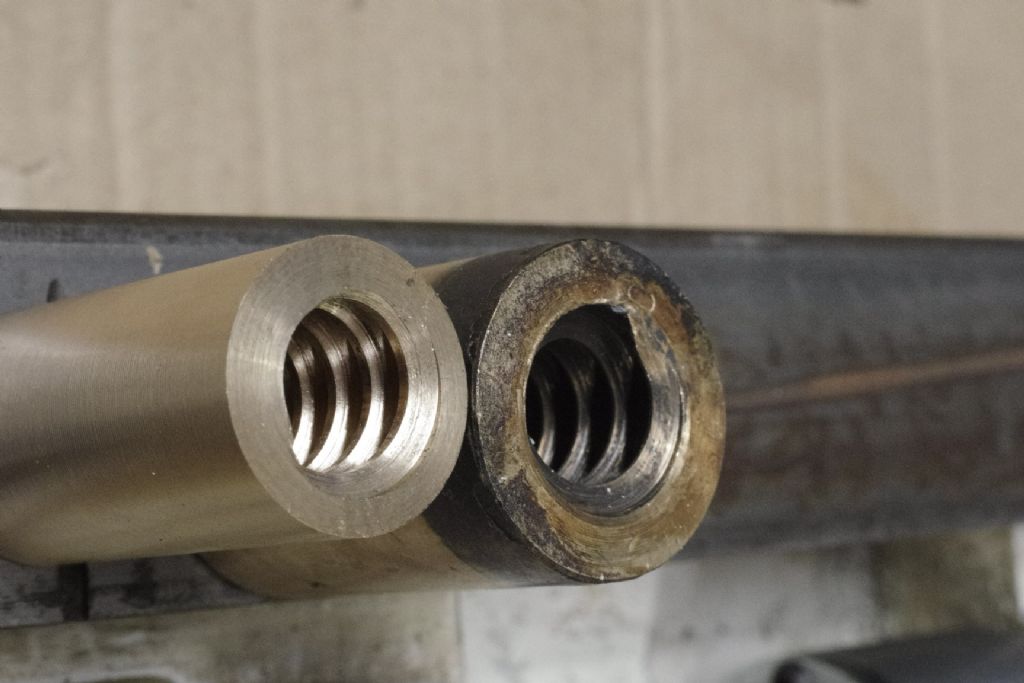
                I have made two 3/4" X 5 ACME nuts out of 100mm of leaded gunmetal. Making them antibacklash will mean sacrificing some of the length as the design of the mill X axis means that the travel will be shorter as the nut length increases. The only way around this is to cut a little more thread on the leadscrew. I am thinking about this, two inches of extra thread would allow the nuts to be full length.

                As made, the nuts have about 0.005" backlash unlubricated.

                #413981
                old mart
                Participant
                  @oldmart

                  At first glance, the bushes inside the quill pulley seem to be excellent, no discernible play even on the thrust axis. More checking will be done when I strip down the head.

                  To maintain the 18+" of X movement with nearly 4" of combined nut length, I will have to increase the length of the leadscrew thread by 4". The two nuts will end up with a gap of about 1 1/2" between them to allow access to the Y axis nut fixing screw and washer. One nut will be fixed and the other will be screwed into a sleeve using a fine thread, maybe 28tpi and have something to lock it. I don't think there will be any way of adjusting the antibacklash without removing the bed. This should not be a problem as the combined length of nut thread is somewhat overengineered.

                  #414726
                  old mart
                  Participant
                    @oldmart

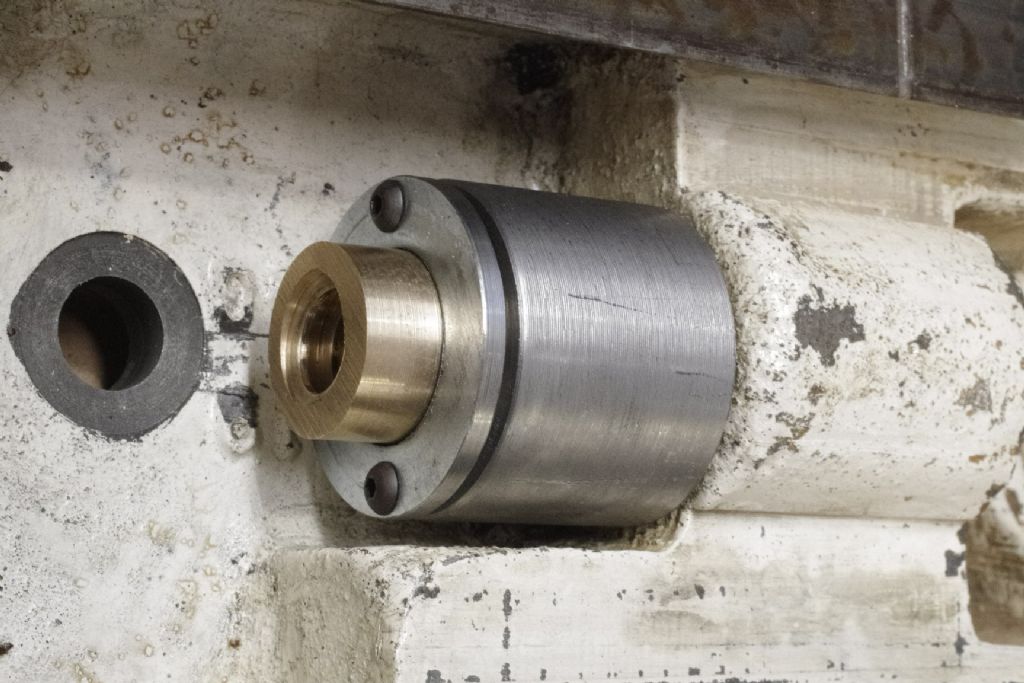
                    I've made a little progress on the antibacklash for the X axis. I made a sleeve to be loctited into one of the bores in the cross slide with a 3/4" clearance hole for the leadscrew. Drilling 3/4" wasn't enough, I had to bore it out a few thou to give clearance. The end for the nut was turned down to just clear the casting and bored to about 1.2" diameter by 1 3/8" deep. I turned the nut down on a mandrel for concentricity, and ended up sizing the pair for a super fine thread. I chose 40tpi and started the female thread by undercutting the bottom 1/4" of the hole and used a left hand threading tool which I had made out of Densimet, spindle in reverse and cutting away from the chuck. The finest er16 inserts I had were 0.5mm, or 28UNF. I went for the 28, as the thread was a 1 off and cut 0.012" deep in 0.002" steps, then 0.001" steps, with a spring cut at the end.

                    The male was done using the same insert, and I started trying the fit when I got to 0.011" deep. The fit ended with about 0.001" clearance and a total of 1" length of thread contact. The end of the nut projecting from the sleeve got turned down, leaving a step for a locking collar held by two 4mm screws. I will use Loctite 628 on the sleeve- casting joint.

                    #415308
                    old mart
                    Participant
                      @oldmart

                      _igp2378.jpg_igp2377.jpg_igp2376.jpgI have some pictures of the X axis nuts. The adjustable one will be fitted when casting has been cleaned, and the fixed one is awaiting the manufacture of a bush._igp2375.jpg

                      #416908
                      old mart
                      Participant
                        @oldmart

                        I got the er22 threading insert holder the other day, the smallest available is 25 x 25, so the mill produced a dustpan full of chips which flew off red hot, some landing on me. The 3/4 x 5 ACME thread has a large helix angle, so the threading tool is tilted at 4 degrees. Four inches of extra thread plus an inch of runout relief mean 5" projecting from the chuck. I will be using the fixed steady at the right hand end of the lathe and also the travelling steady. The travelling steady has two pieces of 1" brass angle 1" long screwed to the original end which I thought was not wide enough to span the 5tpi thread.

                        I'm thinking of pre-setting the travelling steady by skimming the faces with a 3/4" end mill in the lathe chuck.

                        #417366
                        old mart
                        Participant
                          @oldmart

                          The extra length of thread is now cut. I had contemplated turning the compound to 14.5 degrees, but it makes things more complicated when using an existing thread for lining up. I had to adjust the traveling steady several times as the brass pads wore rather quickly. This was despite frequent deburring with a super fine file. I started with 0.006" cuts and gradually reduced to 0.002". I had to double the leadscrew speed and set 10 tpi to achieve 5 tpi pitch.

                          As the centre part of the leadscrew is worn more than the ends, I have had to match the wear by setting the sides of the insert to just rub the worn parts and then continue over the less worn areas. I am hoping to get consistency over the entire length. Doing the other end of the leadscrew requires even more concentration. Lining up on the centre threads, backing off the tool, coming off the end of the thread with just enough to use a small live centre instead of the fixed steady, and then guessing how much of a cut to take. Then starting at the end and remembering to back off the cut before disengaging the leadscrew.

                          Soft jaws were bored to 3/4", so I can hold any part of the leadscrew securely and accurately.

                          Running the leadscrew at double the speed puts a lot of strain on the geartrain, so for safety during the operation, I have replaced the safety link pin in the system with a solid one. There is a greater danger from the shear pin failing during a cut than there is of my crashing into the chuck.

                          #418381
                          old mart
                          Participant
                            @oldmart

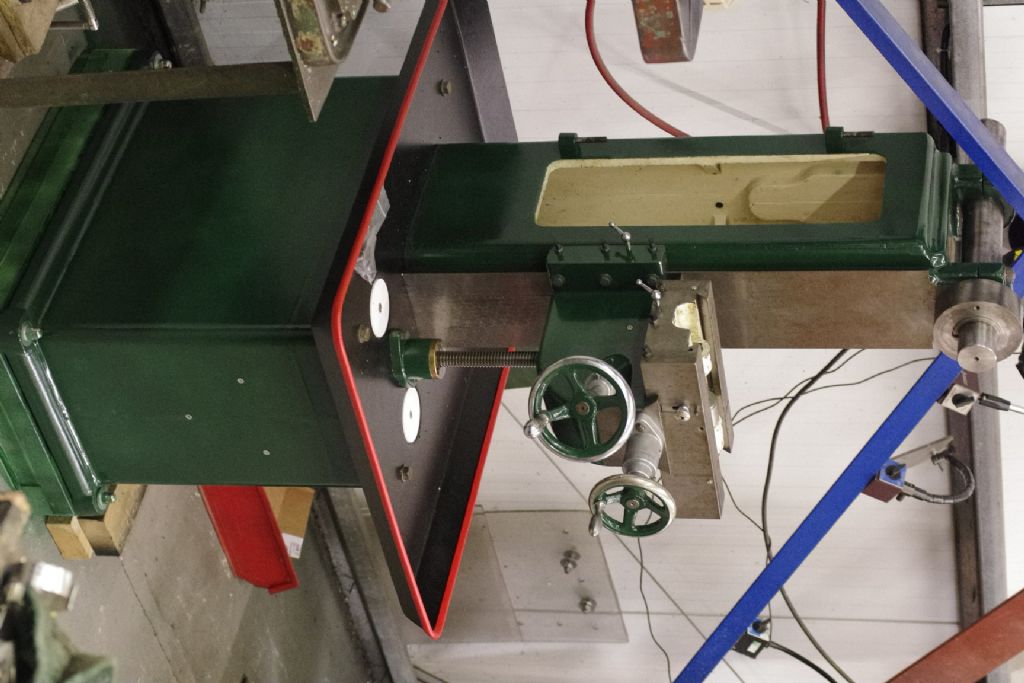
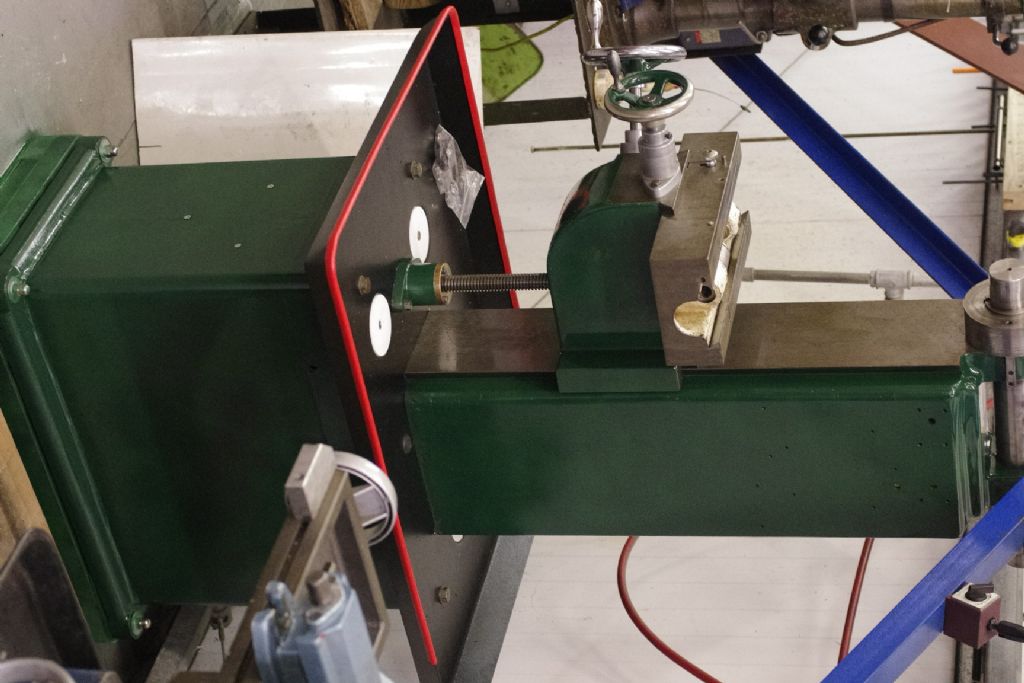
                            The mill is going on a 4" high wood stand with 1/8" aluminium corners to spread the load. This is the maximum we can raise the machine and still just miss the cross bracing for the mezzanine floor above. I'm a great believer in saving my back and the backs of the other oldies who will use it. Short people can make duckboards.

                            At risk of upsetting the purists, I have bought some cans of lawn green Plasticote paint. It is slightly brighter thanTS green, but still has a touch of the grey-green.

                            #418396
                            old mart
                            Participant
                              @oldmart

                              The nameplate on the lower front of the machine looked to be made of plastic, held on by three large drive rivets. I tipped the base over to tap them out from inside and they turned out to be 3/16" round head rivets which were riveted over. They didn't want the thing to fall off, I had to grind the rivet tails down flush after marking their positions, before punching them out.

                              The plastic nameplate turned out to be a bronze casting.

                              #421175
                              old mart
                              Participant
                                @oldmart

                                We have the mill bolted down on the 4" of wood using 12mm studding glued into 4" holes in the concrete floor. The machine is not being fully repainted, just a good abrading of the paint and a spray of Plastikote lawngreen paint. The colour is a brighter green than the top of the can suggests, so not exactly concours, but it seems to be oil resistant. The tray got sprayed Hammerite satin smooth black, and has a red strip surround intended for car doors.

                                We were lucky with the Y axis leadscrew nut, which in conjunction with new metric thrust bearings, seems to have only 0.001" backlash, I haven't checked it with a dti yet. The thrust bearing housing had to be bored deeper and larger diameter to accommodate the larger metric bearings, which are much heavier duty than the originals.

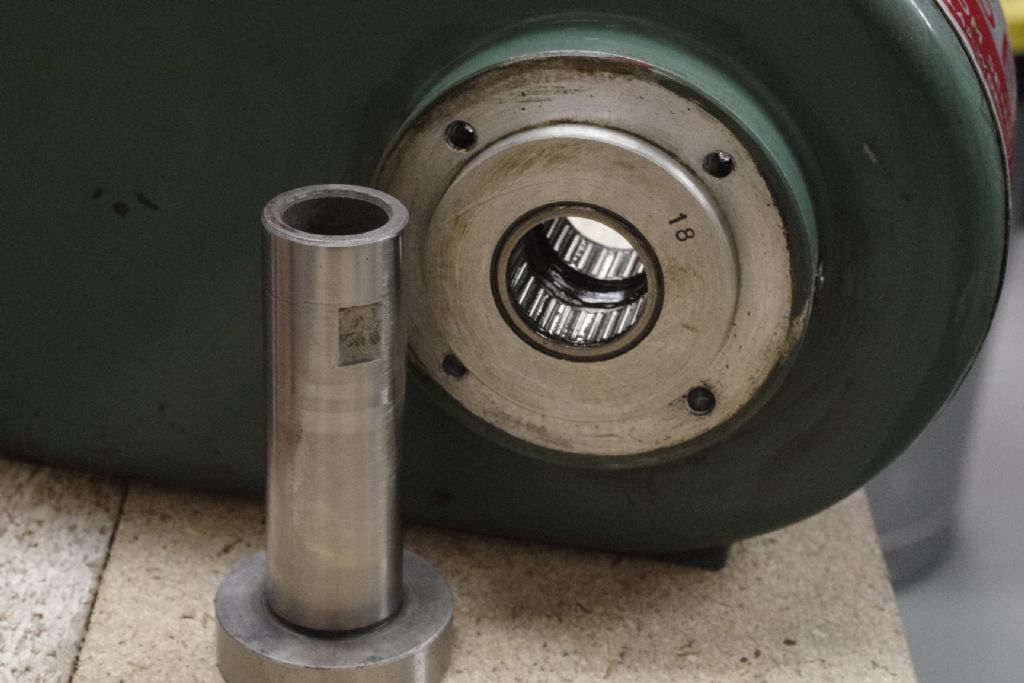
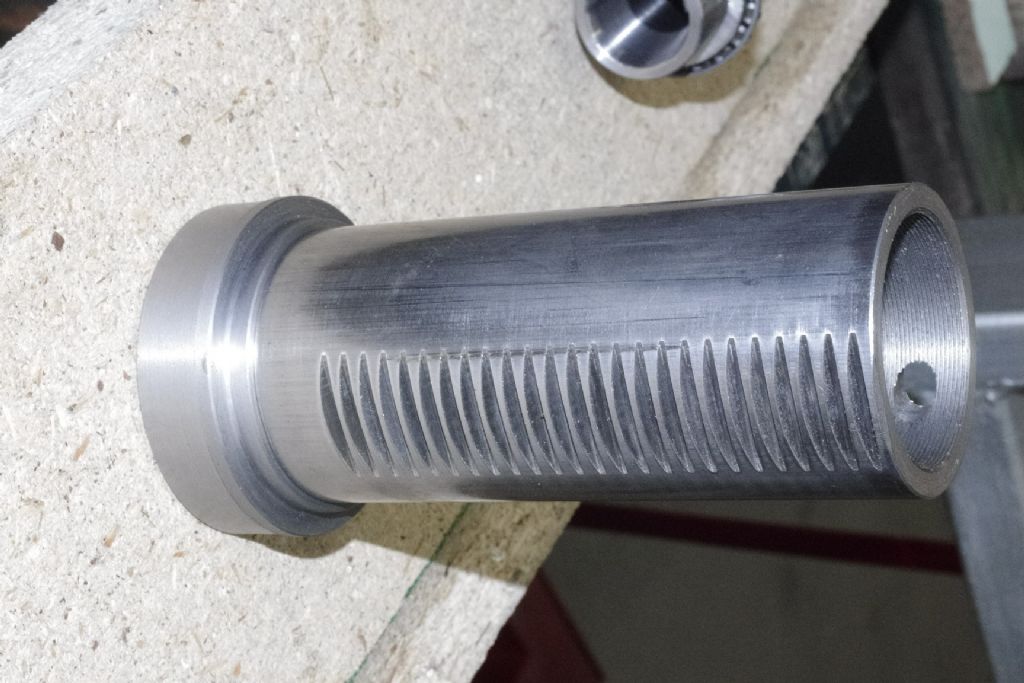
                                I am just starting the conversion to R8 spindle taper. I have an SKF taper roller bearing 35-62-18 for the bottom of the spindle. Also a spindle from ArcEuroTrade intended to fit one of the Chinese mills they sell. The spindle was bought because I didn't feel confident in producing the internal dimensions well enough. The spindle has been checked for accuracy and concentricity and to my relief, there is nothing over 0.0005" tir.

                                Simon Williams may be interested that prior to disassembling the head, I found that his mill is not the only one that has needle roller bearings in the spindle drive. The machine was made in 1969, has the long bed, the later style quill lock and all the castings have the same assembly number 7 stamped on them. A bit of a mystery.

                                #421189
                                Pete Rimmer
                                Participant
                                  @peterimmer30576

                                  Looking at the pic of the x-axis ways they seem to be in quite good condition. You can see the flaking marks on the inner portion and that's a good sign because it's common to relieve the middle of the way a little more so that when the ends wear it doesn't rock on the less worn middle hump. Even if that's not the case, the low level of wear on the middle of the way is still a good sign.

                                  You can put that flat way upside down onto a known good surface plate and hit the four corners with a rubber or plastic mallet and see if it knocks. Also try a very thin feeler gauge under the four corners. If you can't get a 1 thou feeler in anywhere you're on to a winner. Any easy scraping job.

                                  #421194
                                  Simon Williams 3
                                  Participant
                                    @simonwilliams3

                                    Simon Williams may be interested that prior to disassembling the head, I found that his mill is not the only one that has needle roller bearings in the spindle drive. The machine was made in 1969, has the long bed, the later style quill lock and all the castings have the same assembly number 7 stamped on them. A bit of a mystery.

                                    Ah Hah! There's interesting! Any chance of some piccy's of what you've found?

                                    Many thanks for the update – I look forward to more details.

                                    Best rgds Simon

                                    #421249
                                    old mart
                                    Participant
                                      @oldmart

                                      I did try checking the flatness of the X axis ways, it had to be up on the four 1-2-4 blocks which I bought to mill the top of the bed. The leadscrew nut bosses project above the surface. I got lucky with the 1-2-4 blocks, not only are they an unusual size, but they match well as a quartet.

                                      I will post more pictures when the head is dismantled.

                                      #421963
                                      old mart
                                      Participant
                                        @oldmart

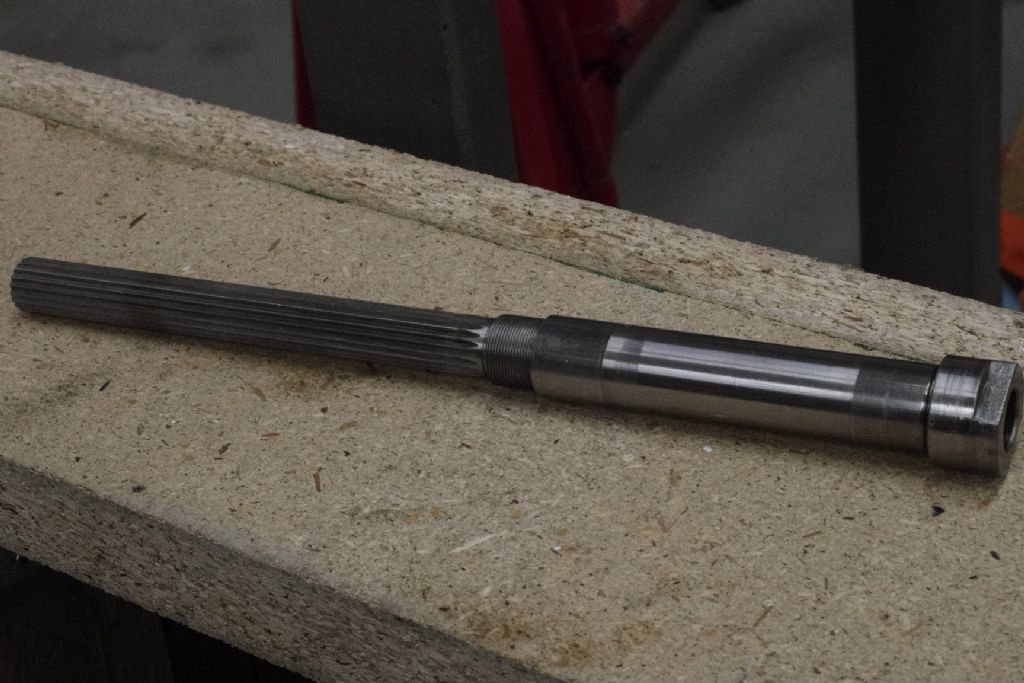
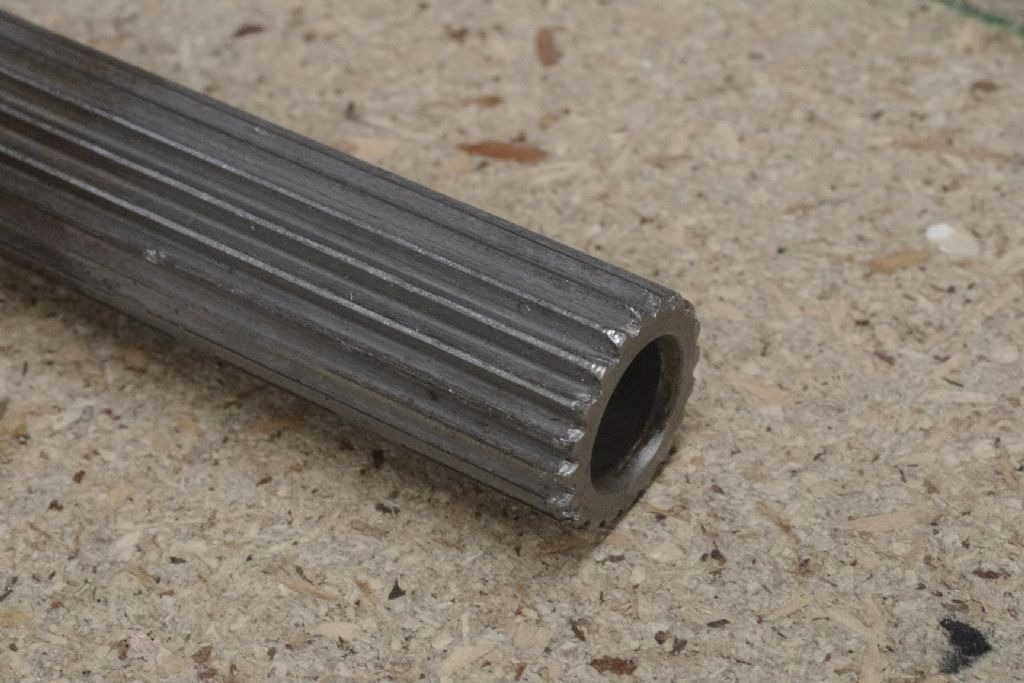
                                        The needle rollers in the pulley shaft look like they are factory installed, the shaft is hardened and ground. This type has a twenty splined shaft, unlike the early head drawing which seems to show a sliding key.

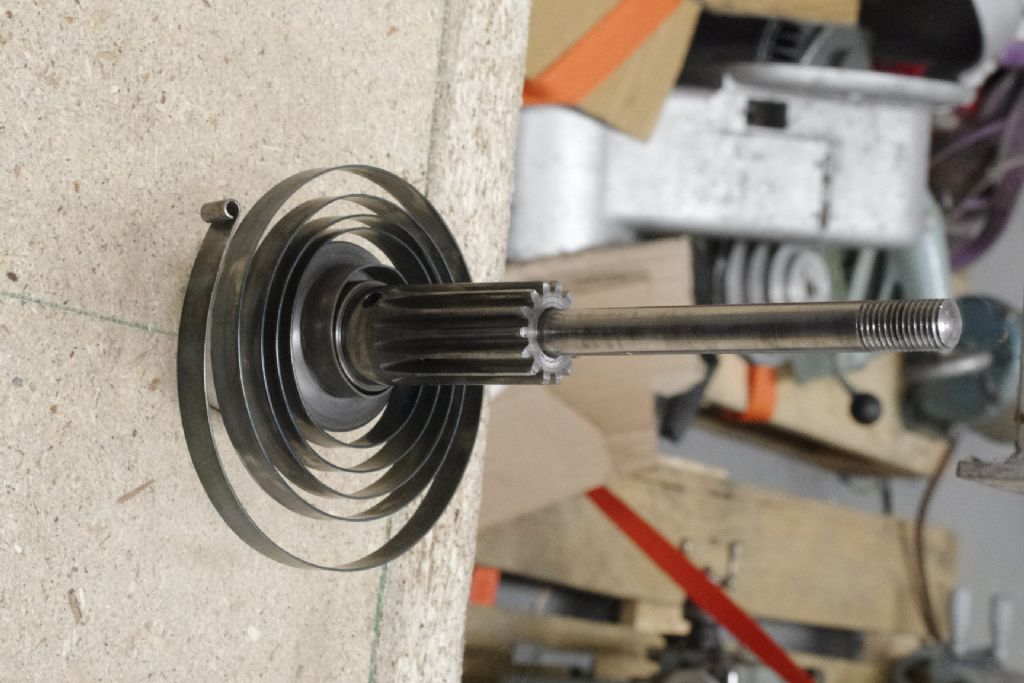
                                        We got the head stripped right down, we haven't yet figured how to rewind the quill return spring when it gets reassembled. I am considering cutting up the original spindle to save the deep drilling and spline cutting of a new piece of en24t. The spindle is not dead hard. The only downside of this is the drawbar hole is 0.012" too small for a 7/16" bar, and expecting a drill to take that small a cut is not likely. It will have to be a captive drawbar then. Just as well there are only a couple of 12mm threaded R8 shanks in my collection. 

                                        I forgot to take a camera today, maybe tomorrow.

                                        Edited By old mart on 31/07/2019 22:11:12

                                        #422129
                                        old mart
                                        Participant
                                          @oldmart

                                          _igp2423.jpg_igp2425.jpg_igp2426.jpg_igp2427.jpg_igp2428.jpg_igp2430.jpgA few more pics.

                                          _igp2431.jpg

                                          Edited By old mart on 01/08/2019 20:26:18

                                          #422132
                                          old mart
                                          Participant
                                            @oldmart

                                            I haven't got the hang of posting text and photos together. You can see how the mill is positioned to just miss the mezzanine cross bracing, while being 4" higher at the same time. The quill return spring will be sorted out when the head is re assembled, it cannot be too difficult. The outer end of the spring is secured by a 6BA screw. The spindle has the 3/4" od 20 tooth spline for the Z axis. The needle rollers for the pulley bearing are an unexpected bonus, having no discernible play at all.

                                            #423111
                                            old mart
                                            Participant
                                              @oldmart

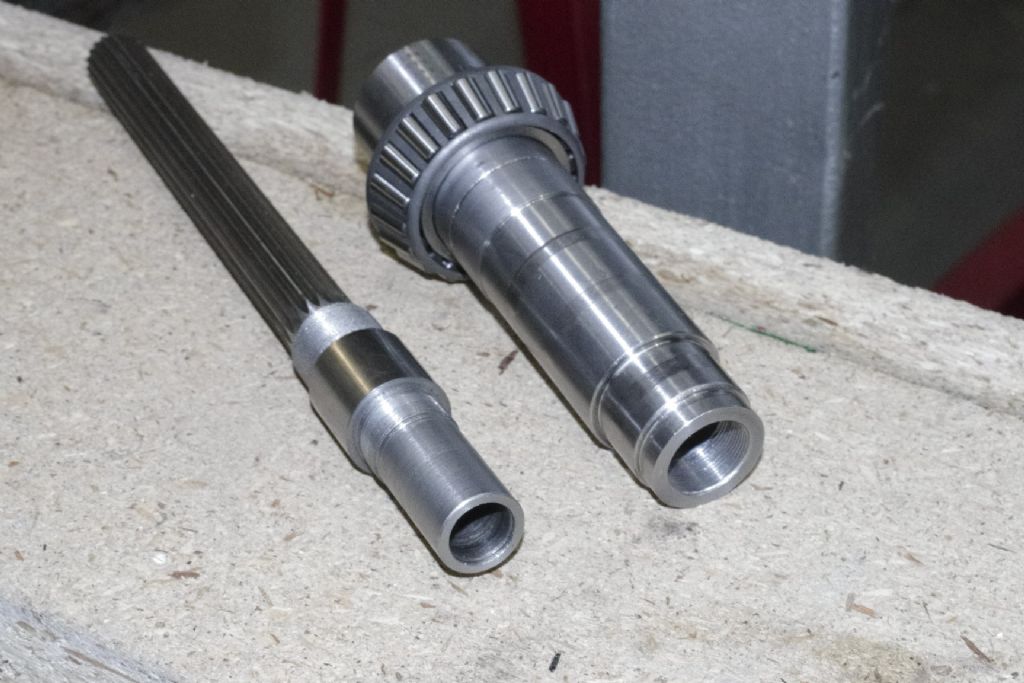
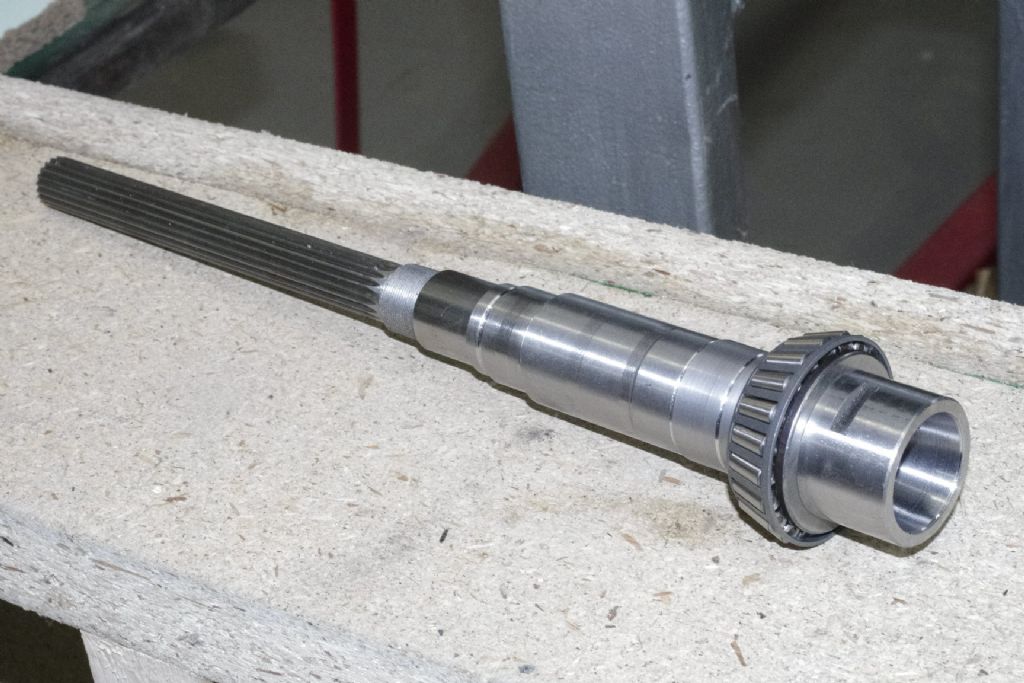
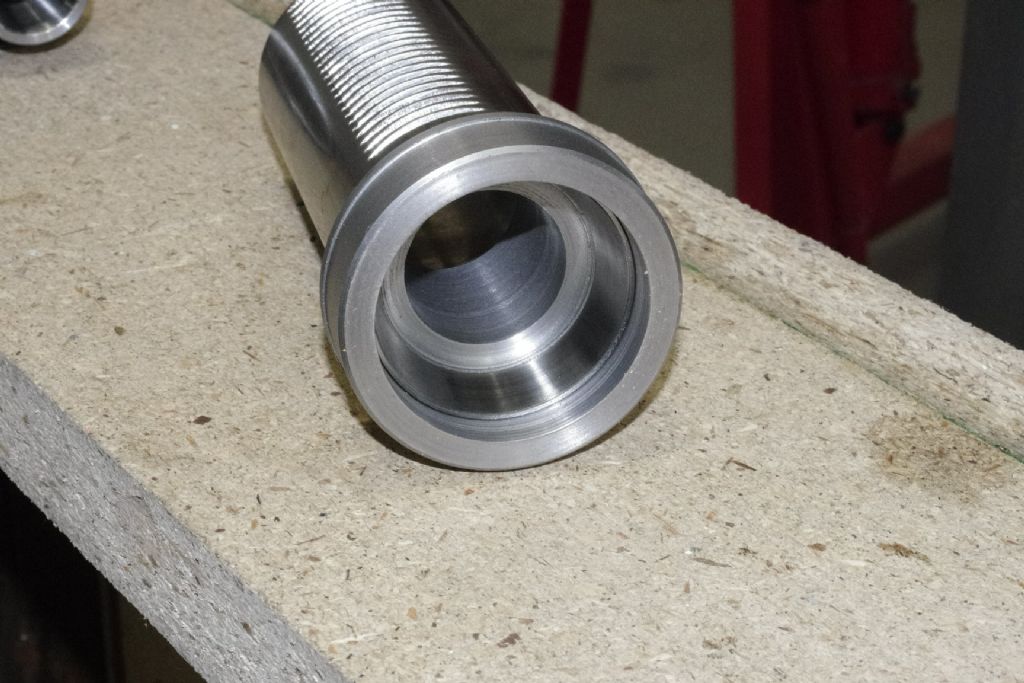
                                              I did some machining on the outrigger bearing holder for the bottom of the quill. It is screwed into the quill body by a 26 W X 2.048" thread, just right for 2" OD taper rollers to fit in the 2" bore. There is a 2" long spigot which just fits the quill bore and a shoulder, which , with the thread and the bore for the spindle, were all turned in one chucking. Trouble started when I turned the work round to finish the external part and the bottom bearing housing. I couldn't quite get everything running exactly within 0.001" tir, even with my best four jaw chuck. Tomorrow I will bore some soft jaws in the Pratt 6 3/4" serrated jaw chuck. Now I am glad that I decided to have a 1.999" by 2" long spigot in the design, plenty to hold in soft jaws, and room to check the shoulder and skim if necessary. Then I will feel confident in getting the concentricity I want.

                                              I have finished the machining of the lower part of the R8 spindle. As the upper half will now be part of the existing spindle, I shortened the lower part, bored it larger, about 20mm diameter and threaded the outer 3/8" long. I used a lefthand threading bar cutting away from the chuck. As the available grooving tools would not quite go down the bore, I used the 16er laydown insert to create a start clearance at the bottom of the thread. There was a quiet ting of the tip fracturing, I had forgotten to put the spindle in reverse. I got the insert turned round and the spindle going the right way and the thread is fine.

                                              #423315
                                              Simon Williams 3
                                              Participant
                                                @simonwilliams3

                                                Many thanks for the fascinating pictures of the needle roller bearing supporting the driven pulley, that looks as if Mr Senior (Senior Junior?) had second thoughts about the bronze plain bearing that I found in mine and went for the needle rollers, presumably for later models.

                                                The other interesting difference is the splined quill shaft – mine is a single long keyway driven by a captive key. I fancy the spline is a much better job, but I guess needs an investment in the appropriate tooling to make it.

                                                Do you have a serial number? Yours must be a later machine than mine.

                                                I've just measured the bore through the quill, I make it 10.9 mm so 7/16 ain't going to go.

                                                Keep us posted, do!

                                                Rgds Simon

                                                #423335
                                                old mart
                                                Participant
                                                  @oldmart

                                                  I don't have the serial number at present, but it seemed to be of 1969 vintage. All the major cast iron parts have the build number 7, except the head casting has no number I can find. The bed is the long style. I was going to make the top half of the spindle, with a mill and rotary table, it is easy to cut that style of spline. Now I am going to cut the bottom off the existing spindle and attach it to the R8 end. The drawbar will be made of 7/16" 431 stainless steel, the only stuff I could get in 400mm lengths. The bottom 3/4" will have the 7/16" UNF thread, the remainder will be turned down to 10mm and the top will have a 10x1mm thread for a 19mm af long nut with locknuts either side and a bronze thrust washer. If there is room inside the spindle above the R8 tooling, I might be able to make it self extracting. I was worried about fitting the two halves of the spindle together. There will be 1 1/2" of close fitting overlap, plus 1/2" of 26tpi thread pulling the halves up to a shoulder. I looked in the Loctite site for a sleeve and bearing fit retainer that did not go off too fast. I have 638, but fitting the parts together and screwing them up tight might have ended badly. 620 is a much slower curing grade and should be fine.

                                                  ps, the s/n is 2961

                                                  Edited By old mart on 09/08/2019 16:51:59

                                                  #423522
                                                  old mart
                                                  Participant
                                                    @oldmart

                                                    Today, I finished the outrigger lower bearing holder and the spindle. The two halves of the spindle fit with about 0.0006" clearance and screw together. I forgot which thread pitch I had used in the bore of the lower section, and to make matters worse, I have lost my unified thread gauge. I searched the cupboard of unknown measuring equipment and found a little thread gauge with 26 and 28 tpi. It turned out to be 28 tpi. Now I have the two halves screwing together with the minimum of clearance, I now have to wait for the Loctite 620 to arrive.

                                                    Mike made a special spanner to hold the spindle when the drawbar is tightened and released as there is no large pulley to hold in the TS head. He also made a spindle bearing preload adjuster spanner. The design isn't as well thought out as the drill mill as to adjust the bearings, you have to drop the quill out of the head, or take the motor, pulleys and their support off of the head to reach the nut.

                                                    Next week, we will be painting the last parts and I will buy a 1hp six pole three phase motor. The six pole motors run at about 1000 rpm, which with the four speeds by belt and a VFD, will give the range I require, somewhere between 150 and 3000 rpm.

                                                    Now I know that a self extracting drawbar is easy to make when I get round to it. There will be a bronze threaded sleeve with a flange at the lower end, trapped within the spindle and loctited in place.

                                                    Photos next week.

                                                    #423659
                                                    old mart
                                                    Participant
                                                      @oldmart

                                                      _igp2435.jpg_igp2434.jpg_igp2433.jpg_igp2432.jpg

                                                    Viewing 25 posts - 1 through 25 (of 46 total)
                                                    • Please log in to reply to this topic. Registering is free and easy using the links on the menu at the top of this page.

                                                    Advert

                                                    Latest Replies

                                                    Home Forums Manual machine tools Topics

                                                    Viewing 25 topics - 1 through 25 (of 25 total)
                                                    Viewing 25 topics - 1 through 25 (of 25 total)

                                                    View full reply list.

                                                    Advert

                                                    Newsletter Sign-up