ML7 tailstock angle alignment adjustment

Advert

ML7 tailstock angle alignment adjustment

Home Forums General Questions ML7 tailstock angle alignment adjustment

Viewing 16 posts - 1 through 16 (of 16 total)
  • Author
    Posts
  • #394097
    Phil West
    Participant
      @philwest50254

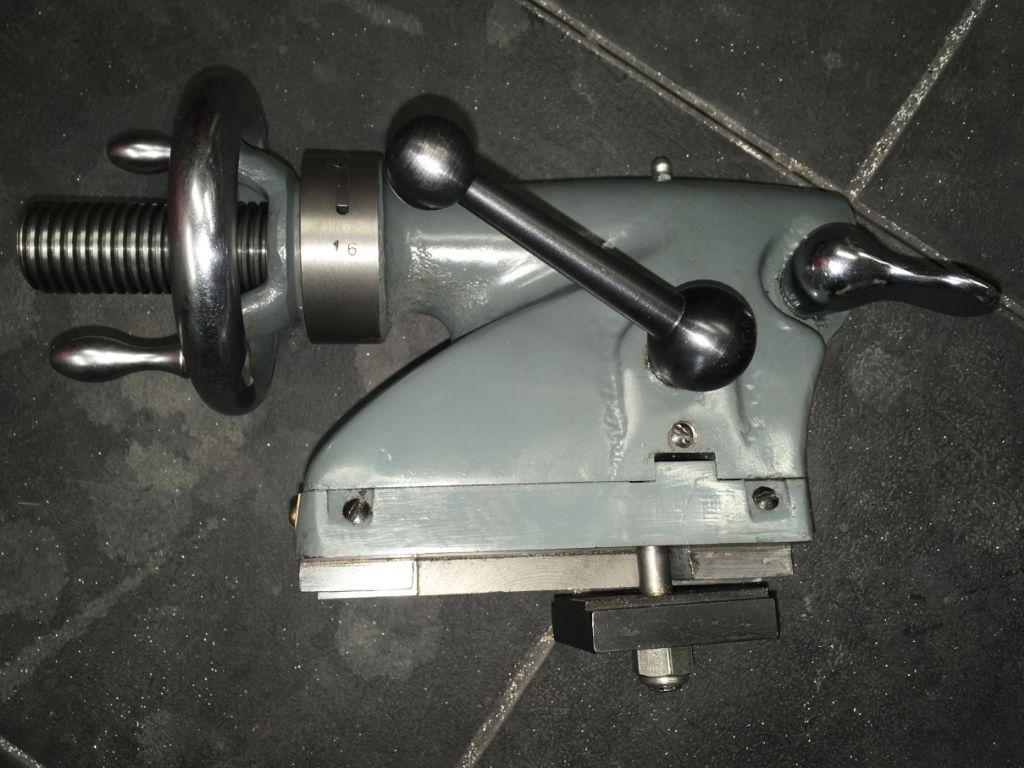
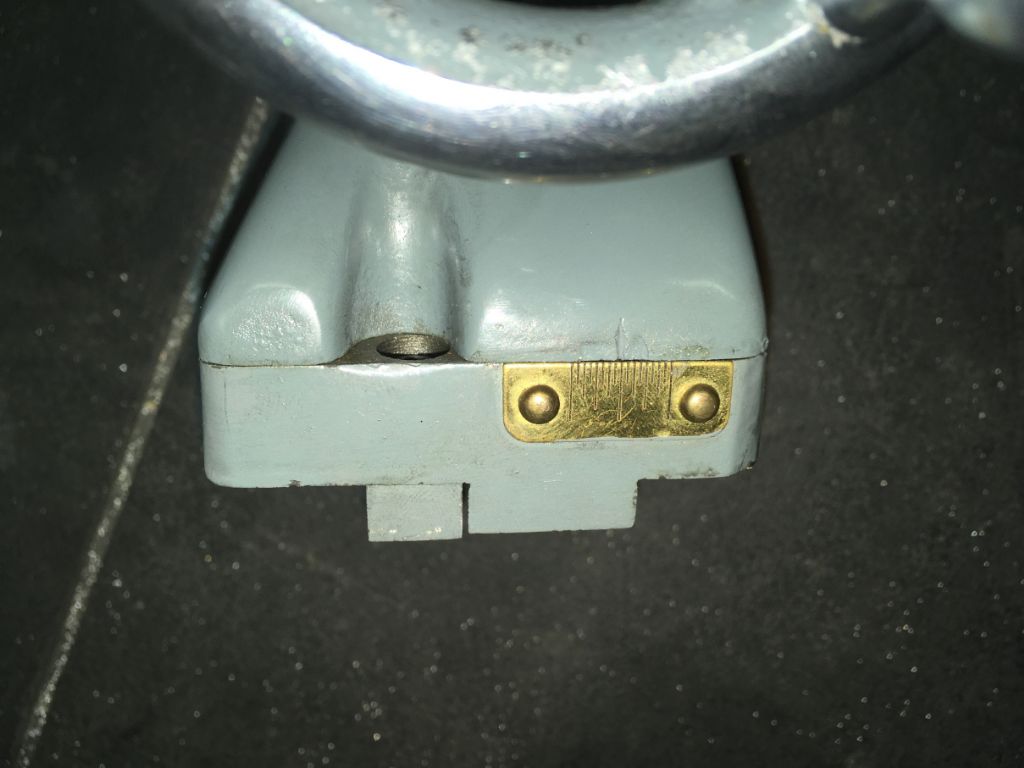
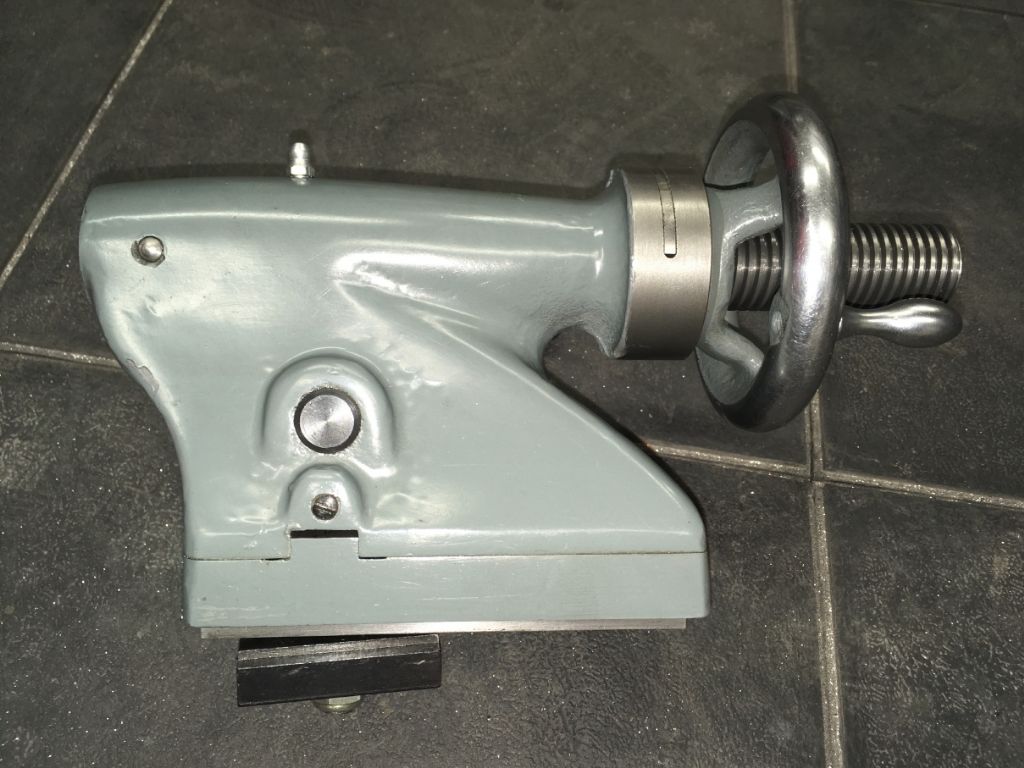
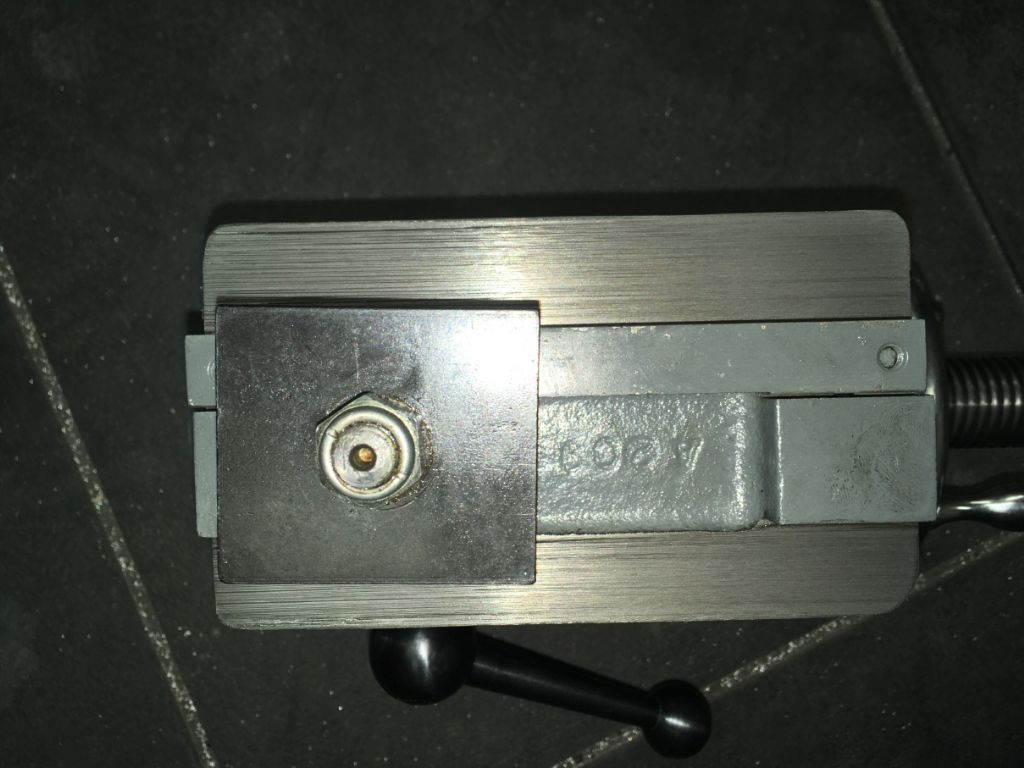
      img_1137_3_1.jpgimg_1136_2_1.jpgimg_1135_1_1.jpgimg_1138_4_1.jpgHi, does anyone have this tailstock on their ML7 lathe. I've been trying to adjust the tailstock angle for the last 5 years or so, it's 2 thou out on the test bar. Looking for someone who has this tailstock and can readily see adjustment occurring on their parallel test bar. Obviously I've tried a lot of things so far – the two rear slotted screws and the two allen heads holding the pinch bar all do not change the angle, they just snug down the movement of the tailstock. I've stripped it all down several times and had everything out to investigate but so far nothing changes the tailstock angle at all. I've tried different parallel bars and fixed centres, all read the same. Also tried reversing the pinch bar, to no effect. This is a new old stock lathe from the 70s. Thanks

      Phil

      Edited By Phil West on 01/02/2019 09:37:22

      Advert
      #26419
      Phil West
      Participant
        @philwest50254
        #394103
        Douglas Johnston
        Participant
          @douglasjohnston98463

          The two slotted screws at each side control the position of the tailstock. Just loosen one side screw and tighten the opposite side and the tailstock moves in one direction.

          Doug

          #394104
          Brian Wood
          Participant
            @brianwood45127

            Hello Phil,

            I think you have overlooked the two small screws either side of the tailstock, fitted just above the cross tongue. They are used as a pair to push the tailstock across the bed to change the set-over angle.

            Free them both off so that they are no longer tight, and then tighten one slightly to shift the tailstock bodily across the bed. I don't know which direction you need to move it in to restore parallel position but with your test bar fitted you should be able to detect the movement on a dial gauge. By these means you can iterate down to the position you want to achieve and having got there, tighten the opposite screw to lock the position.

            I hope that helps

            Brian

            PS Douglas got there ahead of me

            Edited By Brian Wood on 01/02/2019 09:48:03

            Edited By Brian Wood on 01/02/2019 09:49:33

            #394105
            Andrew Moyes 1
            Participant
              @andrewmoyes1

              At the risk of stating the obvious, the cam lock has to be released before the set over screws can do their job. I remember that wasn’t obvious to me when I first bought an ML7 many years ago.

              #394106
              Phil West
              Participant
                @philwest50254

                Tried that unfortunately thanks – about a thousand times. Tightening the one towards the front does actually move the angle – although as soon as you move the angle you have tightened the pinch bar to the lathe bed and the tailstock no longer slides on the bed. And in addition it moves the tailstock the wrong way. The rear screw does nothing – the angle does not change at all whether you tighten really tight or remove that adjusting screw completely. All that screw does is tighten down the pinch bar so the tailstock no longer slides.

                #394107
                John Haine
                Participant
                  @johnhaine32865

                  What do you mean by "angle"? The tailstock's axis should be aligned parallel to the h/s axis by manufacture and isn't adjustable on the Myford. If yours is actually angled then you have a difficult problem to fix!

                  But when you say it is "2 thou out" that implies that it could be parallel but is offset. Doug describes how to use the slotted screws to adjust the offset. The easiest way is to put accurate centres in h/s and t/s tapers, move the t/s up to the h/s and trap a thin short steel rule or similar between the points, and adjust the screws until the rule is at right angles to the axis.

                  I've not seen the little offset scale before, my S7 doesn't have it.

                  #394108
                  David Jupp
                  Participant
                    @davidjupp51506

                    I believe the screws are to allow adjustment of set-over (front to back position) of tailstock – NOT the angle of tailstock to the bed. If you try to twist the tailstock it'll simply bind on the slide.

                    Exploded diagram on Myford site could be clearer, looks to me like the screws at the ends are for adjusting the Gib.

                    Edited By David Jupp on 01/02/2019 10:01:20

                    #394109
                    Brian Wood
                    Participant
                      @brianwood45127

                      Phil,

                      Are you confusing one set of screws for the others that are at the front and rear positions on the bed shoe and on the side opposite to the operator?

                      The rest of us are talking about the pair just below the axle that the clamp for the bed is suspended from

                      Regards

                      Brian

                      Edited By Brian Wood on 01/02/2019 09:58:26

                      #394112
                      ega
                      Participant
                        @ega
                        Posted by John Haine on 01/02/2019 09:52:49:

                        I've not seen the little offset scale before, my S7 doesn't have it.

                        My 1960s S7 does but I left it off when I refurbished the lathe as I found it of very little practical use.

                        PS It occurs to me that this kind of discussion would be more fruitful if the nomenclature and numbering of parts in the manual were used.

                        Edited By ega on 01/02/2019 10:06:57

                        #394118
                        Phil West
                        Participant
                          @philwest50254
                          Posted by Brian Wood on 01/02/2019 09:54:45:

                          Phil,

                          Are you confusing one set of screws for the others that are at the front and rear positions on the bed shoe and on the side opposite to the operator?

                          The rest of us are talking about the pair just below the axle that the clamp for the bed is suspended from

                          Regards

                          Brian

                          Edited By Brian Wood on 01/02/2019 09:58:26

                          Brian – the simple answer to your question is ***yes***. Great stuff many thanks. I turned in the screw facing me under the clamp axle and the dial indicator moved 2 thou in the correct direction. Now when I run the dial indicator back and forth along the length of the parallel test bar it stays dead on the same reading the whole way.

                          Thanks all for your responses, much appreciated!

                          #394122
                          Mark Rand
                          Participant
                            @markrand96270

                            The other point is that you need to back off the screw on one side so you have room to tighten the opposite screw. laugh

                            #394135
                            Brian Wood
                            Participant
                              @brianwood45127

                              Phil,

                              Nice to hear your reply and I'm sure we are all glad that the your problem is solved

                              Brian

                              #394145
                              Lambton
                              Participant
                                @lambton

                                Phil,

                                May I suggest that you obtain a copy of the official Myford handbook for your particular lathe. Myford hand books are excellent and tell you all you really need to know about adjusting and maintaining your lathe and can therefore save you a lot of trouble.

                                Copies are available from "New" Myford or even free as pdf from the net.

                                Eric

                                #394148
                                Phil West
                                Participant
                                  @philwest50254
                                  Posted by Lambton on 01/02/2019 12:12:23:

                                  Phil,

                                  May I suggest that you obtain a copy of the official Myford handbook for your particular lathe. Myford hand books are excellent and tell you all you really need to know about adjusting and maintaining your lathe and can therefore save you a lot of trouble.

                                  Copies are available from "New" Myford or even free as pdf from the net.

                                  Eric

                                  Ok thanks Eric – will do.

                                  #394149
                                  Hopper
                                  Participant
                                    @hopper

                                    Now all you need to do is turn a test piece between centres and measure it for parallel. Ground test bars don't tell the whole story on old worn machines. The proof is in the actual turning.

                                    You will find too that the square piece of key steel on the bottom of the tailstock can be adjusted to obtain a neat fit in between the two inner lathe shears. If the bed is not worn, you set it at the tailstock end and the fit should remain the same along the full bed. If the bed is worn (more common on the pre-1972 "narrow guide" models) there will be excess slack in the worn spot toward the lefthand end of the bed ways. This can throw your tailstock offset out by however much the wear is.

                                  Viewing 16 posts - 1 through 16 (of 16 total)
                                  • Please log in to reply to this topic. Registering is free and easy using the links on the menu at the top of this page.

                                  Advert

                                  Latest Replies

                                  Home Forums General Questions Topics

                                  Viewing 25 topics - 1 through 25 (of 25 total)
                                  Viewing 25 topics - 1 through 25 (of 25 total)

                                  View full reply list.

                                  Advert

                                  Newsletter Sign-up