Home-made Screw Tap – Advice Please

Advert

Home-made Screw Tap – Advice Please

Home Forums Beginners questions Home-made Screw Tap – Advice Please

Viewing 13 posts - 26 through 38 (of 38 total)
  • Author
    Posts
  • #298007
    Neil Wyatt
    Moderator
      @neilwyatt

      Posted by Andrew Johnston on 13/05/2017 13:11:50:

      It's interesting to note that a very common phrase on the forum is that as amateurs/hobbyists we're not in a hurry and therefore don't need to worry about industrial techniques/shortcuts, yet QC toolposts are just that but seem to be 'essential'. devil

      Well my workshop time is limited, but even my home-made QCTP seems to be plenty rigid enough (parting off >2" steel with a carbide insert tool) and I would estimate that it reduces my machining time on any complex job (say one that combines repeat turning and parting of multiple components) by up to two-thirds. It stopped making blanks for the Jovilabe being a (successful) challenge to my sanity.

      Advert
      #298210
      SillyOldDuffer
      Moderator
        @sillyoldduffer

        Interesting comments on Quick Change Toolposts; perhaps I'll hold off on that one. It may depend on what you're doing on the lathe. Now I'm tackling more complex objects, I notice that I often spend ages setting up and only a few seconds actually cutting.

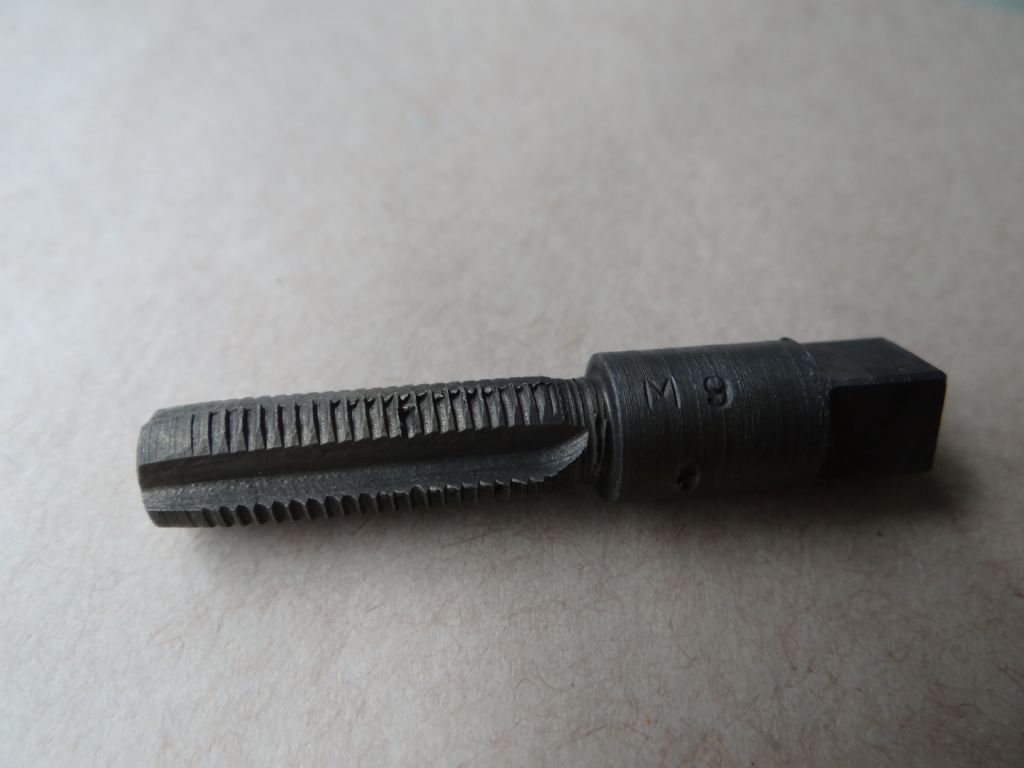
        Anyway, I'm pleased to report that a version of the home-made tap with the slot cut for a right hand thread plus other improvements works rather well, despite obvious imperfections.


        dsc04404.jpg

        As can be seen I still have a problem with burring. Although I'm going to try and sort it out myself, don't be surprised if I ask for help again.

        dsc04401.jpg

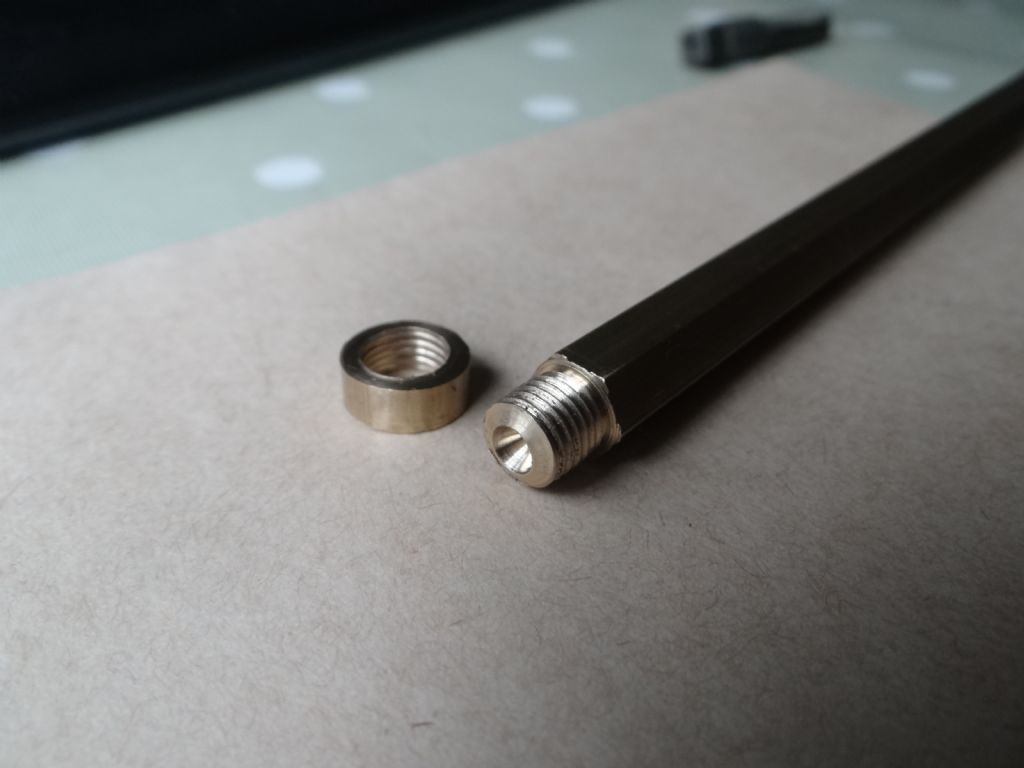
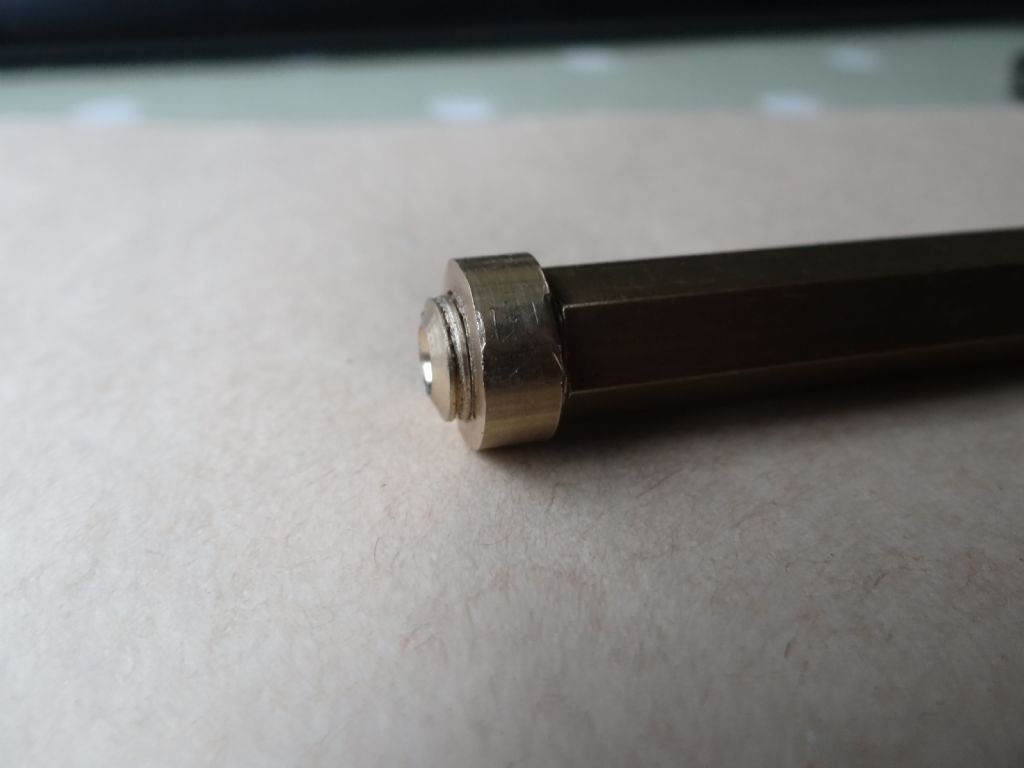
        The home-made die cuts an M9 internal that fits a lathe-cut M9 external thread. There's something very pleasurable about making parts that fit together. Also, I have a real job needing a replacement brass fitting where my new ability to cut an unusual thread may save the day.

        dsc04402.jpg

        Very many thanks for the advice and pointers – I've learned far more from this thread than I had any right to expect.

        Dave

        Edited By SillyOldDuffer on 15/05/2017 11:15:04

        #298214
        MW
        Participant
          @mw27036

          looks like a proper job Dave, did you try the heating trick?

          I've noticed on the most recent article you wrote on the Arduino torsion meter, on your picture, that you have a bit of facial warping going on there? if I met you on a dark alleyway like that I might mistaken you for a roswell grey!

          Michael W

          #298216
          Anonymous
            Posted by SillyOldDuffer on 15/05/2017 11:14:15:

            Interesting comments on Quick Change Toolposts; perhaps I'll hold off on that one. It may depend on what you're doing on the lathe. Now I'm tackling more complex objects, I notice that I often spend ages setting up and only a few seconds actually cutting.

            Looks good, and the proof of the pudding is in the eating – it works. thumbs up

            I found that the only way to remove the burrs is with needle files, takes ages but is worthwhile.

            Setup time versus machining time is par for the course. It takes me far longer to decide how to make a part, make jigs, set up tooling and fixtures than it does in the machining. But if you take the time to do it properly it means that the machining time is not wasted because the part turns out right rather than wrong or it doesn't fit.

            As an example I am currently looking at the design of the check valves on my traction engines. I use the word design loosely as the drawings call for a ½" hole with an external ¼" BSP thread. There's also a ¼" drive square shown on a 5/16" shaft. Good grief!

            Andrew

            #298224
            JOHN MANTOVA
            Participant
              @johnmantova72105

              How are you going to get round that one .Magic Or reverse the figures 1/4 hole 1/2 in thread ?

              #298225
              SillyOldDuffer
              Moderator
                @sillyoldduffer
                Posted by Michael-w on 15/05/2017 11:45:59:

                looks like a proper job Dave, did you try the heating trick?

                I've noticed on the most recent article you wrote on the Arduino torsion meter, on your picture, that you have a bit of facial warping going on there? if I met you on a dark alleyway like that I might mistaken you for a roswell grey!

                Michael W

                I half-tried the heating trick, and mixed your advice with Andrew's. I kept the silver-steel red-hot for longer, just over 15 minutes, before plunging it into salt water. I stirred vigorously rather than letting steam slow the process down because I was trying for maximum hardness rather than toughness. I don't have a proper set of files to test hardness like Andrew, but the second tap I made is harder than the first.

                More experiments with different heat treatments when I make more taps. I've ordered a ball-mill, which should produce a deeper groove with a cutting edge more like a real tap. Although I'm pleased with what I've done I'm also sure I can do better.

                That self-portrait in the magazine and the S.O.D. thing are supposed to be jokes. Sadly, I have a strange sense of humour. You wouldn't want to meet me in a dark alley though – I haven't been handsome since Area 51 insisted on doing that autopsy…

                Dave

                #298230
                SillyOldDuffer
                Moderator
                  @sillyoldduffer
                  Posted by Andrew Johnston on 15/05/2017 12:07:55:

                  Posted by SillyOldDuffer on 15/05/2017 11:14:15:

                  I found that the only way to remove the burrs is with needle files, takes ages but is worthwhile.

                  … the drawings call for a ½" hole with an external ¼" BSP thread. There's also a ¼" drive square shown on a 5/16" shaft. Good grief!

                  Andrew

                  I may have been lucky with drawings. Either they were OK in the first place or I spotted the mistake first. I quite often redraw parts while thinking about ways to make them and doing that helps reveal errors.

                  Another factor may be that I've only worked to metric plans. It might start an argument but I suspect metric plans are less error prone because it being a consistent system reduces the mental gymnastics necessary when simple fractions don't cover the case. For example I find it easier to spot decimal dimensional errors than fractional ones: which is biggest, 7/8" or 57/64"?

                  I know you're right about burrs and needle files. Impatience is just one of the reasons I shall never ever reach exhibition standard.

                  Dave

                  #298238
                  ega
                  Participant
                    @ega

                    Andrew Johnston:

                    Thanks for the explanation. On reflection, it seems obvious that there would be little demand for an obsolete thread. I believe that the buttress thread has replaced the square for some purposes (I have a woodworking vice with a buttress thread).

                    Presumably, your application was a thread for a traction engine rather than a fly press. Looking into this a bit, I came across a statement that "the buttress thread combines some of the easy-working advantages of the square thread with the strength of the vee thread. … All vee threads absorb a large amount of power."

                    Silly Old Duffer:

                    Congratulations on your success!

                    #298305
                    Anonymous

                      To comment on a few points from above:

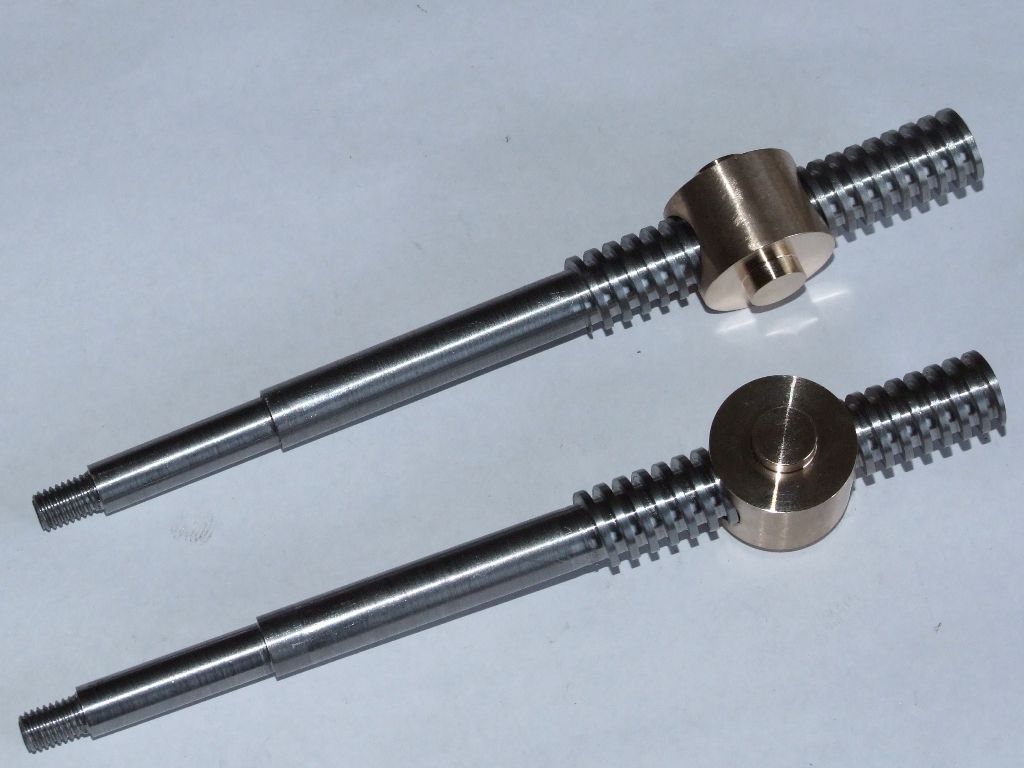
                      Correct, the square threads were for the brake shafts on my traction engines:

                      finished brake shafts.jpg

                      I understand that the buttress thread is good for axial forces in one direction, hence its use in vices; especially woodworking for some reason.

                      When making tools I normally temper after hardening. I aim for the hardening process to produce a part that is as hard as possible. Then I can temper it according to use. I normally leave the tool at tempering temperature for about an hour per inch of thickness as for hardening. That gives time for the atoms to pack the suitcase and say their goodbyes before moving around the lattice.

                      I've just spent a good part of the day modelling the check valve. What a mess. All the threads have been changed to 3/8" BSP. I'll report in more detail in the WDYDT thread.

                      Andrew

                      #298379
                      john carruthers
                      Participant
                        @johncarruthers46255

                        EGA, most of the hss I use is very small. I give it a good dose of heat with the carbon flame until bright yellow or white and hold it there for a minute or two, then plunge into brine.
                        To temper I dip it in the pot of molten lead (which is usually on the go for the leaded lights) and let it air cool.

                        Edited By john carruthers on 16/05/2017 08:59:07

                        #298427
                        Neil Wyatt
                        Moderator
                          @neilwyatt
                          Posted by SillyOldDuffer on 15/05/2017 13:16:13:

                          That self-portrait in the magazine and the S.O.D. thing are supposed to be jokes. Sadly, I have a strange sense of humour. You wouldn't want to meet me in a dark alley though – I haven't been handsome since Area 51 insisted on doing that autopsy…

                          I thought you really looked like that!

                          Biopsy, surely?

                          Neil

                          #298431
                          richardandtracy
                          Participant
                            @richardandtracy

                            Surely an auto-psy is something you do to your self. Like a biography is done by someone else, and an auto-biography by yourself.

                            Regards,

                            Richard

                            #298434
                            SillyOldDuffer
                            Moderator
                              @sillyoldduffer

                              No it was definitely an autopsy. It's not my fault I happen to resemble a cadaver having a bad day. That's why the photo had to be touched up and I'm still counting the stitches.

                              Also, re autopsy, don't forget Americans have strange notions about language and can't spell. To be fair, from their point of view, it was all just a simple misunderstanding – all Englishmen in New Mexico are Aliens.

                              Dave

                            Viewing 13 posts - 26 through 38 (of 38 total)
                            • Please log in to reply to this topic. Registering is free and easy using the links on the menu at the top of this page.

                            Advert

                            Latest Replies

                            Home Forums Beginners questions Topics

                            Viewing 25 topics - 1 through 25 (of 25 total)
                            Viewing 25 topics - 1 through 25 (of 25 total)

                            View full reply list.

                            Advert

                            Newsletter Sign-up