Aligning the headstock and tailstock to the bed axis is the last step in setting up your lathe, not the first.
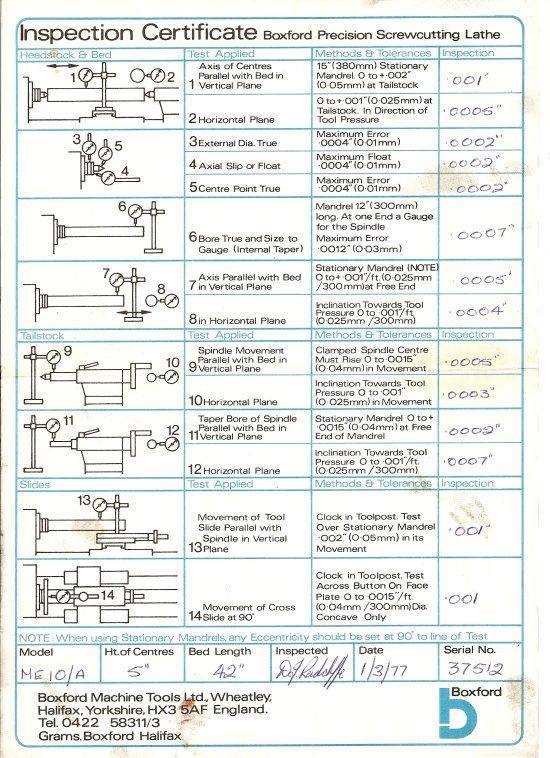
Before getting out the test bars and dial indicators, you need to make sure your headstock bearings are set to the correct clearance and have virtually no detectable movement of the spindle. Easiest way to do that is to grab a piece of 1" bar a bout a foot long in the 3 jaw chuck. Put a dial indicator mounted on the bed (not the carriage) with the plunger touching on the top of the spindle collar just behind the chuck. Yank the end of the bar up and down and see how much the dial indicator moves. Anything more than half a thou is cause for concern. Repeat the procedure with the dial indicator plunger on the side of the spindle and yank the bar back and forth. Observe the reading. Same tolerance applies. If you have too much movement here, adjustment of the bearings is required, as per the manual. (It involves removing shims between the two halves, blueing and scraping etc.)
BTW, a dial indicator reading in tenths of a thou can be an albatross around your neck for this kind of work. As you have found it can be too sensitive and read surface finish rather than true movement. A clock graduated in half thou graduations is ideal. One thou increments is the common useage for home shop and will work OK for our purposes.
Once you have ascertained that the headstock bearings are tight but free running, it is time to strip clean and reassemble the carriage, cross slide and top slide, making sure all burrs and dirt are removed and that gib strips are all good and flat and engaging over a wide area.
Then you are ready to do the headstock and tail stock alignment. There are various ways of doing this. Some start by levelling the bed to get any twist out. But on a 40+ year old lathe like yours appears to be, probably not a lot of poing, because you will probably end up twisting the bed out of level to get it to cut true anyhow. So up to you if you want to spend a day with an engineer's level getting the bed level length ways and then cross ways at several points. Avoid laying the level on the worn section of the bed , ie the first quarter nearest the chuck.
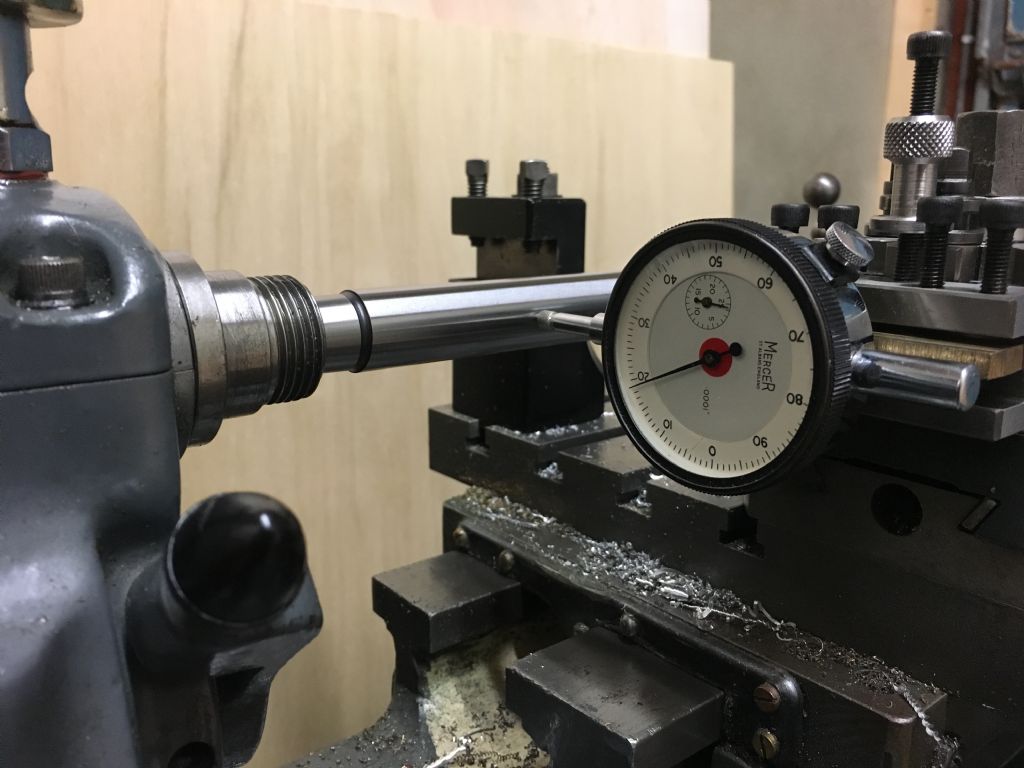
Then you are ready to check alignment of the headstock to the lathe bed. This is done by putting the tapered end o f your shiny new test bar into the taper socket in the end of the lathe spindle. MAKE SURE all is immaculately clean and free from dirt and rag lint and burrs. No tailstock centre used in this test. Mount your dial indicator on the (locked) cross slide and move the carriage back and forth along the bed, with the plunger touching first the side of the test bar, then the top. This will tell you how far out of alignment the headstock is with the bed. Adjustment can be affected by adjusting the mounting feet of the lathe to twist the bed, as per the Myford manual. In extreme cases of bad alignment, you may have to loosen the headstock bolts and use the two jacking screws to align the headstock. It is a good idea before doing this to rotate the lathe spindle with the dial indicator bearing on the end and see it is rotating concentrically. If not, rotate the spindle until you are at the halfway mark in the swing of the clock hand. This will give you an average reading.
Aligning the tailstock is done last.
Put the test bar between centres, the dial indicator on the carriage and move carriage back and forth along the parallel section of the bar, with the plunger first on the side then the top of the bar. This will tell you how far out of alignment the tailstock is. Adjust tailstock where it mounts to the tailstock base to get zero offset in the horizontal plane. The vertical plane is not so critical. Many lathes are made with the tailstock a thou or two higher than the headstock spindle to allow for wear, sag etc.
You can also put the test bar taper in the tailstock socket and run your carriage mounted dial indicator along it with plunger first on the side then the top. This tells you if the tailstock quill is parallel to the lathe bed axis. Best to do this test before setting the offset.
In all probability, if you had a problem centre drilling, you may just need to do the last tests to align the tailstock where some previous owner has fiddled with it and left it offset a bit.
Either way, you are going to have to do a final test turning piece to make sure of the end result under real world conditions with working loads on all old worn parts. Turn a length of bright mild steel bar held in the three jaw with no tailstock centre and measure for parallel. This tells you the headstock alignment. Then turn a test piece between centres and measure for parallel. This tells you tailstock alignment. Test piece size is best about 1" diameter by 6" long mild steel, with a fine finishing cut. Rough turning down the midlde section of the piece to create the traditional two collars speeds things up a bit: not so long to wait for fine cut all along the full length.
There are other ways of doing all these things but this way uses your test bar you bought and should do the job.
Have fun!
Edited By Hopper on 19/12/2016 06:40:39
choochoo_baloo.


 If there is height from bed variation put your maths head on and work out what this would mean to the reading along the side – if you like.


