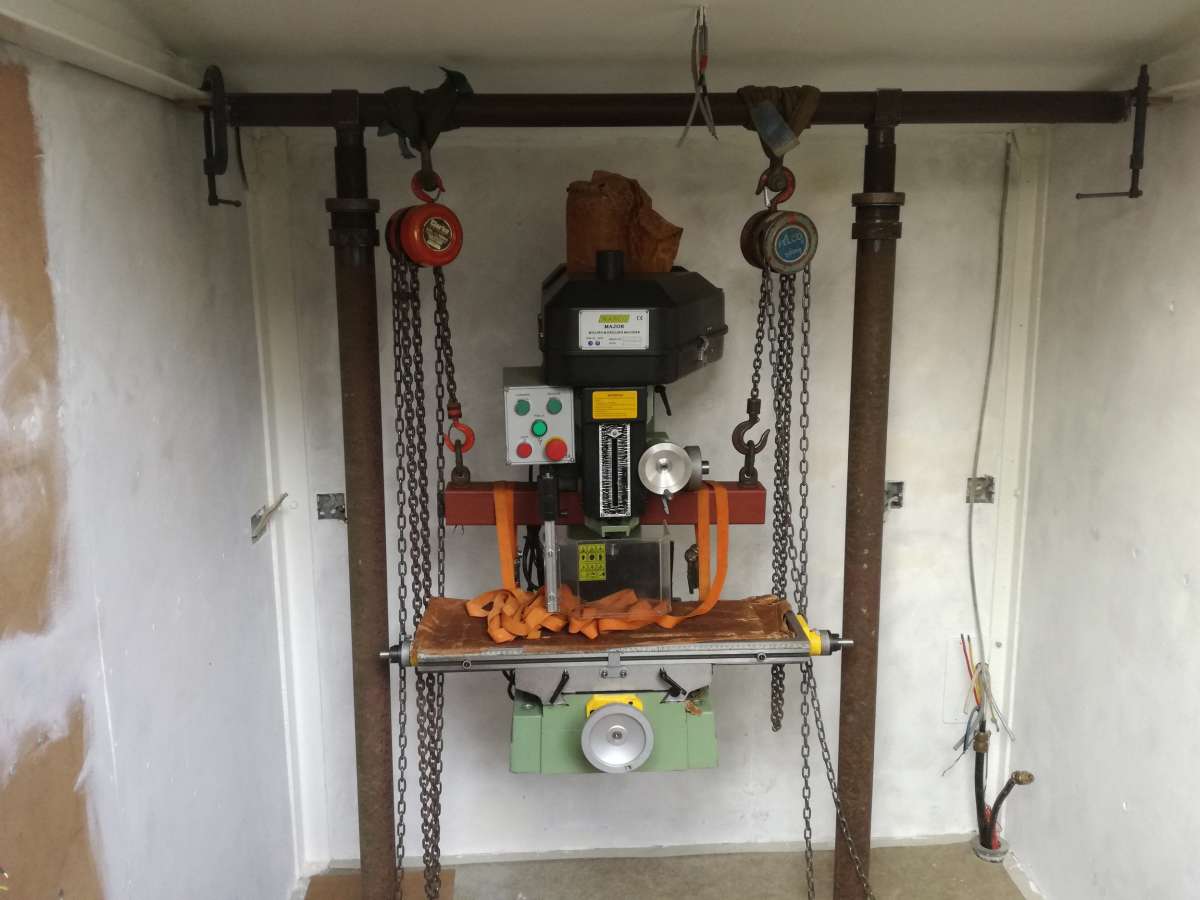
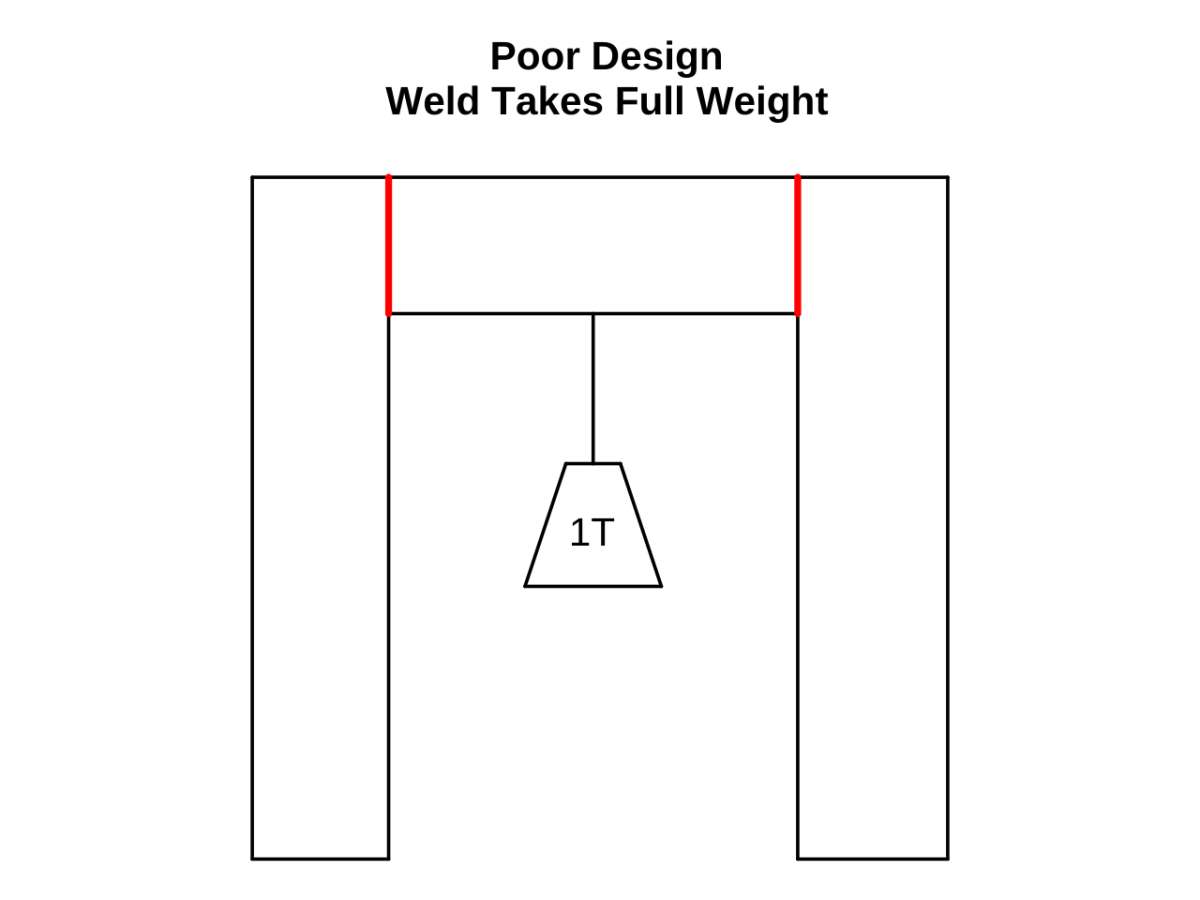
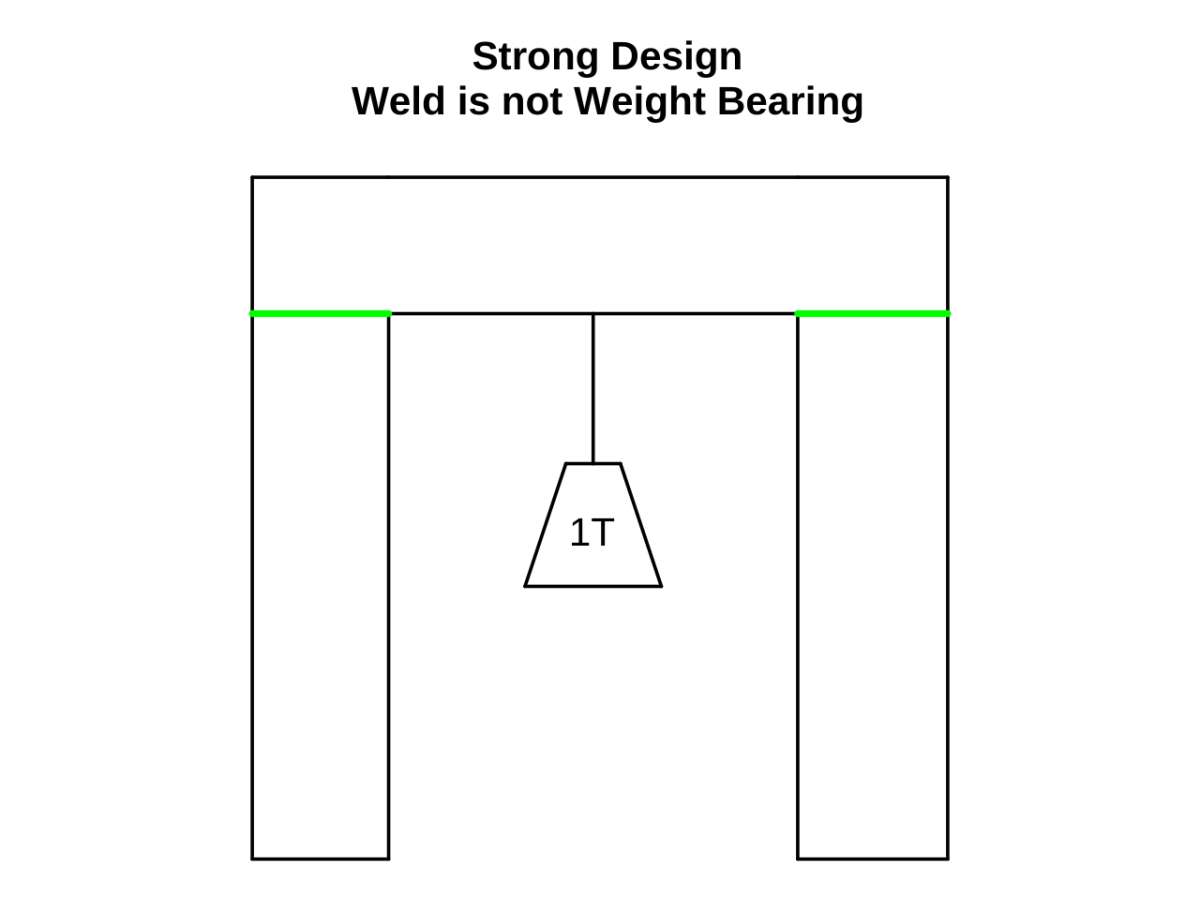
Workshop crane project
Workshop crane project
- This topic has 71 replies, 24 voices, and was last updated 10 April 2024 at 16:33 by
 Oldiron.


- Please log in to reply to this topic. Registering is free and easy using the links on the menu at the top of this page.
Latest Replies
-
- Topic
- Voices
- Last Post
-
-
Running down my workshop
Started by:
Tony Martyr
in: Manual machine tools
- 9
-
27 April 2024 at 18:41
Robert Atkinson 2
-
Binoculars
Started by:
Bill Dawes
in: General Questions
- 8
-
27 April 2024 at 18:03
Dave Halford
-
Omnimill 00 feed gear
Started by:
Wade Beatty
in: Manual machine tools
- 5
-
27 April 2024 at 17:48
Wade Beatty
-
New project needed
Started by:
BOB BLACKSHAW 1
in: General Questions
- 2
-
27 April 2024 at 17:43
Diogenes
-
Alibre DXF import
Started by:
Richard Evans 2
in: CAD – Technical drawing & design
- 4
-
27 April 2024 at 17:30
Richard Evans 2
-
Motors for Variable Frequency Drive
Started by:
chrismac
in: Workshop Tools and Tooling
- 8
-
27 April 2024 at 16:53
Robert Atkinson 2
-
My week this week! My workshop videos
1
2
…
9
10
Started by:
Phil Whitley
in: The Tea Room
- 13
-
27 April 2024 at 16:47
Phil Whitley
-
Quorn 3 end mill sharpening
Started by:
David Taylor 4
in: General Questions
- 6
-
27 April 2024 at 16:43
John Haine
-
Boxford Belt Slipping
Started by:
Hollowpoint
in: General Questions
- 7
-
27 April 2024 at 15:53
Hollowpoint
-
Car leak. Will silicone sealant stick to putty?
Started by:
Simon Robinson 4
in: The Tea Room
- 4
-
27 April 2024 at 15:00
mgnbuk
-
New Member
Started by:
Wynford
in: Introduce Yourself – New members start here!
- 4
-
27 April 2024 at 13:25
Wynford
-
What compressor to run stationary engine
1
2
Started by:
robmill
in: Beginners questions
- 12
-
27 April 2024 at 11:57
duncan webster 1
-
New mill user, what do I need to start.
Started by:
Robert Bowen-Cattry
in: Beginners questions
- 13
-
27 April 2024 at 09:15
Diogenes
-
Rivet Lad
Started by:
Bill Dawes
in: Books
- 3
-
27 April 2024 at 06:02
Colin D
-
SCAM!
1
2
3
Started by:
Howard Lewis
in: General Questions
- 21
-
26 April 2024 at 19:31
SillyOldDuffer
-
PETERBOROUGH SOCIETY OF MODEL ENGINEERS
Started by:
Howard Lewis
in: Exhibitions, Shows and Club Events
- 2
-
26 April 2024 at 16:38
Howard Lewis
-
Is it good practice to nut up taper pin?
Started by:
Greensands
in: Locomotives
- 15
-
26 April 2024 at 12:47
Nigel McBurney 1
-
3D Printer Problems
Started by:
Dick H
in: 3D Printers and 3D Printing
- 3
-
26 April 2024 at 10:31
Dick H
-
24cc DIESEL ENGINE FROM SOLID
Started by:
dean clarke 2
in: I/C Engines
- 7
-
26 April 2024 at 10:00
noel shelley
-
What did you do Today 2024
1
2
…
7
8
Started by:
JasonB
in: The Tea Room
- 46
-
26 April 2024 at 08:55
bernard towers
-
Renewed interest in ME
Started by:
robmill
in: Introduce Yourself – New members start here!
- 5
-
26 April 2024 at 05:58
robmill
-
Unusual (for me) clocks
Started by:
David Noble
in: Clocks and Scientific Instruments
- 3
-
25 April 2024 at 22:48
David Noble
-
Needing Help Identifying Threaded Chuck Fitting
Started by:
Will Robertson
in: Workshop Tools and Tooling
- 12
-
25 April 2024 at 19:27
Howard Lewis
-
Hi from Wales
Started by:
ferroequinologist
in: Introduce Yourself – New members start here!
- 5
-
25 April 2024 at 18:56
Howard Lewis
-
Choosing an MMA Welder
Started by:
hejay
in: Manual machine tools
- 8
-
25 April 2024 at 17:29
Harry Wilkes
-
Running down my workshop