What Did You Do Today 2020

Advert

What Did You Do Today 2020

Home Forums The Tea Room What Did You Do Today 2020

Viewing 25 posts - 176 through 200 (of 636 total)
  • Author
    Posts
  • #461430
    Nicholas Farr
    Participant
      @nicholasfarr14254

      Hi Paul, like you cradle, very sensible move. (a pun somewhere there I think)

      Regards Nick.

      Advert
      #461441
      Lainchy
      Participant
        @lainchy

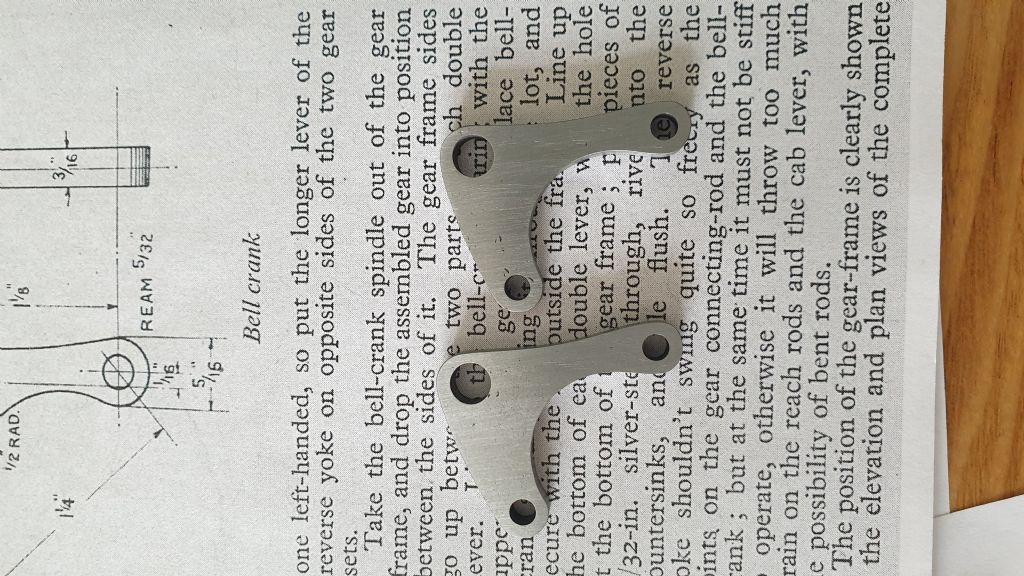
        I finally made a start on Juliet II after pulling together lots of resources (Via help on here, and purchases from Kennions, eBay and of course John Tom's site)

        Lots to learn and indeed, starting on the valve gear, I've had to make / remake some of the parts so far. With each one though, I've learnt something. I figured I'd start on the valve gear as it was minimum outlay. If this bit can be done, then I'm confident I can make the chassis up. We'll see.

        20200331_154226.jpg

        #461463
        Nick Clarke 3
        Participant
          @nickclarke3

          Lainchy you have a PM

          #461601
          Anthony Knights
          Participant
            @anthonyknights16741

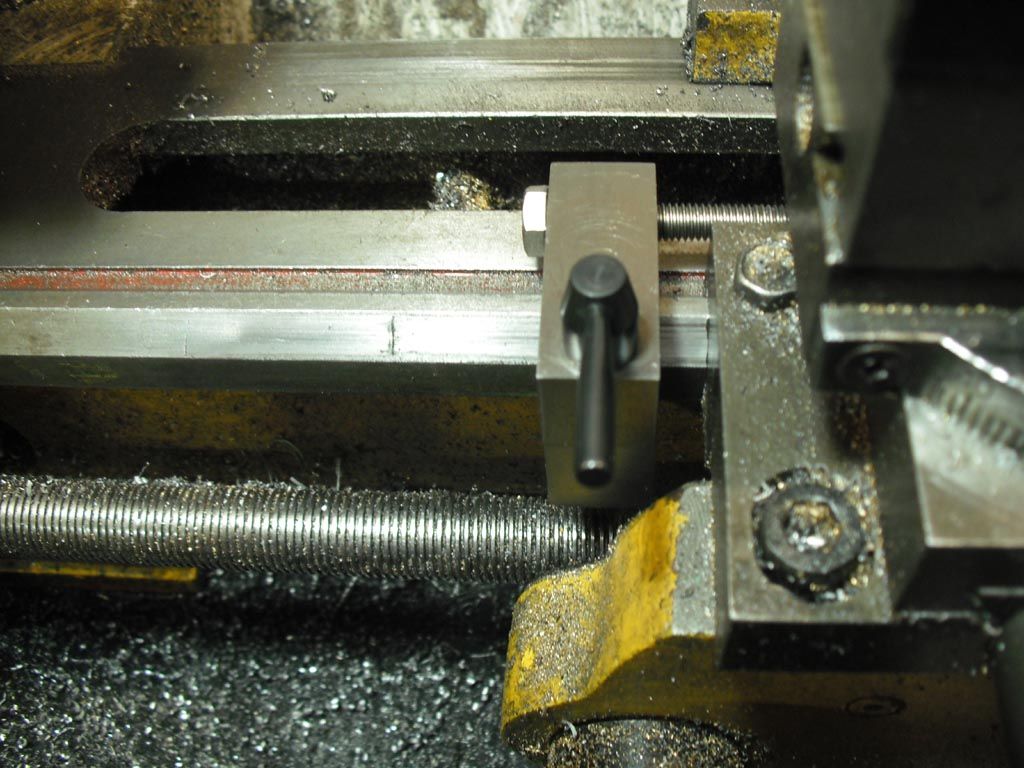
            Finished the carriage stop by fitting a proper operating handle. Also fitted a bolt to act as the stop. This is not intended to be adjustable as I can make minor adjustments with the top slide. It's there to prevent swarf getting between the stop body and the carriage, causing inaccuracies.

            stop.jpg

            stopgap.jpg

            #461892
            Phil H1
            Participant
              @philh196021

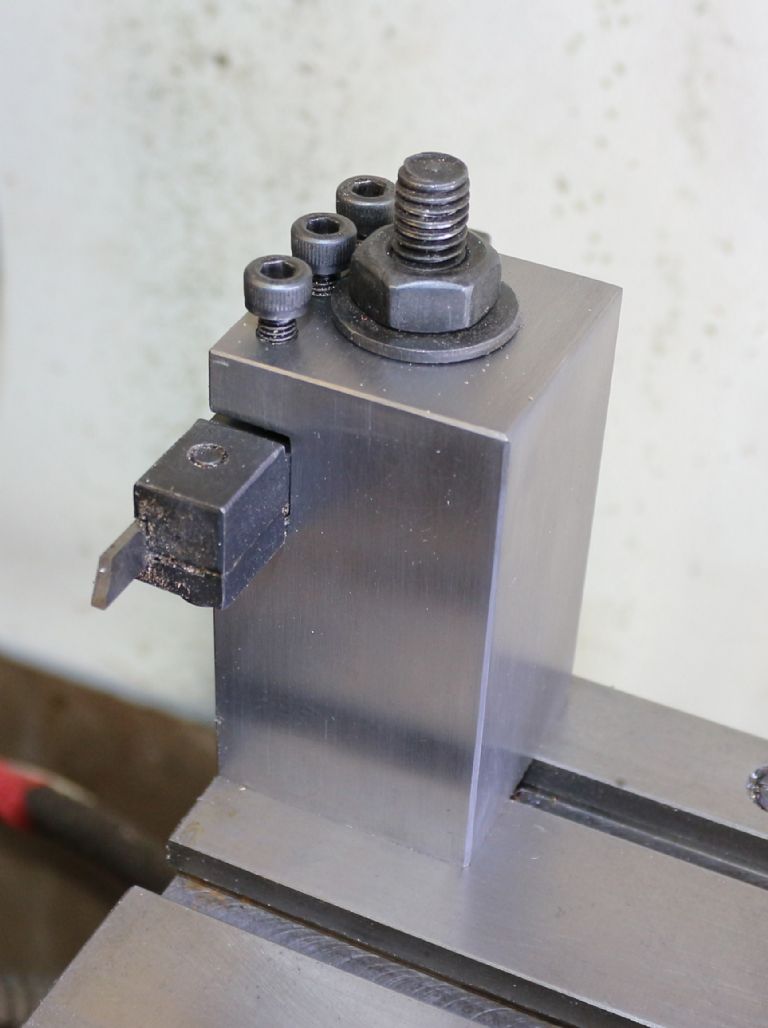
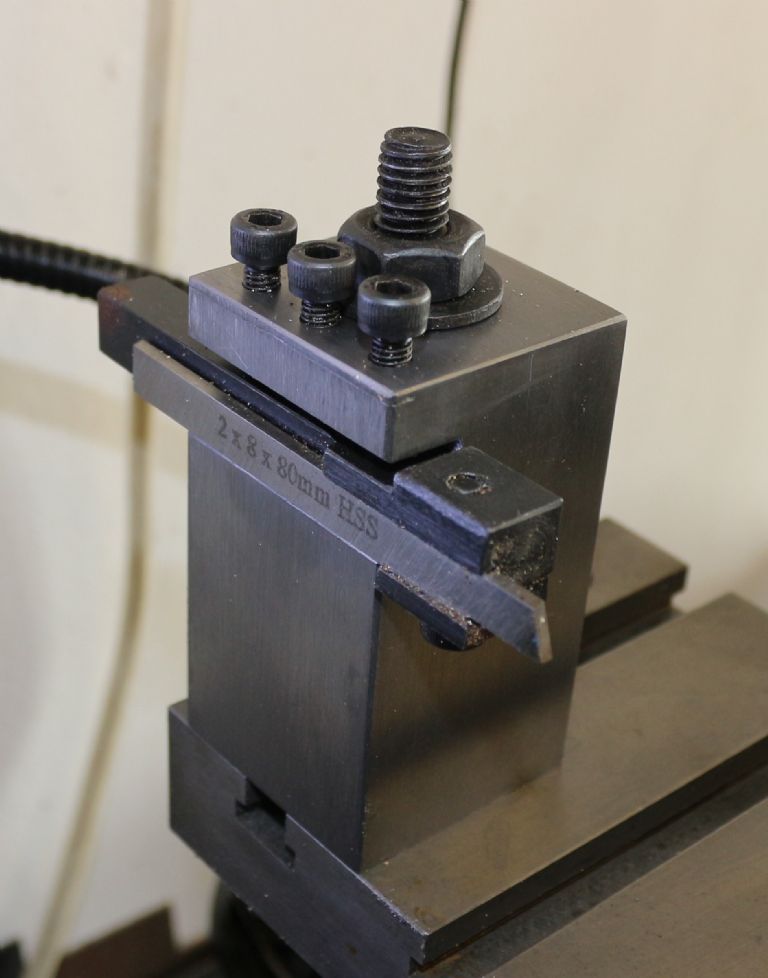
              img_5631 - copy.jpgFinally got my rear tool post in use. It is just a block of steel milled square with a slot and central bolt.

              I tried it on some bronze bar this afternoon and it works quite well.

              img_5630 - copy.jpg

              #461964
              Nigel Graham 2
              Participant
                @nigelgraham2

                Good pieces of work, Anthony & Phil.

                I like the idea of the bolt on the saddle-stop, for swarf clearance.

                @@@

                Me? Today?

                Tired to place an order with ARC Euro only they have closed for the duration. Let's hope they – and so many other businesses including my local bakery – weather this storm.

                After a late start resumed making my wagon boiler's lifting-cradle. It's a plywood fabrication that locates inside the firebox, with steel side angles drilled for Maillon Rapides (or equivalent small shackles) on four rope slings. A cord tied round the slings just below the top of the firebox keeps the boiler steady, and to my delight and surprise the load was in balance when suspended on the block-and-tackle.

                The cradle also holds the boiler sufficiently stable to stand it on one of those "skateboards" on 4 castors – Aldis or Lidls, and I bought two, joking with the cashier about panic-buying trolleys.

                The slings are lengths of ordinary 8mm dia. 3-strand hawser-paid polypropylene rope. (Polyprop is one of the stronger rope plastics, but has the lowest melting-point and has low UV resistance.)

                I tried to splice the eye in the lower end as a splice is far more compact, better-looking and stronger than a knot, and better for the rope. Eventually I gave up in frustration, made a brew, and tied bowlines instead. The top end is clove-hitched (easily-adjustable) to a triangle folded and welded from 12mm stainless-steel rod. I had picked that up somewhere as something useful somehow.

                (I learnt those two knots while in the Scouts – bowlines were also once a near-universal knot used in caving – and they are among the barely dozen knots I have ever had to use for all manner of things.)

                Splicing is of the hermetic arts. The basic eye-splice in 3-strand rope starts with a move that very easily makes the rest all wrong. Intuitively, it weaves three strands through two gaps with no two ever sharing one gap or leaping over two adjoining strands. No wonder Escher stuck to drawing staircases and mill-streams.

                Ironically my stock length of rope came with a professionally made, thimbled and seized, eye-splice at one end.

                #461968
                Steviegtr
                Participant
                  @steviegtr

                  Put the Mondeo wiper motor on & tried it. Seems powerful in both directions. Panel to rebuild now.

                  Steve.

                  ultimate position.jpg


                  most of parts.jpg

                  position#.jpg

                  simple slide.jpg

                  nearly there.jpg

                  Edited By Steviegtr on 02/04/2020 23:23:16

                  #461974
                  Martin W
                  Participant
                    @martinw

                    Looks like a nice job Steve. I have been meaning to fit one to my mill but haven't found the right "Round Tu-It" yet, hopefully will do soon.

                    Martin

                    #462210
                    Steviegtr
                    Participant
                      @steviegtr

                      Did a bit more today. Removed the motor & top cover. Made a steel ring to accept magnet. Many said not necessary but I did it to be sure. Bonded it to the top pulley as pics. Works ok. Next job is to remove the control panel & make a new one. This will have the 20A power supply & the 12V speed controller in it as well as the original mill controls.

                      Drawn a legend in Cad & printed. Made a Perspex cover to sandwich it to the panel. The Engravers are shut so have to make do & mend. So far so good.

                      Steve.

                      tacho 1.jpg

                      tacho 2.jpg

                      tacho 3.jpg

                      tacho 4.jpg

                      tacho 5.jpg

                      tacho 6.jpg

                      panel 7.jpg

                      #462211
                      Nigel Graham 2
                      Participant
                        @nigelgraham2

                        First things first – the goods arrived!

                        Thank you Live Steam Models and Royal Mail for efficient service in very difficult times. I had ordered the fasteners and a pair of safety-valves only 3 days ago.

                        '

                        Had a break from brain-bashing over the steam-wagon by resuming work on the workshop hoist's travelling beam.

                        This entailed drilling bolt holes at already-designed distances symmetrically from the centres along a pair of angles some 6 feet long, to take joining-plates already drilled on the mill.

                        By spotting through the first, middle plate on one angle, then careful marking out and drilling the angles as a pair clamped back to back against an angle-plate on the bench-drill, I achieved sufficient match on these unwieldy components to need only minor enlarging of holes here and there. What will matter is the erected beam's 4 spars being parallel, so the crab rails are level and parallel.

                        (Industry has rather better facilities than me, but still uses slotted or over-sized holes!)

                        Supporting the work is the awkward bit. It lies diagonally across the drill table and sticks out of the shed doorway, – resting on a plate G-clamped to one of the hoist track columns, and a timber post clamped to the chassis of the wagon parked temporarily outside. Well, the hoist will be used in erecting the wagon, so one good turn etc!

                        #462324
                        John Hinkley
                        Participant
                          @johnhinkley26699

                          Back to the gearbox today. Third trial assembly! I'm not sure whether to be pleased or not. I've machined everything so closely to the drawing dimensions that there's no running clearance! Consequently, I've had a bit of "easing" to do. With all the bits except the detents fitted it even looks like the 3D drawings in Atom 3D.

                          Third trial assembly

                          Spacers between the walls will help to stabilise the structure. I think that I will have to try to get some perspex rod by post.

                          John

                          #462370
                          Bob Mc
                          Participant
                            @bobmc91481

                            Nice work John…

                            I made this fitting for the lathe so I can set the 4 jaw chuck up with the dti when working with small diameter stuff, I have a magnetic base with the dti on its arm and find it difficult sometimes to get the needle to be at the top of the small diameter piece.

                            I fixed an old microscope rack & pinion slide on the arm holding the dti and now the dti can be moved back and forth easily over the work piece after the magnetic base is set in the general position.

                            Its now nice and easy to set up…Bob

                            dsc_0013.jpgdsc_0014.jpg

                            #462374
                            JohnF
                            Participant
                              @johnf59703

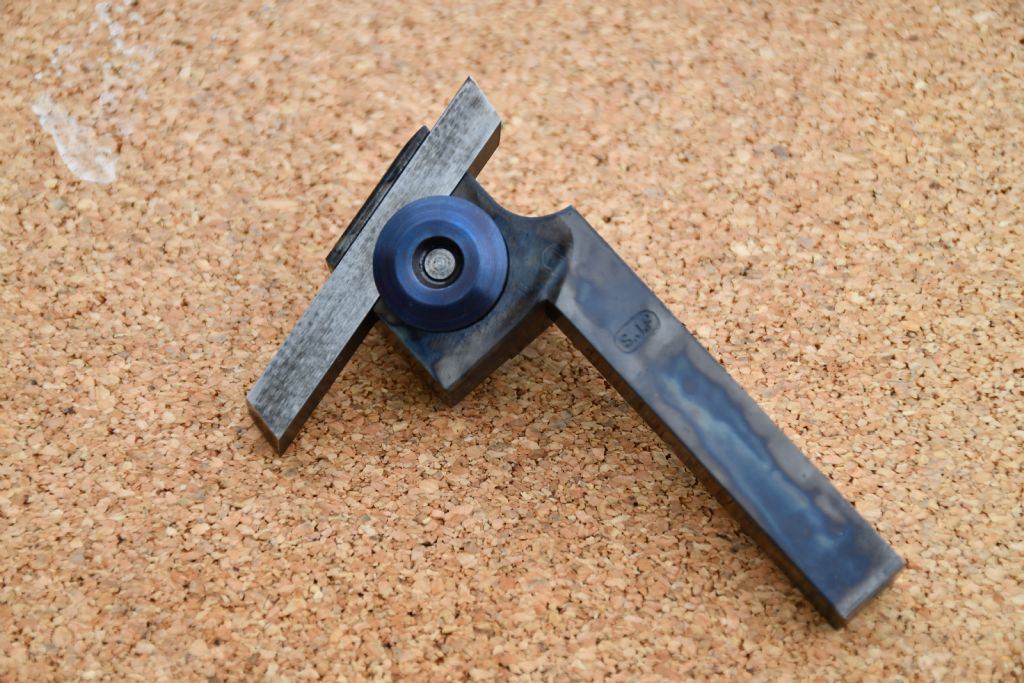
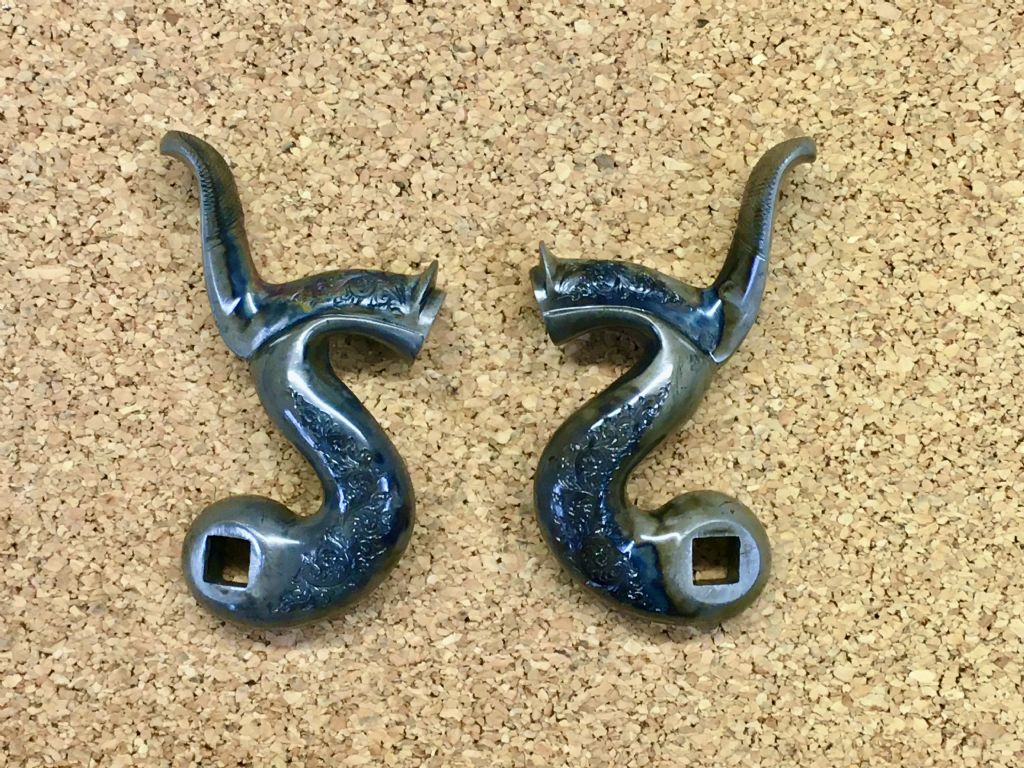
                              Made my first foray into colour case hardening yesterday, pretty much the same as process as regular case hardening, I have done lots of this when in industry and a fare amount since when needed. However Colour Case Hardening seems to be a bit if a black art but the object is to produce the mottled colours as well as a thin hard case as opposed to the much thicker case required for parts production or toolmaking. I used a tangential tool holder I made a while ago as the trial piece incase it all went wrong ! Then a pair of shotgun hammers I made — this is the prime reason for wanting to "master" ? the process — fairly happy with the first attempt but lots more experimenting to do. John

                              088e16a1-b572-423c-88b9-7e9b48ee00a5.jpeg

                              0dda21fe-b00d-4fed-8cb6-7005ab463c6f_1_201_a.jpeg

                              #462378
                              martin perman 1
                              Participant
                                @martinperman1

                                I recently bought an old mantel clock made by the New Haven Clock co America, I paid £23.50p as a spares or repair clock off Ebay, it arrived yesterday well packaged and when I opened it I soon had the mechanism out for a look see.

                                It didnt have a key so first job today was to make one, I took a piece of 6 mm dia aluminium bar, I then measured the spindle across the flats and drilled a whole in the end of the aluminium and with a riffler file I then squared the hole to fit the spindle, I wound the springs up, one for the clock, the other for the hourly chime and then held one of the plates in the vice. The mechanism needs a very good clean but after looking in one of the clock bibles I bought I tweeked the pendulum and its now ticking away nicely in the garage.

                                It has faults, one is the clock doesnt trip the chime mechanism and the other apart for the clean is to tidy the case.

                                I have to make some tools two devices to stop the springs un coiling and four legs to support the frame(s) to support the mechanism while I strip and assemble it.

                                Martin P

                                Edited By martin perman on 04/04/2020 20:52:19

                                #462480
                                mechman48
                                Participant
                                  @mechman48

                                  Fri actually; the PWM/speed controller for/off/rev. on my 'X' drive decided to give up the ghost, I did an elimination process to check out the supply, 240 – 12v transf. supply coming out =12v so that's ok. 12v supply in to PWM double checks transf. input, 12v. Out put on PWM = 0v confirms PWM is kaput.

                                  Went on line & searched for new PWM/ speed controller, found one ( same model ) on eBay for £5.74p free del. expected del. date next Fri, in the meantime it's back to muscle power on the mill 'X' drive hand wheel.

                                  George.

                                  #462646
                                  Anthony Knights
                                  Participant
                                    @anthonyknights16741

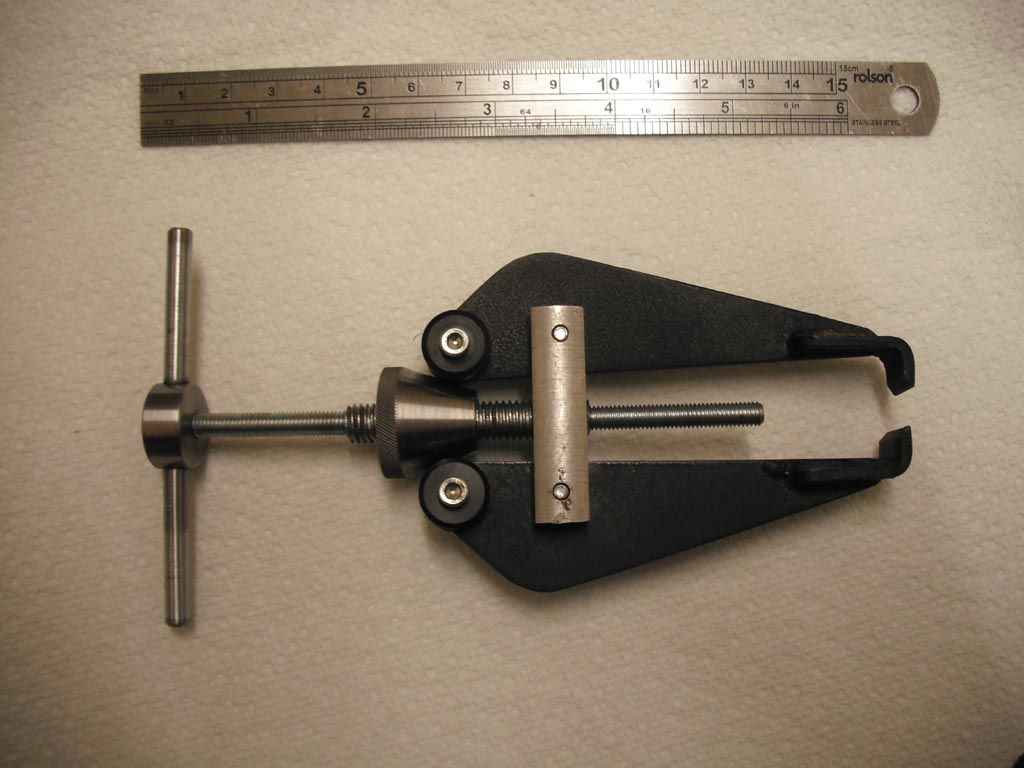
                                    Today I finished the small bearing puller, which I started some time ago, when it was published in MEW. Another "round tuit" job.

                                    puller.jpg

                                    #463531
                                    Ex contributor
                                    Participant
                                      @mgnbuk

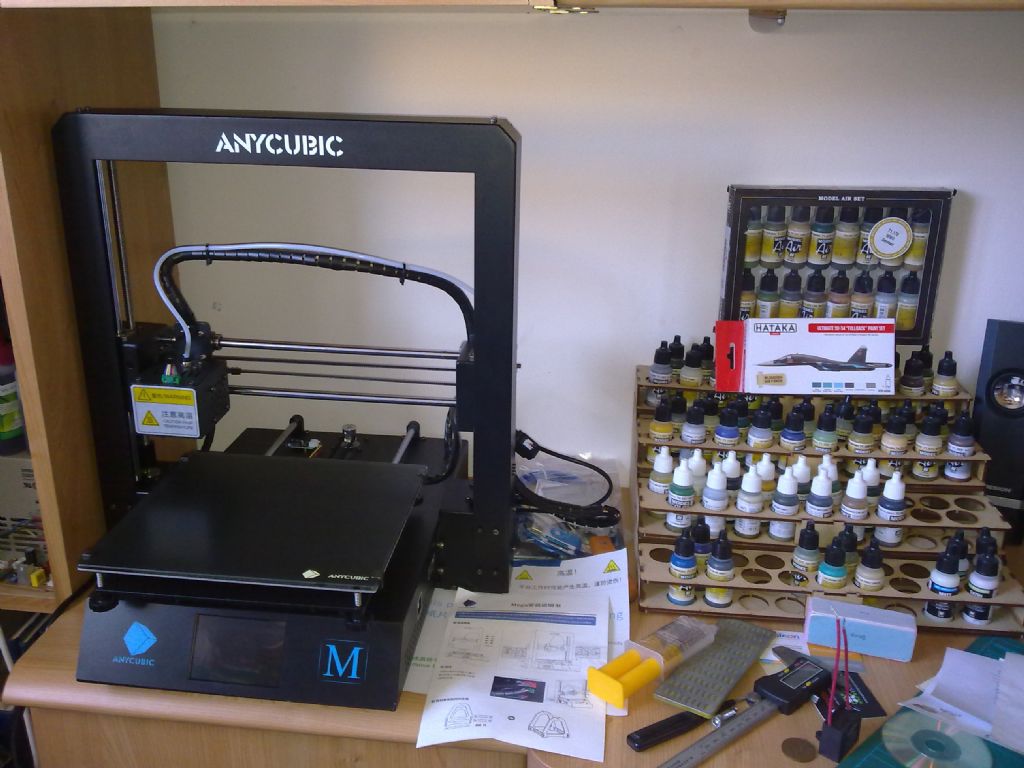
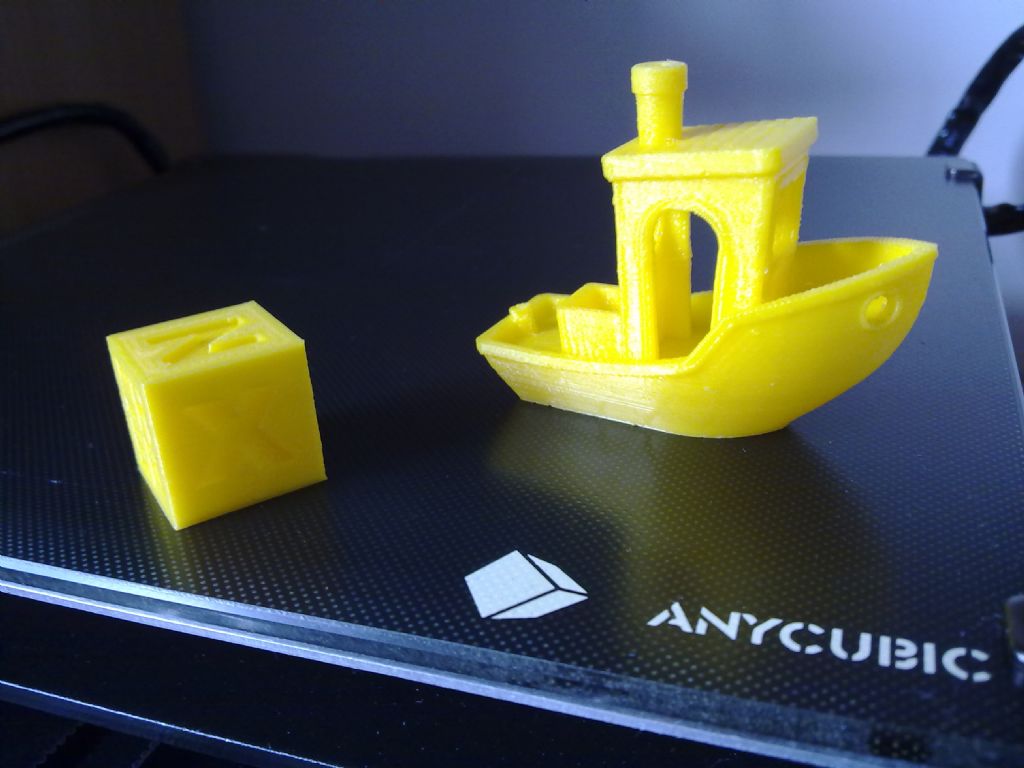
                                      Finally bought a 3D printer, after a lot of prevaricating. Present to self for a "significant" birthday.

                                      070420201206.jpg

                                      Last 3 days spent re-organising the office/hobby room to make space for it. I decided on the Anycubic Mega for ease of assembly (supplied in two pre-assembled lumps, held together by 8 x M5 screws. Plug in 3 colour coded connectors, the mains lead & in 10 minutes it was ready to go) dual Z axis screws & motors and good reviews. A bit smaller build volume than some (210 x 210 x 205) but it fits in a space previously occcupied by a flat bed scanner.

                                      Manual bed levelling went OK, but first print stopped about half way through with a nozzle clog that required a 0.4mm drill to clear. Second 20mm test cube printed OK, followed by my first Benchy. The cube measures 20.07 x 20.00 x 20.00 & I think the extra 0.07 in the X direction is due to a logo on that side. The Benchy isn't perfect, but I think that is down to my inexperience with Cura settings – I did seem to be printing pretty fast, taking around 50 minutes.

                                      090420201212.jpg

                                      The "Buildbase" coating on the heated bed is quite impressive – really good adhesion when hot, but light pressure when cold releases the model cleanly with little effort. Unfortunately play has now stopped, as II have run out of filament . The printer order included a kilogram of PLA, but that is coming seperately – from Germany – and there was only a 10 metre length n the box with the printer.

                                      So time to make a start on getting to grips with FreeCad while I await the delivery of pinter food. FreeCad because it is available in 32 bit and runs on my computer, though it seems pretty well featured & I didn't realise it also has a toolpath creator (CAM) so it should be useful when I get the Triac up & running..

                                      Nigel B.

                                      #463789
                                      martin perman 1
                                      Participant
                                        @martinperman1

                                        Well today, after receiving some new tools yesterday, I took my first clock mechanism apart, a 1920's cottage clock, I have now given all of the parts a good clean and inspection and I am pleased that the wear I've seen is not bad considering the age of the clock, hopefully tomorrow I will put it all back together and sort out the couple of issues I had already found.

                                        Martin P

                                        Edited By martin perman on 10/04/2020 18:18:54

                                        #464240
                                        Michael Gilligan
                                        Participant
                                          @michaelgilligan61133

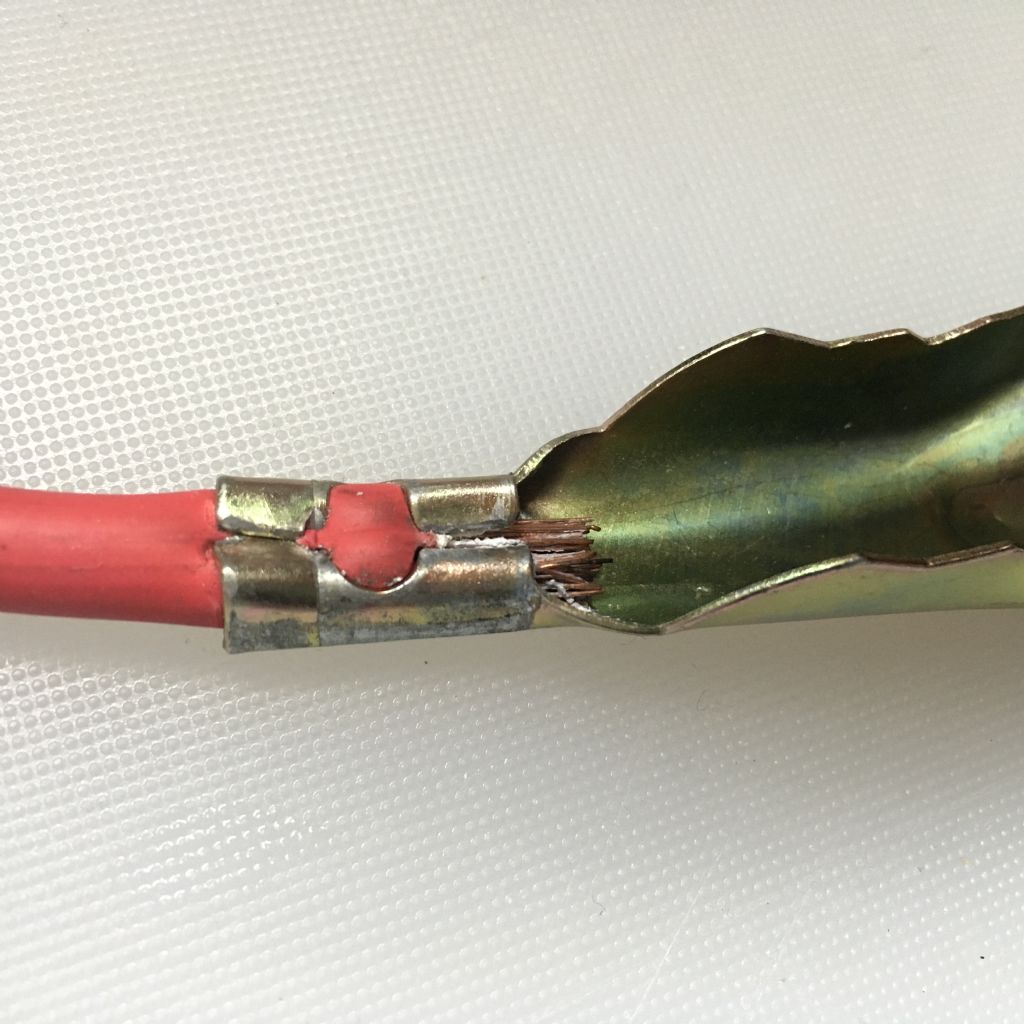
                                          Today I learned something about cheap jump-leads crying 2

                                          The little BMW has not been out since mid-November, and the battery was predictably flat.

                                          Decided to jump-start it from the Suzuki ‘not so Grand’ Vitara

                                          Things were not going well, so I checked the voltages : More than 13V on the Suzuki, and just over 2V showing on the BM … at the other end of two thick wires dont know

                                          Then checked the resistance of the leads which was fine !!

                                          … So I wondered if the battery had died

                                          Then, after a blinding flash of inspiration, I tried another set of leads, and suddenly all was well.

                                          Mystery solved: One connection on the dud leads [Cadmium plated and crimped to Copper] was badly corroded … presumably leaving a single strand of the cable still conducting, and sufficient to show continuity on the meter.

                                          There’s a lesson or two been learned today.

                                          MichaelG.

                                          #464253
                                          Martin W
                                          Participant
                                            @martinw

                                            Michael

                                            Been there with a cheap pair of jump leads that appeared to be OK on a light engine start, enough to for the lights etc. but on a bigger engine/diesel stone dead when the starter was engaged, like you a run round with a meter and all seems more or less OK until load voltage was tested with the starter engaged and all became clear. Now the proud owner of a set of heavy duty jumper leads but not had to use them in anger yet, that's tempted fate with a vengeance frown.

                                            Cheers

                                            #464303
                                            Nigel Graham 2
                                            Participant
                                              @nigelgraham2

                                              Michael –

                                              Not only corrosion but copper oxide junctions can act as diodes!

                                              #464306
                                              Nigel Graham 2
                                              Participant
                                                @nigelgraham2

                                                Me today…

                                                A bit of light garden pottering – used a piece of flexible electrical conduit to repair the split hose from a down-spout weir to the water-butt – short bits of the original sealed with bathroom sealant act as adaptors.

                                                More work on the workshop hoist, waiting until late afternoon so as not to disturb the neighbours unduly with rather noisy band-sawing.

                                                One component, 8-off, is cut from some very rusty old bar-rail, so started using the Drummond manual shaper to produce a clean face on each.

                                                My plan is to drill and tap the 4 mounting-holes required in each, using that new face as datum, weld these embryo Part A to their Part B; then screw the assemblies to the plates they will occupy anyway. That will give broad flanges I can clamp to the mill table for the requisite surfacing and profiling, referred to the plates' own machining-datum corners, which I have marked with a small drill indentation.

                                                '

                                                Disturbing with loud sawing… Well, there is an evidently gadget-conscious family about two doors in the opposite direction, whose young daughters must be getting cabin-fever by now. The other afternoon one of the girls was loudly nagging, ' Alexa! Play xxx! Alexa… Alexa!! ' where xxx was some of the dreariest, cloned pop-music going. I was almost tempted to shout across, ' Alexa! Disobey her! Play Obla-Di-Obla-Da or Gotterdammerung! '

                                                #464349
                                                Boiler Bri
                                                Participant
                                                  @boilerbri

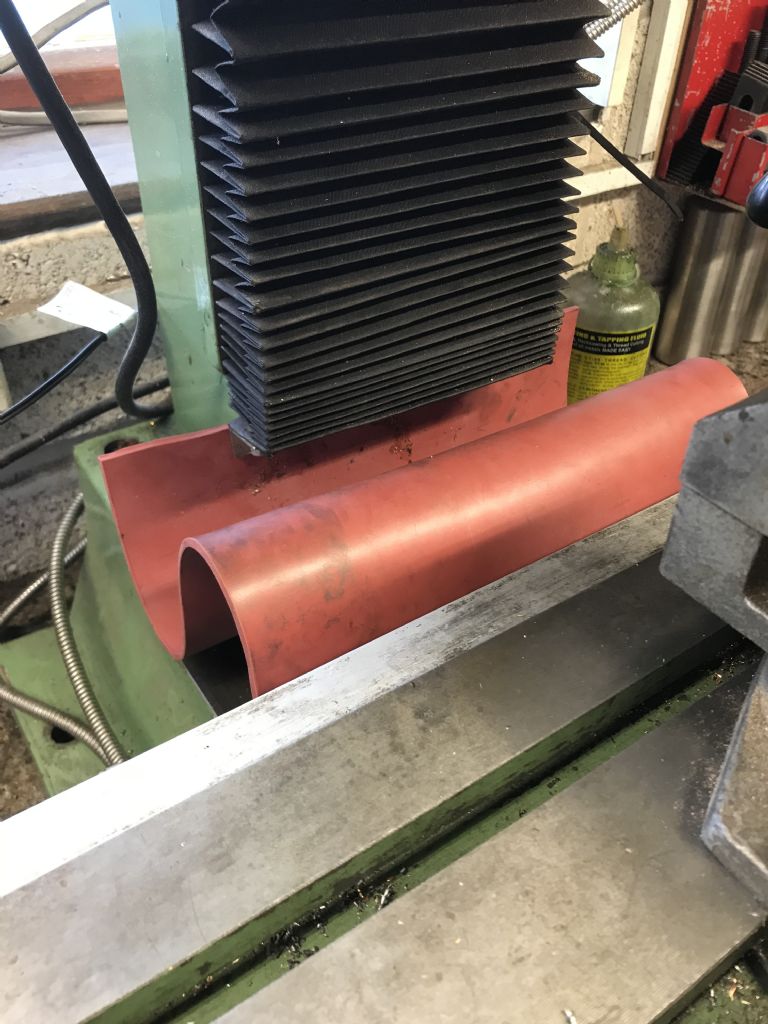
                                                  My Warco wm18 saw a little TLC today.

                                                  The rubber cover had perished over the years and cracked into two parts.

                                                  Nice new one fitted made from silicone.

                                                  new rubber.jpg

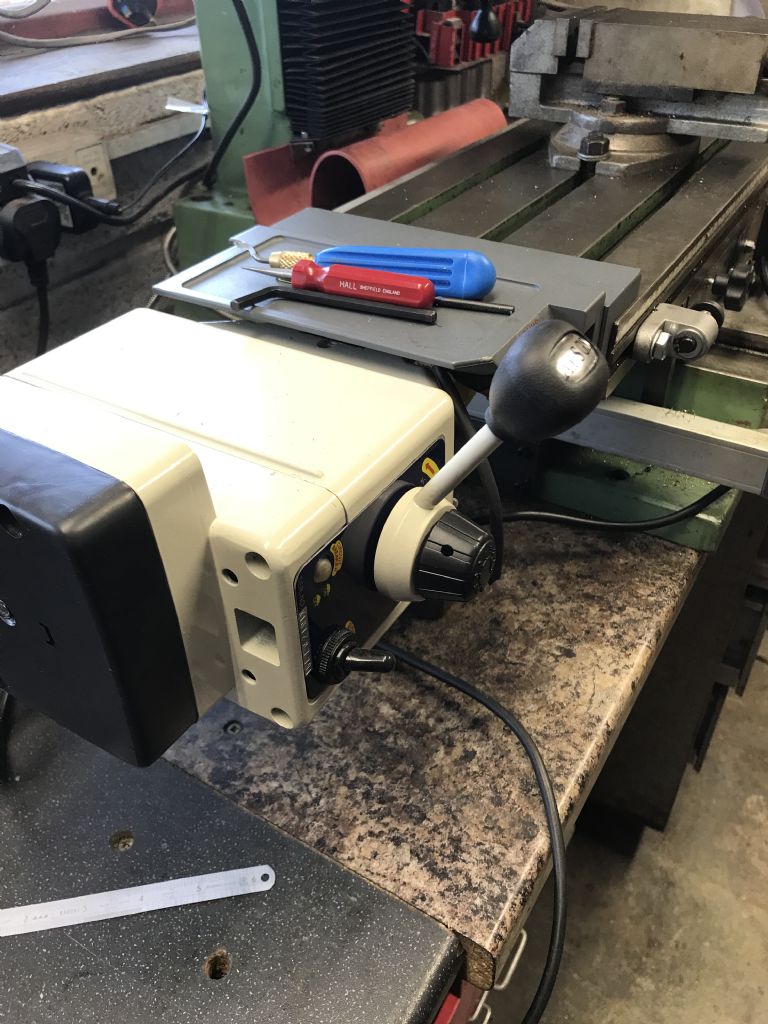
                                                  The new power drive that i fitted in December is working ok. Saves my arms a lot of work. For the money i think it a worth while piece of kit. If you buy one make sure you give Warco the serial number and they are not universal fitting.

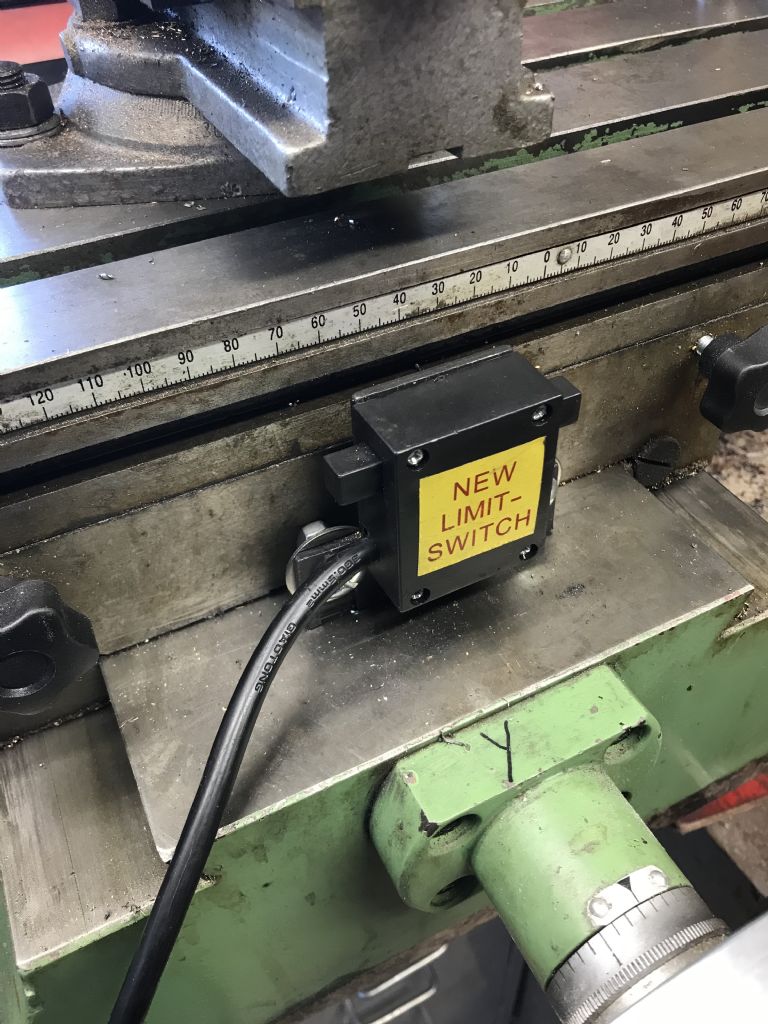
                                                  I have re positioned the limit switch and at the same time cut the box so that the cable comes out of the side. I did not like it being scraped along the bed when moving the table in the Y axis.

                                                  re positioned switch.jpg

                                                  drive fitted.jpg

                                                  Brian

                                                  #464370
                                                  Michael Gilligan
                                                  Participant
                                                    @michaelgilligan61133
                                                    Posted by Michael Gilligan on 12/04/2020 17:49:43:

                                                    Today I learned something about cheap jump-leads crying 2

                                                    […]

                                                    Mystery solved: One connection on the dud leads [Cadmium plated and crimped to Copper] was badly corroded … presumably leaving a single strand of the cable still conducting, and sufficient to show continuity on the meter.

                                                    f6bf4d91-d2b5-4b8e-95c5-1c312363b4a2.jpeg

                                                    #464400
                                                    Frances IoM
                                                    Participant
                                                      @francesiom58905

                                                      Not exactly workshop but corrosion linked – my rather expensive Arcam amplifier developed a very strange fault. It would start from cold with only the LH channel, then the RH channel would slowly turn on and some minutes later gently turn off and could remain off for some time then drift back on then off for rest of day unless the volume was turned very high when after a second or so of distorted sound it would turn on. The problem was a small switch, only visible on rear panel that allowed the pre-amp to be decoupled from the main amp – jogging this on/off a few times cured the problem – being never used it had corroded on the small contacts

                                                      Edited By Frances IoM on 13/04/2020 15:06:48

                                                    Viewing 25 posts - 176 through 200 (of 636 total)
                                                    • Please log in to reply to this topic. Registering is free and easy using the links on the menu at the top of this page.

                                                    Advert

                                                    Latest Replies

                                                    Home Forums The Tea Room Topics

                                                    Viewing 25 topics - 1 through 25 (of 25 total)
                                                    Viewing 25 topics - 1 through 25 (of 25 total)

                                                    View full reply list.

                                                    Advert

                                                    Newsletter Sign-up