WARCO MAJOR QUILL REMOVAL

Advert

WARCO MAJOR QUILL REMOVAL

Home Forums Manual machine tools WARCO MAJOR QUILL REMOVAL

Viewing 25 posts - 26 through 50 (of 80 total)
  • Author
    Posts
  • #557211
    DiogenesII
    Participant
      @diogenesii

      I've been out dealing with work & other issues – apologies.. ..I think if you can get the sleeve out / off, then you will have eliminated one possible cause of the difficulty, which can only be a good thing..

      ..just for the sake of saying it, I guess one should make sure that the quill-nose is 'parked' on the table or that there's something for it to land on, in case something lets go and the whole assembly drops as the sleeve comes off..

      I wonder whether it's just a burr or a slight worn ridge on something that's hanging-up somewhere..

      I found another link with a few different pictures;

      Round Column Mill Drill Spindle Quill….

      ..not sure that there are any surprises, just some different views..

      Good luck..

      Advert
      #557212
      old mart
      Participant
        @oldmart

        Remove the plate from the front of the head, 4 small screws.

        #557214
        Terry Turner 2
        Participant
          @terryturner2

          Thanks to everyone for the helpful suggestion and information links , etc, John Baguley sent his entire article about his work on the Chester Eagle 25 and his machine is exactly the same as my mill and the link from DiogenesII was new to me and a great help.

          I agree with everyone who thinks that there is a burr of some kind ' holding things up'  but I have peered through every hole I can find, the front panel removed, etc and can't see anything..? The splines on top of the spindle are smooth and intact. The quill and spindle are smooth in rotation but come to a gentle /soft stop when I try to lower it and it locks there..? A sharp upwards tap with a copper hammer releases it…..

          I shall look all over it again before trying some gentle extraction force…not a hammer…

          I cant thank you all enough.

          I shall next work on the mill on Saturday morning so I look forward to giving you an update after that..


          Edited By Terry Turner 2 on 05/08/2021 22:00:13

          Edited By Terry Turner 2 on 05/08/2021 22:02:01

          Edited By Terry Turner 2 on 05/08/2021 22:02:33

          #557243
          Terry Turner 2
          Participant
            @terryturner2

            An afterthought….

            in fact I am always constantly having thoughts about that damned quill at the moment….!

            The link that DiogenesII sent referred to a quill removal and there are several references to hardy/crusty old grease almost everywhere.

            As the quill on my machine stops with soft feel rather than a hard metallic 'clunk' , I have decided to do some preparation for my work tomorrow.

            Today I will find 5 minutes to 'flood' the quill / head with WD40 ( the only thing like a solvent that I have to hand)

            I have several cans of the stuff as my family think that every model engineer needs at least two large cans of it every Christmas….

            It will then have 24 hours to soak in before I try again to remove the quill tomorrow.


            Edited By Terry Turner 2 on 06/08/2021 08:15:19

            #557251
            DiogenesII
            Participant
              @diogenesii

              It occurred to me in the wee small hours whether there might be any value in releasing some of the tension on the bearings to allow the fits of quill & spindle to 'relax' a bit.. ..in the sense that two concentric sliding fits installed on either side of a large iron casting might not be quite as concentric twenty years further down the line..

              Having had a few minutes to go out and just have a quiet look over my machine, I note that there are burrs forming on the edges of the splines where they've fretted in the sleeve over time.. ..the chamfers on the lands look a bit 'off-hand'…

              #557255
              Terry Turner 2
              Participant
                @terryturner2

                Thanks Diogenes II….all 'grist to the mill' as they say and I am sure you are right ….my mill was very noisy and the run out is bad , so one or more bearings is 'suspect' so a misalignment or burr is a definite possibility.

                but all those bearings are internal to the quill….unless the quill itself is distorted…?

                Sorry its keeping you awake at night but you are obviously like me and do some of my best problem solving at 4am….

                Walking away from a job and having some thinking time is essential………as you know.

                #557306
                old mart
                Participant
                  @oldmart

                  As you have exhausted all of the possibilities, I think its time to put a soft pad under the quill, and use an aluminium drift to gently tap the end of the spindle. I would measure as you progress to see if the tapping does move it. There is no great danger from the tapping as the quill is being removed to overhaul things, ie, new bearings. When the quill is out, the nuts on the spindle are left hand thread.

                  #557454
                  Terry Turner 2
                  Participant
                    @terryturner2

                    The quill is out, the spindle is out and all the bearings removed.

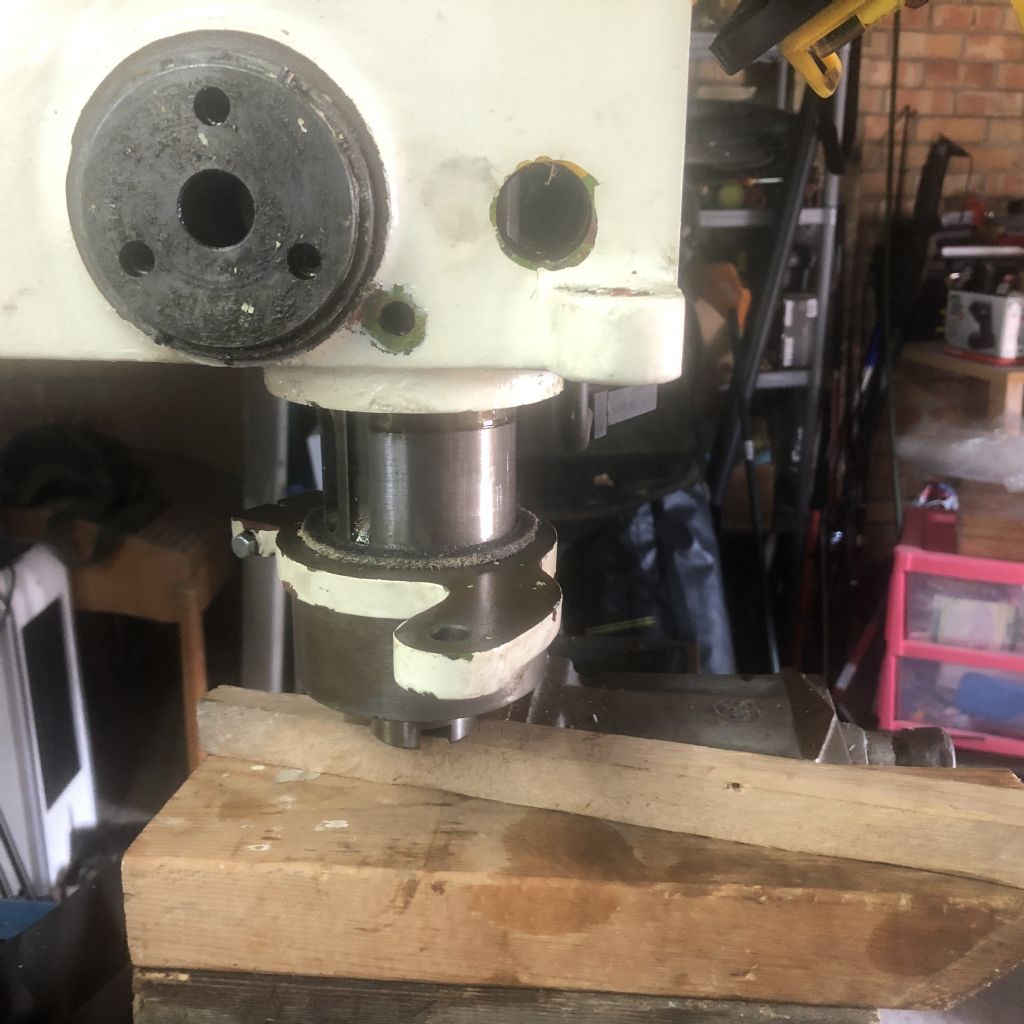
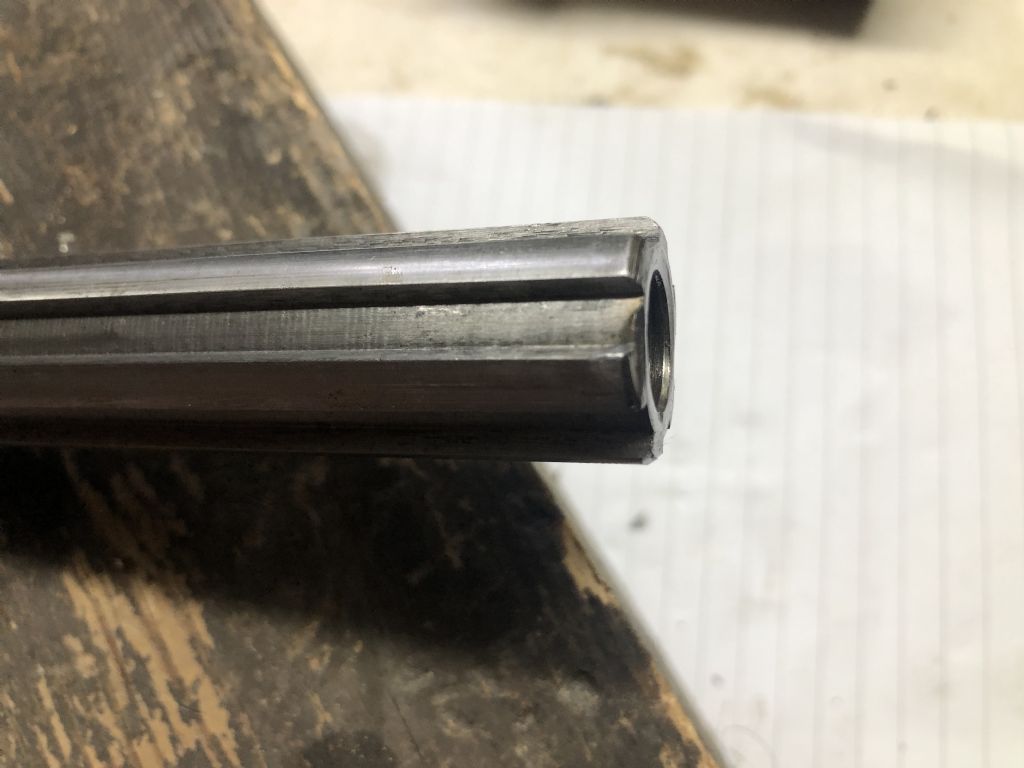
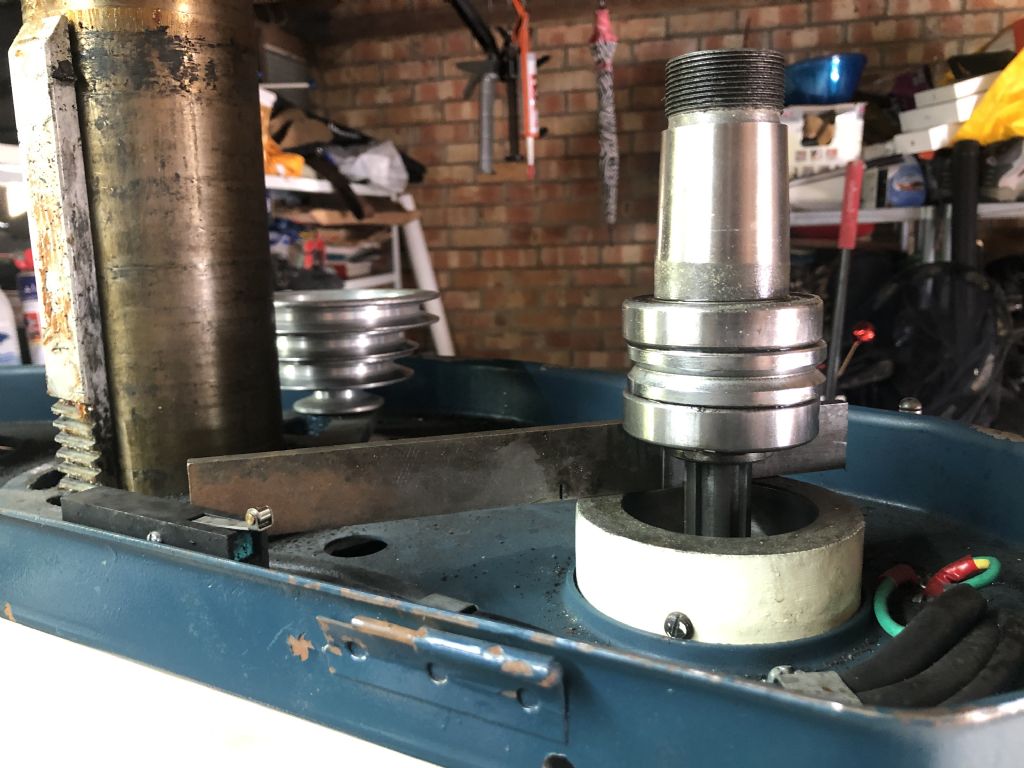
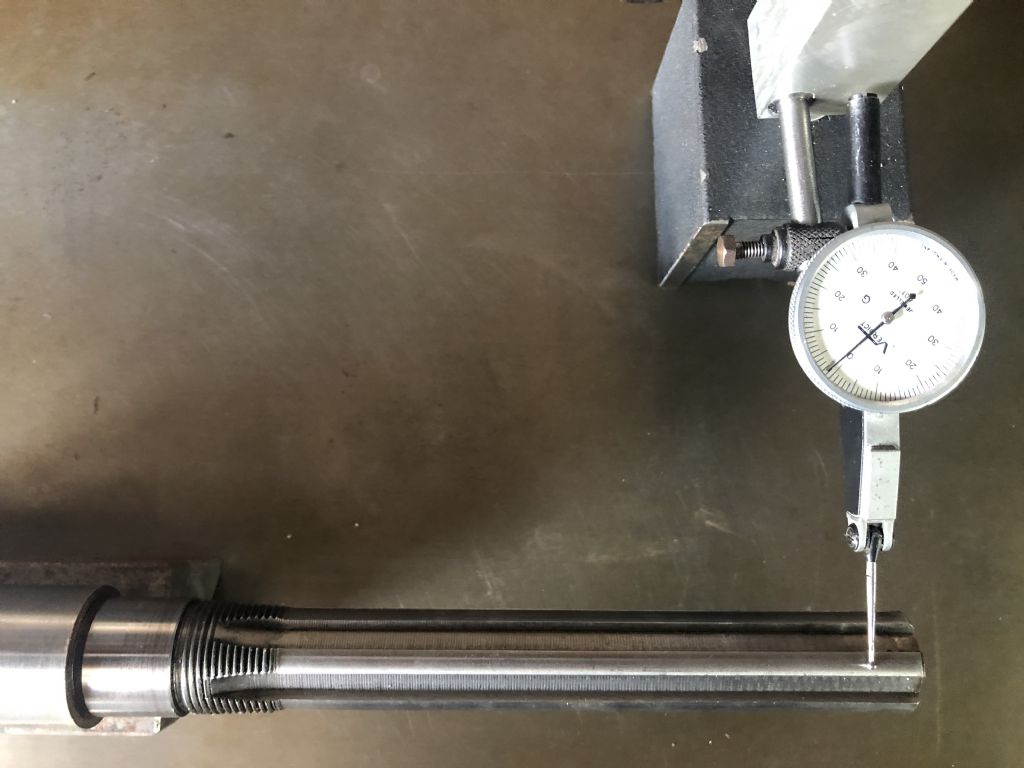
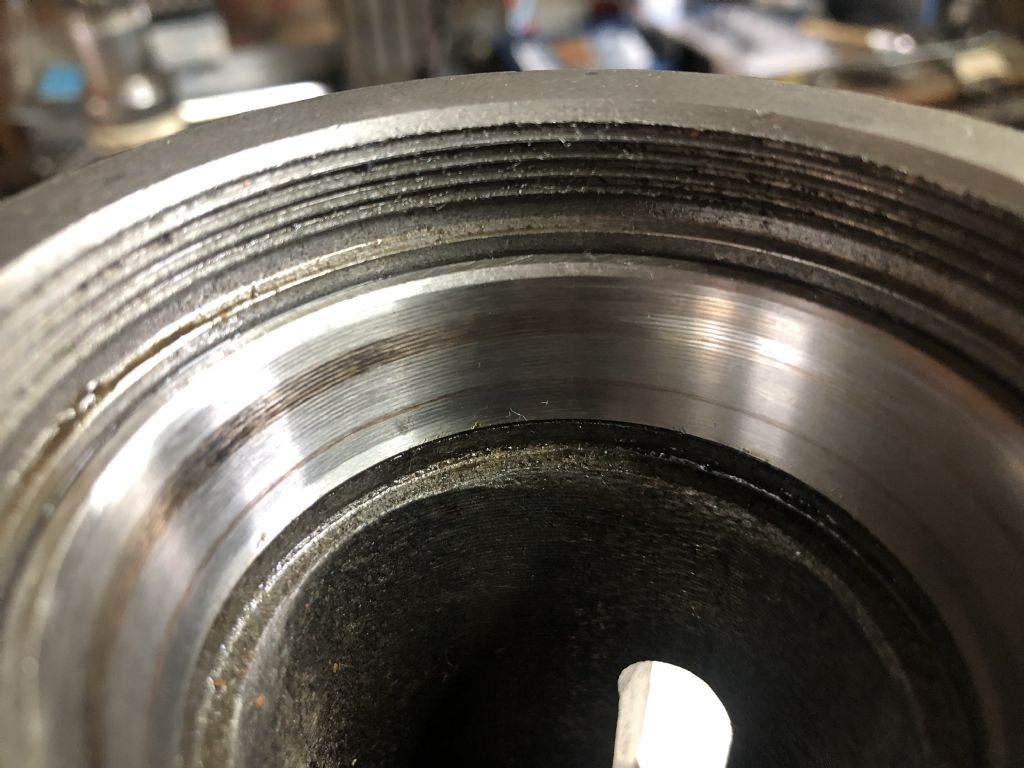
                    The problem….and this is where some of you will say " I told you so"…..there was a bruise/ burr right at the top of the spindle splines which was sufficient to hold the pulley shaft so strongly that after the WD 40 loosened everything and I raised the quill using a wooden lever ( with a wooden block underneath for protection ) it pushed the pulley shaft and bearings out the top of the head….!!!Wooden lever.jpg

                    bruise burr side.jpgI was then able to remove it and all the bearings and spacer using a gear puller and the quill dropped out….!

                    pulley spindle out.jpgI had twice listened to your advice about the possibility of burrs on the splines and inspected those splines but missed what was in fact a flat round edge ' bruise'…? no sharp edges.

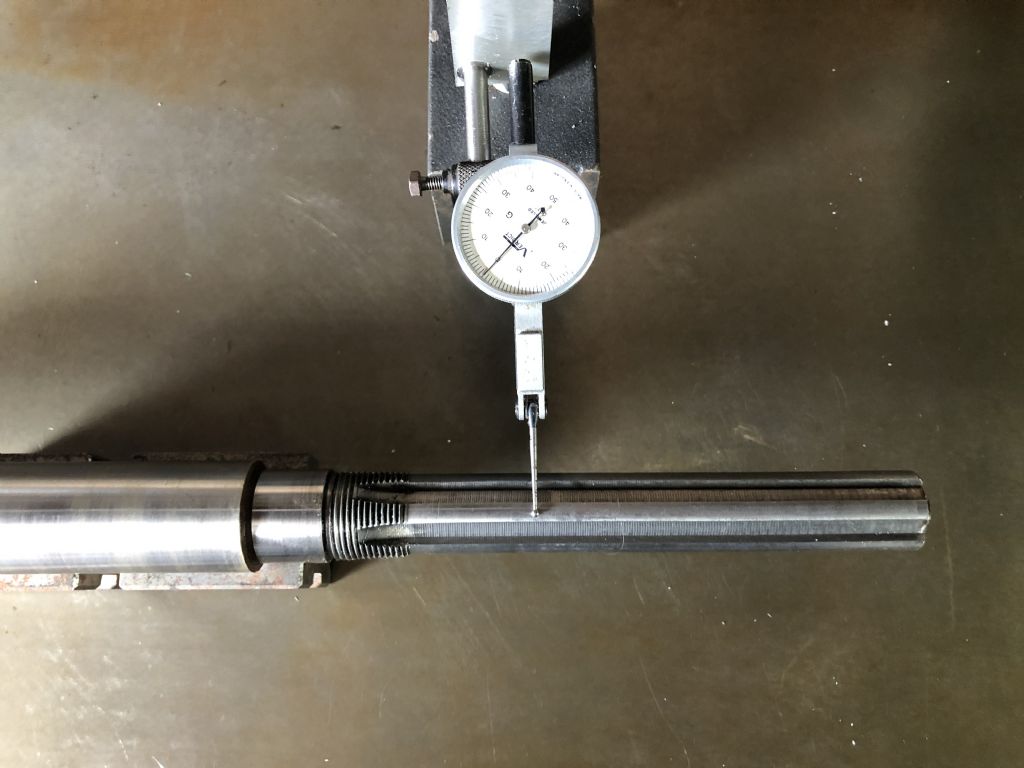
                    I did not believe that the 'bruise' was sufficient to jam things that hard so I put the spindle between two 'v ' blocks on my surface place and checked that it was true………it was…………the bruise/ burr was the actual / only culprit.

                    splines true 1.jpgsplines true end best.jpgBoth spindle bearings were in a shocking condition and I am ashamed that I continued to use the mill with that excessive run out and noise…

                    I have owned the mill from new and at some point I had damaged the top of the spindle..I was the author of my own misfortune.

                    Thanks again to everyone who responded and tried to help, Old Mart, DiogenesII and John Baguley who continues to share valuable information.

                    At some point I will put the whole photography sequence together with a narrative as a U Tube video so it is available to everyone…

                    I am truly grateful for your information and interest.


                    Edited By Terry Turner 2 on 07/08/2021 20:17:35

                    #557459
                    Howard Lewis
                    Participant
                      @howardlewis46836

                      Glad that you at last, succeeded.

                      From here the way is upwards to success. Things will only get better!

                      Howard

                      #557461
                      old mart
                      Participant
                        @oldmart

                        Great to hear the good news, Terry. I would advise renewing both bearings, and use a common lithium high melting point grease. Be sure not to overpack with grease, leave at least 50% air within the quill. Hopefully, removing that label at the front of the head will allow fine tuning of the bearing preload. The correct preload is when running fast for 20 minutes only heats the quill/spindle lukewarm. If the preload is too great, the assembly will overheat very quickly. I have bought bearings from this firm several times and can recommend them. While you are at it, don't forget to check those pulley bearings, and see if that little screw is intended to hold them in place.

                        https://simplybearings.co.uk/shop/Products-Taper-Roller-Bearings/c4747_5262/index.html


                        Edited By old mart on 07/08/2021 20:30:50

                        Edited By old mart on 07/08/2021 20:34:50

                        #557483
                        Terry Turner 2
                        Participant
                          @terryturner2

                          Thanks Howard, and yes Old Mart, I have decided to renew the pulley shaft bearings as well as part of this project.

                          I shall also put new belts on, make a new anti-rotation grub screw and I will do a 'Edwin White' modification to the rack which raises and lowers the head so you don't lose alignment when doing that.

                          John Baguley has also put a speed controlled motor on his and I will look at the cost/benefit of doing that as well…

                          Cheers

                          Terry

                          #557489
                          DiogenesII
                          Participant
                            @diogenesii

                            Good to see a thoughtful disassembly carried out with care – well managed, Terry – Your plans sound very good to me – I think it'll feel tangibly 'better-than-new' when you have it all done, which ought to make for a pleasing result to look forward to at the end of the job.

                            Best wishes..

                            #557507
                            Terry Turner 2
                            Participant
                              @terryturner2

                              Thanks Diogenes II…

                              I am thoroughly enjoying the process and look forward to starting the rebuild now.

                              #557516
                              Terry olds
                              Participant
                                @terryolds52232

                                hi there, just aquired one of these machine,, badge as a' Chester machine tool' Alpine major' still soring it out but from the 1980'a I'd say, very little use.

                                Find this post very interesting indeed,    thanks

                                Edited By Terry olds on 08/08/2021 11:04:46

                                #557530
                                Terry Turner 2
                                Participant
                                  @terryturner2

                                  Hi Terry olds,

                                  I thought mine was a WARCO ( it is unbadged) but one of the forum members realised it was slightly different and was in fact a CHESTER Eagle…

                                  I am at the rebuild stage now . I made a better fitting anti-rotation screw this morning.

                                  Ill put a few more updates on later….

                                  #557542
                                  ChrisH
                                  Participant
                                    @chrish

                                    Hi Terry, please excuse the ignorance, but what is an "Edwin White" modification? Very interested in anything that holds the head in alignment – I have a Warco 'Economy' Mill/Drill, so not too dissimilar.

                                    Chris

                                    #557547
                                    john fletcher 1
                                    Participant
                                      @johnfletcher1

                                      I have an RDM 350 round column table top mill/drill, there was a series of articles in ME in December 1980 on how to get over the alignment problem when raising or lowering the head. I am interested to read more about Edwin Whites idea on the same problem I think RDM mill/drills are known as Rong-Fu in other parts of the World. John

                                      #557550
                                      Terry Turner 2
                                      Participant
                                        @terryturner2

                                        Hi ChrisH,

                                        If you look on U Tube ,as you probably do, there are a number of films about ways of preventing loss of alignment on a round column mill when you raise or lower the head.

                                        Some are complex but a bloke called Edwin White has used a method that I will try…See link below .

                                        He has has bolted the rack used to raise and lower the head to the column with ( 10mm) countersunk screws .

                                        Precise positioning of the rack and bolt holes is obviously essential/ critical but he adds a small shim afterward to make the fit even tighter…

                                        in this film he doesn't go into his method in any great detail but he seems very happy with the result..

                                        I took the top cover off my column and it is 17mm thick and the rack is 11.7mm so I have bought some 10mmx 30mm Socket headed Countersunk machine screws.. Give me a couple a weeks and Ill let you know how it goes..

                                        **LINK**

                                        #557554
                                        Terry olds
                                        Participant
                                          @terryolds52232

                                          hi Chris,

                                          Have today fitted four 1/4 whit cs screws into the rack on my Alphine Major milling machine and tapped into the column 1/4 whit , it is a dm25 machine, will it say's that on the badge, did as per Edwin White video shows and it works ok,

                                          If you google Edwin White it comes up and you see the video's available for column milling machines, they are on you tube to,, but did as per Ewin White, like I say works well for me , pleased with it,,

                                          Terry Olds

                                          #557559
                                          Terry Turner 2
                                          Participant
                                            @terryturner2

                                            Hi Terry olds,

                                            Thanks, that's reassuring….how did you align things to ensure that the head ( when raised ) was aligned correct y before you drilled/ tapped the next hole..?

                                            #557567
                                            Terry olds
                                            Participant
                                              @terryolds52232

                                              Not easy more by eye than anything else , but seems to be inline ,did use a big set squre I had, did it like Ewin White did it by eye, centre punch the rank, the if you take the head to the top of the column you can pull the rack out at the bottom and get a screw driver behind it to drill it 1/4 inch drill bit and not mark the column that way,, same with the top of the rack,, move the head down the column to pull the rack out at the top.

                                              Then after counter sunk the holes, use a transfer punk to mark the column after you eyed it up,, you can lock the head if you like, but I did not , drill the column , this is a cast , so easy to drill, and then tap 1/4 as I did, or as you your case metric size, cleaned up and then put the c/s screws in, job done

                                              Terry Olds

                                              #557573
                                              Terry Turner 2
                                              Participant
                                                @terryturner2

                                                Thanks Terry olds,

                                                I have a slightly different plan for the Edwin White modification, which I will post in a couple of weeks.

                                                #557575
                                                Terry Turner 2
                                                Participant
                                                  @terryturner2

                                                  Chester quill bearings.

                                                  I missed something again….!

                                                  The lower taper bearing race has a pronounced lip protruding into the ID of the quill so it was easy to remove..

                                                  I turned a cylinder the ID of the quill , ( it is a rough casting so a loose fit was all I could achieve) I then dropped the cylinder into the quill so that it sat evenly on the bearing race lip and a sharp tap with a drift removed the seat without any distortion / damage to the casting.

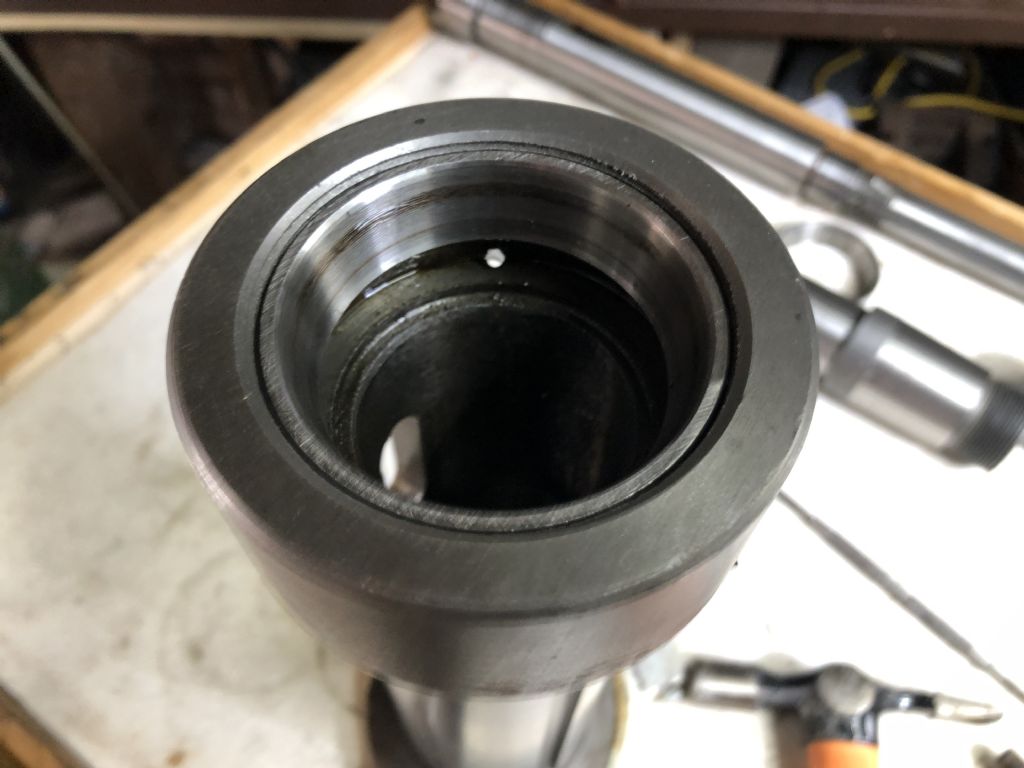
                                                  The upper quill taper bearing race is a different 'kettle of fish'.

                                                  There is no protruding lip and the bearing is completely enclosed within the housing.( see pic )

                                                  img_9660.jpg

                                                  I could not imagine what kind of engineer could create such a design…?

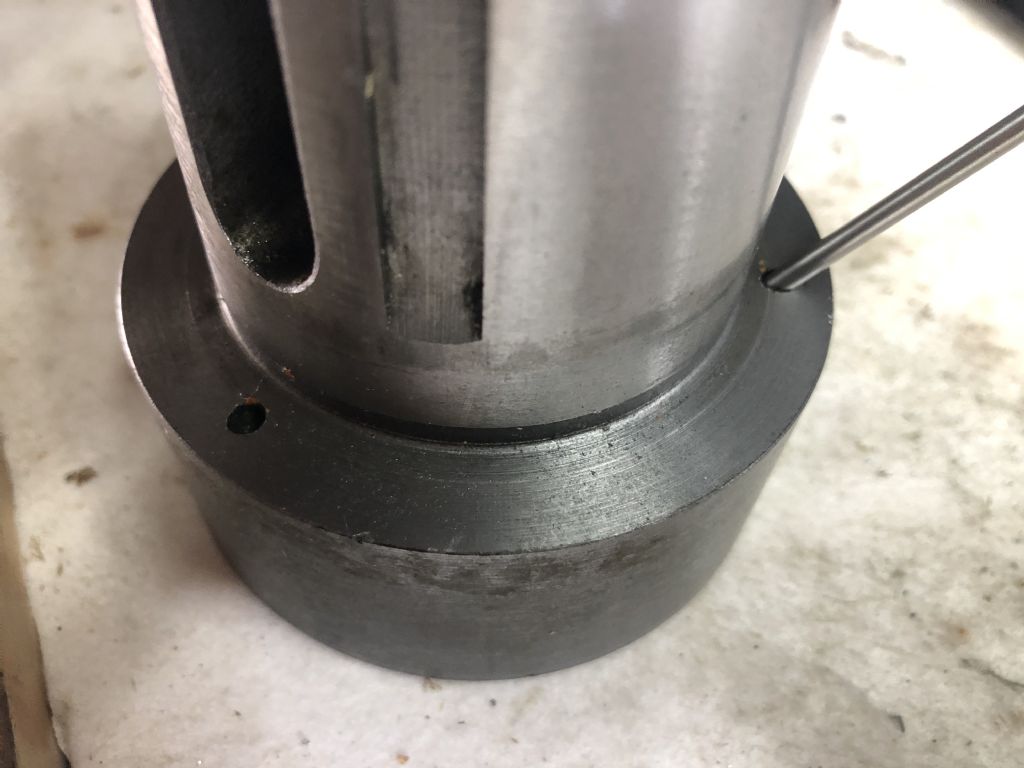
                                                  I thought long and hard about the options and eventually decided that some more thinking time was needed and stood the quill up on my table ( I normally lay it down) …….THEN I NOTICED…..three small holes in the exterior/ reverse side of the bearing housing.

                                                  The holes are 3.5 mm did so I put a piece of rod into one and found it was a 45 degree hole which obviously led to the back ( inaccessible) part of the bearing .

                                                  Tapping each in turn loosened the bearing and moved it enough for me to get a drift in and finish tapping it out.

                                                  bearing access holes.jpg

                                                  img_9670.jpg

                                                  I now understand that it is quite a common practice to provide such access holes but I have never come across them before and the fact I didn't notice them has reinforced my reputation for having poor powers of observation. ( You will remember that I missed the bruise/ burr on the top of the quill spines that caused me so much trouble )

                                                  The bearings are purchased so the re-build will start any day.

                                                  Best WIshes

                                                  Terry T

                                                  #557579
                                                  ChrisH
                                                  Participant
                                                    @chrish

                                                    Thanks for the link Terry, I had a look at it and will check out my mill to see what I can do.

                                                    I have bolted a little laser (the sort you can strap to a handgun) to my head aimed at a target about 2.5m away – the target is a pair of vertical black lines the width of the red laser dot apart or a white background, that works quite well, to about 0.003". My main problem is remembering to turn the laser off after use and then finding the batteries go flat………… funny that. But if the Edwin White mod can be made more accurate than 0.003" that then that would be good.

                                                    I have also fitted a 3ph motor with inverter which has reduced vibration a lot, the motor is much smoother running, as well as providing seamless speed control from about 100 – 2500 rpm(-ish) and has been a tremendous improvement. I also changed the crappy 3 pulley belt system as supplied for a 2 pulley, one on the motor and one on the quill, system using poly vee belts, with each pulley having two sets of vee grooves to provide a low and a high speed setting – very easy to change and a major improvment on the original set-up, no more having to lift the head up to the top of the column to change speed now..

                                                    Look forward to reading of your take on the Edwin White mod in a couple of weeks.

                                                    Chris

                                                    #557584
                                                    Terry Turner 2
                                                    Participant
                                                      @terryturner2

                                                      We are on the same wavelength here Chris.. I saw the laser light check on a U tube video as well and I have one to use for that very purpose..

                                                      ALSO.. the 3 phase motor and speed / controller is a real possibility for me too and I would greatly appreciate any information you can share about the kit you purchased..

                                                      I recently changed my lathe for one with speed control and the improvement in finish when you actually cut / turn at the correct rpm is noticeable…

                                                      All the best

                                                      Terry T

                                                    Viewing 25 posts - 26 through 50 (of 80 total)
                                                    • Please log in to reply to this topic. Registering is free and easy using the links on the menu at the top of this page.

                                                    Advert

                                                    Latest Replies

                                                    Home Forums Manual machine tools Topics

                                                    Viewing 25 topics - 1 through 25 (of 25 total)
                                                    Viewing 25 topics - 1 through 25 (of 25 total)

                                                    View full reply list.

                                                    Advert

                                                    Newsletter Sign-up