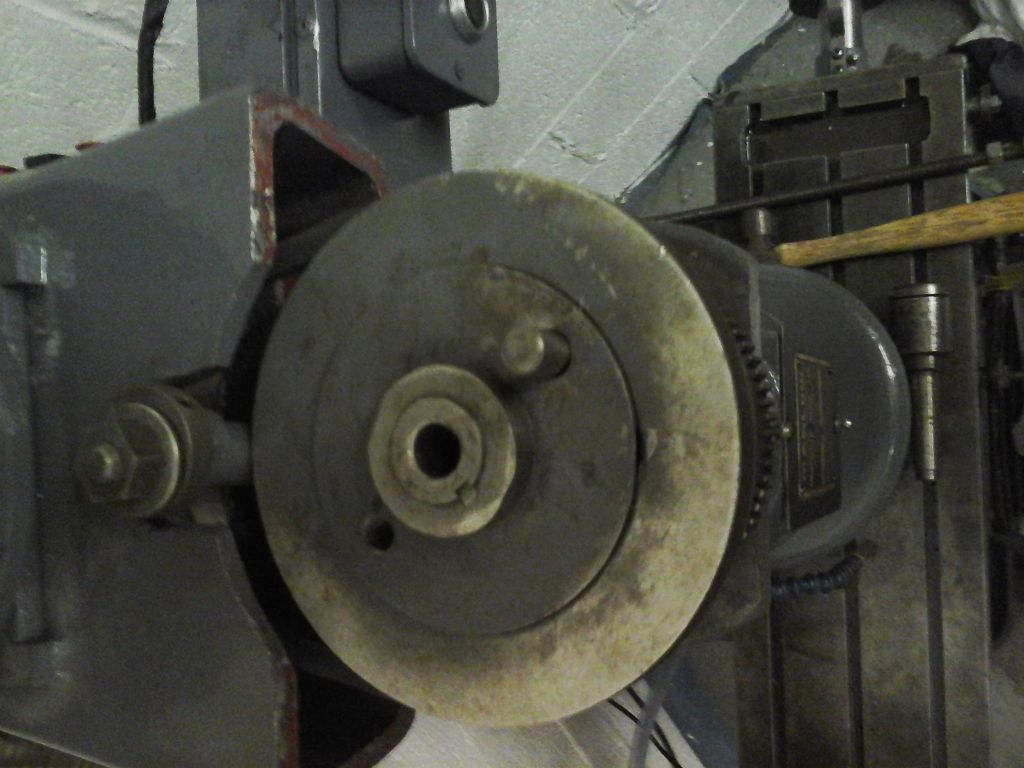
Marlow 3A Mill
Marlow 3A Mill
- This topic has 9 replies, 3 voices, and was last updated 25 November 2014 at 19:21 by
 David Hill 5.
 David Hill 5.
 David Hill 5
 Robbo
Robbo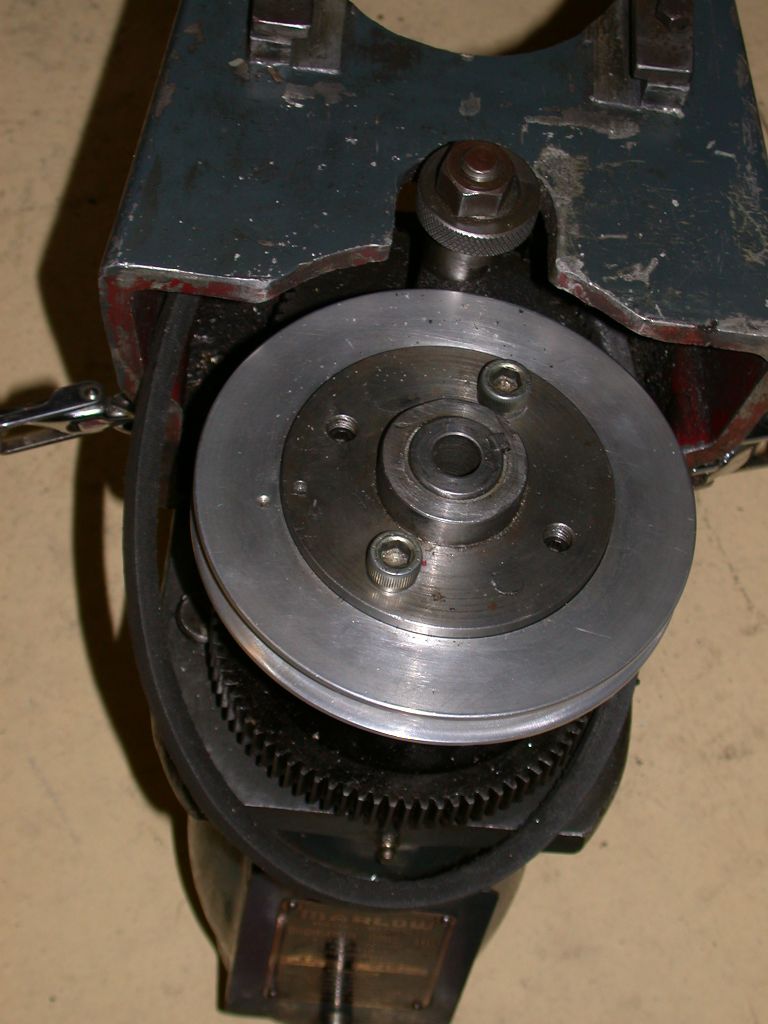
 WALLACE
- Please log in to reply to this topic. Registering is free and easy using the links on the menu at the top of this page.
Latest Replies
-
- Topic
- Voices
- Last Post
-
-
Collet Identification Please?
Started by:
Nigel Graham 2
in: Manual machine tools
- 3
-
10 September 2026 at 23:59
southernchap
-
How much !?!
1
2
Started by:
Michael Gilligan
in: Workshop Tools and Tooling
- 16
-
10 September 2026 at 23:38
Vic
-
Octopus Heat Pump
1
2
Started by:
Michael Gilligan
in: The Tea Room
- 14
-
10 September 2026 at 23:28
Bazyle
-
Model Engineer & Workshop
Started by:
Tony Watson 3
in: Model Engineer & Workshop
- 16
-
10 September 2026 at 21:42
Pippin
-
Parting off
1
2
Started by:
Peter Simpson 3
in: Beginners questions
- 21
-
10 September 2026 at 19:11
Martin Johnson 1
-
Oilstones / Waterstones
Started by:
Grindstone Cowboy
in: General Questions
- 5
-
10 September 2026 at 18:27
Bo’sun
-
What Did You Do Today 2026
1
2
…
7
8
Started by:
JasonB
in: The Tea Room
- 46
-
10 September 2026 at 17:22
John Hinkley
-
Preview of whats coming in Freecad 26.3
Started by:
Russell Eberhardt
in: CAD – Technical drawing & design
- 2
-
10 September 2026 at 14:00
blowlamp
-
WARNING: Phishing Attempt on MMEE Bookings?
Started by:
Nigel Graham 2
in: Exhibitions, Shows and Club Events
- 1
-
10 September 2026 at 13:21
Nigel Graham 2
-
End mill sharpening
Started by:
petro1head
in: General Questions
- 10
-
10 September 2026 at 13:20
not done it yet
-
Inserting An Angled Feature (Alibre Atom)
1
2
Started by:
Nigel Graham 2
in: CAD – Technical drawing & design
- 4
-
10 September 2026 at 11:13
Nigel Graham 2
-
Reaming drill sizs
1
2
3
Started by:
Steve Huckins
in: Beginners questions
- 23
-
10 September 2026 at 11:04
Howard Lewis
-
Article about Steam Luanches
Started by:
dbs88
in: Model Engineer.
- 7
-
10 September 2026 at 08:45
dbs88
-
Mystery engine
Started by:
David Ambrose
in: Model Engineer.
- 3
-
10 September 2026 at 06:47
JasonB
-
Claude et al
Started by:
Michael Gilligan
in: The Tea Room
- 1
-
10 September 2026 at 03:22
Michael Gilligan
-
opposed twin i/c engine
Started by:
bricky
in: Help and Assistance! (Offered or Wanted)
- 2
-
9 September 2026 at 23:01
bricky
-
Final diameter fo cutting teeth
Started by:
Dalboy
in: General Questions
- 3
-
9 September 2026 at 17:57
Dalboy
-
spark eroder
Started by:
martin haysom
in: General Questions
- 10
-
9 September 2026 at 13:41
simondavies3
-
lathe;mounting a squarish sheet of metal to be cut into a disk?
Started by:
modmechengine1333
in: Beginners questions
- 12
-
9 September 2026 at 12:29
Grindstone Cowboy
-
Inappropriate adverts on the site
Started by:
Joseph Noci 1
in: Website Questions, Comments, and Suggestions
- 15
-
9 September 2026 at 07:51
James A
-
Bandsaw Blades for Clarke CBS 45 MC
Started by:
Barry Smith 4
in: Workshop Tools and Tooling
- 6
-
8 September 2026 at 18:28
not done it yet
-
What is this Tool?
Started by:
James A
in: Workshop Tools and Tooling
- 8
-
8 September 2026 at 13:08
Bo’sun
-
Question about GHT’s retracting topslide drawing
Started by:
ega
in: Workshop Tools and Tooling
- 8
-
8 September 2026 at 11:43
ega
-
GRAVOGRAPH AF3
Started by:
Speedy Builder5
in: Workshop Tools and Tooling
- 7
-
8 September 2026 at 11:05
John P
-
Red Wing Hit and Miss
Started by:
John Purdy
in: I/C Engines
- 4
-
7 September 2026 at 18:14
John Purdy
-
Collet Identification Please?
 Nigel Graham 2
 southernchap
 Michael Gilligan
 Vic
Vic Bazyle
 Tony Watson 3
 Pippin
 Peter Simpson 3
 Martin Johnson 1
 Grindstone Cowboy
 Bo’sun
 JasonB
 John Hinkley
 Russell Eberhardt
 blowlamp
 petro1head
 not done it yet
 Steve Huckins
 Howard Lewis
 dbs88
dbs88 David Ambrose
 bricky
 Dalboy
 martin haysom
 simondavies3
 modmechengine1333
 Joseph Noci 1
 James A
 Barry Smith 4
 ega
ega Speedy Builder5
 John P
 John Purdy