Feed, speed, and swarf.

Advert

Feed, speed, and swarf.

Home Forums Beginners questions Feed, speed, and swarf.

Viewing 25 posts - 1 through 25 (of 26 total)
  • Author
    Posts
  • #246465
    Robin Graham
    Participant
      @robingraham42208

      Tonight I was turning a 5mm diameter end on a piece of half inch EN3B bar. I was going at 700rpm, 2mm DOC for the first swipe (I'm a wimp!), and 0,05mm/rev feed using a carbide insert tool. After the first 5mm or so of the cut, the swarf bundled up into a sort of bird's nest on top of the tool, and when I looked at the result it was obvious that the surface finish went from pretty good to bloody awful when that happened.

      I think my question is – are there any 'rules of thumb' which can tell you when you've got speed/ feed right, or which way to adjust, by looking at the swarf? Sometimes I get a continuous spiral (current record about 2m before it breaks with 1mm DOC) and the surface finish is fine.

      Rob.

      Advert
      #8209
      Robin Graham
      Participant
        @robingraham42208
        #246469
        mechman48
        Participant
          @mechman48

          Go with what the machine is telling you, listen & look, you've half answered your own question…

          ''Sometimes I get a continuous spiral (current record about 2m before it breaks with 1mm DOC) and the surface finish is fine''.

          George.

          #246471
          Hopper
          Participant
            @hopper

            Depends on lots of things, including what lathe you are working on, which you have not told us.

            The rough finish could be due to the "bird's nest" bundled up on top of the tool bit rubbing on the job and roughing up the surface after it has been cut by the tool.

            Or it could be that the tip broke off the tool bit and so the finish went bad. Inspect the tool tip with a magnifying glass to see if it is still good, or try a new tip.

            Or it could be a bit of metal welded onto the tool tip that is causing a bad finish. Again, inspect with a glass or try another tip.

            More generally, try running at a higher speed with carbide tooling. Slow speeds and light feeds and light cuts tend to tear the points off the bits. On a "full sized" lathe, the rule of thumb is to get the swarf coming off so it turns blue after leaving the tool bit. Red hot and sparks means RPM is too high, normal steel color means not really fast enough.

            Of course on a smaller "hobby lathe" you will not necessarily have the rigidity of machine to do the above so you have to play with the speeds and feeds to get a good result with out stalling the machine, slipping belts, chattering etc.

            2mm DOC should be fine, unless you have a mini lathe in which case a bit less might be needed? Plenty on here who use carbide on their mini lathes can advise you on that, if you have a mini lathe.


            PS, and watch those long spirals of swarf, they can flick around and catch sleeves, eyes, loose tools and all sorts before you know it. If you up the feed rate or change the angle the tool is set at, you should be able to get it to produce nice short curled chips that are much easier to deal with and don't make those "bird's nests" you found.

            Edited By Hopper on 13/07/2016 06:07:27

            #246490
            Anonymous

              Inserts are designed to curl, and break, the swarf to avoid problems arising from 'birds nests' or long spirals. Neither are particularly useful for a CNC machine running lights out! There's no need for rules of thumb; the insert manufacturers publish recommended speed and feed data for each insert. While these recommendations are not cast in stone, the feedrates in particular seem important, and are generally higher than most MEs use.

              So I'd recommend increasing the feedrate to at least 0.1mm/rev, and possibly more. Personally I'd be running at 1700rpm for 1/2" diameter EN3B.

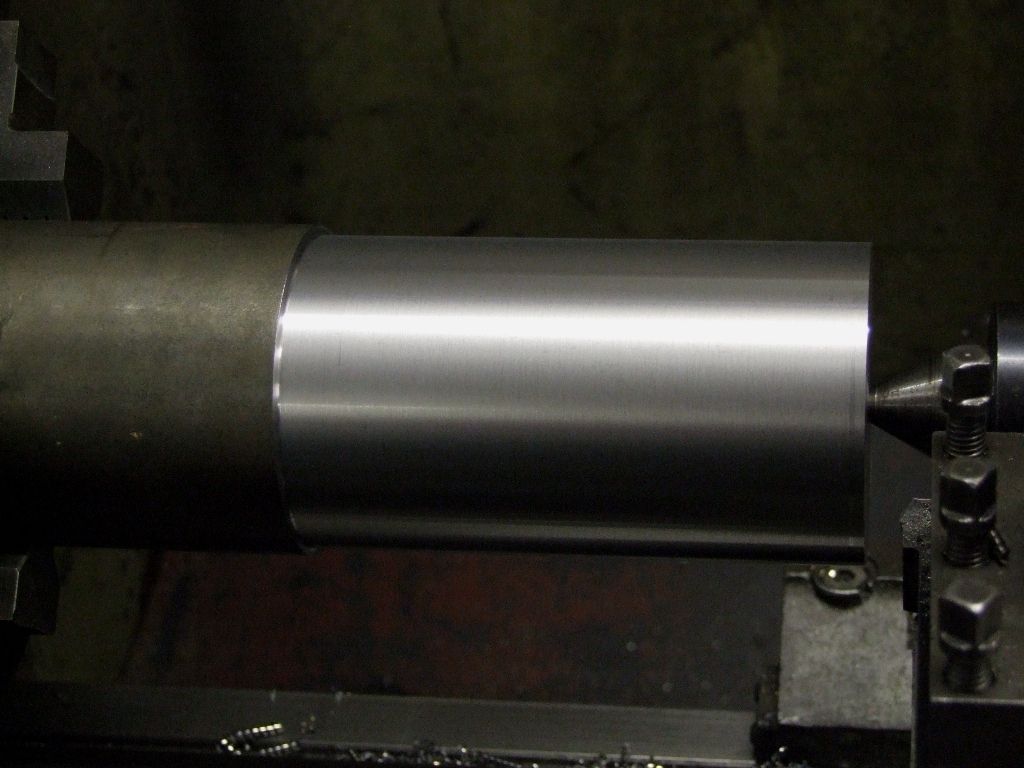
              This is EN1A, so rather easier than EN3B. It was machined at 370rpm and 0.15mm/rev; stock OD is 3":

              finish.jpg

              The short curled swarf can just be seen bottom left.

              Andrew

              #246749
              Robin Graham
              Participant
                @robingraham42208

                Thanks, all good info. It was on a generic 12×36 Chinese lathe, so rigidity shouldn't be a problem with this DOC

                Embarrasingly I now see that I had CCGT 060204 (whatever that means!) tip in the tool, which I think is designed for Ali – they actually work well for finishing mild steel but probably not up to taking roughing cuts. I think I need to take a step back, rationalise my tooling, and make some systematic experiments with the tools I've got, which is a mix of HSS, brazed carbide and indexable carbide. I started this metal-mangling malarkey on a small Proxxon 400 lathe (roughly the same size as a mini-lathe) and I was so happy to be making stuff from metal that I didn't really care how long things took to finish. Now I've got a bigger machine (the bug bit) and also some more experience, my focus is moving more to the destination than the journey, so I need to get things as right as pos first time.

                Thanks again for your replies, and apologies for the delay in responding – real life intervened in the form of a suspected fractured hip, which turned out not to be, but is fairly painful – pain, apart from being painful is strangely tiring.

                Rob

                #246766
                Eugene
                Participant
                  @eugene

                  You're right about the CCGT tip. The 04 suffix represents the radius in mm at the cutting point and would be regarded as a semi roughing tool; 02 is the usual finishing radius.

                  I started out with the CCGTs on my Myford M Type as I didn't have anything else by the way of tools or holders. They work well on MS but only if its not too rough on the surface to start with, plus facing cuts on a ragged edge result invariably in broken tips. If your stock is OK to start with you can actually take quite chunky cuts with them.

                  Now I've made Harolds' simple grinding rest and got some HSS tools looking more or less right, the performance I can get has greatly improved.

                  Last week just by way of experiment I got the machine to remove a quarter inch on diameter, ie a cut of .125" off some unknown steel using a home brew HSS knife tool. No chatter or groans from the lathe and a perfectly acceptable finish; not bad for a 70 year old half horse lathe.

                  If I would give any advice it would be to reserve the CCGTs for what they are best at, and get some good HSS cutters to hand. Harolds' grinding rest was an interesting project in itself, and now I'm starting to understand it a bit more the tooling is pretty fair. One for you perhaps?

                  The next play area is some tangential HSS doo dads I've bought from Eccentric Eng.

                  Eug


                  Edited By Eugene on 16/07/2016 08:44:02

                  #246776
                  Muzzer
                  Participant
                    @muzzer

                    Nothing wrong or embarrassing with using CCGT tips on steel, although you should look up the actual inserts you have. There are CCGT designed for light-medium cuts in steel, which pretty much describes what we do, as well as others optimised for cutting aluminium and others than can be used for both. Being ground finish ("##G#" ), they are sharp and can cut just as well as HSS.

                    As Andrew says, get the conditions right before giving up or reverting to something else. Getting right first time means doing it by the book rather than randomly trying out different tooling if the first attempt doesn't work out immediately.You will probably need to use power feed to get a constant feed and the surface speeds will need to be fairly high.

                    #246790
                    Anonymous

                      The 0602 string refers to the size of the insert. That's quite a small insert for the size of lathe. I do use them, but only for small boring bars. As standard I use the next size up, 09T3. As Eugene says the final 04 refers to the tip radius. However, I would disagree with him about it being for semi-finishing. Any tip radius can be use for finishing, although the larger radii are more robust for roughing. The finish on the steel bar pictured above was done with a 0.8mm tip radius insert. The only disadvantage of larger tip radii is that they can give poorer finish for DOC less than the tip radius depending upon the material.

                      I use 0.8mm tip radius inserts for roughing, and finishing where the cut is pure facing or sliding. As standard I use 0.4mm tip radius inserts and only use 0.2mm tip radius inserts where the 'sharpness' of the internal corner is important.

                      Andrew

                      #246802
                      Ajohnw
                      Participant
                        @ajohnw51620

                        You are using a raked tip. I've noticed on the ones that I use that they have limitations on max depth of cut. I use the triangular ones, micro polished for aluminium but the geometry seems to be the same as coated ones for stainless finishing and work well on all materials I have turned with them.

                        The types of tip that just have a groove around the edge don't seem to have this problem when I have used them but produce an inferior finish. Useless once the coating wears off as well.

                        angel I don't find speed particularly critical – could be an important point for those with more light weight machines. Feed though is and the finest may not give the best finish especially with lighter cuts. A lot depends on the lathe so there can't be any hard and fast rules. The aim needs to be to achieve a final size with a feed and cut depth that suites the lathe and the material that is being machined. Often very fine feeds can only be used down to a certain minimum depth of cut. Past that the finish may deteriorate. It depends on the machine.

                        John

                        #246804
                        MW
                        Participant
                          @mw27036

                          I would like to report a good experience i've had from Cutwel.Ltd, i bought a 1/2" 5% cobalt TiN coated HSS drill, fully ground and it was so sharp i could almost cut my fingers on the lips, it also had a 4 facet point. 

                          I was wondering to myself the wisdom of paying almost the cost of a cheap drill set for 1 drill and thought i may have made a bad move, but then i was doing production work and i thought i needed something decent. Not exactly rolling in it and consider myself to have a modest income so cost is something i care about. 

                          It paid off, on long components that needed deep holes i was expecting the finish to be bad and to my surprise it was lovely. The flutes carried the swarf away very efficiently. 

                          Just goes to show the difference a good sharp drill can make.

                          Michael W

                          Edited By Michael Walters on 16/07/2016 13:00:22

                          #247281
                          JasonB
                          Moderator
                            @jasonb

                            I came across this video which shows quite well how DOC affects the type of swarf a tipped tool will produce.

                            Talk about tips starts at 11.00mins in and actual turning example at 16mins, plenty of fast hot chips just like Andrew likes.

                            **LINK**

                            J

                            PS His other videos are quite good, at least the couple I watched were.

                            #247300
                            Robin Graham
                            Participant
                              @robingraham42208

                              Thanks for further responses – this is all very interesting to me! It's been a bit of a culture shock going from a 45kg bench lathe to a half ton+ job in one jump. I don't think I've got anywhere near what the machine can potentially do in terms of removing metal quickly and (fairly) accurately.

                              Michael W – thanks for the pointer to Cutwel. I had a look and and was somewhat bewildered by the range of carbide lathe tooling they offer, which is my difficulty really – but with the info from contributors to this thead the mists are beginning to clear. Maybe someone should write a guide to indexable tooling for the amateur in MEW, if it's not been done already. I suppose it might go "ensure the tip is well tightened in the holder, then carefully place it in your scrap metal bin and take a piece of HSS to the grinder" though. So maybe not!

                              JasonB – I had a look at the video you linked to, the guy was doing exactly the sort of experiments I was thinking of, so that's helped – he was showing stuff on a Colchester Student, which is a heavier machine than I have, but in the same ballpark. Bookmarked!

                              Regards, Rob.

                              #247319
                              Roger Williams 2
                              Participant
                                @rogerwilliams2

                                +1 on ' this old tony ' videos. One of the best in my opinion.

                                #247327
                                Anonymous
                                  Posted by JasonB on 19/07/2016 18:45:03:

                                  Talk about tips starts at 11.00mins in and actual turning example at 16mins, plenty of fast hot chips just like Andrew likes.

                                  **LINK**

                                  Blimey, that's way faster than I'd be running 3" diameter stock. smile o I'd be nearer 500rpm, that's still around 400sfpm. To some extent chip formation versus depth of cut depends upon the insert tip radius; I don't recall that being mentioned? Feedrate seems to be the most important parameter in getting the proper chip formation. Blue chips are good. Not so good when one lands on you, and eye protection is essential. It's interesting to note that at the highest DOC the surface finish deteriorates, with some banding, implying that the cutting conditions are unstable.

                                  There is such a wide range of inserts and tooling available that an overview article would be difficult. I recall that there has been at least one article in MEW describing the basics of insert tooling and the codes. Rumour has it that some articles looking at surface finish versus tooling and cutting conditions across a range of materials are planned. wink 2

                                  Andrew

                                  #247352
                                  John McNamara
                                  Participant
                                    @johnmcnamara74883

                                    Hi All

                                    My only lathe is a large machine and the top speed is 1250 RPM, With larger diameters not a problem with a carbide tool a 5mm depth of cut is easy, but scary, I rarely do it. Many carbide tools have a blunt cutting edge often with a negative rake, they need high surface speeds to function as intended. In a way they plough through the work relying on high speed to deform the metal. Set up properly you can get a very good even mirror finish.

                                    Smaller parts are the problem how do I turn a 5mm or less diameter shaft and get a decent finish 1250 RPM is simply not fast enough for a 5mm shaft, x 1250rpm = roughly 64 surface feet per minute. Carbide prefers almost ten times that.

                                    For me the answer is to do the finishing cuts with high speed steel ground and honed razor sharp with a positive top rake and a slightly rounded tip, power feed about .002" – .004" per rev. I rather like the tangential tool holder from Eccentric Engineering. (No connection, just a customer)

                                    I like to leave about .010" after roughing down with the carbide Then take a couple of .002" cuts (to remove any spring from the heavy carbide cutting) and to get a good base for the finishing cuts. Then after a measure up take one or two more cuts to finish.

                                    Obviously this is all too slow for a commercial operation although it takes longer to talk about it than actually do it.

                                    Most of the parts I make are one offs I like to creep up on the final size. Better than going too far and regretting it.

                                    PS

                                    I just fitted a new main roller bearings to this lathe, gee what a difference that made, no more streaks just a satin chrome finish. A lot of work but worth it. Now when I dial in .0003' a third of a division, about as much as my eyes can see, the tool just scrapes away a smear of metal. I could not do that with the old bearings, it was hit and miss. A fine scrape cut like this is normally not possible with carbide tools If you want a good finish it is not sharp enough. This is where high speed steel excels.

                                    Regards
                                    John

                                    #247371
                                    MW
                                    Participant
                                      @mw27036

                                      "In a way they plough through the work relying on high speed to deform the metal"


                                      Well you would end up with alot of blunt tools after that, probably because they're meant to cut it not push it into shape, that generates an awful lot of heat for not much gain.

                                      Also you can cut it as slow as you like really, It isn't necessary to have tons of speed, I worked on machines that could top 100,000 rpm, but we found that anything above a fairly low level lost pretty much all benefit. The rpm figure just became pointless for what the tool could deliver. Not to mention what it probably did to the lifespan of the bearings.

                                      Michael W

                                      Edited By Michael Walters on 20/07/2016 18:28:38

                                      #247390
                                      Anonymous

                                        On the issue of sfpm it is true that carbide can be used at much higher speeds than HSS. However, it is not always essential in order to get a good finish. It depends upon the material, and to some extent the shape of the insert. Neither it is true that you can't take small DOCs with carbide and retain a good finish. Again it depends upon the material and insert.

                                        For external turning I don't normally bother to take finishing cuts; if I put on a 20 thou cut I expect the lathe to take 20 thou off. Of course there's a caveat for that when involving slender workpieces and boring bars.

                                        As an example for the 3" diameter bar shown a few posts ago the final cut was 20 thou and it's within 3 tenths of a thou of size.

                                        Andrew

                                        #247396
                                        Ajohnw
                                        Participant
                                          @ajohnw51620
                                          Posted by JasonB on 19/07/2016 18:45:03:

                                          I came across this video which shows quite well how DOC affects the type of swarf a tipped tool will produce.

                                          Talk about tips starts at 11.00mins in and actual turning example at 16mins, plenty of fast hot chips just like Andrew likes.

                                          **LINK**

                                          J


                                          PS His other videos are quite good, at least the couple I watched were.

                                          There may be a bot of a moral in that video – on more mundane lathes stick to smaller tip sizes.

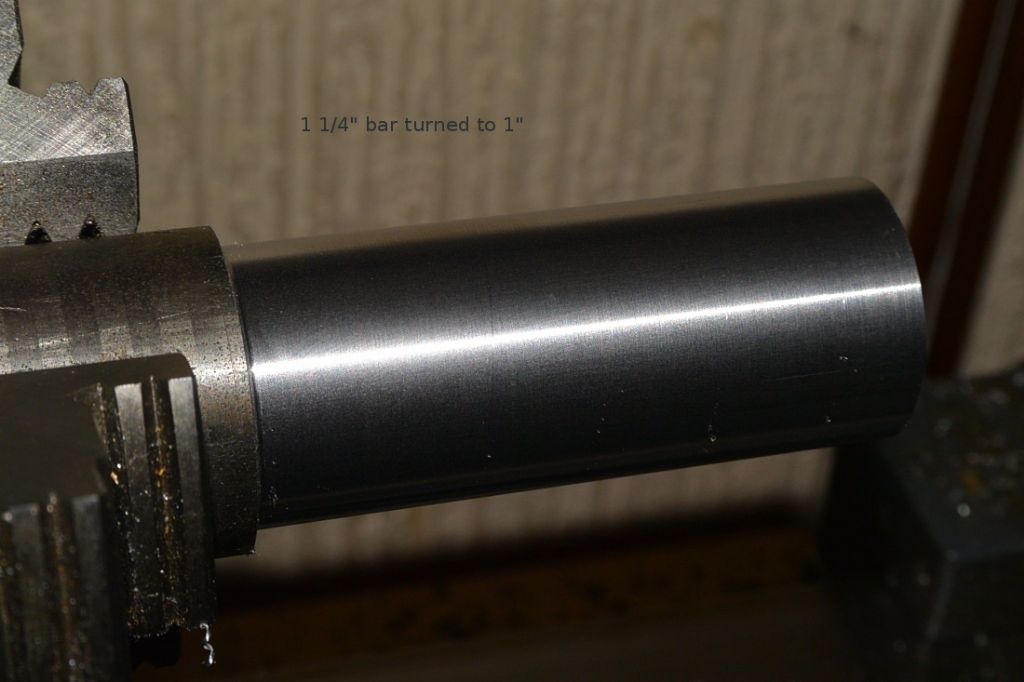
                                          The depth of cut aspect is interesting. I posted a shot of some moderately nice shiny MS turning around 1" dia. Depth of cut was around 1mm, 2mm off the dia Using a TCGT11 finishing tip. This is it.

                                          slideadjcarbidetool.jpg

                                          I have a lot sticking out of the chuck really and tried a circa 3mm deep cut – just wouldn't have it. Loads of vibration. Swarf length was about 4" running at about 4 – 500 rpm on a mini lathe. The scratches from it can be just seen on the work. The feed was 0.085mm / rev. Normally I would have speeded that up a bit ot improve the finish but a pain to do on a mini lathe.

                                          Finishing tips should reduce the depth of cut requirements of the larger tips before they start breaking the chips.

                                          What I haven't done is increased the speed to see if that has the same effect as increasing feed rate usually does when the finish is as above.

                                          Maybe I should add that the chuck marks aren't down to the work slipping – down to me rotating it as I close the jaws up. I like things to run as true as they can.

                                          John

                                          Edited By Ajohnw on 20/07/2016 23:21:46

                                          #247400
                                          Mark C
                                          Participant
                                            @markc

                                            Negative rake tools (inserted) tend to be used on tougher materials (although they work happily on soft stuff as well (for me at any rate). They do "plough" the work but they are not "blunt" in the same respect as a sharp HSS tool but they do not have an edge to them that feels sharp. They require more power due to them "folding" the chip before the fracture. They invariably have a chip breaker formed in them and runing fast and deep produce very hot "bits" of swarf if you get it right.

                                            That insert in the film looks like it might be a "wiper" type (most of the heavy cutting negative trigon tips I use have them) and will produce a very good finish when used in the sweet spot for feed, speed, coolant and material.

                                            Material has a massive effect on all of this, there are an awful lot of different "mild steel" stock about……..

                                            Mark

                                            #247402
                                            Mark C
                                            Participant
                                              @markc

                                              I should add that I find them easier to get stable results out off as well. As Andrew mentioned, once they are working, you get off what you ask for without the need to sneak up on a dimension but you do need to take out any flexing in the machine – for me using a Boxford, that means getting the first cut on with a stop and measure to work out what is coming off!

                                              Mark

                                              #247404
                                              John McNamara
                                              Participant
                                                @johnmcnamara74883

                                                Hi All

                                                The following link will lead you to many pages and diagrams that illustrate the metal cutting process.

                                                I used the words
                                                metal cutting theory
                                                as a search

                                                Ploughing on a micro scale.

                                                **LINK**

                                                Regards
                                                John

                                                #247432
                                                Ajohnw
                                                Participant
                                                  @ajohnw51620

                                                  My father had a toolmaker's term for poor quality steel from WW II. The term generally used was park railings. A lot of them were melted down due to steel shortages also anything else they could lay their hands on. I mentioned some steel I have bought that tended to tear what ever I did with it.

                                                  Actually I don't think that some aspects of the video that Jason posted are any different to using HSS tooling as far as finish is concerned. On real world lathes best finish often needs some combination of depth of cut and feed rate. Cutting force in other words. Shallower cuts are likely to need heavier feed rates to a point where super fine cuts wont give a decent finish at all. Running the tool along again at the same setting is often a bad idea as is very fine cuts. There is a video of DoubleBoost making an ER collet chuck where he sets the highest speed possible using a carbide tip and messes with feed a bit. The feed just needs to be fine compared with the rad on the tip. Big rads on small lathes are bad news in some way however they can also up the cutting forces when very light cuts are taken and that can help.

                                                  **LINK**

                                                  Right at the end of the video. Last 3 mins. It's interesting that he gets a much better finish where the cut is interrupted. I reckon that is down to the sudden shock of the cut steadying the lathe down.

                                                  John

                                                  #247437
                                                  JasonB
                                                  Moderator
                                                    @jasonb

                                                    Its part 3 you want John

                                                    #247448
                                                    Ajohnw
                                                    Participant
                                                      @ajohnw51620

                                                      blush Thought I had linked to part 3. Sorry about that.

                                                      Having been taught old school – even out of date when I was taught, I find this sort of thing interesting. Nothing to do with types of tip.

                                                      If asked to produce some very precise, smooth shiny work several cuts are needed. At least 3. On something the size of a Student and up in very good order depth would be circa 30 to 40 thou or more but at some point the finish probably wont be as good as it can be. 1st cut trues it up. This may not leave the work as round as it could be as cutting depth will have varied so 4 cuts etc might be a good idea.

                                                      Anyway the basic idea is to work to size with more than one cut of the same size at a depth and feed rate that suits the lathe, material – and the tool. Suitable cutting forces in other words. That way the actual depth of cut can be measured and any variation accounted for by very marginal variations in the next one. It's possible to hit a couple of 0.0001" accuracy or better this way. Out of date because anything that needed this level would be done on a grinder. It also takes a pretty good lathe to achieve the level of finish work this accurate needs. Then there is actual roundness and lack of taper.

                                                      John

                                                    Viewing 25 posts - 1 through 25 (of 26 total)
                                                    • Please log in to reply to this topic. Registering is free and easy using the links on the menu at the top of this page.

                                                    Advert

                                                    Latest Replies

                                                    Home Forums Beginners questions Topics

                                                    Viewing 25 topics - 1 through 25 (of 25 total)
                                                    Viewing 25 topics - 1 through 25 (of 25 total)

                                                    View full reply list.

                                                    Advert

                                                    Newsletter Sign-up