Milling cams

Milling cams

Home Forums Beginners questions Milling cams

Viewing 16 posts - 1 through 16 (of 16 total)
  • Author
    Posts
  • #241253
    Roger Hulett
    Participant
      @rogerhulett83124

      Where can I find instructions on how to mill cams. I have a small horizontal milling machine and a dividing head. The table of the mill will only move sideways and backwards,it will not tilt as the You Tube mill does when cutting a cam.

      #8144
      Roger Hulett
      Participant
        @rogerhulett83124
        #241259
        JasonB
        Moderator
          @jasonb

          Roger there are several ways it can be done without the need to tilt the head of a mill.

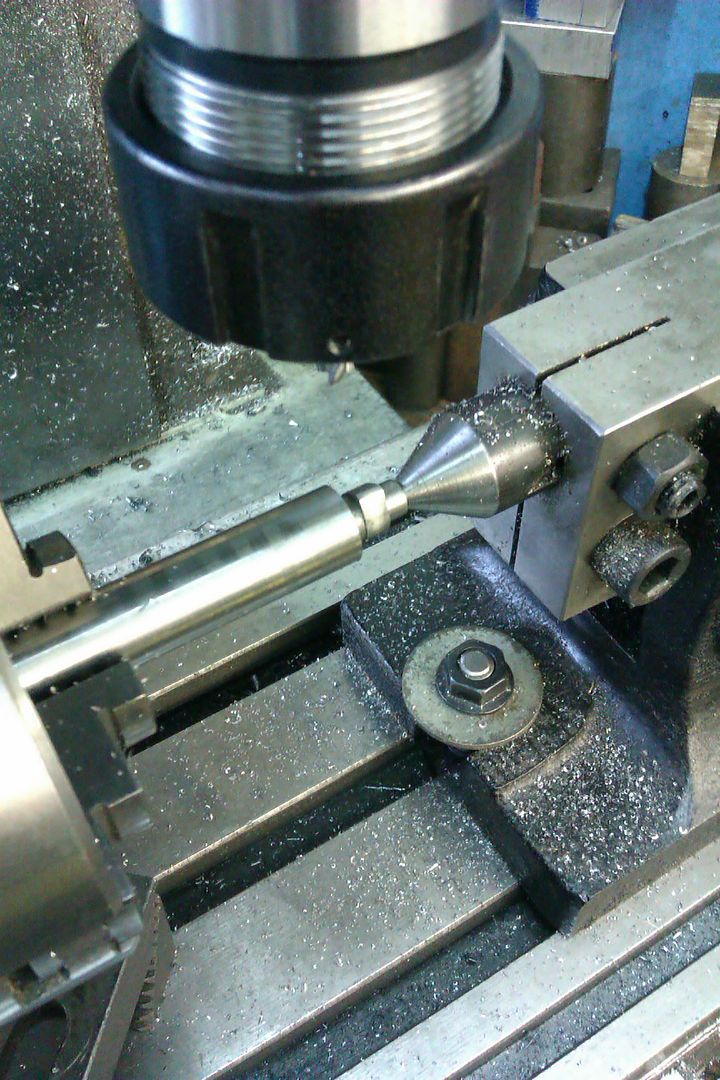
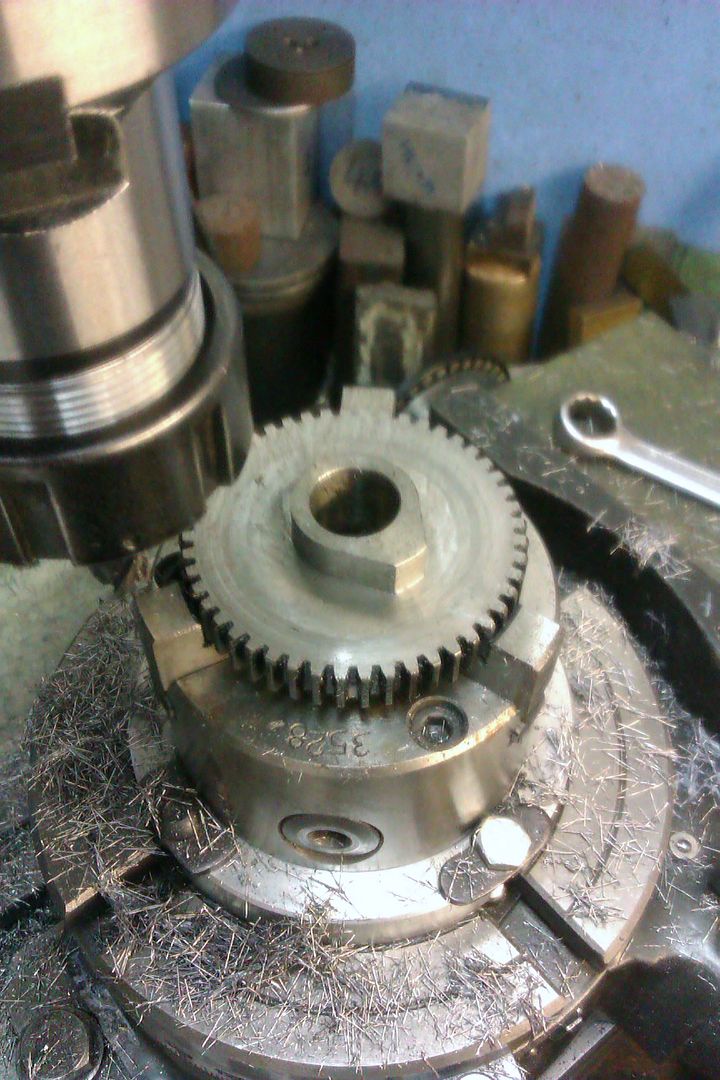
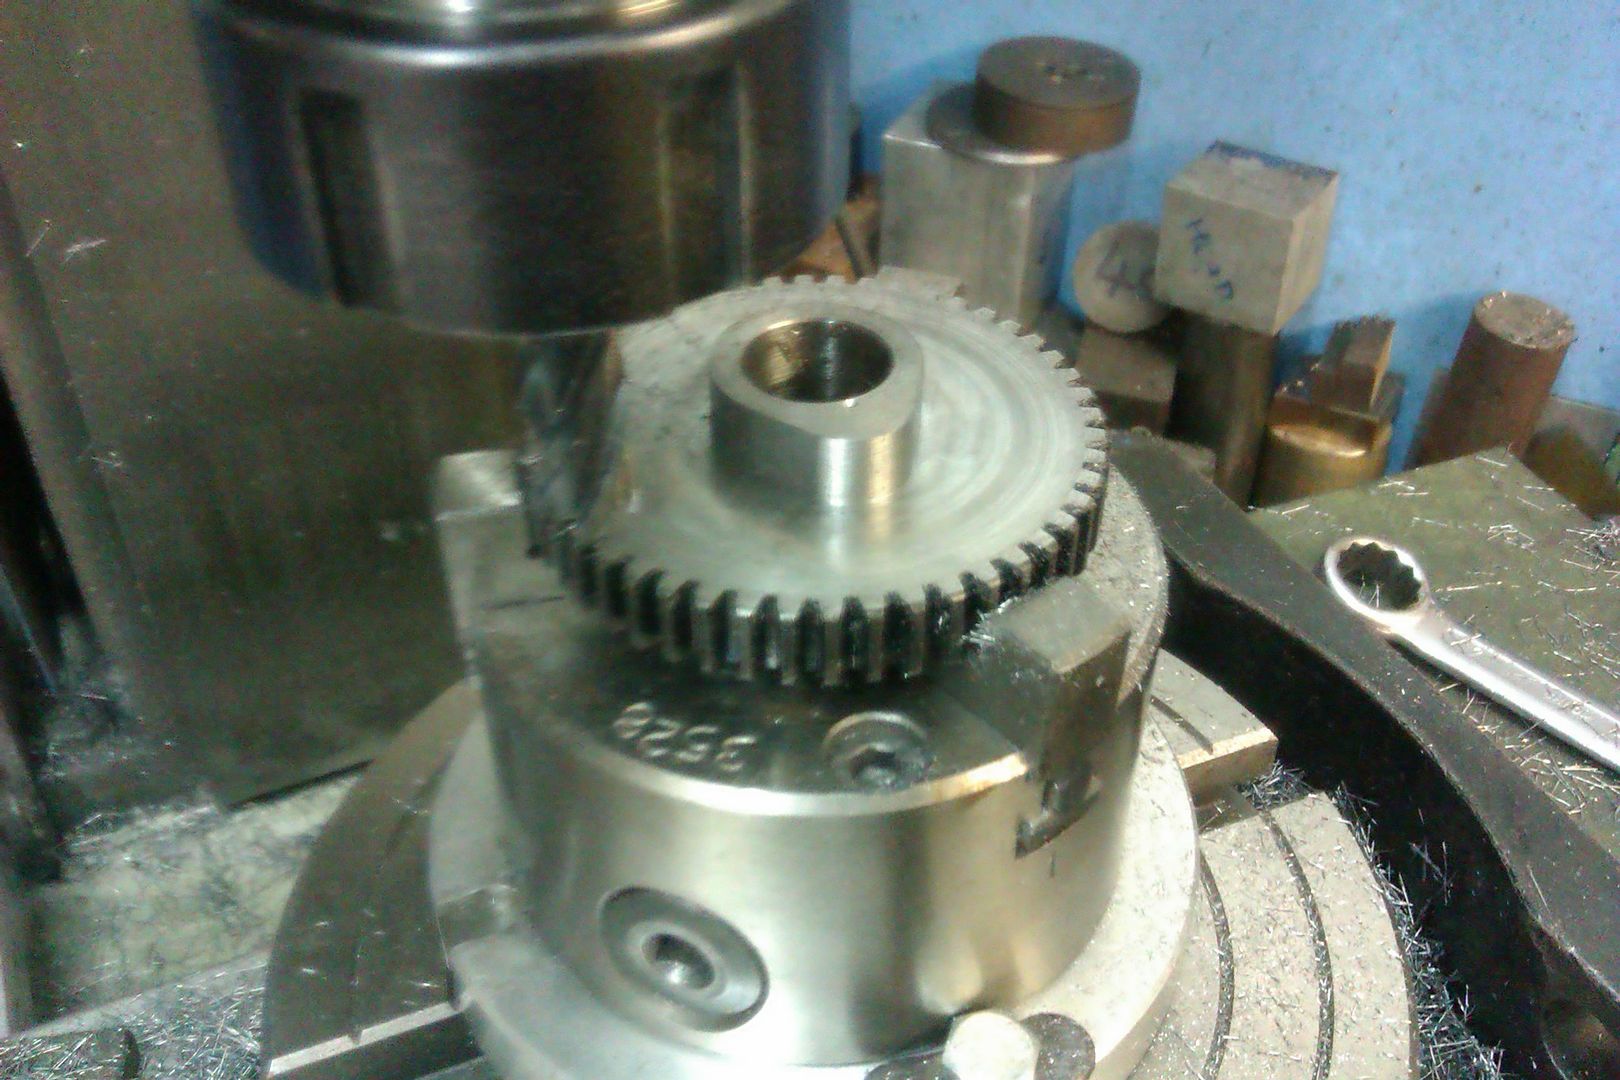
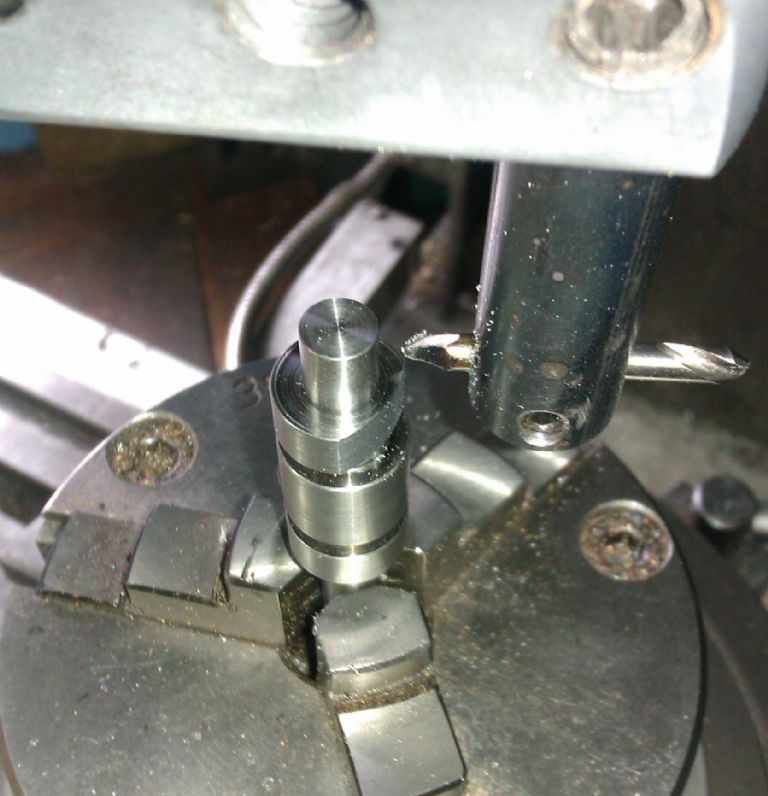
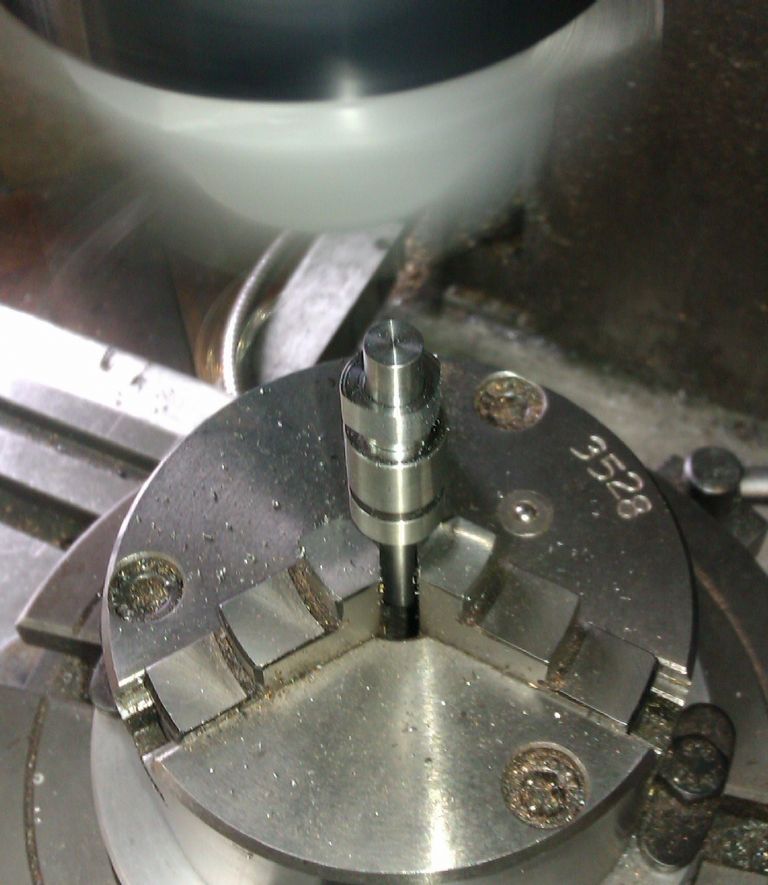
          One its to have the "camshaft" horizontally along the mill and supported by a rotary table or dividing head. You then rotate the cam blank one or two degrees at a time and adjust the height of the cut for each setting, this can be used for single cams as well as several along a camshaft

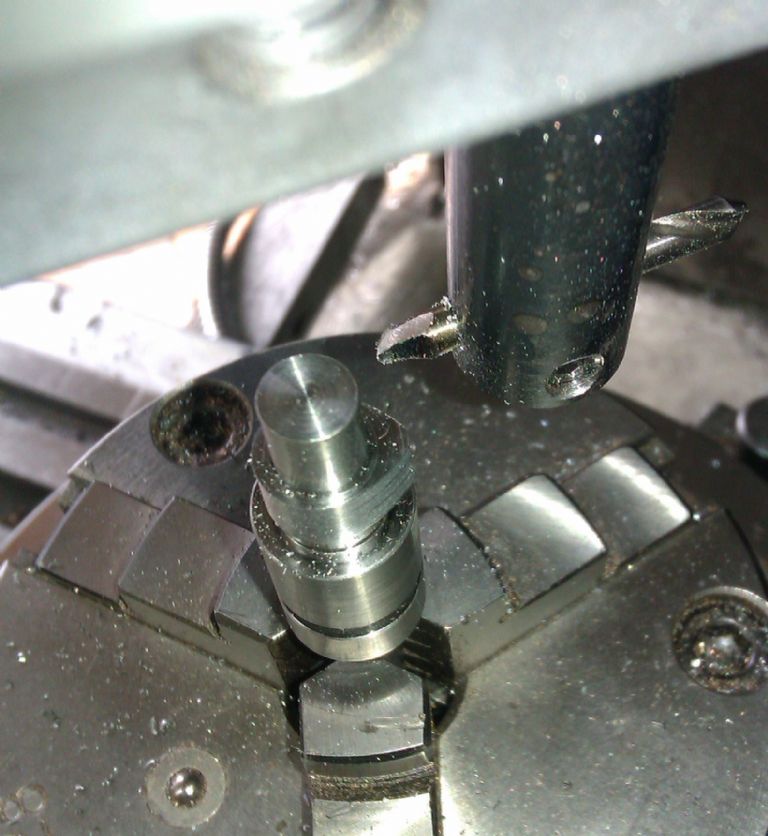
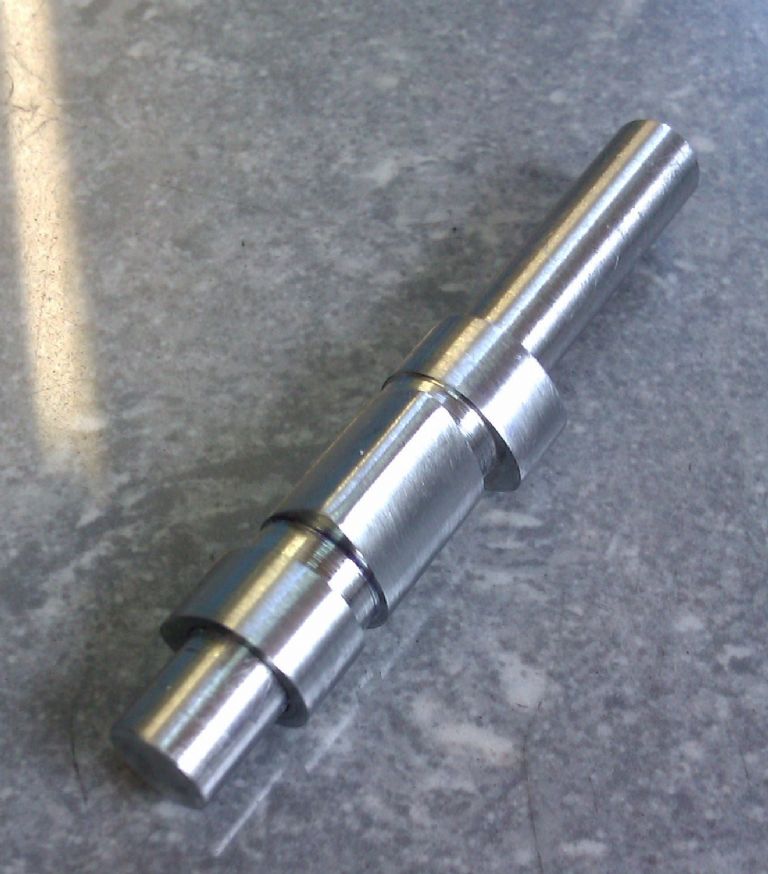
          Another method which is best suited to single cams with flat flanks is to have the "shaft" pointing vertically, take a few cuts off the side of the cam blank until you get two the base radius and then rotate a degree or two, take another pass and so on until you have covered the required angle leaving a lobe. the top of the lobe is then filed or milled round. This is easier and faster as you don't have to make a lot of fine adjustments to the Z height.

          If the cam has curved flanks then these can be done with a similar setup as above but use a boring head to swing a tool at the required flank radius then cut in stages as before.

          imag1507.jpg

          imag1508.jpg

          imag1509.jpg

          imag1510.jpg

          What engine is the can for? and what dividing head do you have? then I could go into more detail of the best method

          J


          Edited By JasonB on 03/06/2016 10:55:47

          #241260
          Anonymous

            As far as I understand the geometry the method of milling cams by tilting the dividing head and setting change gears can only create cams based on spirals. I'm not sure why you'd need to 'tilt' the table? For milling cams it is normal to use a vertical head on the horizontal mill, and tilt both the dividing head and vertical head to get the precise lead required. If you want cams with arbitrary shapes then you'll have to use one of the methods outlined by JasonB.

            I made the cam for my hit 'n' miss engine mostly by filing and some simple rotary table work; if I was doing it now I'd use the CNC mill and save the faffing about.

            Andrew

            #241262
            Roger Hulett
            Participant
              @rogerhulett83124

              The engine that I need these cams for is a 1921 single cylinder o.h.v. 142cc.

              My rotary table is a Warco HV4 4" with chuck and 3 dividing plates.

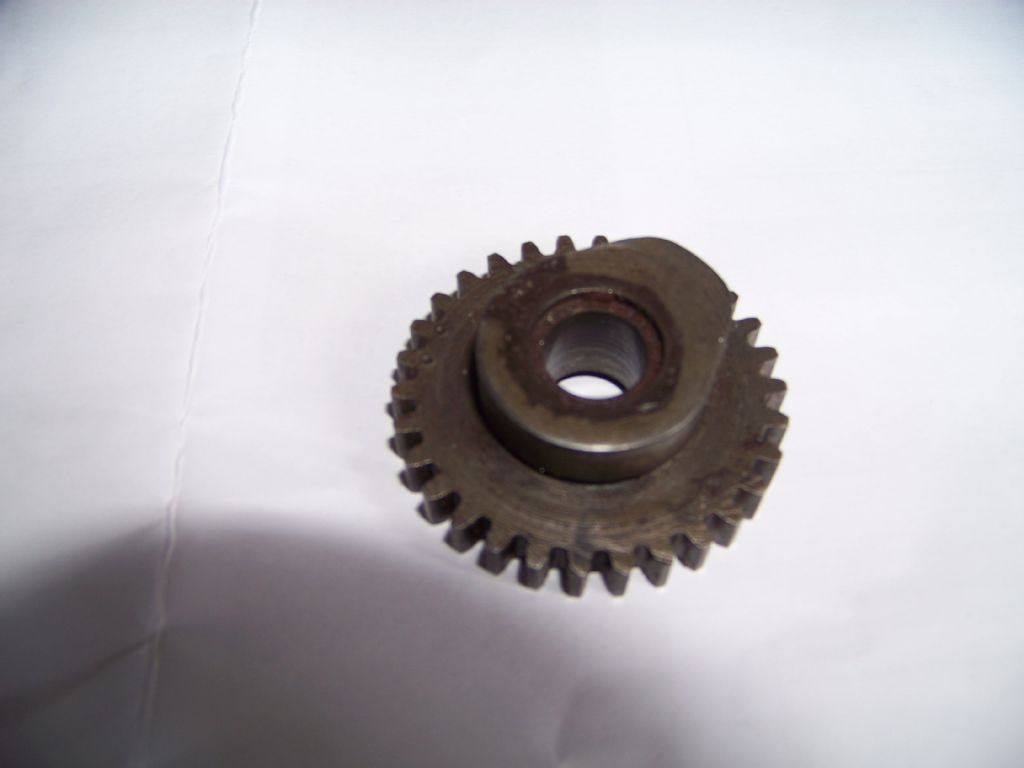
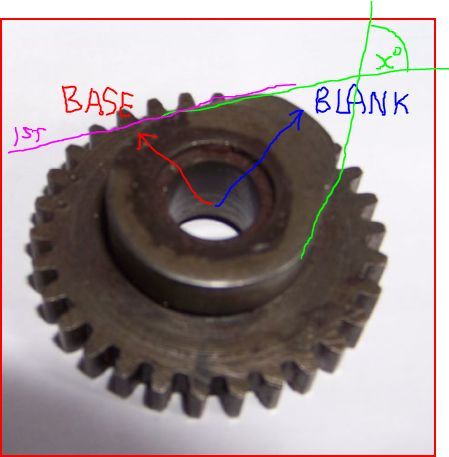
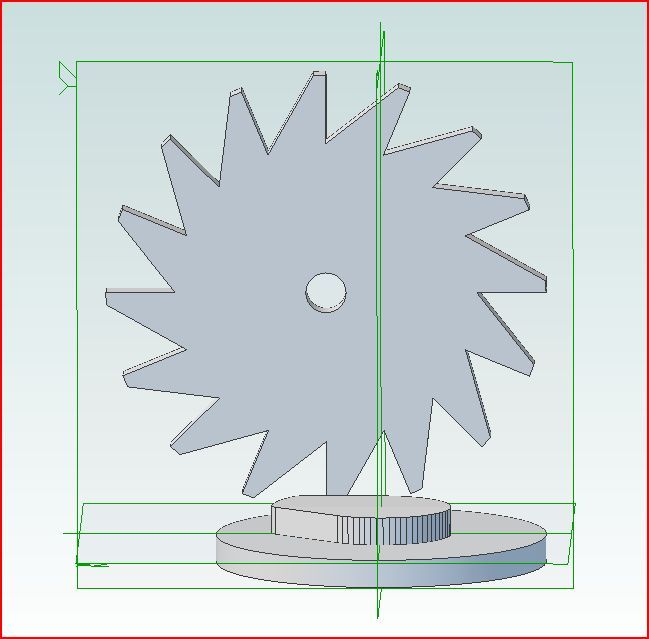
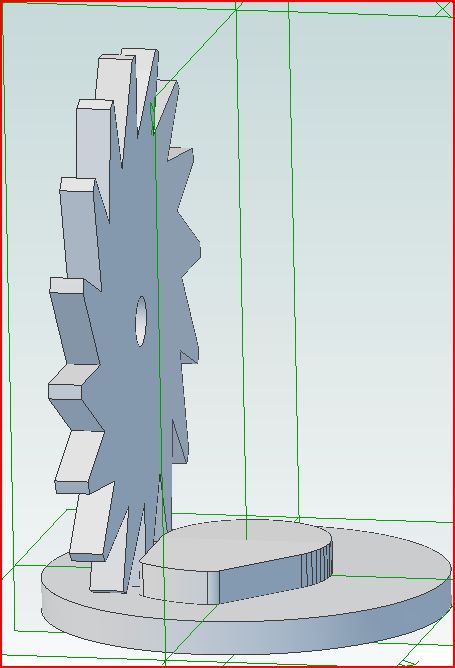
              Attached is a photo of the gear cam wheel.100_6044.jpg

              #241266
              JasonB
              Moderator
                @jasonb

                Ah the one you posted the other day, have you decided to do it as one piece or two?

                J

                #241269
                Roger Hulett
                Participant
                  @rogerhulett83124

                  Yes. The original is in one piece,so I will stick to that.

                  #241271
                  Roger Hulett
                  Participant
                    @rogerhulett83124

                    I will cut the gear after I have achieved the cam. I have learned a lot about gear cutting since I bought the rotary table and I am fairly confident I will not stuff it up. I am not confident about milling the cam,so if that is a failure it is easier to make another blank and not have wasted my time on cutting the gear ! If that makes sense.

                    #241273
                    JasonB
                    Moderator
                      @jasonb

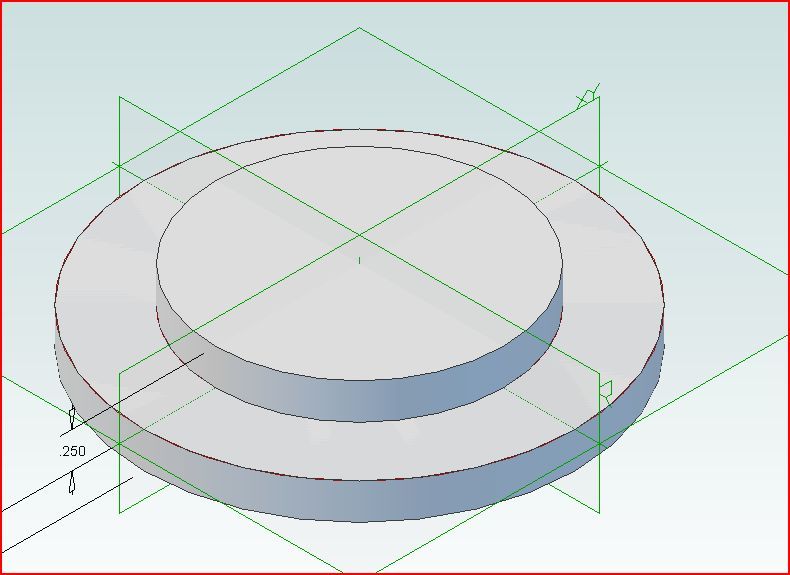
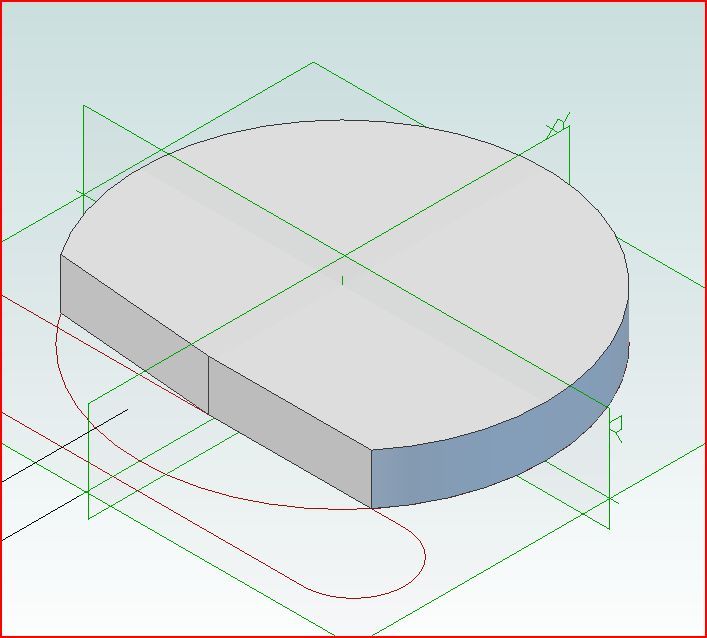
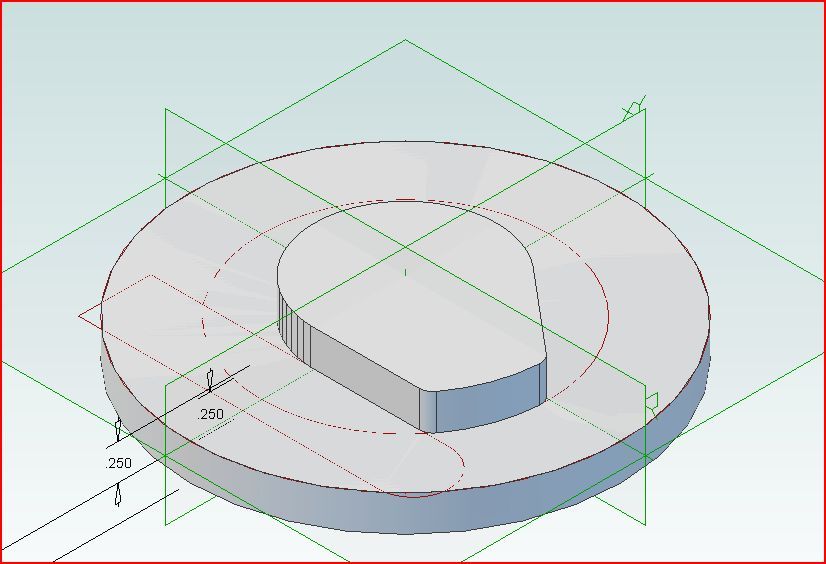
                      First job is to turn your blank disc. The main diameter will be the OD of the gear and the smaller diameter will be twice the blank radius shown in blue. Drill and ream/bore the hole as well (I have not shown the hole and will leave the gear part out of some images)

                      rogercam.jpg

                      This should give you a bit of metal that looks like this, hold it in the chuck on the rotary table with the cam blank facing up and center the part under the milling spindle. If it is too big for the chuck make a mandrel to fix it to.

                      rogercam9.jpg

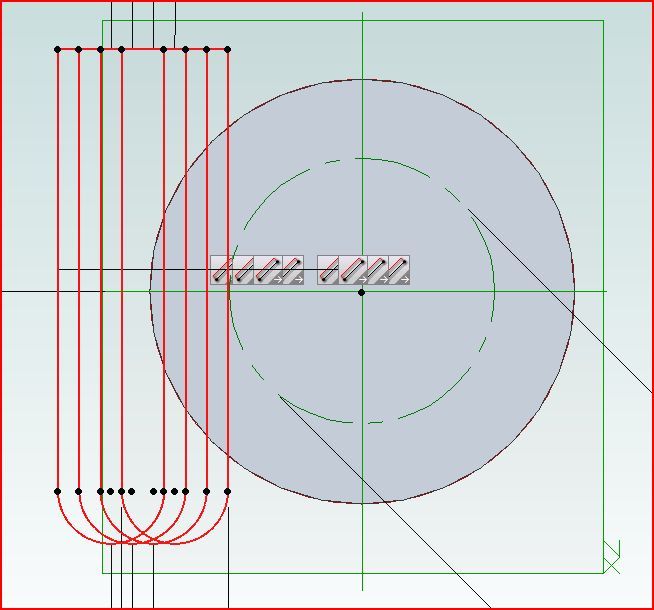
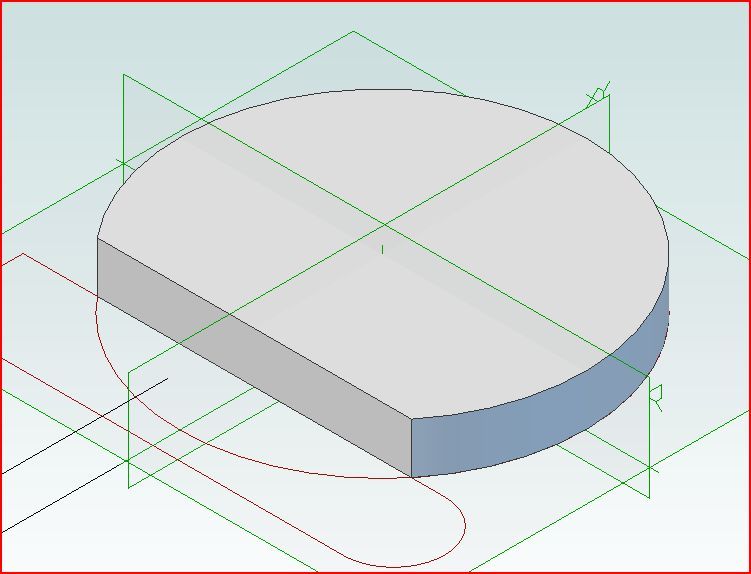
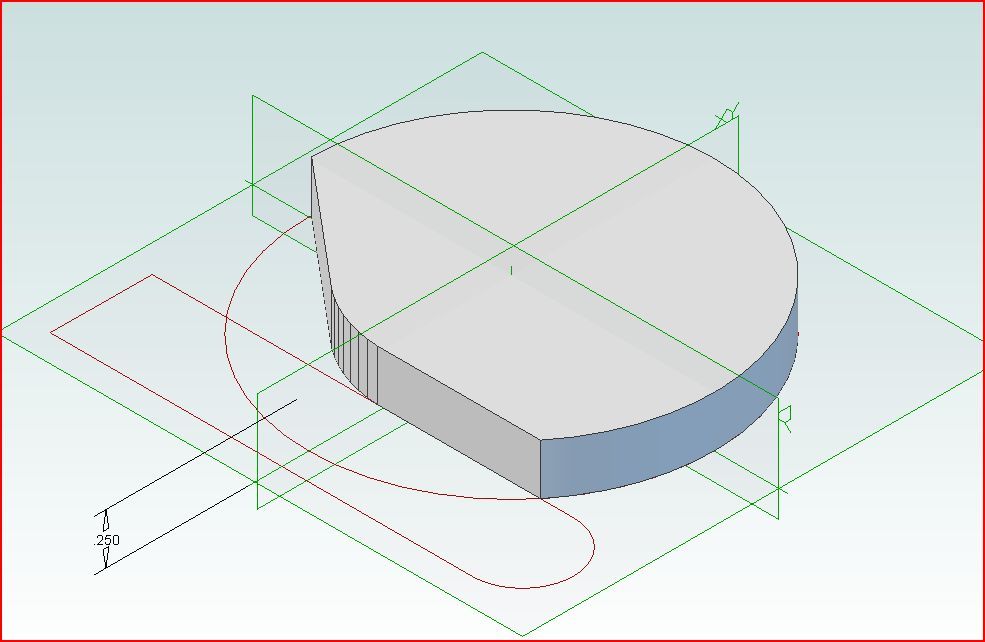
                      Fit a reasonable milling cutter into the machine, say 1/2" or 12mm and with a fag paper between the gear part and the cutter set your height. Now take a series of cuts off the left hand side using the Y-axis until the cutter reaches the base radius, shown in red above, lock the y-axis (gear part of blank not shown from now on) This is your first cut shown in pink

                      rogercam2.jpg

                      This will leave the cam part of the blank looking like this.

                      rogercam3.jpg

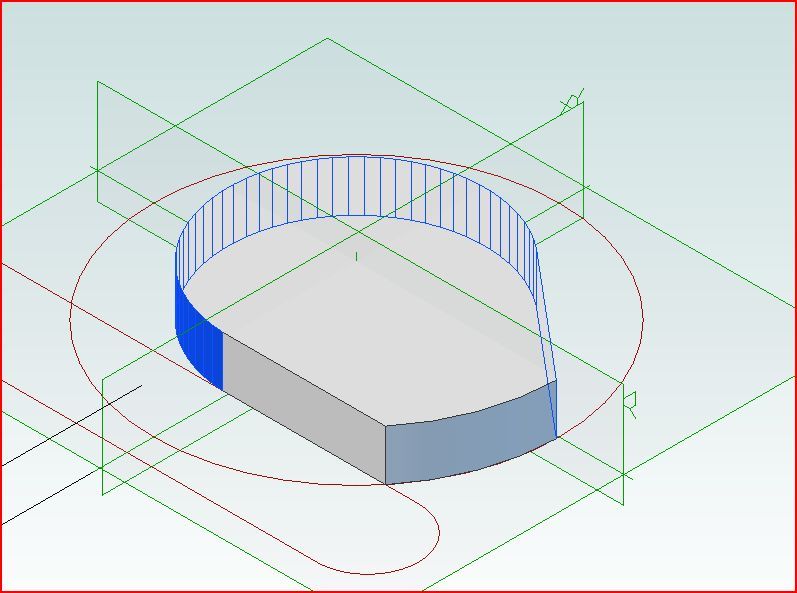
                      You don't need to use the dividing plates for this, the scale on the rotary table will do. I would suggest you make the following cuts in 2degree steps (half a turn) which will give a good surface that will need little cleanup, I have shown 5degree so things show up better. So turn the handle of the table a half turn so the work moves clockwise when viewed from above and take another cut in the y-axis. This will take a small cut off the front half of the blank

                      rogercam4.jpg

                      Keep repeating the half turn, cut, half turn, cut and you will see the shape start to develope

                      rogercam5.jpg

                      Keep on going for the required angel (360 less xdegrees shown in green above)

                      rogercam7.jpg

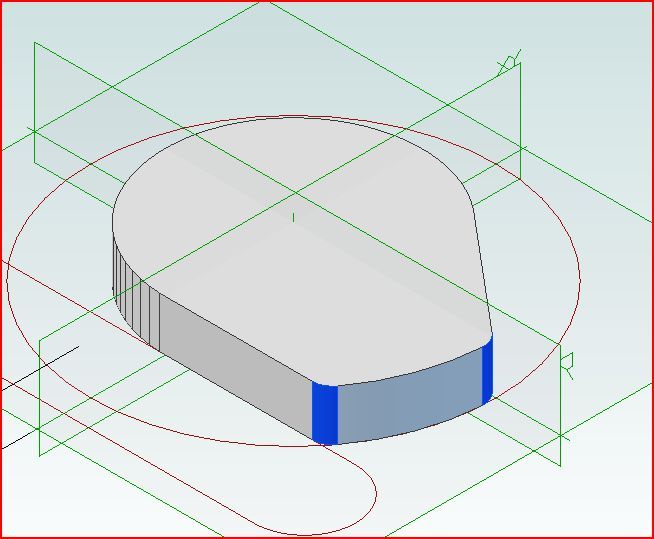
                      You can then just file the small radius at the two corners of the cam

                      rogercam8.jpg

                      Then a bit of emery on a file will blend in all the faccets left by the cuts and you should have a part like this ready to gear cut

                      rogercam8.jpg

                      #241281
                      Roger Hulett
                      Participant
                        @rogerhulett83124

                        That is an excellent set of instructions…however…how do I adapt to a horizontal mill ?

                        #241283
                        Anonymous
                          Posted by Roger Hulett on 03/06/2016 13:55:17:

                          …however…how do I adapt to a horizontal mill ?

                          Use a collet chuck instead of an arbor and use the rotary table set vertical and facing the spindle. It's a bit of a PITA as it isn't easy to see what is going on. Perfect excuse to buy a vertical mill as well. smile

                          Andrew

                          #241284
                          Speedy Builder5
                          Participant
                            @speedybuilder5

                            If you don't have a collet chuck for your Horizontal mill, you could use a side and face cutter? In which case, it would be better to turn the cam boss off centre to reduce the volume of material to be removed. I assume your table or the horizontal head has rise and fall ?
                            BobH

                            #241290
                            JasonB
                            Moderator
                              @jasonb

                              Oops missed the Horizontal mill bit.


                              Easy enough to alter, set up the part in the same way with a side & face cutter on the spindle but make the initial cuts along the back in the x- axis direction. Then just carry on rotate-cut-rotate,cut

                              rogercam10.jpg

                              rogercam11.jpg


                              Edited By JasonB on 03/06/2016 16:36:27

                              #241292
                              Roger Hulett
                              Participant
                                @rogerhulett83124

                                I will use Andrew Johnson's method. I have ER32 collets and collet chuck. If successful I will post the pics. If not successful I will keep trying until I do get it right. After all it's only bits of metal !!!

                                #241372
                                Roger Hulett
                                Participant
                                  @rogerhulett83124

                                  Now I'm in a quandary. I have two alternatives,but which is the best and less likely to end in tears, for a novice ?

                                  Collet chuck,milling cutter and rotary table set in a vertical position,or, side & face cutter with rotary table set horizontally ?

                                  #241373
                                  Phil P
                                  Participant
                                    @philp

                                    I don't want to add to your confusion, but you could do a lot worse than reading this article by Graham Meek.

                                    I used it to make the cams for a model IC engine and it worked out really well.

                                    http://modelenginenews.org/techniques/meek_cams.html

                                    Phil

                                  Viewing 16 posts - 1 through 16 (of 16 total)
                                  • Please log in to reply to this topic. Registering is free and easy using the links on the menu at the top of this page.

                                  Latest Replies

                                  Home Forums Beginners questions Topics

                                  Viewing 25 topics - 1 through 25 (of 25 total)
                                  Viewing 25 topics - 1 through 25 (of 25 total)

                                  View full reply list.